Search Results for: Felucca
Final Details on Loading The Felucca – for now!
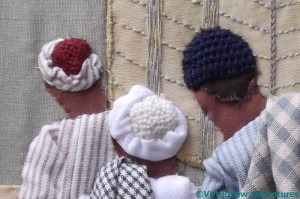
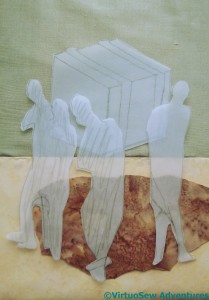
Both of the labourers on the right have a small piece of dark brown cotton attached to their heads to give the impression of hair.
Two of the hats (the ones on the right) are turban-like things with a central section and a twist of fabric, and you’ve seen them before. They were really very successful, but the other two labourers seem to be wearing knitted or crocheted caps. Somehow trellis stitch didn’t seem quite right, so in this case I’ve used detached buttonhole stitch with return, in navy blue pearl cotton.
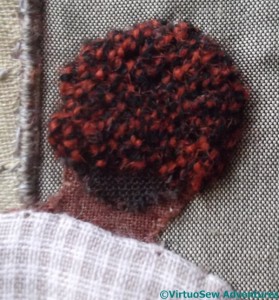
The final hat is much woollier. I used a heathered worsted yarn and trellis stitch. I have a few doubts about this one, but for now I’m content with it.
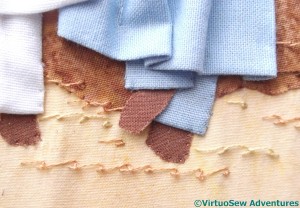
I was concerned that the dark cotton and the light background cotton were too distinct, and made too much of a contrast. My first efforts to break up the surfaces were not as successful as they might have been, but in due course I arrived at the solution – rows of scroll stitch using a single strand of thread, in tones that lie between the two extremes.
I’ve left the little foot unattached, dangling over the sandy surface and seeming to poke out of the trouser leg just as it should.
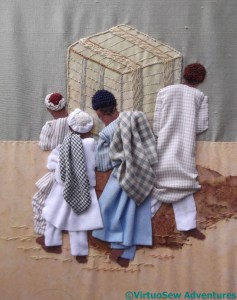
And behold the (nearly) final version.
I think there is just enough of the scroll stitch, and the packing case has almost the right level of detail to make sense, but not so much as to attract more attention than it should. The people have worked, if anything, even better than I hoped they would.
I’m going to wait until I know where in the Dreams of Amarna the piece is going to live – either as a patch on one of the main panels, or as a stand-alone, separate panel – before I do any more. At the moment, I don’t know what more to do, or how to do it, and until I do know, I’m not risking the success I’ve already had.
More progress on Loading The Felucca
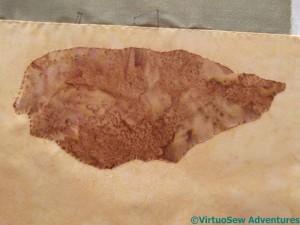
While I was working on the packing case, which is the first embellished section I will be applying, it occurred to me that for those occasions when the light was a little marginal (grey-ish yellow is a difficult colour to stitch in poor light!) I could perhaps prepare a layer that would be applied to provide the shadow on the ground.
I traced the approximate shape and used the tracing as a pattern piece. The fabric is – as are most of them – a cotton from one of the plethora of quilting and patchwork stands I visited during last year’s Harrogate Knitting and Stitching Show. The print gives a sort of scrunch-dyed effect that I thought might help to create the appearance of broken, shadowed ground.
Then I realised that placing it sensibly demanded that I bear in mind the other main pieces. I’ve cut out the tracing I used for the packing case, and the forms I intend to use for the people, and spent a bit of time juggling the positions of each element.
The people, by the way, are not supposed to proper people shaped from an artist’s model. Some of the shapes have extra legs, and one of them is two people blended into one. They will be differentiated by their clothing, or at least so I hope!
As it happens, attaching the shadow didn’t take as long as I expected. I decided that edging the fabric with blanket stitch would create a hard edge which would counteract the idea of the shadow going over broken ground. I may even choose to add stitching to break up the edges even more when the figures are in. I have learnt over the past few years not to overdo detail on one section of a piece like this until I have some sense of how the whole thing is going to turn out!
I am expecting to crop this piece very close, to concentrate attention on the figures and their burden, but I learnt with the Camberwell that it is easier to have some leeway around the edges of my project!
Loading the Felucca – starting on the packing case
Since appliqué is a layered technique, I had to work forwards from the most distant object. For this subject – once the background was in place, that was the packing case.
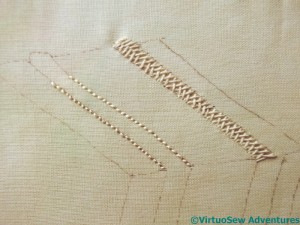
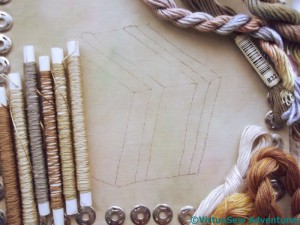
The first thing I had to do was to work out how I was going to represent the lengths of wood running as bracing all around the box. My first thought was to use reverse herringbone stitch, as I did for the contour lines on the Map of Amarna, but as I was stitching it I became less sure.
I worked the other band in ordinary herringbone stitch, then sat back and frowned at the frame for a while.
The result of my frowning cogitations was that I decided that I definitely didn’t like the reverse herringbone stitch, and wasn’t totally happy with the standard herringbone stitch either.
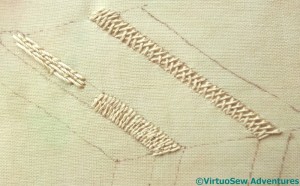
I tried variations on couching stitches – Bokhara Couching and Roumanian Couching, in the lower half of the nearer band – and was no happier.
Just as well I enjoy these puzzles, isn’t it!
Finally it occurred to me that the grain of the wood would be running lengthwise in these pieces of wood, while in the planks that make up the box, the grain would appear to run across the box. The stitching I had tried had given the impression of the grain running across the bracing struts. So I tried Bokhara Couching again, but running lengthwise.
That’s better, I think, but the next task is all that unpicking.
Loading the Felucca
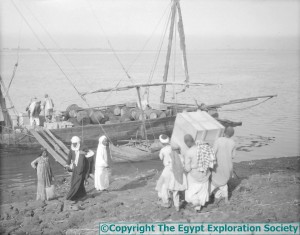
Here is another one of the photographs from the Egypt Exploration Society that I would like to represent in some way.
The expedition felucca was loaded with all the excavated finds and taken to Cairo so that the Cairo Museum Director could choose what would be retained for their collection. The carpenter spent weeks making special boxes to carry the more delicate finds, like Hatiay’s carved door lintel, and a large section of decorated wall plaster (more things for me to embroider!). Then everything had to be loaded on to the felucca…
I’ve decided to concentrate on the group carrying the packing case. Partly this is because the whole photograph is a little confusing and difficult to decipher in places, and partly because they rather drew my eye, and I want to experiment with appliqué. What I hope to do is “dress” each figure, so the folds of the fabric I use creates the folds in the garment. I have no idea whether this will work, but if I don’t try I will never know!
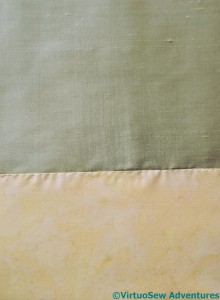
Last time I was at the Harrogate Show I found myself in unfamiliar territory, frequenting the patchwork stands, in search of suitable fabrics for the ground and the clothes. I’ve used a piece of silk dupion from The Silk Route for the river. It’s a pale grey-green, and I think I will have to find somewhere else to use it to pull it into the overall design properly, but it has a lovely subtle sheen that looks quite watery. I’ve attached it around the edges using strands pulled from the weft, because I have nothing else suitable. The ground is a sandy cotton, doubled because I could see the silk through the first layer, and attached using a single strand of stranded cotton from my stash.
You last saw the fabric I chose for the packing case being used as the background for the Crock of Gold Hoard. It’s a flimsy overdyed turban cotton which won’t take much stitching without reinforcement, so I’ve backed it with a layer of white cotton to give it a bit more body.
Then I had a wonderful rummage in my stash, and pulled out a selection of silk and cotton threads to play with. The tubes are Mulberry Silks threads (also last seen in the Crock of Gold Hoard), and I’ve also laid out a linen thread, two Stef Francis stranded silks, and a couple of miscellaneous threads from I-Know-Not-Where.
This should be fun!
The Felucca Is Finished
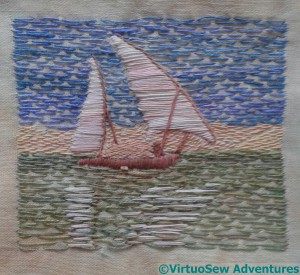
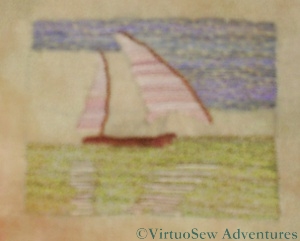
I have finished the first trial of the Felucca design. As I always say of these design fragments, I do not yet know whether they will make it to the final piece.
You can barely see the stitching on the coastline – I used a fine thread and spaced the stitches far apart. For the cargo, I crammed the stitches as close to one another as I could. The sails are worked in Satin Stitches rather than darning, and the spars in Stem Stitches. I’ve decided I am happy with the pinkish tinge on the sails, and the greenish Nile is just as I imagined it would be.
I think it has worked. The reflections of the sails bring the whole piece to life, and I added some small stitches to provide an impression of a reflection of the spars.
The Felucca – Second Stage
I’m afraid that this photo isn’t as good as I hoped it would be, but it does show the progress I am making on the Felucca.
I realised that not only did I need to have the sails completed before I put all of the sky in, but I needed to put the Nile in before I put in the reflections.
So I’ve done the Nile – nearly. If you look carefully you will see that there is a small section of Nile behind the Felucca which hasn’t been finished yet. I’ve used the same irregular darning stitch as I used for the sky, and run in the reflections using long straight stitches in the spaces between the rows of green. I need to put a few more stitches in yet, but I’ve run up against rather a headache which I need to resolve.
I need to do the land behind the Felucca. I was intending to use a paler version of the reddish-brown thread I’m using for the hull and the spars. However, when I put it in, it really didn’t work. No, I mean it. Not At All. I’ve since tried a couple of other threads with no marked success, so I need to spend some time finding a suitable thread.
If you look at the photo on the original post, the tones of the sky, the Nile and the elements of the felucca are not quite correctly reproduced in my embroidered piece. Part of this is because the base fabric isn’t white so everything is turning out a little darker than I expected. I think it will work in spite of the changed tones, but I am anticipating working the design again in a different form or scale, maybe using different threads, so if in the end I don’t like it I will still feel I have learnt something useful!
Beginning the Felucca
I’ve begun to work on the Felucca design I have already described. As I am not at all sure about the colours or the stitching that I will want on the final panels (remember this is to be a design element for the edging panels I described a little while ago), or even the scale, I am thinking of working this design several times on different fabrics, with different threads and at different scales, to see which one I like best. I’m sure I will find something to do with any leftover pieces of embroidery!
This version is about two and a half inches by one and a half inches, and it is worked on turban cotton, just like the fabric I used for my earlier experiment with the Dig House. I’m using similar stiff overdyed linen threads as well, but this time I have learnt from the trouble I had with the Dig House. The fabric has been hooped up over a piece of calico, and although it is slightly irritating to have two layers to stitch through, it has a lot more body and is much easier to stitch.
I’ve put the design onto the fabric using a transfer pencil and began with the sky, using a sort of irregular darning stitch. Then I realised that if I were to work the sails first it might be easier to fill in the sky afterwards. I’m not entirely sure about the thread I am using for the sails – it may be a little too pink – but I think it will be hard to be sure before I have finished. I have a dark blue-green thread that will do the Nile perfectly (I hope), and I will be able to run lines of stitching in the hull and sail colours into the water section to make reflections.
This might become my evening stitching until I have finished it. Although it is small, the colours are distinct from one another, and the stitches don’t have to be as precise as they would if it were a counted piece.
EDIT: spelling improved!
The Felucca
The photograph here is a close up from one of those that the Egypt Exploration Society made available to me, and shows a Nile felucca in passage with a cargo.
Mary Chubb describes in her book the expedition’s arrival at the site on a felucca, one of the traditional sail-driven freighters of the Nile and Eastern Mediteranean. As she also mentions in the book (when they go on a tour of the Pyramids on first arriving in Egypt) that she is somewhat claustrophobic, it seemed to me that an open sailing vessel and the broad sky over the Nile were probably very important to her. As the felucca also took their finds back to Cairo for inspection by the Museum Director, it was very important to the Expedition as well.
So clearly the felucca should figure at least once in my Dreams of Amarna panels! Equally, however, I need to develop the styles of embroidery I will use for the panels and their assorted images. So I am never sure, when working on these small elements, whether they will end up as part of the final piece or not.
I’ve not even started stitching the Felucca yet, but I have decided that it will be another experiment. I am going to try to stitch the whole thing using straight horizontal stitches. This should emphasize the breadth of the space, which would have been so important to Mary. I am not going to attempt to fill the space, either, so the picture will look slightly sketchy, rather like a photocopy of a memory, perhaps.
Another day of photography (first helping)
I’ve been working hard on the manuscript of the book I’ve written around the Dreams of Amarna, and one of the things I want to do is stitch the story together with pictures of the ordinary Egyptians working on the dig. They are honoured in the stitchery (View of the Excavation and Loading The Felucca), but that didn’t seem quite enough.
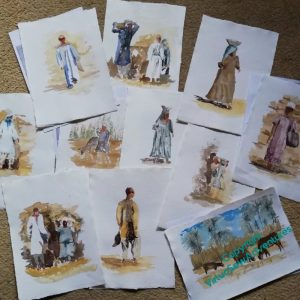
So I’ve been doing lots of little watercolours of labourers, basket carriers, and fragments of the dig and the scenery, and now I’ve sorted out the overlays (there will be more about my experiments with ink and inktense later), I bundled up the whole kit and caboodle and took it across to Bernard Rose Photography to see what he could do.
We rattled through the watercolours in fine style, as apart from occasionally flattening a piece of paper (I tend to paint a bit sloshy…!) there was little adjustment needed.
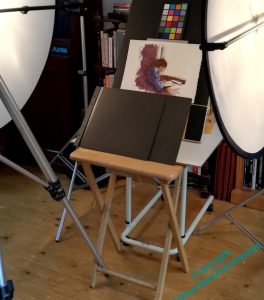
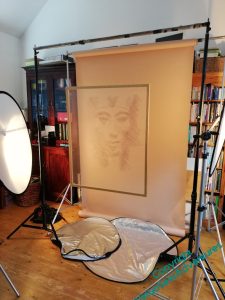
Then, however, matters became more complicated… The overlays are big, and the fabric is slightly shiny, and I hadn’t worked out how to hang them. So we started with the easy bit – overlays on their own, in front of a background. You get a hint here of the reflectors spaced all around, and just the general sense of engineering involved. There are two pairs of tripods with poles between them, one with the background, the other supporting the overlay, suspended on fishing line through eyelets. Then there are the tripods with the diffusers on, and out of shot, there’s the tripod with Bernard’s camera in place.
More work on the assembly
Once the backing boards had been drilled and painted, the pieces could be properly assembled.
And oh, what a world of pain those words conceal!
Never mind, moving on…
I like the look of this – it is the first time I got to look at the panels upright, and it’s astonishing what a difference it makes. I’ve been through the entire process a prey to Doubts, and they are beginning to dissipate at last.
So the next thing was to make it possible to hang the overlays in front. I don’t want to have the gauze touching the embroidery, permanently in place, in fact ideally I would like to be able to remove them more or less at will when the pieces are exhibited, so I’m still working out how to achieve that. In the meantime, I decided to put channels top and bottom of the gauzes, so I have an interim solution. That will mean that, for example, I can start to think about booking the second photography session.
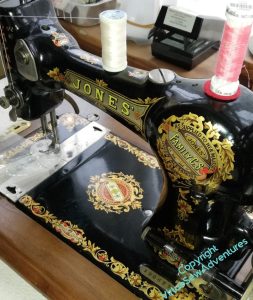
Deciding on that interim solution, however, meant fishing out my old friend Jones. Jones was given to me when I was eight, and I did a fair bit of dressmaking with him, until I was deemed old enough not to do myself a mischief using my mother’s Bernina. He weighs rather a lot so with years of a bad back, I’ve not used him for years and years, so I was rather pleased that, first, he worked, second, that when it came to it, I also remembered how to wind the bobbin, and third, getting him out didn’t make my back go “spoing!”…! As you see, the bobbin is not quite the same as modern ones, not least in that it is long and thin, and the bobbin carrier (not on display) looks more like an asymmetric torpedo, with a very sharp point.
Now I’ve draped the gauze over the top of the panel it is clear that I need to be absolutely on top of the ironing, since crumples in the fabric interfere with the face showing. It has also shown, however, that the effect that I was reaching for can be achieved.
Next steps – decide whether I need to cover the places where the panels butt together, and (definitely!) iron the gauzes.
But for now, I’m pleased with progress!

