Tynemouth Priory, First Installment
As I got further on with the vessel, I decided I could no longer put off a trip to the north east to have a good look at the Priory for myself. It was a breezy day, so the light changed a lot, and I was nearly blown off the pier into the sea, but I got about 250 photos, so I hope to have enough to provide a basis for my depiction of the Priory.
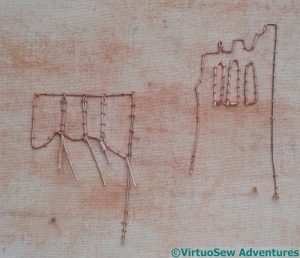
Unfortunately all those photos haven’t really helped me to settle on how I am going to represent the priory. I am going to have to do Something, and see whether the Something unlocks the floodgates of ideas that I need. One thought is to make slips to give the Priory some more of a three-dimensional feel, so I’ve started by roughly colouring the base fabric and the paper-covered wire, including outlining the window-slits.
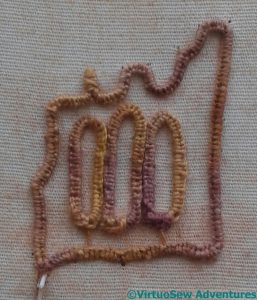
In other cases, the wire edging is often done last – as I did myself with the Stumpwork Violets – with the edge of the blanket stitching facing outwards. In this case, I really don’t want the edge emphasized, so I’m hoping to use that looped edge to sew into instead. The edges of the window outlines are rather nestled up to one another, and they’re so small I didn’t even attempt to do separate top and bottom tiers. Quite how well that will work, I’m not at all sure, but then it’s all an adventure, isn’t it!
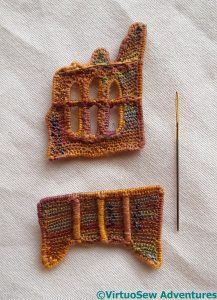
After a couple of days of concentration, this is what I finished up with, together with a needle to help you get a sense of scale. And after all that care to colour the fabric, I ended up using needlelace. The main thread is a variegated stranded silk, but once I had detached the pieces from the base fabric I stitched in again to add some more detail. Whether it’s enough detail, or the right detail, is another question. That decision can wait until I have the rest of the headland done, I think.


Very nice!
I love the needlelace wired slips you made Rachel! Another solution for stitching buildings would be to couch down some canvas and use canvas stitches. That’s what I learned from stitching a stumpwork kit by Jenny Adin Christie.
I like this – altogether more zingy than I thought, and it looks like masonry, too.
It looks very real, I used Google Image to check photos of Tynemouth Priory, and I think the variegated thread is just perfect for the weathered ruin.
Sorry not to have commented before, as the boat gradually became perfect. (The lifebuoys are marvellous!) Now this building looks equally fine. I can’t wait to see it all put together, Rachel.
The priory windows are awesome, Rachel!
That is an impressive building!
You are certainly putting a lot of thought into this, and I do hope your photos were of use to you. It’s ridiculous how easy it is to take too many photos these days isn’t it?
Your needlelace slips look fiddly, but they do look effective, I think the variegated thread has worked well here.
I can’t wait for the next installment!
It’s so tiny!
These two pieces are looking gorgeous Rachel – great work. xx
great work on the tiny slips after so many photos. I really like the thread which gives an old and weathered look without being dull and dark.
oh, that looks good! I like how you’ve done the windows. Sorry if you’ve mentioned this before, which Priory is it?
The slips are gorgeous and the thread has just the right range of colours. I’ve never been to Tynemouth Priory but it instantly reminded me of the stone at Lindisfarne, not a million miles away!
How tiny that is! The colors are wonderful, though. I liked your efforts with the belts on the previous posts, but I’ve waited too long and comments are closed now, so I’m telling you here. =) I wasn’t thinking about how very small pieces would be on this.