
Search Results for: Loading The Felucca
Final Details on Loading The Felucca – for now!
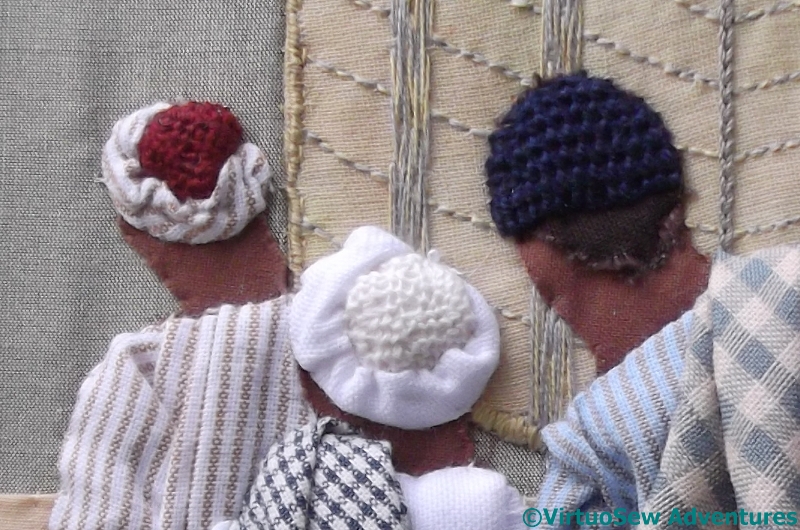
Comparing Hats
Woolly Hat
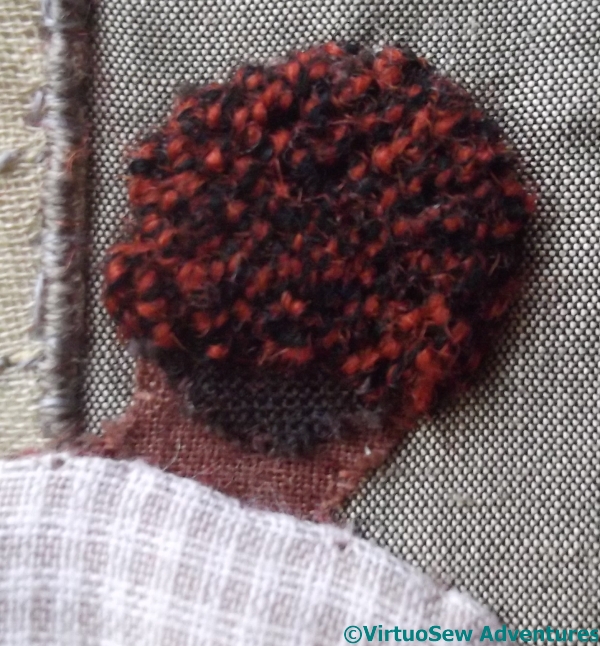
Both of the labourers on the right have a small piece of dark brown cotton attached to their heads to give the impression of hair.
Two of the hats (the ones on the right) are turban-like things with a central section and a twist of fabric, and you’ve seen them before. They were really very successful, but the other two labourers seem to be wearing knitted or crocheted caps. Somehow trellis stitch didn’t seem quite right, so in this case I’ve used detached buttonhole stitch with return, in navy blue pearl cotton.
The final hat is much woollier. I used a heathered worsted yarn and trellis stitch. I have a few doubts about this one, but for now I’m content with it.
Foot Dangling Over Sand
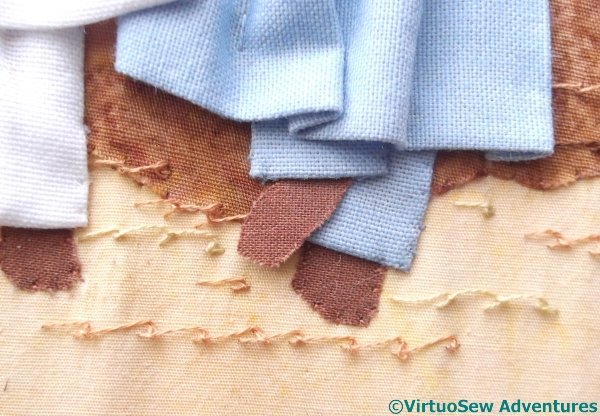
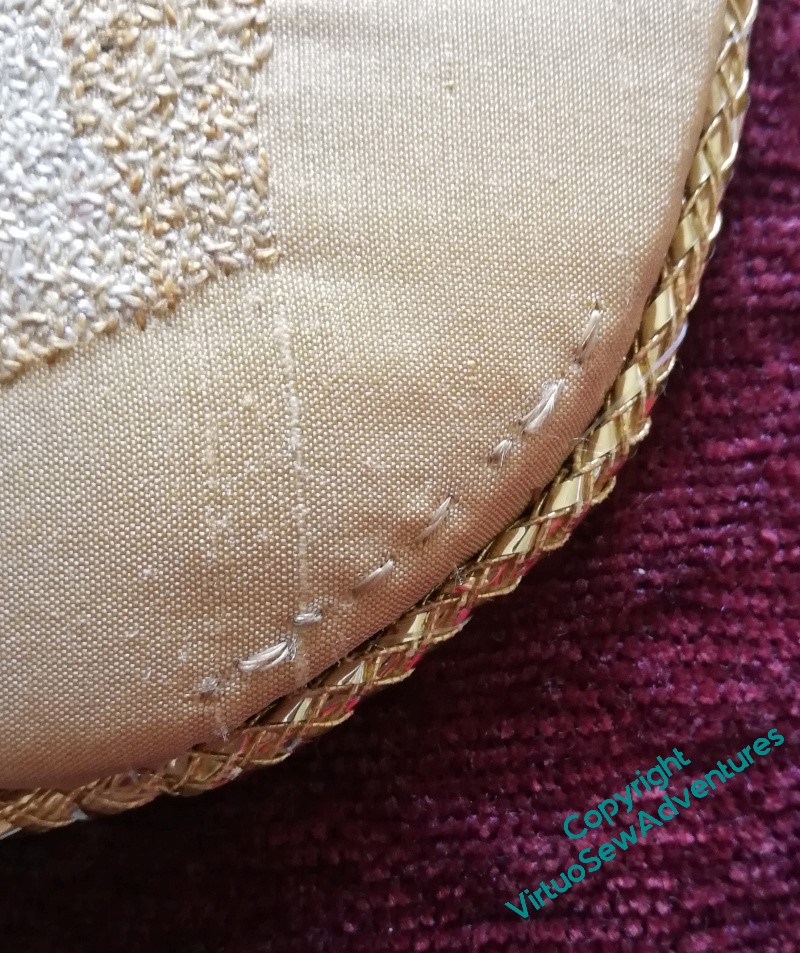
I was concerned that the dark cotton and the light background cotton were too distinct, and made too much of a contrast. My first efforts to break up the surfaces were not as successful as they might have been, but in due course I arrived at the solution – rows of scroll stitch using a single strand of thread, in tones that lie between the two extremes.
I’ve left the little foot unattached, dangling over the sandy surface and seeming to poke out of the trouser leg just as it should.
Finished I Think
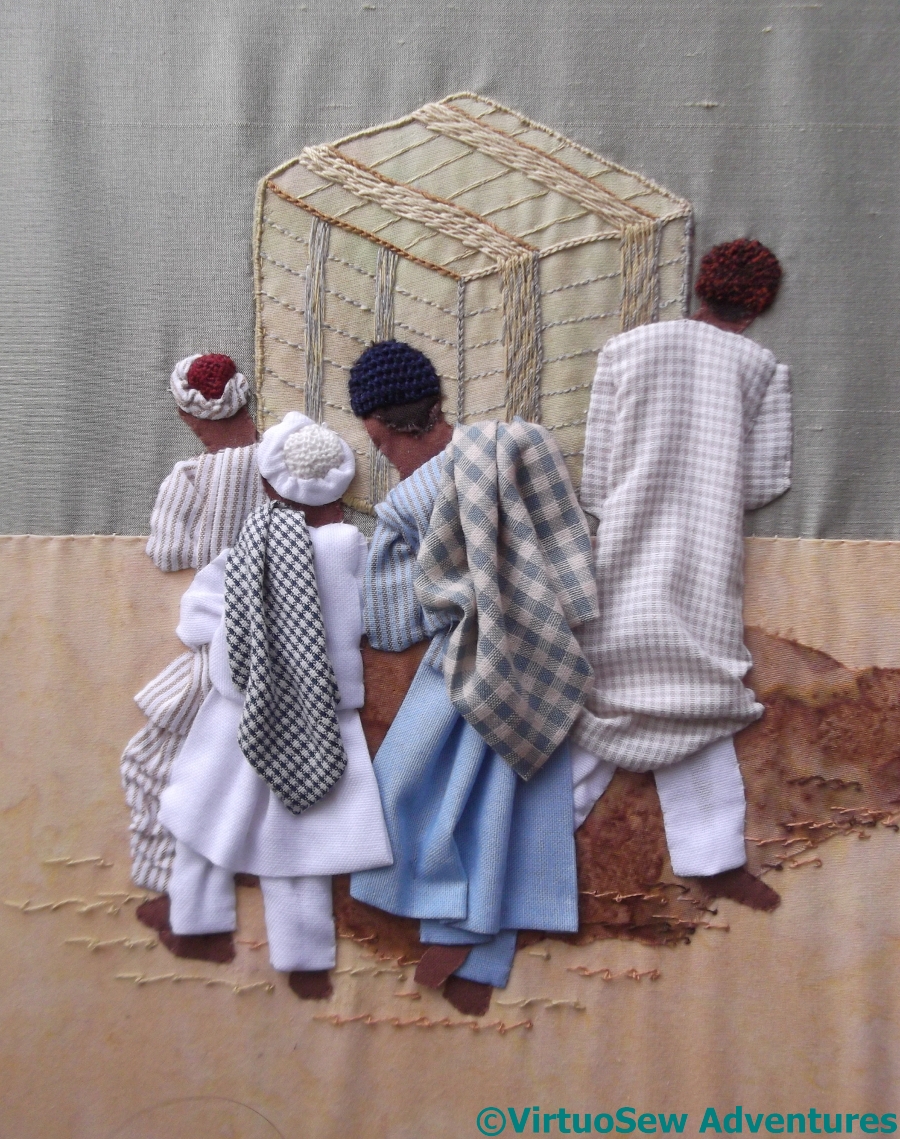
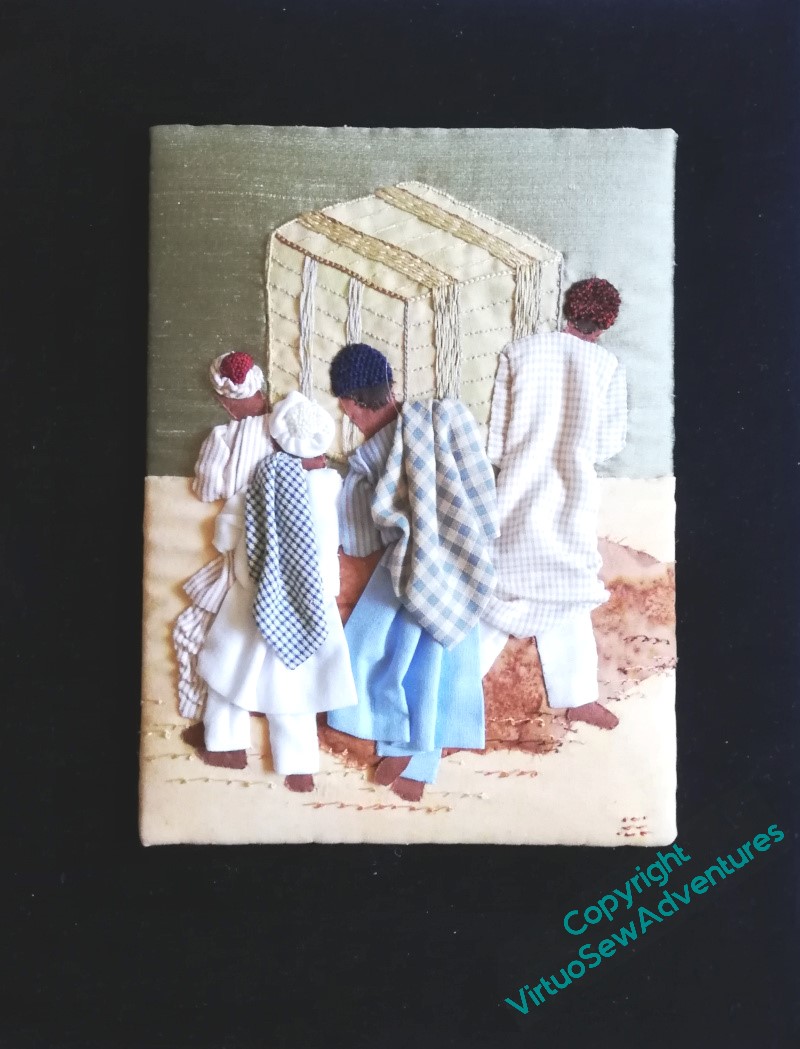
And behold the (nearly) final version.
I think there is just enough of the scroll stitch, and the packing case has almost the right level of detail to make sense, but not so much as to attract more attention than it should. The people have worked, if anything, even better than I hoped they would.
I’m going to wait until I know where in the Dreams of Amarna the piece is going to live – either as a patch on one of the main panels, or as a stand-alone, separate panel – before I do any more. At the moment, I don’t know what more to do, or how to do it, and until I do know, I’m not risking the success I’ve already had.
More progress on Loading The Felucca
Testing Placement
While I was working on the packing case, which is the first embellished section I will be applying, it occurred to me that for those occasions when the light was a little marginal (grey-ish yellow is a difficult colour to stitch in poor light!) I could perhaps prepare a layer that would be applied to provide the shadow on the ground.
I traced the approximate shape and used the tracing as a pattern piece. The fabric is – as are most of them – a cotton from one of the plethora of quilting and patchwork stands I visited during last year’s Harrogate Knitting and Stitching Show. The print gives a sort of scrunch-dyed effect that I thought might help to create the appearance of broken, shadowed ground.
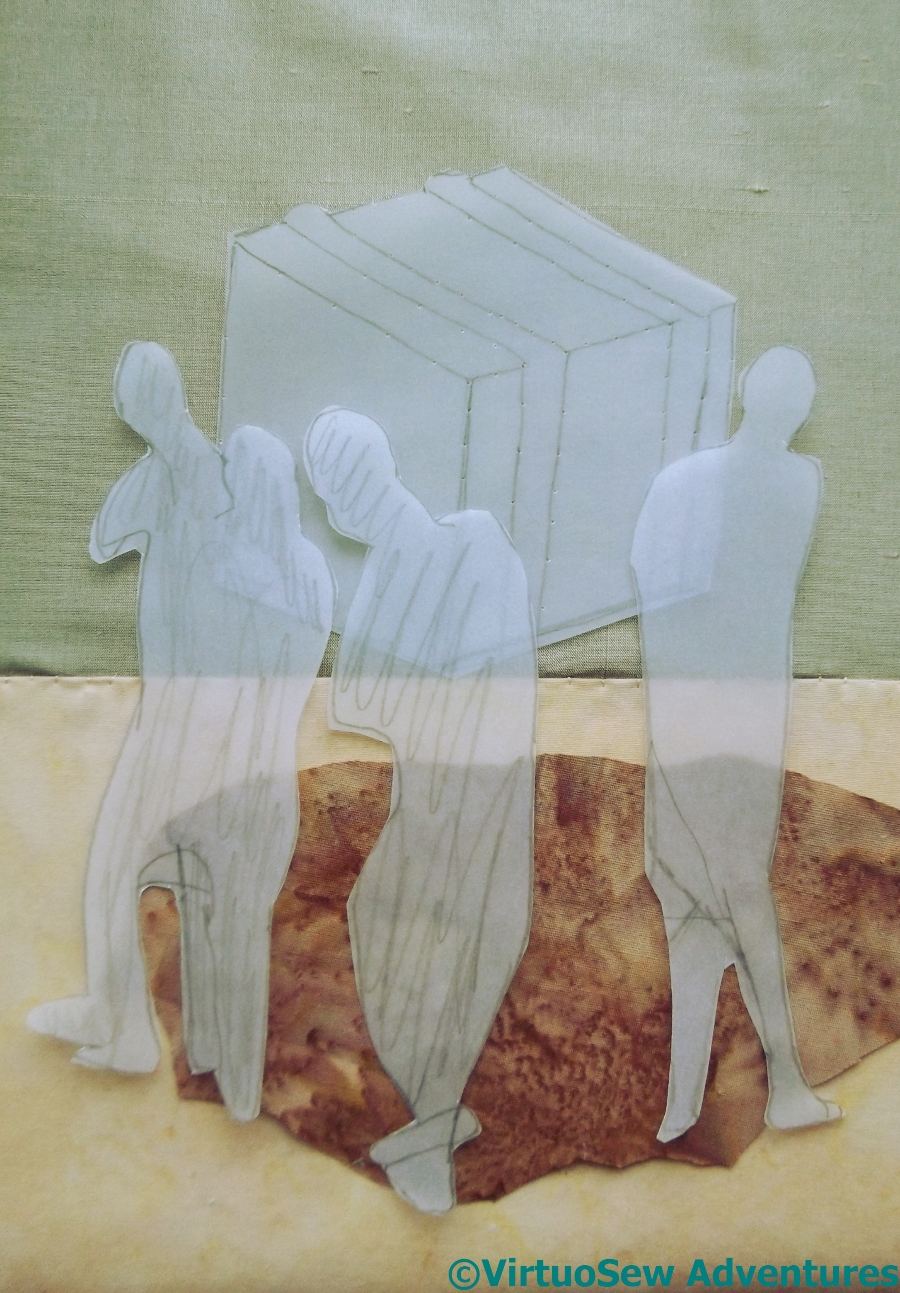
Then I realised that placing it sensibly demanded that I bear in mind the other main pieces. I’ve cut out the tracing I used for the packing case, and the forms I intend to use for the people, and spent a bit of time juggling the positions of each element.
The people, by the way, are not supposed to proper people shaped from an artist’s model. Some of the shapes have extra legs, and one of them is two people blended into one. They will be differentiated by their clothing, or at least so I hope!
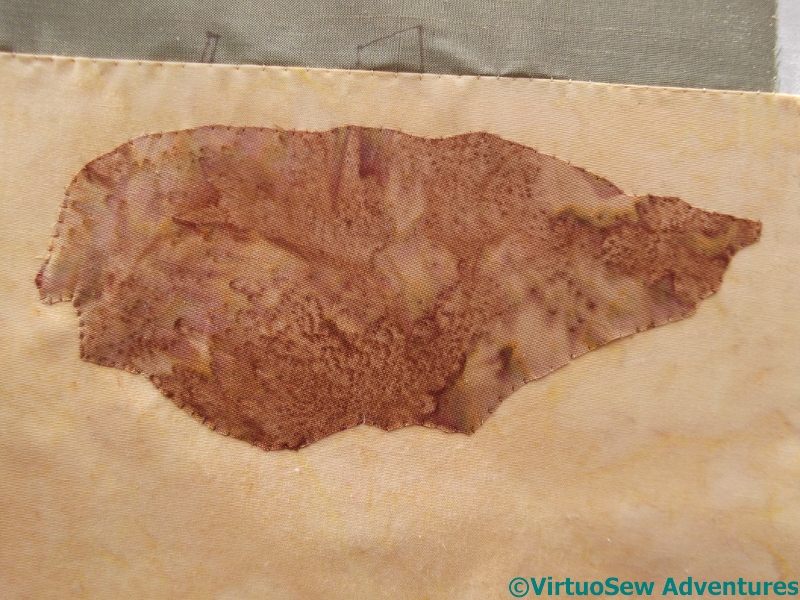
Shadow Attached
As it happens, attaching the shadow didn’t take as long as I expected. I decided that edging the fabric with blanket stitch would create a hard edge which would counteract the idea of the shadow going over broken ground. I may even choose to add stitching to break up the edges even more when the figures are in. I have learnt over the past few years not to overdo detail on one section of a piece like this until I have some sense of how the whole thing is going to turn out!
I am expecting to crop this piece very close, to concentrate attention on the figures and their burden, but I learnt with the Camberwell that it is easier to have some leeway around the edges of my project!
Loading the Felucca – starting on the packing case
Decisions Decisions
Since appliqué is a layered technique, I had to work forwards from the most distant object. For this subject – once the background was in place, that was the packing case.
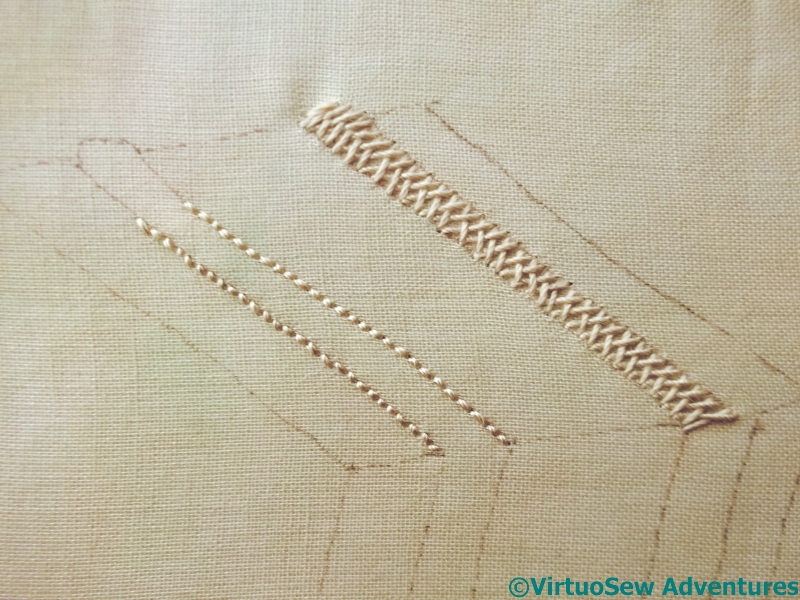
The first thing I had to do was to work out how I was going to represent the lengths of wood running as bracing all around the box. My first thought was to use reverse herringbone stitch, as I did for the contour lines on the Map of Amarna, but as I was stitching it I became less sure.
I worked the other band in ordinary herringbone stitch, then sat back and frowned at the frame for a while.
Still More Decisions
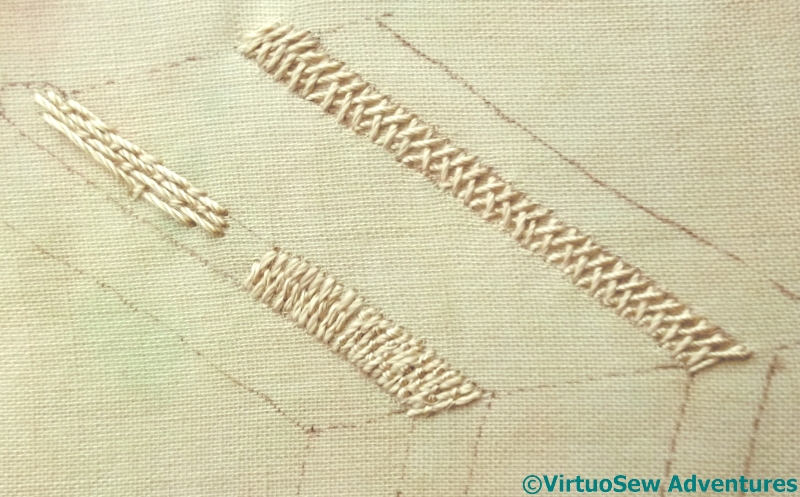
The result of my frowning cogitations was that I decided that I definitely didn’t like the reverse herringbone stitch, and wasn’t totally happy with the standard herringbone stitch either.
I tried variations on couching stitches – Bokhara Couching and Roumanian Couching, in the lower half of the nearer band – and was no happier.
Just as well I enjoy these puzzles, isn’t it!
Finally it occurred to me that the grain of the wood would be running lengthwise in these pieces of wood, while in the planks that make up the box, the grain would appear to run across the box. The stitching I had tried had given the impression of the grain running across the bracing struts. So I tried Bokhara Couching again, but running lengthwise.
That’s better, I think, but the next task is all that unpicking.
Loading the Felucca
Loading The Felucca
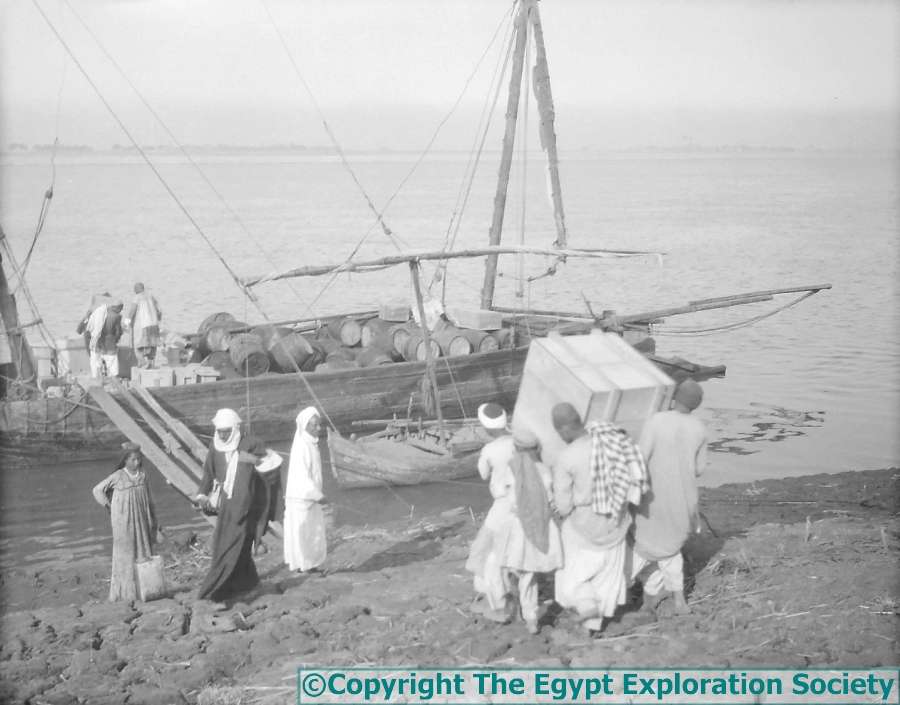
Here is another one of the photographs from the Egypt Exploration Society that I would like to represent in some way.
The expedition felucca was loaded with all the excavated finds and taken to Cairo so that the Cairo Museum Director could choose what would be retained for their collection. The carpenter spent weeks making special boxes to carry the more delicate finds, like Hatiay’s carved door lintel, and a large section of decorated wall plaster (more things for me to embroider!). Then everything had to be loaded on to the felucca…
First Layer
I’ve decided to concentrate on the group carrying the packing case. Partly this is because the whole photograph is a little confusing and difficult to decipher in places, and partly because they rather drew my eye, and I want to experiment with appliqué. What I hope to do is “dress” each figure, so the folds of the fabric I use creates the folds in the garment. I have no idea whether this will work, but if I don’t try I will never know!
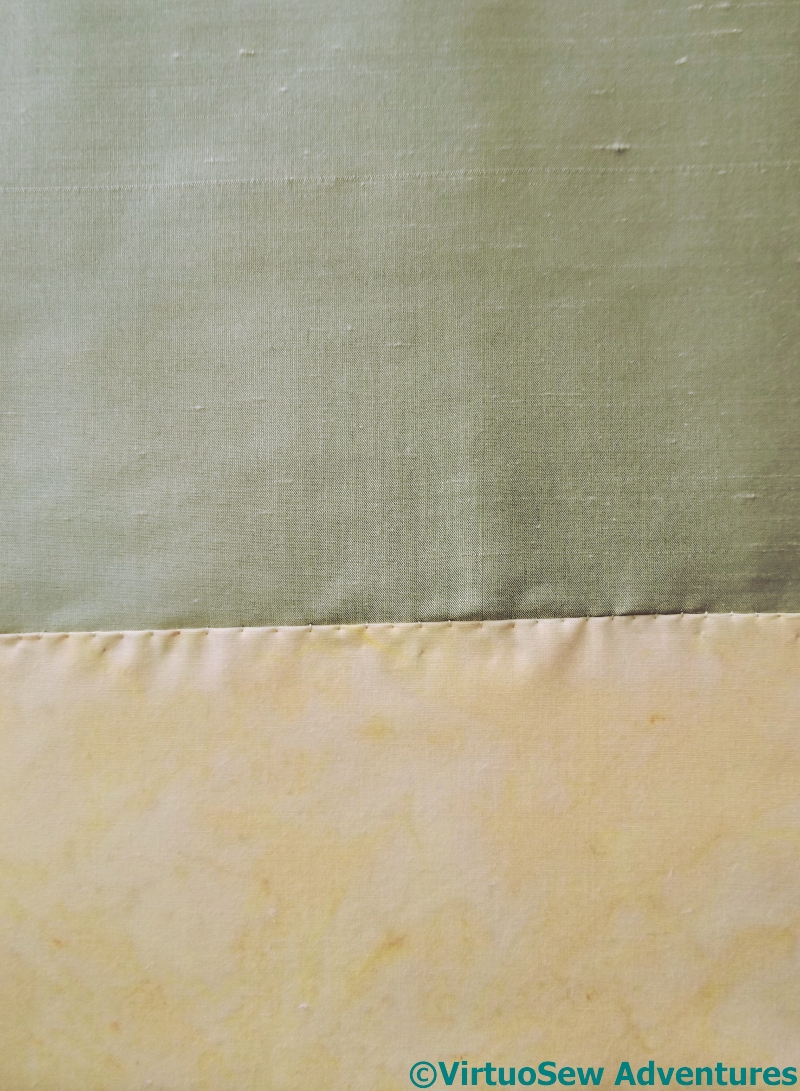
Last time I was at the Harrogate Show I found myself in unfamiliar territory, frequenting the patchwork stands, in search of suitable fabrics for the ground and the clothes. I’ve used a piece of silk dupion from The Silk Route for the river. It’s a pale grey-green, and I think I will have to find somewhere else to use it to pull it into the overall design properly, but it has a lovely subtle sheen that looks quite watery. I’ve attached it around the edges using strands pulled from the weft, because I have nothing else suitable. The ground is a sandy cotton, doubled because I could see the silk through the first layer, and attached using a single strand of stranded cotton from my stash.
Threads For Packing Case
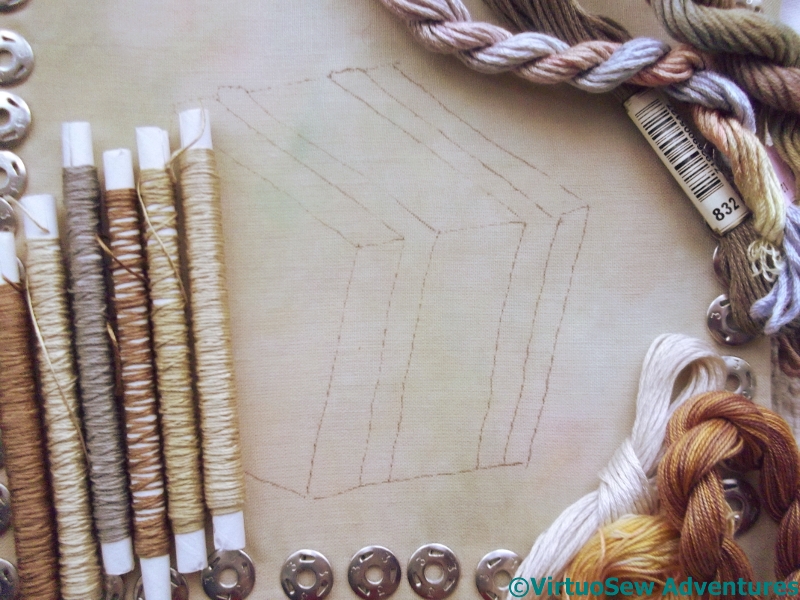
You last saw the fabric I chose for the packing case being used as the background for the Crock of Gold Hoard. It’s a flimsy overdyed turban cotton which won’t take much stitching without reinforcement, so I’ve backed it with a layer of white cotton to give it a bit more body.
Then I had a wonderful rummage in my stash, and pulled out a selection of silk and cotton threads to play with. The tubes are Mulberry Silks threads (also last seen in the Crock of Gold Hoard), and I’ve also laid out a linen thread, two Stef Francis stranded silks, and a couple of miscellaneous threads from I-Know-Not-Where.
This should be fun!
Another day of photography (first helping)
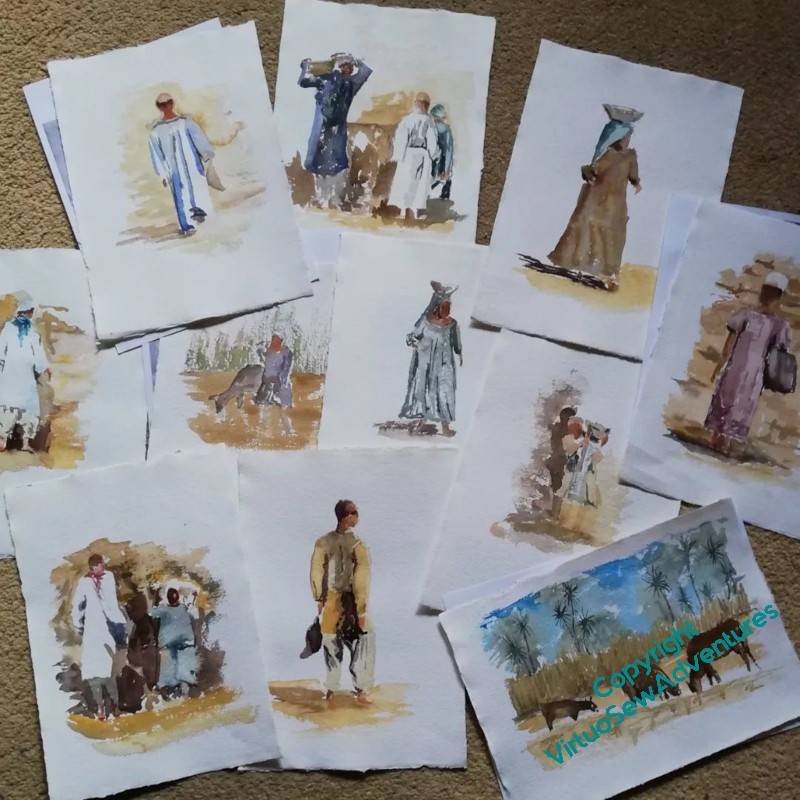
I’ve been working hard on the manuscript of the book I’ve written around the Dreams of Amarna, and one of the things I want to do is stitch the story together with pictures of the ordinary Egyptians working on the dig. They are honoured in the stitchery (View of the Excavation and Loading The Felucca), but that didn’t seem quite enough.

So I’ve been doing lots of little watercolours of labourers, basket carriers, and fragments of the dig and the scenery, and now I’ve sorted out the overlays (there will be more about my experiments with ink and inktense later), I bundled up the whole kit and caboodle and took it across to Bernard Rose Photography to see what he could do.
We rattled through the watercolours in fine style, as apart from occasionally flattening a piece of paper (I tend to paint a bit sloshy…!) there was little adjustment needed.
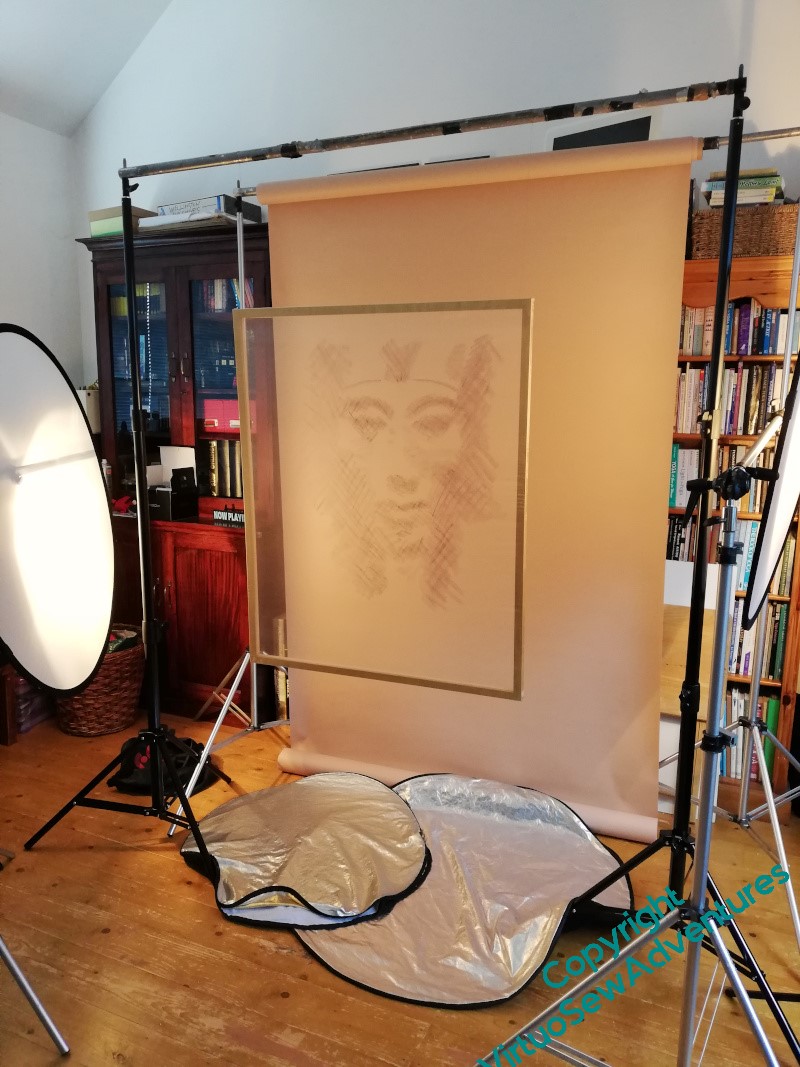
Then, however, matters became more complicated… The overlays are big, and the fabric is slightly shiny, and I hadn’t worked out how to hang them. So we started with the easy bit – overlays on their own, in front of a background. You get a hint here of the reflectors spaced all around, and just the general sense of engineering involved. There are two pairs of tripods with poles between them, one with the background, the other supporting the overlay, suspended on fishing line through eyelets. Then there are the tripods with the diffusers on, and out of shot, there’s the tripod with Bernard’s camera in place.
Mounting Choices Again

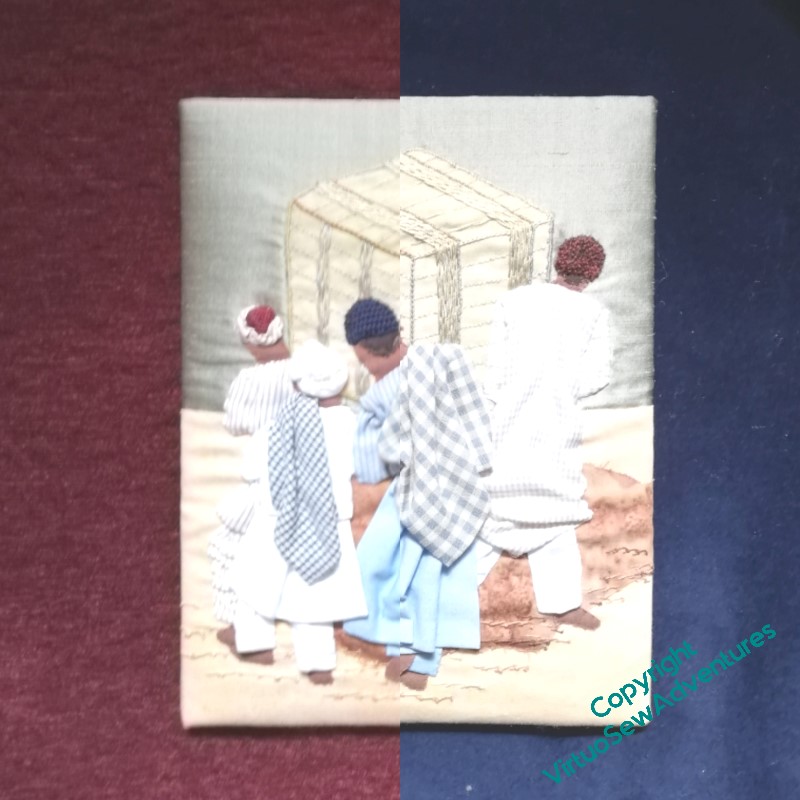
There were some quandaries about mounting “Loading The Felucca”. Burgundy? Navy? Copper? Brown? I posted these pictures on various social media sites – each of which picked a different preference, which wasn’t helpful at all, but at least left me free to apply my own judgement.
So I chose the same navy blue velvet I used for the Amarna Royal Family. All the other fabrics had something going for them, but the navy blue brought out the colours and shapes more emphatically and truly – although I fear you will have to take my word for it, as my photograph doesn’t really bring out the blueness of the velvet!
However, in the course of the final mounting process, I discovered that the embroidery was no longer visibly signed. Curses!
Then I checked, and neither was Ankhsenspaaten. Curses again!
They are now…
Laying out the “spots”
The first place to start with planning layouts was to simply trim my photocopies neat, square, and not too close, and see what result I could achieve.
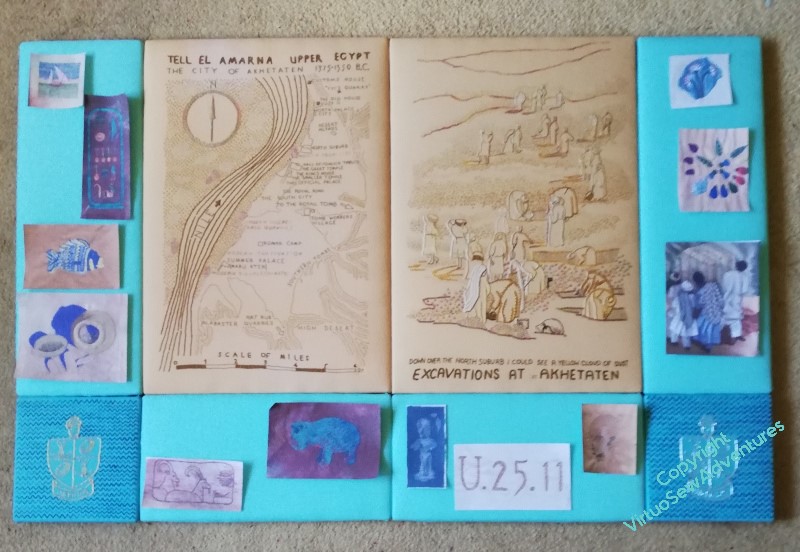
I’m not at all pleased with this. It looks much too congested – or alternatively, not congested enough! If I had twice as many spots, maybe slightly smaller, and had them all jammed together, it might work, but this is betwixt and between, which is no place to be!
So I tried again, trimming some of the pieces closer or in a more shaped fashion, but still all of them being used. This is better. Actually, much better – but I think it still feels congested, and rather unbalanced. So, I need to think about what I can pick up from this, and take forward.
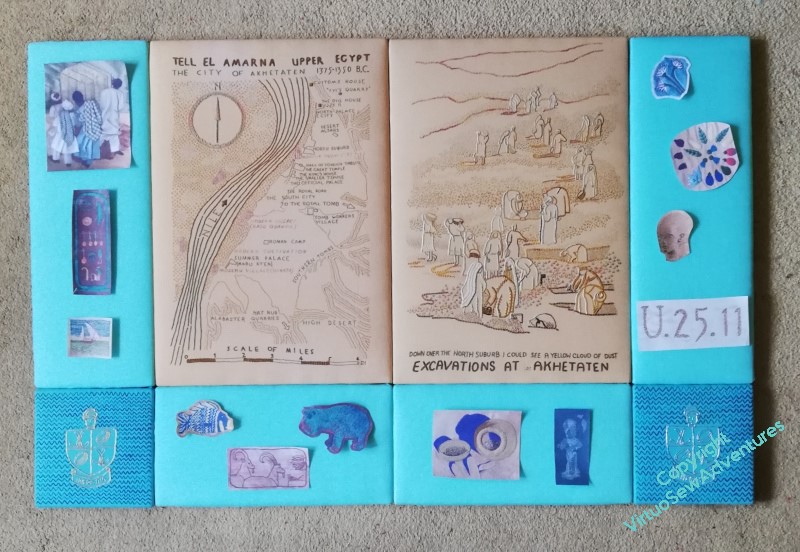
But before I do that, I do have a guideline in mind already: I want to use the “spots” which refer to finds or incidents that Mary referred to in the book with the View, and the ones which depict things already known about with the Map. So it’s arguable that I should either have “Loading The Felucca” with the View, or mount it separately. As it is bordering on too large in any case, I think I may choose to mount it separately.
The other one which is a bit tricky to wrangle is “Typed on Camelback”. It clearly has to be with the View, but it’s a little too wide to fit comfortably on the uprights, where I had it in the earlier two pictures.
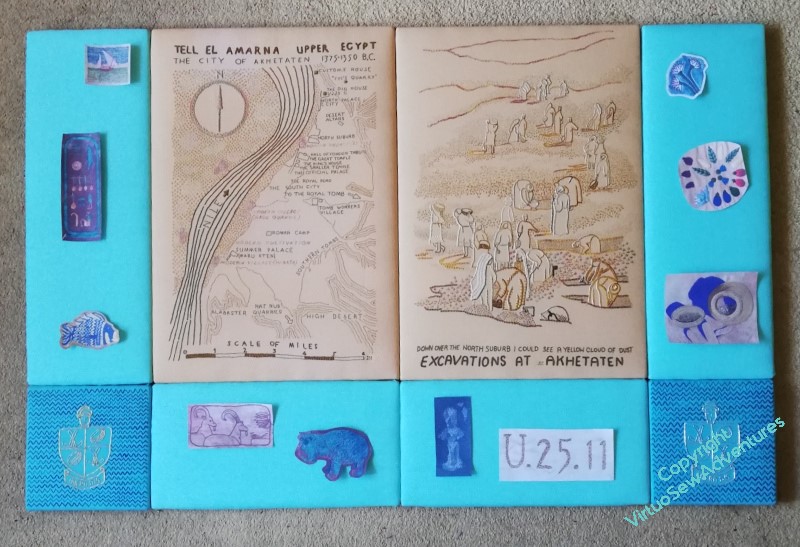
So how about this? I’ve taken off “Loading the Felucca”, and the “Head of Ankhsenspaaten”, and everything is now rather more spaced out. I think this works quite nicely, but at the same time, I thought the “Hittite Amulet” and the “Crock of Gold Hoard” had looked very happy side by side, so I wonder what further adjustment I can come up with?
Finally starting the Faience Necklace
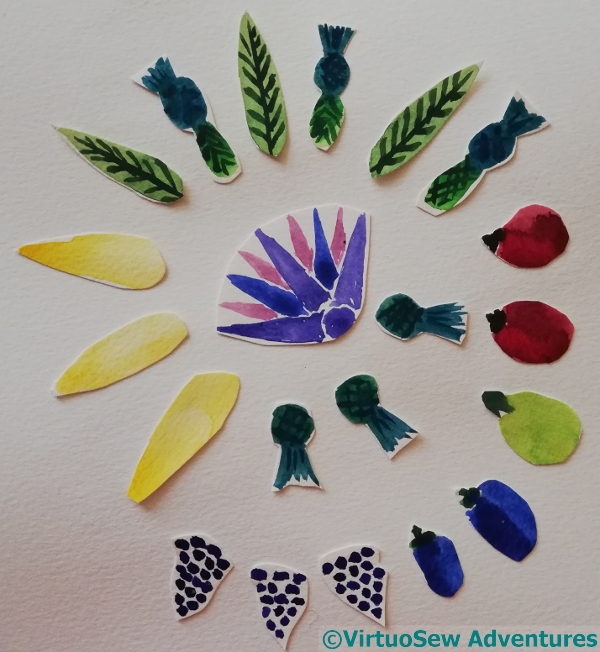
When, after my holiday with the Hounds, I came back to the Faience Necklace designs I’d created with my painted cutouts, I found that the version I’d liked then no longer appealed. Instead, it was the various spirals that sprang out at me, so I began to play with them a little more, tweaking and varying the design.
I must remember paper cutouts as a future designing method. It makes it much easier to play with a lot of variants in a relatively short space of time!
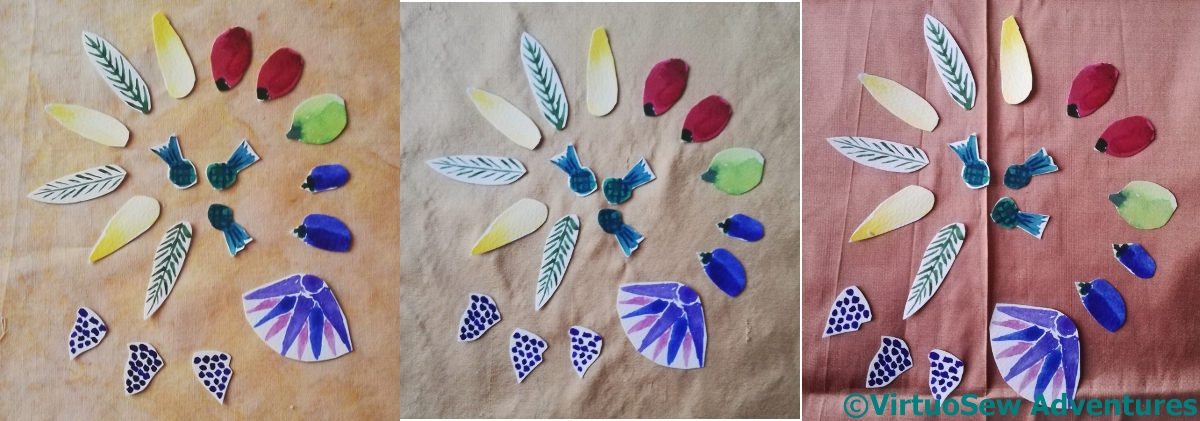
Then I had to decide on a fabric. No, I hadn’t ironed the silk on the right. This was very much an improvisation! From left to right – a quilting cotton I used in “Loading The Felucca“, a leftover of the silk I used for the “Head of Ankhsenpaaten“, and a silk in a shade very similar to that used for the “Colossus of Akhenaten“. In the end I decided that the sandy print on the cotton would help to evoke that sand in which they were digging, and framed up. I’ve put a calico backing in in the frame, and attached the cotton over the top.

Since it’s winter, I’ve been working under my craft light, and it does rather wash out colours. I’m using Japanese flat silk (not sure why, it just seemed to be what I wanted to do), and I’ve started by hand-twisting some fine thread and outlining each element in reverse chain stitch.
This does two things – it covers the design transfer lines and it allows me to think about how I’m going to tackle it. Originally I was going to work each element in satin stitch, to echo the high gloss of the faience, but now I’m beginning to think more and more of using stitch to echo the natural elements the faience depicts. Remember what I said, when I finished the Hounds, about returning to my first love, the effects of stitch and thread?
Watercolour investigations

There’s more than one way of thinking about a project. I’m still trying to feel my way to an understanding of Akhenaten’s face, and this is one way of doing so. The purple one in the middle is the most recent, and most clearly shows the strong shape of the face. So I might be making progress.
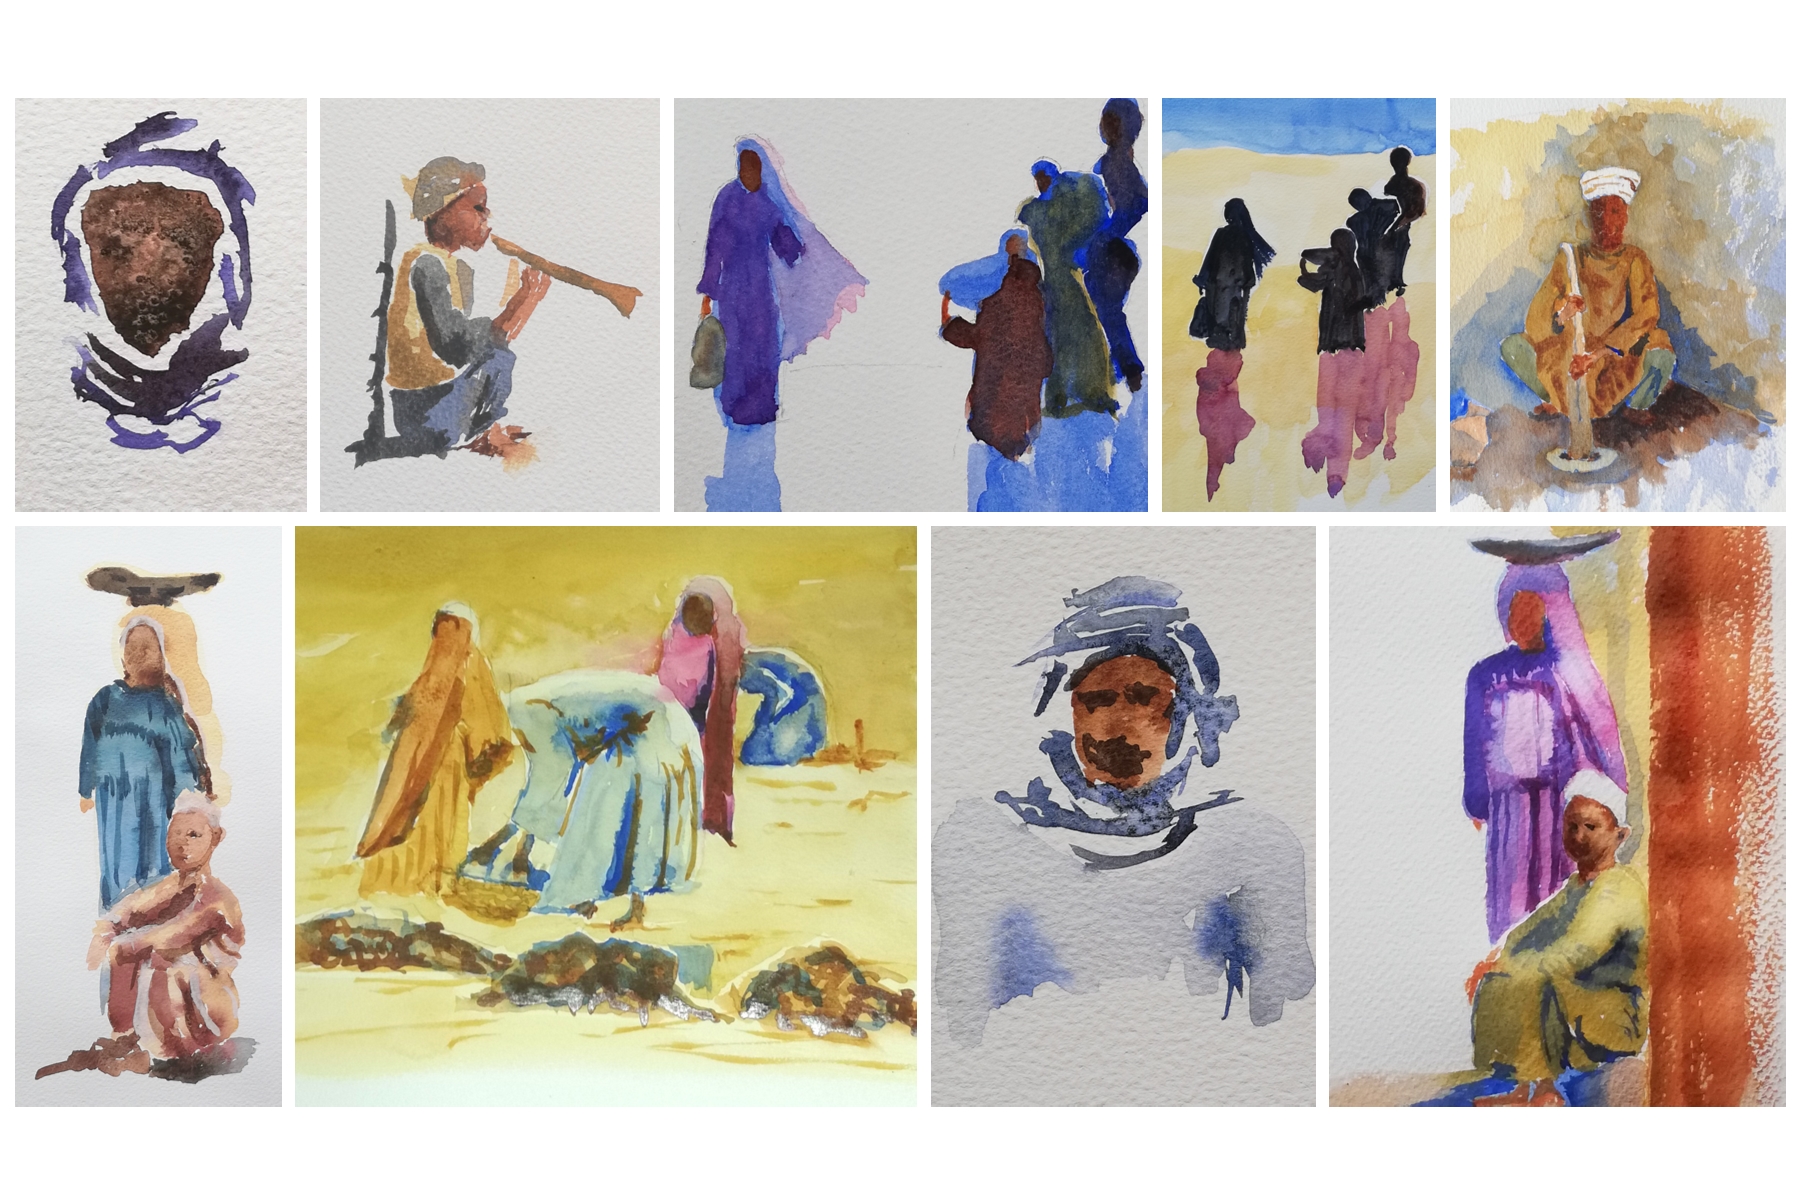
But the watercolours also give me a chance to show things that I’m not at all sure I want to attempt in embroidery. Of course, I’ve already done “Loading The Felucca”, which shows people, and the background of the second panel does too, but in all honesty, I think that difficult as they are, the watercolours were actually easier than the stitching!
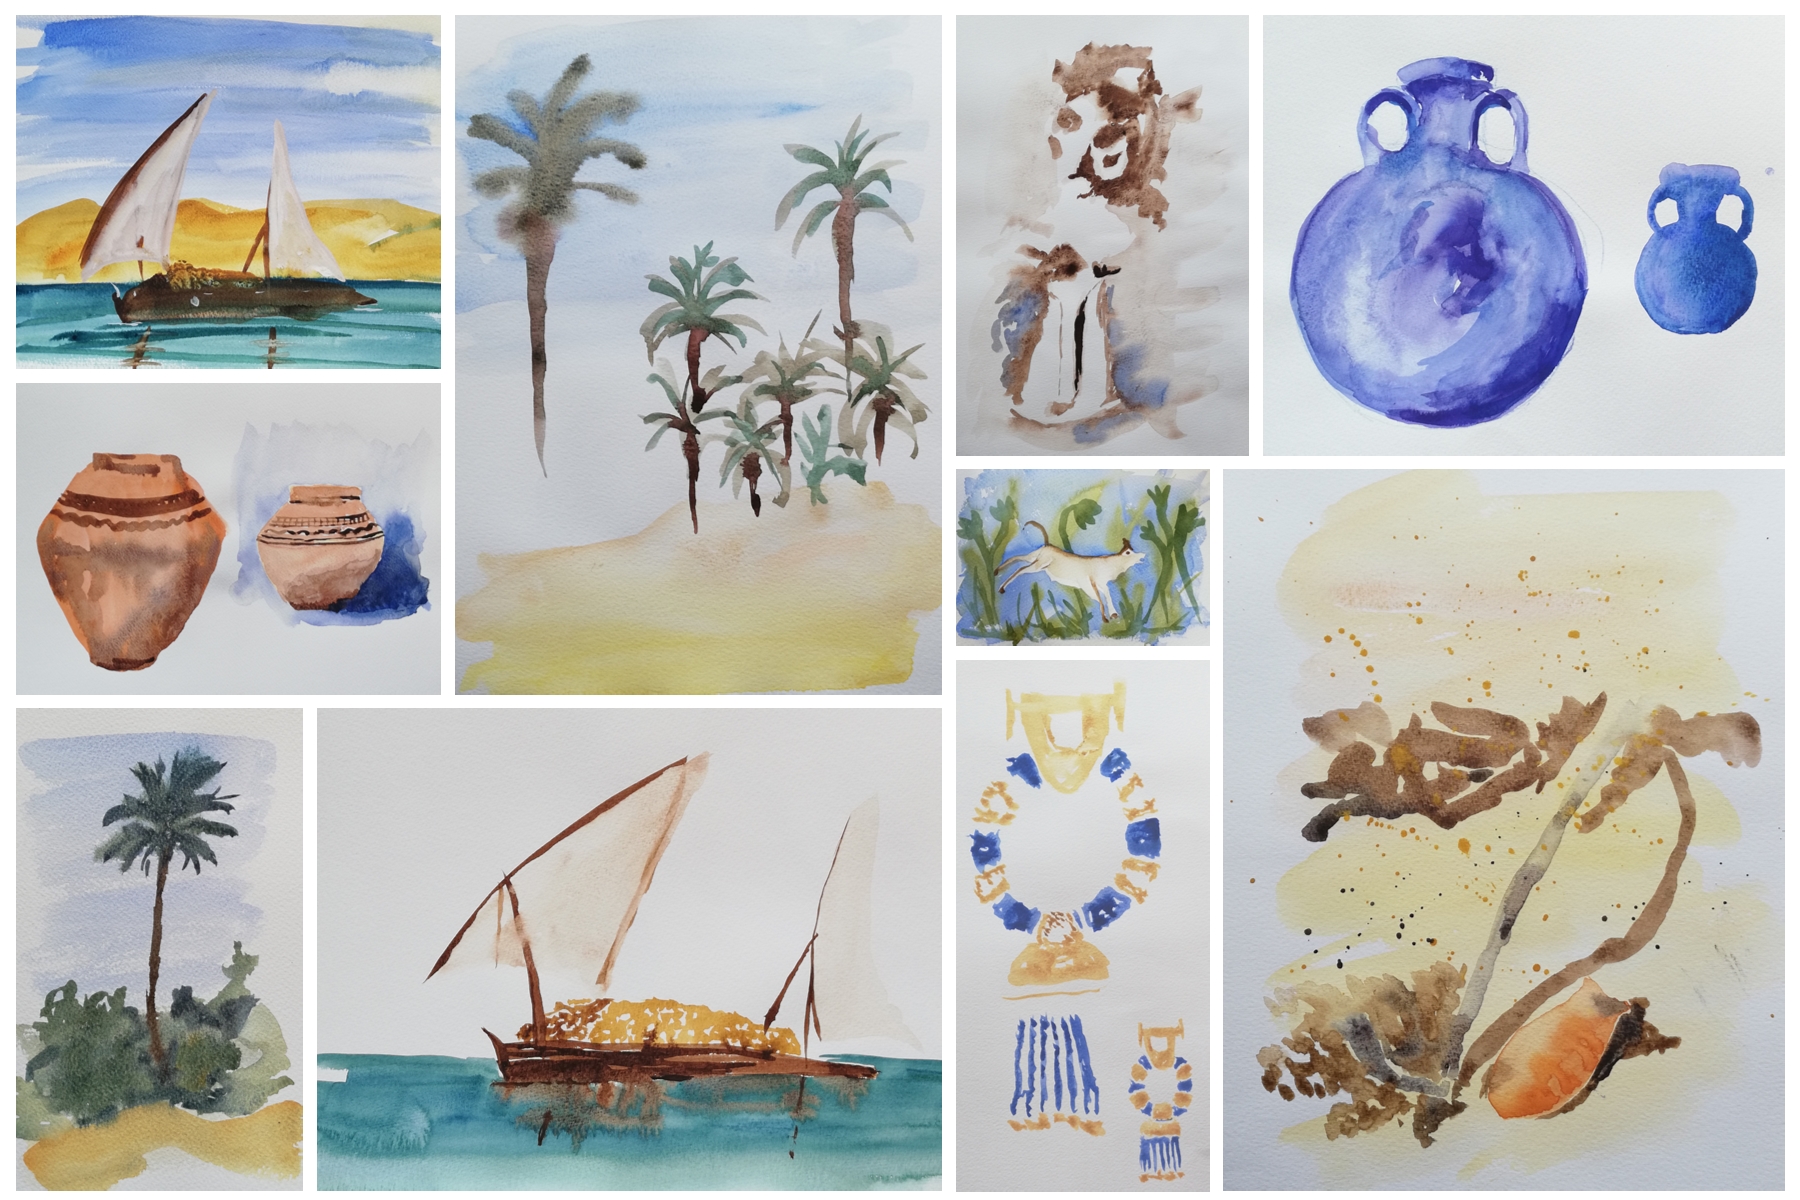
The felucca, and the Hittite Amulet have both appeared in stitch already. I’d like to do more of the jewellery (I’ve got an assortment of goldwork supples to play with, after all!). I’m planning to do some more fresco fragments, and I’m sure another idea or two will occur to me soon!
Finishing the Head of Nefertiti
Unless I decide otherwise, the head of Nefertiti is now finished.
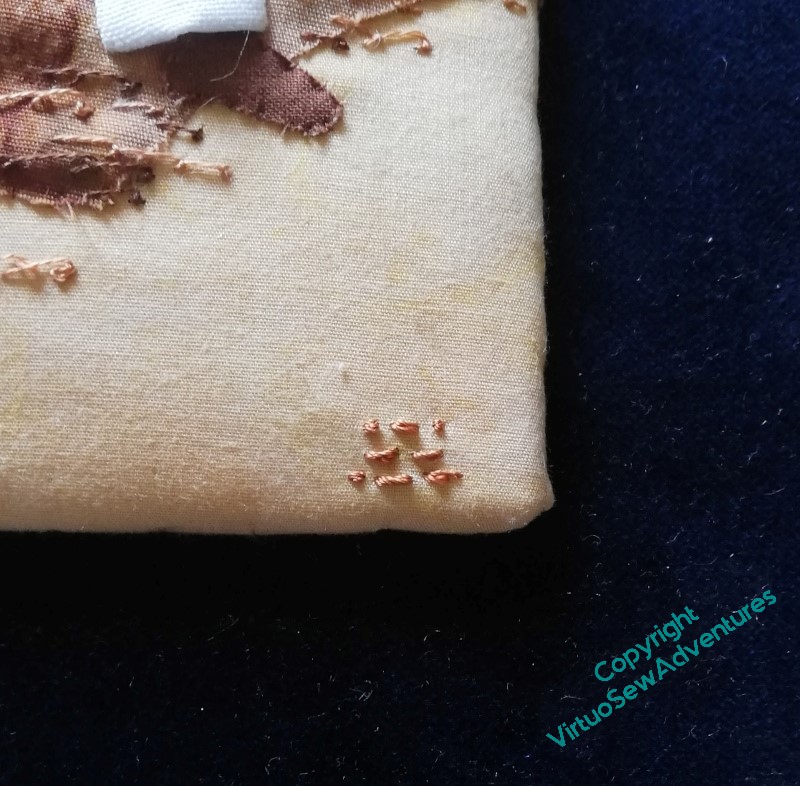
Signature Cartouche
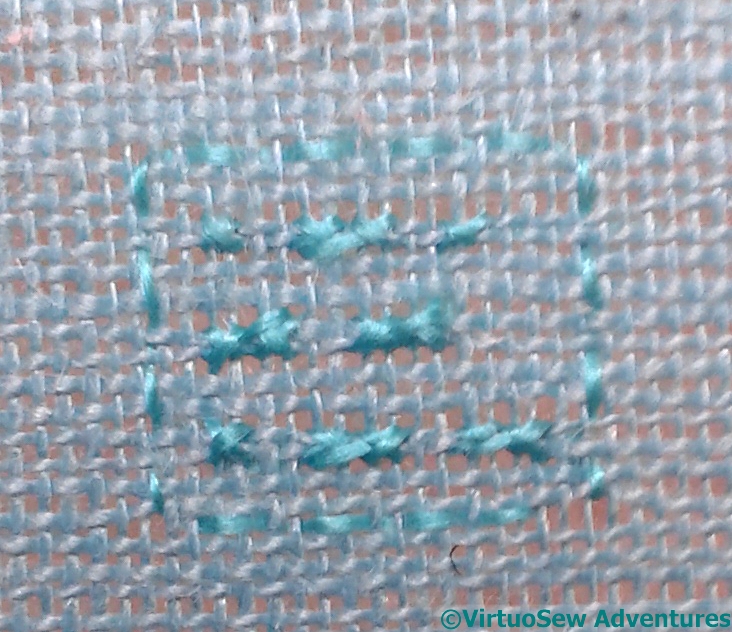
I’ve worked my Morse Code cartouche slightly differently this time, using cross stitch for the dots, long armed cross stitch for the dashes, and counted running stitch for the frame. This works rather well, so it’s a possibility for any eventual canvaswork projects in the future.
However, in this instance it is almost completely invisible, so I may yet unpick it and rework it twice the size, with four threads in each direction instead of two.
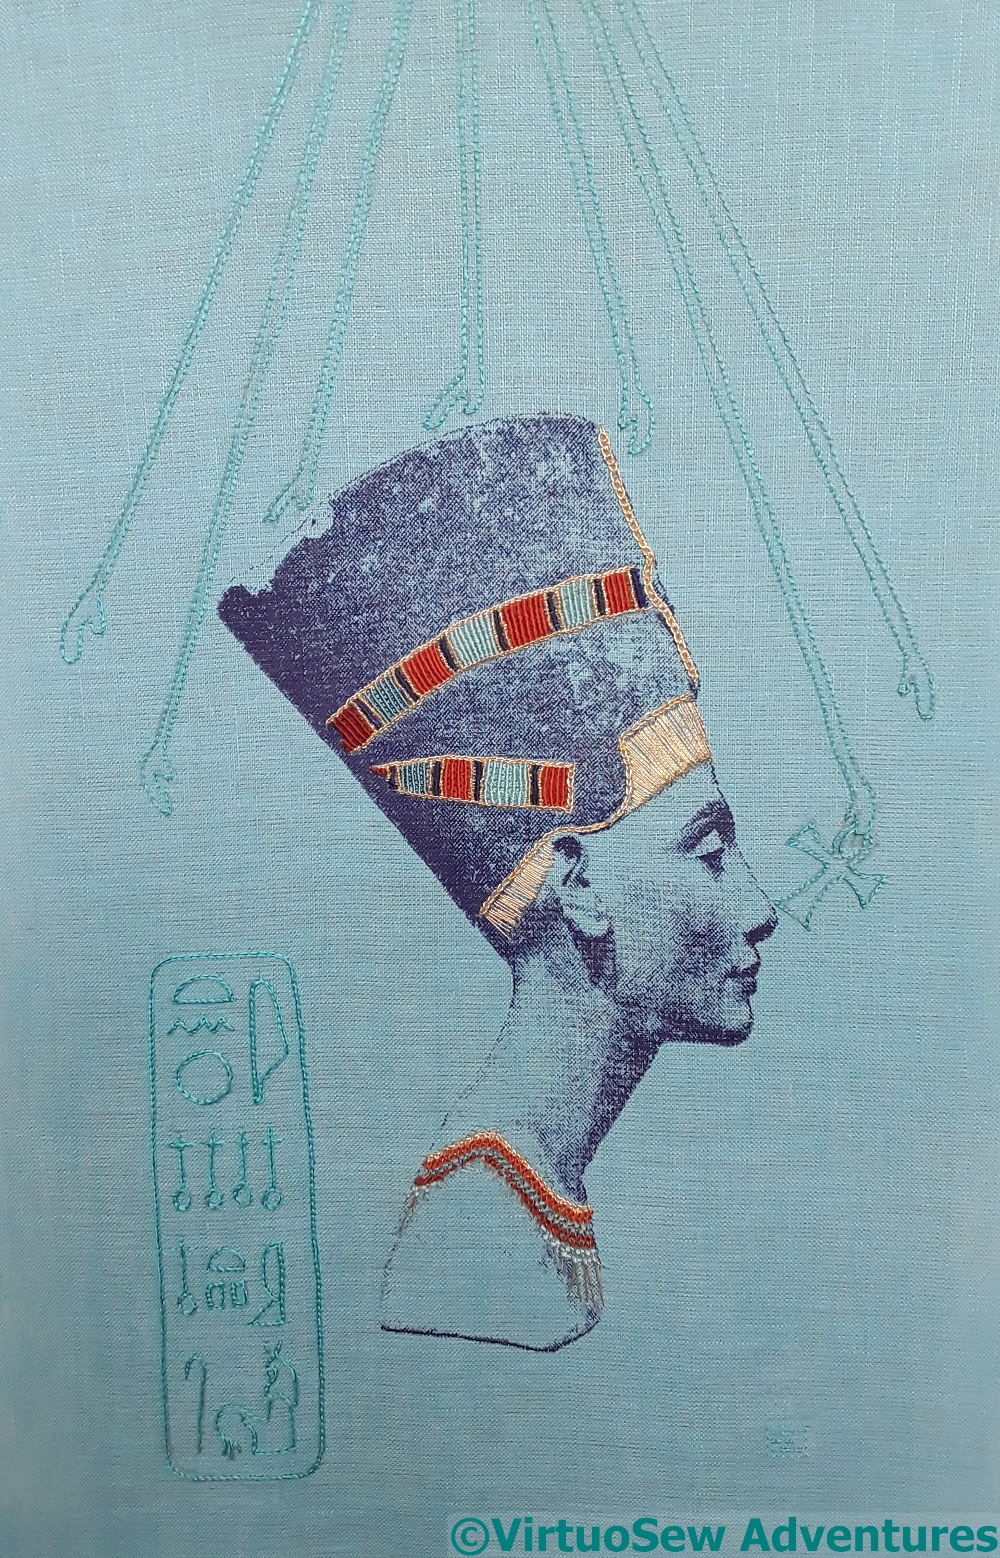
Finished Head Of Nefertiti
In the end, if you recall, I decided to work Nefertiti’s cartouche, both the hieroglyphs and the frame, in reverse chain stitch using untwisted silk.
The rays of the Aten are worked in reverse chain stitch, but using hand twisted silk.
I am a little concerned about balance and the strength of the design, but when I was playing with my photos of of the finished panel, I noticed that when I cropped the picture closely, rather than including all of the length I have stitched of the rays of the Aten, it was much improved.
That happened with the Camberwell Panel, and with Loading the Felucca, as well, so I shouldn’t be surprised.
And I really should remember to play with that sort of detail when I am mounting and finishing my embroideries!