
Search Results for: Reverse Chain with Buttonhole Edging
More Goldwork On The Spot Sampler
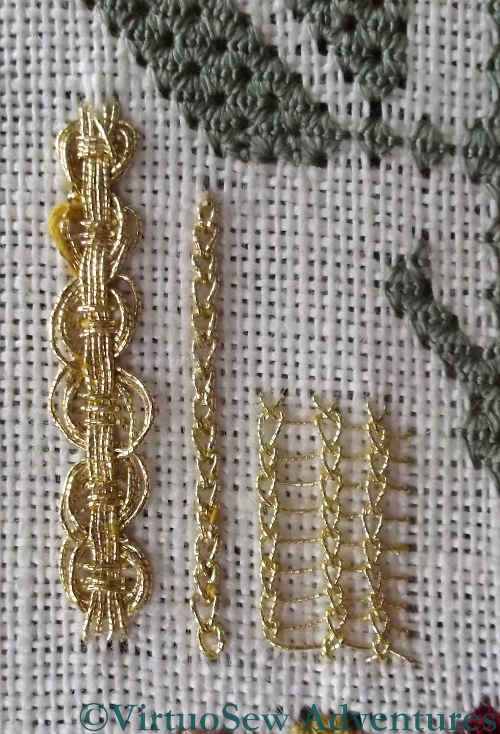
Guilloche Stitch, Reverse Chain Stitch and Ceylon Stitch
I have been working more on the Spot Sampler of late, slowly catching up with the metal thread stitchery. If you are confused by my posts on this, you aren’t alone – I spend a few minutes every time I sit down trying to work out where I’d got up to!
Some of the stitches are familiar – Ceylon Stitch, for example, I have used before. In this case I have used the lighter and floppier of the metal threads supplied. It creates a more lacy effect than Tricia intended, but I thought the thread might “strip” less dramatically (I was right, too!). When I finish the main body of the sampler I may go back and work new versions of some of the stitches around the edge, so in this case, for instance, I would choose to use the heavier, thicker thread. This will make the sampler even more useful by giving me some sense of the variation of appearance available through different threads..
As you can see, I still haven’t entirely got to grips with Guilloche Stitch, although using the stiffer thread did make the whole thing slightly easier. I was becoming slightly anxious about finishing the panel without starting a new length for the last course of interlacing!
Reverse Chain With Buttonhole Edging
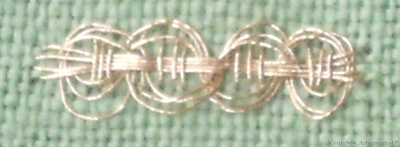
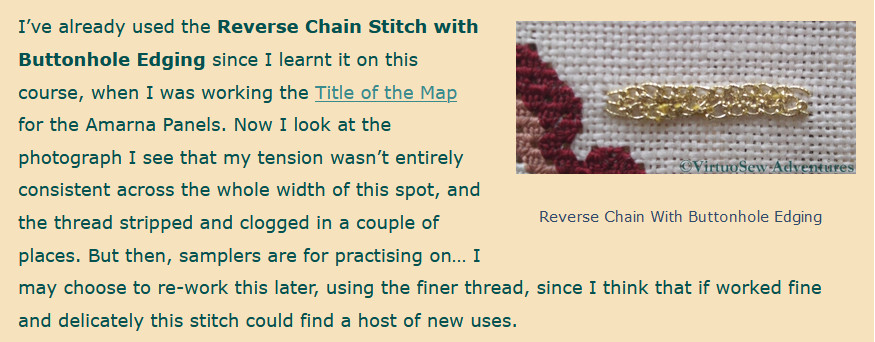
I’ve already used the Reverse Chain Stitch with Buttonhole Edging since I learnt it on this course, when I was working the Title of the Map for the Amarna Panels. Now I look at the photograph I see that my tension wasn’t entirely consistent across the whole width of this spot, and the thread stripped and clogged in a couple of places. But then, samplers are for practising on… I may choose to re-work this later, using the finer thread, since I think that if worked fine and delicately this stitch could find a host of new uses.
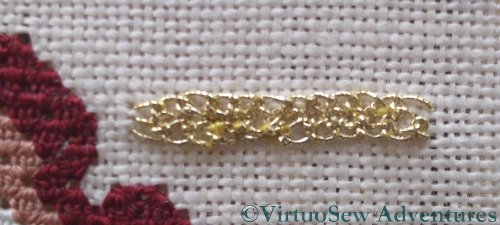
Plaited Braid Stitch on the Spot Sampler
I felt when I finished my practising for Month Fourteen that the real test of my grasp of Plaited Braid Stitch would come when I came back to the stitch after a week or so. As you can see, I’ve worked it as a counted stitch here, in the larger size and using the heavier thread, and it seems as though I got it right. I kept the instructions to hand all the time, of course, but I’m very pleased with this. It is a real testimony to the clarity of the instructions, and the way they gave me some grip on the structure of the stitch, that I didn’t feel at all anxious when I was working this.
Can you hear me purring?
Tudor and Stuart Goldwork – Month Five Stitches
As I’ve mentioned, while I continue to persevere with the silkwork (there is a limit to how long I can stitch such fine work, even with the magnifier), I’m practising the goldwork stitches on a separate cloth. I don’t want the silk catching on metal threads while I’m working it, so the best way to avoid the problem is to do no metal thread work until the silk is finished. However, I couldn’t bring myself to ignore all the interesting stitches we are promised – hence the practice cloth.
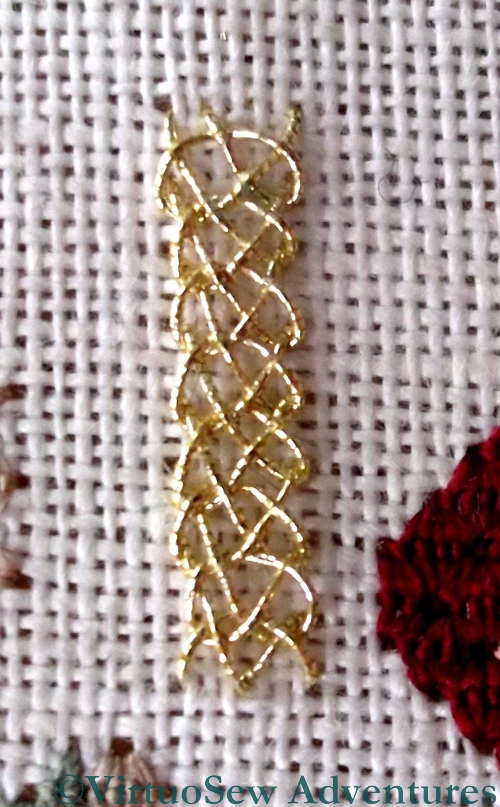
Reverse Chain With Buttonhole Edging
I can see potential to use the Reverse Chain with Buttonhole Edging in the Amarna panels, since it creates a very complex impression when seen at real size, while not being all that difficult to stitch. It looks a lot like a braid or a filagree, so might be used to represent the necklaces that the Pharaoh gave to favoured courtiers at the Window of Appearances.
Guilloche Stitch
Guilloche stitch was an entirely different matter. It didn’t seem to matter what I tried, I couldn’t keep the crossing places of the final stage neatly under the long straight stitches, and the loops wouldn’t stay neat. In fact I even had a go in cotton threads, as you can see below.
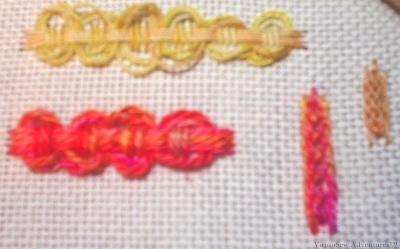
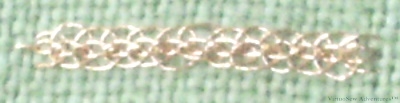
Stitches Tried In Mercerised Cotton and Pearl Cotton
The yellow is a mercerised cotton, while the orange is a fairly heavy pearl cotton. The Guilloche stitch seemed to work better in the heavy pearl cotton, which makes me wonder whether it is simply a matter of scale. The bulk of the pearl cotton makes the stitch so much more compact, whereas the gold thread on the practice cloth is much too fine for the spacing of the stitches. Note that the Reverse Chain with Buttonhole Edging looks much more braid-like with the finer, mercerised thread, where the pearl cotton almost looks like a different stitch. All of these stitches should also be easier when I’m working on the real piece which is resting on a floor frame. I’ll be able to use both hands to control the thread if necessary!
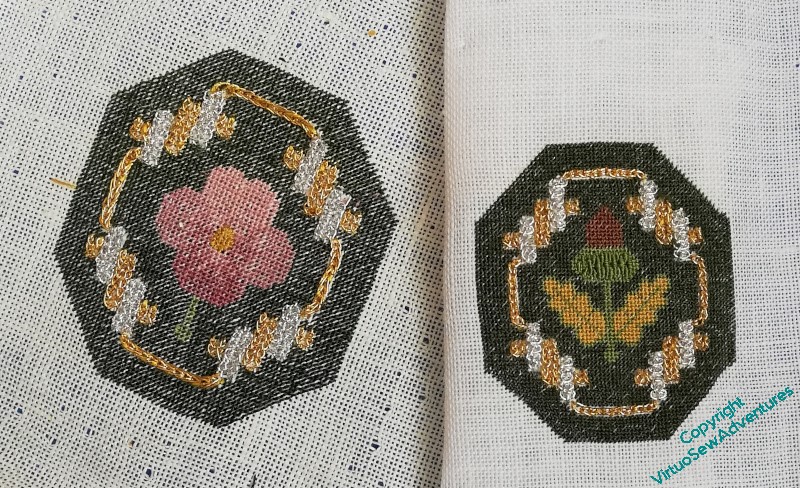
Golden Accessories – Pansy
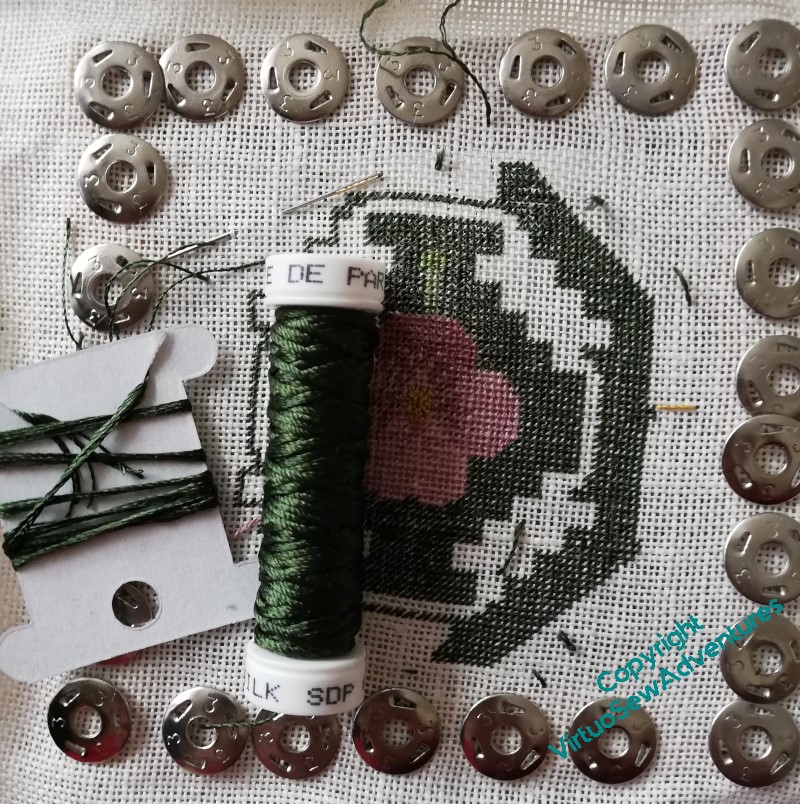
The Pansy continued apace, with only one alarming period when I thought the small amount on the card was all I had left to finish the dark green.
Then I found an entire full reel, gleaming at me from the bottom of the project box.
I was greatly relieved, to say the least!
Next, however, on to the gold and silver.
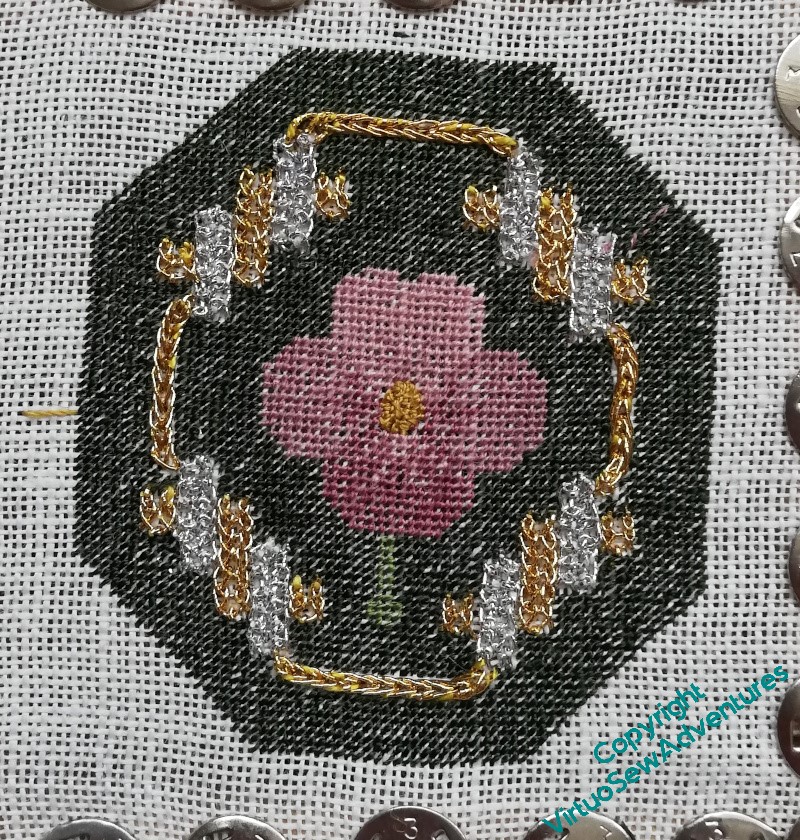
Some of this echoes the other two, and was fairly easy to put in place – reverse chain stitch in the narrow sections. I learnt from last time, however, and this time I put the silver strapwork panels in before the gold, which was again Ceylon Stitch.
The silver was reverse chain stitch with buttonhole edging – so it’s the stitch I used for the titles on the Map of Amarna and the View of the Excavation. Nicely familiar, and very satisfying – but also very much easier without the Ceylon Stitch in place. Next time I will try to think through the order of my stitching!
However….
It turns out that when I fished out a piece of linen to do the last of these pieces, I didn’t check it very well. The stitches are markedly bigger, and more spread out.
Next time, Rachel, take the time to count the threads!
The Excavation – Further Dilemmas
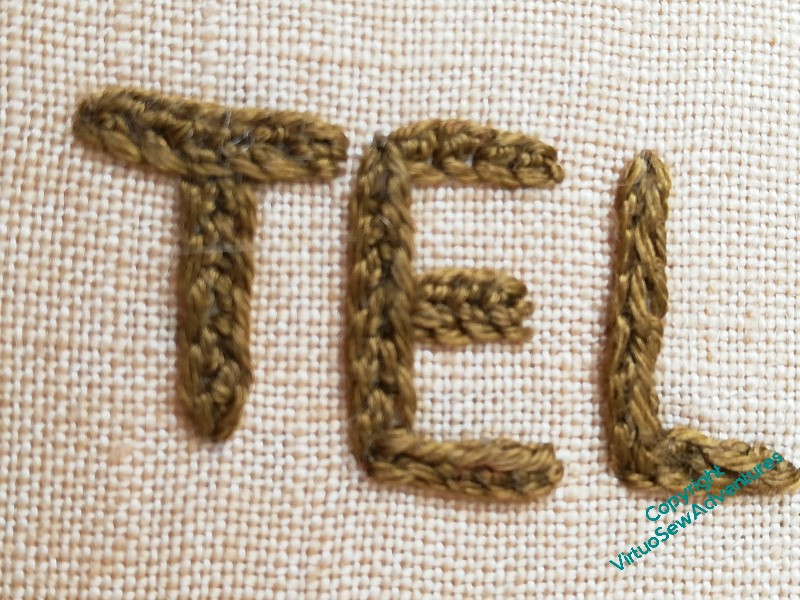
You may recall I was wrestling somewhat with the large title, still trying to work out what the stitch was. Since I had jumped the gun a little, and already have the Map stretched and stapled to the frame, I can’t look at the back, and I wanted to maintain consistency across the two panels, so I had to find out.
I did a little more rummaging on my blog, and finally found a reference to it!
So now I know what to do there, I can move on to my next dilemma..
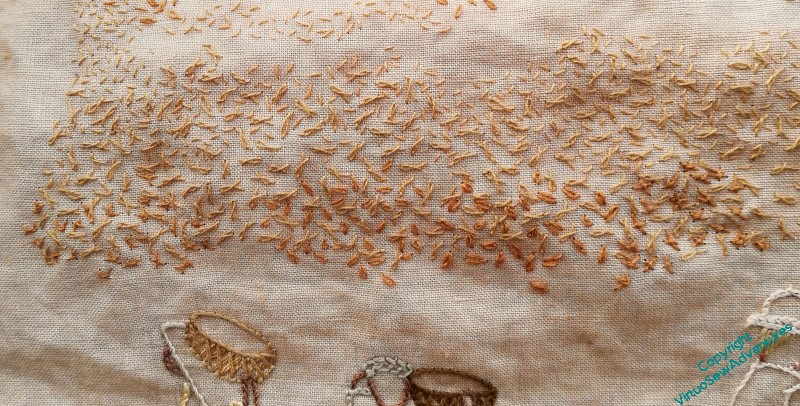
You can see, I think, that the uppermost strand of this section is in Seed Stitch, and the next is Twisted Chain Stitch. All single strand (honestly, what’s happened to me, I used to be all about chunky stitching with six strands in the needle!!) and random as far as I can make them. I felt that the lowest area of this section needed to be more emphatic, and tried a variant on Danish Knotted Cross, followed by single chain, followed by both of those in a slightly thicker thread, and then stood back and looked at them.
Even with my glasses, I was struggling to see any difference.
Now, I find myself wondering, does this matter, or does it not? How emphatic do I need to be, how much do I need to emphasise this mid-ground area?