Category: Dreams of Amarna
The Head of Nefertiti, Embellished with Silk and Gold
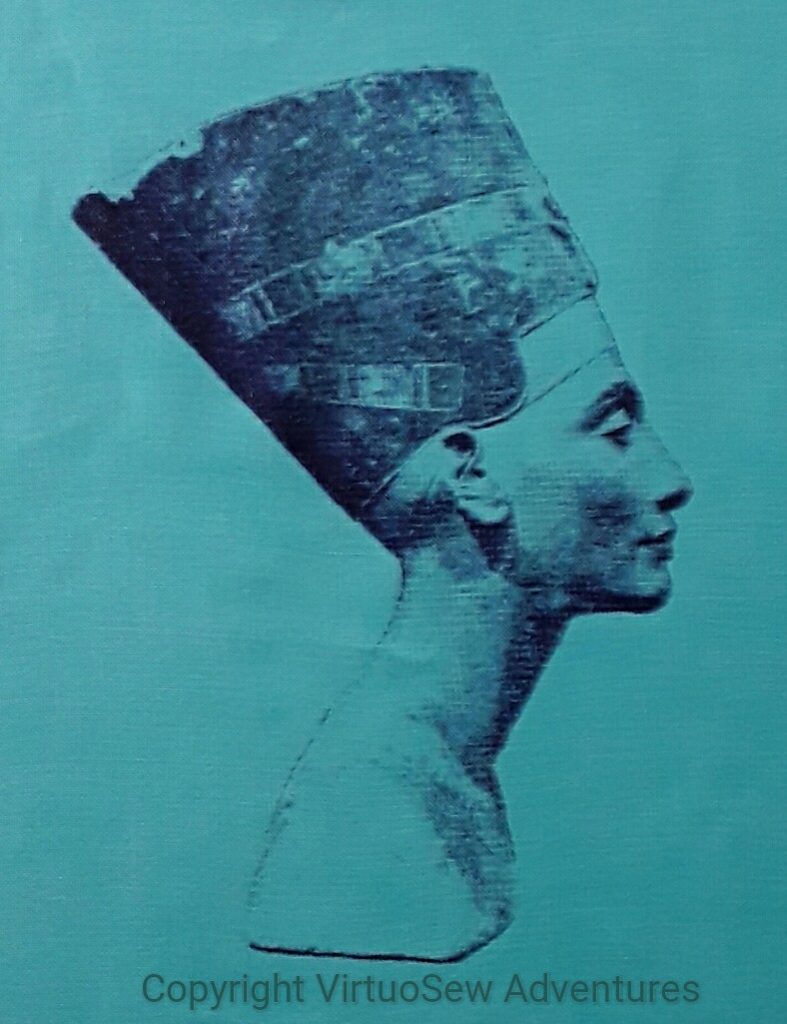
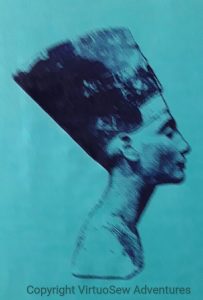
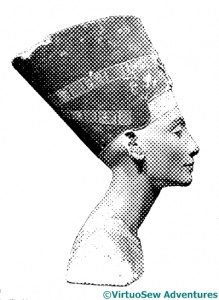
Screenprint of the Head of Nefertiti
This is much the best print I’ve managed of Nefertiti, pressure, speed and amount of ink all working nicely, and very few really dark sections. What I want to do now is to highlight the coloured elements of the crown she wears – unique to her, apparently, no-one else in ancient Egypt has ever been depicted wearing it. I’ve got some gorgeous silk threads from Mulberry Silks which should do the job perfectly, but first they need a skeleton of gold. I had a lovely rummage in among the assorted wonders I’ve received from Thistle Threads (they have their own special box, of course), and after staring critically at the linen fabric, picked out the Special Tambour, and made a start.
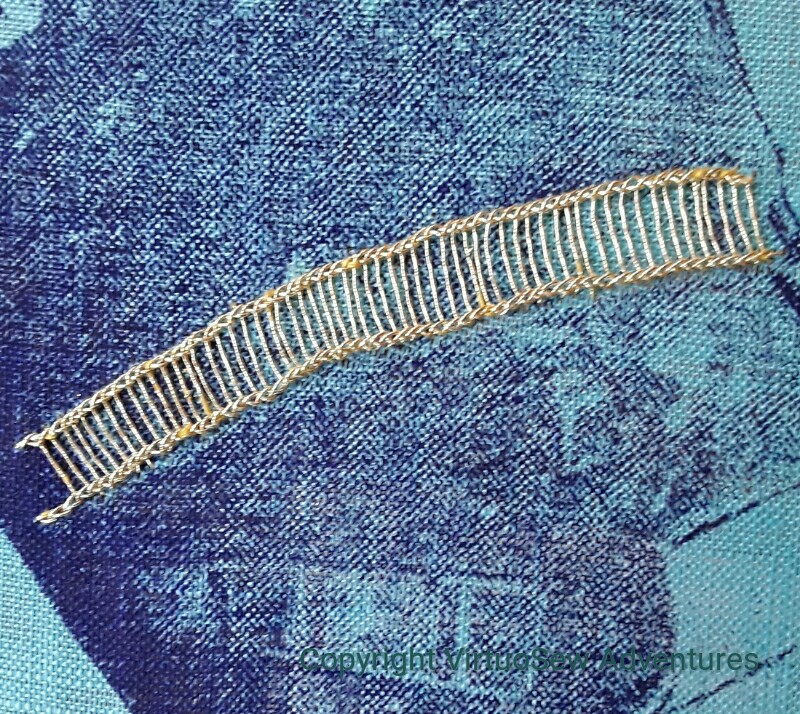 My idea is to create a framework of Ladder Stitch, and then add colour – as in the Tudor Rose project – using silk threads. Long term readers may recall that during the Tudor and Stuart Goldwork Masterclass, I had some trouble with Ladder stitch, so although I was fairly sure the idea would work, I sat down with some trepidation.
To be very pleasantly surprised. Something has happened in the intervening few years, and my ladder stitch wasn’t as trying as I expected, and moved fairly swiftly, too. I may yet decide to redo the stitches, because I re-tightened the fabric in the frame about halfway across, but that will depend upon how much better the second section looks when I have done it.
That’s a good start to a new project, isn’t it!
Experiments for The Head of Nefertiti
You may recall that the final “Dreams of Amarna” pair of panels is intended to include the heads of Akhenaten and Nefertiti, screenprinted onto gauze, and floating over the top as free-hanging veils.
I decided to have a small screen done of Nefertiti, in order to practice the technique and experiment with the different types of gauze.
The screen duly arrived, and I did about six prints, all of which were dreadful. I put the screen away in disgust and decided to try another time.
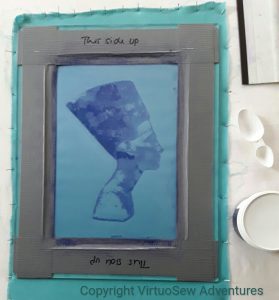
This print shows some of the problems. I pressed too hard, obscuring some of the detail and caking the fabric – in this case a linen, because I have a plan to add silk and gold embroidered highlights. It would be impossible to get a needle through, and if I did, a metallic thread would be stripped in short order.
There’s clearly a trick to it – a combination of pressure (not too much), amount of ink (enough!) and angle of the squeegee (just right).
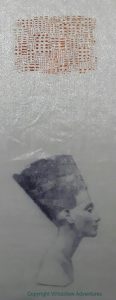
These two prints on gauze give me some hope. The orangey-terracotta is the small, blocky screen I bought to test out the idea first of all. I’ll embroider something over the top of this, just to see how it works.
And the head of Nefertiti is rather better, too. Next time I get out my Dreams of Amarna pieces to stare at them and play with layouts, I will be able to hang the gauze in front and play with distance and placement.
I’m beginning to think that it isn’t outside the bounds of possibility that I might finish the Dreams of Amarna one of these days, and even be pleased with it!
The Red Panel on the Nefertiti Shawl – Part Three
Third installment..
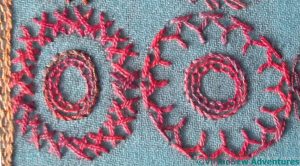
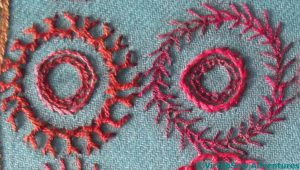
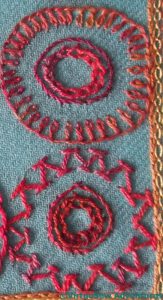
Remember, the two inner circles are always in the same stitches – Open Chain Stitch, and Stem Stitch.
The two outer circles in this case are in Herringbone Stitch, and Half-Chevron Stitch. I’m a little disappointed that neither the counterchanges of colour nor the counterchanges of thread seem to show in this photo. I assure you, they were there when I worked it!
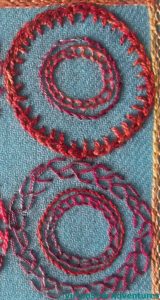
The first of these is Breton Stitch, which is a little like Herringbone stitch with added twist. I’m sure I could have done it with the twist towards the outside, but I think like this, it will balance some of the other circles which have a strong edge.
The second is Wheatear Stitch, which I have found myself turning to every now and again, although maybe not often enough. It produces a spiky but continuous line, so while it has definite uses, it is also one which doesn’t work in all contexts. That said, I enjoyed working it, so maybe I will be able to tweak either the context or the stitch, so as to use it more…!
This pashmina is going to be quite the stitch sampler, isn’t it!
The Red Panel on the Nefertiti Shawl – Part Two
Moving on to the next set of stitches…
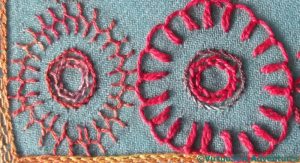
The circles weren’t perfectly drawn, so the slightly wonky appearance of perspective is partly owing to that. The lighter coverage is Cretan Stitch. I often have trouble using cretan stitch in my more figurative projects, so I’m hoping that being reminded of it will help me to find uses for it in future. Up and Down Buttonhole stitch is an old favourite, as long term readers will know. I’ve done it more neatly, but I always enjoy stitching it.
This pair was actually among the last to be finished. Italian Border Stitch can be described as a fly stitch with a French Knot instead of a straight stitch. First I did a single row, and it looked a bit thin, so I added a second layer. Much better!
The second circle is in Chained Feather Stitch. This one curves well around the circle, and has something of the feel of a victor’s laurel wreath about it. Maybe an omen for me finally finishing the Dreams of Amarna in the next year?
The Red Panel on the Nefertiti Shawl – Part One
Once the colour scheme was sorted out, I decided that I was going to try my usual trick again. There are elements of the panel which will be the same, and other elements which will change. The combination ensures that there is interest everywhere, but rhythm and similarity to help the eye rest.
So, the two inner circles are open chain stitch for the innermost one – at about the largest scale at which open chain stitch works without decoration, which is tiny! – and simple stem stitch. Furthermore, the open chain stitch always uses the thread used for the outermost circle, and the stem stitch counterchanges to a different weight and tone of thread.
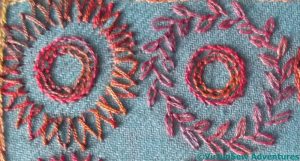
The first circle here is done in Chained Blanket stitch using a silk perle in a warm russett-y red. Chained blanket stitch is one I’ve rarely used, but I’ve decided I like it. It produces a strong edge, and a pleasing texture. The second circle is in a rather finer silk thread, with a blueish tone – counterchange again, you see. This time I used Closed Feather stitch, which is one of the old faithfuls…
The next two continue the theme…
The outer circles are in Basque Stitch (top), which is another stitch with a family resemblance to chain stitch and blanket stitch, this time using two strands of stranded silk, and Chevron Stitch, in another silk perle. Chevron Stitch is an old friend, but as you see, it doesn’t run happily around curves – or at least, not curves as tight as this.
Still, the counterchanges of russet against burgundy, thick against thin thread, same stitches against new stitches, all seem to be working so far…
Progress on the Nefertiti Shawl – the frame
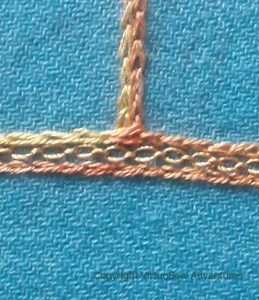
The internal borders of the Nefertiti Shawl, outlining the various coloured blocks, turned out to be fairly easy, as they were part of the inspiration that struck me when I was laying out the pashmina to transfer a design to it. The threads are all silk, with a soft perle used for the chain stitch. The vertical internal borders ended up as two rows of chain stitch, which should define the coloured blocks nicely.
The horizontal border consisted of two rows of chain stitch, in the same variegated silk thread, bordering a single row of cable chain stitch in a much shinier silk thread, which turned out to have a mind of its own. It kept trying to tie itself in knots, it twisted into snarls, and it unwrapped itself when I tried to finish off ends. But it looks lovely!
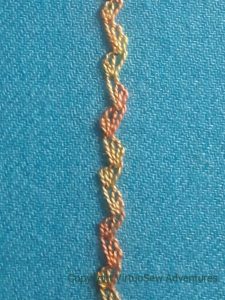
My design ideas put two lines of gold on either side of the coloured blocks that I’ve taken from Nefertiti’s crown. I didn’t want to do them the same, so I decided to make the rows nearest to the coloured blocks slightly wider. Then I had a wonderful rummage in my books of stitches and chose to take the opportunity, since the rows are straight, to use the Wavy Chain Stitch I found when I was doing the Circle Skirt and couldn’t get to curve. It works beautifully on the straight!
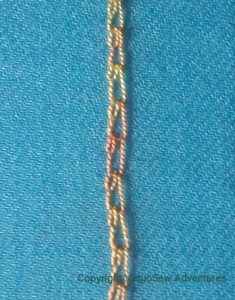
The outer lines, I decided should be narrower. Shell Chain Stitch seemed to fit the bill perfectly. It belongs to the same family – chain stitch – but produces a light, almost textured effect.
Having made all my decisions, it became a matter of sitting quietly, doing miles of chain stitch variations. The coloured panels will follow later…
Adventures with a screen print
It occurred to me recently that when I finally finish the Dreams of Amarna panels I will probably want to exhibit them somewhere – displaying them at home would require a complete redesign, including moving walls! – and that, however large or intricate they may be, two panels do not an exhibition make.
At the same time, however, I’d had an idea for a design for which I could apply the combined silk and gold stitches of the Tudor Rose, and furthermore, that might allow me scope, later, to play with some of the mixed media techniques that are available…
So I went rummaging among the assorted copyright-free and Creative Commons images on the web (my goodness, there are thousands!) and found a photo of the famous painted head of Nefertiti which is in the Berlin Museum. Then with some cropping and processing, from a photo of the bust in its case it became a plain headshot with no background, rendered in the style of an old-fashioned newsprint picture. An email conversation and a payment later, that image had been turned into a custom-made Thermofax screen…
At which point, all the simplicity fell over. I’ve actually done four screen prints on the faience-coloured linen, and about three on sandy coloured linen, and none of them was good enough for my purposes. I’m not sure whether the screen is too detailed for the fabric or whether it is simply my technique that is faulty.
So I guess I just need to try harder!
Amarna Geese – stage 2
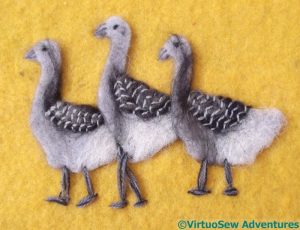
I’ve started adding more detail with needle and thread. The chevron pattern, the eyes, and the detail on the beak are all made using straight stitches in single strands of Appletons wool. I can’t think where I got a whole series of greys, unless it’s from hand-me-downs. I’m glad I have them now, but it isn’t a colour I much like and I can’t imagine going out and buying them!
For the legs, I have used three different colours of wool in the needle. I can see that for all my staring at photographs and trying to sketch, I’ve not really got a clear or accurate idea of the details of goose anatomy! And somehow, for all my care in placing the cut out felt geese, they’ve ended up attached in not-quite-the-right place.
Still, let’s not despair.
I’ve also added some ground below the the geese. Three strands of different colours of wool, again. I did a sort of loopy knot stitch crossed with a split stitch, which I couldn’t reproduce if I tried. But it produces a very good broken-ground effect, so as long as I don’t decide I need more ground, we’ll be fine.
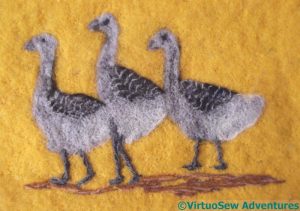
Then I sat down at the embellisher and tried to blend the fabrics together. This meant quite heavy embellishing, but fortunately the fabrics are none of them dense, so there was room for the fibres to mingle.
When I noticed that the legs weren’t getting caught in, I twisted some more threads around them. That’s better.
Then another pause. Do I add leaves, to match my vague memory, or shall I leave well alone?
The Stumpwork Violets Finally Planted
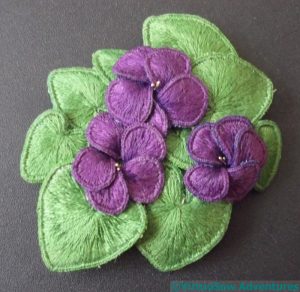
I wouldn’t care to do much real hand embroidery on a fabric “doped” (after the fashion of early aeroplane wings!), with the mixture of inktense and aloe gel. Once it had dried, the calico had something of the texture of a cheap printed furnishing fabric, and did not recover well from having holes poked in it. I suspect it would prove rather abrasive on more delicate threads, but in this case I was simply using stranded cotton.
And there were many holes poked in it – one for each of the elements. I turned back one of the two wires at the base of each, to help to support the curves I was trying to set into them, using the wires around the edge. The other wire I poked through a hole which was in turn poked through the fabric using a stiletto. Bending that wire back on itself should have kept the elements in the place, but as with all of my embroidery adventures – it wasn’t quite that easy!
When I fished out the packet of stamens from my second Frostings Box, I found that there were three strands of each of three types, and picked the most delicate gold ones, so as not to overpower the flowers. So that worked out nicely – one strand for each flower! – and caused three more holes in the calico..
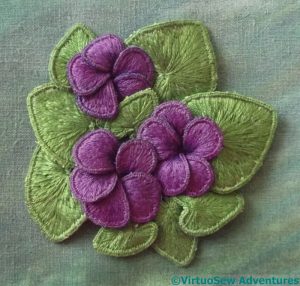
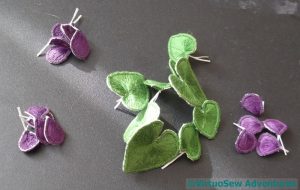
The elements were still wriggling a bit, though, so I decided to put some padding behind the clump to help to entrap the wires, and also to enhance the domed effect that I was hoping for. That meant that it made sense to trim the padding and enclose it with the calico, creating a single, “free-standing” clump of violets. The elements are held in place with minimal stitching, the curves nestling together, and the wires and threads entrapped in the padding. It wouldn’t stand up to much handling, but then it won’t get any!
Click on the pictures to see them at full size – I think they give a good sense of the dimension and “loft” I managed to achieve.
Can you tell that I’m rather pleased with my violets?
Returning to the Stumpwork Violets
I finally gave myself the necessary encouragement to get back to the Stumpwork Violets.
Er, that is to say, I spoke to myself very severely, and pointed out that it was looming over me and needed dealing with!
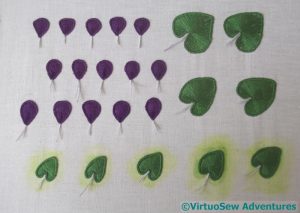
I used my new Inktense blocks to experiment with colouring the base fabric on the last few leaves, painting over the top with the aloe vera gel suggested by Deanna over at Eclectic Meanderings as a substitute for textile medium.
I also used the aloe gel on the spare piece of calico I painted as a background for the clump of violets. I don’t intend any of this to be visible. It will just provide some dark green depths underneath the clump, rather than leaving me worrying that the fabric underneath might grin through if the leaves move. As with the clothing on Loading The Felucca, I don’t want to stitch everything down too much, so this will relieve a certain anxiety.
In this context, the effect of painting over the marks with the aloe gel, deadening the marks and blending the colours, is not a problem. I’m not keen on the overly blended effect with ordinary pastels, as it looks a little mannered, but as all I want is that a sense of depth behind the violets, I’m content. Given how much dust those few strokes created, I certainly would not want to have an un-fixed piece of fabric anywhere near the finished Dreams of Amarna panels!
While the aloe-and-inktense blend was drying, I tackled cutting out the elements of the stumpwork.
In spite of all my care – and they do look lovely in the sunlight, don’t they! – I ended up with little white edges on all the pieces.
So, out came the inktense blocks and the aloe gel again, and I spent some time colouring the little white edges and then painting gel on them.
I wonder whether I might be avoiding the assembly process…?

