Category: Dreams of Amarna
Experiments with A Marudai
I’ve been fascinated by Kumihimo braiding for ages. I first heard about it many years ago from a mathematician friend of my husband’s. Quite why, I can’t now recall, unless it was a desperate attempt on the part of the mathematician to find something textile-related to talk to me about.
Jolly decent of him, don’t you think? He certainly had no idea what he was starting..
Anyway, I’ve heard a lot about it, and rather like the effects that can be obtained. In the UK, the best source for information and equipment is Jacquie Carey at The Carey Company. Jacquie has also become better known to historical embroiderers because while she was researching historical braids she became fascinated by the stitches in them, and besides her books on Braiding, she has now written books about Elizabethan Stitches (remember my experiments with some of them for the Glittering Nightcap?), and Sweet Bags!
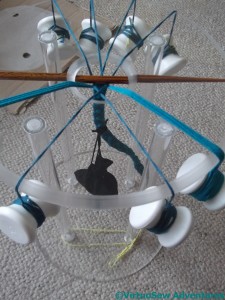
I’ve bought myself an acrylic marudai and bobbins, and spent a fascinating – not to say, bewildering! – couple of hours at Texere Yarns in Bradford, trying to find some suitable yarns to experiment with.
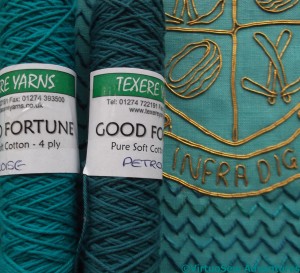
Since my initial aim is to create a braid edging for the Crest for the Dig, I began by finding some cotton knitting yarns that seem to go very nicely with the panels, as well as a whole load of extra yarns for additional experiments.
Then I started playing…!
A Dilemma
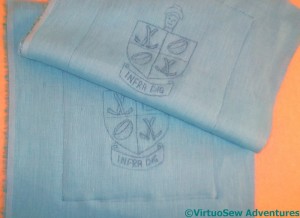
Now, you may recall from when I began the first one that there are to be two Crests, one for each panel, balancing each other. Furthermore, since there will be a gauze overlay, everything has to have the visual strength to show through it.
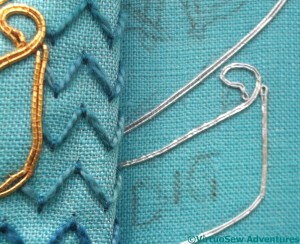
I don’t think that this silver thread has enough force or shine. Even with a fairly strong background using my Cloud Filling variation, to throw it into relief, it will simply disappear.
So I have been experimenting. The edge of the shield, the top of the scroll, and the bottom of the scroll, all use different threads.
All of them are equally insipid in comparison with the gold. I’m afraid that if I use any of these threads for the panel, I will end up with an unbalanced overall appearance with one corner panel seeming very faded in comparison with the other.
I hope to find a more suitable thread at the Harrogate Knitting and Stitching Show this week. Or alternatively – more of the gold so I can do a second gold one!
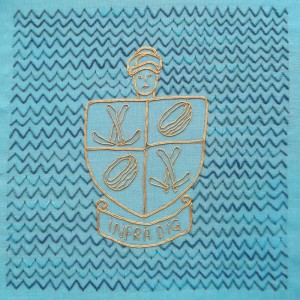
The First Crest for The Dig – Finished
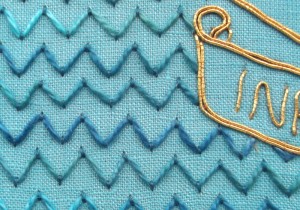
The Cloud Filling Stitch variation that creates the ripple effect is fairly easy to do, and once I had decided to get working on it, finishing the first panel really ripped along.
As you see, I’ve not been too pernickety about spacing. It would have been possible, but it wouldn’t have been in keeping with the original inspiration, besides being utterly maddening to achieve.
I began by working each row individually, first the short stitches and then threading the pearl cotton, but I soon found that it was much quicker to do several rows of the holding stitches, and then threading the pearl cotton through them.
So here it is, done. The other crest panel, when I get to it, will be in silver, with the same background. I need to get the other piece of fabric onto the frame and get ready, because it is good to have at least one project in which I know exactly what I want to do.
There is one question that remains to be solved – how will I edge each panel? I’ve been thinking about lucetting, crochet, or kumihimo. I have a feeling that a lot of experimentation lies in my future.
Progress on the Crest for the Dig
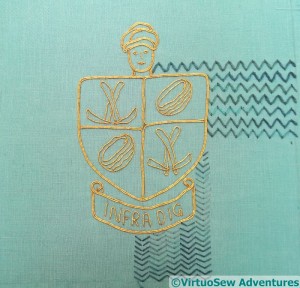
The goldwork on the Crest for the Dig went rather quickly, and I found myself running straight into a brick wall. I narrowed my background choices down to two, and then stopped. I’ve even extended the patches of trial background, and propped the frame up to stare at.
The arrowhead stitches create a subtle effect; patchy ripples, almost here-and-then-gone-again. Rather like Amarna, in fact – it’s thought the city was inhabited for less than thirty years.
On the other hand, the pearl cotton cloud stitch variation is more reminiscent of the rippling paint pattern that originally inspired me. The variegated thread helps to stop the background pattern from being too solid and monolithic.
Choices, choices….
In fact I took the frame to my parents’ house, last time I visited, and said plaintively “Help!”
We stared at it, talked about it, and finally decided that the pearl cotton variation on Cloud Filling Stitch is the way to go. It’s more in keeping with the idea of the doodle that inspired this design, the thread is closer in scale to the scale of the gold thread, and it’s also a better reflection of the ripple pattern I want to bring to mind.
I’m also considering how I’m going to edge the panel of stitching. At the moment, my ideas include lucetted cord or a flat kumihimo braid. The lucetted braid might be too narrow, but on the other hand I’ve only ever done one piece of kumihimo braid, so that would be rather a leap into the unknown!
The Plan for the Dreams of Amarna
I had several very useful comments after my last post, but they all (understandably!) failed to take into account my overall plan for this project.
So, a quick re-cap, for the benefit of everyone who hasn’t (unlike me) been thinking about the Dreams of Amarna for the last twenty years. I first wrote about this in March 2010, but I first started thinking of an embroidery project inspired by the book “Nefertiti Lived Here” a good fifteen years before that!
I thought about various ideas for the Amarna embroidery for a good five or ten years, on and off, but then it finally came together in about 2008 during conversations with my cousin. In fact I started this blog partly in order to give myself a push, and to make sure that I kept at it.
My idea at the moment is for two large panels, which will be colour-blocked as mirror images of one another using sandy colours (for the desert) and turquoise (for the faience used so often in ancient Egypt).
The sandy panels are about 35 centimetres by 50 centimetres, and getting the right proportions for the turquoise will be very important.
These panels will be overlaid with a gauze layer, screen printed with the heads of Akhenaten and Neferetiti. I have already done some experiments with screen printing on gauze, and I know that not only will it be rather tricky to find the right gauze, but working out how to hang it is going to be a real challenge. The gauze overlay means that colours that are subdued may not show strongly enough – in fact some of my early pieces for the project may end up being mounted as standalone pieces, for that very reason.
This post, from earlier this year, gives you a very rough idea of how the layout may look.
The Antelope Frieze and the Felucca may both turn out to be too inspidly coloured to show through.
Continuing The Crest for the Dig
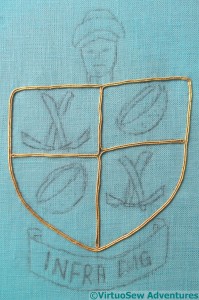
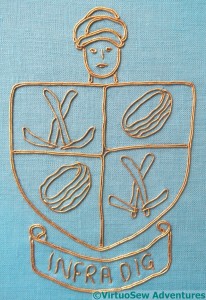
The sensible first stage for the Crest was to do the goldwork. First of all, I’m not at all sure how I am going to do the background, so I should concentrate on the bit I’ve decided on. Secondly, I was a little worried that I might not have enough gold thread of the type I wanted to use…
That being the case, I decided that rather than giving each line a stop and a start, I would try to keep the lines going. That has meant a lot of thinking had to go into getting all the double lines right, and a bit of a fiddle at the central crossing point!
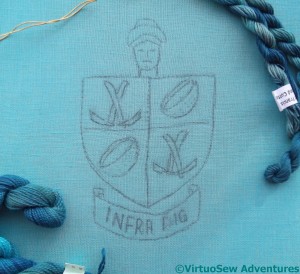
In the interests of both contrast and economy, the charges – motifs, in non-heraldic language – and the motto will use only one line of gold, but the shield, the Gufti’s head, and the scroll will use double rows to help pull it out from the background.
The goldwork of the Gufti’s head doesn’t have quite the same sense of life as my original sketch, but I am very pleased with how the folds of the turban turned out.
The charges – crossed touriehs (mattocks) and rush baskets (used to carry the spoil away) – have turned out well too. I was concerned that I might need to create a woven effect on the baskets, but now I look at the finished goldwork, I think it is enough to create the effect I am looking for.
The motto is a little uneven, but after all, it recalls Pendlebury just doodling something over dinner, and while drawing and sketching were vital skills for archaeologists – in fact they still are – I doubt he would have put the care into a doodle that he put into recording a trench!
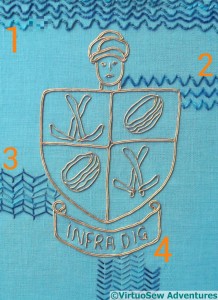
That didn’t take very long, did it. Suddenly I realise that I should have thought it out a bit better before I started. There’s a rippling pattern sometimes seen on plaster which I would like to recall in the background. It’s a simple pattern, but I think it could be effective – if I can get it right. In order, the trials I have done here show:
1 – Variegated Pearl cotton following a ricrac “stencil”, couched as invisibly as possible using a single strand of stranded cotton.
2 – Variegated Pearl cotton in a variation of cloud filling stitch that creates a ripple effect instead of the usual diamond pattern.
3 – Variegated Stranded cotton in rows of open cretan stitch, using three strands.
4 – Variegated Stranded cotton in Arrowhead Stitch.
I’ve discounted the first and third possibilities, but I’m still staring thoughtfully at the other two.
The Panel of the Excavation
Having completely redesigned the idea and the thrust of the second of the two background panels, I have to design the actual image I will use.
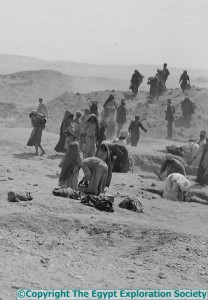
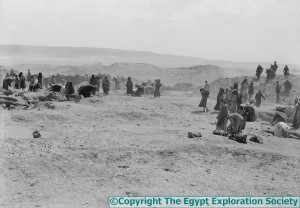
This image is cropped from a photo of the excavation from that wonderful collection of photos that The Egypt Exploration Society has allowed me to use as reference material for this project, and rather than using it just as it is, I’m going to alter it and maybe even add people to it…
There’s a lovely shape and pattern here, but the overall proportions of the picture don’t match those of the Map of Amarna, and they must. I need to make the design taller, without leaving myself with too much empty space top or bottom. A certain amount of empty space can be filled with stitching, but since this isn’t an abstraction of reality – like the map – but a representation of a moment in time, I need to be a bit more careful about what I do and how I represent everything, including the ground.
Here is the intermediate stage. I tweaked the contrast on the original photo and printed it out at a couple of different sizes, then my mother and I had an orgy of primary school paper collage, arranging and re-arranging groups of people to create a slightly busier, taller, picture of the excavation.
The next stage is to reinstate detail where I need it. The blobby effect of the reduced level of detail is just what I needed while planning the pattern of the excavation, but although the finished embroidery won’t have a high level of detail in most of the figures, I’m not sure that the lack of detail is in the right places…
This is not proving quick to develop!
The Crest For The Dig – Making a Start
Some time ago I started to work on a design for my version of the crest that John Pendlebury doodled for the dig on the first night after the expedition arrived. It was to be the corner design for one of the panel assemblies, matched by I’m-not-sure-what in the other corner.
In the process of my recent replanning, the corner design turned into twins – there will be one for each panel. The design has also become less spare. I am planning – as originally – to work all the lines in couched metal thread (one silver, one gold), but instead of leaving the background plain I am now intending to couch or stitch a background of spaced rows of wavy lines. Some of the small fragments of painted plaster from Amarna show such a pattern, and it will create some texture and density in the corners of the finished panels.
I am using the remains of the gold thread I used for Christus Natus Est, but I’m still not sure what thread to use for the background. By the time I took this photograph I had already decided that I was going to choose a matte thread for the couching. This will help to bring the gold forward.
I had also already decided to use a variegated thread. The wavy pattern usually alternates rows of dark and light, but in this case I hope that the fabric will provide the light and the variations of colour across the background will give a sense of movement and “flow”. The couched metal thread will be very static and stiff, and without some sense of flow somewhere, the whole thing will look a bit pedestrian.
I have yet to make a decision here. The choice, unless I find some other thread which appeals even more, is between a pearl cotton and a stranded cotton. They are both from Stef Francis, and both are in the same colour sequence. I hope that when I have the gold done, the answer will come to me!
Dreams of Amarna – a complete rethink!
In the intervals of stitching, I have been wrestling in thought with the background to the second panel of the Dreams of Amarna. My original idea was to balance “The Map of Amarna” with “London to Amarna, 1929″, but I have been struggling to envisage how to set the elements into a harmonious pattern. Then I had a conversation with my mother, and did some more leafing through my photographic sources, and all my ideas turned upside down…
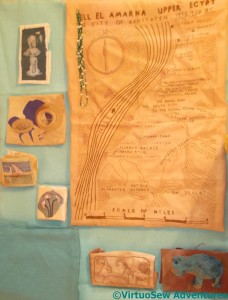
Here you see a very rough layout, to give you an approximate idea. I’ve laid out the Map of Amarna and the linen for the side and corner panels, and then put the patches on the side panels.
Of course, the patches won’t be set out in this arrangement. Not least, I am considering putting the cartouches of Akhenaten and Nefertiti on the horizontal panels, which will mean that there would be no space there for any patches at all. Fortunately I can double check that I have the right hieroglyphics, because the Egypt Exploration Society have been very helpful!
There is a fair mix of shapes and sizes of the patches, and the colours seem to be working well, so for the moment I am very pleased with the way this is looking.
And Panel Two?
Well, I am now thinking about showing the travel in patches around the sides, and showing a section cut from this photo of the excavation in progress on the main panel.
This will give me plenty of opportunity to use the different threads I used in the Map to differentiate all the people from each other.
At least, if I get it right, it will…!
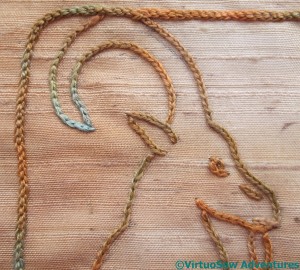
Finishing the Antelope Frieze
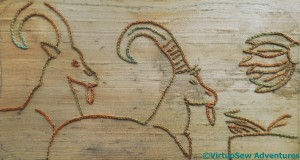
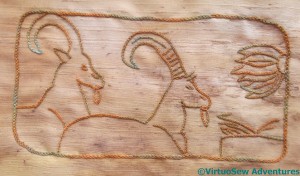
That didn’t take as long as I expected. Reverse chain stitch goes quite quickly once it gets started.
I am not at all sure what the elements to the right of the Antelope are intended to represent, but in the interests of completeness I’ve included them anyway.
I decided to stitch the frame after all, using the Hungarian Braided Chain Stitch I first used on The Crane Pot last year. It is structurally easy to get a grip on, especially immediately after an orgy of reverse chain stitch!
And furthermore, I’ve rather fallen in love with it – the intricate braided effect excites all my imaginative faculties!
The slubby, handpainted silk is rather reminiscent of the sort of papyrus that tourists bring back, but rather than the garish coloured designs that are painted on those sheets, the subtle variations in the silk thread pull the impression back to resemble the stone in the original photograph. I also rather enjoyed the simplicity of a single stitch and a single type of thread.
I was really pleased, when I took this close up, to see how even the stitches were. This evenness hasn’t, in the past, come naturally to me – anyone who has ever received a handwritten letter from me will know that – but I think all the work on Thistle Threads Online University Courses is beginning to pay off!

