Category: Dreams of Amarna
More Slow Progress On The Crock Of Gold
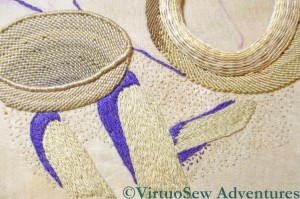
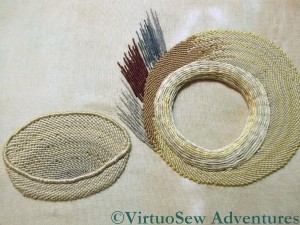
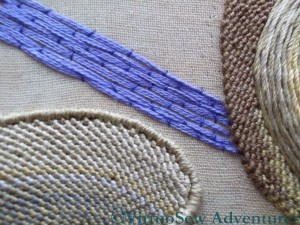
I have been making progress on the sticks and the ground around the Crock and Lid. The speckling seed stitches are getting done in stages, rather as I tackled the (much bigger) job of the tête de boeuf stitch on the Map of Amarna.
The sticks are now all done, but in spite of the pattern of the shadows, they look a bit too flat. Somehow the pattern of dark and light is too undifferentiated.
So I have added some highlights here to two of the sticks. I’ve used the same stitch – split stitch – and simply stitched over the top of the first layer. It’s tricky, because in addition to the two layers of fabric, there are two or three layers of thread to get through. Nor am I entirely sure that it is giving exactly the effect I wanted.
Still, there is still much speckling still to do, not to mention the shadows of the pot and the lid. That will give me time to think a bit longer, and plan a bit more.
For those in the UK who missed the previous broadcasts of “The Man Who Discovered Egypt”, it will be re-broadcast over Christmas – BBC4, on Thursday December 27, at 7pm.
The Crock of Gold Hoard – The Ground And The Shadows
There’s been a frustrating hiatus in my stitching life of late – I’ve had tennis elbow, and have had to write up old embroidery projects for you instead of making progress on any of my current ones. I’ve been going stark, staring mad with frustration, because even holding a book has been painful.
However, I’m beginning to get back to it at last. Cautiously, so there will still be older projects interspersed with the current ones!
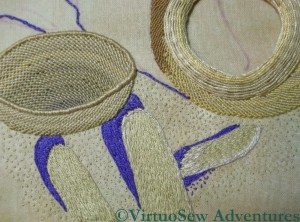
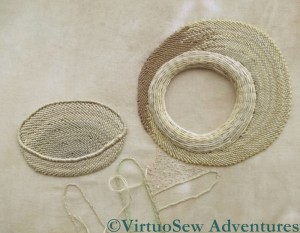
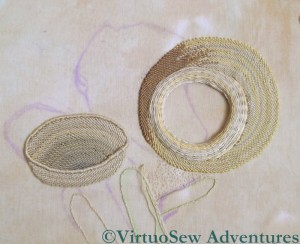
I’ve been doing a few stitches here and there while I’ve been trying to rest the elbow, as much as anything else to gauge my recovery (or lack of it, as it sometimes seemed!). So now you can see that I’ve nearly outlined all the shadows. There’s just the shadow inside the pot to deal with and it occurs to me that I might need to find some tarnished purl to create the effect of the shadow on the metal inside!
I’ve also made a start on the sandy effect seed stitches, in a small section between the pot and the sticks. That’s going to challenge my boredom threshold, even though I don’t intend to have the seed stitches all over the background!
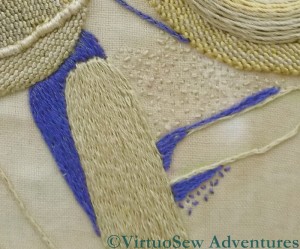
This close up shows that I’ve also managed to fill in the first of the sticks, using split stitch filling. I need to add some highlights later, because as it stands it’s a little flat.
Still, it’s great to be back!
Crock of Gold Hoard – Those Wretched Shadows!
When you last saw the Crock of Gold Hoard (here), it included some highly unsatisfactory shadows, and my mother and myself had pounding headaches and crossed eyes from deciphering the original photograph.
It took several hours of frustrating, painstaking unpicking, aided by tweezers, but I managed, and then started on the ground while I pondered the shadows. There are some sticks or something on the ground, and I want the ground to look sandy and speckled so I’m going to use seed stitches to create the sandy, gravelly look.
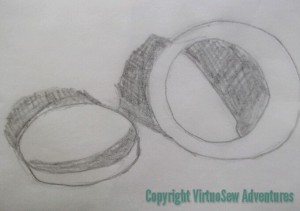
There followed still more headscratching, sketching and puzzling (including experiments with photo-editing and watermarking on my tablet computer – that’s why there are two different copyright notices in this post!),
This example isn’t quite right – the shadow of the pot isn’t long enough, but it does demonstrate quite clearly that I’ve decided to simplify the shadows very considerably.
Since I’m removing the archaelogist and his hands, as well as the confusing shadow of the post which is out of the picture, I’ve decided I might as well simplify as many of the other shapes as I can. As I’ve said before, I’m not a needlepainter, and I’m not aiming for complete realism. Still, getting the shadows right will do much to make the design seem realistic enough.
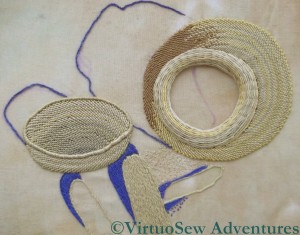
I’m sure the detail of the shadows will change, but I’ve now drawn in an outline of those simplified shadows in chalk. I’ve even remembered that the pot has shoulders and a raised rim.
Crock of Gold Hoard – Problems with Shadows
I mentioned in my last post that I was somewhat troubled by the question of the shadows that I need to have in this picture to “anchor” the Crock and its lid in space. Since the silk I used for the Crock has a sheen, my original idea was to try to find a matte thread to help keep the shadows in the background.
I had three dark, “shadowy” colours in a linen thread, and tried those first. I wasn’t happy either with the colours (too dull and drab for shadows cast by an Egyptian sun) or the texture (rough and scratchy), so I tried a soft lilac-y blue stranded cotton, couched down with a darker blue. That was better, but not really dark enough.
So this on the left was my next attempt. I like the shading effect and depth of colour that I’ve managed to achieve, but I can already tell that the shape of the shadow is absolutely wrong.
So I packed it up, and took my problems to my mother, who is an artist, and has a much more practised analytical eye than I have.
At which point, we realised that the shadows were rather more difficult even than I’d thought.
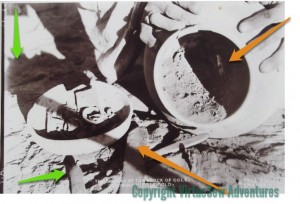
A lot more difficult! The amber arrows indicate (approximately) what appear to be two conflicting light sources. Since the ground appears to be uneven, this must be a photo taken on site during the excavation. The vertical green arrow in the top left corner is pointing at a shadow which is clearly of something on top of a pole somewhere out of the picture. The other green arrow points to shadows show that the ground underneath the lid isn’t as even as a careless glance would at first suggest.
I’ve got a lot of unpicking to do!
Crock of Gold Hoard – Working the Rim of the Crock itself
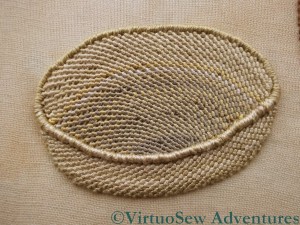
After much cogitation, I decided to work stem stitch band around the rim of the Crock of Gold. It seemed to me that that this might create the right combination of a rounded shape and a smooth line around the rim. Although satin stitch worked beautifully for the much narrower rim of the lid, I was sure that it would lead the eye wrongly in this case. In fact if you look at the foundation stitches for the stem stitch band, I think that confirms my suspicion.
The choice of stitch also meant that by changing colours as I worked the stem stitch over the foundation, I could keep the sense of movement that I feel recalls a hand-made pot. Had I worked the rim in satin stitches, changing colours would have created a rather blocky effect – fine when I come to re-create some of the geometric patterns the Egyptians used, not so good for a plain and undecorated earthenware pot!
I had a momentary wobble as I began to work the rows as the stitches seemed not to be packing together, and I kept catching my needle on the felt, but gradually as I added more rows of stitching I realised that it was working.
Now I have the rims done, I need to do the shadows, and I’ve not quite worked out how, as yet.
Still, thus far, the Crock of Gold is working pretty well. I think the raised effect of the rims will help to keep the chipwork visually contained, and that will be important, as there’s the potential for chipwork to draw the eye too much.
The Fragment of Tile That Started It All
At the beginning of her book “Nefertiti Lived Here“, which is the inspiration for my “Dreams of Amarna” project, Mary Chubb describes a fragment of glazed tile she found at the bottom of a case full of excavation plans one wet and miserable February morning. That fragment, a genuine artifact from the excavations being undertaken far away in Egypt by her employer, the Egypt Exploration Society, ignited in her a hunger to go to Egypt and see for herself. Her description is so lyrical and vivid, I can’t possibly fail to include a representation in my panels:
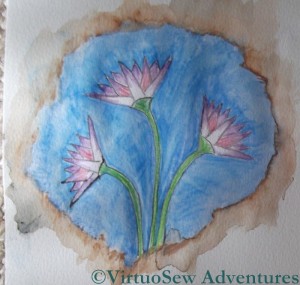
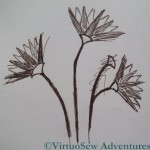
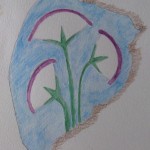
The background was an incredible, adorable, hedgesparrow blue, the glazing just high enough to give it the same shell-like glowing quality. Against this grew three lotus flowers; the slender curling stems just firm enough to hold up the swaying heads of the flowers, faintly lilac-tipped within their dream-green, fanshaped sepals.
Unfortunately, she doesn’t include a photo, or a drawing, or even an accession number for the find so I can track it down for myself, so I’ve had to devise my own!
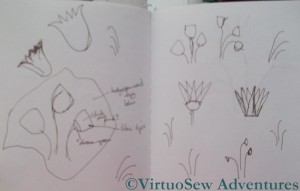
I’ve been looking through my reference books and photos to find out how the lotus flower was depicted in ancient Egypt, and I’ve found that there seem to be two versions, one with individual petals, and one a little simpler and more stylised. I suspect that the more complex version is more likely to be Amarna-period, so it’s a pity that my second coloured draft worked out better!
When I’ve settled on my design for the lotus flowers – and remember that these are only my first thoughts – I will need to work out how I can represent the broken edges of the tile, and even what shape to make the fragment. I may yet find myself finding a surplus tile and breaking it to see what happens.
Or would that be taking research too far?
Crock of Gold Hoard – Working the Rim of the Lid
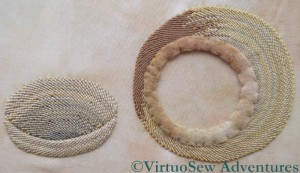
While continuing to work the eccentric spiral trellis stitch for the lid, I’ve been thinking about the rims.
Before I move on, though, this picture shows how I’ve tried to introduce darker colours inside the lid to create an impression that it is hollow.
I think it’s worked, too!
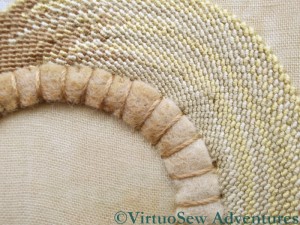
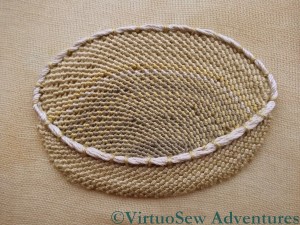
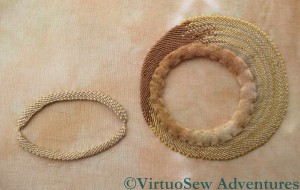
It’s clear that I’m not going to be able to use the same techniques for both rims, since one is so much wider than the other. I used felt for the rim of the crock itself, and four lengths of silk thread twisted together to put some padding on the lid rim. As much as anything else, this is to create a visual sense of depth when I put in the chipwork. Even without the padding covered, this works pretty well.
However, with the padding covered with satin stitch, it looks altogether better. Working the satin stitch was something of a trial, because I have a layer of calico, a layer of turban cotton, and then the edge of the trellis stitch to deal with. I’ve varied the colours around the rim to create some sense of depth and highlight.
I’ve realised while I’ve been working on this that the next serious challenge on this piece is going to be working out how to put the shadows in. As it stands, it is interesting, but not visually satisfying, because the crock and the lid seem to be floating in mid-air. They need to be brought back to earth, preferably without a crash!
More on the Crock of Gold Hoard
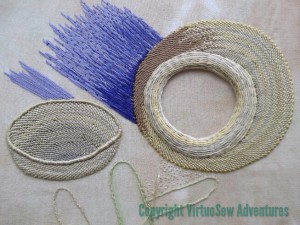
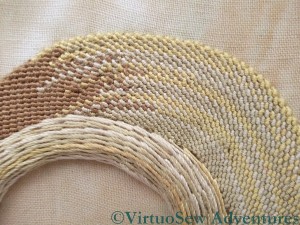
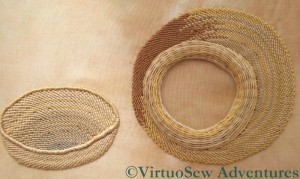
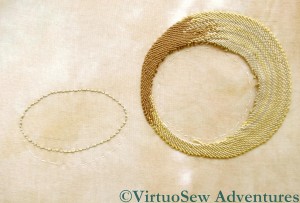
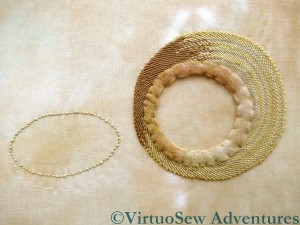
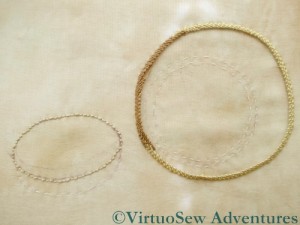
I’ve been making progress on the Crock of Gold Hoard. Quite a lot of progress, in fact. Working spiral trellis stitch in such a way as to leave an asymmetric gap in the middle was a rather odd experience! If you click on the picture to look at it at full size you will see that some of the crossover points where I changed colour break the spiral a little, but in fact I think the effect is working reasonably well.
I decided not to pad this version of the Crock – although who knows what other versions I may try? – but I did feel that padding the rim would help to put the chipwork in the right context when I do it. I happened to have some variegated felt that toned nicely, so I’ve cut two hoops of it and stacked them to form the padding for the rim. It has the added benefit of concealing the raggy edges of the spiral trellis stitch, and should help the rim to stand out a little against the main body of the Crock.
What I’ve yet to decide is how I shall work the rim, so for now I have set the problem to one side while I work on the dish that was used for a lid. In this case the spiral trellis is worked on the inside of one half of the backstitch foundation and the outside of the other. This may seem another eccentric variation, but bear with me – I have my reasons! I want to maintain the continuous slant in a single direction, which I feel better reflects the texture of a hand made pot, whereas the zig zag effect of trellis worked back and forth across a shape (look at any close up in Month Two of the Glittering NightCap) doesn’t feel quite the right. I grant you that it’s another tiny detail that may not really effect the overall impression, but if I’ve learnt anything in the last few years from Thistle Threads and others, it’s that small details do count.
Starting On The Crock of Gold Hoard
I’ve already written about the historical background for the Crock of Gold hoard, and described two possible planned “patches” based on the idea. Now, what with completing the Map of Amarna, I have energy and enthusiasm to start on a first representation of the discovery of the hoard.
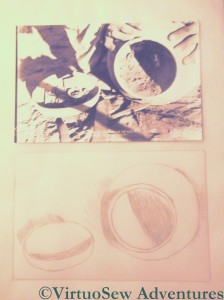
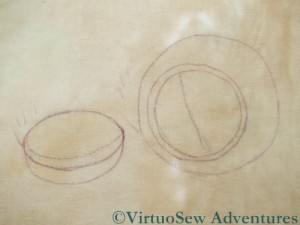
I began with one of the photos that the Egypt Exploration Society was kind enough to let me copy for my reference material. The sketch that I worked from it has eliminated such details as the archaeologist’s hands, the confusing shadows cast by items and people outside the frame, and even the splinters of wood that the pot is sitting on. I can add such details to my stitching as I go along, but for transfer to the fabric I want something that is as simple as possible.
Since this panel is going to include gold and silver chipwork to represent the ingots in the hoard, I’ve used calico to back the flimsy sandy overdyed turban cotton that I’m using for the main background fabric. I transferred the design using the prick-and-pounce method, and then gave the lines a little more staying-power with a quilter’s pencil.
I’ve decided to work this version of the discovery at the same size as it appears on the photograph. I may decide that this is too large and I need to work a smaller version – since I had that fright in looking at the borders, I’m acutely aware that some of the pieces I work will be classed as “explorations” or simply mounted separately.
I’m working the pot in spiral trellis stitch, using a fairly heavy silk thread, a Silk Twist of medium thickness from Mulberry Silks. There are several close shades in the pack I have (it’s called “Old Cotswold”) and I shall be swapping between them. Maybe not entirely randomly, but close. I’m aware that this risks looking more like a woven basket than a terracotta pot, but the other obvious choice, I think, would be long and short stitch curving over the pot, and that risks looking too polished. As I am stitching I will be able to think about other possibilities, and if this ends up as an “extra”, I will be able to tackle the smaller version with a much better understanding of the shapes and design elements involved.
It’s precisely this sort of challenge that brings embroidery to life for me. I love picking stitches for what they might remind me of and how they might illustrate the elements I have in mind. Perhaps it won’t surprise you that my favourite painters are Impressionists rather than exponents of photo-realism!
Dreams of Amarna – The Crock of Gold Hoard
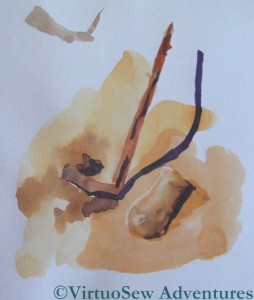
As I am thinking much more seriously about the Dreams of Amarna project these days, I am developing ideas and plans faster than I can stitch them. That’s not a problem; it just means that I need to document my ideas as well, so that I don’t lose them before I get a chance to stitch them. In this case, I’ve included doing the occasional watercolour of some of the possible projects – this is a tourieh (a sort of mattock) with a terracotta pot. The shadow isn’t necessarily in the right place, but at least it shows I’m thinking of the right things!
The Crock of Gold Hoard, as it was called, caused the Expedition considerable anxiety, but in the end contributed the finance for several weeks of work to the next season, so perhaps it was worth it! It consisted of gold and silver ingots in an earthenware crock, guarded over the centuries by a small silver amulet, thought by JDS Pendlebury to be Hittite.
I am thinking of working two references to the Hoard: a small or nué panel of the amulet itself (in fact, you may recall that I’ve already bought the materials for this!), and a panel showing the discovery, which will give me the chance to include some gold and silver chipwork to represent the ingots.
In some ways the Hoard has been easier to research than other incidents, because I discovered a somewhat later article (behind a paywall, so I shan’t link to it) about the Hittite amulet, as well as having access to the photographic archive of the Egypt Exploration Society. There were probably a good many articles in the ordinary press as well – nothing catches a journalist’s attention like gold. That said, I’ve been Googling and discovered that Dr Henri Frankfort, JDS Pendlebury’s predecessor as Director of the Excavation, also found a Crock of Gold.

