Category: Large Embroidery Projects
Akhenaten’s Face – Again
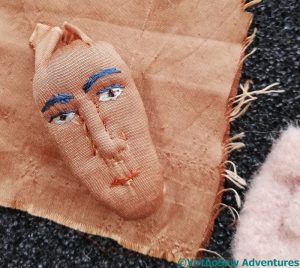
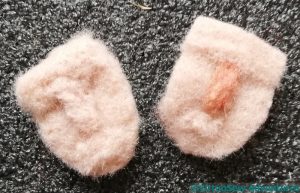
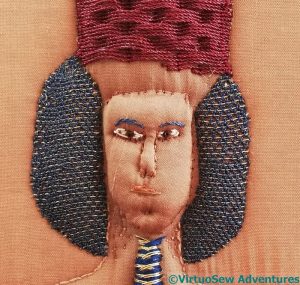
As you may recall, my last attempt at a face for Akhenaten wasn’t entirely successful, so I started again… This time I needlefelted the shapes very fiercely (which I enjoyed more than I expected to!) until they were quite solid and strongly shaped, only to discover that they were far too deep and I had to saw off the back half with a penknife!
Then I stretched another fragment of silk over the top and worked the features.
When you consider how deep the eyesockets are in the felt, I’m a bit surprised that the eyes on this version don’t appear more deep-set, but he does have nice heavy brows, and the rest of the features aren’t too bad..
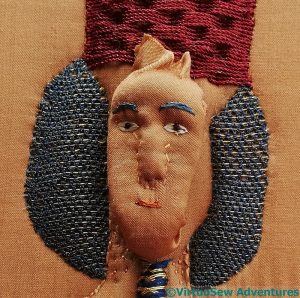
The face is also as narrow as it appears in that purple watercolour from a couple of weeks ago, so I felt quite optimistic when I turned back to the frame he sits on.
However, you can’t say that this face is much better than the apoplectic trumpeter – it has turned out by far too narrow for the space left for it, and I suspect that the detached buttonhole stitch with return used for the wig has done too much damage to the fabric to take it out.
So this is not the one to use, and I have to try again.
Again!
Watercolour investigations
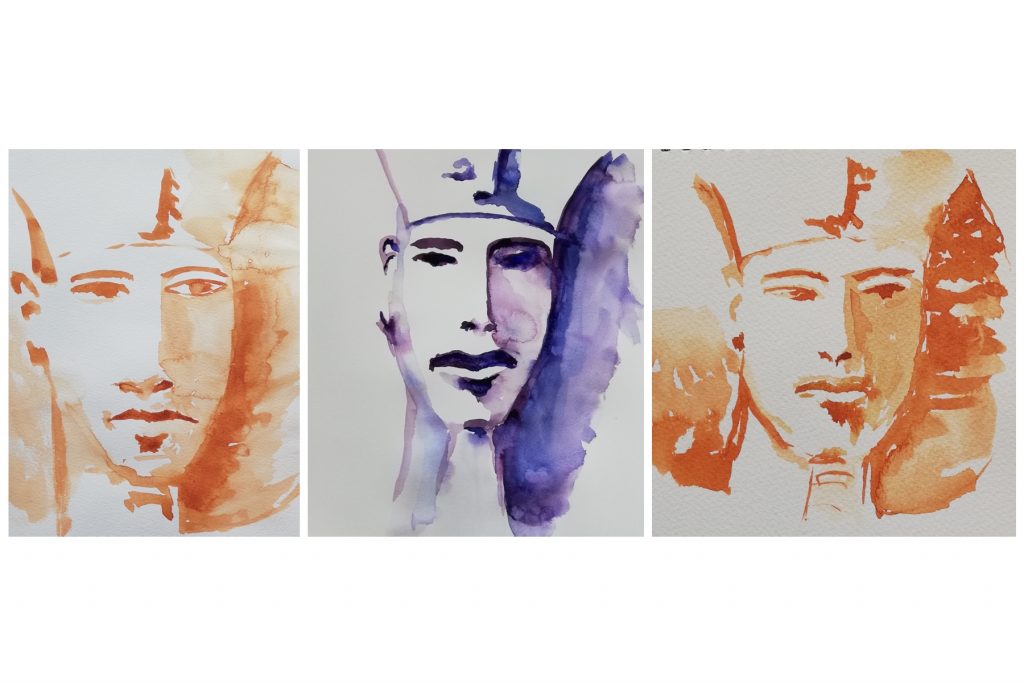
There’s more than one way of thinking about a project. I’m still trying to feel my way to an understanding of Akhenaten’s face, and this is one way of doing so. The purple one in the middle is the most recent, and most clearly shows the strong shape of the face. So I might be making progress.

But the watercolours also give me a chance to show things that I’m not at all sure I want to attempt in embroidery. Of course, I’ve already done “Loading The Felucca”, which shows people, and the background of the second panel does too, but in all honesty, I think that difficult as they are, the watercolours were actually easier than the stitching!

The felucca, and the Hittite Amulet have both appeared in stitch already. I’d like to do more of the jewellery (I’ve got an assortment of goldwork supples to play with, after all!). I’m planning to do some more fresco fragments, and I’m sure another idea or two will occur to me soon!
More on Akhenaten’s Return
I’ve felt the face was rather weak, so I decided to try again.
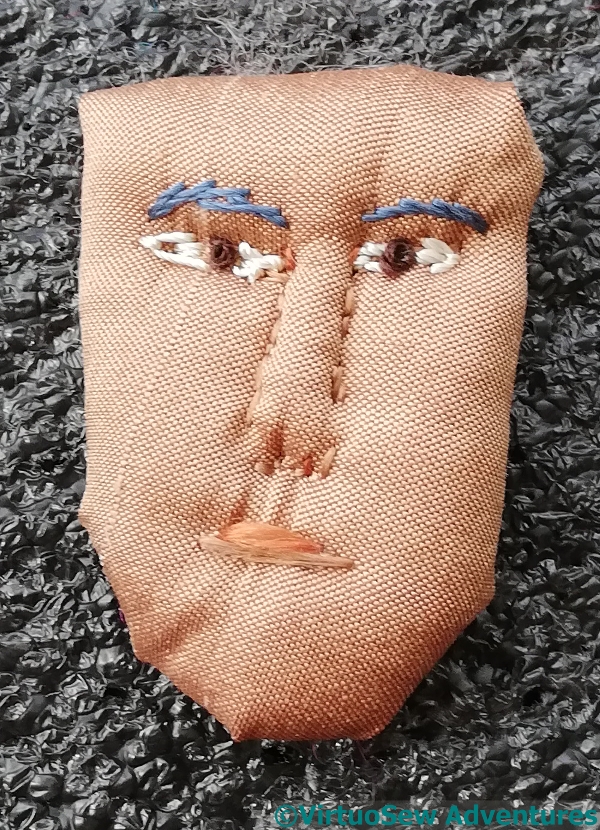
This time I needlefelted the padding underneath, to try to get the nose, the heavy brows, and the mouth in place.
Twice.
Then I covered the padding that seemed the better with silk, and stitched the features again. In some ways, this is better than the first attempt, but it still looks a bit twisted. The eyes are certainly staring, but the nose isn’t straight.
In my defense, it became harder and harder to stitch, even though I began to feel that the shaped padding wasn’t shaped enough. Or even padded enough!
I think that before I attempt another version, I need to work out a way of keeping the silk under control while I add the features, without actually attaching it all the way around
In spite of that, I decided to attach this face in place of the last, and see whether I felt that a face “stuck on afterwards” would be a problem.
Well, no, I don’t think it is, although it’s hard to be sure. Not least, it involved removing still more of his headdress. That will need more padding to sit well with a more padded face.
I am sure that I need a new version, though. At present he looks like an apoplectic trumpeter, and that is not a good look for the Heretic Pharoah!
Getting back to Akhenaten
I’ve not written about the Colossus of Akhenaten for a while, but that isn’t to say I’ve stopped thinking about it. Unfortunately Akhenaten is proving obstreperous (as in life, so in embroidery…!)
I decided to try to sneak up on him by playing with details such as the crook and flail regalia.
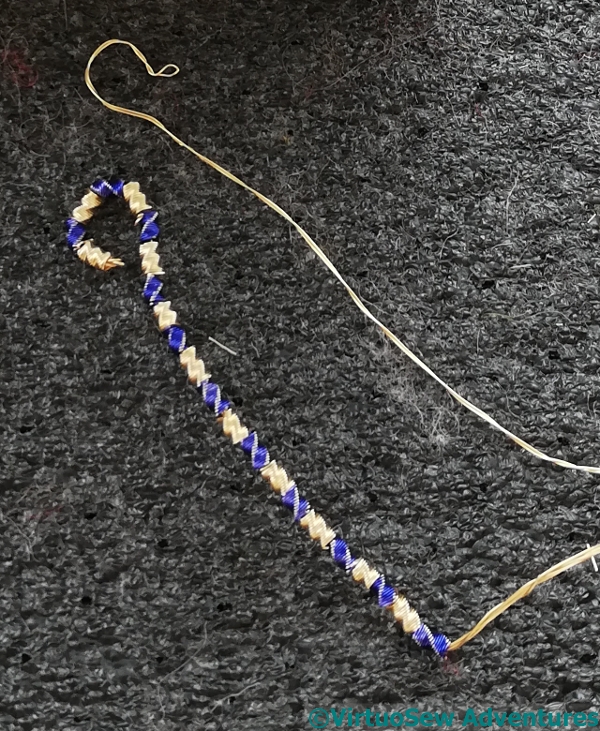
I don’t want these to be couched to the fabric in bits, I want them to seem like miniaturised regalia, so I’m planning to thread various coloured purls onto wire and then poke the end of the wire through the fabric to the back.
This heavy purl – called “Rope” on the Golden Hinde website – seems to work perfectly for the crook, but single wire wasn’t strong enough to support it, so much of the experimentation was to get the right number of strands. I’m so glad I have proper goldwork scissors – the rope is tough and springy stuff.
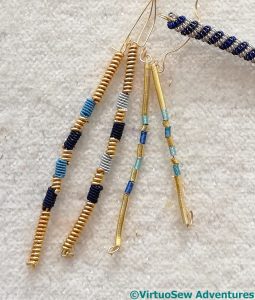
You may recognise the materials in some of these experiments for the flail!
The two on the left use silk-covered purls in blue, with heavy gold pearl purl. The two on the right are coloured and gold purls, some of those used in the chipwork on the belt.
The potential handle is a gloriously stiff, over-the-top purled pearl purl in blue and silver, named something like “winter spiral”. I have my doubts about it in this context, because it’s silver rather than gold, but we’ll see…
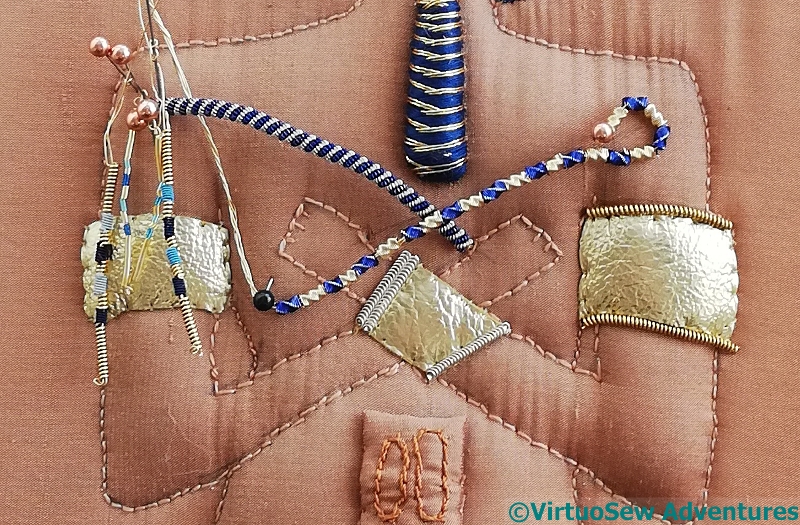
I couldn’t resist trying the crook and flail trials in place.
I’m happy with the crook, but the flailing bits of the flail are giving trouble. None of the options really looks the right scale – the purls are too small, the pearl purl may be a bit too heavy, and the “winter spiral” handle doesn’t look quite right, either.
So I have some more thinking to do. Again…
Now, where had I got to…?
What with one thing and another, it is quite some time since you last saw Ankhsenpaaten. I had got quite a long way, and was pleased with progress, but still not entirely sure about her.
Then, of course, we had the Christmas period, and I don’t even attempt to stitch anything that requires serious concentration during that time. There are simply too many other things competing for my attention.
And besides, my favourite place in which to stitch is occupied by the tree….
So when I came back to her, I was full of trepidation. This seems like such a simple way to create an image, but in order for the “Stare Hard and Then Stitch” approach to be really successful, I need to have some sense of the whole thing in my head, so that the stitch sizes and threads all fall naturally to hand as each element is worked and reworked. The long break, and a variety of other things happening in the background, mean that my mental “map” of this piece had fallen out of my head, and needed to be painfully clawed back in again.
And “painful” was indeed the word. I’ve not regained the sense of surety I was beginning to feel at the point when I stopped working on it.
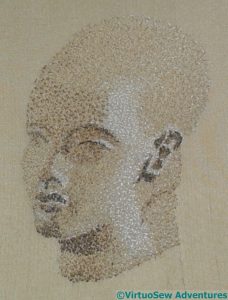
However, I continued to juggle with lights and darks, adding some of the details in the extension of the head and neck at the back which supports the stone in an upright position, staring and then stitching, and stitching and then staring.
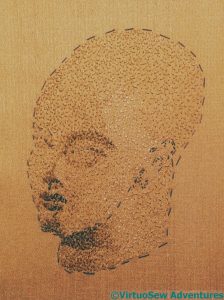
I’ve brought the strong darks around the ears a little more to the fore, emphasized the light area down the side of the face, and brought a little more detail around the mouth and the line of the jaw.
There are elements of this I’m still not entirely confident about, but I am also becoming afraid of going too far, and ruining it by doing too much.
Time to stop, turn my back, and come back when my anxieties have stepped into the background and I can judge more truly. I’m declaring her “provisionally finished”.
Head of Ankhsenpaaten – progress
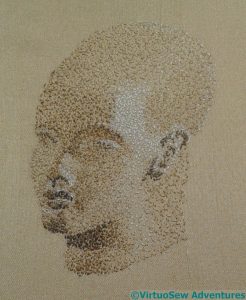
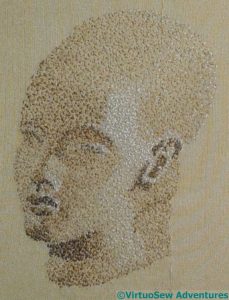
There is relatively little to say about Ankhsenpaaten, because the form will be created with loads of seed stitches in slightly different shades of silk thread, so there will simply be more of the same.
However, you may find it interesting to watch it come into focus, so I will post a series of pictures, along with what comments I feel I can make.
Do click on the pictures for a closer view, and a better sense of what is happening.
You can see from the earlier post that I only transferred the most basic of outlines, so I am using the photograph as my reference and working the various shades over one another to develop the layers of colour and shade.
I have started by trying to understand the most basic planes of the face and the shades needed to bring them alive.
I tend to find it much easier to get my bearings if I can get some of the darker areas in, because that gives me the beginnings of a sense of depth and form. It is, however, a slightly terrifying approach, because there’s something so very definite about a truly Dark dark!
One of the shades of silk is very close to the fabric, but there is just enough difference that the light bouncing off it creates a sense of difference between inside the lines and outside the lines.
Mounting the Two Amarna Princesses
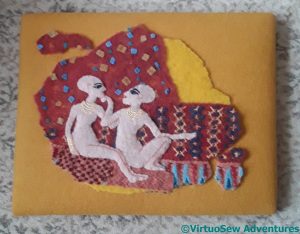
I felt that the finishing technique for the Amarna Geese really worked, creating just the right impression of a fragment of fresco, so, after thinking it over a little more, I tackled the Princesses.
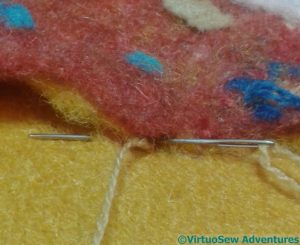
The depth of layering of the felts made it much easier to attach to the padded mount, although if I could only have found my curved needles, it might have been yet easier.
Again, I couldn’t bring myself to chop the princesses into bits. If I had thought of the display method to begin with, and created the piece with that in mind, I might have been able to do so, but as it is – they are so exquisite, I simply couldn’t do it!
Finally mounted, with the separate bits on the corners. They look just the way I hoped they would!
Head of a Princess
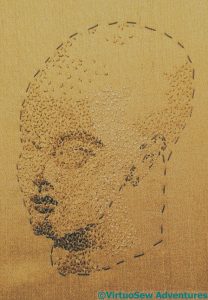
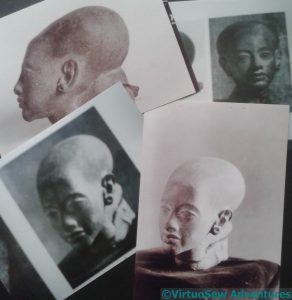
One of the crowning finds of the season was a small carved stone head, interpreted as depicting one of Akhenaten and Nefertiti’s daughters, Ankhsenpaaten. I know the princesses (two of them!) have already appeared, but that is a separate piece, whereas this version may be able to form part of the main panels.
I gathered several source photographs and some fabric, and Thought Hard.
And decided to challenge myself. Whenever will I learn?
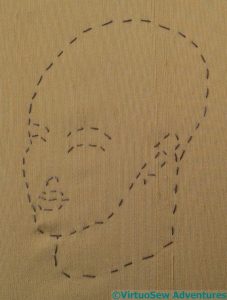
So I’ve stretched a piece of calico over some small stretchers, and attached a rather nice piece of silk over the top.
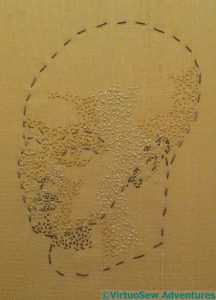
Then I’ve traced the main elements of the head onto tissue, and transferred it using running stitch. I’m going to need to be careful, because I want to be able to remove these running stitches when I’ve finished, but there is a lot of stitching to do yet.
I just hope I’ve transferred enough to give me the right level of guidelines!
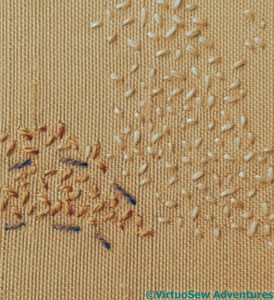
I’m going to use seed stitches in several different shades of spun silk, hoping to end up with something of the granular effect that some stone has. I’m starting with one layer of seeding, staring hard at the source photo and stitching clouds of seed stitches to give the first level of dimensionality. It is going to take quite a while to do this, especially when you consider that it is a very simple technique.
Simple in principle, that is. In execution, not so much!
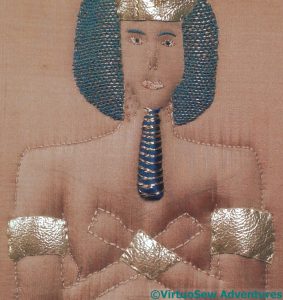
Akhenaten’s Beard, And Other Details
I spent a bit of time looking at images of pharaonic tie-on beards (now there’s a sentence I never expected to write – not in a normal frame of mind, anyway!) while I tried to work out how best to portray the impression created, even if maybe not the precise pattern that was used for Akhenaten’s version.
The patterns included a sort of interlaced pattern, and a vaguely herringbone-brick-like pattern, and some widened towards the base, and others became narrower and curled up a little at the tip. My version – based on the images of the Colossi of Akhenaten that inspired this piece – widens towards the base.
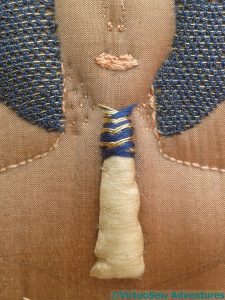
I’ve chosen a plaited effect in blue and gold, using one of the standard gold threads from Thistle Threads and a plain blue silk perle, alternating two stitches from each side (the blue is used double, so had to be flattened and untwisted at every stitch). It required a bit of juggling with needle, thread, and bone stiletto to keep everything in order, but once I had the trick of it, the beard progressed relatively smoothly.
The widened base isn’t quite as wide as it was, but on the whole, I’m fairly pleased with it. So I’ve added a few more details, and some of them I am really not sure about.
I’m happy with his belly button. Somehow it makes him even chubbier!
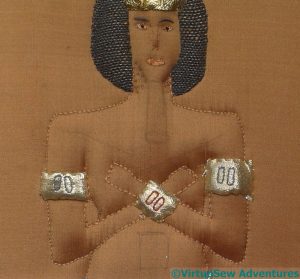
I think I’m also happy with the cartouches on his tummy. It’s the same silk as the background, but turned at right angles, which shades the colour slightly.
My concern lies with the armlets and wristlet. I’ve given two of them edgings, one of gold pearl purl, the other of flattened silver purl with a gold strip threaded through, and at the moment, neither of them looks right.
I do have an idea for the crook and flail he is holding, but I may leave those and buy the materials at the Harrogate Knitting And Stitching Show. So I have time to think, assess, and Stare Thoughtfully.
And as one of my offline friends reminded me recently – Akhenaten wasn’t known for smoothly following the existing tracks during his lifetime. It would be too much to expect his stitched representation to do so!
Akhenaten – more details
My first attempt to dress Akhenaten with his armlets and wristband used a strange gold fabric I’ve had for some years. An old friend bought it originally to make herself an evening dress, but it’s a very difficult fabric to work with – it frays if you even breathe near it, it doesn’t drape at all well, but it doesn’t like structured shapes either.
She despaired, and gave it to me. What are friends for, after all?
I’m playing with fragments to see whether I can find something to do with it. So far I have discovered that iron-on interfacing doesn’t stay ironed on to it, either.
And, frankly, I think the armlets look more like waterwings. So it doesn’t work for a Pharaoh’s armlets, either!
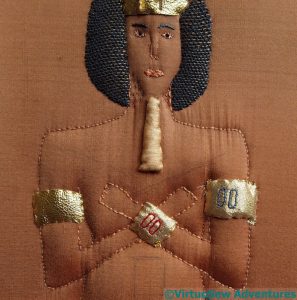
The next attempt was to use gold kid leather. I’m a bit happier with the kid leather, even though I’ve not been able to put the cartouches on it, but while I was thinking about that, I decided I should maybe think about the tie-on beard which seems to have been an element of royal iconography in ancient Egypt – to the point that even the female pharaoh, Hatshepsut, had herself depicted wearing one.
I made a small, padded form, using cotton padding covered with gauze, and attached it carefully. Then I had to work out how to cover it, and what sort of pattern would be appropriate.
And I really need to think of some way to pad out his nose, don’t I!


