Category: Large Embroidery Projects
Getting started on Akhenaten’s Belt
I knew I wanted to fill in the belt with coloured chipwork, but how?
I had started off with the idea of making lotus flower shapes, but very soon became frustrated. I didn’t like the way it was looking, and, adding insult to injury, it was exceptionally fiddly to do.
So, no, think again. It might be possible to do something like this another time, but at the moment I can’t quite think how I would do so!
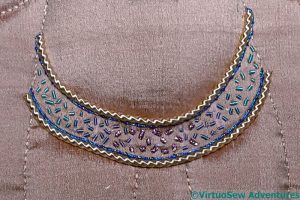
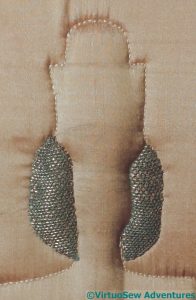
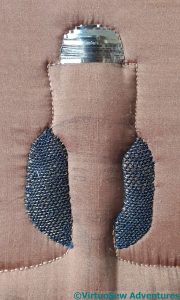
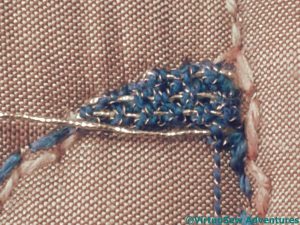
The next attempt was to use standard chipwork without attempting to make pictures. I know that the chips are very spread out here, but I began with the coloured purls, scattered across the belt to create a graduated colour effect, which shades from purple in the middle through blue to dark blue-green and light blue-green. The gold background had to wait until I had the colourwork right.
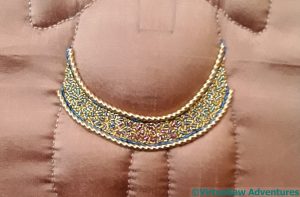
Once that was done, I went back and added the gold chipwork. I have four different types of gold purl, some smooth and some rough, so the sparkles would have some variety and colour. I think I’m much more pleased with this, and I will be able to tweak the blue twist to bring it more to the foreground.
Beginning Akhenaten’s Loincloth
While I mull over the gold section of Akhenaten’s headdress, I’ve decided to work on his loincloth and belt.
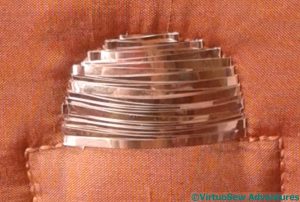
The original inspiration here was for the silver purls to represent the pleats of the loincloth, but when I talked with Sarah at Golden Hinde, when I was buying all the wonderful metal threads, she suggested that I should probably do the belt and fall first, not least, to have somewhere to tuck any untidy ends of the purls while I’m still getting the hang of it!
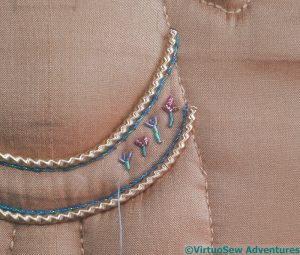
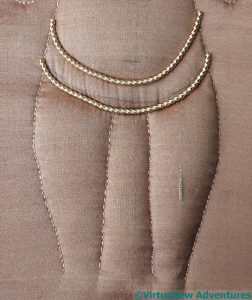
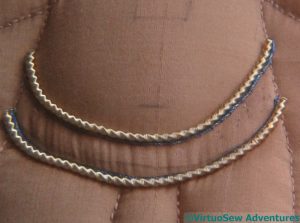
So I started with a very large gold purl with a sort of twist on it, and settled it neatly into the stitching lines from the quilting. That was followed by a slightly iridescent blue twist. It’s going to be tricky to keep that as visible as I want it to be, and I may very well end up playing around with the placement, or even removing and reinstating it later.
Still, onwards and forwards….!
More on Akhenaten’s headdress
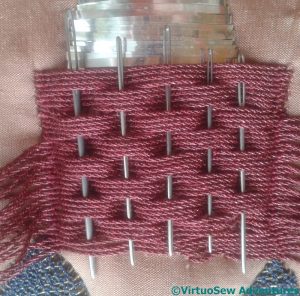
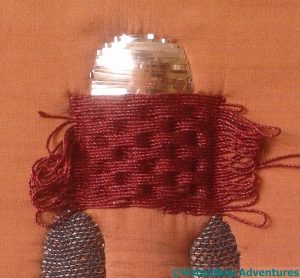
When you last saw Akhenaten I was starting to sink the ends for the headdress. There were so many ends to sink, and so much tugging to do so, that I was beginning to worry that I would lose the texture of the basketweave. So I threaded some old, blunt needles through the floats to keep them raised, and reduce the rearrangements and tweakings I needed to do as I went along.
And once all the ends were duly sunk – which took several sittings! – the crimson section of the headdress did turn out rather well.
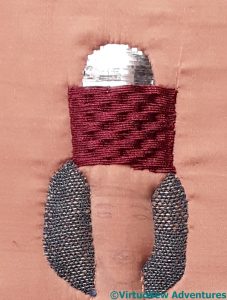
The next section will be golden, and will bear the cobra and the vulture heads, but I’m not quite sure how to tackle it, so I’m going to leave the ideas to marinate a bit before doing it. I think it may be separate from the rest, and run up over the crimson, which is why the basketweave couching runs further down the head than it ordinarily would.
Finished The Amarna Backpack!
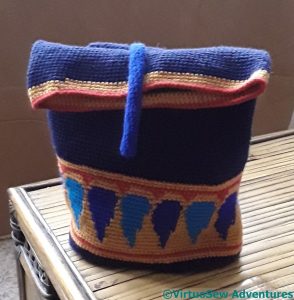
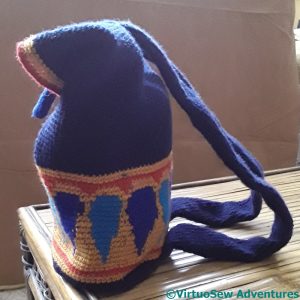
I rejoice to report that the Amarna Backpack is finished!
Well, nearly. It is in want of a lining, and it needs a weight in the end of the strap that weighs down the top.. But I have finished and assembled the bag itself, and in the process I have learnt that I am not keen on constricted tubes of crochet – so not keen that I ended up doing broader tubes. They might have taken more yarn, but they involved less muttering!
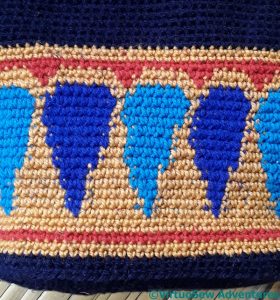
The pattern worked out rather well, I think. It is deeper than the pattern in the magazine, and more complex, because the main section involves three colours in each row. The three yarns tangled constantly while I was working this section, and the pattern hasn’t quite turned out as neatly or as evenly as I might have hoped, but I am still rather pleased that it is genuinely reminiscent of the inspiration!
I may have to change the placement of the straps, but until I have used it a few times – I want to carry sketching things in it – I won’t be sure what will be comfortable, or even useable…
I went to the knitting shop where I bought the materials just before Christmas, to buy materials for another project, and was highly entertained to find that I am there known as “The Egyptian Bag Lady”, because the project intrigued them so much. So next time I go, I must remember to take the backpack with me so they can see it.
More Progress on Akhenaten
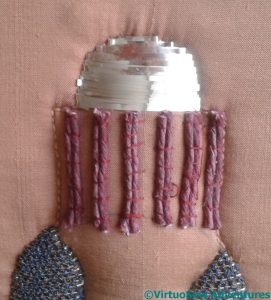
 I’ve decided that Akhenaten’s headdress should continue with basketweave couching in crimson twist. I was in a quandary about the padding for this – it would be dreadful to have white padding leering at me where the twist changes from up to down – when it occurred to me to colour my own. So this is the ordinary cotton “string” used for padding, which I have coloured with one of my inktense blocks and a little aloe vera gel, and then waxed once it had dried.
Of course, the colour didn’t seep all the way through, as you can see from the whitish-grey ends of the couched pairs here, but at least the colour will ease back rather than drawing attention to itself.
You would think, by the way, that the waxed string would be fairly easy to couch in place, but it wasn’t. It had a will of its own, and far too many ideas about wandering off!
But it worked beautifully.
As I understand it, basketweave couching can be worked turning the thread at the end of each row, or sinking it. I would have liked to have turned it, as that is the more economical technique, but I felt that this would create the impression of a compact and complete shape, whereas – however stylised it is – this shape represents a three-dimensional object, the headdress wrapping around Akhenaten’s head.
That means more than 70 ends to sink, through silk, thin padding, and calico.
Oh well, onwards, ever onwards!
Trialling a finishing technique
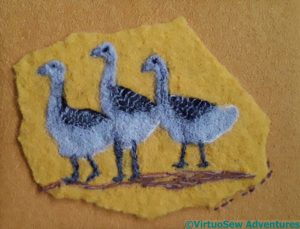
I’ve not been finishing any of the Amarna pieces for presentation, because once mounted and framed, they take up much more space, and also because I’m not sure which pieces are going where. However, the needlefelted pieces are not going to form part of the main panels, and I rather think it may take more than one attempt to get them just right. I’ve decided I want to present them rather as pieces of fresco are presented in museums, on a background which is similar in colour to the main colour, but not close enough to mislead.
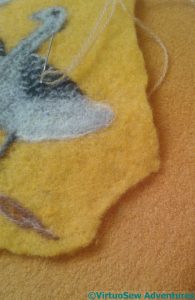
So the first thing to do was to find a suitably-sized artist’s canvas, and cover it with some padding and then a nice woollen fabric which is a warm yellow, slightly darker than the felt background. Then I cut around the Amarna Geese to make a rough, uneven shape. I should probably have cut off a head or something so that the fresco would look suitably fragmentary, but I simply couldn’t bring myself to do that!
I used a fine woollen thread to attach the felt to the background fabric, as far as possible remaining within the thickness of the felt. That was quite tricky, and I wonder whether there might be an easier way. I’m glad I didn’t start with the two princesses!
My Morse Code signature is in double straight stitches, following an edge. And there’s a bit of a corner left open there. I might do an extra goose head and add it in as a separate fragment!
Progress on Akhenaten
Working with goldwork in a European winter is optimistic at best, and much as I enjoyed working the Detached Up and Down Buttonhole Stitch with Return, it took rather longer than I might have hoped. When I managed to sit down with a quiet mind, a good light, and plenty of time, I found that the work would speed up. It was tricky to keep it even – I didn’t entirely succeed, either – and I wondered, halfway through when it was rather too late, whether I should have worked it “upside down” as in Jacquie Carey’s book “Elizabethan Stitches”.
I have decided to keep working on the head and the crown, at least until I don’t know what to do next, so the next section was to be the top of the headdress. Now, although the colossi don’t show Akhenaten wearing the combined crown of upper and lower Egypt, I’ve decided to reference it in the colours for the headdress.
So the top section of the headdress is a zigzag of sliver plate. It’s not as even as I would like, perhaps, and I am wondering (I’m doing a lot of wondering with this one, aren’t I!) whether I should have started at the bottom and worked up. I’m not sure I have enough left over to do it again, so unless and until I decide I can’t bring myself to leave it this way, I’m going to remain content with my very first effort using silver plate.
Akhenaten – the next stage
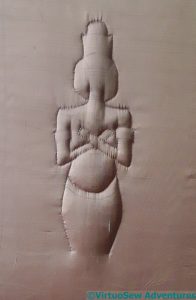
Once I had stuffed the figure from the back, I began to add to the backstitch outline with, for want of a better term, internal outlines.
I realise that the detail of the crossed arms has given him a hollow chest, but as the embroidered details are added I will be able to adjust the padding, if necessary removing some of it. Adding the stitching is going to be interesting. Some of it will need to balance over the curve of the padding, and some of it I will need to tighten a little through the padding – for example, his carefully-carved belly button.
At this point, I had to pause for thought. When the idea first came to me, it was the pleated loincloth that I could visualise, but the rest of the piece had yet to come into focus. I went rummaging on the web for polychrome representations of Akhenaten, and rummaging in my stash of threads for inspiration. And then suddenly, that inspiration duly arrived….
I remembered the ornamental stitches of the Tudor Rose Project, and fished out the Gold Special Tambour and Gilt Sylke Twist. Akhenaten’s wig is sometimes represented as black, and sometimes as blue. Black can be a somewhat problematic colour, often too dominating or simply “killing” other colours, so I decided I would go for blue, and the Indico Blewe Gilt Sylke Twist looked like it would produce just the right effect. Using the Gold Special Tambour as the thread for the return of the Detached Up And Down Buttonhole Stitch With Return helps to give a little more emphasis to the glint of the gold in the Gilt Sylke Twist.
But it’s not a quick stitch. This is going to take a while….
Lost Momentum…
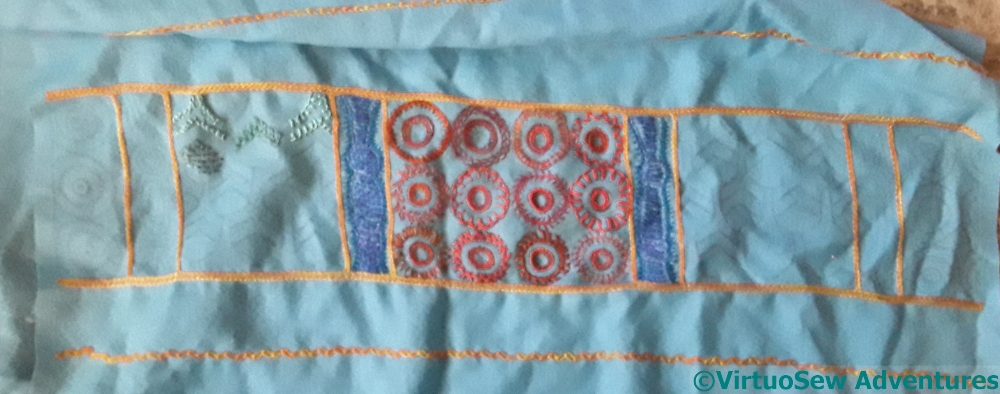
I’ve run into a bit of a problem here. I still love the idea, and I still want to finish the Nefertiti Shawl, but I’ve lost all momentum, and all sense of structure.
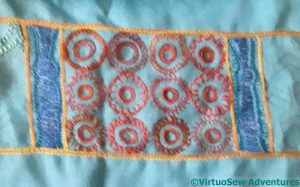
I’m happy with all the red circles. I like the colour variation and the unevenness – in real life, in a half-decent light, which winter in Britain rarely provides, there’s a vibrant, lively feel, and the use of the line stitches reflects the original pattern I used for the filling. Good.
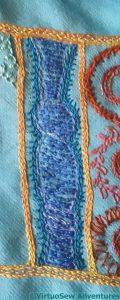
The blue section is where the trouble started. I’ve done two of them already in spite of my doubts because I’ve come across all too many instances where a piece only worked when I’d kept on through the doubts.
I’m not sure whether it is the yarns, the colours, or the stitches that are the problem, or even whether there is a problem at all.
The pashmina is in a lovely twill weave which flows beautifully, but it’s quite fine, and a lot of the threads are thicker.
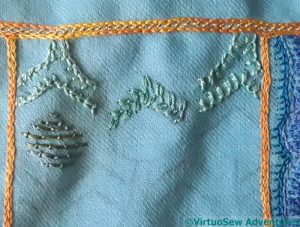
But the problems of the blue section fade into nothing when I get to the green. I love the overlapping scale pattern, and I was really looking forward to stitching it. But I can’t find a pattern of stitching that works, and again, I’m not sure whether this is the colour, the thread, or the stitch.
I have no idea how to sort this one out. Unless inspiration strikes, it will be some time before you see it again.
Akhenaten – the scary bit!
I did say the next bit was scary!
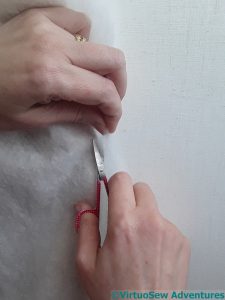
I undid the stitches holding the silk and top layer of wadding to the calico backing, and cut away the polyester wadding close to the back stitches outlining the figure. Quite apart from the fact that I had to tie myself in knots to follow the edge around, particularly around the neck and shoulders, and beneath the arms, I was terrified of cutting through the backing, or the padding I didn’t want to cut, or, worst of all, cutting through the silk.
If you are of a nervous disposition, do not attempt this technique. Try something soothing instead. Like base-jumping.
The next bit was hardly less scary.
Having been terrified of the prospect of cutting any of the layers, I then had to cut slits in the calico at the back, in order to stuff the figure more firmly.
I’ve had occasion in the past to express my conviction that holes into items to be stuffed actually open into the Fourth Dimension or something. The capacity of the item to be stuffed always seems to be higher than is suggested by the measurements.
And guess what, it happened again. I’ve done my best to stuff evenly, using small pieces of stuffing, but I won’t be at all surprised to find that after the next stage (whatever that turns out to be!) I will be doing more of it.

