
Category: General Embroidery
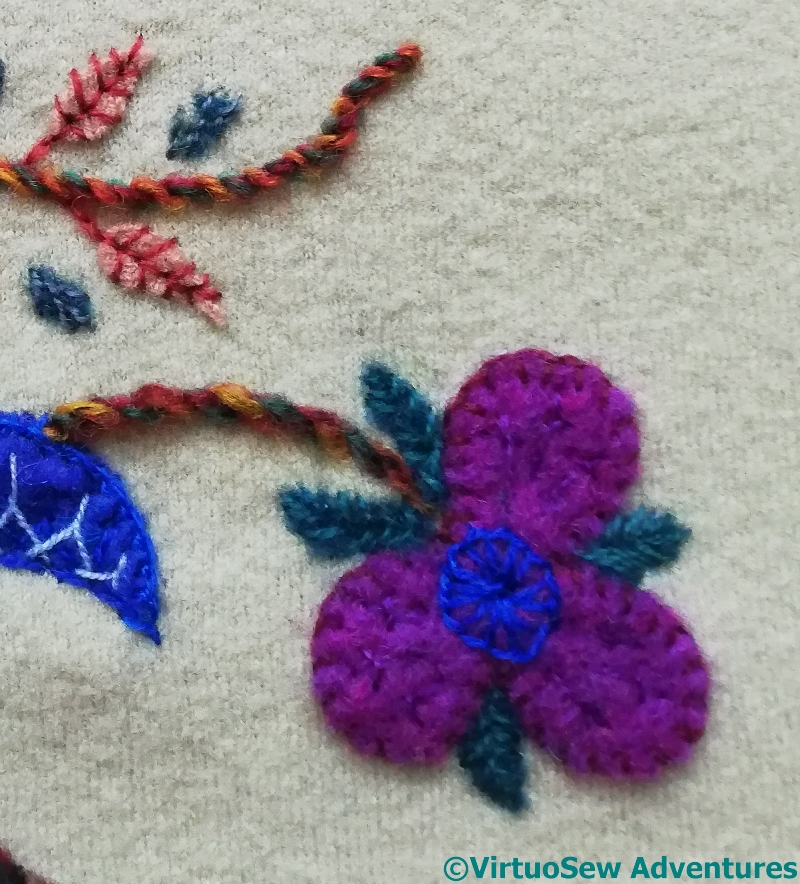
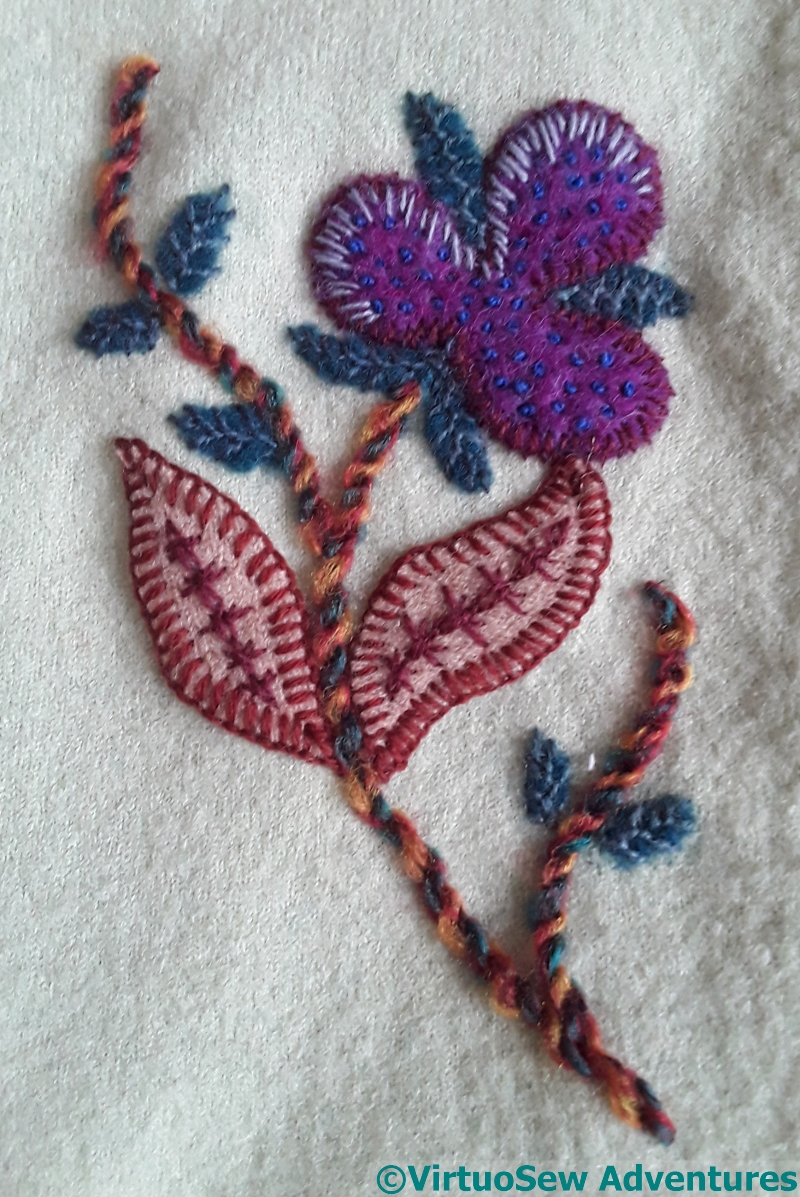
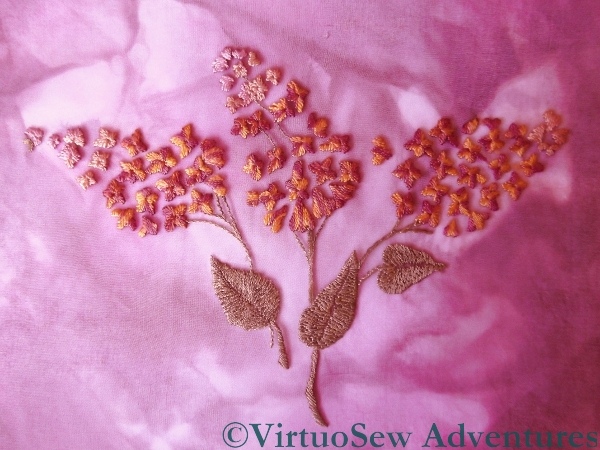
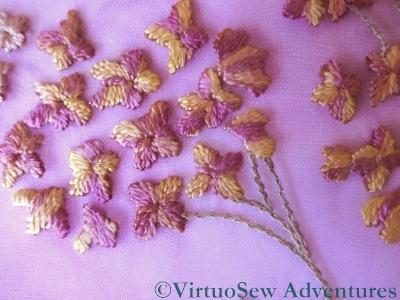
Jacobean Coat – Large bloom

You can see here that I’ve reversed the colours of felt used for the same flower shape on the sleeve, and added tiny blue stitches as highlights.
Chained blanket stitch, crested chain stitch, fern stitch, and a slightly freeform variant of feather stitch adorn the various petals. The light blue is used to tie down some trellis couching and for three tête-de-boeuf stitches to lighten the bowl of the flower.
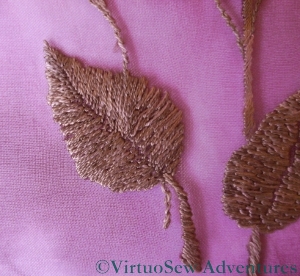
The edges of the fawn leaves are simply caught down with an overcast stitch, but the spines are worked in Siennese Stitch, found in one of my multitude of stitch dictionaries. The circle is one of several, edged with up-&-down blanket stitch, and speckled with what Barbara Snook describes as “Knotted Stitch – Danish origin”. At the extreme right there are two small brown leaves, with reverse chain stitch stems and long straight stitches creating veins. The fabric comes from some thick walking socks which felted in the wash!
There were three of these three-petalled flowers (if that’s what they are!) and I worked each in the same way – blanket stitch edges, sword stitch for texture, blue central circle in buttonhole stitch, and teal leaves in fishbone stitch.
As you can see, deciding to keep some elements the same, or similar, has spread beyond the smallest leaves!
Jacobean Coat – Half-Circle Motifs
One of the exasperating elements of this project is that the lovely clear, delicate green of the fabric isn’t showing on any of the photos I am taking. This strange, rather disheartening cream fails to reflect one of the pleasures of working on it.
Here you see the side of the coat with the two lilac half-circle motifs. There are also three circle motifs, and two huge leaves, not to mention all the little teal leaves that I’ve not even applied yet.
The circles have been relatively easy, but both the fawn leaves and the two lilac motifs are giving trouble…
The first one of the two lilac motifs has rather lost the way home.
Somehow it is fussy, tired, and full of the wrong sort of detail. It’s also too dark. I need to reduce the dark blue and dark maroon stitching.
I’m not even sure that the felt will survive.
That said, I like the blanket stitch variation of the lilac stitches, and the green Reverse Palestrina Stitch.
This is a better version.
There aren’t as many colours, or as many stitches as in the version I’m not happy about. The fronds are in Cable Chain and Twisted Chain, and the purple trellis is couched with the blue.
Now I need to unpick the first one and come back to it, informed by the much better second version. I don’t want it to be entirely the same, but closer would certainly be better!
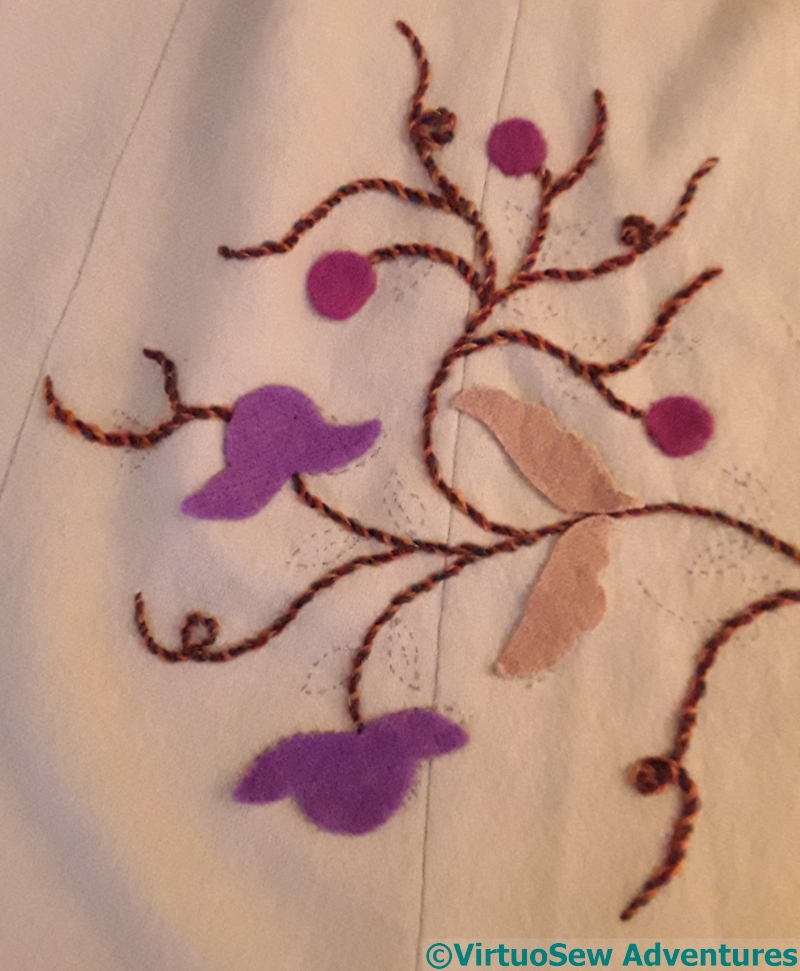
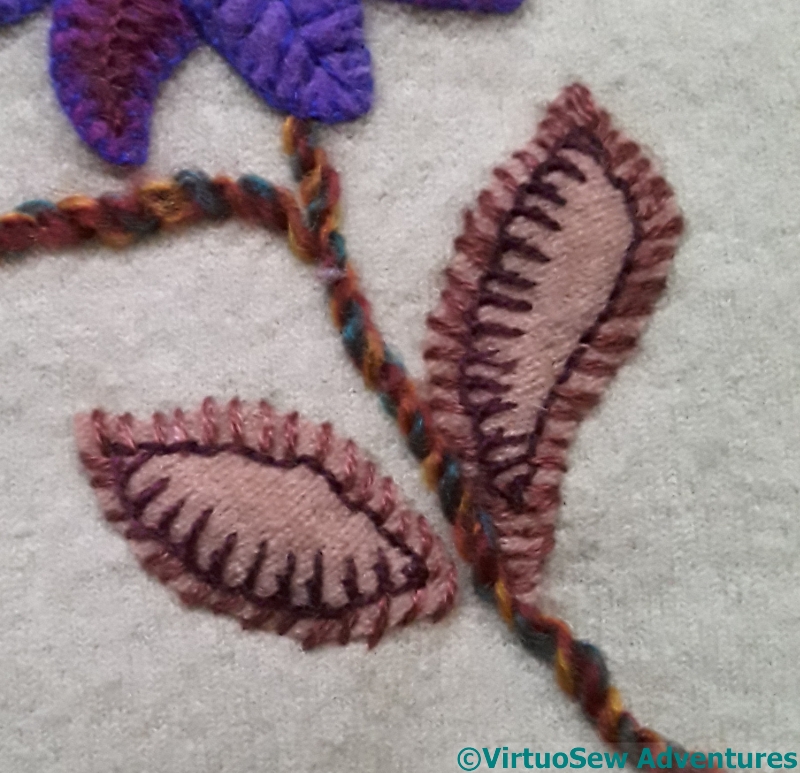
Jacobean Coat – the leaves at the base of the spray
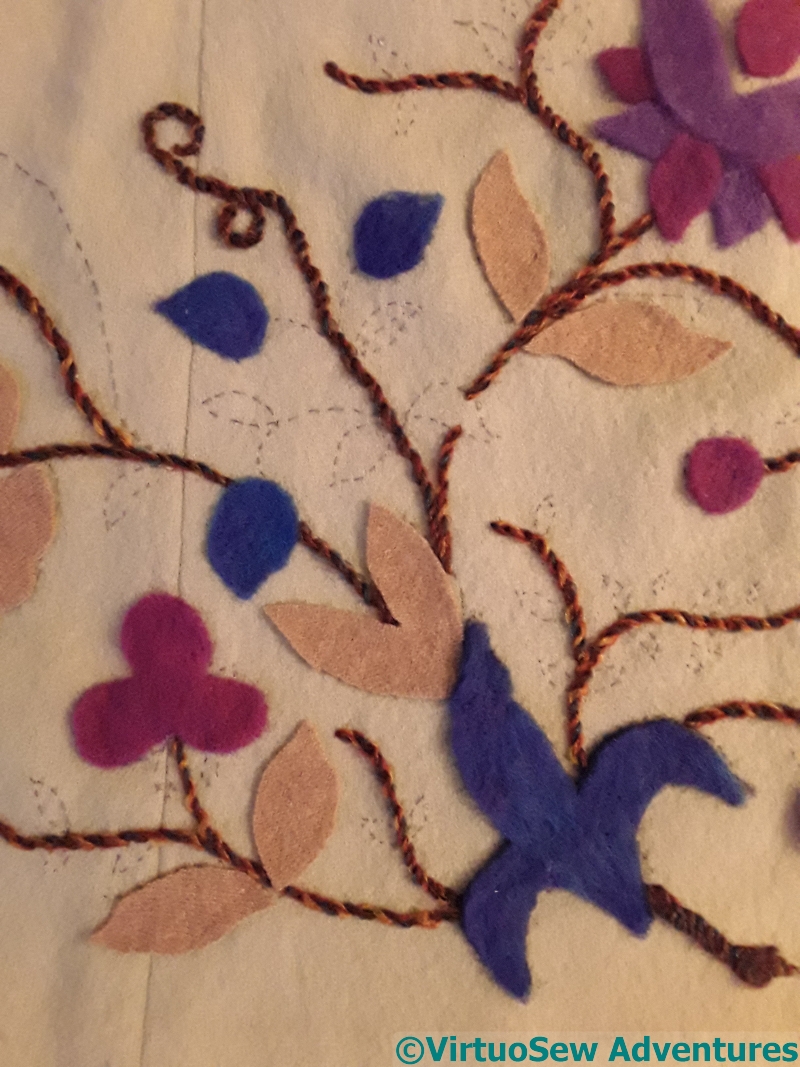
This photo shows the central section, with the major felt sections in place, and the minor ones left until later. That in turn means that the colour range is not quite right, because the greeny-teal is missing.
What it does show, however, is that the disheartening spotty effect I experienced with the Piano Shawl is entirely prevented by the couched stems!
Since my blue felt was made using layers of blended wool sliver it has some slight variation of colour, which I was hoping to pull out in my stitching. That may not quite work, but at least I can try.
I also want to make the fawn leaves much more varied, so although there are several successful treatments I could choose to use in all cases, I’m going to try to be more experimental.
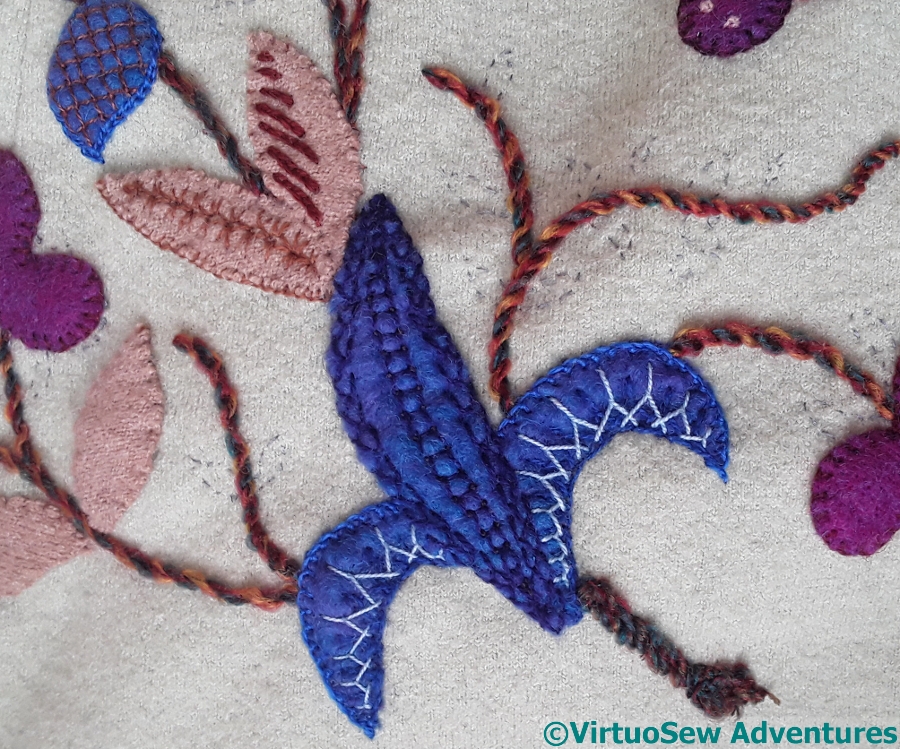
This photo is already out of date, because I’ve unpicked the fawn leaves once already, and I’m not entirely sure about some of the details on the large blue leaves. The light blue half-Cretan stitch may not survive to the finished garment!
There is a mid-blue knotted edging stitch on the top edge of the two outer blue leaves which I may have invented at the time, and certainly can’t reconstruct in the cold light of day. The spine of the central leaf is Square Chain, with the corners couched down with a darker thread, and the edge is closed feather stitch. There will probably be a lot of closed feather stitch – it is a useful stitch for the edges of these shapes.
Jacobean Coat – beginning on the felt
I haven’t put all the felt pieces all around the coat, because apart from anything else I have limited tolerance for cutting out bits of felt, but I have a good start made, and I can start playing with stitches, which is much more fun!
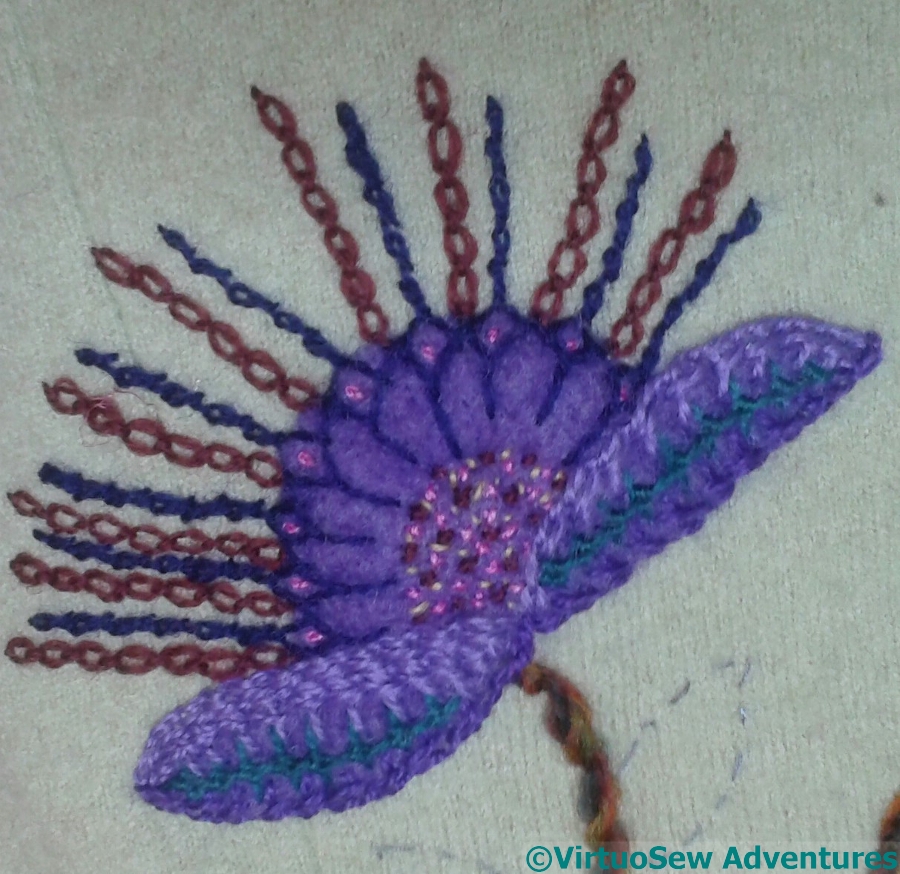
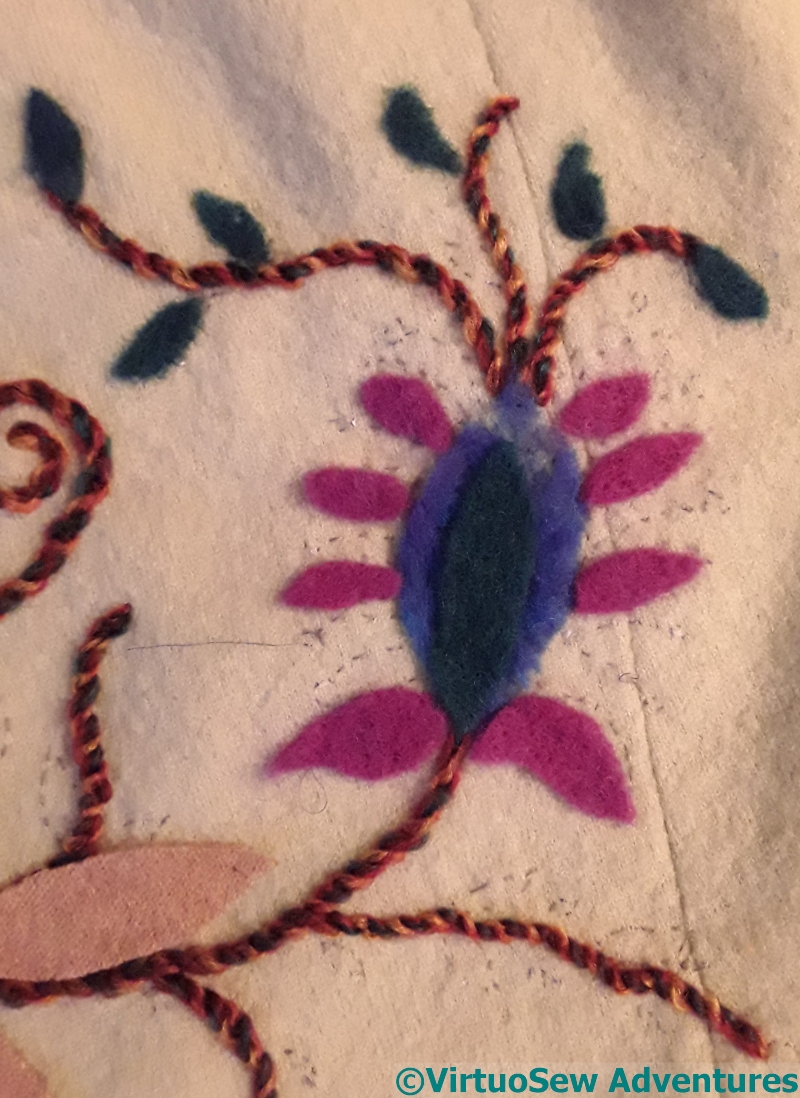
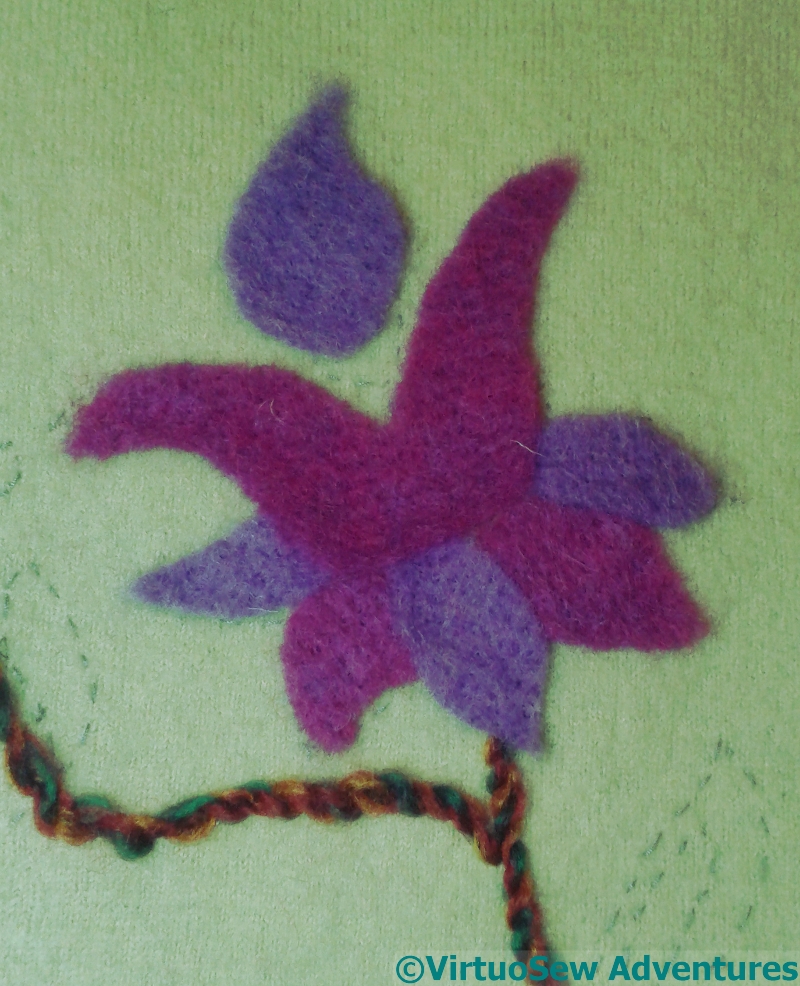
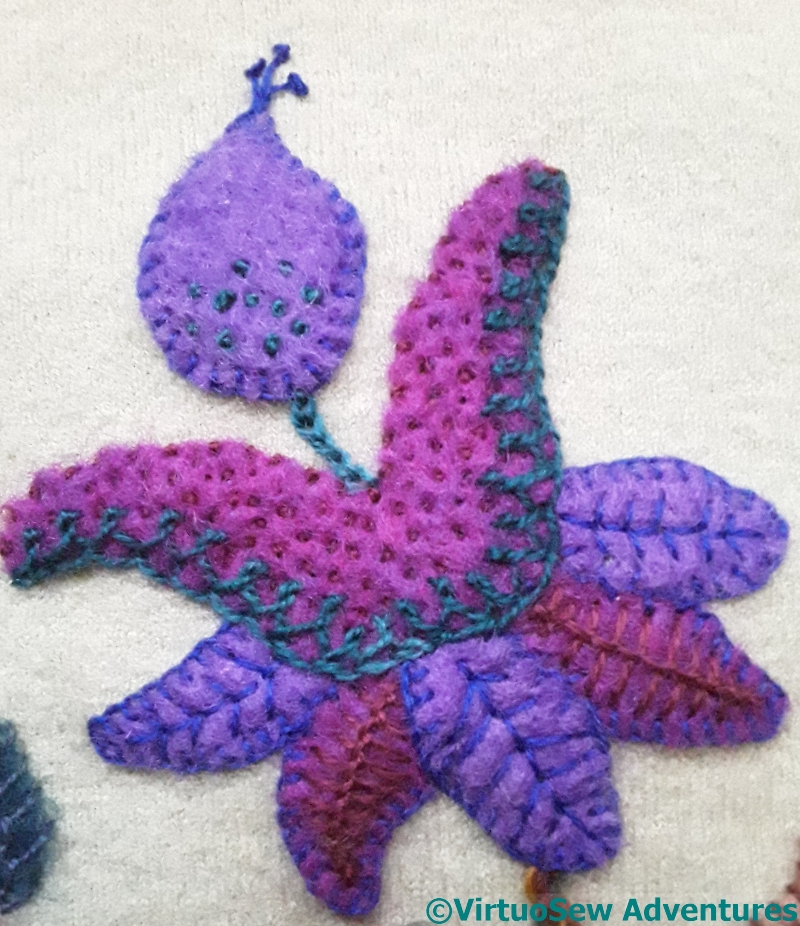
This is one of the most complex motifs.
The blue felt is one I made myself, because I didn’t already have a suitable one – which explains the thin patch at the top. Wet felting is not as easy in practise as it seems in theory!
The teal leaves were easy, of course, because I have already decided to use feather stitch. After that, some thought was required..
A teal trellis, couched with pale yellow, provides the “lift” here, and one of my favourite stitches, cable chain, provides the fronds. I’ve reduced the number of fronds – I think there were two between each petal – because I thought it would look fussy otherwise.
The blue stitching on the blue felt is Crested Chain. The colours are close enough to create texture, rather than contrast, rather as the slightly rusty pink square chain modifies the petal colour in a different direction to the dark blue chained blanket stitch of the leaves at the base.
As with all the elements of this design, when I have the whole piece more or less finished, I will expect to add further details and tweaks to balance it all across the piece. We’ll see…
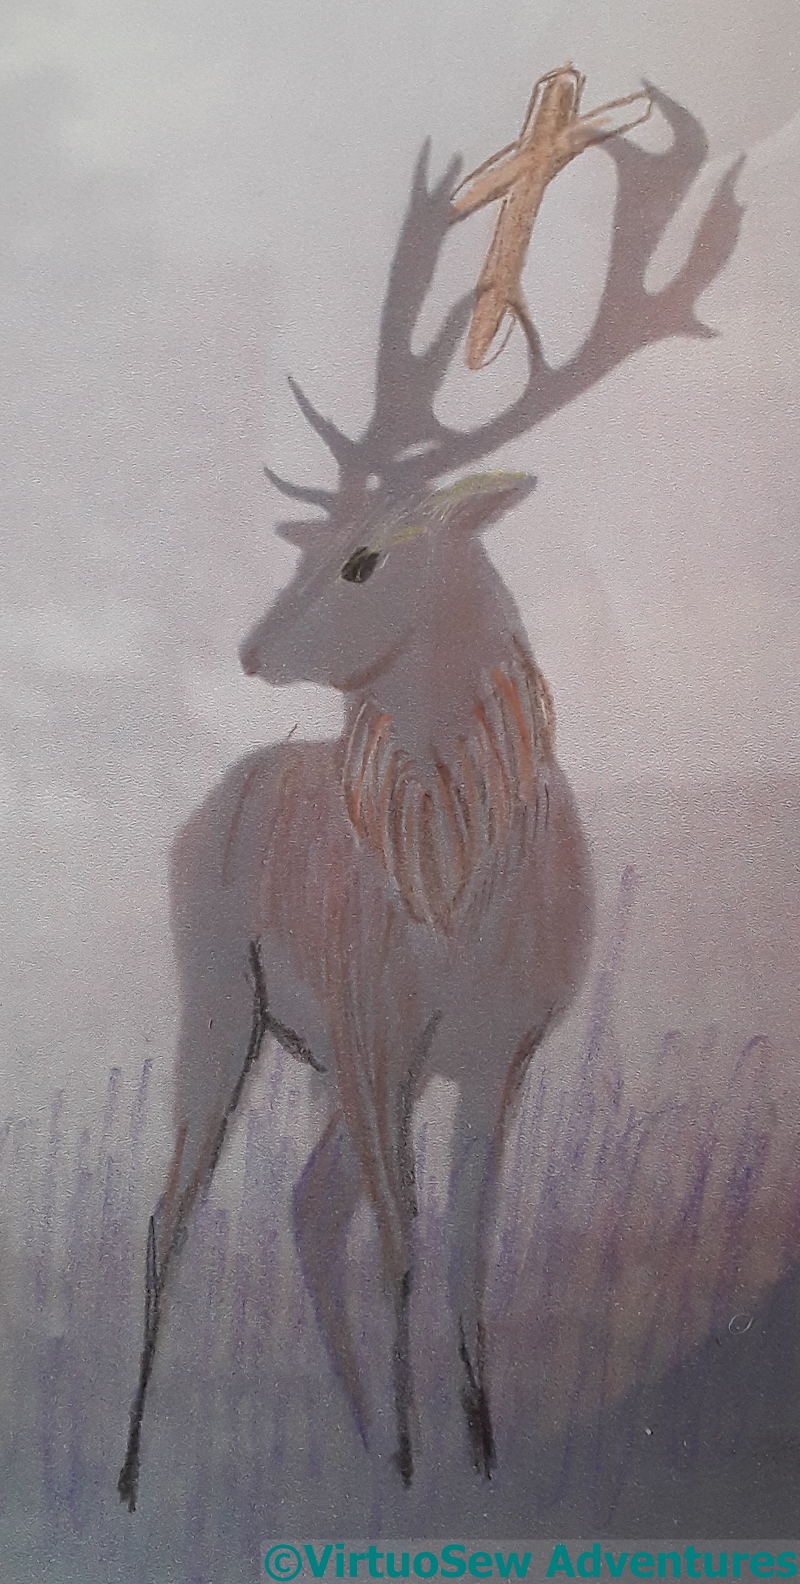
Thinking about the stag for the Vision of Placidus
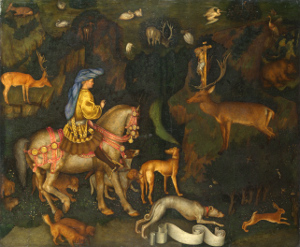
Pisanello “Vision of St. Eustace” in The National Gallery, London
I’ve already mentioned that, although I have more yet to do on the Dreams of Amarna, I have little thoughts, now and again, about my plans for the next Really Big Project, the Vision of Placidus, inspired by Pisanello’s “Conversion of St Eustace”, Elizabeth Goudge’s “Herb of Grace”, my mother’s fine binding of “The Wind in The Willows”, and the kingfisher I saw at Flag Fen. Oh, and the “Chasse a la licorne” tapestry in the Musee de Cluny.
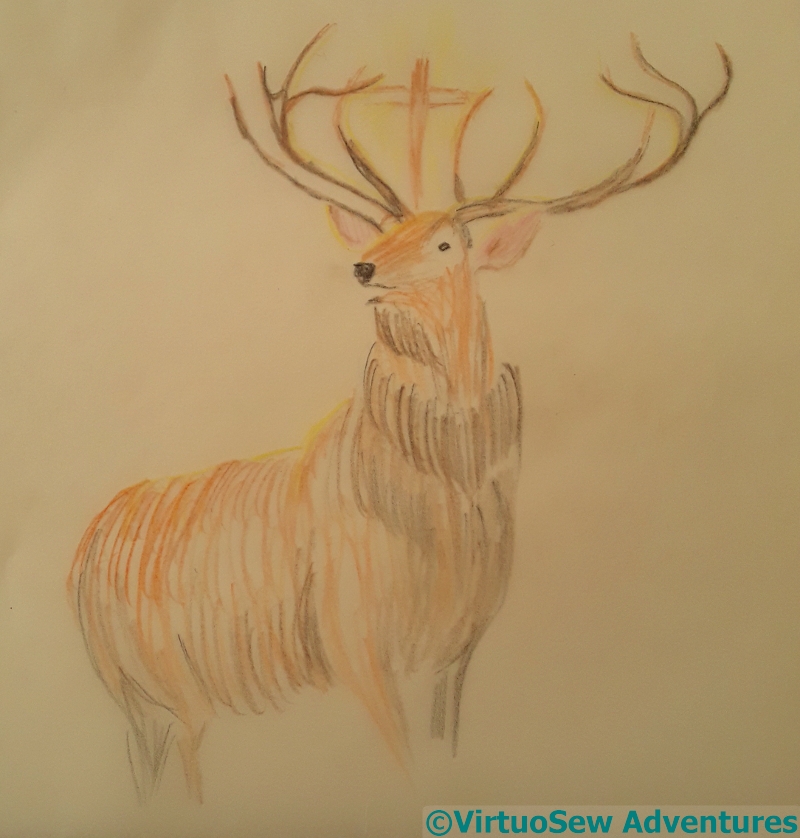
Based on the Stag from Landseer’s The Monarch of the Glen, with an attempt at
The Stag with the crucifix in his antlers is going to be the major character, and while I know I’m tearing into a genius of the past, I think Pisanello’s stag is a bit too tame for the story…
My first thought was to start from Sir Edwin Landseer’s Monarch of the Glen. After all, he’s full of personality and presence, and a recognisable figure to add to the layers of meaning and reference. But no, I think the crucifix won’t settle well into the antlers, and the pose isn’t quite right, either….
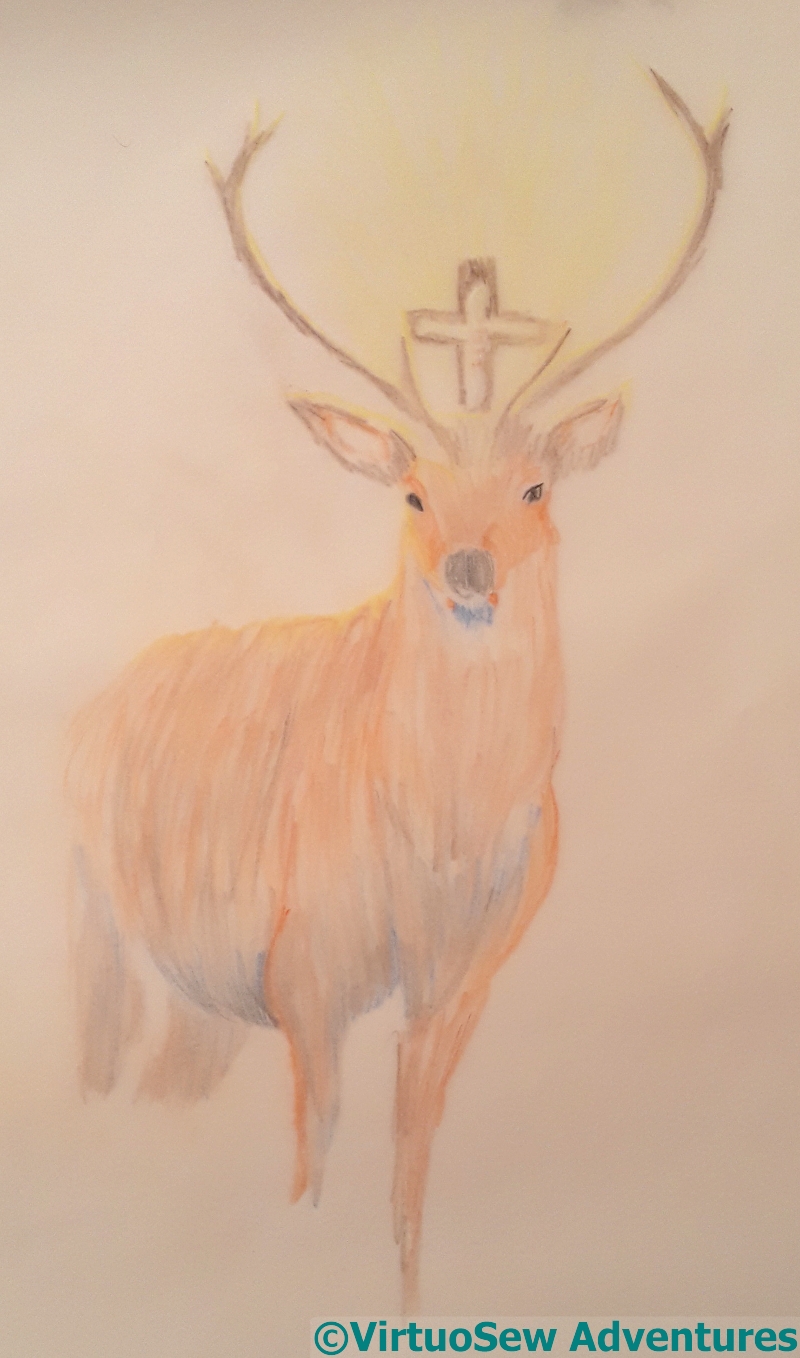
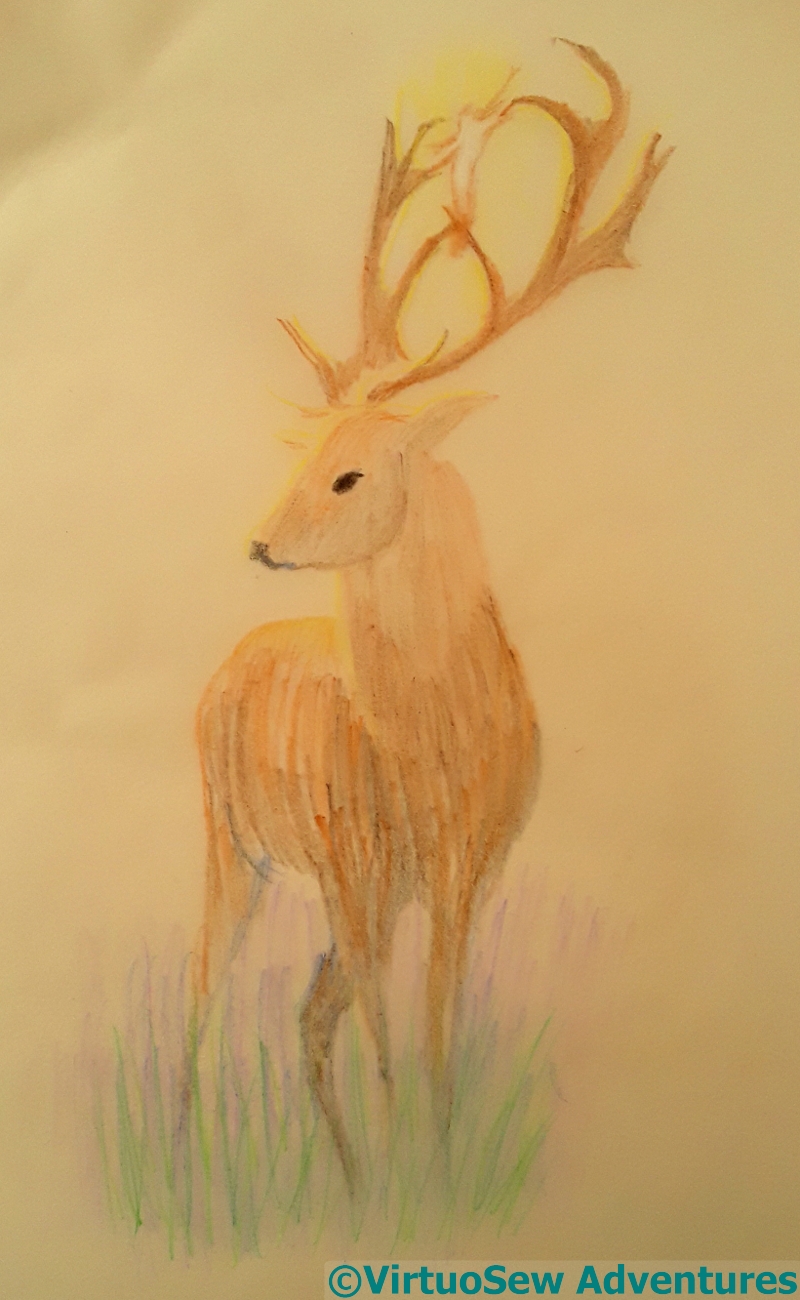
Second attempt at a stag with a crucifix between its antlers
Then I spent more time rummaging online for pictures of stags, and came up with another to try. I like the challenging, direct stare of the pose here, but it puts the onlooker in the position of Placidus (according to the stories, he took the name “Eustace”, or more probably a Latin variant thereof, when he became a Christian), and I want Placidus to be in the picture. That said, he was a second century Roman, and I’m intending to dress him in florid fourteenth century dress, so don’t expect too much accuracy…
My next thought came from a book about the landscapes of Capability Brown that I bought for my cousin for Christmas. I’ve told her about the plans for Placidus, and she opened her gift, leafed through it, and then turned the book to me and said “Would this help?”
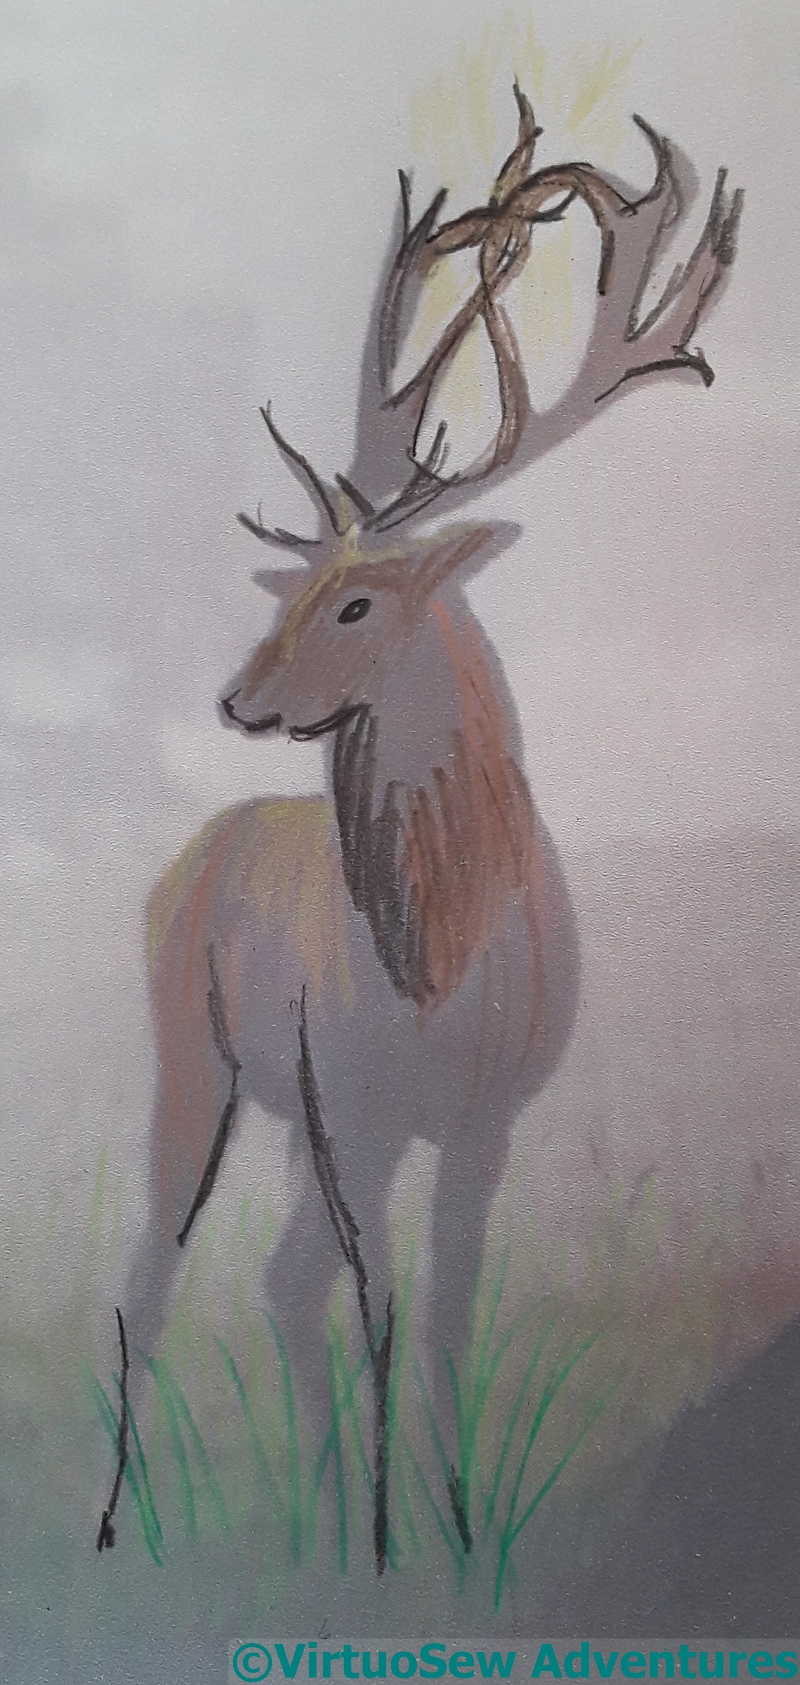
Third attempt at a stag with a crucifix between its antlers
Fourth attempt at a stag with a crucifix between its antlers
Fifth attempt at a stag with a crucifix between its antlers
This is by no means the first time my cousin has helped me with design planning – it was talking to her that enabled me to crystallise the ideas for the Dreams of Amarna – and I like the photo enough to have three attempts at it. I still don’t think I’ve got it right. That said, all of these sketches have allowed me to think, not just about the pose, but about how I will use my threads to create the effect I want, of the illumination in the scene emanating from the crucifix.
A good use of time, even if not a stitch was set!
Jacobean Coat – Sleeves – I was right!
When I finished the first set of embroidery on the sleeves of the coat I said I thought it might need Something More.
After some thought, I decided that the Something More in question was a bit of light. This required a little negotiation, as my client (my mother) had wanted rich colours, and had originally enacted a veto on the lighter ones I had picked out. But then, she’d not seen what I had in my mind, and once she did, my tentative suggestion of a few lighter bits was met with a definite “Yes”.
She also said that what I’m doing is not quite what she had in mind, but it’s better. Phew!
The first small, exploratory illumination was to add some pale blue stitches around two of the lobes of this bud (flower?). I didn’t want to add too much because, first, this isn’t meant to be actual illumination, and second, I felt that if I added these stitches all around, not only would I run into trouble in terms to angle and sense, but it would suddenly start looking a bit stiff and too “matchy-matchy”.
There’s a phrase I never used as a teen, even though I certainly had the concept…!

For the second sleeve, it was harder to settle on the best way to “lift” the motif. There was already the tiny tuft of pistil stitches stitched directly onto the fabric, which had done something a little similar.
For now, I’ve simply added a row of French knots highlighting the curves. The yarn is mohair, and has a lovely high shine which adds to the variation in the effect.
In case I needed to say so – I am really enjoying this project!
A strange buddleia
I really cannot imagine what I was thinking of when I worked this piece. The design was a transfer, I remember that much, and I worked it many years ago.
It is yet another discovery from a forgotten box, and the reason it was in the forgotten box in the first place is that I’ve not the vaguest idea what to do with it!
The fabric is a variegated gauze, and the embroidery is in two variegated silk threads – the florets in satin stitch (on gauze – I must have been mad!) and the leaves in long and short stitch.
The burgundy gauze isn’t quite so bright in real life – it’s turned out really very oddly in the photograph – and the green leaves don’t disappear in real life as they do in the photo.
I have thought about applying it to an evening blouse – I wouldn’t need jewellery with that at the neckline – and I’ve also thought of mounting it to create a non-folding fan, but the engineering involved in the latter rather defeated me, and I have yet to find a fabric that it will work with for the former.
These forgotten boxes, by the way, are beginning to drive me absolutely wild – there’s something I would love to write about if only I could find it, and not only is it not in any of the boxes I have discovered by accident, it is in none of the sensible places I’ve looked, either!
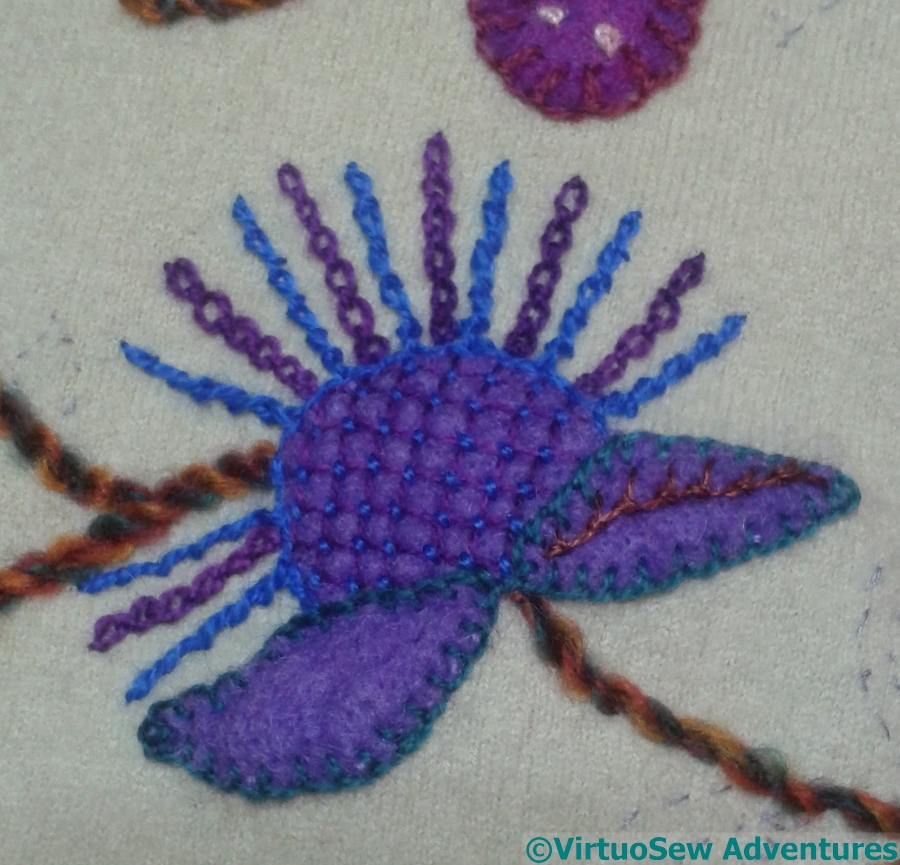
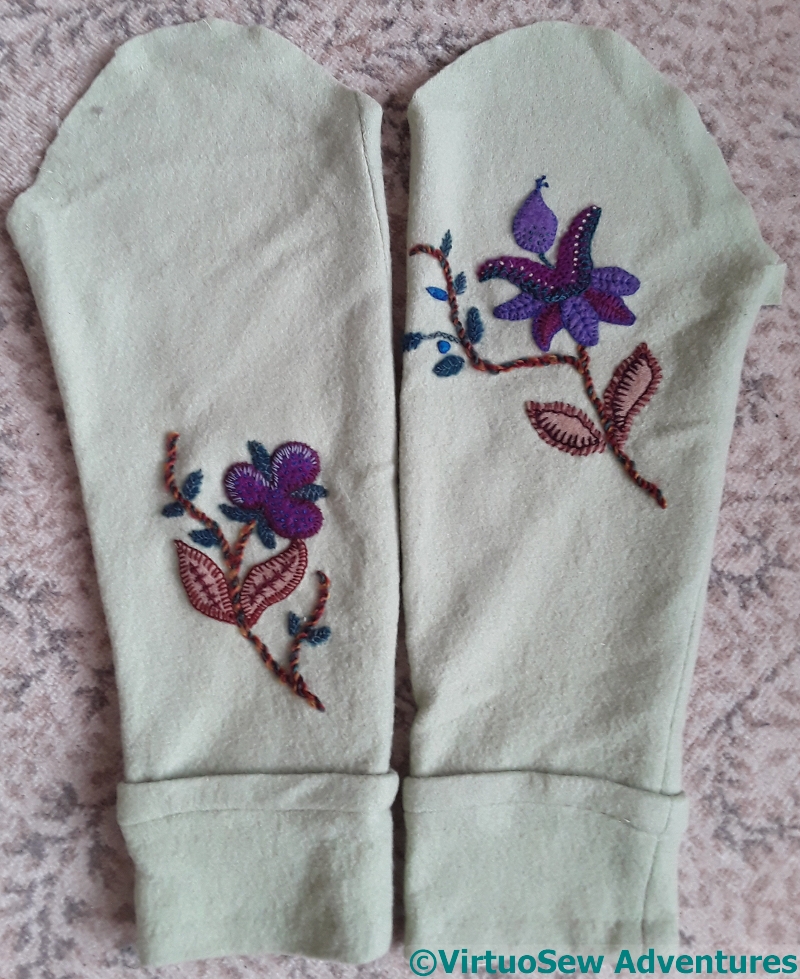
The Jacobean Coat – Sleeve Two Embroidery
The second sleeve began in the same way as the first, with felt motif elements lightly needlefelted into place. There is a similar motif on the body of the coat, but with the colours reversed. Whether I will use similar colours in embellishing it, I don’t know – wait and see!
I am removing the tacked design outlines as I go, at least where they show around the edges. It may not be entirely necessary, but it’s much more satisfying not to be spotting them as I work, and I know I would spot them in the finished coat, even if no-one else could do so.
The edges of the large leaves on the second sleeve began with straight stitches over the edges, using a wonderful mohair yarn from Gumnut Yarns. The different amounts of shine from the various threads I’m using will help to add another level of interest to the whole design.
The second level of detail is worked in Up and Down Blanket Stitch, which is a very old favourite. This time I’ve changed the relative heights of the two uprights to create a more varied effect.
There’s a lot going on with the flower motif; Thorn Stitch on the lilac petals and a variant of Loop Stitch on the purple ones, using different thread colours to change the emphasis on the colours.
Crested Chain Stitch in teal edges the flower shape (given it’s a Jacobean style design, realism has nothing to do with it – I’ve not the vaguest idea what sort of flower it is supposed to be!) and I complicated matters for myself by working inward from the tips of the horn shapes to the centre. It is a directional stitch, so although most people won’t be able to notice that sort of detail, I think it is worth doing.
Finally! Crazy Paving Canvaswork finished!
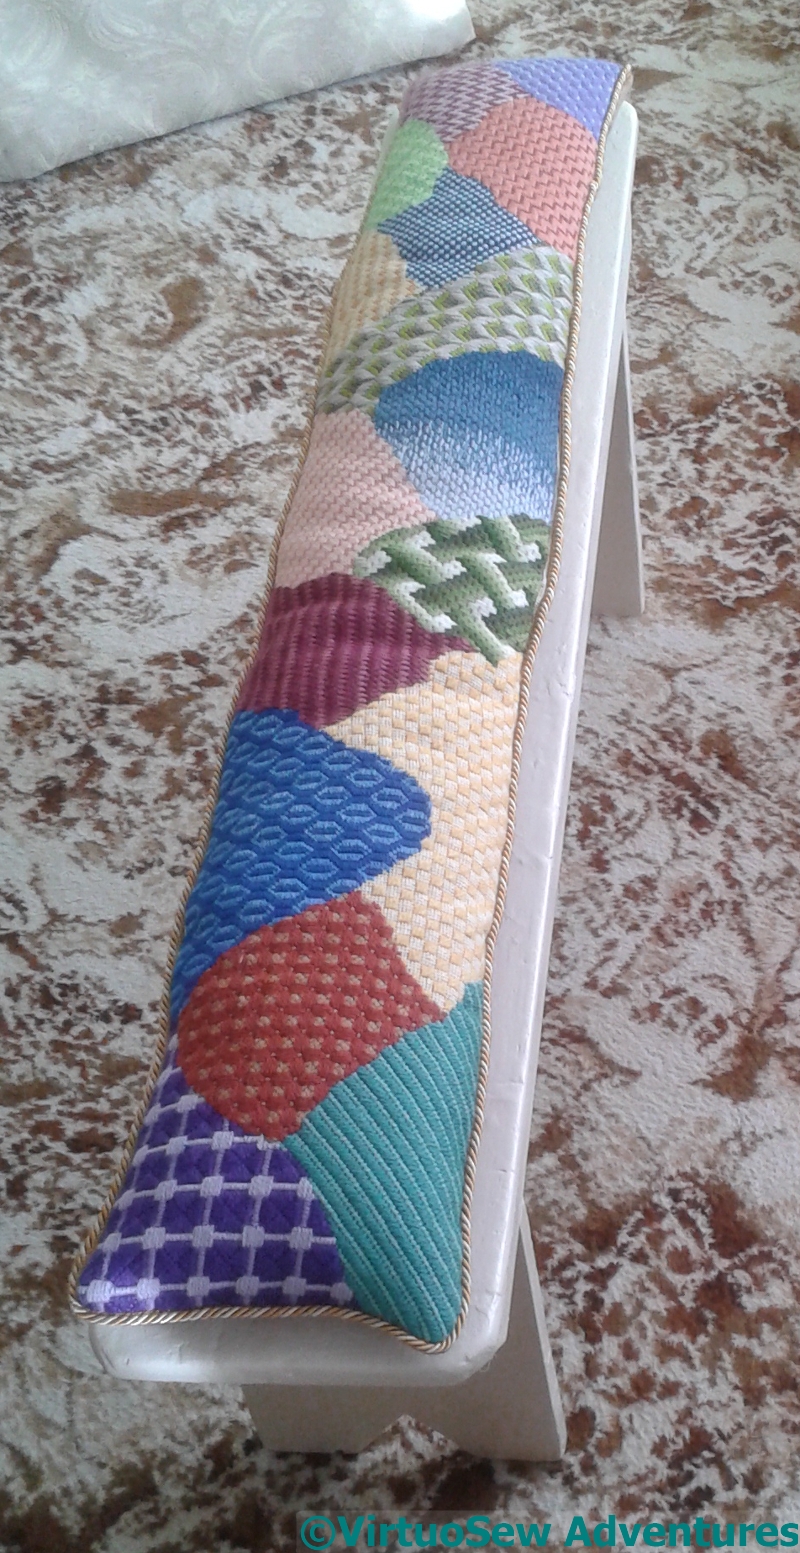
In fact, it was finished a long time ago, and somehow I didn’t get around to writing it up…
Not that there is much to say. All of the interest (almost!) was documented in the stitching.
The old form has been scraped, holes filled, sanded, and repainted, and the cushion is a simple shape, tidied up with piping cord.
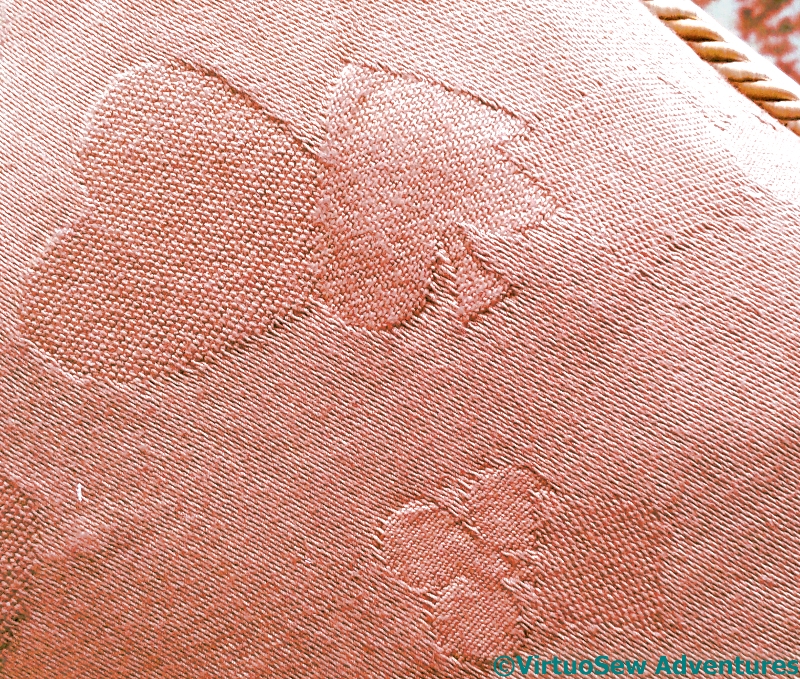
Some of the interest, in fact, is in the backing fabric. It’s an unremarkable jacquard woven pattern in cotton on a synthetic warp, but the design – rather ironically, since I’m card-blind for all practical purposes! – is a design of suits I created during my MSc in Textile Design Technology. It’s clunky, and not well-differentiated, but it was the first time I designed a jacquard pattern. The only time, too, but it was fun while it lasted, and I’m glad I asked the technician to weave a half-metre for me instead of the 10 cm that was all that was needed for the module.
Same design, different stitches
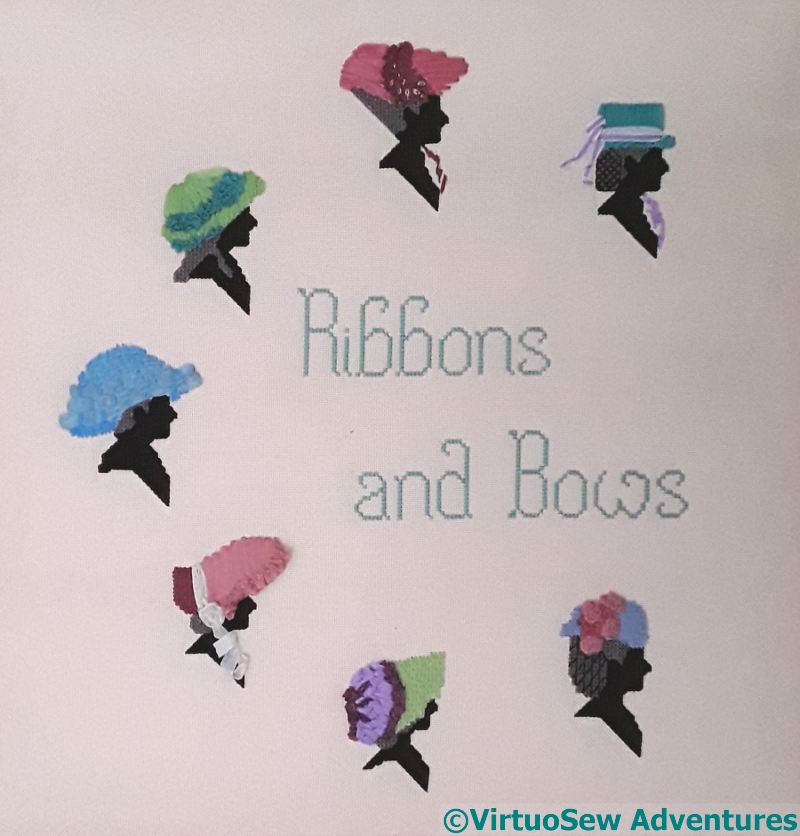
Ribbons And Bows
I’ve been rummaging in a variety of boxes, because with “Leaving the Tyne, 1915” finished and on display, and two “Dreams of Amarna” pieces in a good state, I feel as though I have a bit of mental space and time to consider, not just the progress on the Dreams of Amarna, but also any other half-thought-through bits and pieces I may find.
I’m not sure whether that is going to be true, but I live in hope! These “bits and pieces” are particularly obscure and particularly hard to find something to do with.
Amy
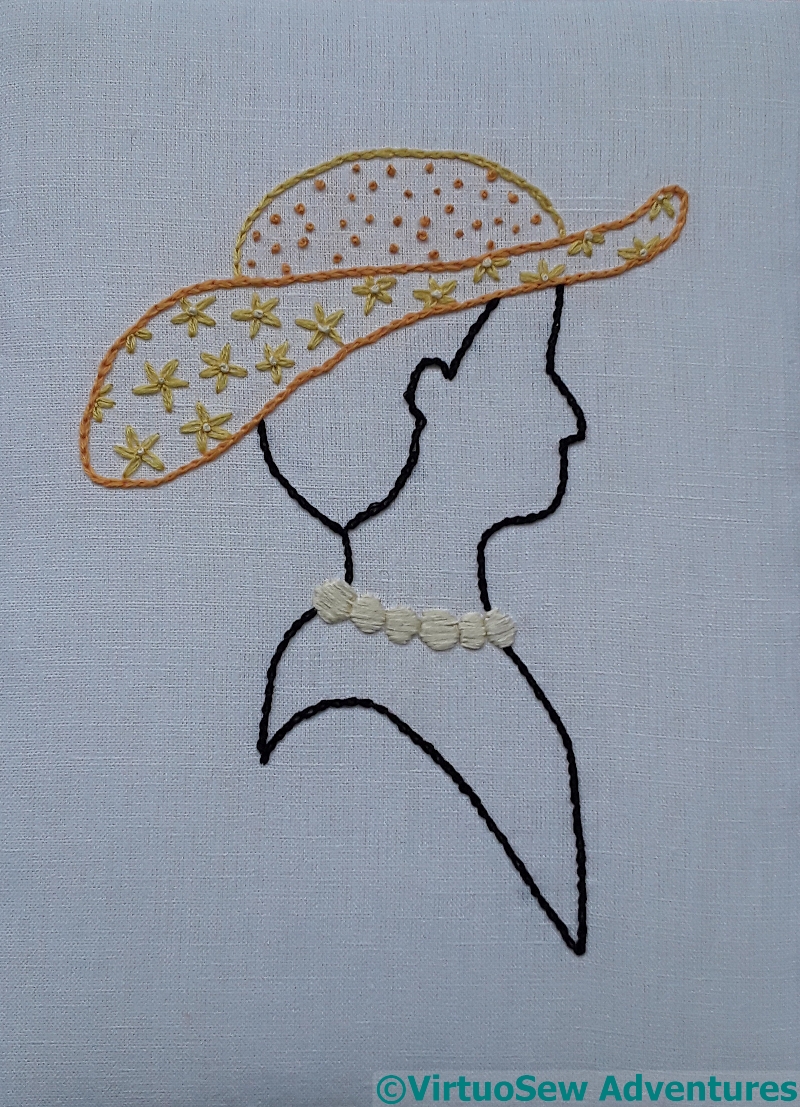
These two Lovely Ladies were part of an exploration of stitch ideas and silhouettes, originally with the idea that they might become teaching pieces. They originate with a sampler of cross stitch and ribbonwork silhouettes I devised in “DevaStitch Designs” days.
When I thought of teaching, I extended the idea by enlarging the heads, and playing with stitchery to replace the ribbonwork. However, I’m not much of a teacher at the best of times, and when I asked a few people, I was told that the second version, with silk georgette layered to create the impression of the silhouette, would be daunting for beginners, and uninteresting for improvers.
Ouch.
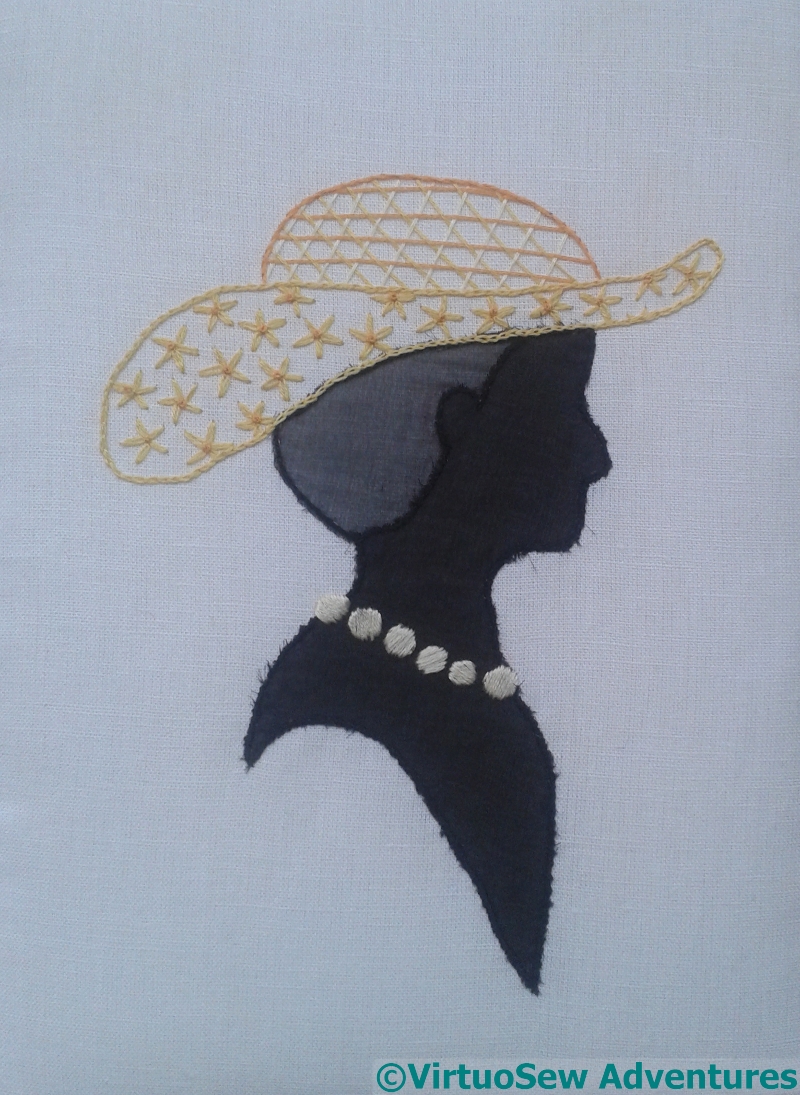
Annis
So I’m still trying to work out what to do with them. I rather enjoyed doing the silk georgette (it’s held down with back stitch, then chain stitch, and then satin stitched over the top!), and it certainly makes the bead necklace stand out nicely. The two parts of the hat provide clear, distinct shapes to outline and fill with stitched patterns.
I still have some ideas for a lady in the cloche hat that I’m dying to put into action, but at the moment I have no good excuse to do so!