
Category: General Embroidery
Grape Hyacinths, 3
You may recall that I rediscovered the grape hyacinths some time ago, and, once I’d completed the leaves, I decided that the flowers were All Wrong, and took them out. A couple of weeks ago, I think, you saw a post about that, and about the further experiments I made.
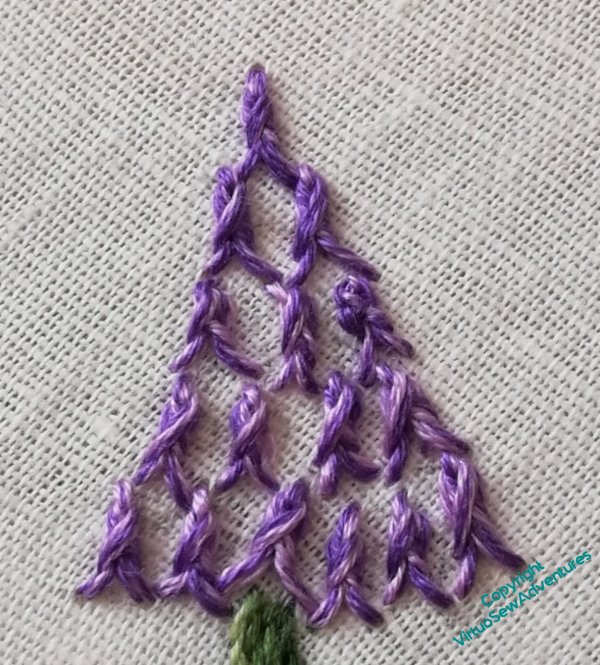
The little satin stitch dots were definitely a misstep, so I thought a little harder about what it was I thought so charming about the flowers, and decided it was the slightly ruffled edges of the florets.

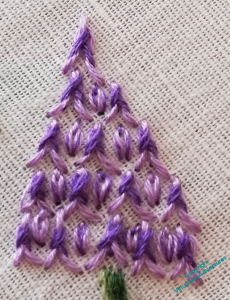
The resultant flower head, with dark stitches over light, seemed rather too much like a chequerboard, so the ones you see here use blended threads, but the same for both layers of the stitch. That’s better, although I still have some concerns…
I think the stitches may be a little too long, and I should perhaps make them rather more compact (remember my obsession with scale of stitch – it hasn’t figured at all while I’ve been concentrating on the Amarna Family, but it’s something that I’ve been aware of, and working on, for a long time now).
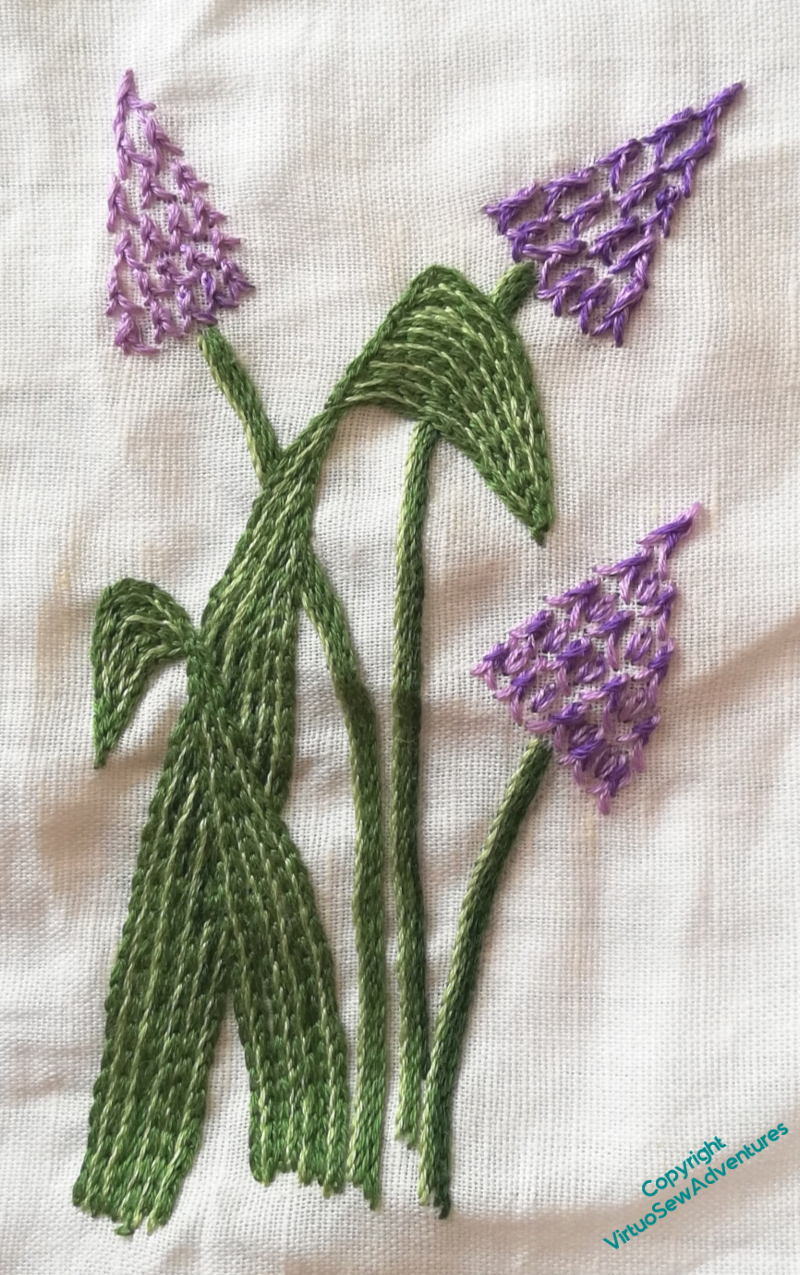
However, by the time I’d done all of them the second (third? fourth?) time, I was a little weary of the design. I’ve put it away with a mental note to try to find it again in the Spring, and see whether it’s easier to come to a decision when I have the real flowers in front of me!
And now, Episode 38 of SlowTVStitchery is live. It discusses shortness of memory, the Neanderthals, and and the terrors of yarn chicken…
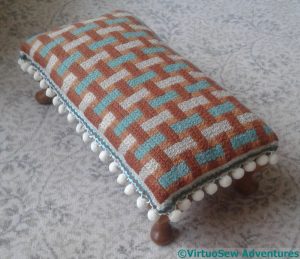
The Stash Busting Canvaswork Footstool – Stitching Begins
Once I’d drawn out the size I thought I needed for the footstool cover, I needed to think about how to break it up and make something that looked deliberate.
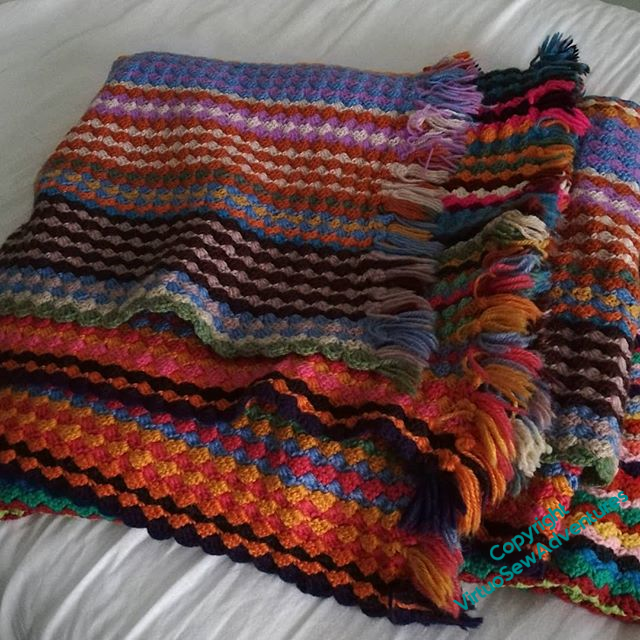
I could, of course, take inspiration from Grandmama’s everlasting crochet blankets, made, I think, purely to keep herself occupied in times of trial. But somehow, that didn’t seem quite right. Maybe the footstool area seemed too small for that to work properly.
I gave some thought to how to divide up the space, but compared with the Crazy Canvaswork Cushion, the idea fell together really quite quickly.
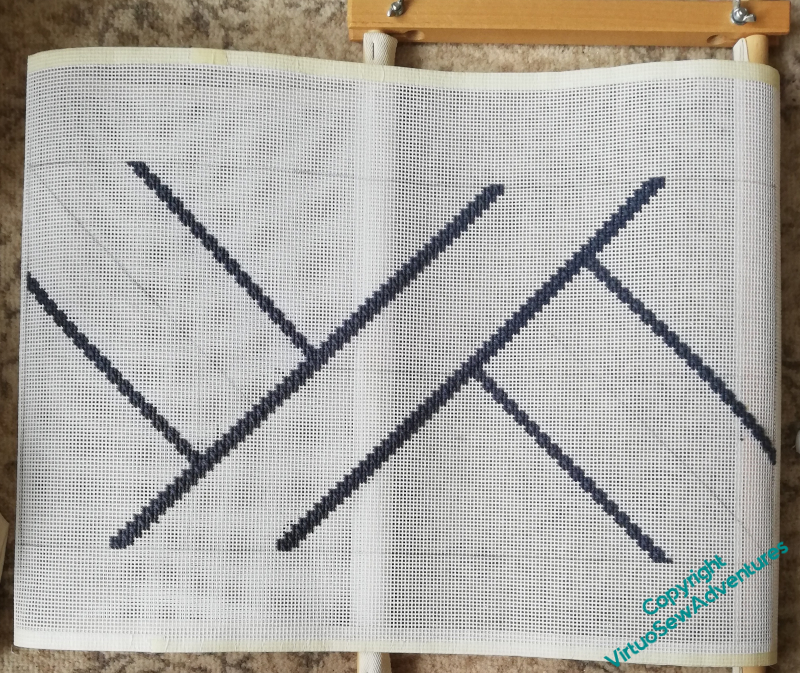
I divided the area into seven sections, one long diagonal and three on either side, and then stitched along those lines in grey wool, using framed mosaic stitch.
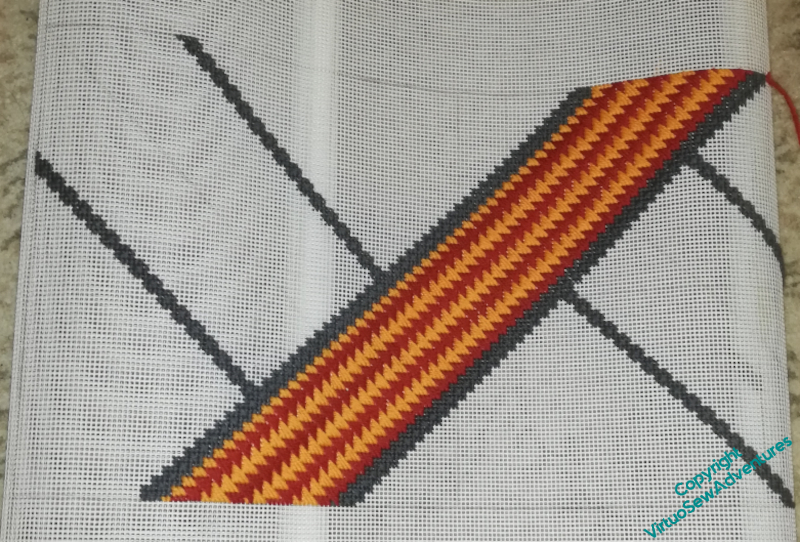
Then I started with the first section. The colour scheme was rather determined by what I felt I had a sufficient amount of thread for, and I decided after some experimentation that I was going to confine myself to diagonal stitches, and what’s more, that the diagonal stitches were all going to slant the same way. I’ve discovered that not all “Tapestry Wool” hanks are created equal, and some are distinctly thinner and sparser than others, so I really don’t need the added difficulty of making stitch directions mesh!
The next episode – Episode 37 – of SlowTVStitchery is now live. It considers the attraction of literary adventures, additional details on the Amarna Family Group, and the preferability of overcast weather for goldwork.
Grape Hyacinths, 2
Having completed all the greenery and removed the satin stitch flowers, I had to put new flowers in. Naturally, that didn’t happen first time, either!
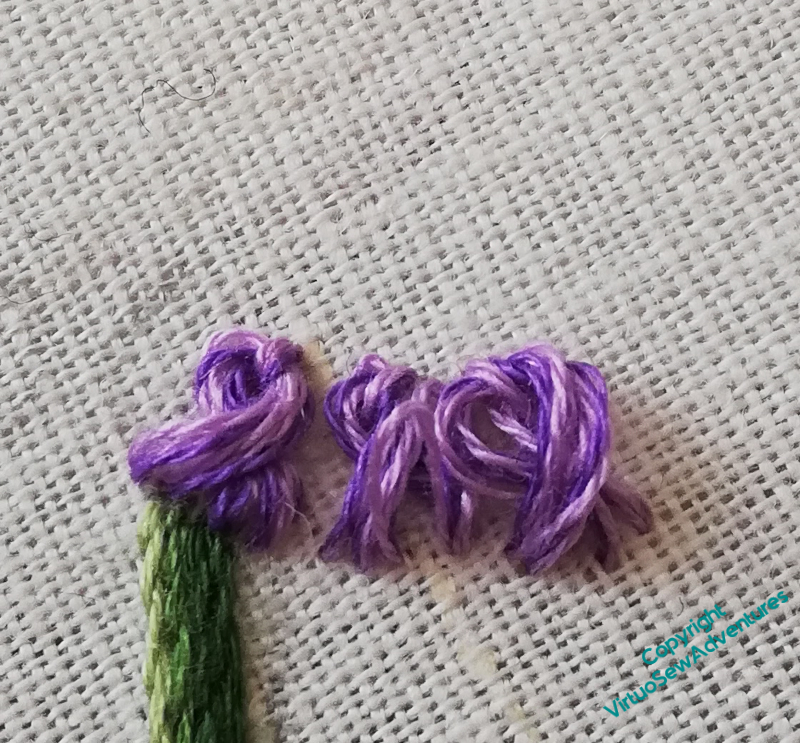
This was my first attempt at the individual flowers on the grape hyacinth flower heads – twisted chain stitches using several different coloured strands of stranded cotton.
I wanted to try something raised, to contrast with the flatness of the stems and leaves, but this, slightly full, version of twisted chain hasn’t really worked. It looks far too heavy for a spring flower!
Out it came, and I tried again.
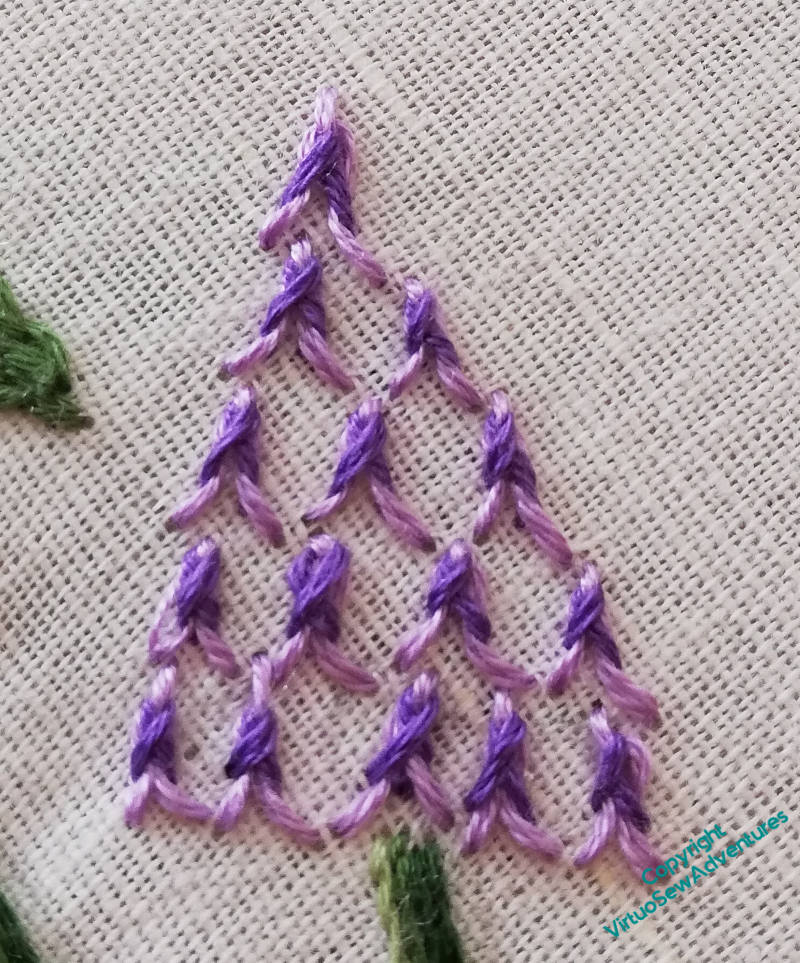
And for my second try, I may have invented another stitch. Again!
This is Fly Stitch topped with Twisted Chain Stitch. What I wanted to achieve was the slight sense of a ruffled skirt at the bottom of the individual bells, and this certainly works well enough for me to keep going, using this stitch, at least until I have a better idea!
All that admitted, I felt I’d ended up with too great a space between the stitches, and of course, I don’t want to try to fit more in, in case I lose the ruffles (as it were!). So I have filled in the gaps with single detached chain stitches.
Of course, I may yet come back and do somethign entirely different. but I decided at this point to leave this in place and continue my experiments!
The next SlowTV Stitchery is now live. Episode 36 tackles the difficulties of the canvas, Reynard the Fox provides a distraction, and there is some tackling of quandaries by changing tack..
Another footstool
Remember this footstool?
It has a cousin, also worked by Grandmama, which has been working hard as the footrest at my mother’s computer desk, and the stitching of which is past recovery.
So the idea is that I should do a canvaswork panel for it, and Only From Stash. After all, where is the point of having a stash if you don’t make good use of it?
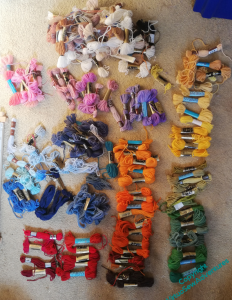
That is all very well – I do have some suitable canvas. Just!
But much of my tapestry wool stash is inherited from others – notice the huge pile of neutrals! – and it might be rather a wild ride to get a 10 x 21 inch piece of sensible 10 count canvaswork out of this selection.
I had intended to do something with Clarice Cliff colours, but as it happens, I don’t have as much leftover of those colours as I thought I had. I’m pretty sure that the pinks won’t figure, and unfortunately the greens are too thin on the ground and too mismatched, as well. Much thought will be needed!
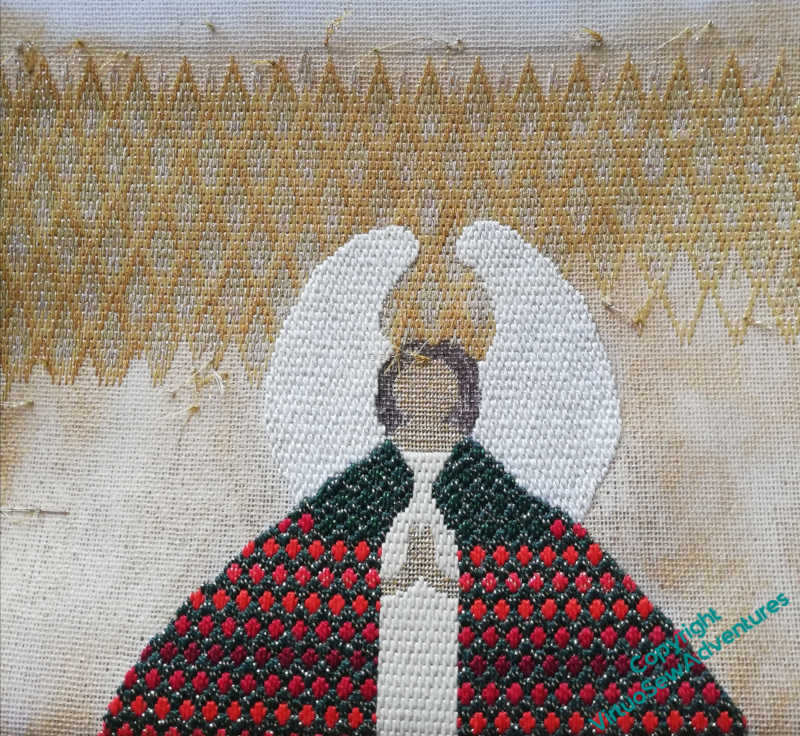
While I was thinking about that, however, I also prepared Episode 35, the first SlowTVStitchery video for the new project, the Canvaswork Angel, in which the Christmas Angel is introduced, and there is some discussion of the detrimental consequences of visual confusion and the delaying effect of Doubts.
Finishing the Clarice Cliff Tote
There’s a reason I don’t do much counted cross stitch these days!
It’s repetitious, and samey, and it doesn’t offer the chance to play with texture and pattern that I get in other techniques.
Oh, wait, that’s three reasons.
In this case, add a fourth – working on aida which is already set into a bag, and a bag, what’s more, that is complete, and since the bottom of the bag is a fold and not a seam, I can’t even unpick it to make it a bit easier to work. This bag has been fighting back with every stitch, and reminding me why I laid it aside.
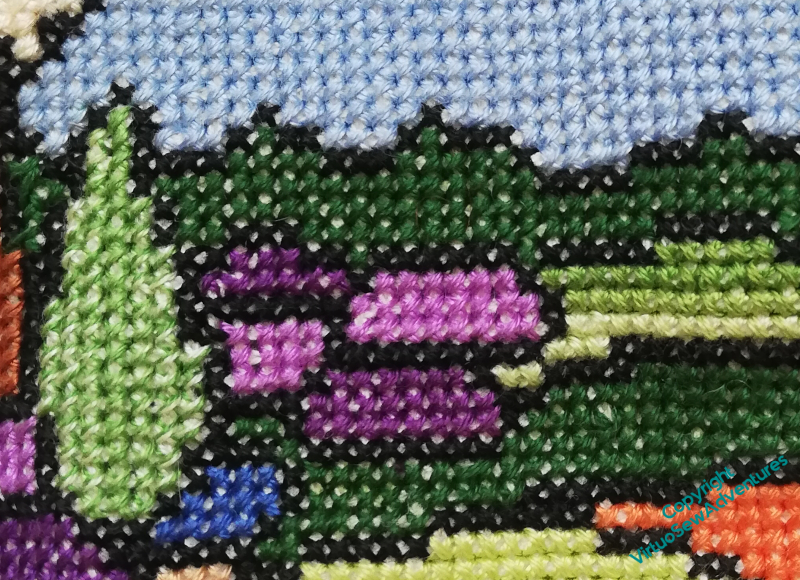
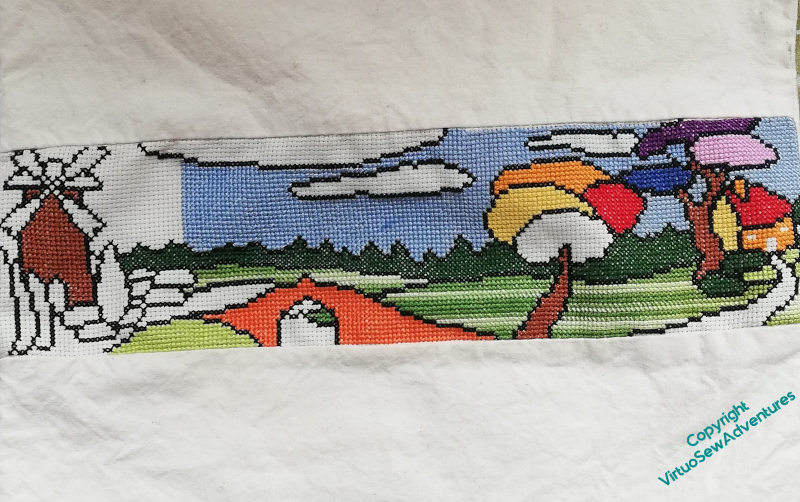
However, it wouldn’t be me, if I didn’t find a way to demonstrate a little bit of variation… I’ve used one of the variegated threads in two ways, once with the two strands in the same orientation and each cross stitched individually, and the other with the two strands in opposite orientations and each row stitched out-&-back.
And finally, after what felt like weeks of doing nothing else but this (which isn’t even remotely true, let me reassure you!), I’ve got the bag finished. All of the aida is covered, even the white clouds. But there are no loose threads on the back, and if I have doubts about some details, I’m not about to undo them now. It’s taken nearly thirty years to get this far!
On to happier things: Episode 34 of #SlowTVStitchery is now live! In which the final corner is finished, and inklings of new ideas arise…
A little box to embellish
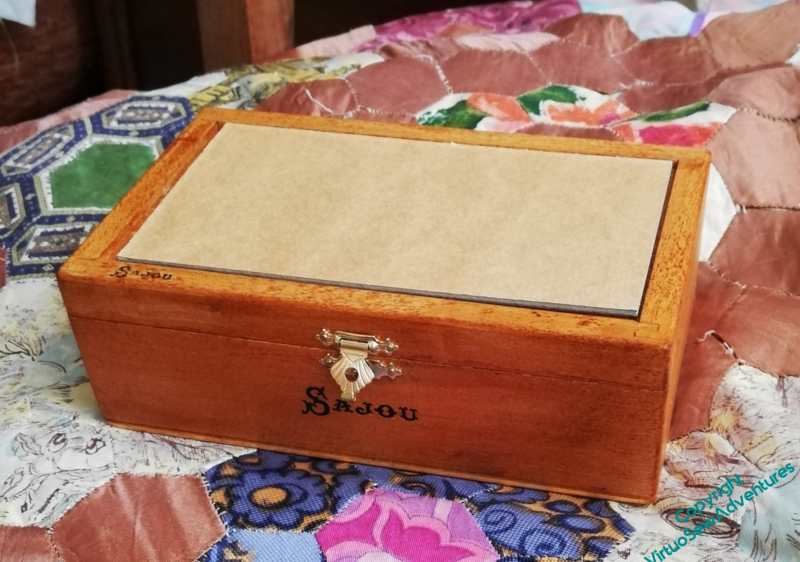
I can’t remember where I got this little box – probably eBay – but it was so long ago, I don’t remember what I had in mind, if anything. It’s about five inches by two inches.
I found it again, and decided it was about time I came up with something to do with it.
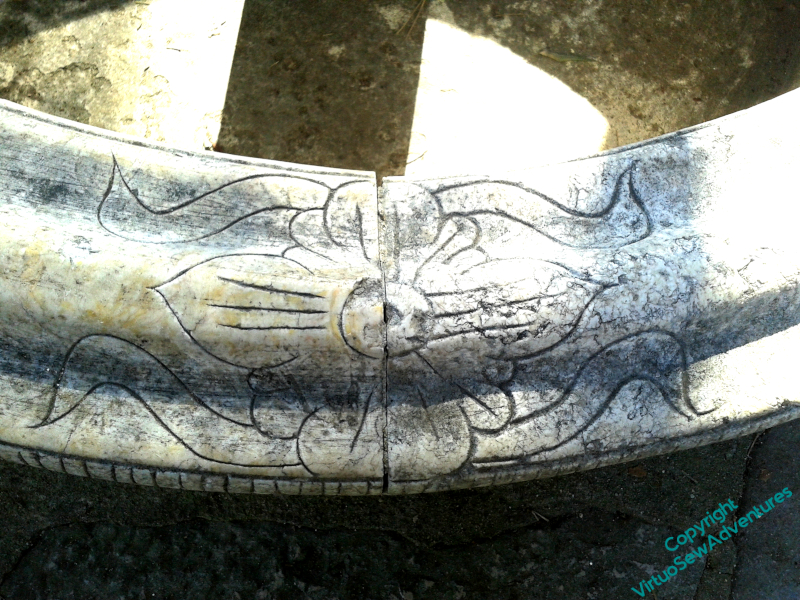
This is a bit of carved stonework I photographed in Lisbon. I should warn you that the finished piece is probably going to be really very unlike this inspiration, because, if you look at the rough ideas below, you will see it is already wandering. And when I started thinking about it, it was going to be surface embroidery, and now I’m thinking about silk purl and wire purl.
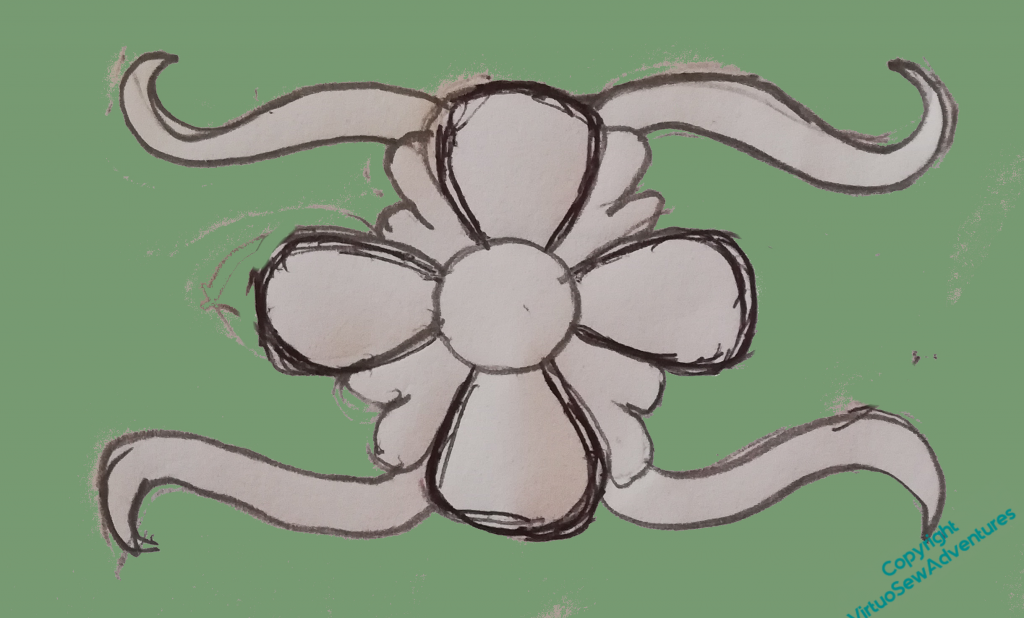
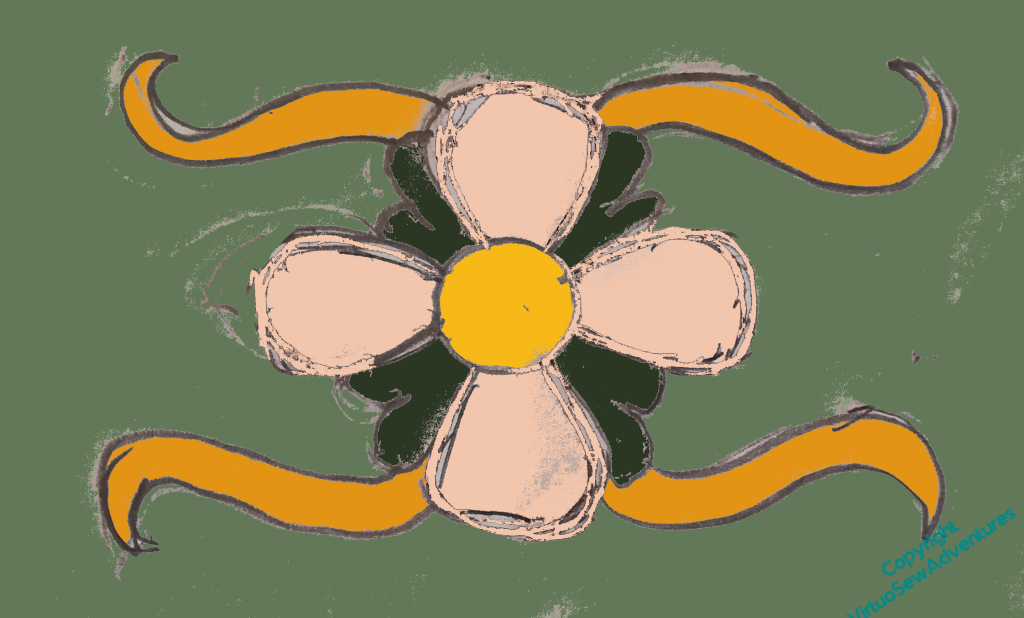
I think the ribbon things are going to change somewhat as well, although I’m not sure quite how..
In other news, Episode 33 of Slow TV Stitchery is now live, in which the penultimate corner is completed, and the contents of Autumn’s book stash is discussed.
Resurrecting an old idea
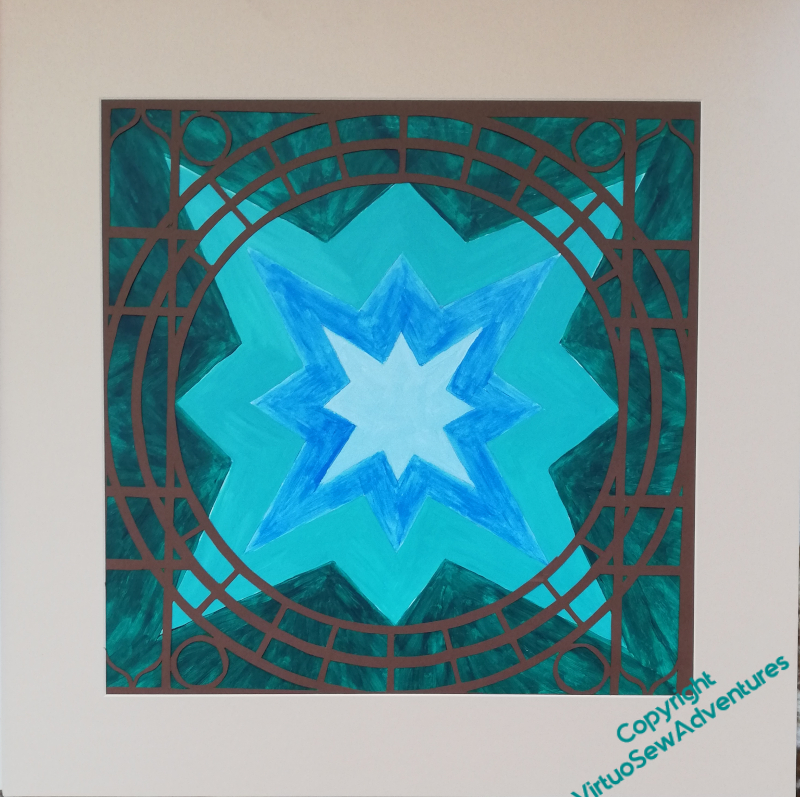
Aqua Angles 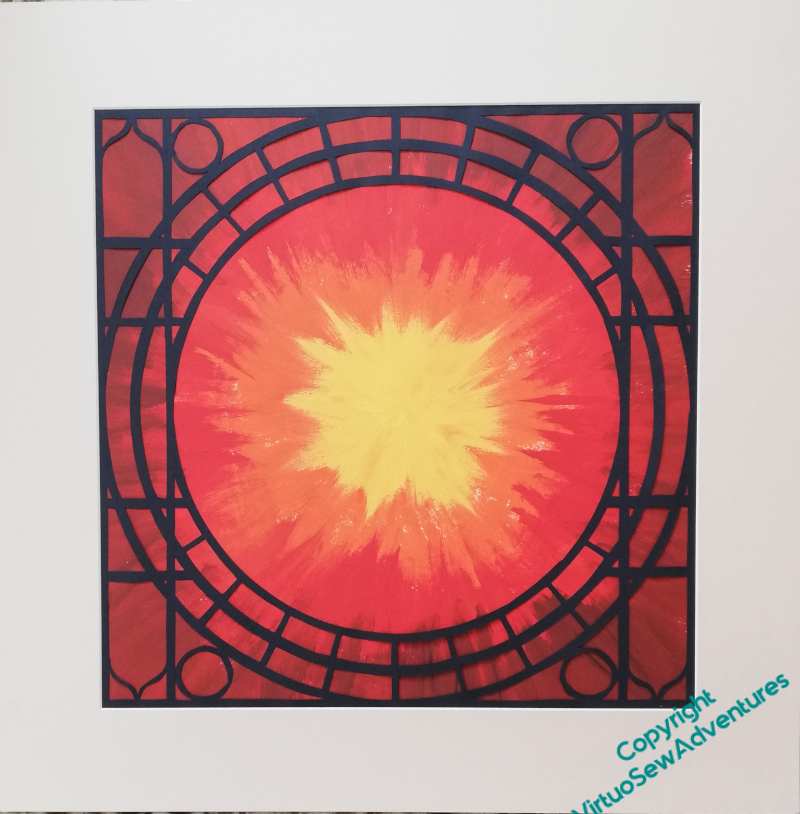
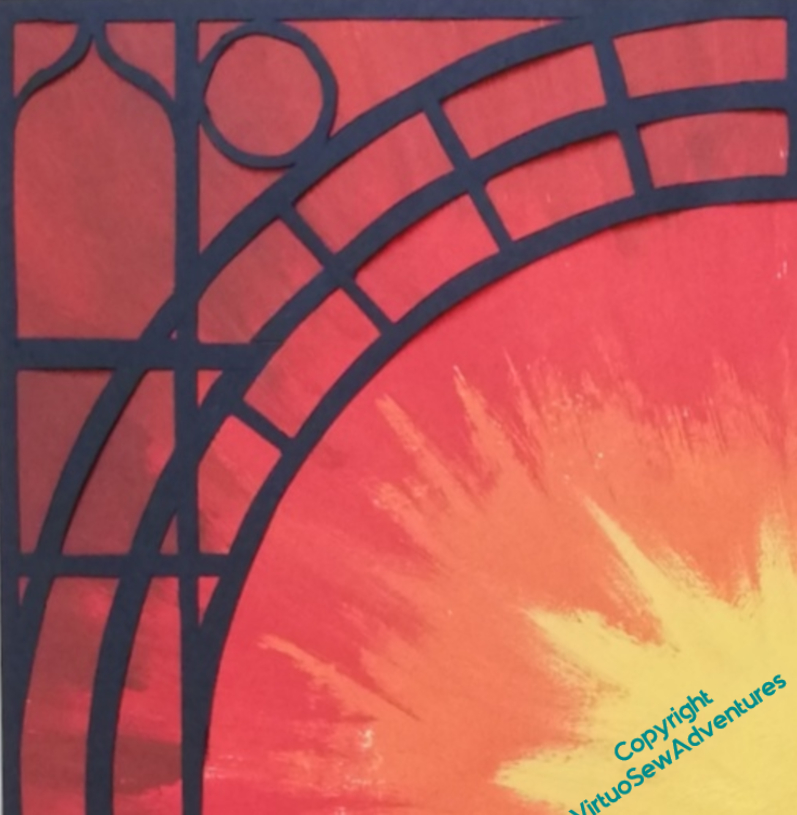
Orange Flare 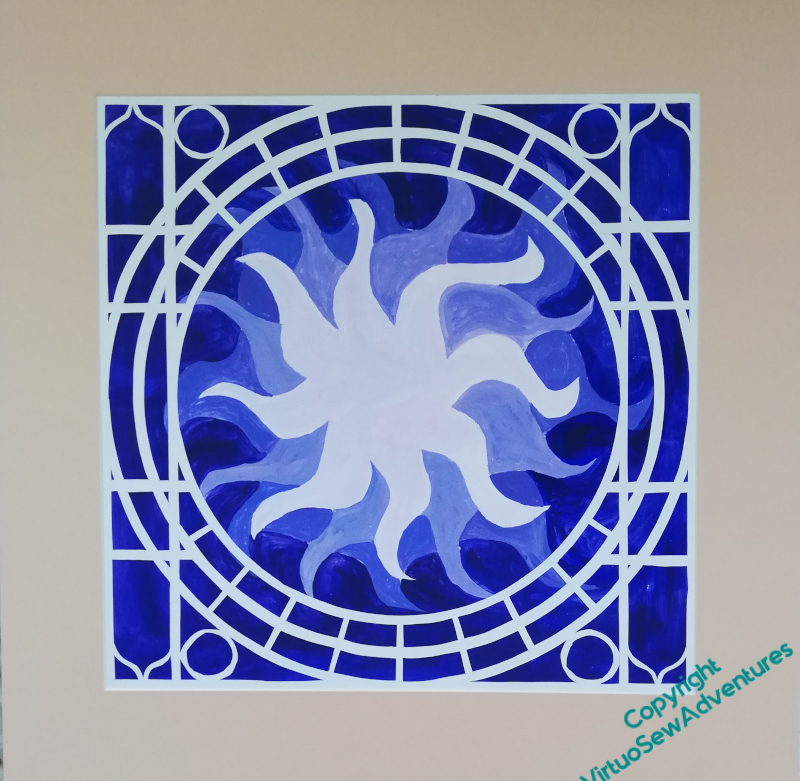
Blue Star

Philip James de Loutherberg.
Copyright The Science Museum
These designs were an idea from years ago, submitted to the Ironbridge Gorge Museum as a possible kit for sale in their shop. Hence the multiple colour schemes – although the orange one is inspired by that famous painting of Coalbrookdale by Night, by Philip James de Loutherberg. The Museum didn’t go for the idea, which is possibly a mercy, as I’ve had a thought since then.
I think it might look altogether more interesting if, instead of reflecting one side of the bridge around the compass to create the corners of a square, I use just one side to make a quadrant design.
My further thought is that, rather than using all tent stitch (as I suspect I would have suggested for a kit), I should maybe use a square canvaswork stitch throughout (maybe mosaic stitch, or cushion stitch) and maybe create a smoother gradiant of colour using several strands of thread in the needle.
However, when I went rummaging for the leftover length of antique cotton canvas I was sure I had left over from a previous project, it wasn’t there. So there is going to be something of a pause, while I work out how much I need, and find somewhere I can order it from.
But in the meantime, Episode 32 of SlowTVStitchery is up, in which details and the upholstery of a stele are considered, and the anouncement is made that Slow TV will continue.
Another UFO
I’ve been finding long-hidden projects again.
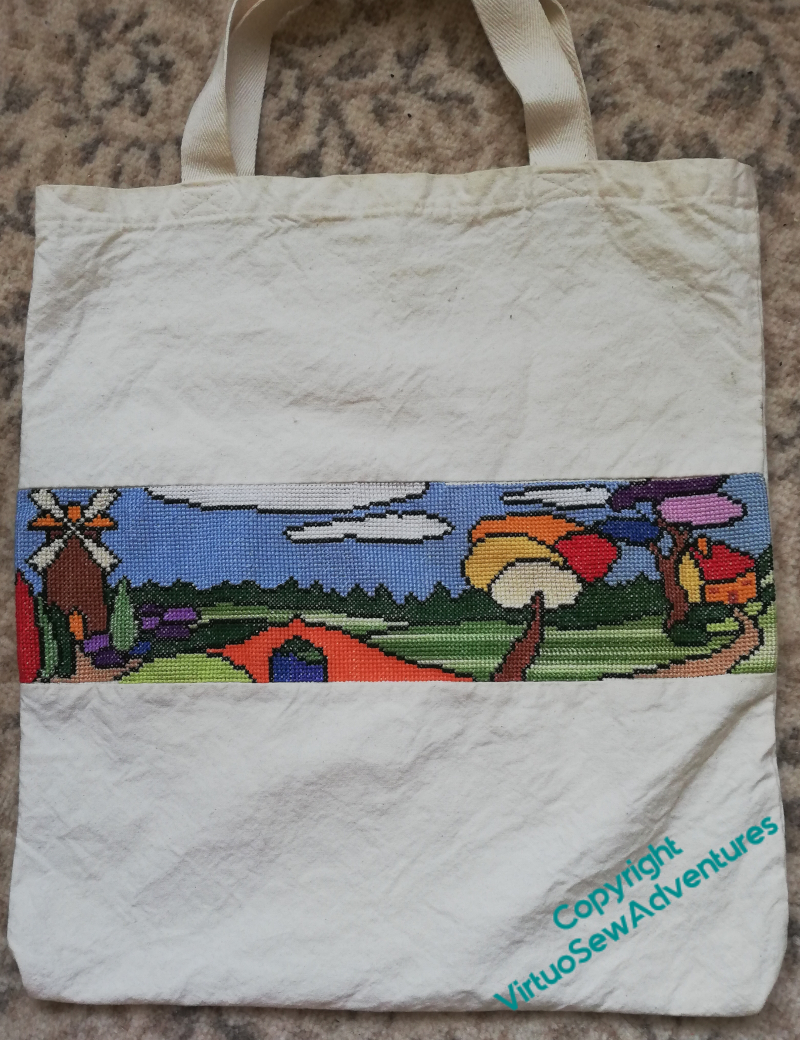
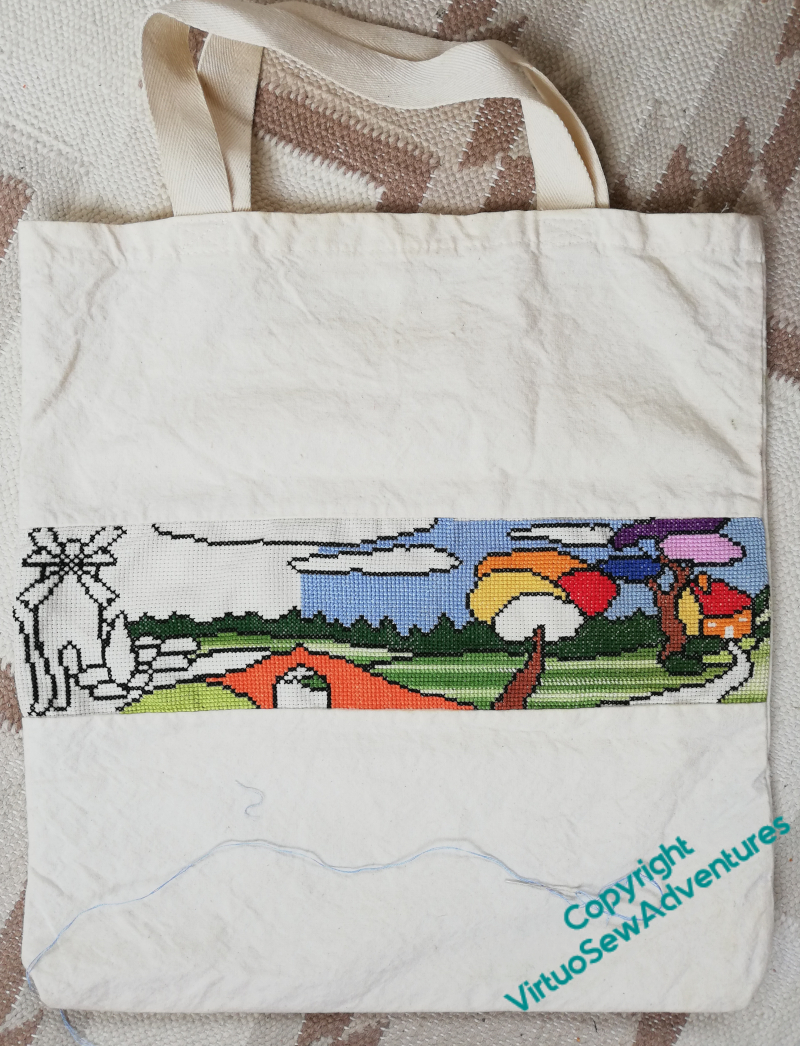
This one is a cotton fabric bag with a strip of aida inserted in one side, which I think was a subscribers’ gift for Needlecraft magazine, some time in the distant past. In DevaStitch Designs days, I created a range inspired by the Bizarreware of Clarice Cliff (with the approval of Wedgwood, the rights holders), and I suspect that my original idea for the design was to add it to the range.

And then something happened and the bag disappeared into a box for what feels like centuries. I’ve found it again, and this time I am determined to finish the wretched thing, and start using it.
It has become clear that the aida is slightly off-grain, but it’s not likely to show when the piece is in use. If I were to make a bag with a cross stitched element I would work the cross stitch separately and apply it afterwords, so that the straight grain was indeed straight.
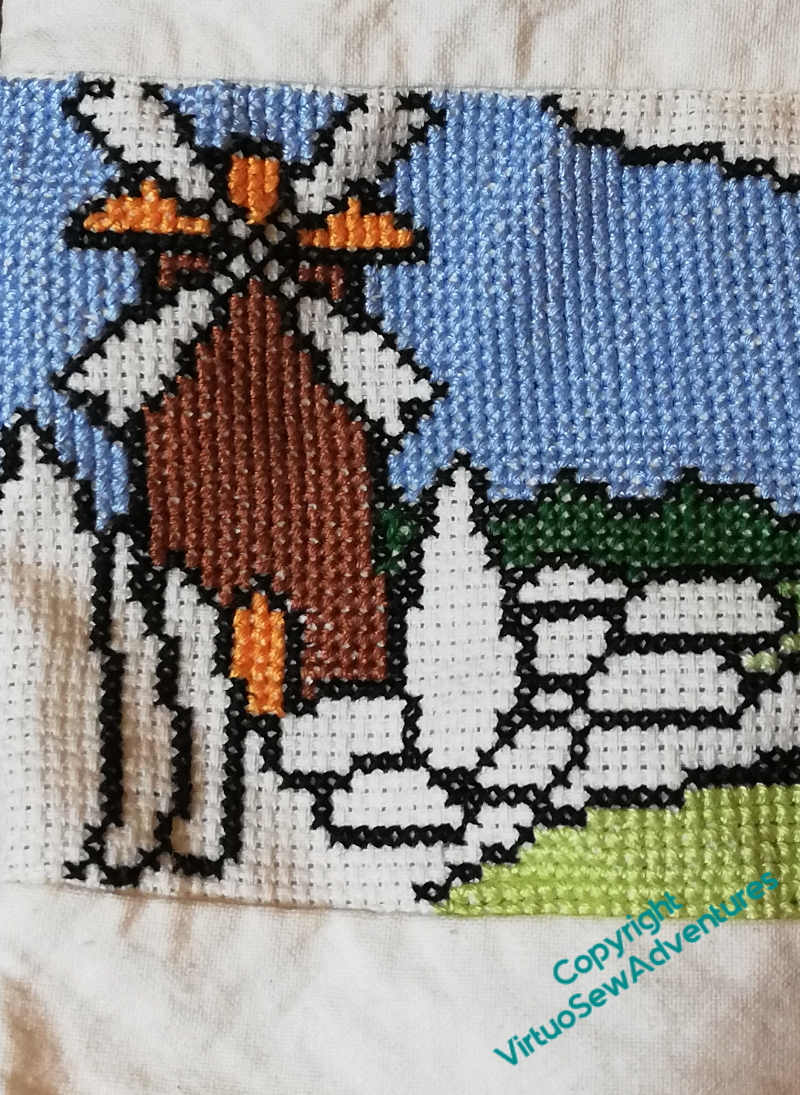
The first thing to do was to finish the black outlines, which are such a distinctive part of the Clarice Cliff style, and which will make everything else simply a matter of colouring in.
I had to invent a bush or two, because my chart didn’t cover all the fabric I had available, but once the windmill and extra bushes were in place I continued with the sky.
Then I got slightly tired of blue and gave myself a bit of a rest by filling in the windmill. I have more to do, of course, but I think it will be quite cheerful when it is finished.
SlowTV Stitchery Episode 31 is now live, in which progress continues to be made, and some thought is given (again) to the eventual mounting of the piece.
I suppose this is a UFO…
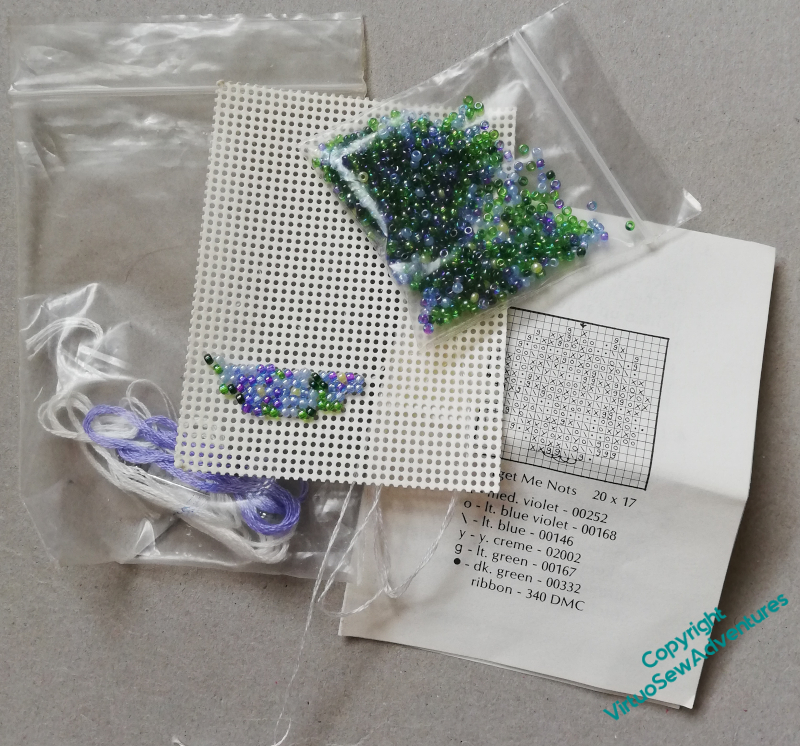
I was looking for something else entirely when I found this beadwork brooch started on a piece of perforated paper. It must be close to thirty years old, like the Japanese Embroidery kit, so it’s been languishing for a while.
There seems to be a bit of a theme of tidying up UFOs in odd moments while I’m working on the Amarna Family Group, so it didn’t take me long to decide that it would be a good idea to finish this one while I’m about it!
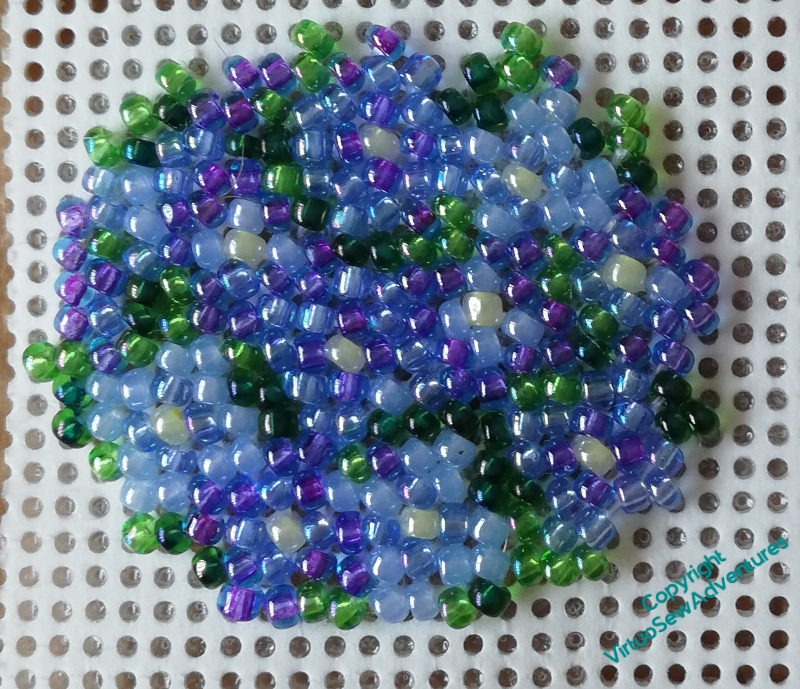
Nor did it take too long to finish the beadwork, once I’d found my bearings on the chart and learnt how to distinguish the different bead colours end-on, as well as side-on. The pale blue, lilac, and dark lilac look much the same when most of what you see is the hole through the middle.
The only time I’m happy to use glue with my stitching is on the back of pieces like this, so I painted the back with glue and trimmed the paper to size, adding a felt back and the brooch finding.
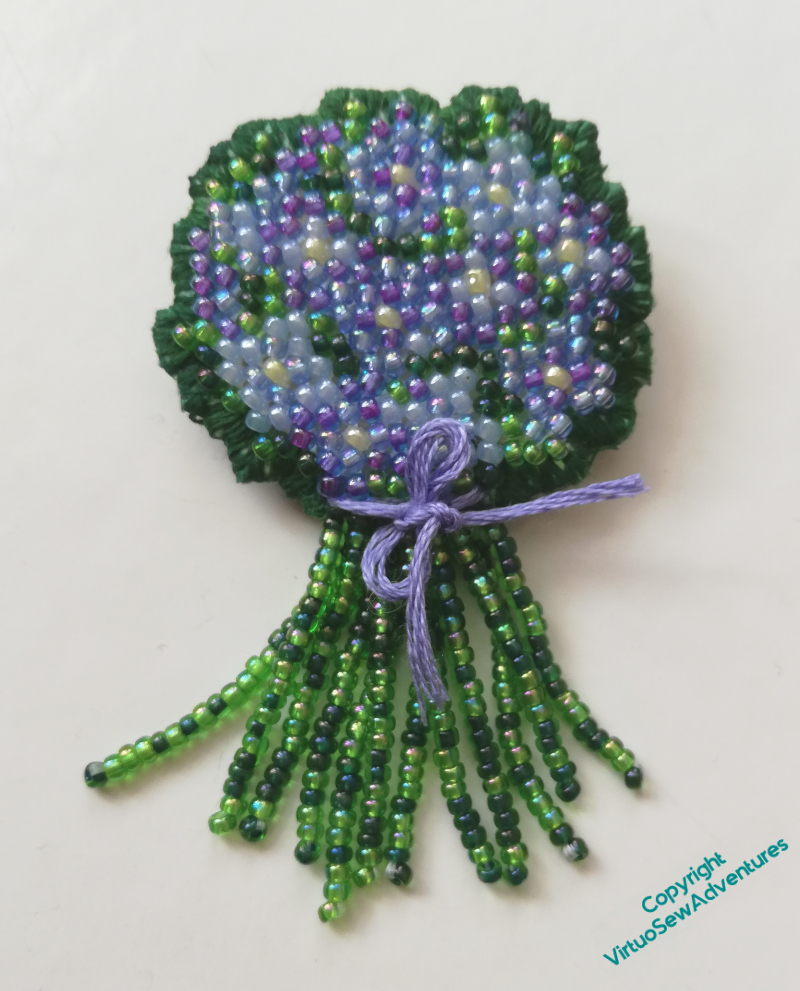
Once I’d done that, however, I thought that as a brooch, it would look a bit half-hearted. So I decided to add some stems – just randomly strung green beads from the leftovers, using proper beading thread and a beading needle.
Then I oversewed the edge in dark green, filled in the gaps with inktense, and tied a tiny bow at the front. I don’t know whether the original designer would approve, but I like my version better than theirs!
In other news, Episode 29 of Slow TV Stitchery is now live. In which it is noted that two needles are not less trouble than twenty-seven, some further thought is given to the presentation of the finished piece, and a milestone is reached…
Textile Tours of Paris
A little while ago, we were in Paris – a trip planned last year, and carried on with, sanitiser in hand, in spite of the certainty of quarantine when we got home.
Amid a variety of adventures (we were staying with family) we went on a Textile Tour of Paris with Rebecca Devaney.
Ultramod – buttons 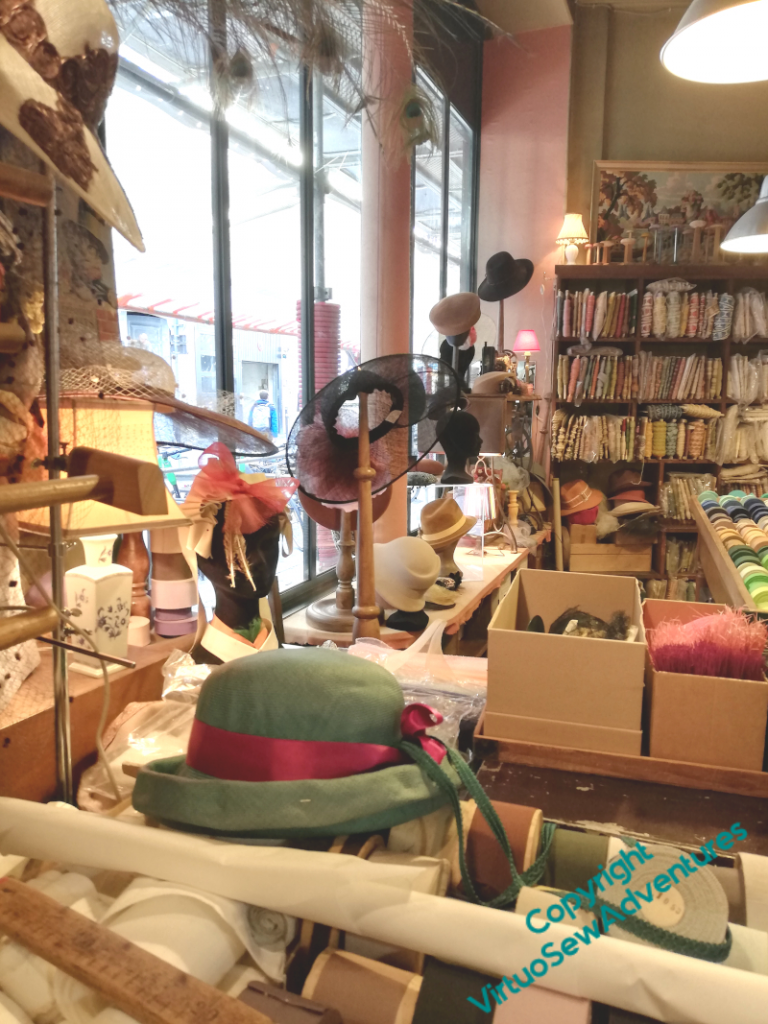
Ultramod – Hats 
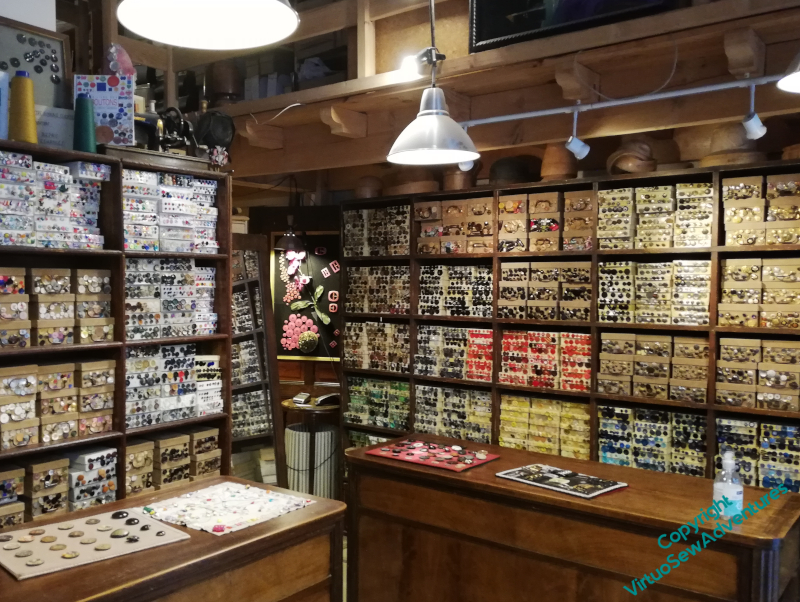
La Droguerie – Colour wall
We met at Metro Quatre Septembre, and Rebecca guided us to the various shops, telling us about the history of the atelier system and the particular histories of the various shops as we went. Even my non-embroidering engineer uncle found things to interest him – there was a poster for a manufacturer of sewing machines which pivoted (to use the modern term) to aero engines during the first world war! – but in fact, all of us found something to respond to our particular interests.

Mokuba Collection 
Au Ver A Soie 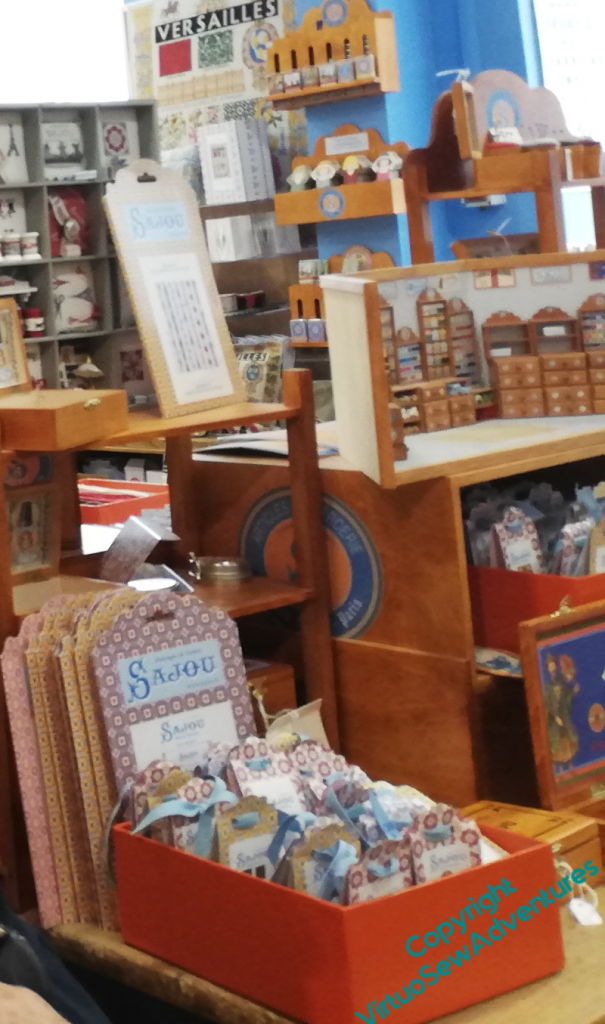
Boutique Sajou
The shops are all very different, and now I’ve visited them I will be better prepared for another visit, perhaps with plans in mind. What they share is knowledgeable and enthusiastic staff – in fact one of those in Au Ver A Soie is doing an RSN course. Online, in these days, naturally, but it was a great delight to see someone else’s work, if only on their phone.
If you get a chance, when travelling is easier, do take a tour with Rebecca. She’s delightful, knowledgeable, and enthusiastic, and the extra bits and pieces of information you have, not to mention some sense of all the interesting materials you can find, are all well worth the effort.
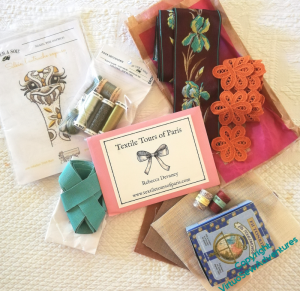
As you can see, I was fairly restrained in my purchases, because I had not travelled with extra suitcase space, or planned in advance. The grosgrain ribbon matches the stone in my engagement ring, the brown ribbon with irises is for a hat, and so is the orange flower lace, the silk thread from Au Ver A Soie and the fil dentelle from Sajou are just to play with, and the little ostrich kit is my entertainment for the period between Christmas and New Year!
And in other news, Episode 27 of SlowTVStitchery is now live, and discusses reaching an important turning point, and the delights of solving embroidering puzzles.