
Category: General Embroidery
Getting Started on “Evelyn Rose”
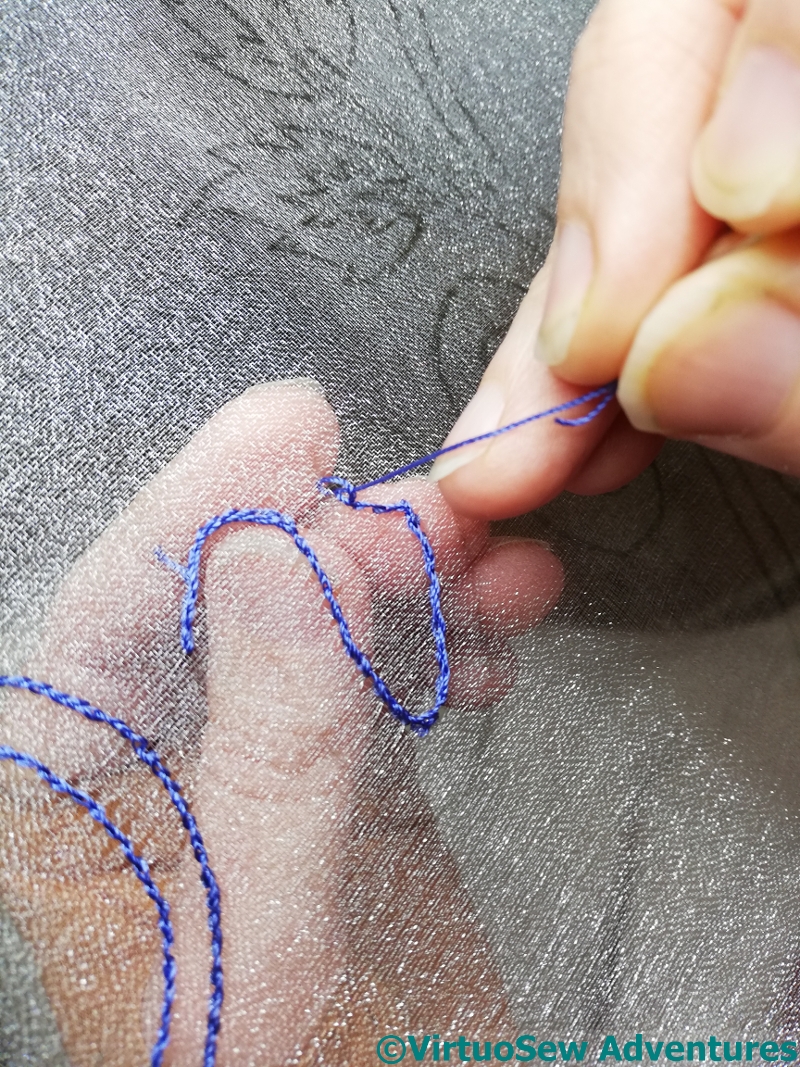
I found a gauze with a slight glint to it, stretched it on my frame and drew the design on to it. And at this point, the primary challenge I was going to face made itself felt – finding the angle from which to see the lines on the fabric, so that I could do the stitching. Add in the glint on the fabric, and sometimes I could see the lines, sometimes I could see the fabric, and sometimes I wasn’t sure I could see either… I knew it would be this difficult, by the way, but I thought the end result would be worth it!
The stitching is going to be very simple, mainly satin stitch (yes, I know!) because the main characteristic I want here is the magical effect of the embroidery floating above the backing surface.
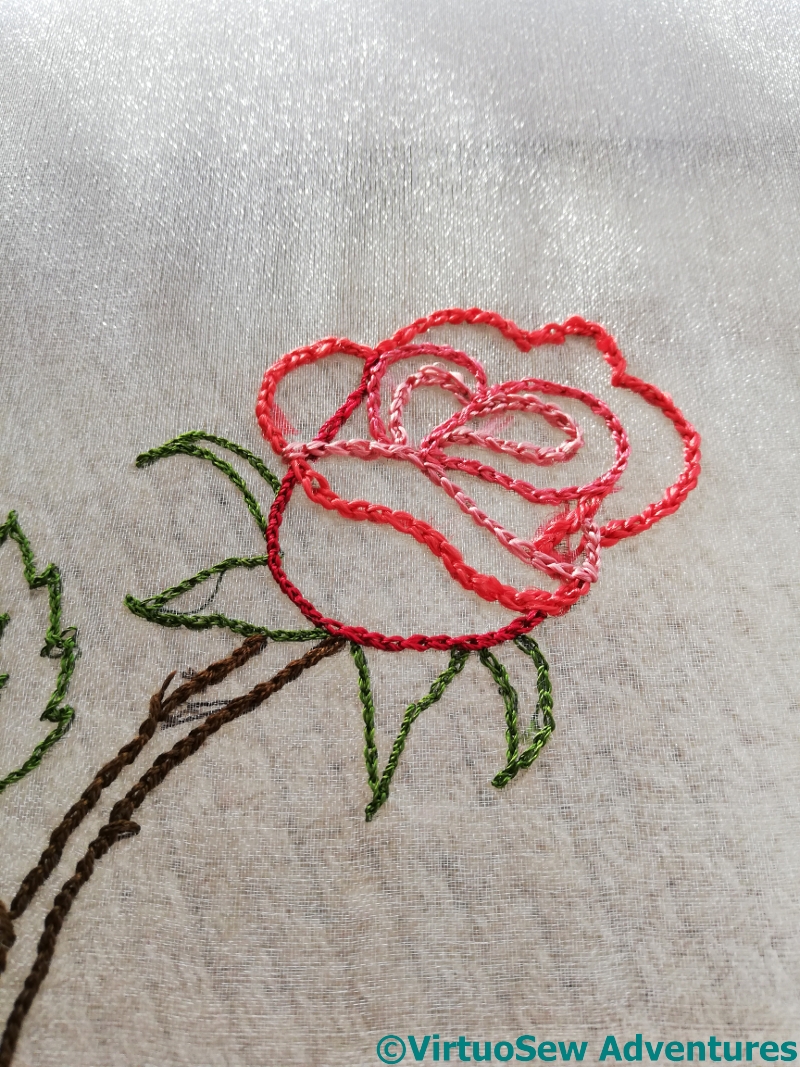
Obviously, the first thing to do was to outline every element. I’m using a mixture of silk thread, some vintage, and some from Thistle Threads courses.
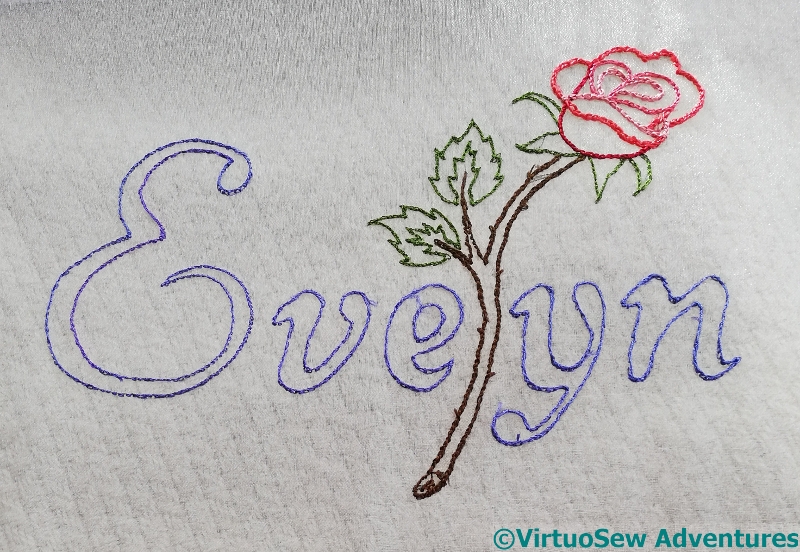
So here you are – all outlined, and the thorns already in place on the stem. You can see the fabric I have over my worktable through the gauze in this picture, and you can see that glint in the sunshine as well.
The next episode of SlowTV Stitchery – Episode Seven – is now up. It explains why “Slow TV Stitchery” and offers memories of an astronaut. I hope you enjoy it.
A Commission for an Embroidered Panel – “Evelyn Rose”
Earlier this year a dear friend and his wife produced a baby girl, who they’ve named Evelyn Rose. We were, of course, thrilled for them, and sent many congratulations, and even managed to speak to them (they’re in a different time zone). During that conversation, they said, “We love what you do, and we’d love you to do something for Evelyn!”.
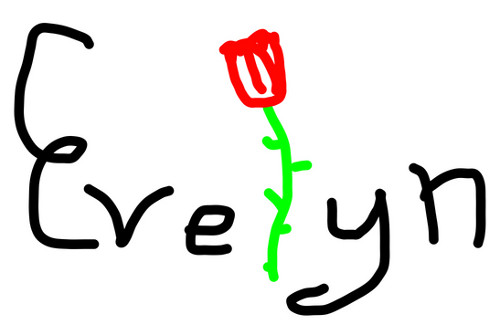
Well, I didn’t have another commission looming, and the Faience Necklace wasn’t framed up ready to go yet, so that fell very pat. I asked what they had in mind, and this is the sketch that came back.

That gave us a lot to think and talk about. I played with a variety of typefaces, and finally settled on a cursive style. Then I thought about roses. My first thought was stylised canal art roses, but they never have stems, so I thought some more. Unusually for me, at this point I got out my paints, found some photos of roses, and started experimenting with simplifying them and really understanding the forms of them and the way the petals fold.
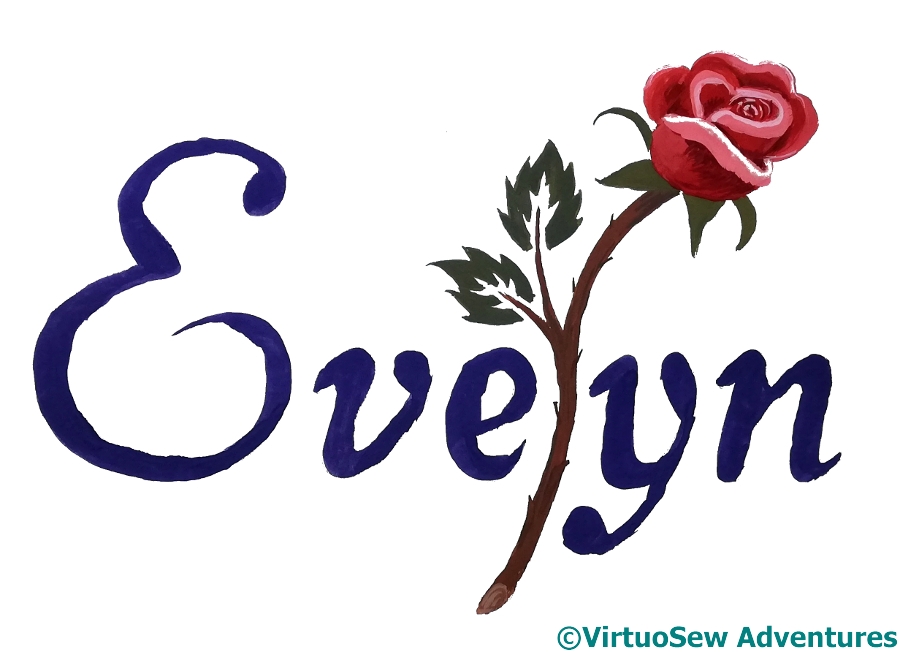
I ended up with this basic design – the name in an elegant cursive font, and the “l” replaced by a single stemmed half-open rose. Then I thought of the embroidery on gauze I experimented with a few years ago. It seemed to me that this was a perfect opportunity to play with this technique, and it has the advantage of producing something sufficiently grown up that in 20 years time, Evelyn probably won’t be embarrassed to have it on show…
Episode Six of “Slow TV Stitchery” is now up. Please take a look, and ask me any questions that occur to you…
Traycloth finished at last
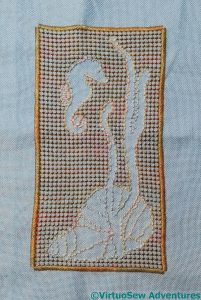
I started this traycloth years ago, largely to experiment with the pulled work stitch I used as the background of the decorative panel.
The idea was to have a sandy background against which the shells, seaweed, and seahorse would be set, and although I enjoyed doing it, it isn’t the most successful of my embroidered experiments. It feels a bit lacklustre, but at the same time, I can’t say I’ve been filled with enthusiasm by the idea of doing anything substantial with it.
While I thought about the details, to see whether I could find something that would work, I hemstitched around the edge, so I will have a useable, if not enchanting, traycloth.
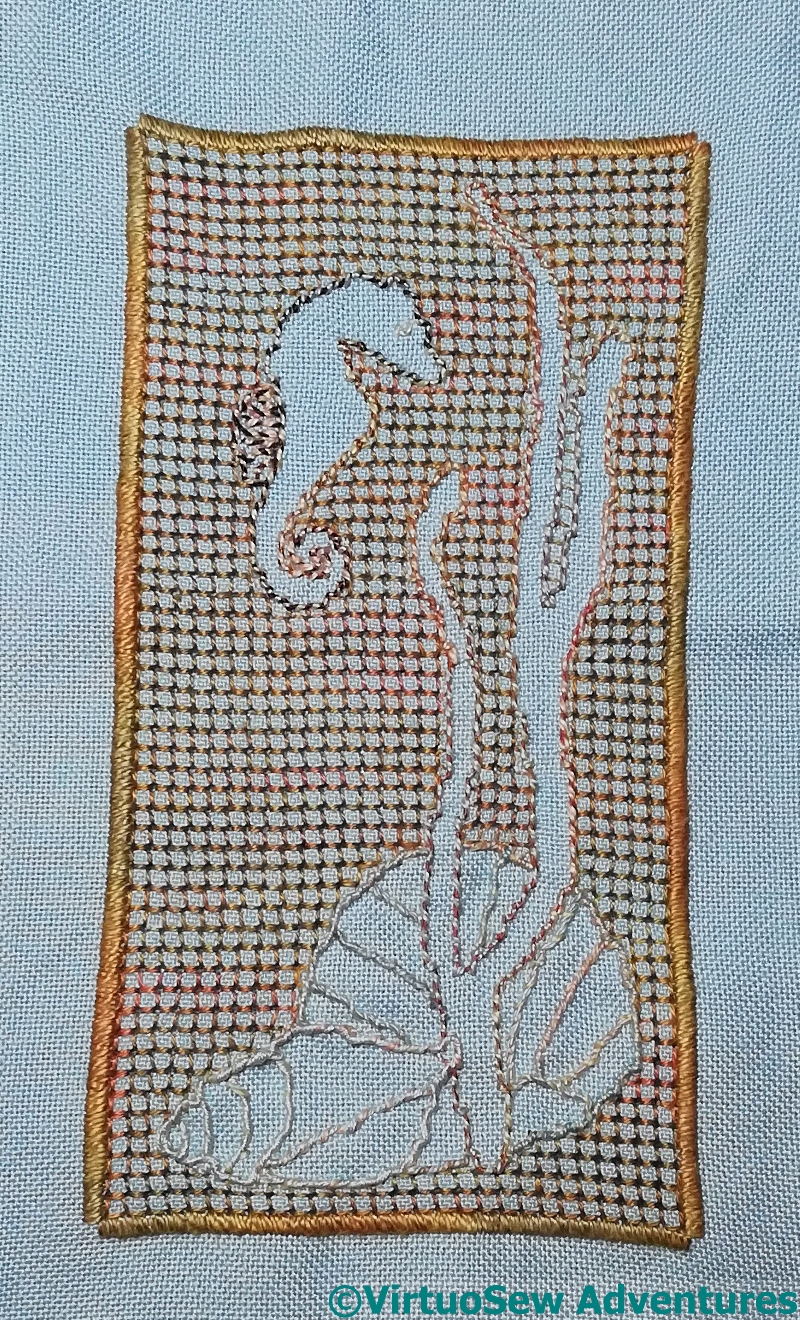
Then I thought hard. Maybe something could be done to differentiate the various elements without actually unpicking them all. The upshot is that the backstitched outlines have been whipped with a different colour of thread in each case, to pull out the differences a little more.
It still isn’t wholly successful, but it is now a usable traycloth and out of my welter of Unfinished Objects which occasionally leap, unanticipated, out of boxes I thought contained something else, to hit me in the face.
And that is most definitely a Good Thing!
A Source of Inspiration (2)
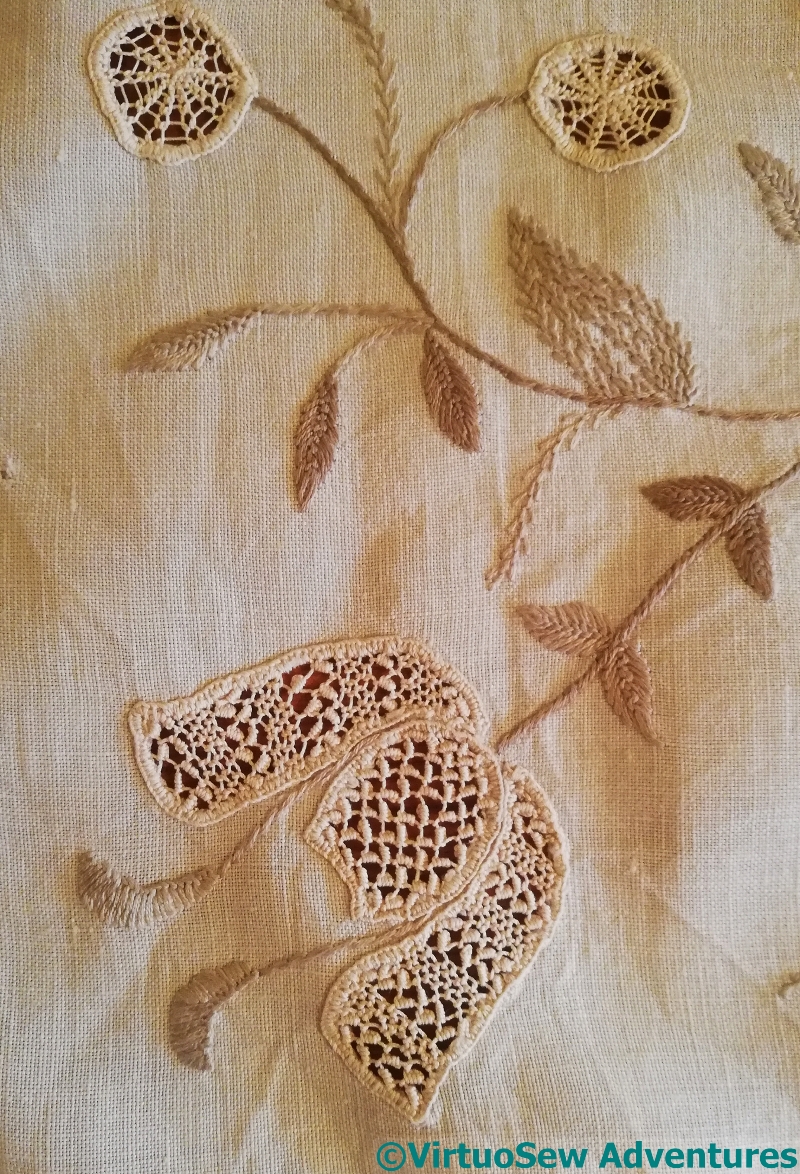
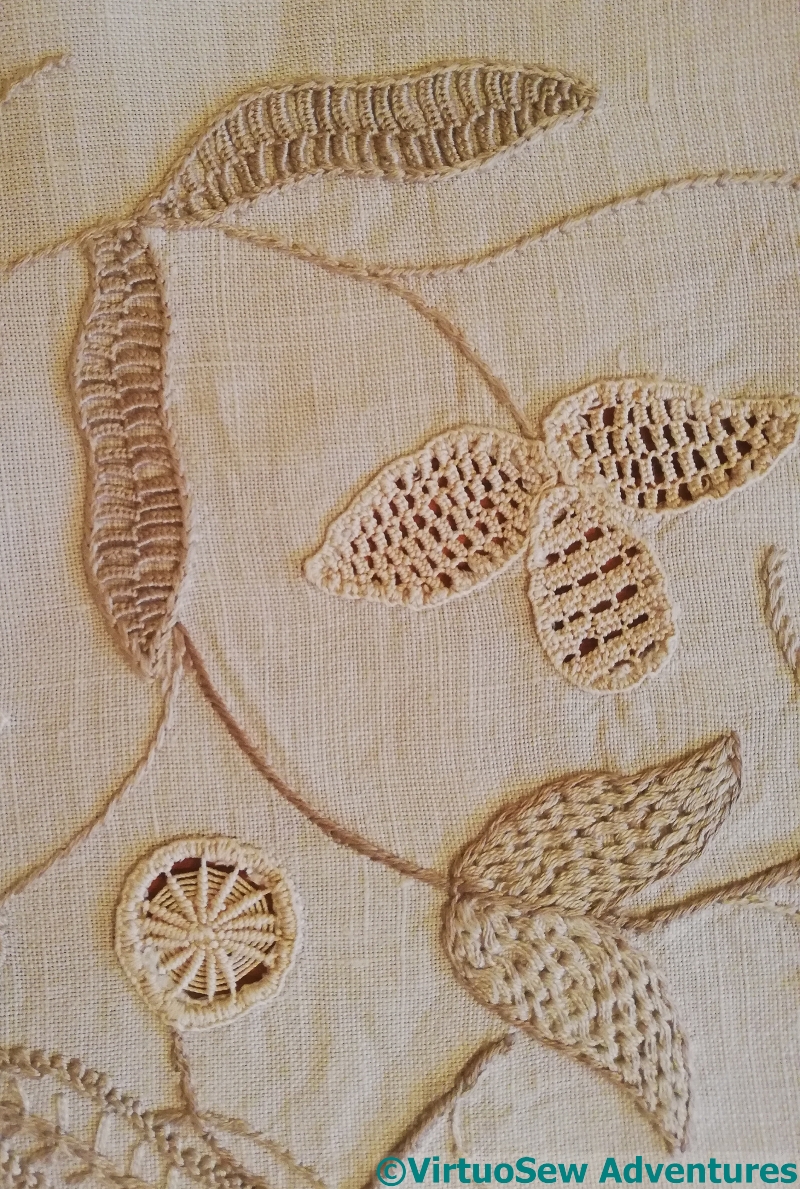
The Spiders Web Wheels in this case aren’t Spiders Web Wheels at all, but a needlelace variation. I think they are both worked in a spiral, and I’m not absolutely sure that they are the same: the slight difference in appearance may be purely a result of a different working tension or spacing.
I’ve only just realised that the small leaves aren’t worked stacked fly stitches, but in close, long-armed feather stitch. In fact feather stitches and their variations show up a lot in Grandmama’s embroidery – she must have enjoyed them!
I don’t think it has ever occurred to me to work needlelace stitches in bands, as she has here, but I can see myself trying it, one of these days! I do have a book, somewhere, full of needlelace stitches, ready for when I have a suitable project and the opportunity to Experiment…
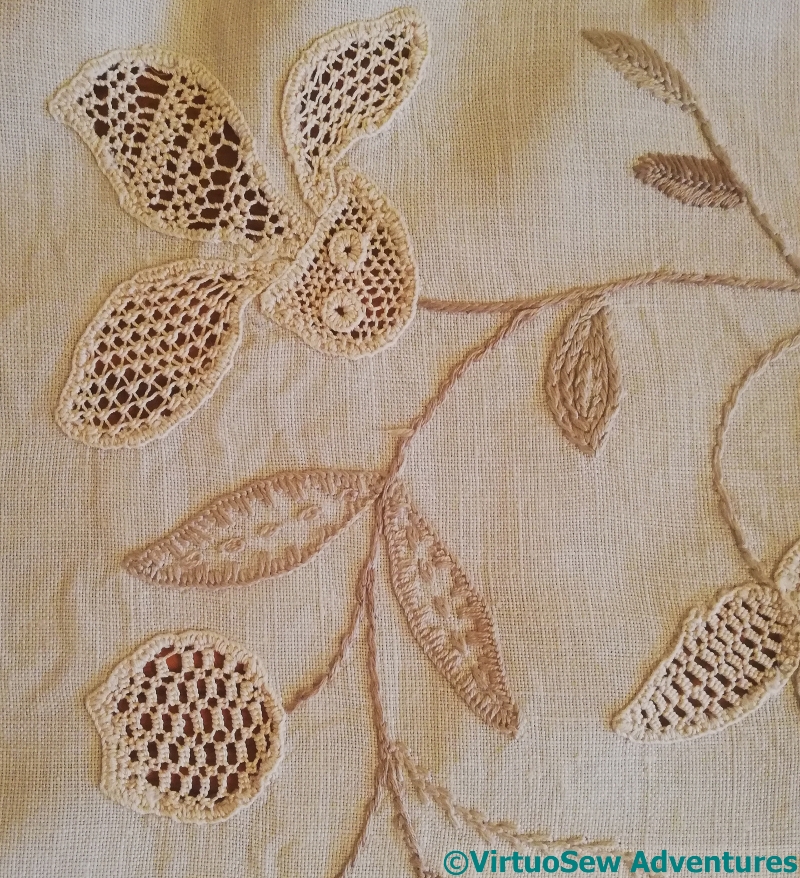
When I was working on the lifebelts for the ship in “Leaving The Tyne”, I used the technique of a buttonhole wheel on thread, and discovered just how fiddly they are to make. Grandmama’s are even smaller and fiddlier, and sewn onto needlelace and not fabric!
The two embroidered leaves in the middle remind me just how effective simple stitch length variation can be. Much as I love my complex, textural stitches, sometimes all you need for a border is a blanket stitch variation!
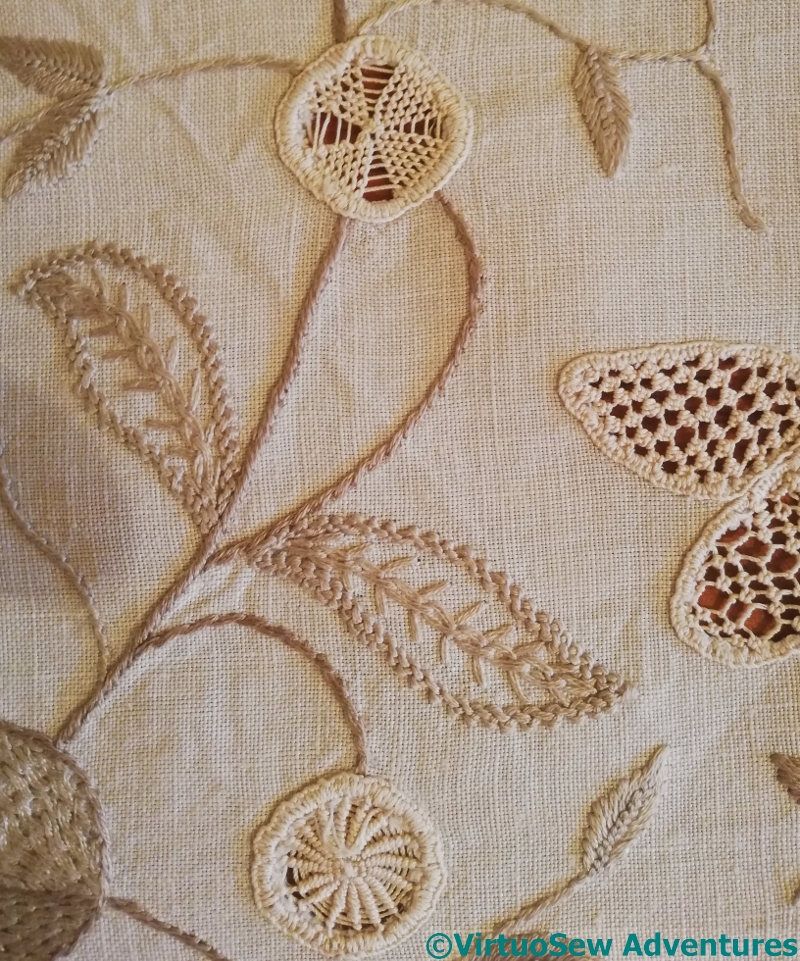
The variations possible to fill a circular shape seem to be endless, don’t they – a sort of beginning of a Maltese Cross at the top, a really dense Spiders Web at the bottom.
And this time, I think the two central leaves are in Wheatear Stitch, outlined with very close and small feather stitch outlines.
I really must try some of Grandmama’s stitches one of these days. Somewhere in the house I have the notes she took on a course, and I’m pretty sure they included sketches of stitches I haven’t seen in all my shelves full of needlework books….
A Source of Inspiration (1)
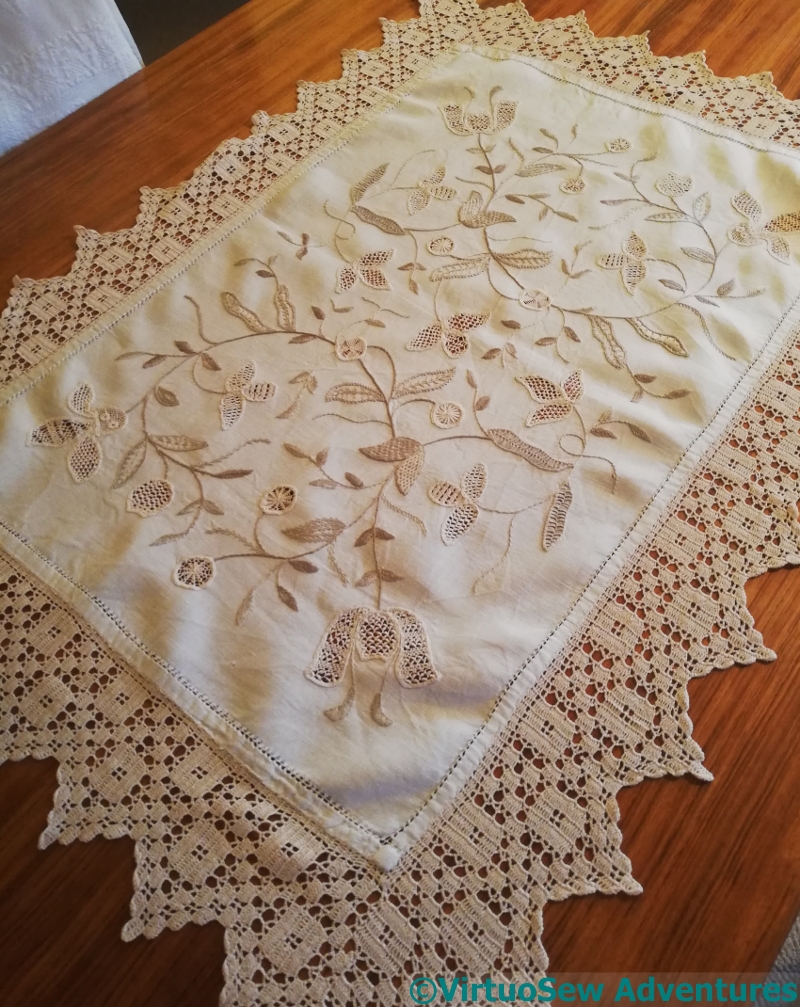
You might recognise some of the motifs on this teacloth..
Grandmama worked it, we think during the War, and it involves some motifs I used for the Coat of Many Colours.
In fact, even if I don’t use the exact motif, this teacloth, and a tablecloth (a sort of extended Director’s Cut!) are frequently the first places I look for inspiration when I am trying to put together a design for something stylised but floral. I suspect Grandmama would be laughing like a drain, as the family puts it, at the mere idea of being an inspiration all these years later!
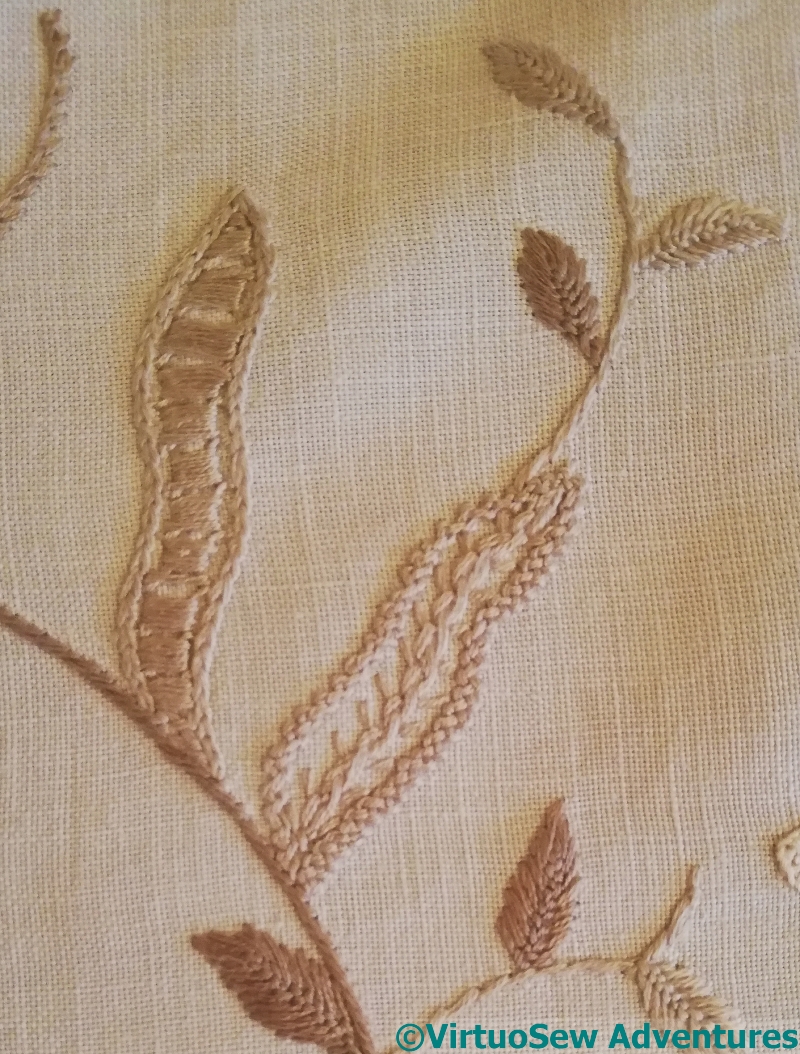
I’ve also learned an even greater respect for textile and embroidery historians, examining and cataloguing design and stitch use over the years. It’s all too easy to assume, complacently, that one’s first assessment of a stitch was correct, and I learnt when I looked at this photo that I was definitely wrong about the second of these two leaves. It might be Wheatear, but I suspect I will have to look at the back to be sure.
And I’m far from convinced that Grandmama didn’t simply make up the other one as she went along. It’s a whipped or wrapped Something, but it looks like a more complex composite stitch to me…
Whipped Spiders Web Wheel as a needlelace stitch, a sort of floral motif of needlelace, and a pair of leaves in the top left that I thought for a moment should have been cut away. However, looking more closely (aren’t smartphone cameras really useful on occasion!), I see that the edging isn’t buttonhole, but chain, so, no.
And that pair of leaves in the bottom left? They’ve been puzzling me for a while. The stitch looks a little as though it’s a whipped or wrapped stitch. Maybe stem stitch worked over foundation stitches?
More on the Robin’s Backing
The point at which the four seam treatments joined looked a little untidy, so I decided to cover it with Something.
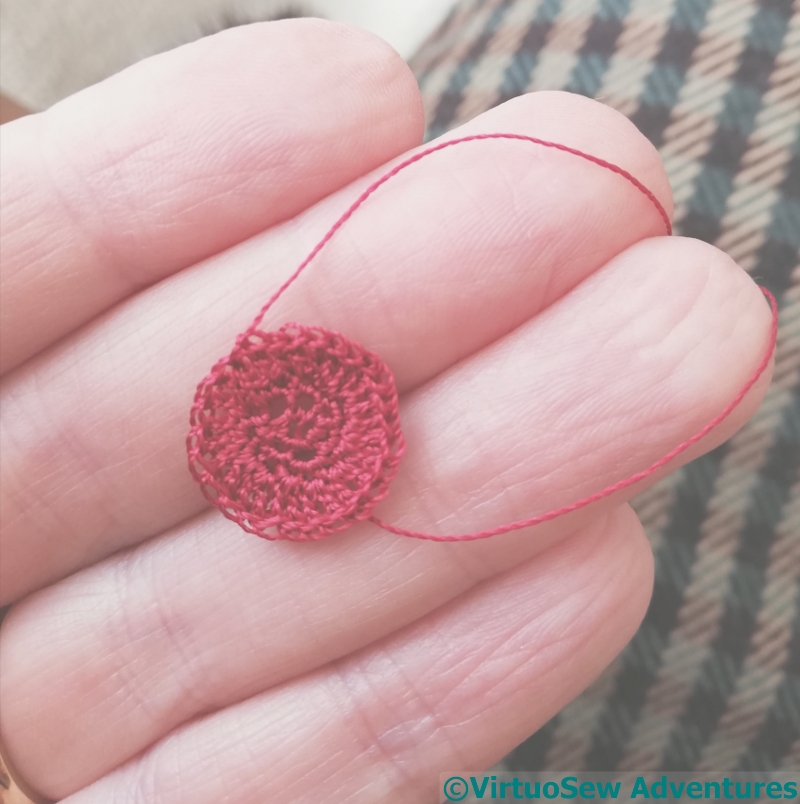
After some thought, and given that I don’t have a box of ready-to-go trims and buttons for the purpose, that Something turned out to be a disc crocheted using Soie Gobelins, a fine steel hook, and my magnifier.
I felt a little cross-eyed when I’d finished, in spite of the magnifier, but satisfied with it, all the same!
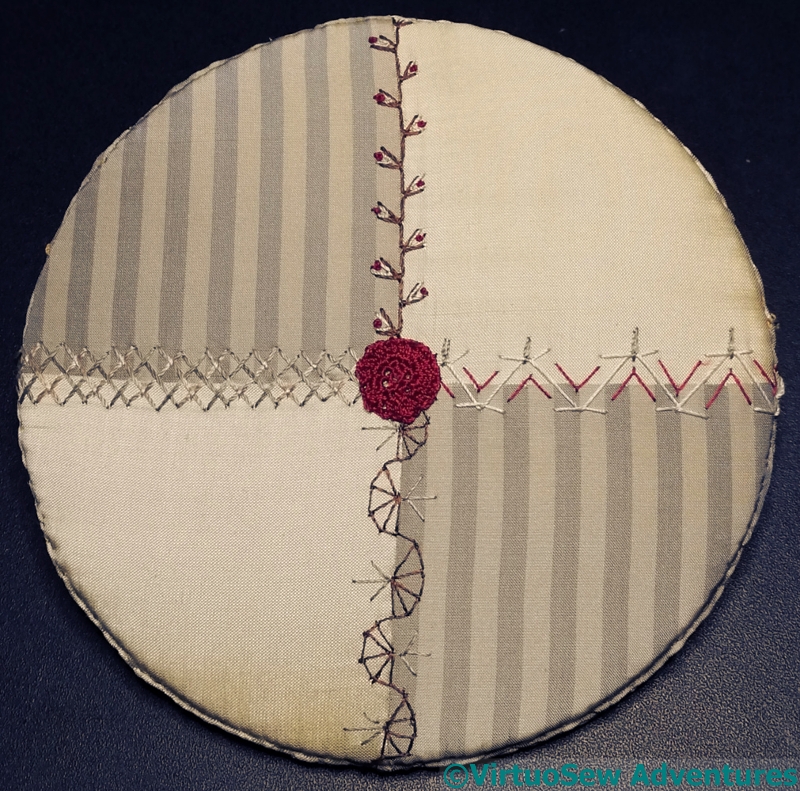
Then I only had to attach my little disc over the centre point to camouflage the meeting point of the seam treatments.
Once the Tame Crazy Patchwork was completed, I gathered it over the padded disc of card that matches the one the Robin was stretched over, and ladderstitched the two discs firmly together.
Using silk sewing thread. My, how my attitudes have changed since I’ve done all those Historical Embroidery projects!
I need to provide a hanging loop and cover the edge with cord, and then the Robin will be properly finished at last!
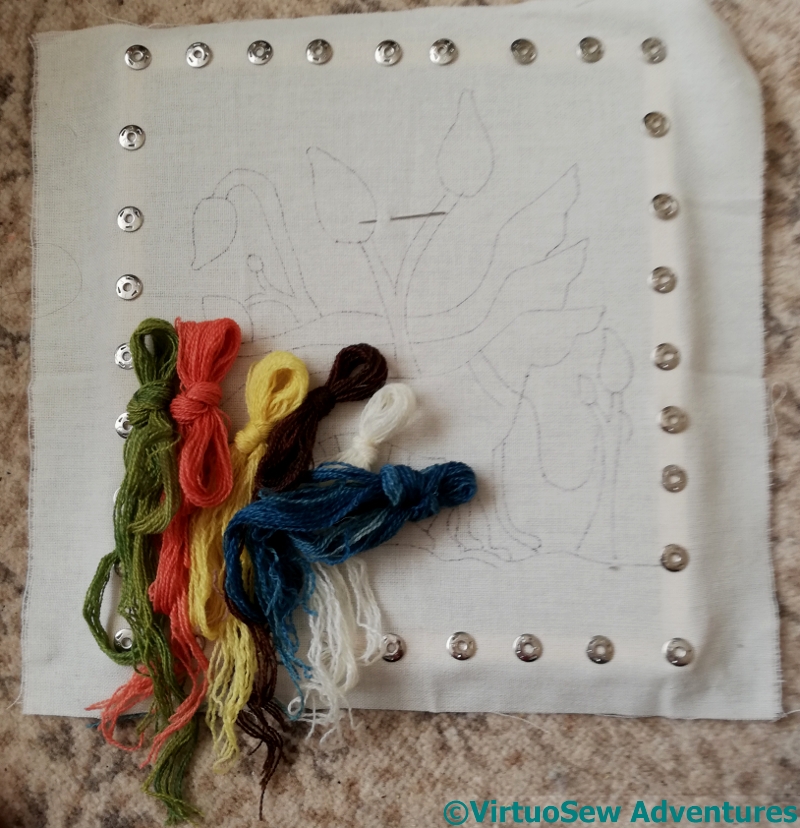
Finishing the Hounds
The next task was to work the outlines and the ground.
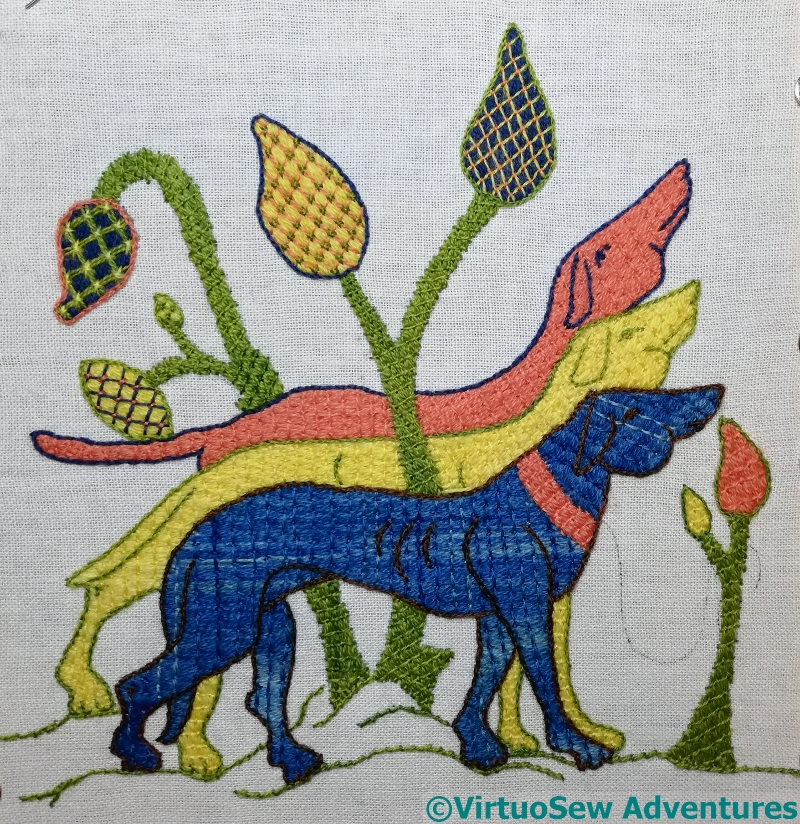
Each hound is outlined in a contrasting colour, as is each leaf shape.
The outline colour is also used for the little details – mouth, eyes, ears, and at the point at which I took this photo, I’d stitched all the ground (in twisted chain, which I don’t think is at all historically accurate, but it was fun!) but not yet outlined the tree trunks.
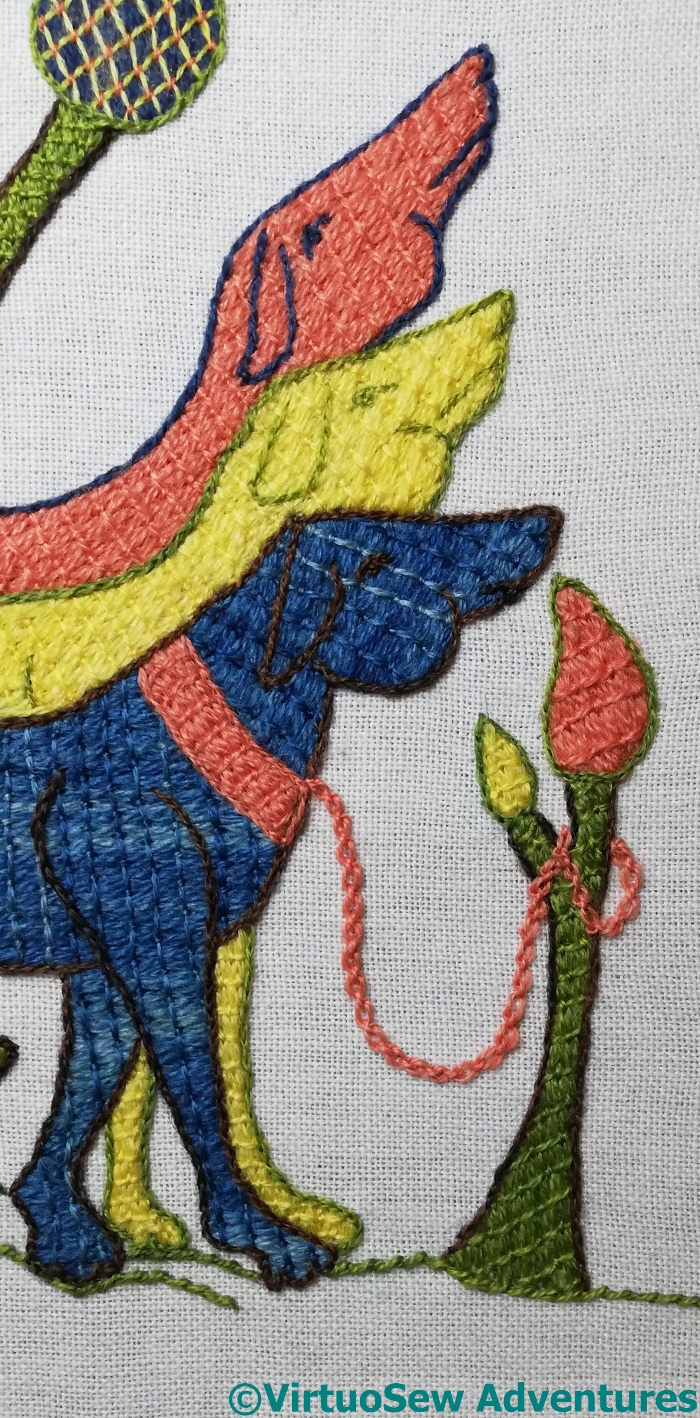
This photo gives a sense of the effect of the chocolate brown outlines around the green trunks, and affords you a nice close up of the leash on the front hound, worked in cable chain stitch, very small and neat. This is another one where I doubt the historical accuracy, but I was so pleased to find myself thinking up ideas like that I was in no mood to spoil the fun.
I don’t usually go in for such overheated ideas as New Year Resolutions, working on the principle that if I want to change something, I don’t hang around waiting for the new year to do so. However, stitching the hounds has given me something a bit like one – I need to go back to my first love, to the effects of stitch and thread, and the use of them to denote the textures or the ideas I want to convey. Let’s see how that pans out!
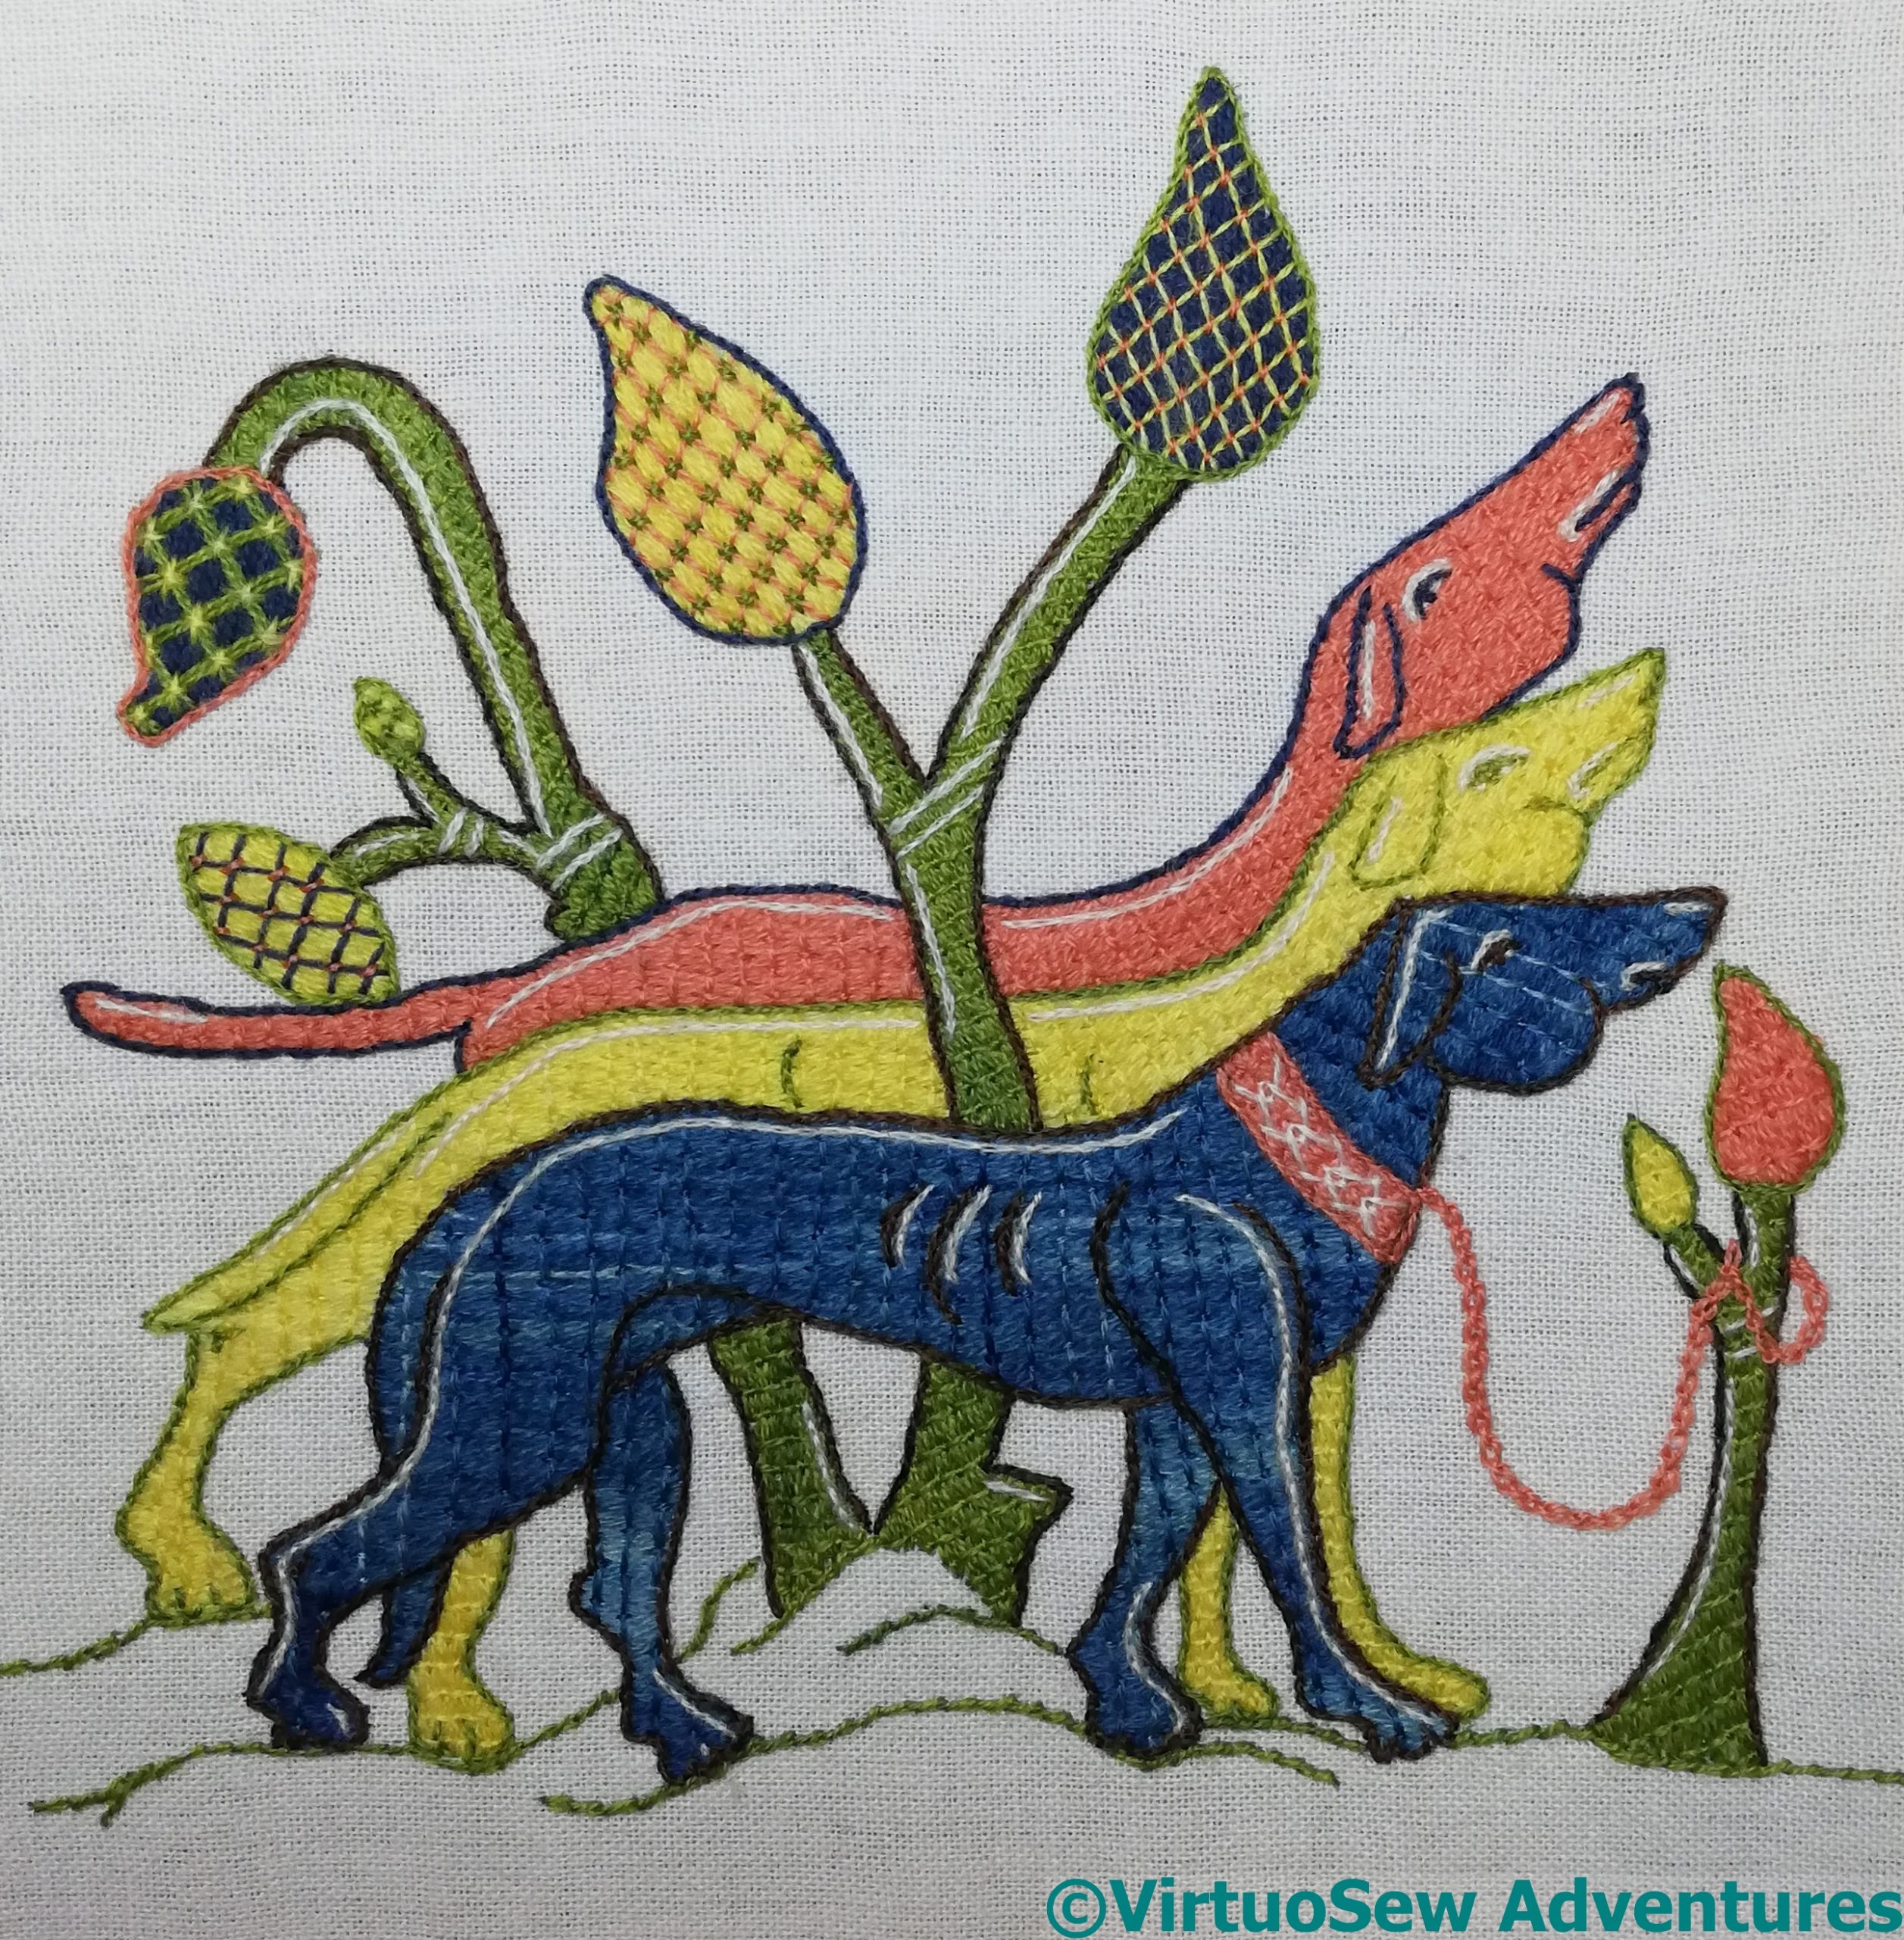
I give you The Three Wise Hounds, design by Tanya Bentham, stitched by me. I didn’t quite finished them by Twelfth Night, but since Epiphanytide lasts until Candlemas, on the second of February, I think I can get away with it!
Stitching The Hounds
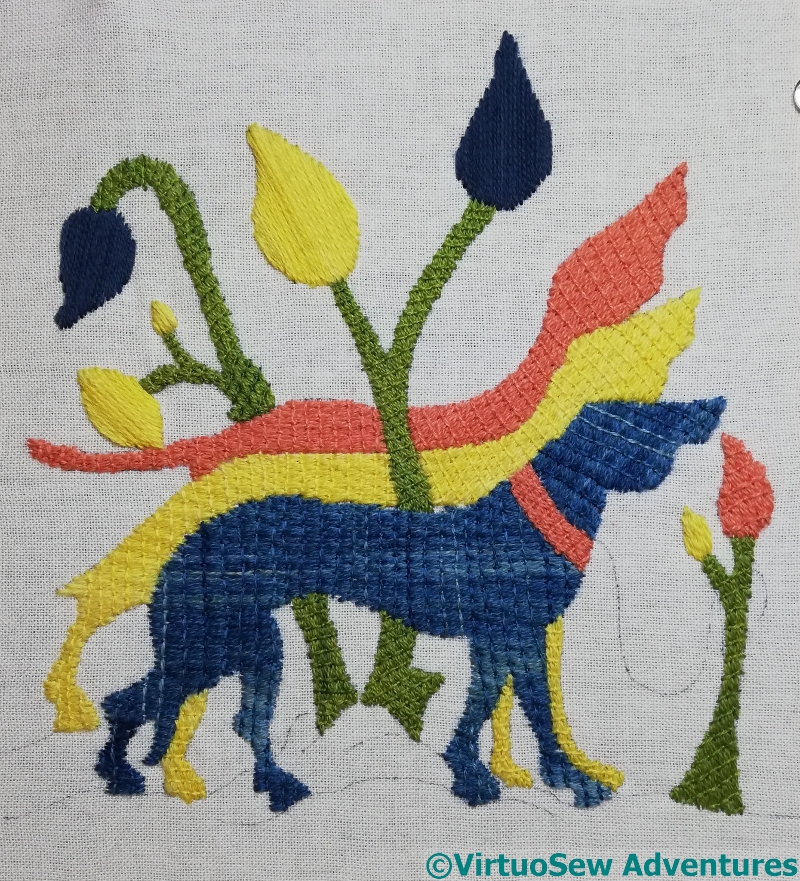
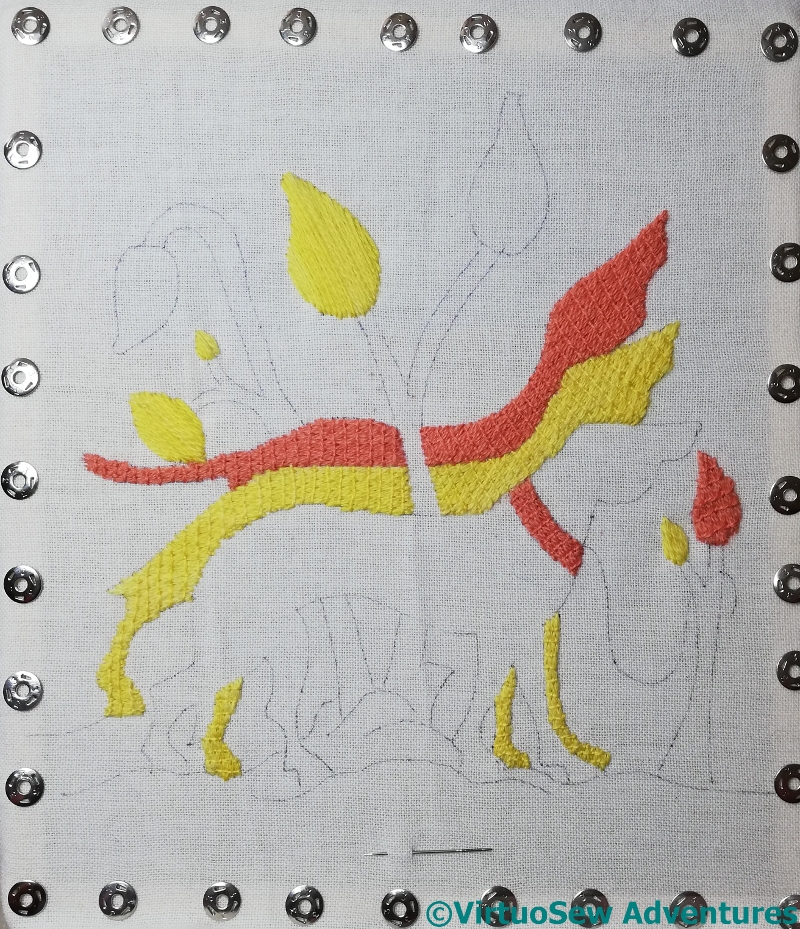
One of the delights of Laid and Couched work is the slight sense of a return to childhood, but with added skills, as it were. The first layer consists of the threads laid and couched (hence the name), and is rather like “colouring in”: it produces a layer of flat colour, which will be tweaked and detailed later.
Or in this case, not quite flat colour. The thread Tanya includes is wool that she has dyed herself using natural dyes, and there are unevennesses in the colour that only adds to the charm. As you can see from the two large blue leaf-shapes. I was a bit over-determined to pack in the stitches on the frontmost hound and didn’t have thread leftover for the leaves. This being a holiday project, I went rootling in my stash for an indigo wool, and they only one I have is both much darker, and a different structure. But that will matter less when the details are added, so onwards!
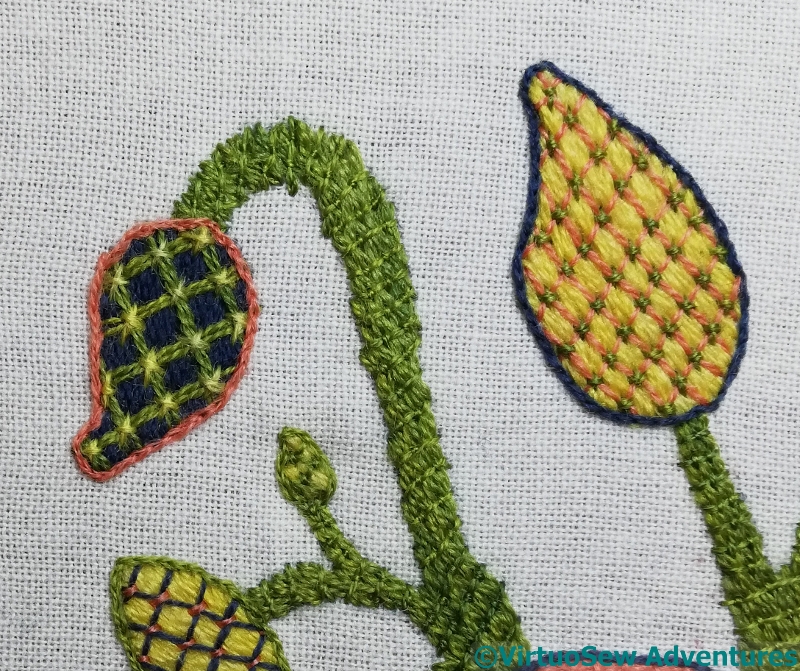
Each leaf-shape used the other colours in a different way – as grid, as outline, as couching stitch. The outlines are in split stitch, and each of the grids is couched slightly differently, with a horizontal stitch, a vertical stitch, and upright cross or a diagonal cross.
In addition, I experimented with grid spacing for the blue one shown here. I like this variation, even if it does produce a rather loud plaid effect!
I was quite glad to find the variations slipping in. They might be a sign that I’m recovering from Akhenaten!
Starting The Hounds
Finishing Akhenaten this year has left me rather wiped out. It’s not helped by the fact that he needs to be got off the frame and mounted somehow and that is proving Not Entirely Trivial, as The Australian would say, so I’ve been getting a 1000-watt glare every time I enter the room.
So I thought I would tackle something smaller and friendlier over the holidays, something that would help me gather my thoughts, and give me a change of scale and emphasis. Tanya’s gorgeous laid and couched work hounds seemed just the thing. I lost my heart to them months ago, when Tanya first showed them, but Akhenaten was such a dog-in-the-manger that I didn’t buy a kit.
However, by the time I went to Harrogate, he was finished, so I decided he didn’t have a vote any more, and indulged myself. After metal threads and silk, wool is a lovely change, and the medieval habit of using the direction for the lower layer that makes for the longest stitch on the surface means that each section is slightly different, and stops me worrying about what I’m trying to represent. Which is also a lovely change.
I’ve decided that they are called Caspar, Melchior, and Balthazar, in honour of the season in which I am stitching them.
A backing for the Robin (in progress!)
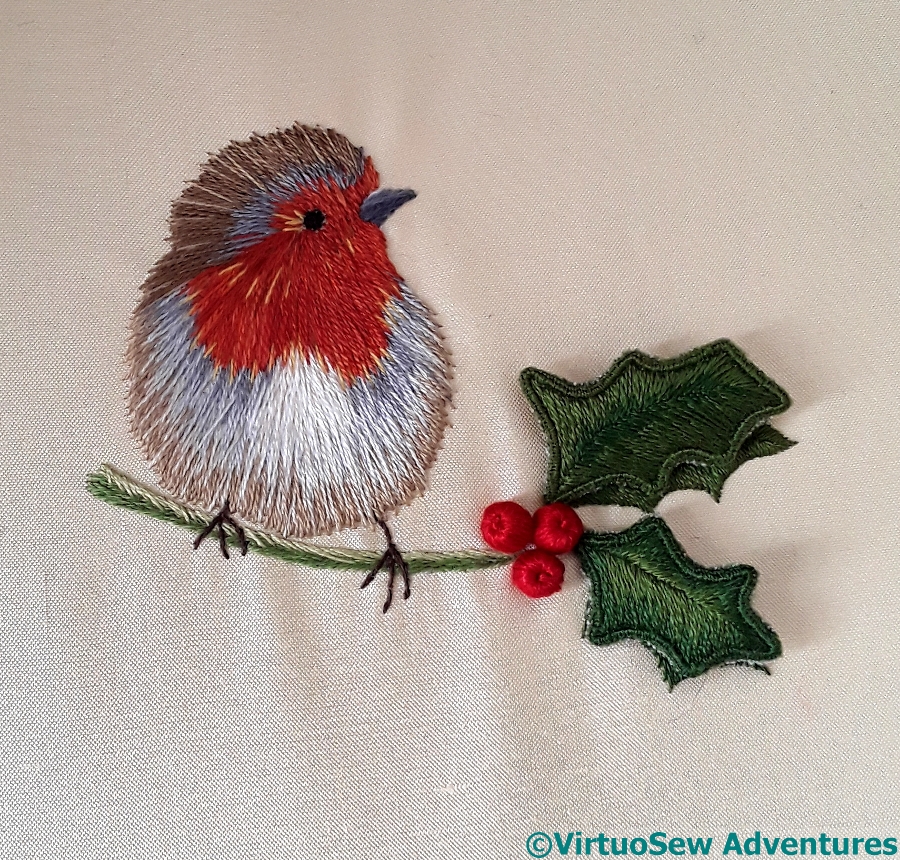
You may vaguely recall the little robin with stumpwork holly that I worked a couple of years ago. I mounted him on a circle of card and then didn’t make any more progress..
But I have now!
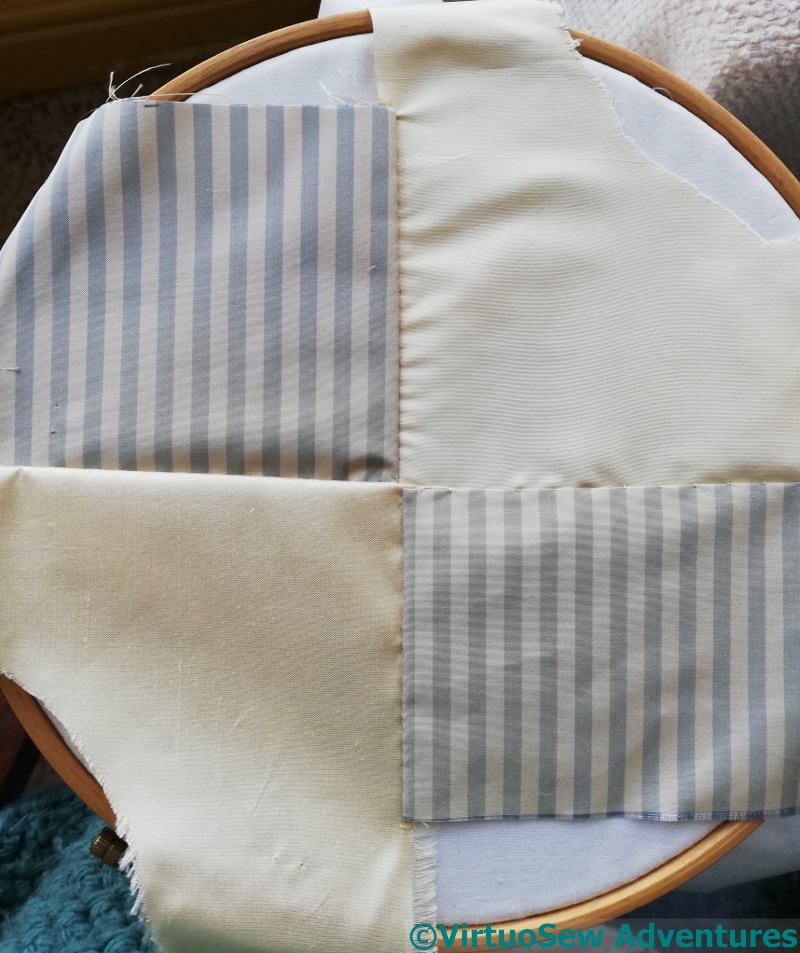
I’m using leftover fragments of silk from various Thistle Threads courses to do a rather tame crazy patchwork circle to cover the padding for the back, and then he can hang or be propped in a corner somewhere, looking cheery. I’ve settled on a simple quadrant arrangement, so I have four seams to deal with.
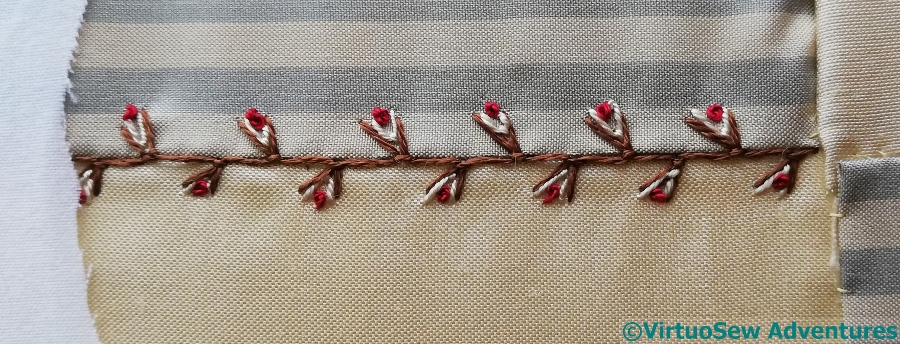
I said, when I found “Floral Feather Stitch” that I’d be using it again, and here it is, tweaked and embellished with a Fly stitch and a French Knot to emphasize the “floral” element. I really like this stitch – a simple, but extremely effective variation. Or maybe a stitcher’s “mash-up”!
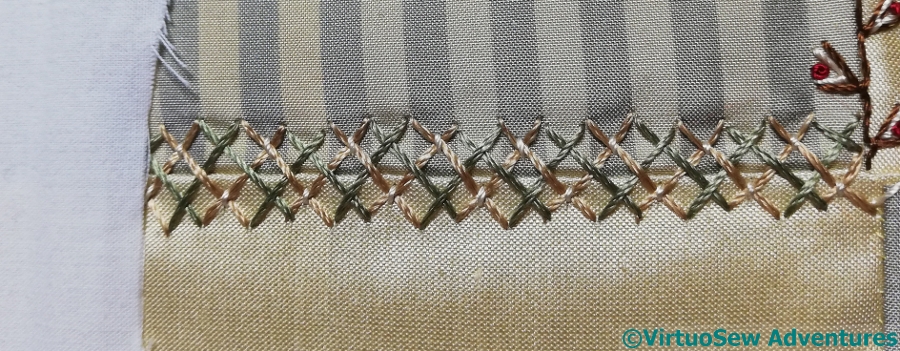
The second uses Interlaced Herringbone Stitch, with the second pass interwoven with the first and then tied down with short straight stitches. This one is maybe a little monolithic, but the first one is so simple, I didn’t want to unbalance the appearance with anything broader.
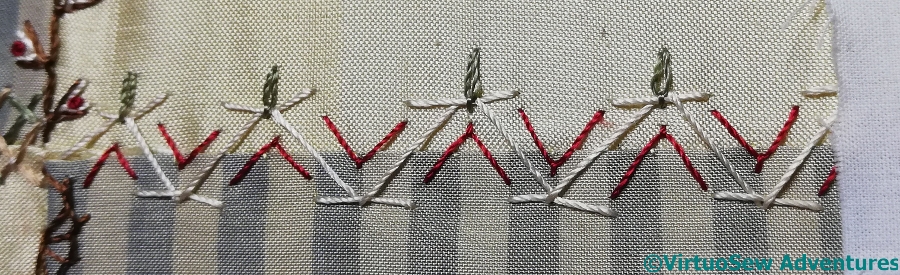
The third is Chevron Stitch, embellished with alternating Fly Stitches and Detached Chain Stitches on the “top” edge. This one went a little ragged, but I still think it works.
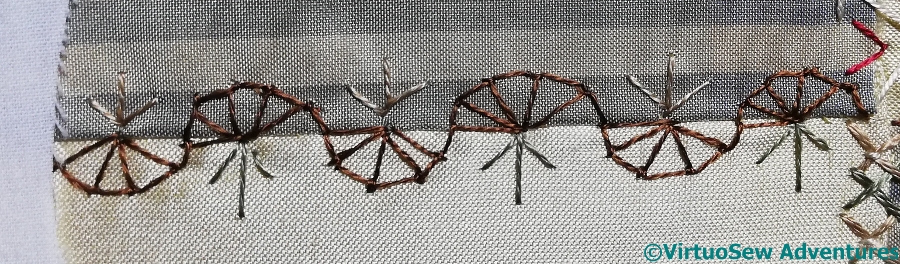
The final one has alternating Half Buttonhole Wheels with Straight Stitches filling the gaps. Again, this could have been expanded and extended, but I thought there was quite enough for the purpose!