
Category: General Embroidery
A strange buddleia
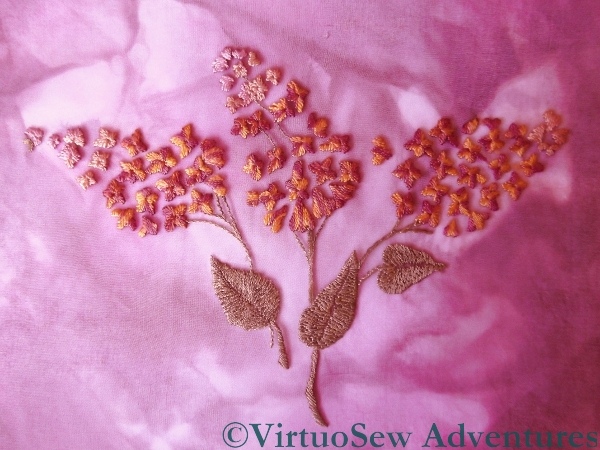
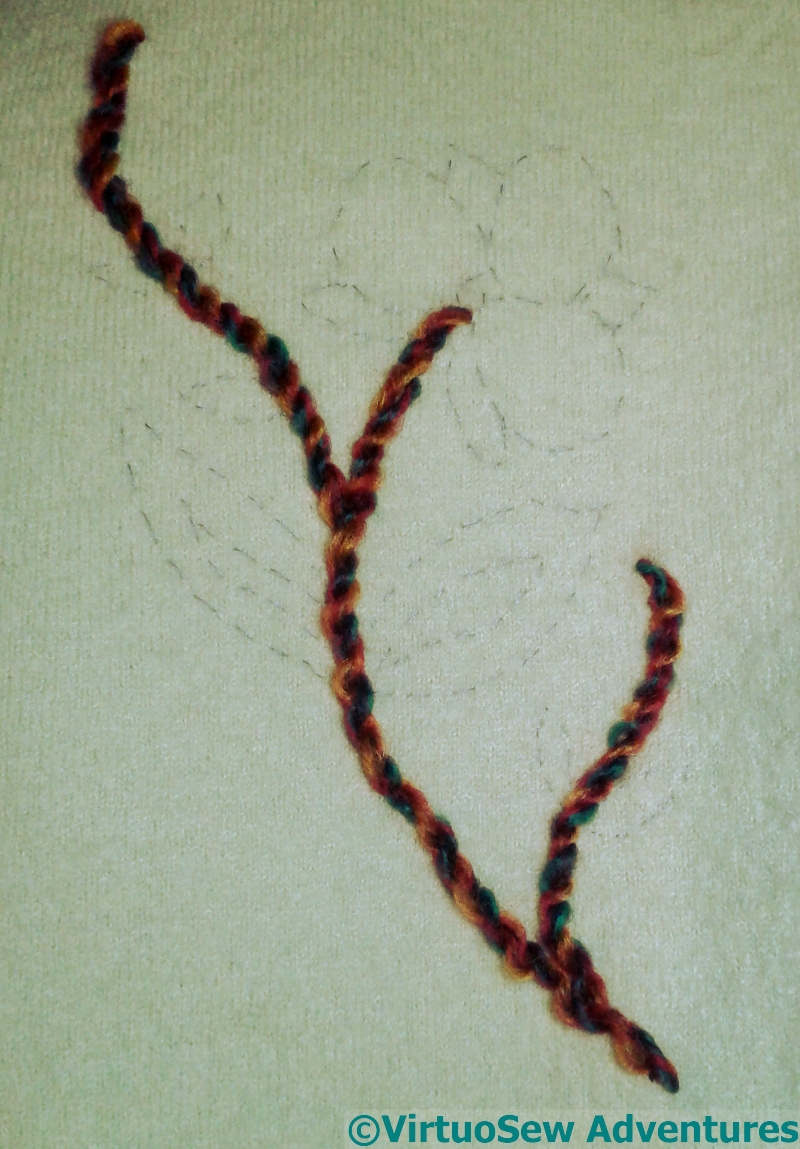
I really cannot imagine what I was thinking of when I worked this piece. The design was a transfer, I remember that much, and I worked it many years ago.
It is yet another discovery from a forgotten box, and the reason it was in the forgotten box in the first place is that I’ve not the vaguest idea what to do with it!
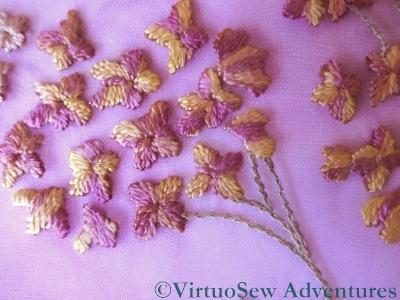
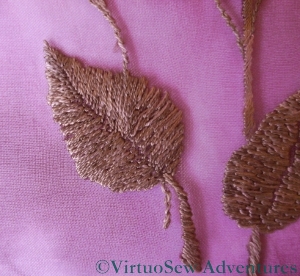
The fabric is a variegated gauze, and the embroidery is in two variegated silk threads – the florets in satin stitch (on gauze – I must have been mad!) and the leaves in long and short stitch.
The burgundy gauze isn’t quite so bright in real life – it’s turned out really very oddly in the photograph – and the green leaves don’t disappear in real life as they do in the photo.
I have thought about applying it to an evening blouse – I wouldn’t need jewellery with that at the neckline – and I’ve also thought of mounting it to create a non-folding fan, but the engineering involved in the latter rather defeated me, and I have yet to find a fabric that it will work with for the former.
These forgotten boxes, by the way, are beginning to drive me absolutely wild – there’s something I would love to write about if only I could find it, and not only is it not in any of the boxes I have discovered by accident, it is in none of the sensible places I’ve looked, either!
The Jacobean Coat – Sleeve Two Embroidery
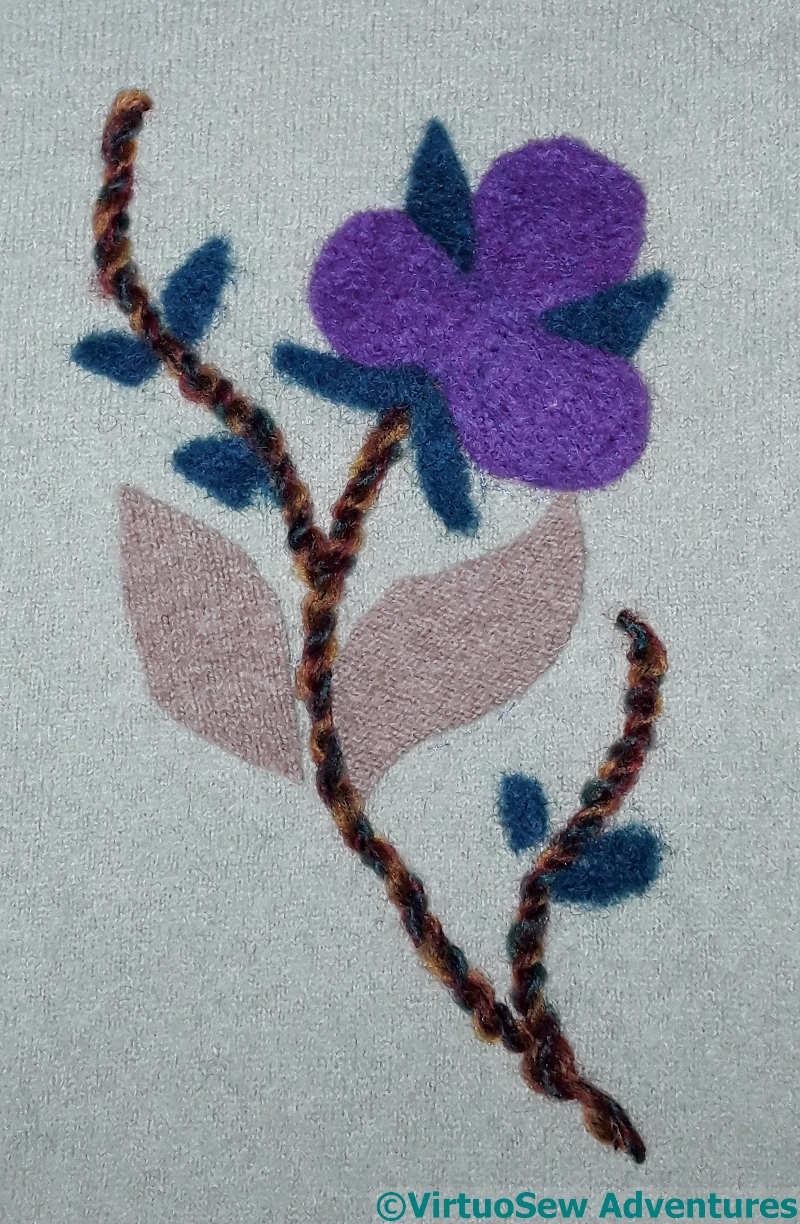
The second sleeve began in the same way as the first, with felt motif elements lightly needlefelted into place. There is a similar motif on the body of the coat, but with the colours reversed. Whether I will use similar colours in embellishing it, I don’t know – wait and see!
I am removing the tacked design outlines as I go, at least where they show around the edges. It may not be entirely necessary, but it’s much more satisfying not to be spotting them as I work, and I know I would spot them in the finished coat, even if no-one else could do so.
The edges of the large leaves on the second sleeve began with straight stitches over the edges, using a wonderful mohair yarn from Gumnut Yarns. The different amounts of shine from the various threads I’m using will help to add another level of interest to the whole design.
The second level of detail is worked in Up and Down Blanket Stitch, which is a very old favourite. This time I’ve changed the relative heights of the two uprights to create a more varied effect.
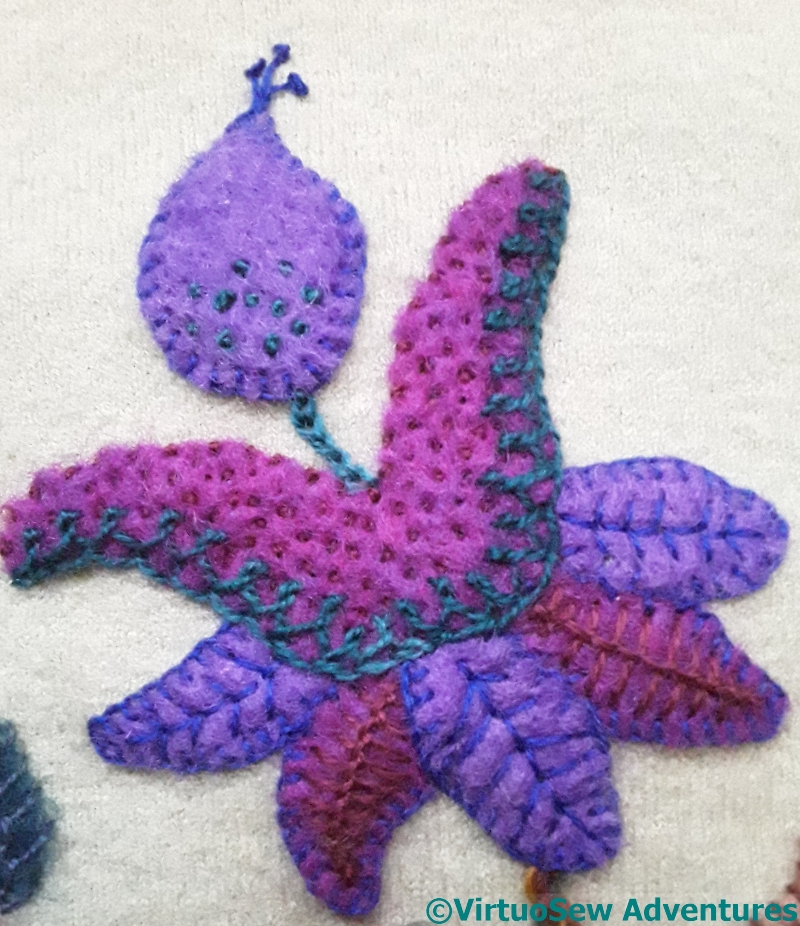
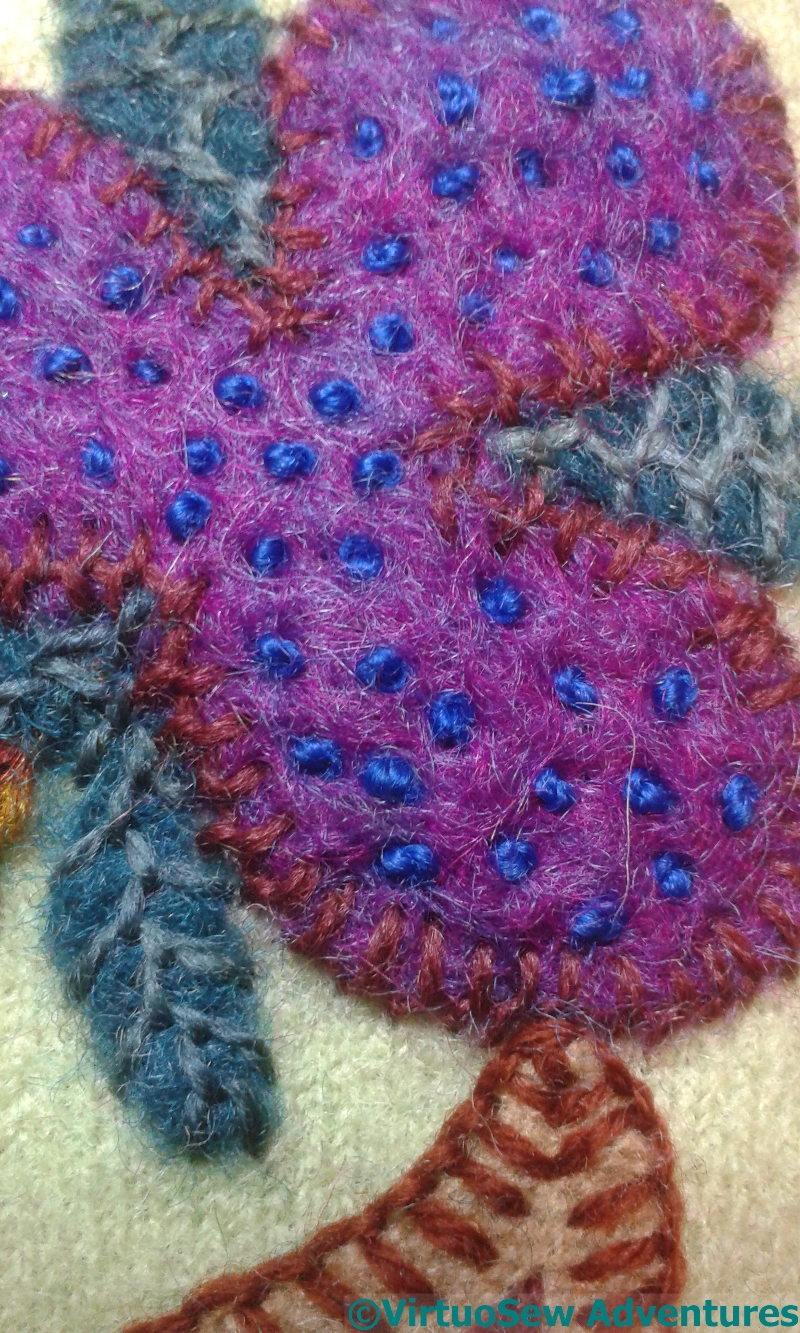
There’s a lot going on with the flower motif; Thorn Stitch on the lilac petals and a variant of Loop Stitch on the purple ones, using different thread colours to change the emphasis on the colours.
Crested Chain Stitch in teal edges the flower shape (given it’s a Jacobean style design, realism has nothing to do with it – I’ve not the vaguest idea what sort of flower it is supposed to be!) and I complicated matters for myself by working inward from the tips of the horn shapes to the centre. It is a directional stitch, so although most people won’t be able to notice that sort of detail, I think it is worth doing.
Finally! Crazy Paving Canvaswork finished!
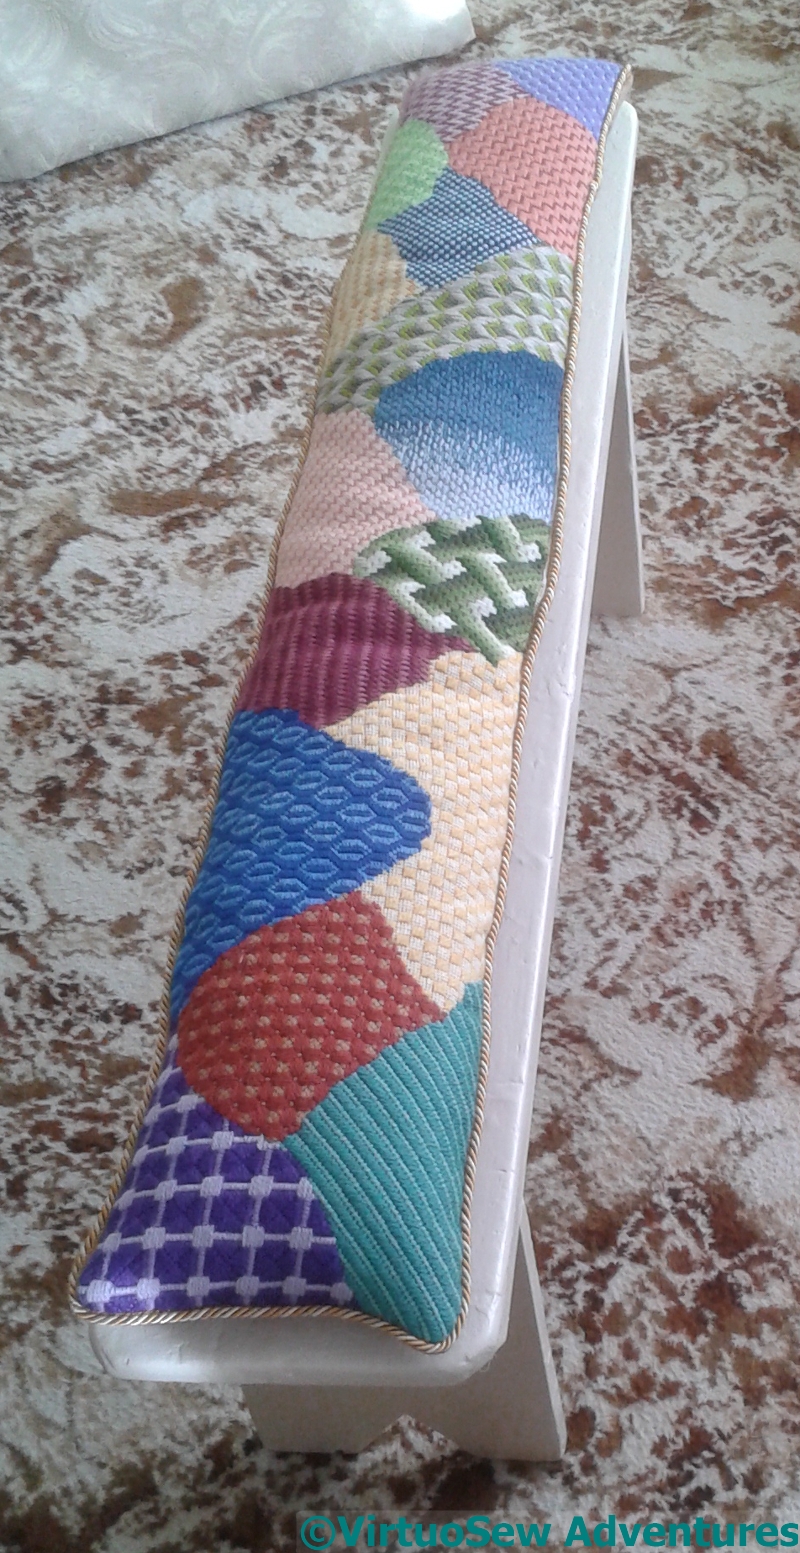
In fact, it was finished a long time ago, and somehow I didn’t get around to writing it up…
Not that there is much to say. All of the interest (almost!) was documented in the stitching.
The old form has been scraped, holes filled, sanded, and repainted, and the cushion is a simple shape, tidied up with piping cord.
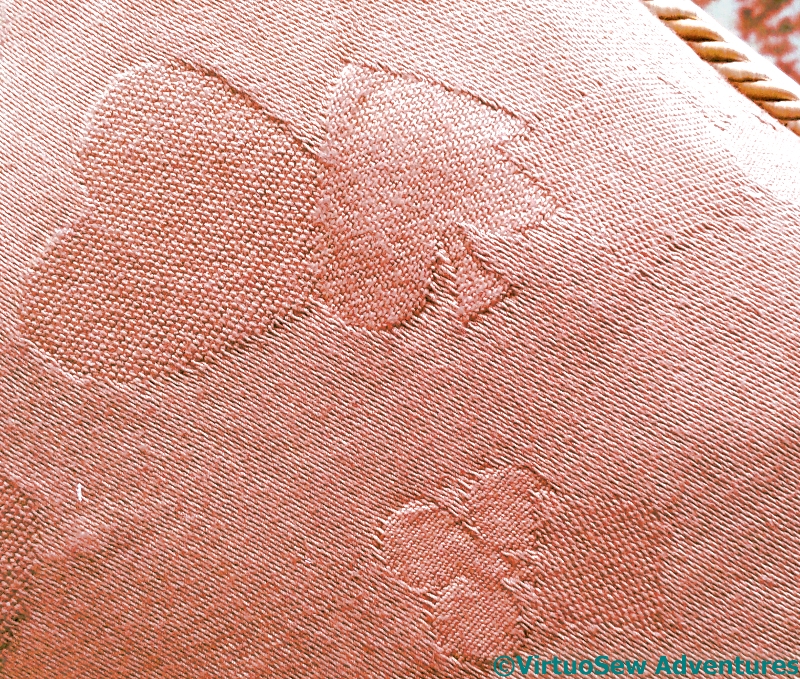
Some of the interest, in fact, is in the backing fabric. It’s an unremarkable jacquard woven pattern in cotton on a synthetic warp, but the design – rather ironically, since I’m card-blind for all practical purposes! – is a design of suits I created during my MSc in Textile Design Technology. It’s clunky, and not well-differentiated, but it was the first time I designed a jacquard pattern. The only time, too, but it was fun while it lasted, and I’m glad I asked the technician to weave a half-metre for me instead of the 10 cm that was all that was needed for the module.
Same design, different stitches
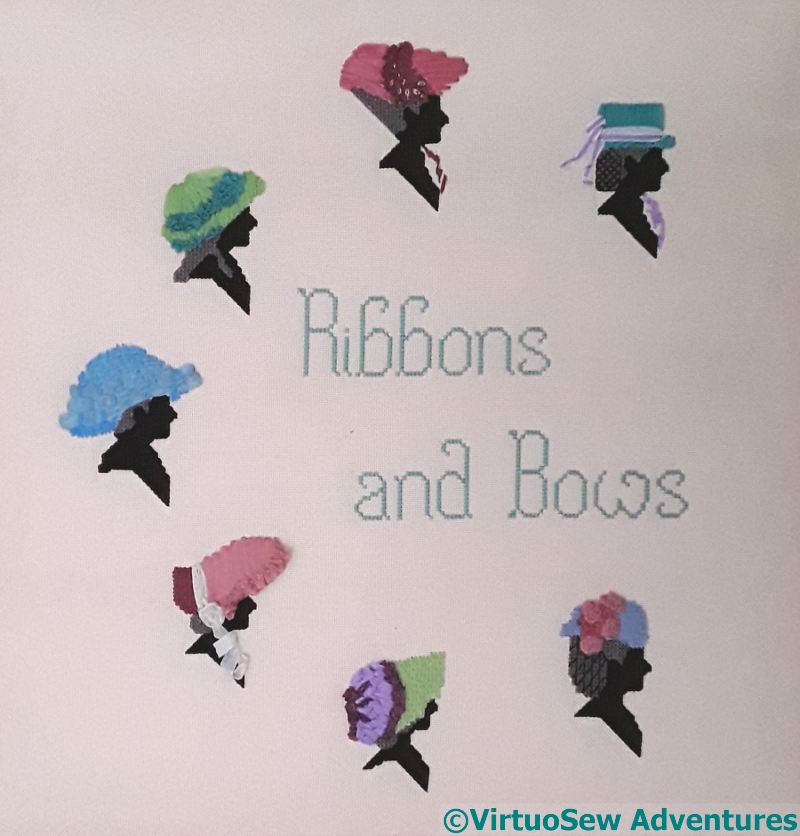
Ribbons And Bows
I’ve been rummaging in a variety of boxes, because with “Leaving the Tyne, 1915” finished and on display, and two “Dreams of Amarna” pieces in a good state, I feel as though I have a bit of mental space and time to consider, not just the progress on the Dreams of Amarna, but also any other half-thought-through bits and pieces I may find.
I’m not sure whether that is going to be true, but I live in hope! These “bits and pieces” are particularly obscure and particularly hard to find something to do with.
Amy
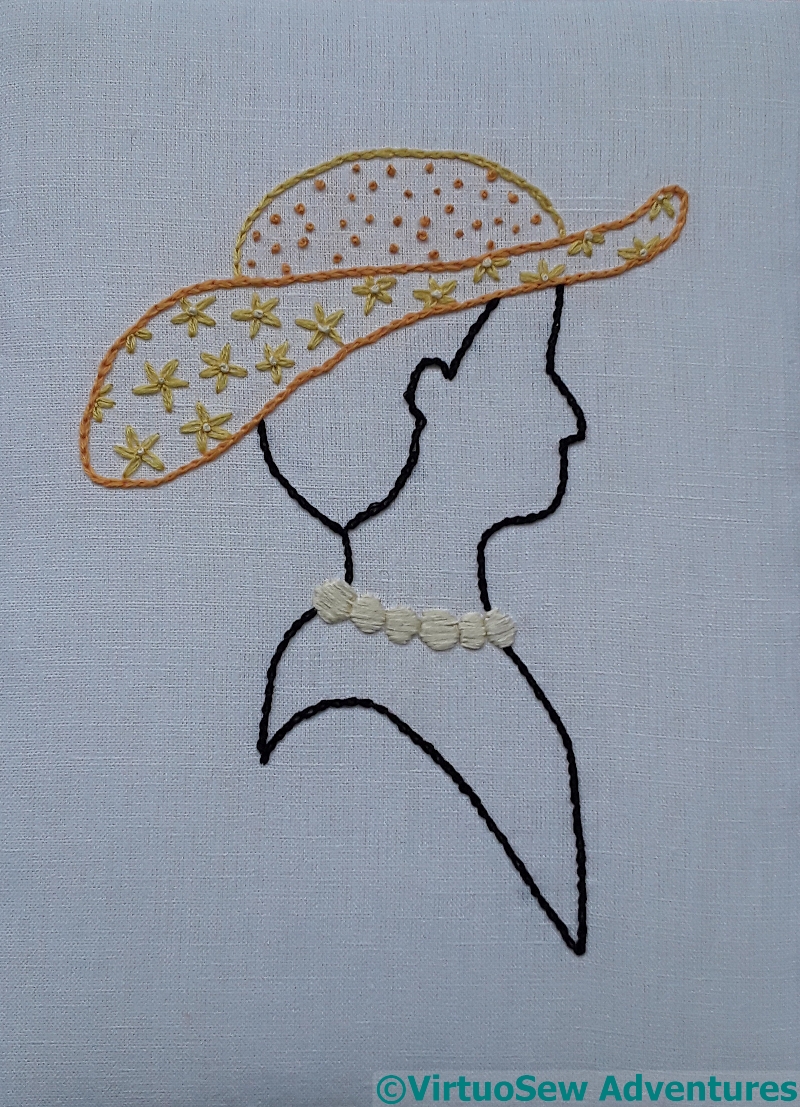
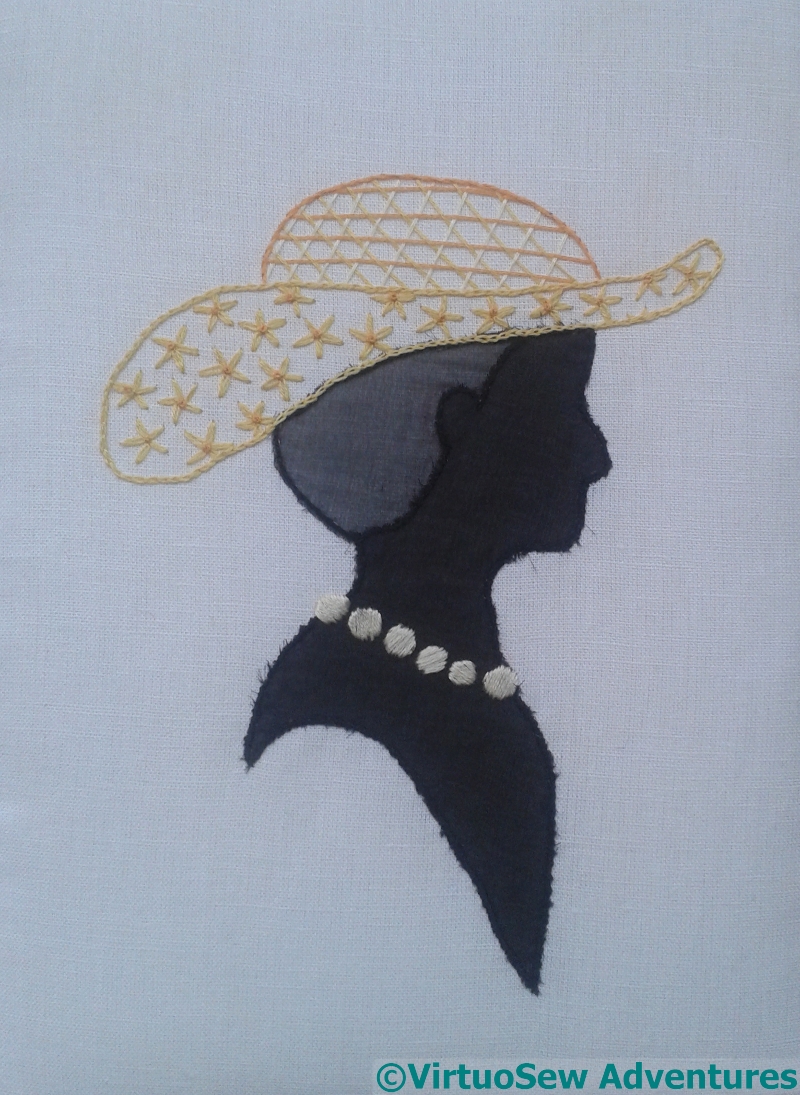
These two Lovely Ladies were part of an exploration of stitch ideas and silhouettes, originally with the idea that they might become teaching pieces. They originate with a sampler of cross stitch and ribbonwork silhouettes I devised in “DevaStitch Designs” days.
When I thought of teaching, I extended the idea by enlarging the heads, and playing with stitchery to replace the ribbonwork. However, I’m not much of a teacher at the best of times, and when I asked a few people, I was told that the second version, with silk georgette layered to create the impression of the silhouette, would be daunting for beginners, and uninteresting for improvers.
Ouch.
Annis
So I’m still trying to work out what to do with them. I rather enjoyed doing the silk georgette (it’s held down with back stitch, then chain stitch, and then satin stitched over the top!), and it certainly makes the bead necklace stand out nicely. The two parts of the hat provide clear, distinct shapes to outline and fill with stitched patterns.
I still have some ideas for a lady in the cloche hat that I’m dying to put into action, but at the moment I have no good excuse to do so!
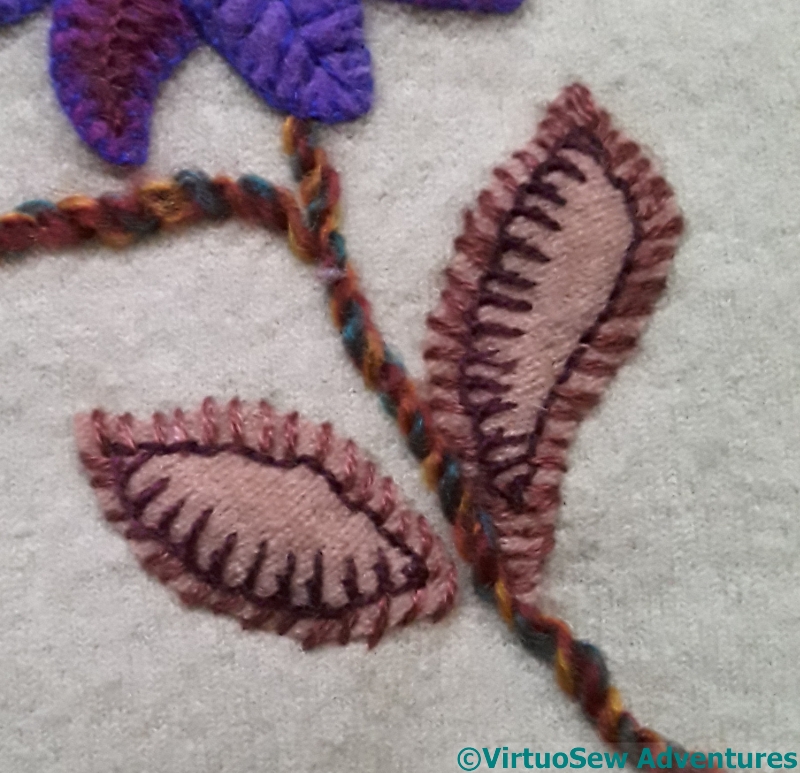
The Jacobean Coat – Sleeve One Embroidery
Having decided to start with the sleeves, and with stitch and thread choice for the small teal leaves in place, I could start to think about the other details. This picture shows the basic motif, with no stitching on it and really no idea where to start.
Incidentally, the coat fabric is a lovely clear pale green, and it doesn’t matter what I do, it just doesn’t photograph to advantage – or at least, not in winter daylight. I’m hoping Mam will be able to wear it in the spring, and we’ll be able to get some good photos for you to see!
I have decided that each of the motif elements will be stitched around the edge, or – as with the feather stitched leaves, stitched from edge to edge.
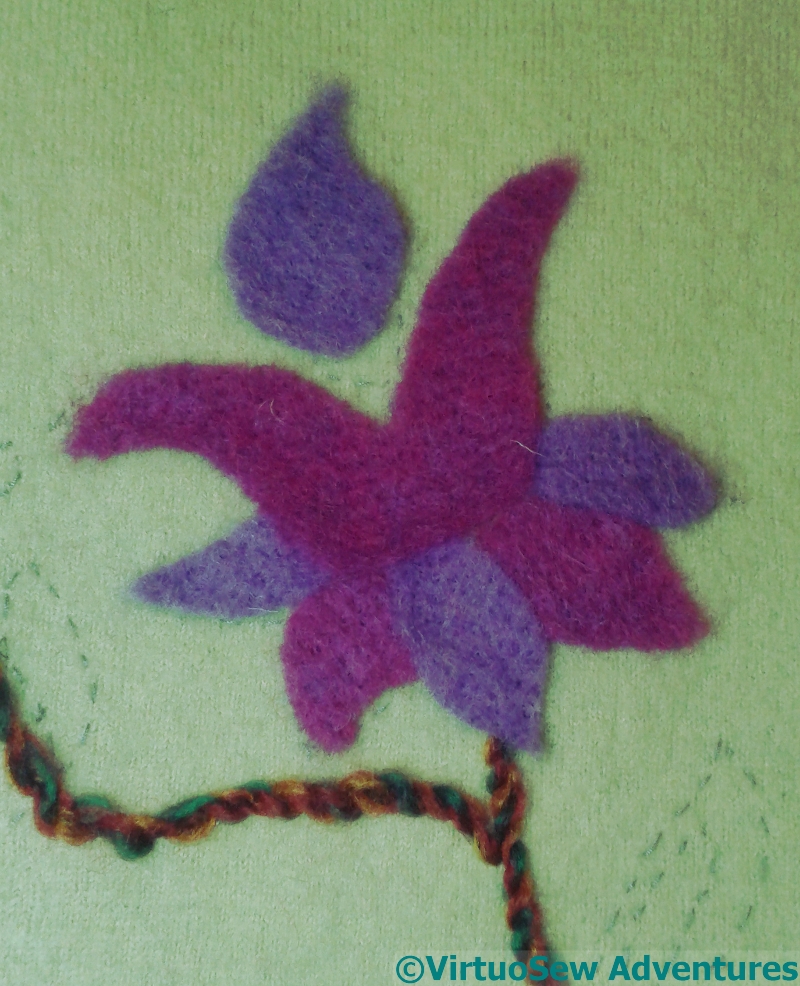
I think the stitch around the edge of the purple shape is called “Loop Stitch”. It creates a “spine” which can have arms of whatever length you want. In this case I wanted them neat and not too big, and they’ve almost disappeared into the felt in some cases.
When I’d added the outline, I felt something more was needed, and added the scattering of blue French Knots. They help to vary the colour and change the tones a little. This is not going to be an exercise in minimalism!
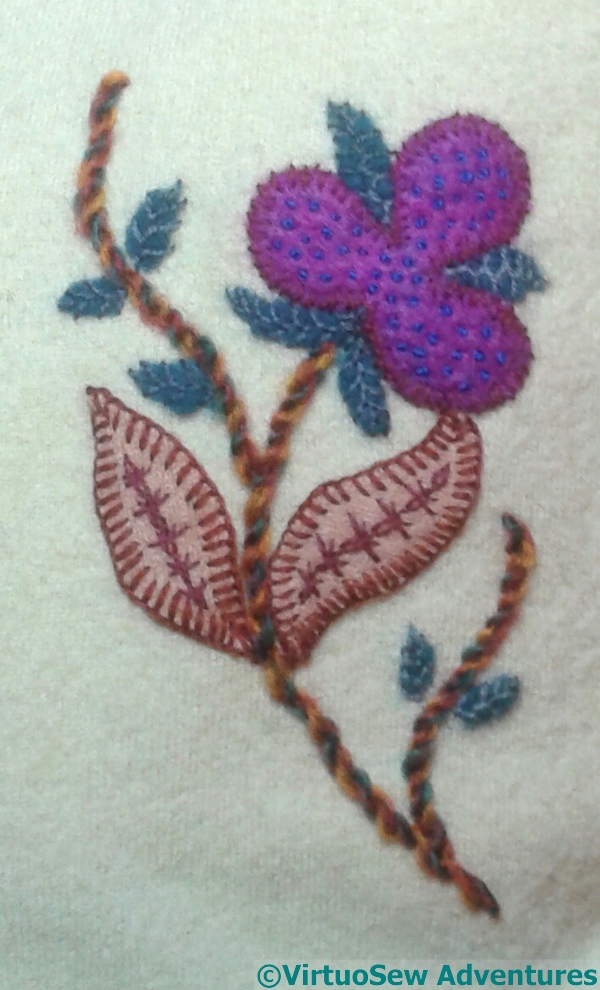
Here you see the – for now – finished motif on Sleeve One.
The large leaves have Blanket Stitch edges, and a large central vein made using one of the un-named stitch variations from my books by Edith John.
The reason I say “finished for now” is that I feel it may need a few light details to add a bit of sparkle, although I’m not sure of colour, or placement. I’m leaving the idea to sort itself out in my head as I continue to stitch.
The Jacobean Coat – colour and stitching begins!
The second stage, after all those stems, is to start adding colour. I’ve started with the sleeves because they are a bit more manageable than an entire coat, and it gives me a chance to feel my way towards the colour distribution of the stitches over the felt.
The purply colours and the teal are from sheets of that lofty felt I used for the princesses, while the beigy-brown was one of my grandfather’s sweaters, found in a box looking moth-eaten and thrown in a hot wash to felt it a bit. We’re a thrifty family…
The placement of the motifs is different for each sleeve, one above and one below the elbow, and it isn’t even the same motif. Repetition is overrated!

I think I will probably settle on using feather stitch over the felt for these tiny leaves, which are scattered throughout the design.
The rest of it is going to be a riot of stitches and stitch combinations, so this will provide a moment of rest in embroidery, a moment of reassuring similarity from which the exuberance can take flight.
It will also give me something to be doing if inspiration fails for any of the motifs!
One of the things I have learnt, over the years, about working on these large projects that involves making it up as I go along, is that there needs to be something useful to do while the next bit is being mulled over – it reduces the pressure and gives space for the mind to wander over new and interesting stitch choices.
Crewelwork Designs
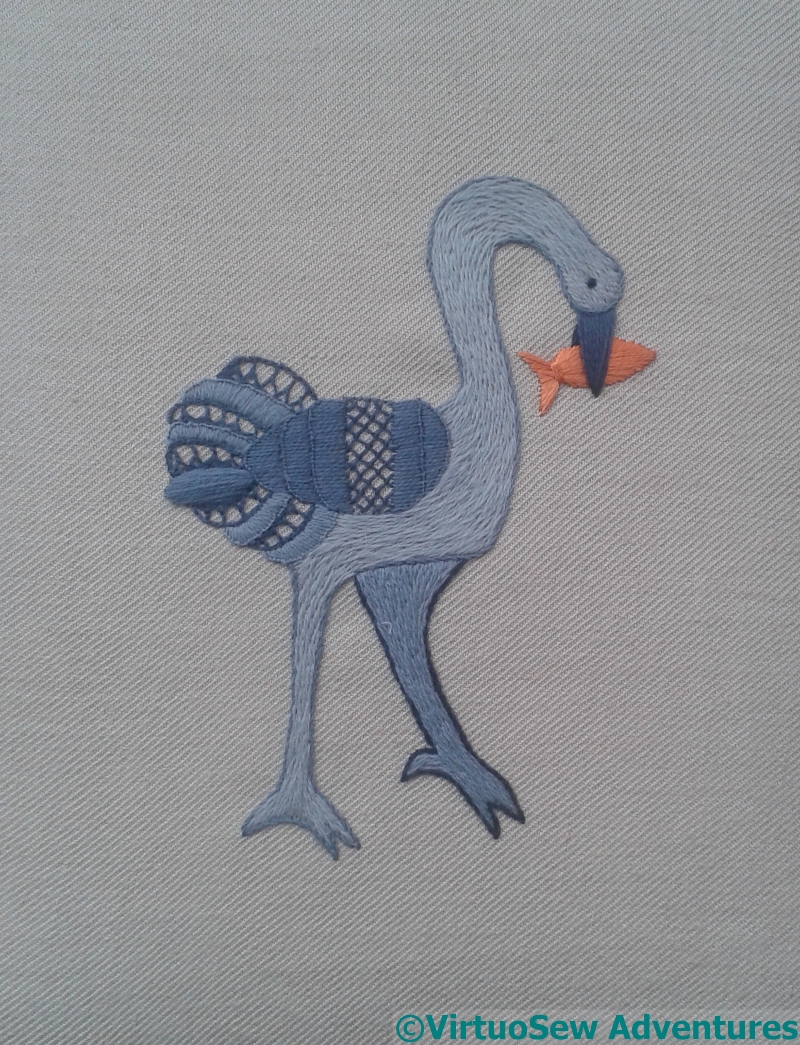
Herne The Hunter
I can’t remember where I found the basic outline of this heron. There’s something a bit late-medieval about him, and I found the various shapes a good way of playing with interesting stitches. He’s worked in crewel wool, apart from the orange-gold fish in his beak – that’s silk!
The main, flat colour sections of his body are worked in split stitch filling. This isn’t a technique I’m especially fond of, but it does fit in well with the style of the drawing, and it provides a plain filling that allows the trellis couching over his wing, and the half-chevron stitch in his tail to be the stars of the show.
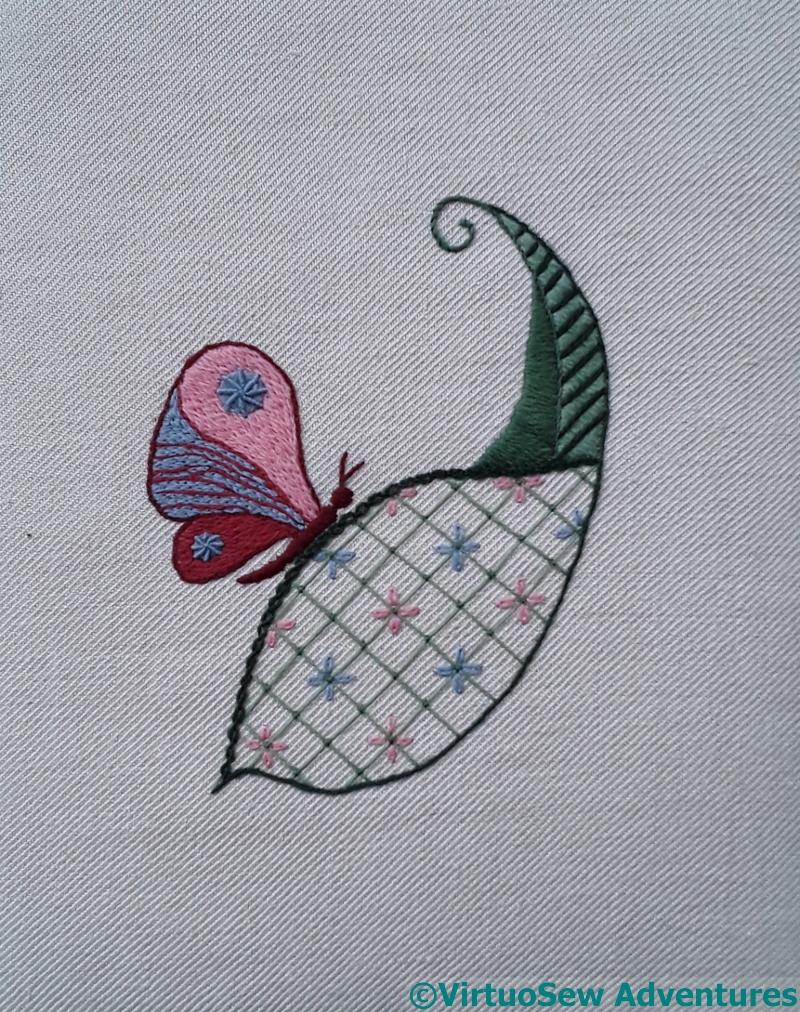
Flutterby
The butterfly settling on the huge leaf in this second panel also makes use of split stitch filling, with the roundels on the wings working in spider’s web stitch, and the antennae in a single fly stitch. However, the whole reason for creating this design was to have a large space to fill with the ornamented version of trellis couching. I believe that classically, this stitch is worked much smaller and more densely, but what I was trying to do here was to marry the old style with more modern sensibilities, and opening it out creates a crisper, lighter effect.
I’ve not been able to work out what to do with these, either. They’re mounted over board, and waiting for inspiration!
6 (Old) and 6 (New) and 6 (Yarny Things) in 2018
You may recall that last year Meredithe and Anne came up with the idea of managing “Significant Progress” on six old projects or Works In Slow Progress, with room for six entirely new ones – because we all know how easy it is to be completely knocked for a loop by a shiny new project or sudden obsession with a new technique! – and have called the project “6 and 6 in 2018“. It was extended to add “6 Yarny Things”, halfway through the year. Again, I wasn’t very organised about posting updates, but I have at least managed to do a round-up of the year.
So, how did I do?
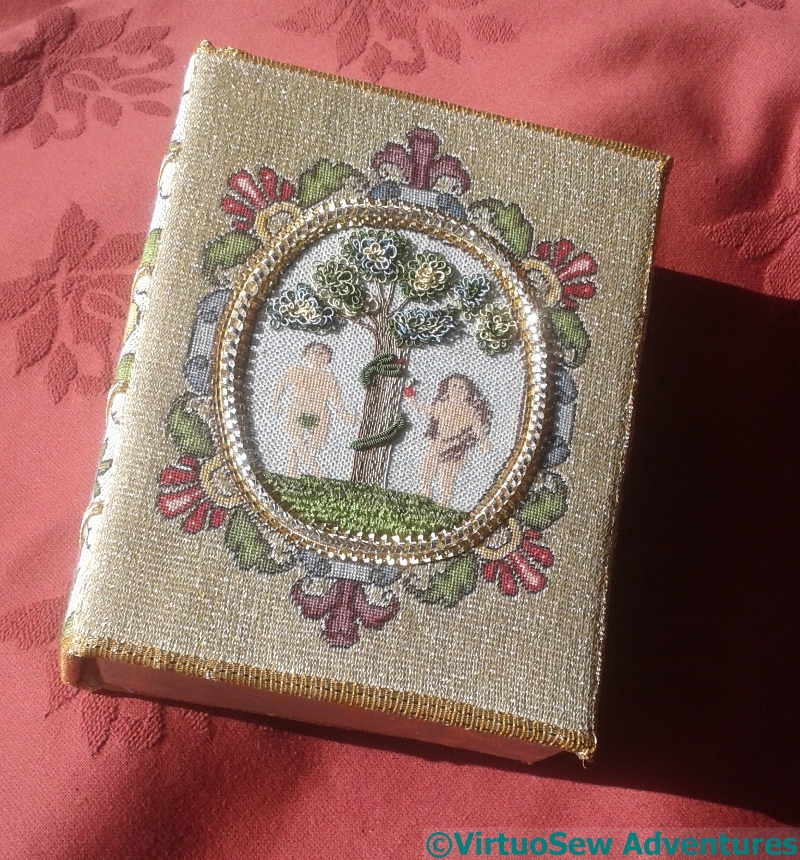
Eve In The Garden Of Eden Finished
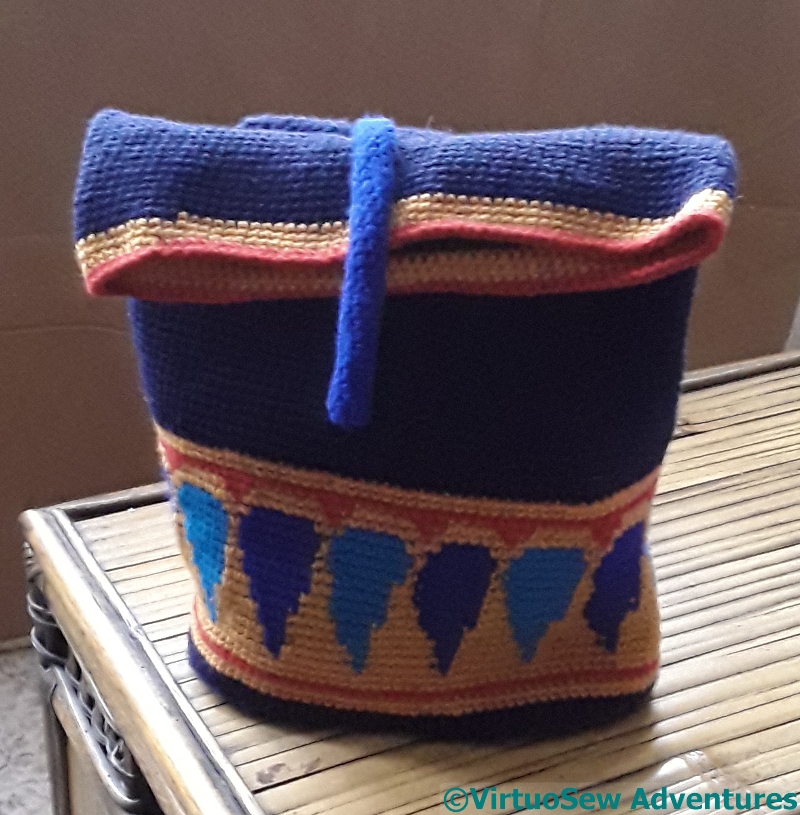
Amarna Backpack Finished
First of all, the Old projects:
Eve in the Garden of Eden is finished, and so is the Amarna Backpack!
But the Nefertiti Shawl and the Christmas Angel haven’t seen any activity at all, although I may have worked out part of my problem with the Nefertiti Shawl, so it’s possible that when I work out a new scheme of stitching, I might find that unblocked and easier to work on. For the Christmas Angel, I just need to settle down and persevere…
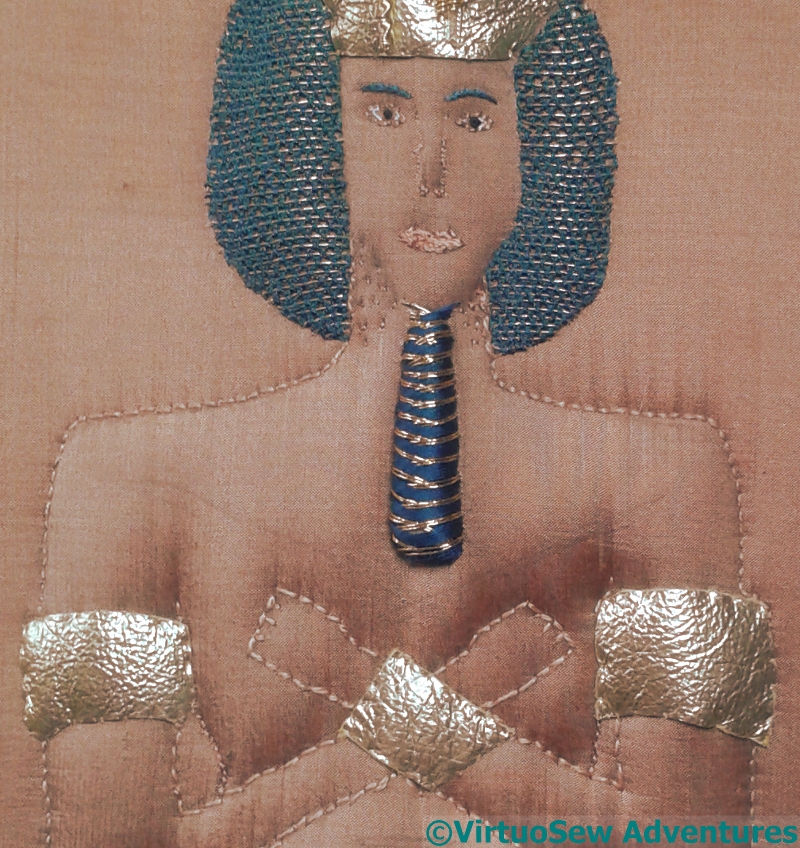
Akhenaten’s Beard
Akhenaten has moved on significantly, and with a few reservations about detail and solving a few last little problems, I’m very pleased with him indeed.
Now, the New…
FinishedCoverForTheMagnifier
Of course, there was the little magnifier cover (finished), which was a vaguely StitchOff-inspired piece worked last Christmas and New Year.
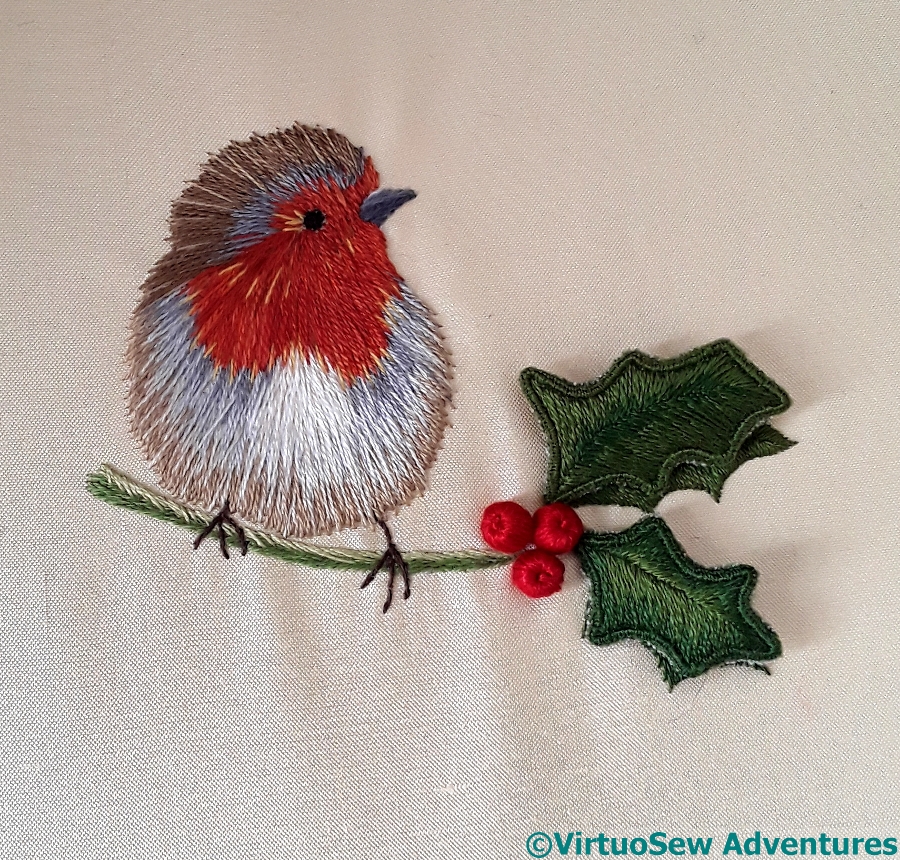
The Robin Completed
Then there was the little Robin. I’ve not finished him into something yet, but I enjoyed working him, and I have become a little more comfortable with silk shading!

Leaving The Tyne 1915
And, of course, there was “Leaving The Tyne, 1915“, which was a very intense, and very long-running project, which, if I say so myself, was finished triumphantly in advance of deadline, and formed part of the display in Liverpool Cathedral.
Then, when I hit the buffers with Akhenaten, because I’m not sure what to do next, I got started on the Head of Ankhsenpaaten. She’s not finished yet, either…
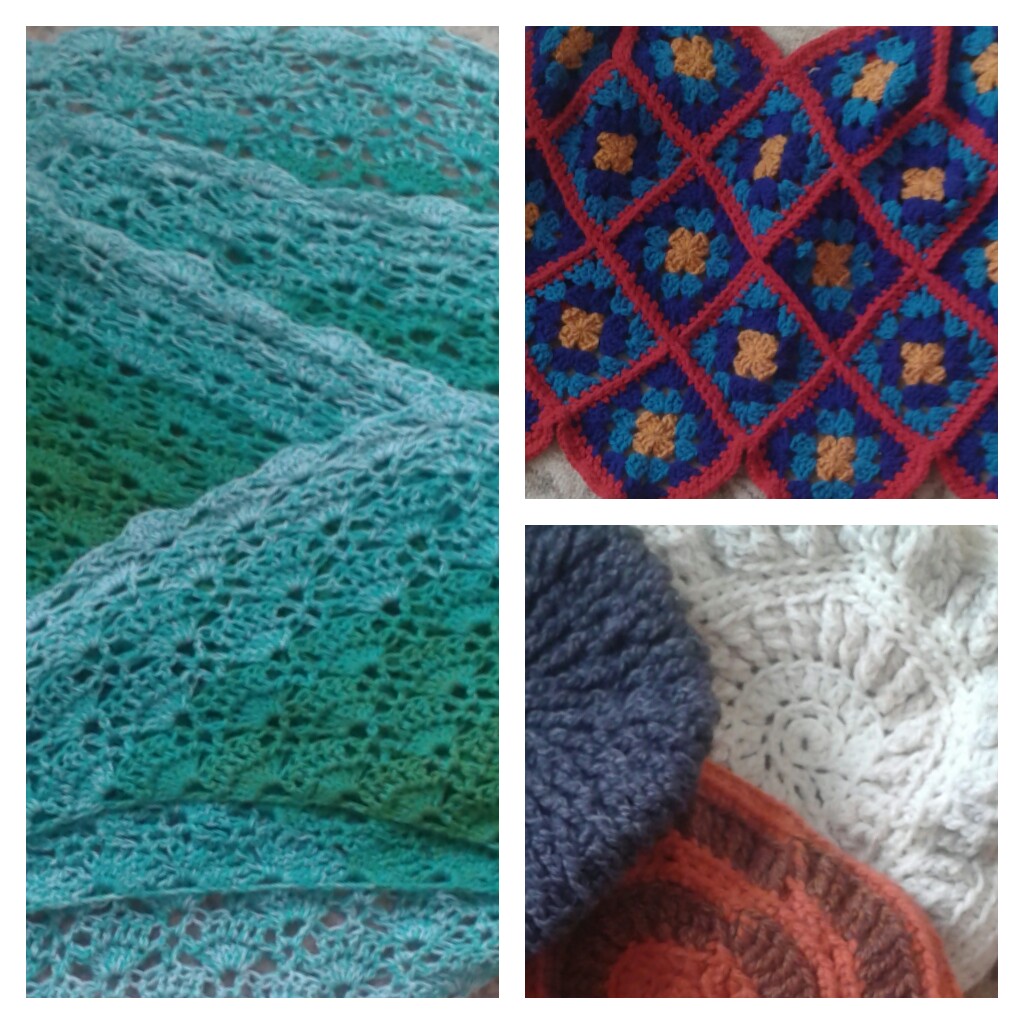
Yarny Things
And finally, the Yarny Things. These are a shawl, a cape, and three berets. There’s another beret somewhere, and a pair of socks. That’s seven!
I’ve also started on a Moebius Shawl, and another pair of socks…. It’s just possible that I’ve taken to crochet more than I might have expected to!
Stems done!
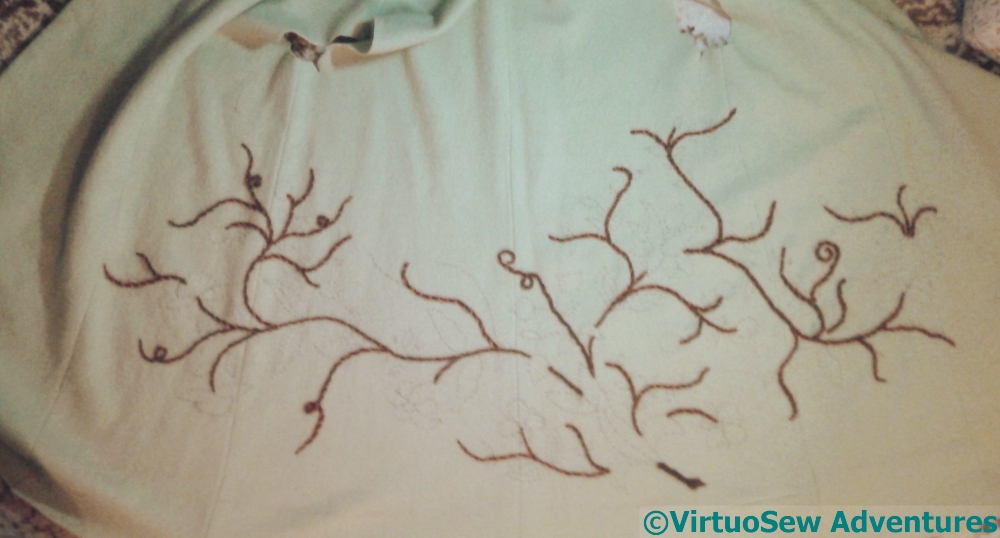
Stems Done!
I’ve got all the stems done on the Jacobean Coat!
Sleeve Motif 1
I’ve been quietly attaching the chunky knitting wool along the lines of the stems, and I’m quite pleased with progress so far. I’ve tweaked a couple of tendrils, and there are a few details I’m not quite sure about, but it’s a start.
In fact, it’s better than that, because I have started on the felt appliqué!
Sleeve Motif 2, Stage1
Both of the sleeves have motifs on them, one placed above the sleeve and the other below.
I decided to test the next stage on one of the sleeves, in case it didn’t work, but I rather think it will. I’m using the same lofty, fluffy felt I used for the Amarna Princesses, and I have lightly needlefelted it in place so that I can add the embroidered details without stabbing myself on a pin.
From Watercolour to Embroidery
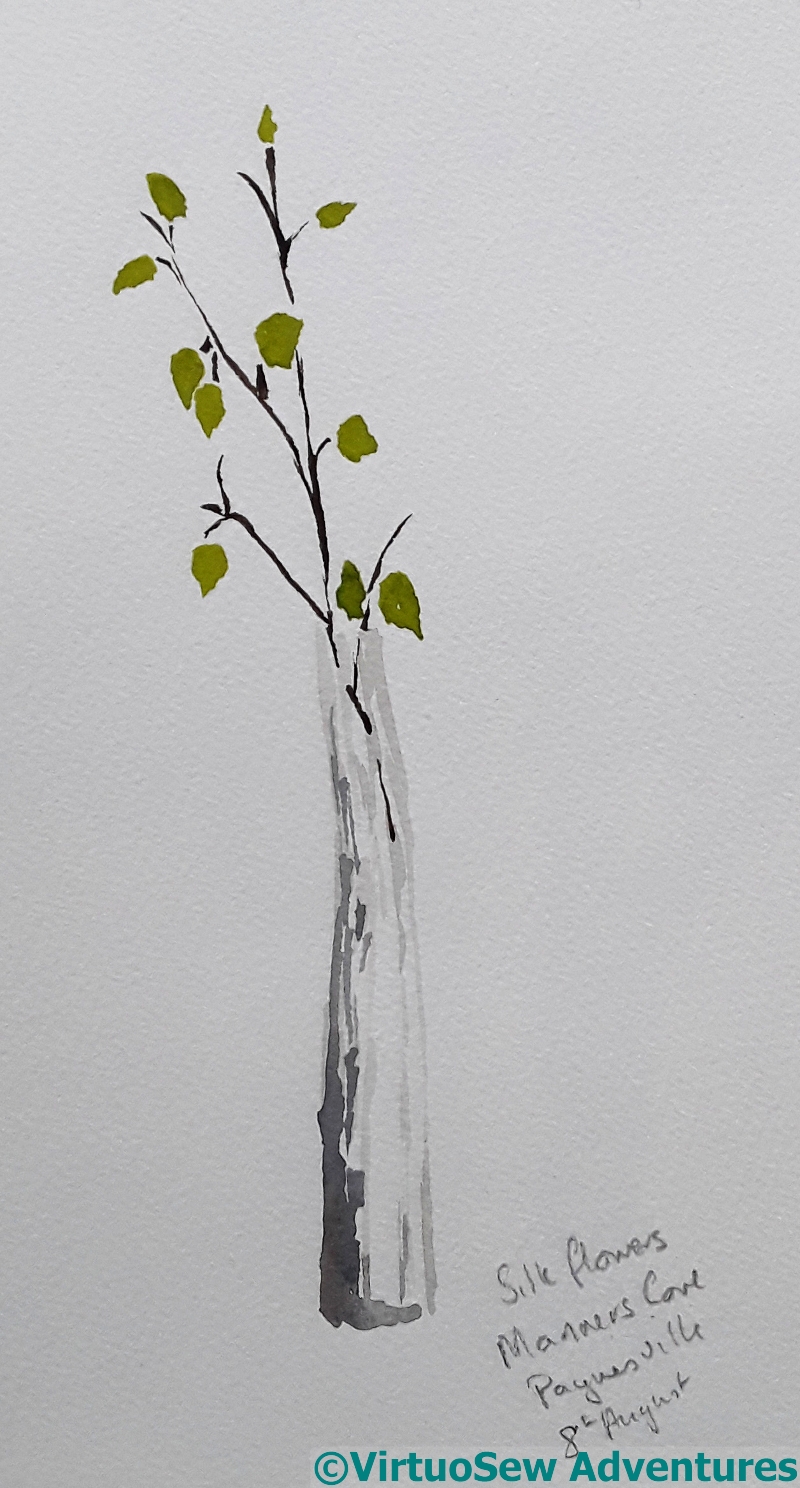
Watercolour : Silk Flowers at Paynesville
This vase of flowers was on the table in a motel room we stayed in, many years ago. For some reason they caught my eye, and for our whole stay – which was full of activity and outings – I wanted to paint them. But we were never in the room for long enough during the daytime.
Finally, on the morning we were going to leave, I got out my paints, sat down, stared very hard, and painted this. I’ve noticed that if I really want to paint something, it often works much better than paintings I’ve done because I want to practise painting.
I don’t think I even bothered to take a photograph. Everything I wanted to remember about the vase is in the painting.
When we got home, however, it seemed to me that the painting offered possibilities as the basis for a simple embroidery.
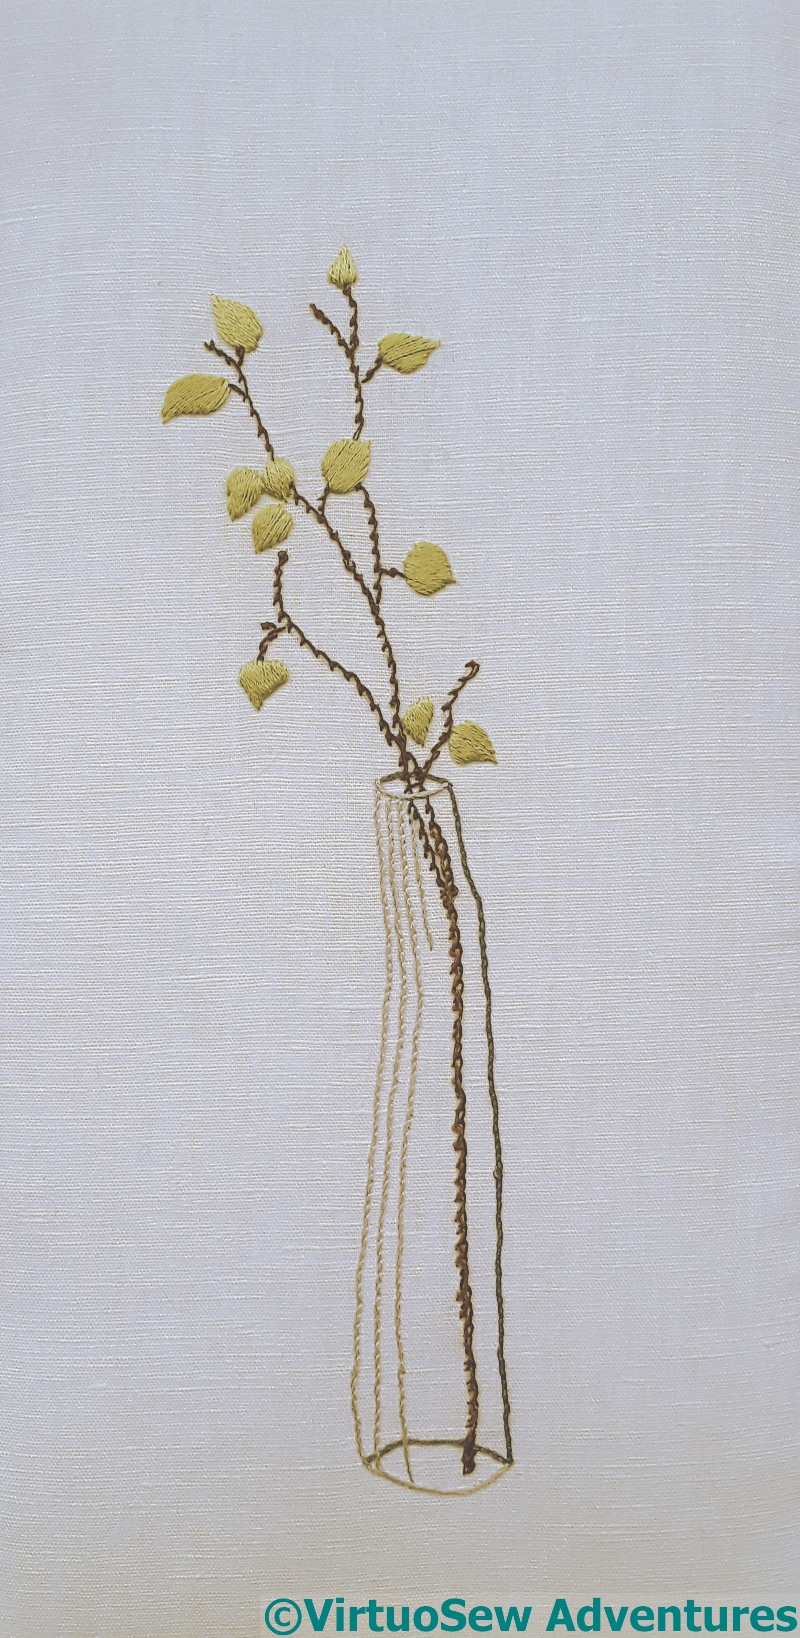
Embroidery based on the watercolour
A very simple embroidery, but, as you see, making use of a variety of stitches.
The vase was textured glass, not clear, and I represented that using lines of coral stitch among the stem stitch. I didn’t work it more densely, because I wanted it to have a certain lightness of touch.
The twigs were very rough and twiggy, so I used scroll stitch.
Finally, the simple shapes of the flowers were best represented using my neatest and most careful satin stitch. All I really wanted from them was the colour.
I haven’t the vaguest idea what to do with the embroidery, so I’ve laced it over a board to keep it tidy. But I thought you might be interested to see one of my very rarest stories – I know other designers often do detailed watercolours of their designs, but it’s not how I work. More often, I have a rough idea in my head, and work on each element while I’m planning the details of the next, waiting for the piece to tell me what it wants.
This has turned out well, but I’m still slightly bewildered that it happened at all!