
Category: General Embroidery
Playing with Dyeing
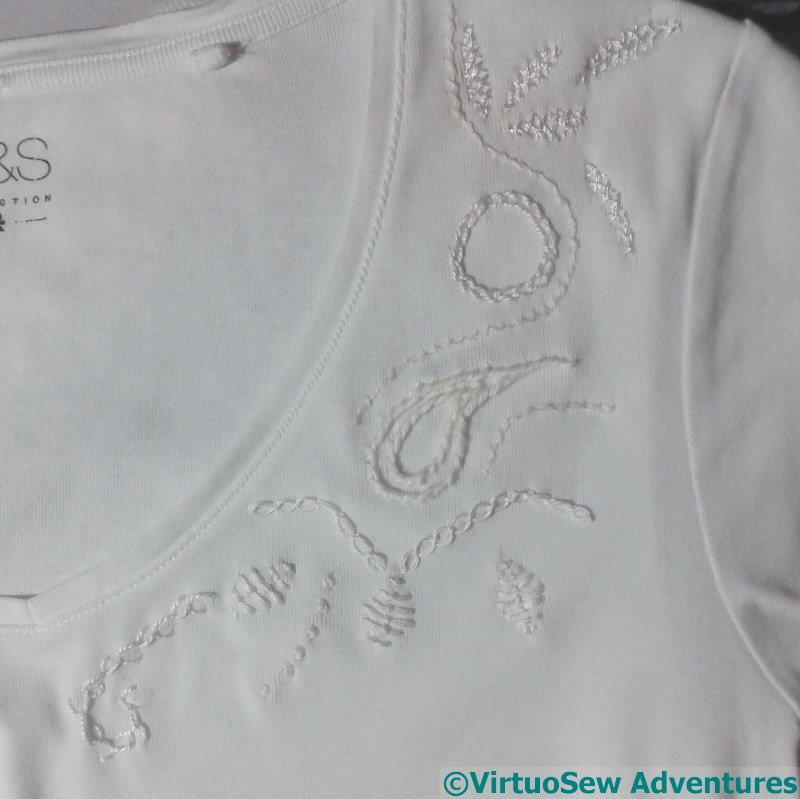
White Embroidery
I’m continuing to think about that quotation from Pliny, and considering how I might bring it to life. In the meantime, I’m trying to develop some familiarity with small-scale dyeing, rather than the huge machinery of my course, so when I heard that The Wild Dyery, not far away, was running an evening of indigo dyeing, I decided to go along.
I found a cotton T-shirt in a charity shot, and proceeded to embroider it using every different white thread I could find. I want to see how the different threads respond, because it occurred to me that I could add to my adventures by embroidering with mordanted threads.
Ever the over-complicatrix of my own life….!
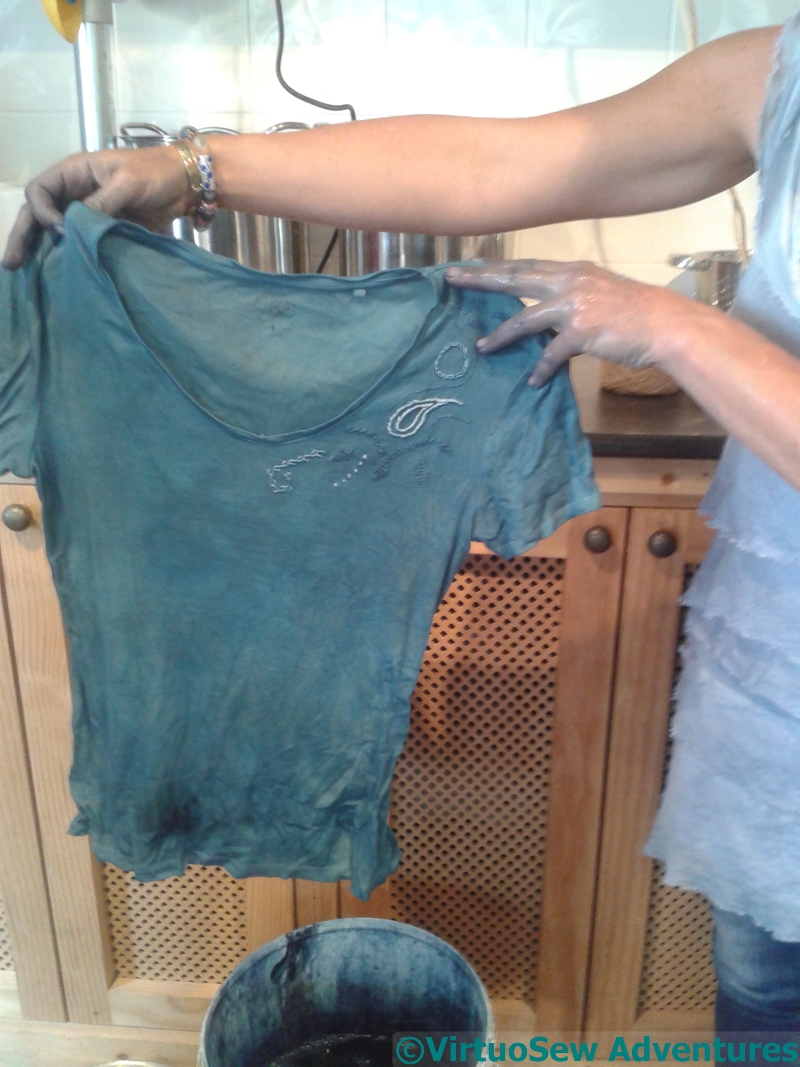
Out Of Dye Bath
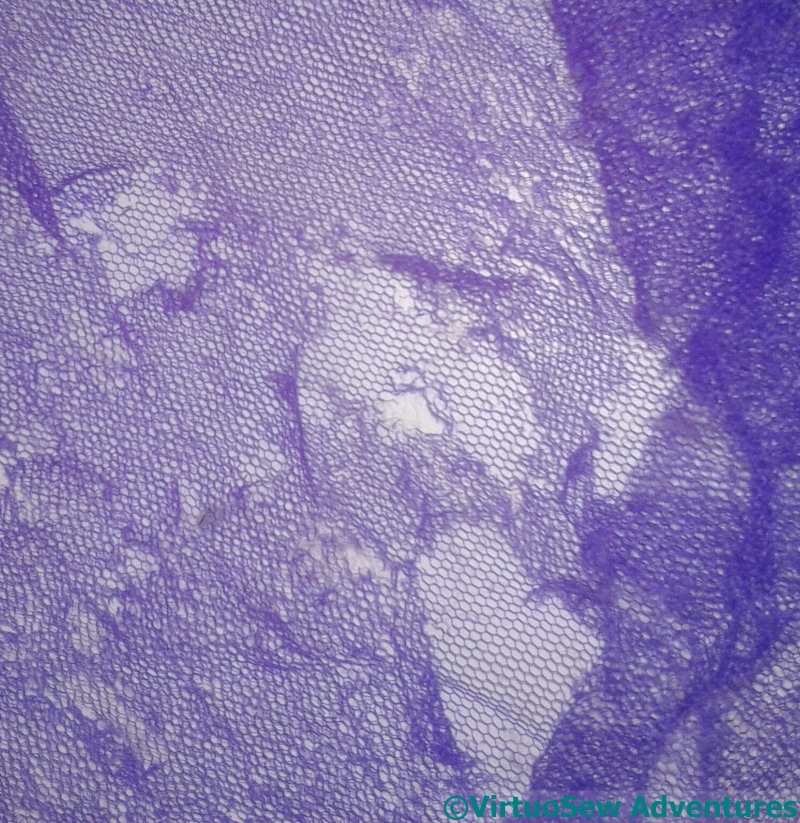
Justine, owner, tutor, and guide in our adventure, kindly hauled everyone’s pieces out of the dyebath for them. As the dyeing process with indigo is an oxidation reaction, incautious splashings in the dyebath, even drips from a piece being removed, can compromise the dyebath by removing dye from it before it has a chance to bond with fabric.
Besides, as she commented – there’s no need for everyone to leave with blue hands!
Brought home, rinsed, hand-washed and then left to dry, the T-shirt came out lighter, blue rather than turquoise, and with a few interesting discoveries made…
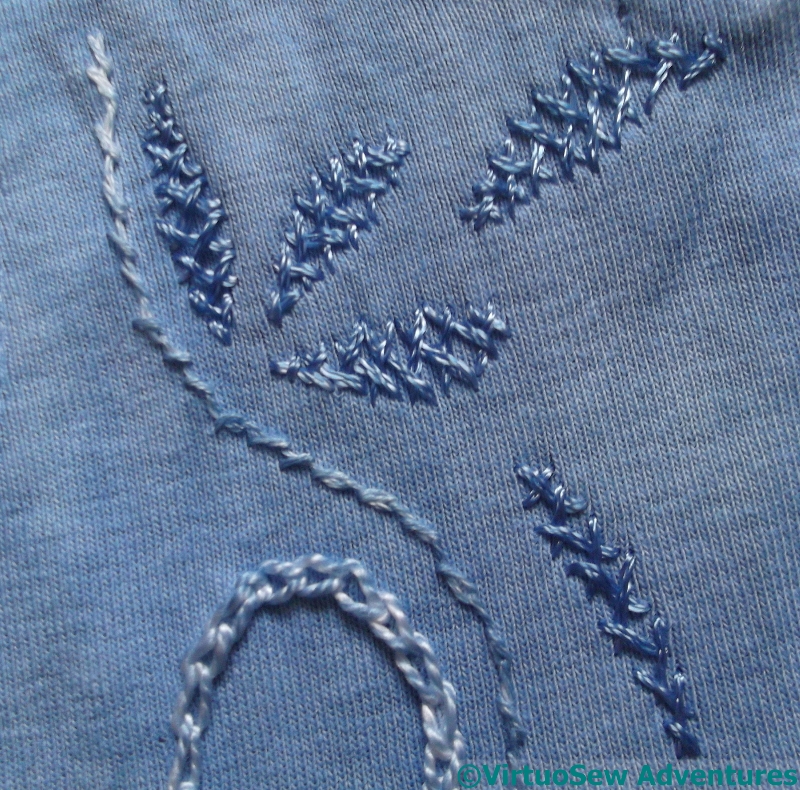
Top Section
Working from the top down…
The herringbone stitch leaf shapes are in Anchor Marlitt, and that seems to have taken the dye nicely. I’d expect that, I think, although the thread is so glossy I might have expect it to have some finishing treatment.
The line of twisted chain stitch is in that frustrating DMC linen. I didn’t enjoy stitching with it, as it it rough, stiff and lifeless. It’s taken the dye in a rather patchy fashion, and I suspect as I wear and wash the T-shirt, the dye will wear off even more.
The next, the circle of chain stitch, is pearl cotton, and this is such a popular thread with the companies that overdye threads that I was expecting it to take the colour much more strongly.
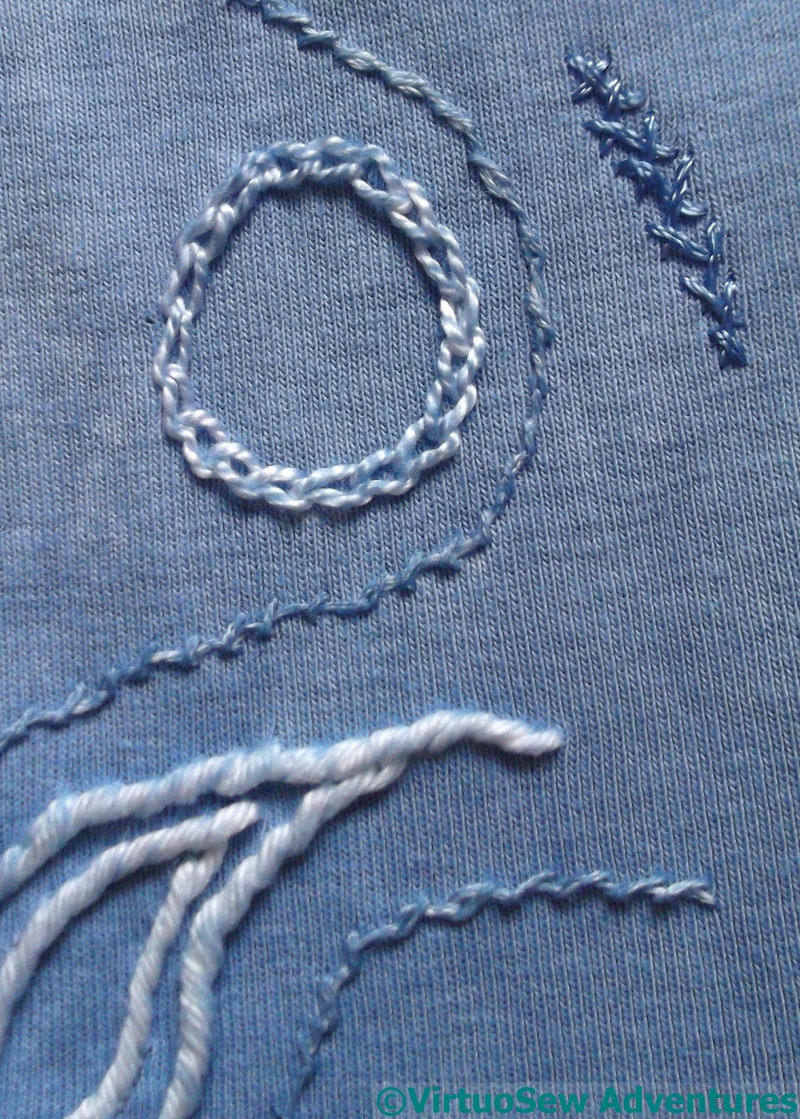
Middle Section
The next photo shows that circle in full, together with the twisted chain stitch in linen thread that curved around it.
The paisley shape in stem stitch is in soft embroidery cotton, and this absolutely astonished me. I was expecting at least some signs of attachment, but there are only the faintest suggestions that the dye was able to attach to the yarn.
Cotton usually takes dyes really well – just think of how easy it is to revive an old cotton shirt with a packet of dye – and if, anything I was expecting it to be one of the darker results. As it is, I think this will wear off in short order!

Lower Section
The line of cable chain stitch is more the colour I was expecting from the soft cotton. It’s a tightly twisted, stiff, mercerised crochet cotton, and it seemed to swallow the dye and hang on to it.
The diamonds of romanian couching stitch are stranded cotton. That has taken the dye well, too, although there are hints that whenever the threads have crossed each other there has been a resist effect, which may show more as the T-shirt is worn.
The feather stitch is pearl cotton and the trail of seed stitch is soft cotton, and they haven’t taken the dye any better than before.
Well, that’s given me something to think about, hasn’t it!
Modern Stitch-Off Adventure – 4
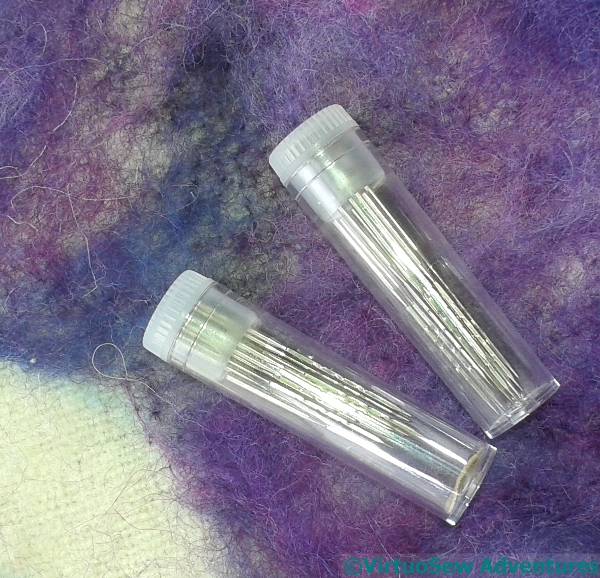
Spare Needles
I’ve been gradually accumulating the skills needed to wrangle my embellisher successfully. It was worth buying the extension table that fits around the arm of the machine – that began to make the whole thing seem possible.
Using the net to hold down the fibres made a huge difference, and so did piling up props to keep the weight of the blanket from pulling on the needles. The props then worked better again when I covered them, and the table, with a slippery plastic tablecloth to stop them getting caught up.
I’ve also found that on my wooden sewing table, the embellisher “walks” with the vibration of its movement. Two layers of heavy batting on the table seem to have fixed that particular alarming problem, and then I bought some spare needles (20 of them!) and relaxed a little, which made it easier not to jerk at the fabric and break needles.
Fibre And Felt
So what with one thing and another, I’m beginning to feel as though I might be getting to grips with the embellisher!
I’m also beginning to learn which fabrics work. Obviously, the hexagonal net gets shredded and doesn’t get pulled into the fabric. Dense commercial wool felt doesn’t felt in well, in fact it seems to pull itself back out again; but real wool tweed and the lofty “pre-felt” pieces felt in like a dream, and end up looking almost as though they were part of the fabric.
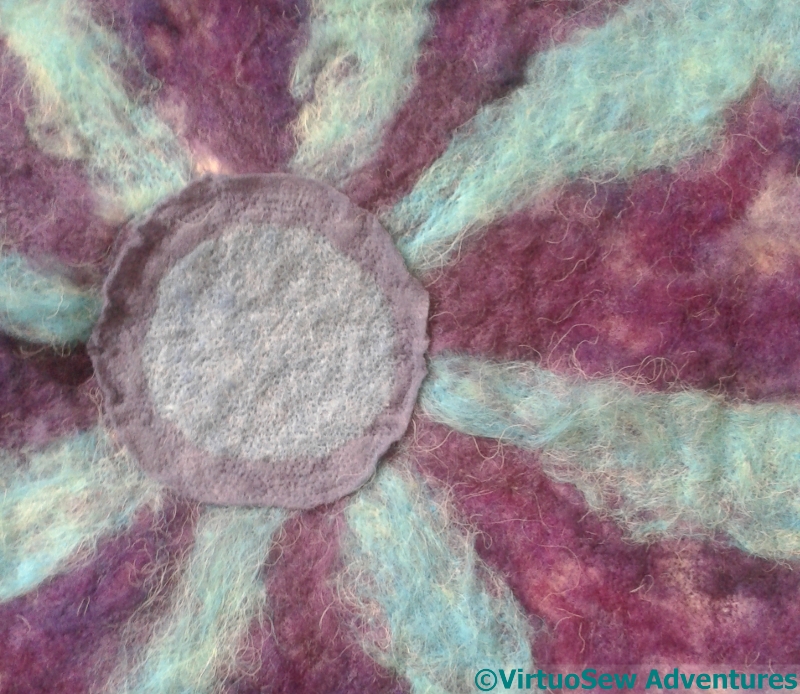
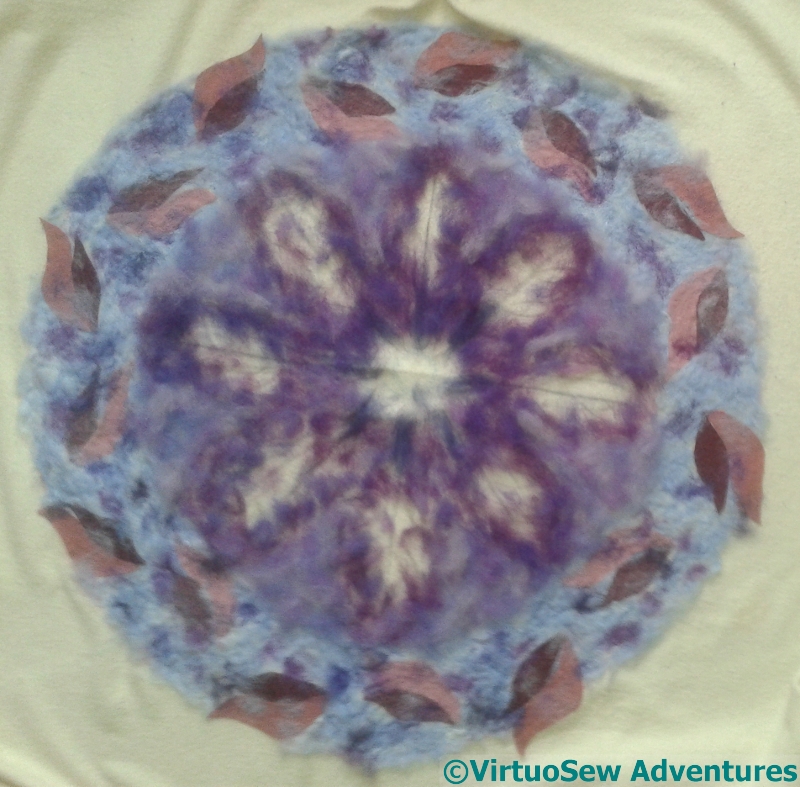
Medallion
The fibres seem to remain quite lofty and furry, even after being fairly thoroughly felted in, although the merino becomes flatter than some of the other fibres. The more I work with the embellisher, the more I realise that there is rather more to it than meets the eye!
A lot more….
At the moment, the colours aren’t quite working, but my next stage is to start to add details, and tweak the colours a bit. I need to add the teals and greens that are part of the fabric pattern that gave me the colour-scheme, and also help some of the edges and lines of the pattern to come to life..
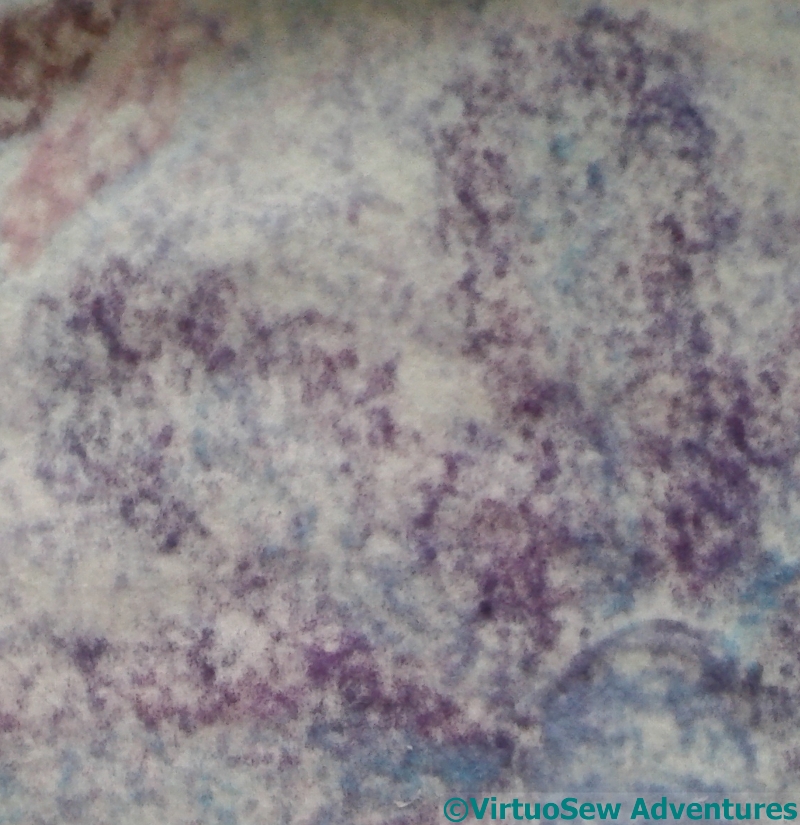
Back View
But I might also choose to use the back… The spotty, “dithered” effect is very like the overall effect of the fabric I’ve mentioned, so I need to consider whether to continue adding to what is at present the “front”, or to start adding tweaks to the “back”.
If it is still the back…!
Modern Stitch Off Adventure – 3
More Blends
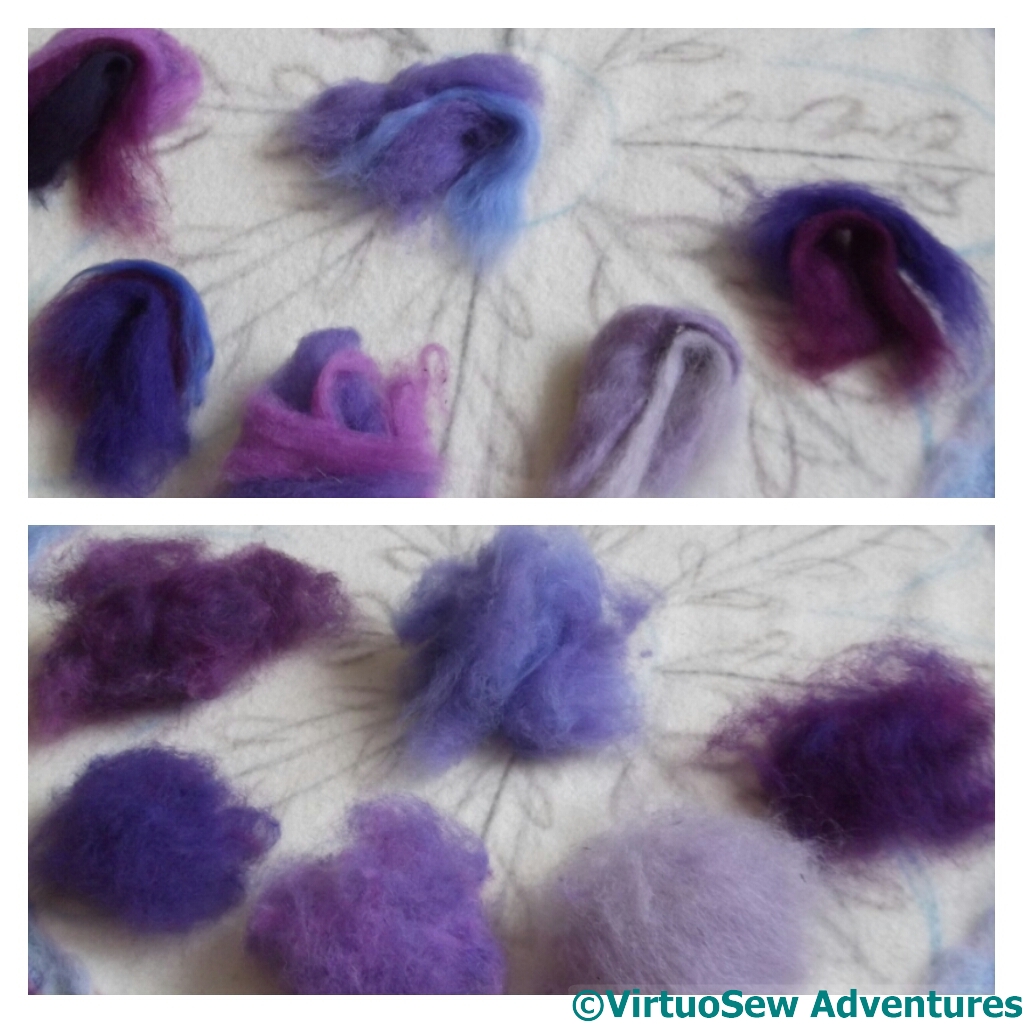
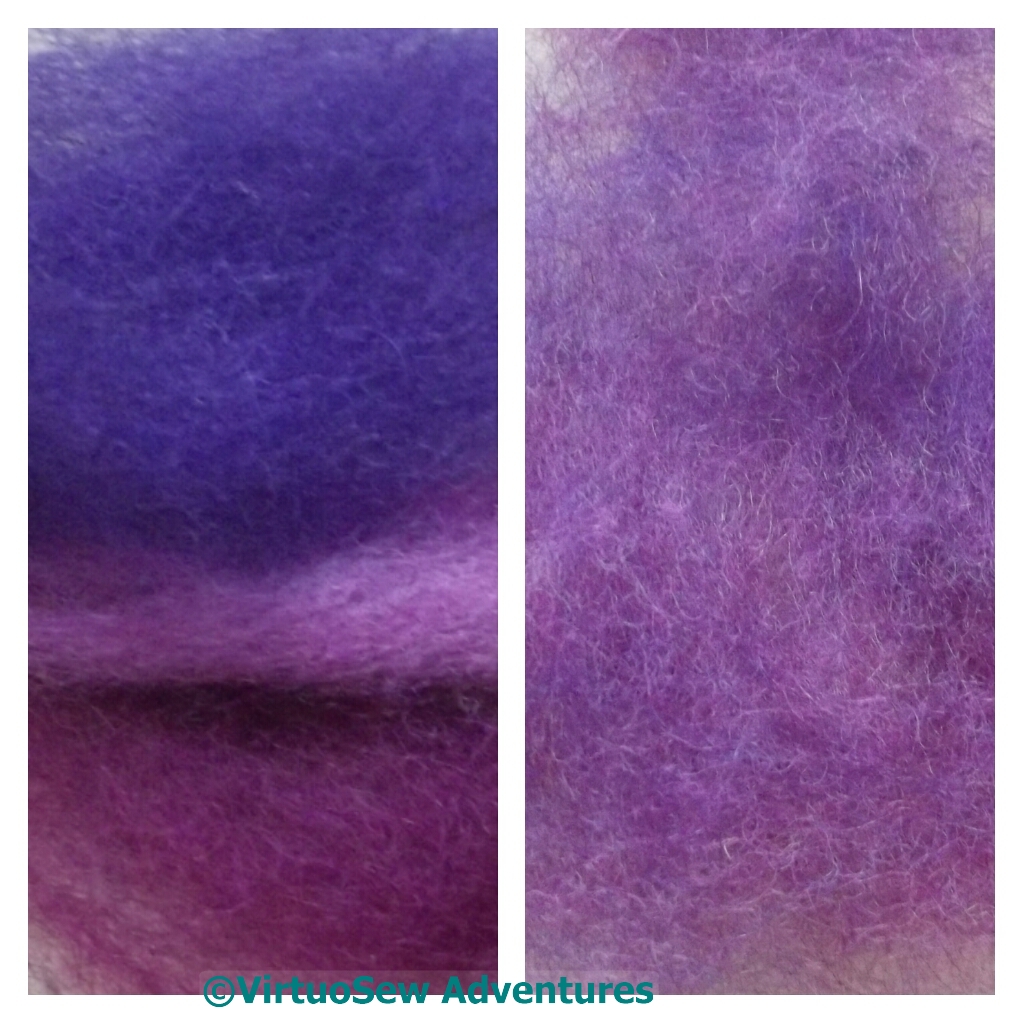
I mentioned in the first post about this project that I was planning to use what are technically referred to as “intimate blends” of fibres to create a more subtle colour range. If you click on the picture you will get a better sense of the varieties I am putting together.
If I were planning to spin these blends, I wouldn’t start from here. Some of the colours are lovely silky-smooth, long staple, Falklands merino, and others, labelled “Nepal Wool” in my local shop, are short staple, and very curly and springy. I’ve even got some very wiry undyed Devon and Cornwall Longwool, bought last Autumn at the Lost Gardens of Heligan (go, if you get a chance: we had a wonderful day out there!). So the characteristics are very different, and that matters quite a lot with yarn, although there is a way to do almost anything if you have the time to make it work. It matters less with felting, so some of my blends would make my spinning master splutter something like “Didn’t I teach you anything?”.
Beginning Central Section
Fortunately, what I am attempting is based entirely on the colours.
The blanket became very unwieldy at this point. I’ve since found the label and discovered it weighed four and a quarter pounds before I even began!
However, that wasn’t really the problem. I didn’t want to have pins within the area I was working, because they’d be certain to get caught up and cause more breakages (by the action of what my father refers to as the Law of Maximum Cussedness). The central section is about two foot in diameter, so a lot of as-yet-unattached fibre was rather more free to move under the netting than I would have wished. Furthermore, because of this I was finding myself tensing up and pressing harder on the foot pedal, and that was when I would get out of sync and break a needle or two.
Modern StitchOff Adventure – 2
Second Layer Of Circle, with net in place
Hexagonal net laid over the fibres helps to keep them from around the “foot” for want of a better word, of the embellisher. I’ve pinned it down, inside and outside the ring, and spent a lot of time struggling with a piece of blanket which seems to get larger every time I go back to it.
The challenge with an embellisher is to move the fabric when the needle unit is up, because if the needle unit is down when the fabric moves, needles get broken.
And I can assure you, they break. Eight, I think, by the end of my first serious day of using my embellisher.
The blanket got heavier and more unwieldy, but by the end of the day I was beginning to feel I might be getting the hang of it.
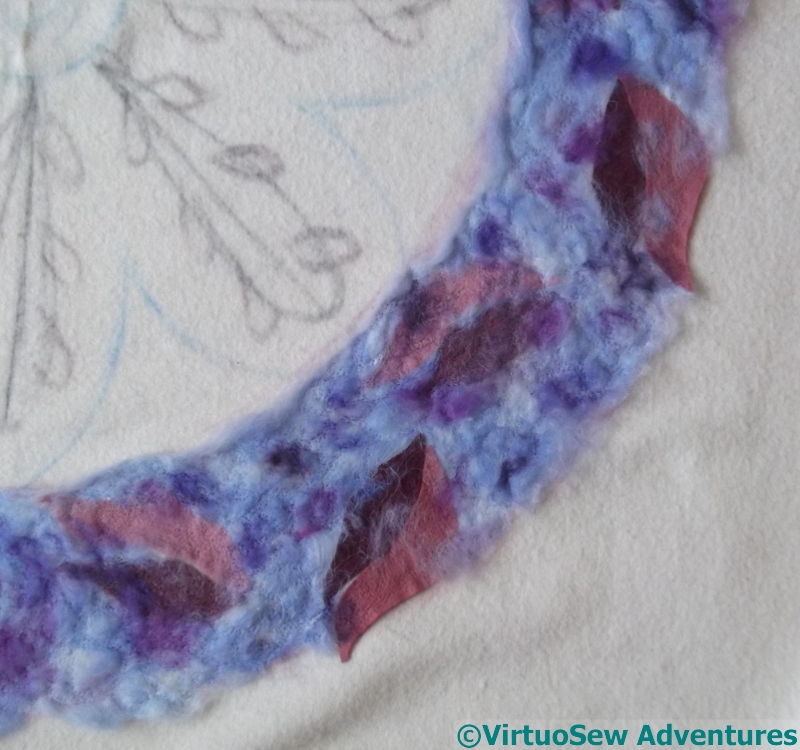
Early Stage Outer Circle
This might be in part because my sewing table was gradually accreting some props. I covered it with plastic tablecloth, to help the material slide, and stretched the plastic tablecloth over a clothes horse.
That in turn helped to raise the main weight of the blanket – the bit I wasn’t working on – so that it was no longer dragging down on the section I was working on.
I even piled up some of the blanket on the windowsill, and I do rather wonder what anyone passing by might have thought of the net curtains swishing tempestuously with no person in sight!
Shredded Net
What was definitely not feeling better by the end of the day was that hardworking and hapless net. It doesn’t get felted in – that’s why it’s such a useful addition to the armoury of the user of an embellisher – but it does get pretty thoroughly shredded. This may be in part because I’m not yet experienced enough to know when I can dispense with it, or it may be because I’m working on small parts of the piece at once because it is so big and heavy.
Fortunately I bought a couple of yards of it, for precisely this purpose!
Second Frostings Box
Frostings Box
Many bounces and squeaks of excitement…
After a trip to the post box to pay the customs charge (I’ve no idea whether the rules have changed, or whether they’ve just got a bit zealous – Tricia has always been scrupulous in declaring contents on the package), I have received my second Frostings Box from Thistle Threads.
And yes, it’s in the same glazed card box with a magnetic clasp. Sturdy, and lovely to look at!
Frostings 2 – Group 1
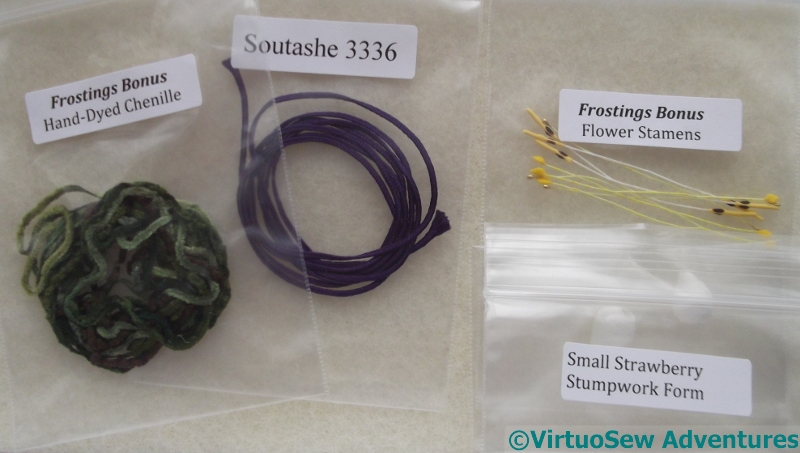
At risk of making everyone drool all over their keyboards, here’s the low-down – together with some of my ideas…
There is some hand-dyed chenille (that’s destined for Placidus, if I don’t find a use for it earlier). I haven’t an immediate use for the soutache or the strawberries, but the Flower Stamens may come in handy for the Violets…
Frostings 2 – Group 2
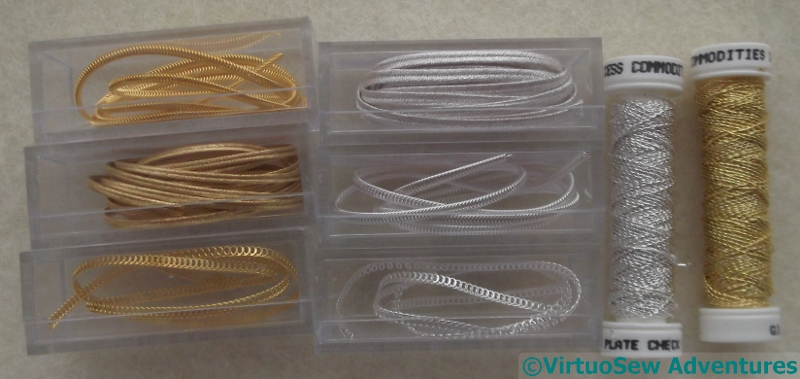
I’m not quite so sure about the metal threads.
I’ve not got them out of their boxes to work out how to use them, but they might make embellishment on the jerkin for Placidus, or on Jason and Medea’s clothing for The Golden Fleece. Or even form parts of Egyptian jewellery for the Dreams of Amarna.
Frostings 2 – Group 3
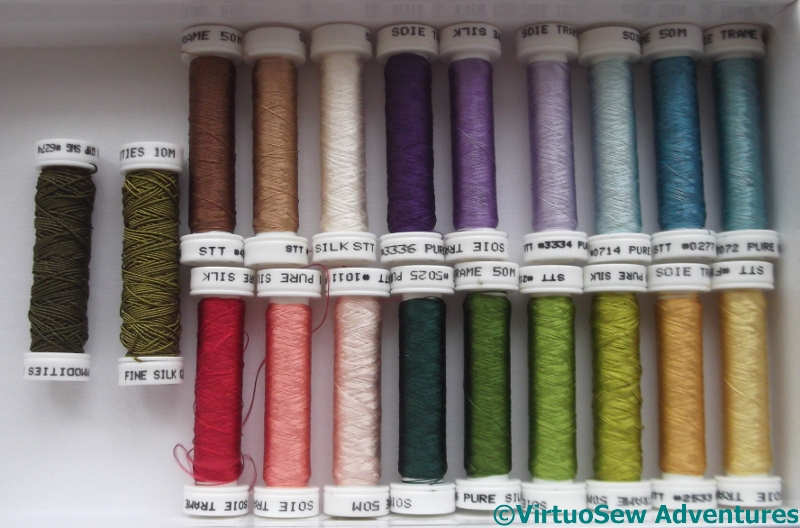
Finally there are two silk gimps (all on their own to the left of the picture) and a lovely selection of fine filament silk Trame. These are in some of the colours used in the Soie Ovale, but much finer, and as Tricia describes in a recent post, the whole idea here is to allow us to twist our own threads, blending colours and thicknesses to achieve the effect we want.
Music to my ears!
Inspired By Spring Flowers – 2
Texture
Once I’d finished the little needlebook, using the little pack from Rowandean, I thought I might have a bit more of a play, and make a scissors case and a pincushion.
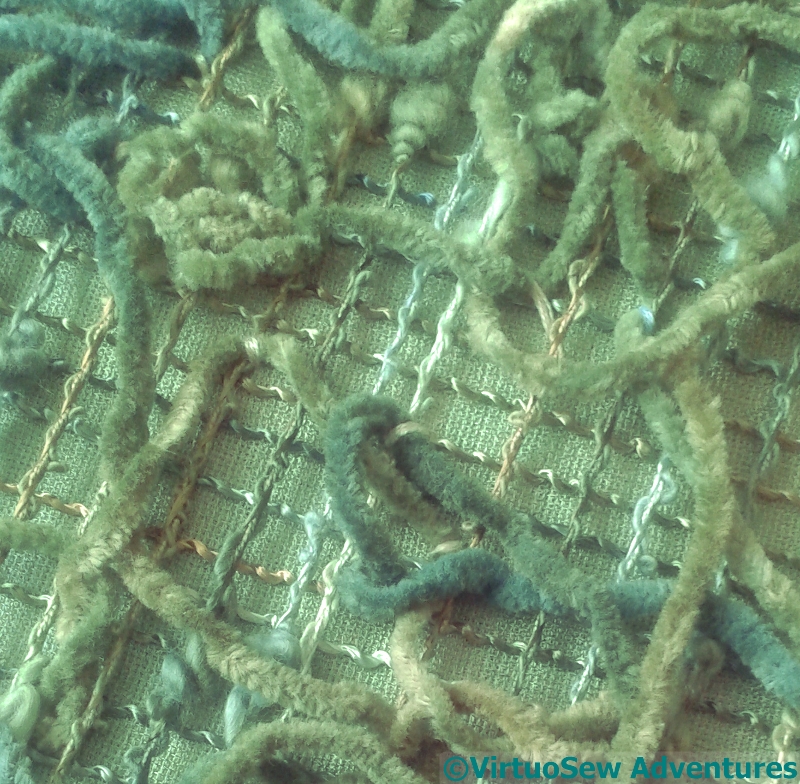
So I fished out a piece of dyed silk left over from a book box my mother made for her fine binding of The Wind In The Willows, and a whole hank of fantastical, textured threads, and spent an afternoon tacking them in place and then playing with my embellisher, in order to create a mossy, textural piece of fabric to line the scissor case and back the pincushion.

Inside Scissors Case
Bear with me, I know the textures would snag the scissor blades! I used some of the pieces of gauze from the kit – also run gently through the embellisher – to smooth down the lining. The texture is still there, but it has been muted and slightly smoothed over. And now the scissors will be beautifully padded and protected!
The edges are simply whipstitched – a considerable effort, through two layers of felt and two layers of the embellished fabric, but I’m glad to say I didn’t break any needles doing it!
Scissor Case – Front

Scissor Case – Back
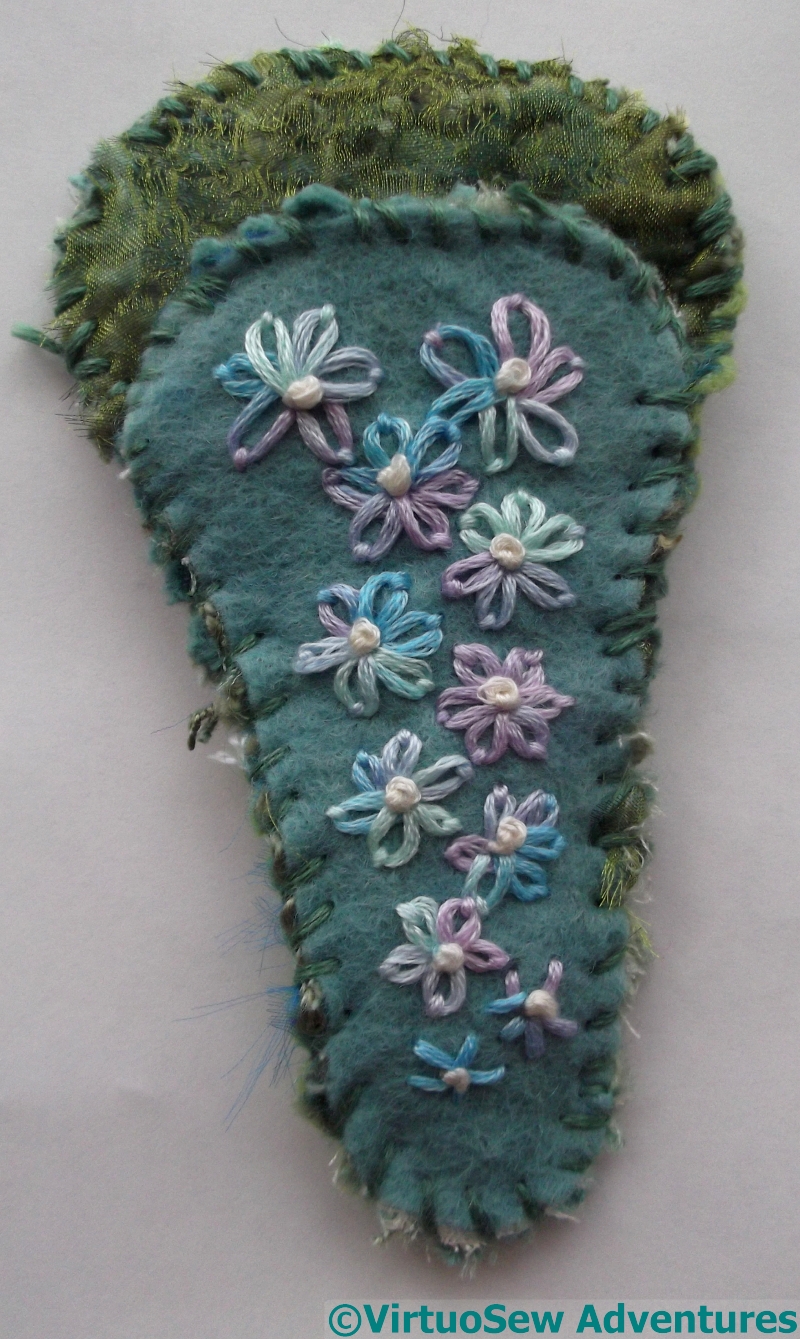
For the front and back, again I used simple stitchery, in undivided stranded cotton. A vaguely wisteria-like (not really Spring any more…!) fall of lazy daisy flowers with French Knot centres enliven the front.
And three wheatear stitch stems (seedheads left over from winter, perhaps…?) decorate the back.
The variegated thread makes all the colour changes happen by magic, and since my other main project at the moment is the 40-count tent stitch of Eve In the Garden Of Eden, six strands of stranded cotton is a blessed relief..!
Lady’s Magazine Stitch-Off – A Modern Adventure
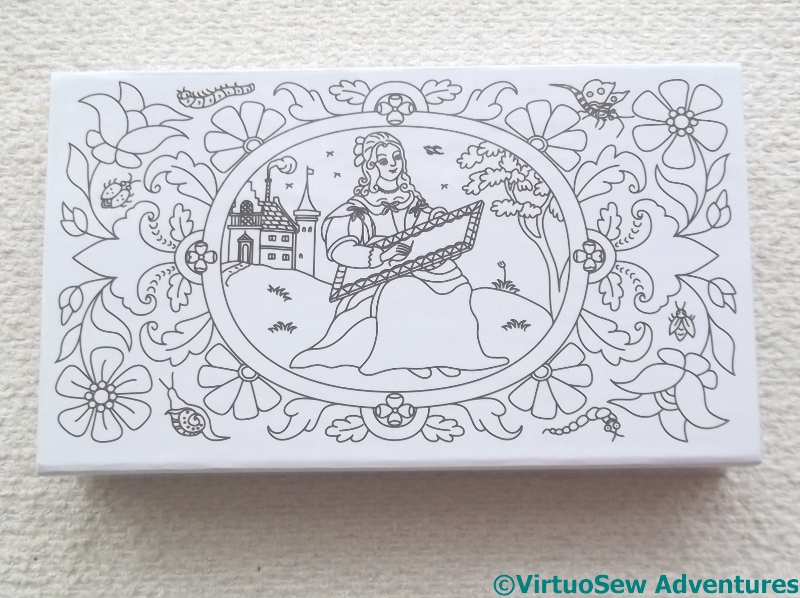
Sketched Medallion
I have a matchless talent for complicating my life. In my defence, I can say that this will be practice for future projects, but oh, my…
I have always had in mind to try a full-on-modern, Jane-would-never-have-done-this, take on one of the Stitch-Off designs. This is going to be that project.
I’ve been intending to do something with this blanket for quite some time, and I’ve also been intending to have a serious play (as it were) with my embellisher. Not the least of the challenges will be in managing a full size, pure wool blanket – nearly six foot square, and heavy.
First Thoughts
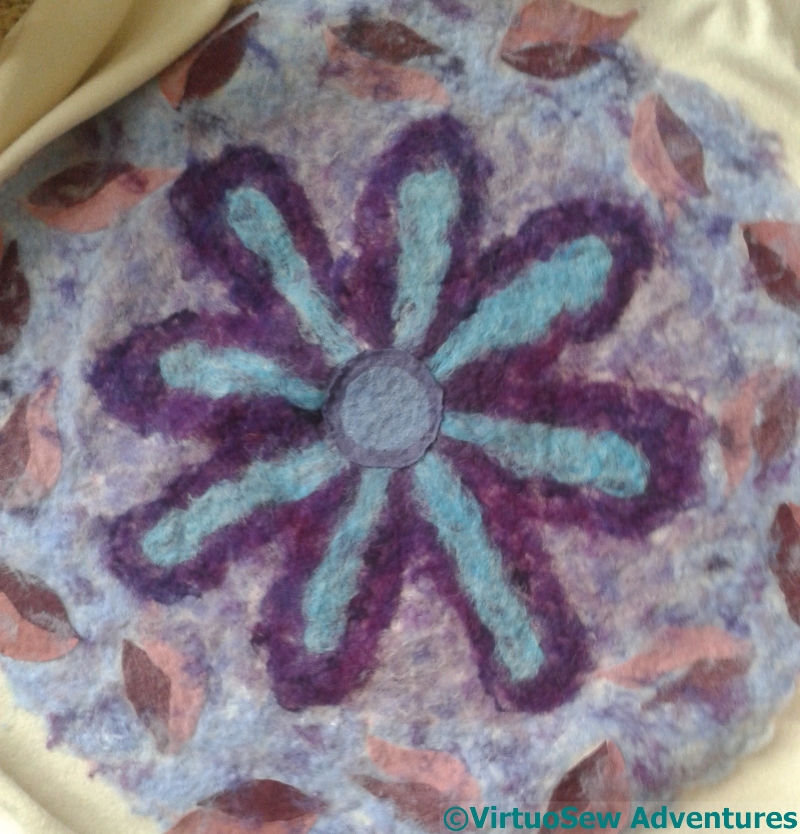
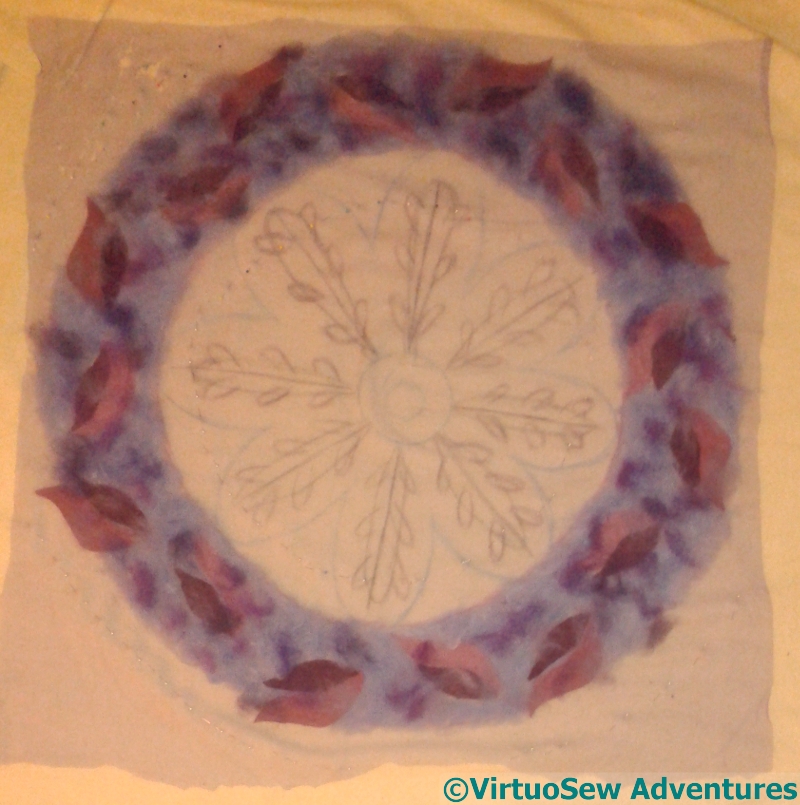
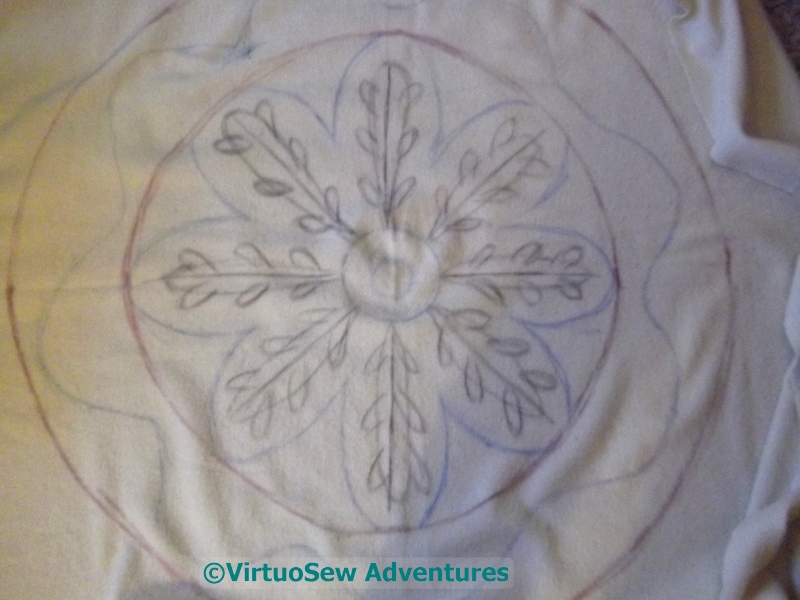
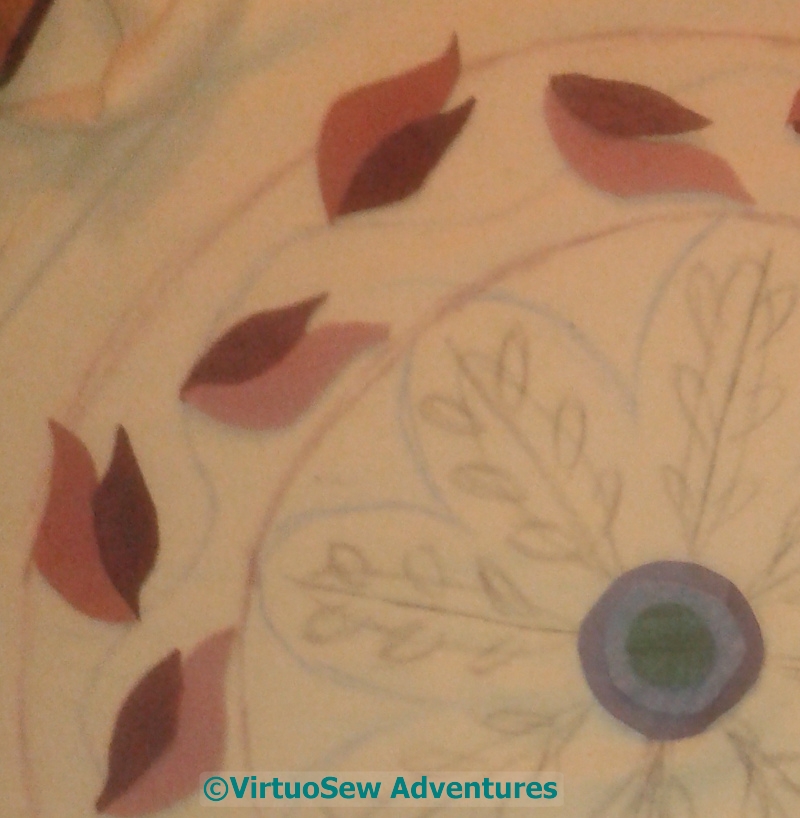
I’ve sketched out the central medallion from the design for the child’s cap by eye. From now on, it’s a venture into the unknown…
I began by cutting leaf shapes in two colours out of two different types of felt, and alternating them around the circle. My wavy stem line wasn’t quite even, so I’ve tried to even up the spacing by eye, and attached the leaves roughly.
I’m expecting to build up this pattern in layers, and fine-tune the felting as I go, so the first stage here is just to make sure nothing moves too much..
Originally needle-felting was an industrial process for making a non-woven fabric. It dates back to about the 1860s, and these days is used for things like geotextiles and insulation. A quick rummage online told me that among the applications are tiles on the Space Shuttle and tennis court surfaces. The application to craft and art is much more recent, but it uses exactly the same needles – just not as many of them!
An Experiment in Blending Fibres
However, because of this background, an embellisher is a great way to use wool fibre as well as fabric in a project, and that in turn means an opportunity to play with colours. One of the strongest memories I have of my childhood introduction to the textile industry is visiting a woollen mill in Totnes in Devon, which made upholstery fabrics. The manufacturing process began with bales of alarmingly bright colours of wook fibre being thrown into a carding machine, and ended with wonderfully subtle, lively colours of fabric coming off the looms. I’m going to see what I can do to emulate this intimate blending of colour using my little hand cards.
Inspired by Spring flowers..
Cover Layers
You may recall that last year – or was it the year before? – I joined in a “Make & Take” at the Rowandean stand in Harrogate. Last time, I bought a little kit and one of Katrina’s pages of ideas and brought them home to play with.
Of course, as we all know, the Bringing Home is the easy part… !
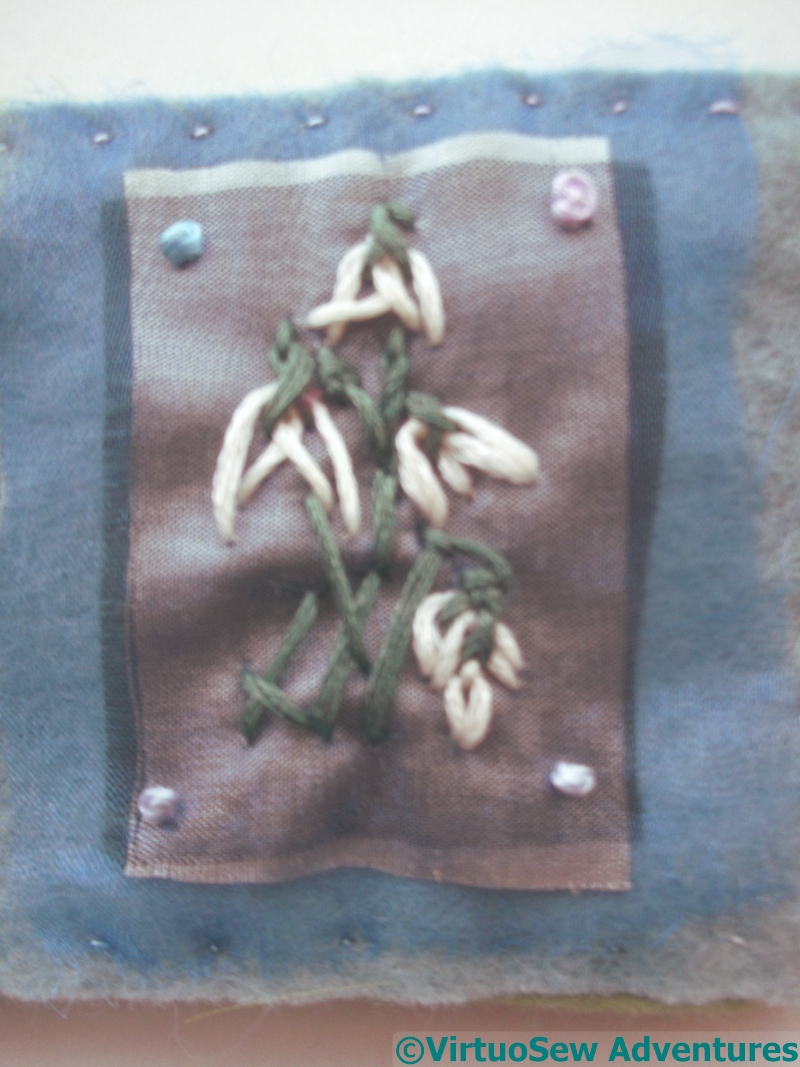
The colours are soft and fresh, springlike, so I thought I would start by playing with forms vaguely inspired by spring flowers. The ultimate inspiration here was from snowdrops, made by stitching a fly stitch and a twisted fly stitch on top of one another. It has almost worked, certainly close enough for my purposes. Maybe an embroidering botanist would like to play a bit more.
Grape Hyacinth
The flowers are stitched on a piece of gauze which is layered over a piece of silk, which in turn lies over apiece of felt. The french knots in the corners held everything together while I tackled the flowers.
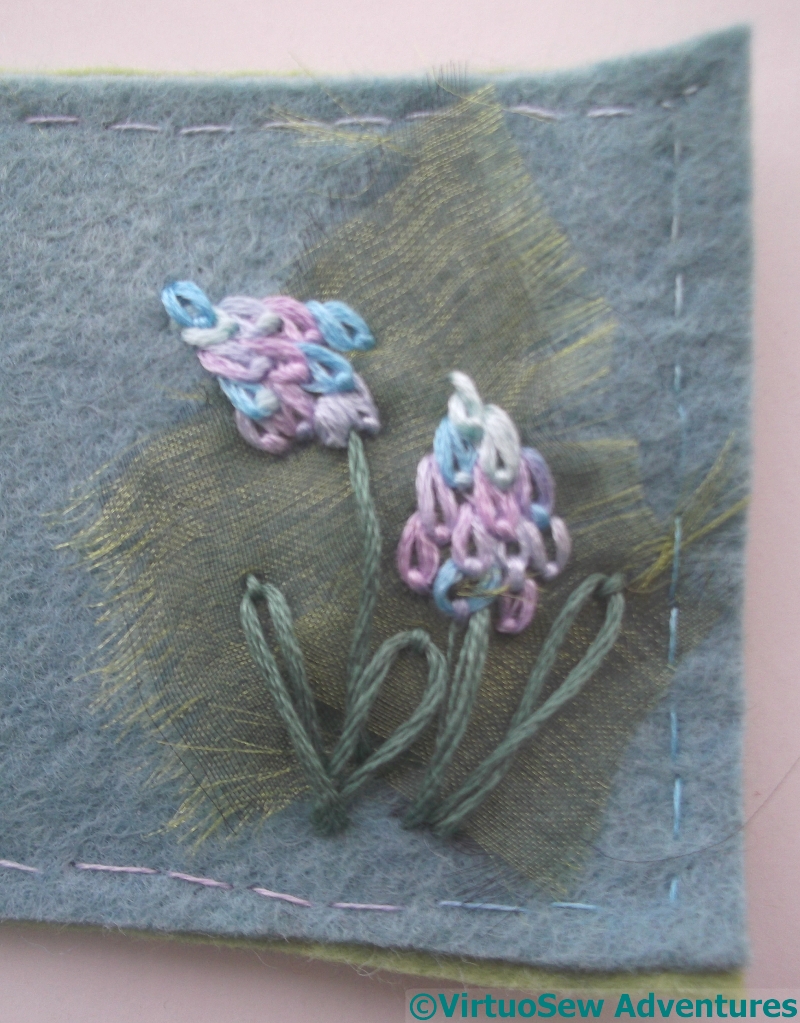
The next fragment was vaguely inspired by grape hyacinths, which are among my favourite spring flowers. Overlapping detached chain stitches worked well, and layering gauze over the felt helped to bring the flowers out from the background.
I may choose to fray the gauze further, but I was struggling with light at this point and decided to see what I thought under different atmospheric conditions!
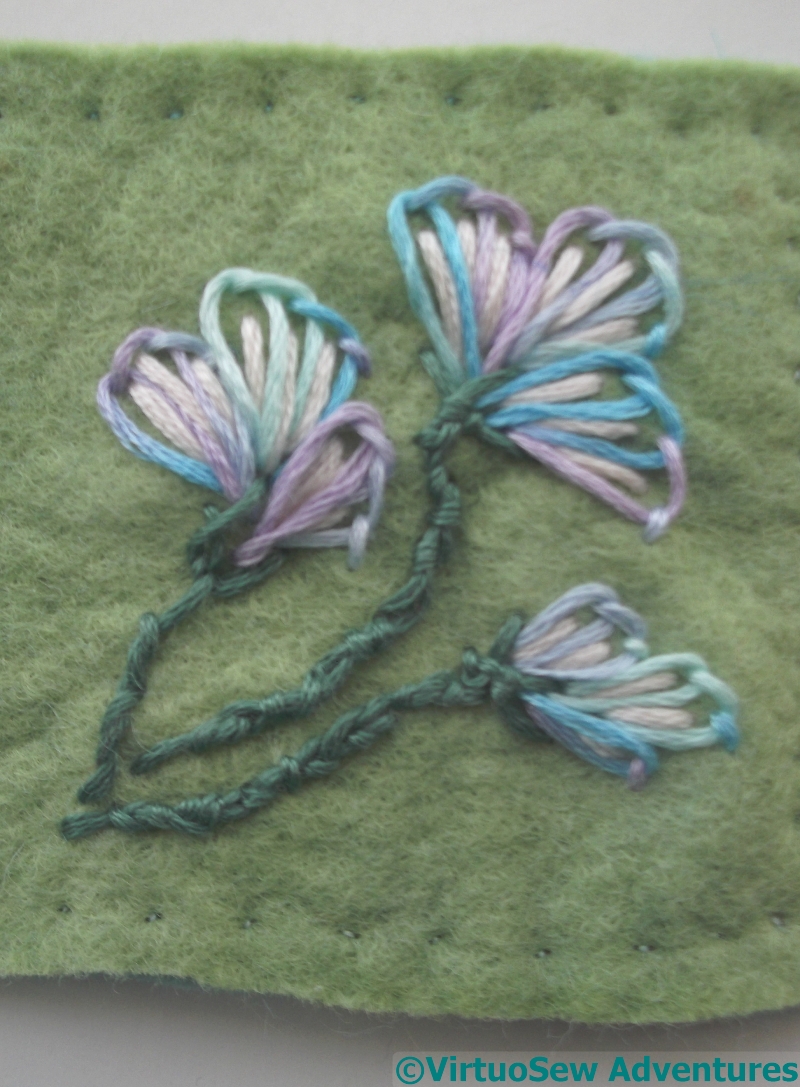
Crocus of a sort
I did mention that I’m no botanist! The ultimate inspiration here were the stripy crocus I see a lot near where I live. They are getting a little old and blowsy, not the trim, upright bolts of colour that first appeared, but nevertheless the ones I’ve stitched look more like some strange new flora, unknown to either science or art!
I rather enjoyed them, all the same…
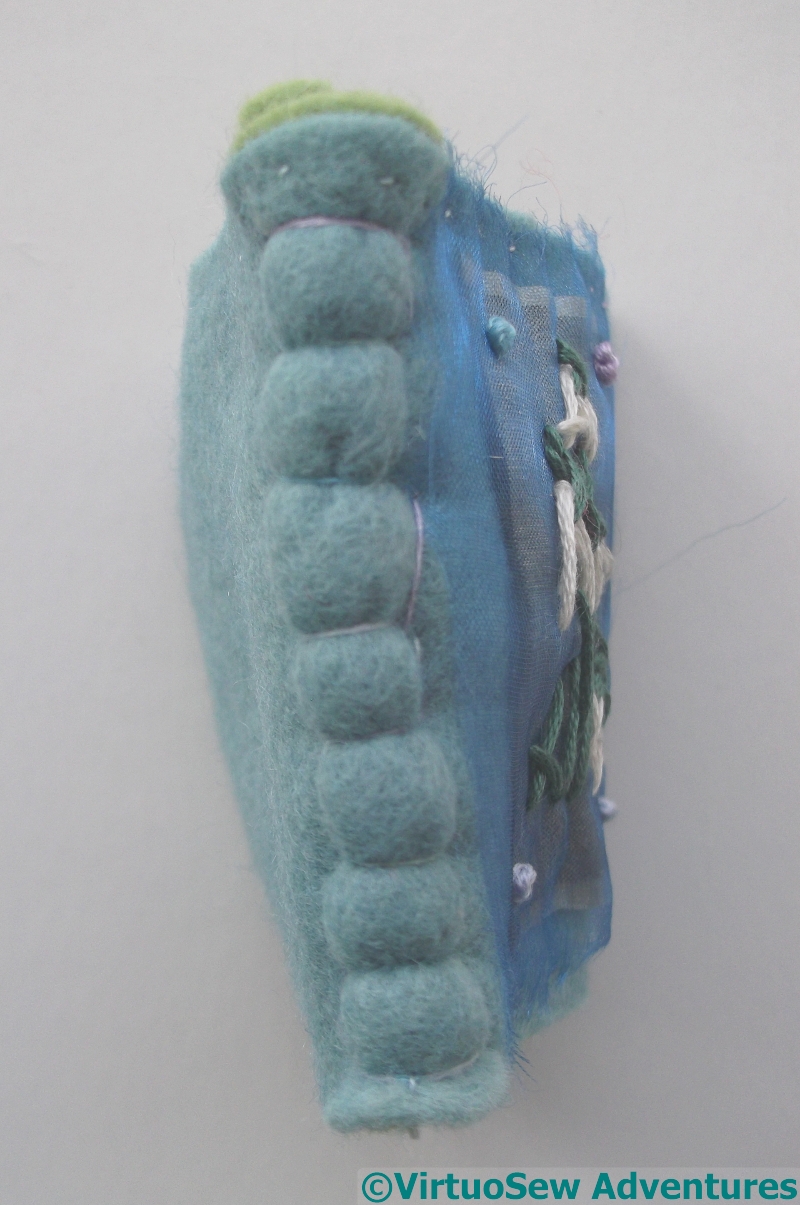
Stitched Spine
I’ve turned the resulting pile of felt into a needlebook, rather more illustrated that is usual, and with a dramatic stitched spine. This was a distinct piece of experimentation – I could have done with a milliner’s needle, but not having one I improvised with a beading needle, which was very flimsy and flexible, but did the job in the end.
Now I’ve put it under a heap of books to flatten it gradually without the squashing effect of an iron. And I still have some felt, some thread, and some gauze left over for further experimentation!
Lace for Topsy..
Lace Pillow
Another report from my mother on the project to clothe Topsy..
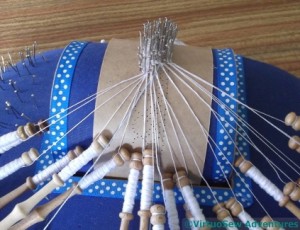
Topsy’s dress is going to give me a reason for stitching and lacemaking. I have done some torchon lace but I want to learn a new kind of lace – Bucks Point. Lace making looks far more complicated that it is, at least when using simple patterns. There’s lots of guidance, since the design is pricked out (literally) on stiff card, often with little symbol to help you remember which stitch you are doing. The bobbins’ weight provides the tension, hence the decorative beads, and in all the patterns I have used so far, I was working with only four bobbins at any one time, even though there may be twenty, thirty, forty bobbins in the design.
I have chosen the very simplest pattern, just the new “ground” and a “cloth” fan. For none-lacemakers, the ground creates that part of the design where you are just space filling, in this case it joins the fan to the footside (the straight edge which will be used to mount the lace on cloth). The cloth stitch is made by a weaver pair of bobbins going under and over the other threads just as if you are weaving cloth. The complication lies in remembering the sequence of stitches – it took an hour and a half to work out the sequence for one fan and attached ground. Since the design is a simple repeat, the next one took three quarters of an hour with much referring back to instructions. Six fans on, it takes half an hour with just occasional glances and I am looking forward to cutting down the time as I continue. There is a long way to go as this piece is to edge Topsy’s petticoat. I have more ambitious plans for the dress itself.
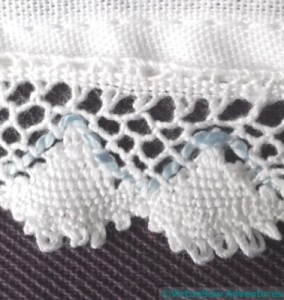
Petticoat Lace
It took four months, but I completed the first length of lace and attached it to Topsy’s petticoat. And I am pleased with the result. It’s neat, decorative, not flamboyant – just what I wanted. The first two or three sections are a bit wobbly but thereafter the pattern becomes more crisp. The blue gimp will echo the embroidery on the dress.
I had some difficulty in remembering not to cover the pin in this style of lace making, since doing just that was an essential part of all the Torchon lace I have made. But once I’d mastered that, the ground became easy to do, and, of course, the fan was worked exactly as I had done in previous lace making. Heartened by this, I felt I was ready for something more complicated.
Stitching the Christmas Angel
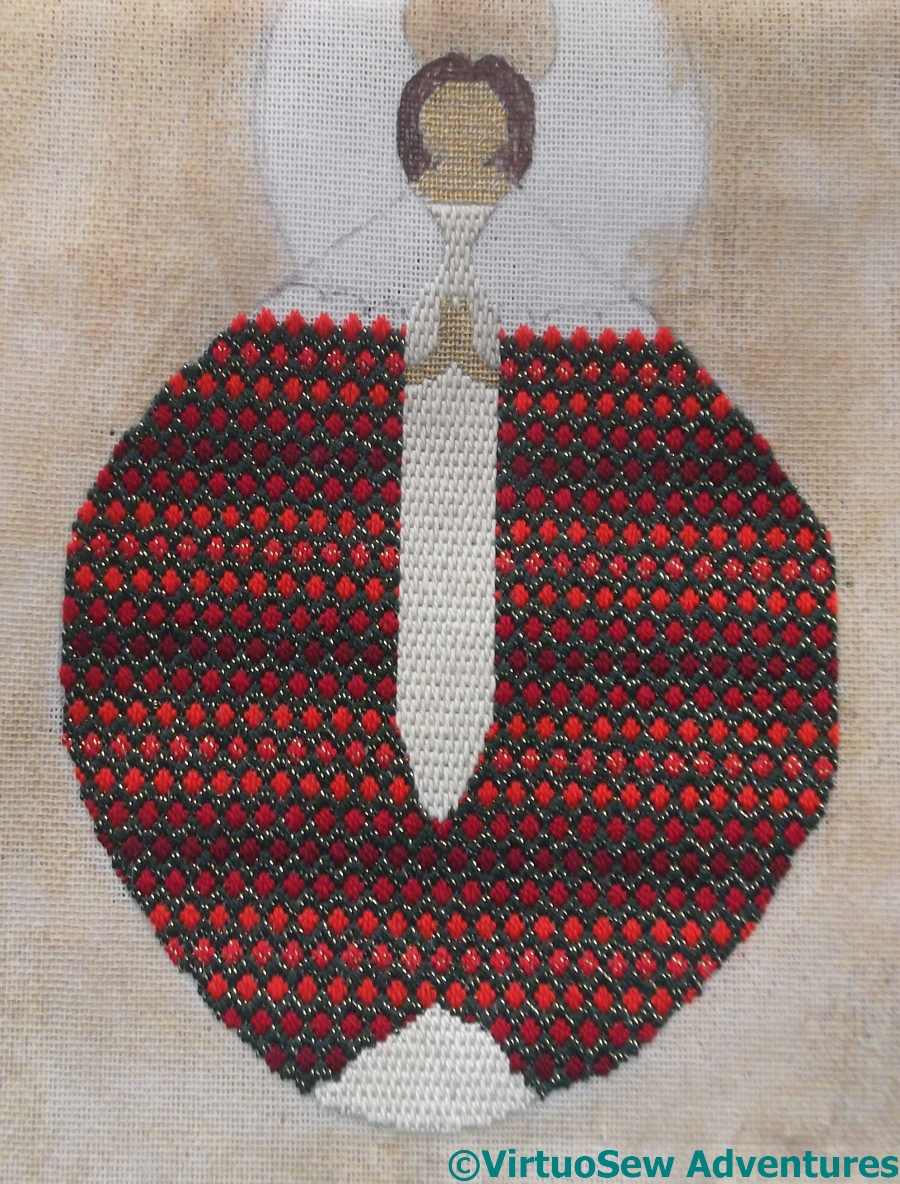
Stripy Cape
Rather than being stitched in time for Christmas, I found myself stitching the Christmas Angel over Christmas. About halfway through the stitching, I also coloured in the hair with brown pen. It helps keep the head distinct from the background and the wings, and somehow pulled the whole thing into focus.
My invented bargello pattern of various pearl cottons, including some with a metallic twist in them, has turned out fairly well, if redder than I expected.
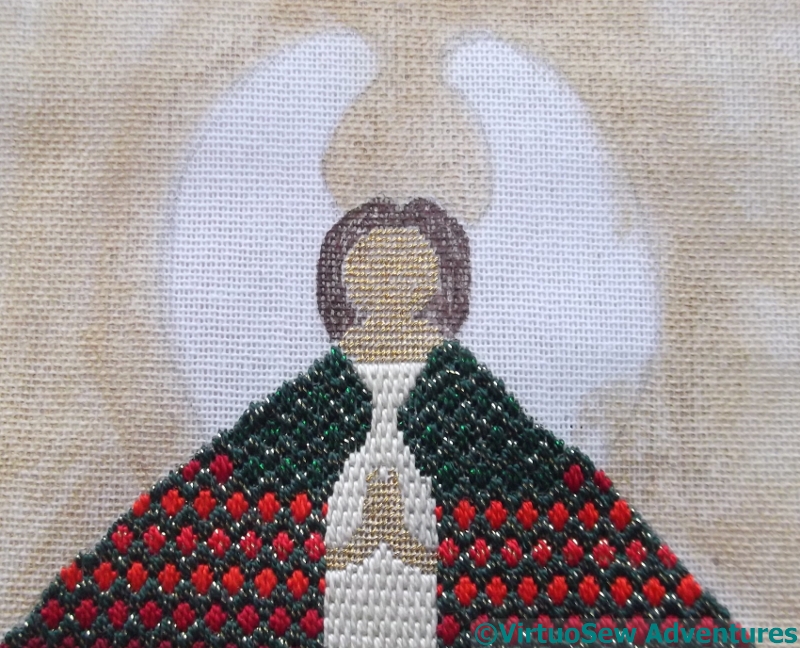
Shoulder Cape
As a result, I chose to stitch the shoulder cape in greens. There are two variants here – green with a gold thread and green with a bright green thread. I’ve been using the green and gold as the striped “framework” for the Cape, so I simply used the green and green for the spots. The shoulder cape will be outlined to allow for a bit more shaping, using couched gold thread, but that’s one of the last elements of the design.
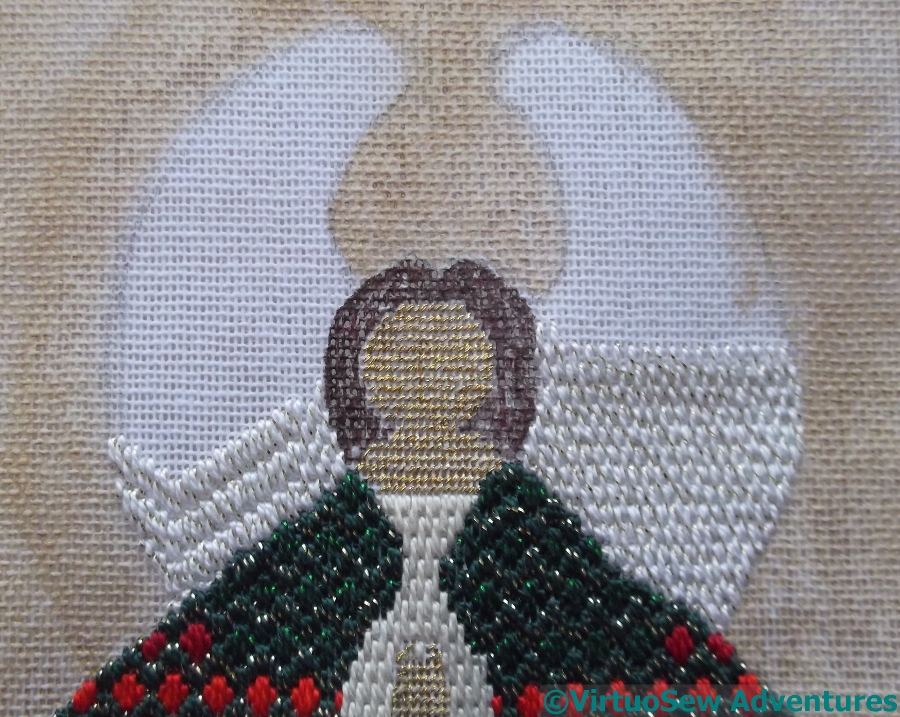
Decisions regarding the Wings
The next challenge was to decide how to work the wings. I started off wanting to create some sort of strong patterning, just with the stitches, but in the end I realised that, as the background is going to be strongly patterned, and the cape is so striking, the eye will need somewhere to rest.
So, plain brick stitch it is, although in another of those glitter-twisted pearl cottons, which are quite ridiculously tender and tricksy to stitch with, at least on this canvas. Even Gilt Sylke Twist and Gold Wyre seem robust by comparison!