
Category: General Embroidery
Found in Tidying
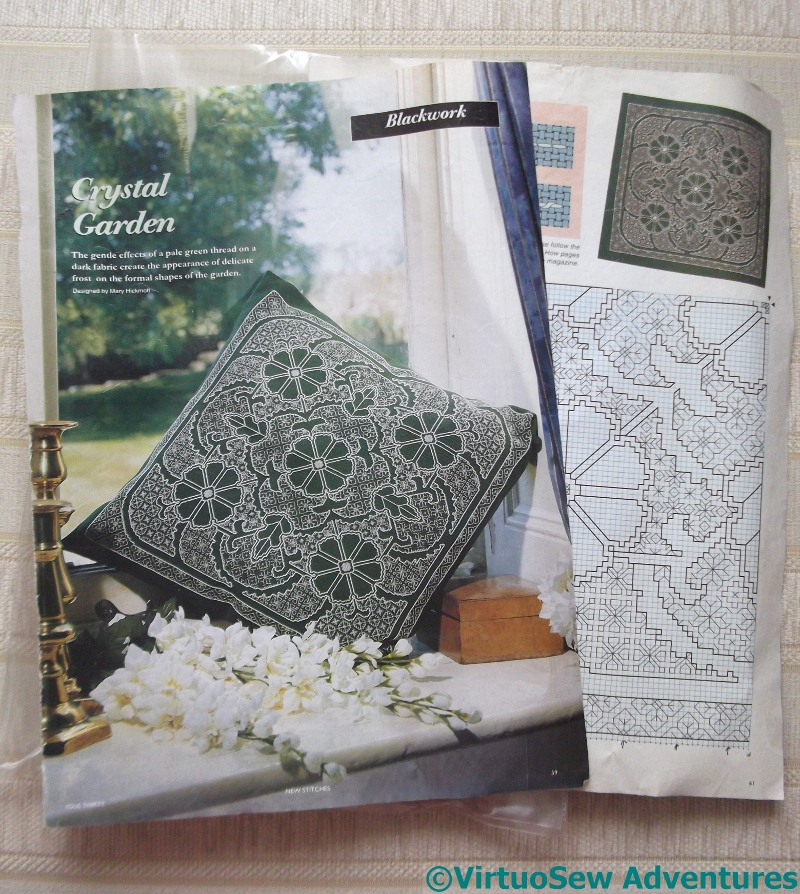
Blackwork Pattern
Remember all those frames? And the teacloth? And “Co-operation is better than conflict“?
There’s been a bit more tidying up going on, and this appeared, ready prepared and kitted up. Presumably by the very same lady – or, given what embroiderers are like, possibly acquired from someone else who’d decided not to do it after all. I’ve found all sorts of half-completed needlework projects on Embroiderer’s Guild stalls!
The design was in a copy of “New Stitches” magazine, but heaven knows how old it is. At least eight years, because we’ve had it tucked away that long!
Blackwork As Inherited
There’s not much of it done, so one of us will have plenty to keep themselves occupied with.
In spite of Topsy, my mother is talking about taking it on. She’s much better at counted work than I am, so I’m likely to leave her to it, although I must admit it does look rather charming, and blackwork is a style I’ve yet to tackle!
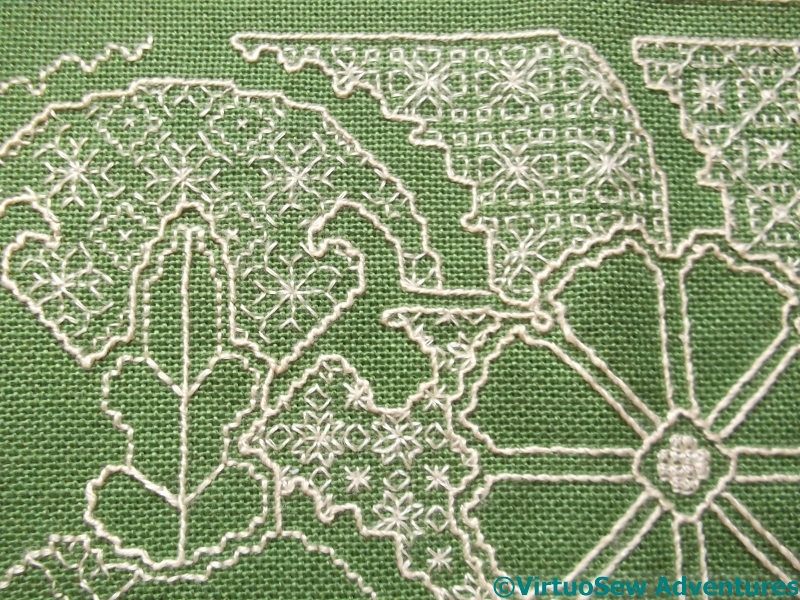
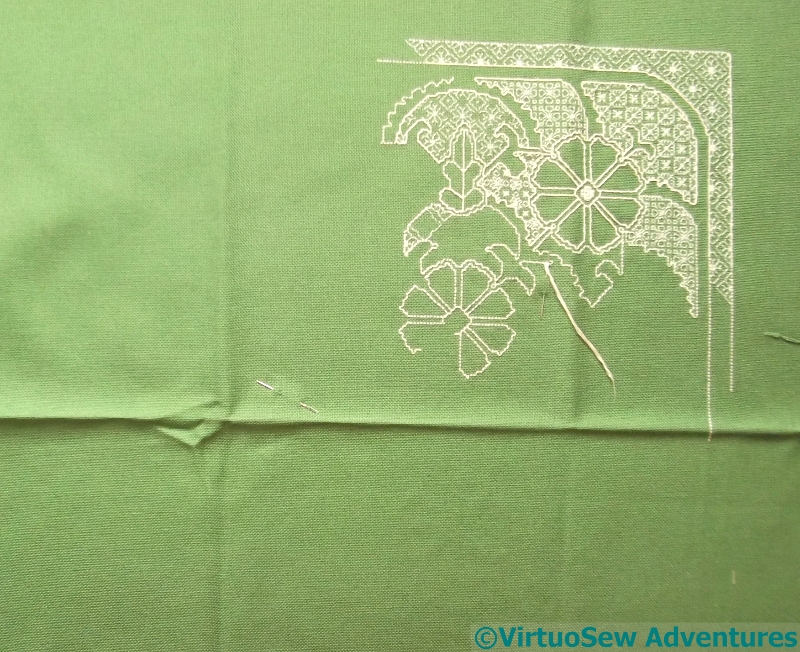
Blackwork Detail
Look at all the different stitch patterns here! So intricate…
If ever either of us gets this finished, I’ll be sure to let you know…
A Lovely Teacloth

One Corner Of Teacloth
This teacloth was worked by my mother as a schoolgirl.
The design came from a transfer, and there was another girl in her class that was working the same one. With rather a difference. Her flowers were all lazy daisy stitch, and anything else was stem stitch, apart from the edges, and she got the whole thing finished in a term.
Needless to state, as her mother’s daughter, and with the spectre of Miss Hunter in the background, my mother wasn’t going to use a stitch with “lazy” in the name.
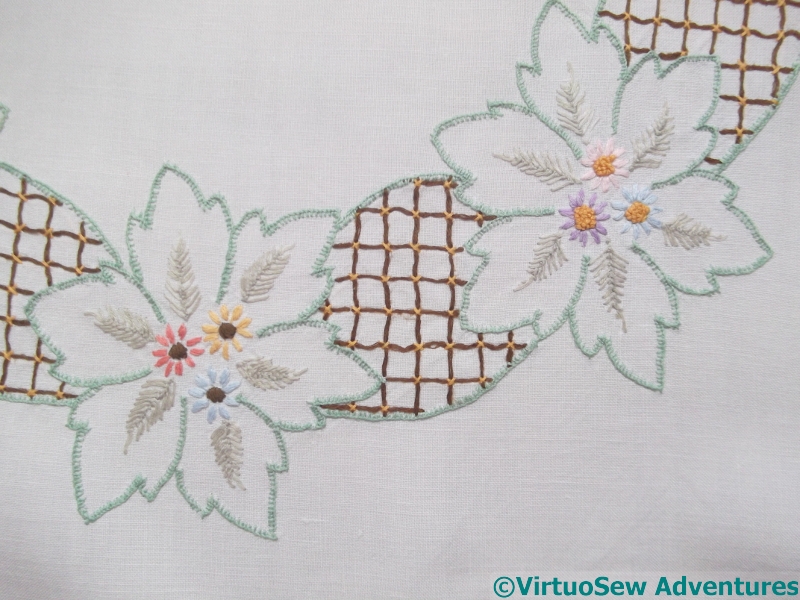
Central Ring
She did all the edges in blanket stitch – which with my recent experience with the Azorean Cutwork has me extremely impressed. It takes so long to make any noticeable progress with it!
The leaves are all in feather stitch, and they’re beautifully shaped, and the flowers are satin stitch – very neat satin stitch, which again is one of my least favourite stitches, and one I only do neatly in short bursts and with something else to do in between!
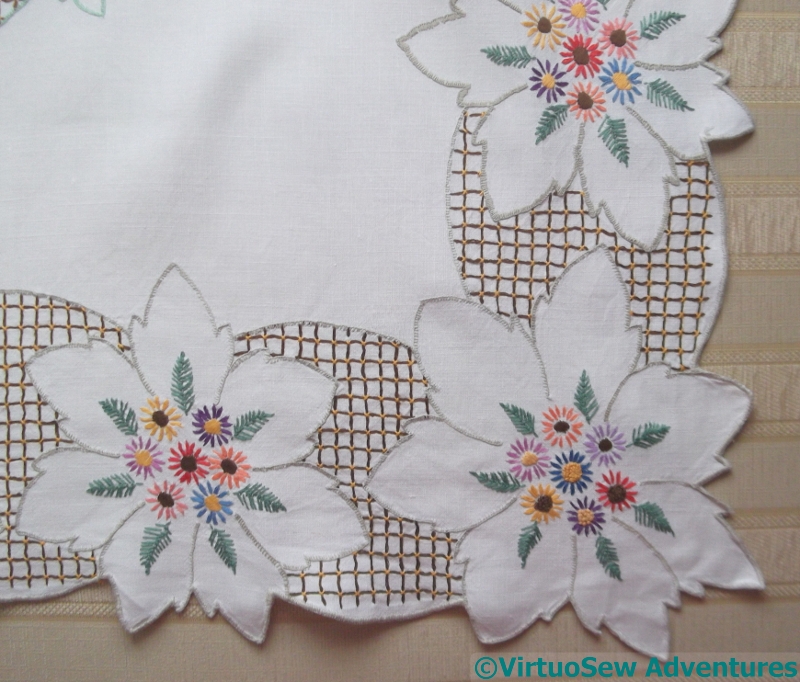
Detail Of Corner
Of course, my mother didn’t get her teacloth done in a single term – but her teacher was so impressed with what was finished that she took it home and handwashed and pressed the completed corner to put in in the end of term exhibition.
In spite of the fact that I very much doubt whether the teacher had contributed anything at all to my mother’s skill in the matter!
Favourite Summer Suit
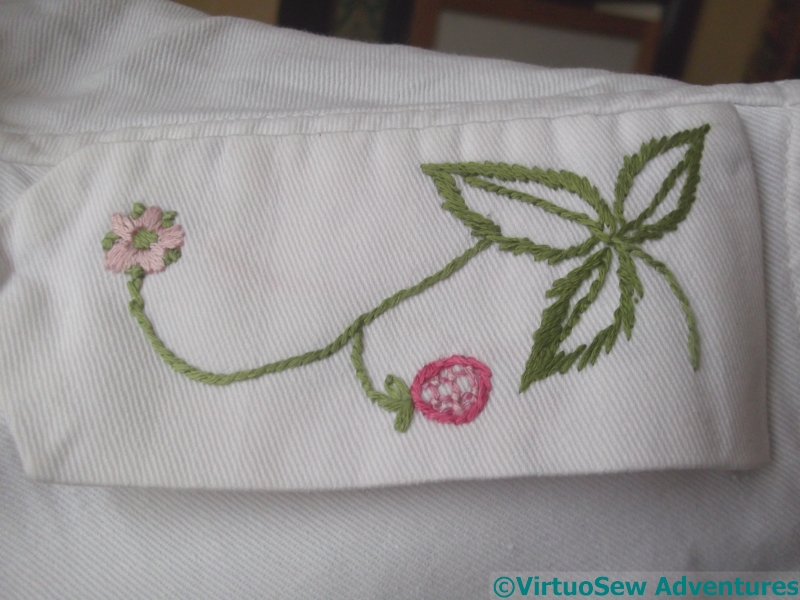
Epaulette of the Strawberry Suit
When the summer comes, some women turn to shorts and vest tops, some go for swishy skirts and gypsy-boho tops. I have a third option – to turn to my grandfather’s old tropical uniforms, which are in lovely sturdy cotton drill softened by all those years of washing, and very nearly indestructible. I’ve dyed two sets, and painted paisley patterns on one of those, but I’m completely outclassed by my mother, who embroidered one set when I was a child.
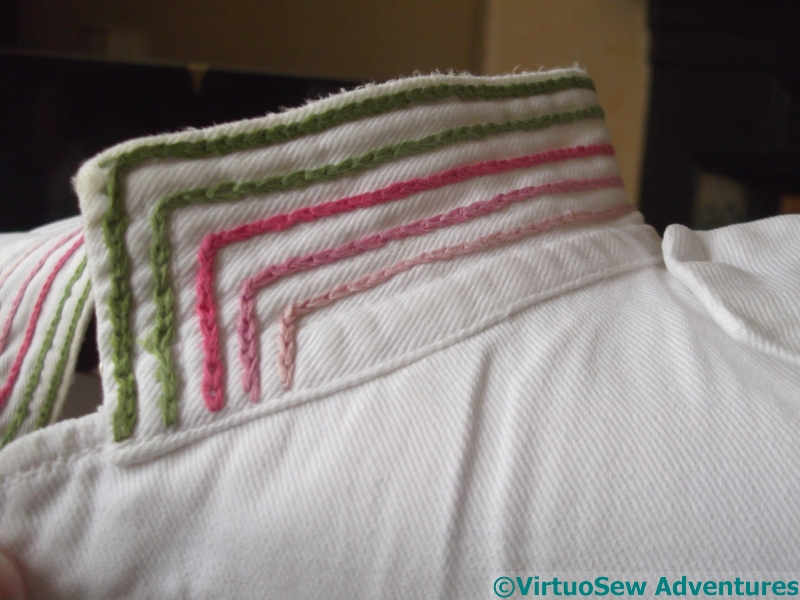
Collar Details
The designs are based upon very stylised strawberries, strawberry leaves, and flowers. The jacket has short sleeves, epaulettes, and a standing collar, decorated with rows of chain stitch using all the colours used elsewhere in the design. The usual uniform buttons were replaced with vibrant pink mother-of-pearl effect buttons, which make the whole thing markedly more frivolous-looking..
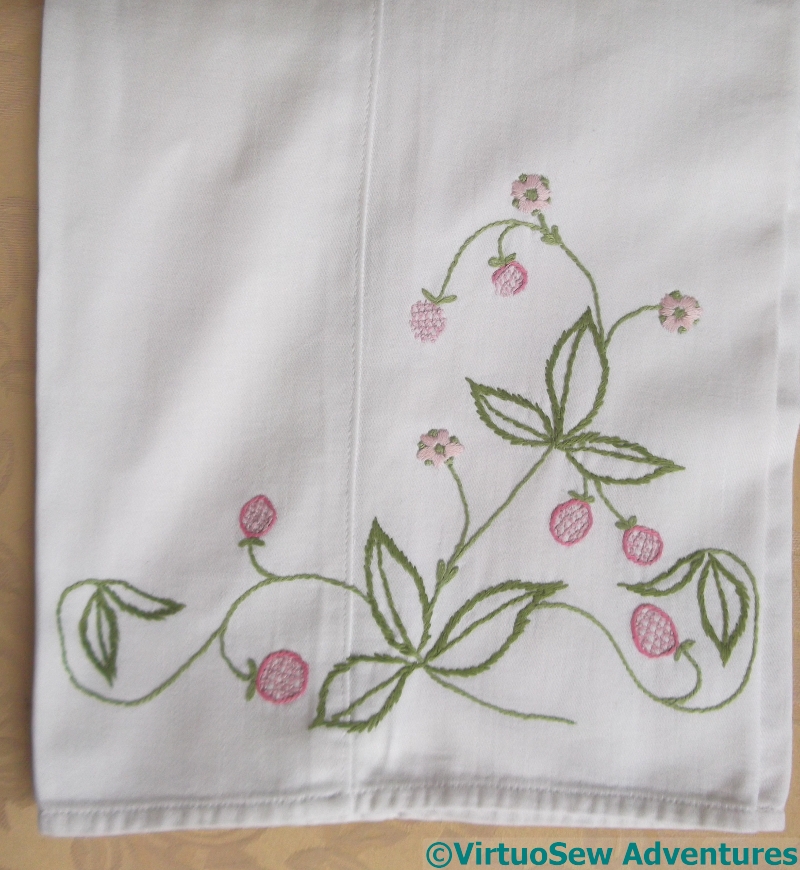
Trouser Embroidery
Most of the embroidery is near the hem of the trousers. The strawberries are worked in trellis couching, and the rest of the embroidery is in stem or satin stitch.
I have memories of thinking my Mam looked fabulous in it when I was a child – so much so that I wrestled it from her a few years ago, and feel fabulous myself, every time I wear it.
What I don’t recall is what my Grandfather thought of the transformation…
Flame Stitch Pin Cushion
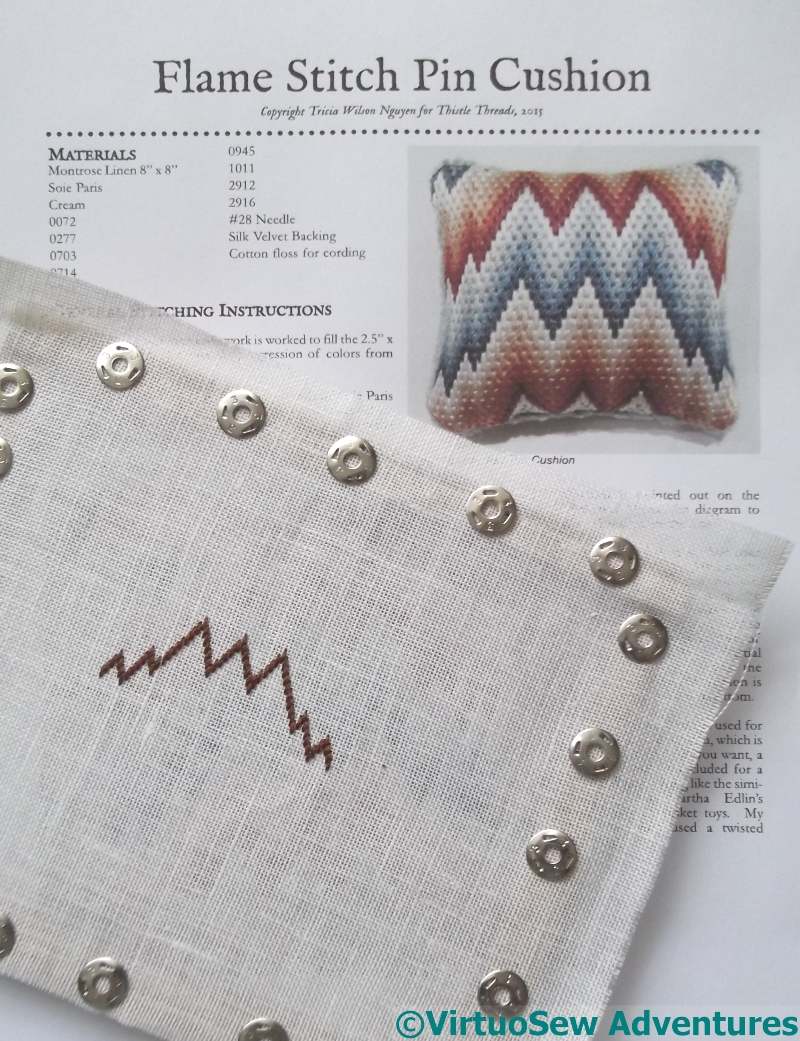
Pincushion Instructions
I hadn’t intended to do any of the Frostings Box designs, because I was intending to keep all the threads for my own purposes, but I’ve not been able to settle to anything this summer. I lost my “Dreams of Amarna” notebook (and found it again!), and although I have several pieces I want to do for it, I have no idea how I want to do them!
So I’ve been starting lots of little things to do in the intervals of the next major project.

Test Stitching
I’m determined not to buy anything for these projects, so I fished out a random piece of linen, and then the next thing was to discover how many threads to use. The instructions said four strands of Soie de Paris, but since I have no idea where the linen came from or what count it was, I thought the choice was worth testing. The left section is in two strands and the right is four.
Four it is, then!
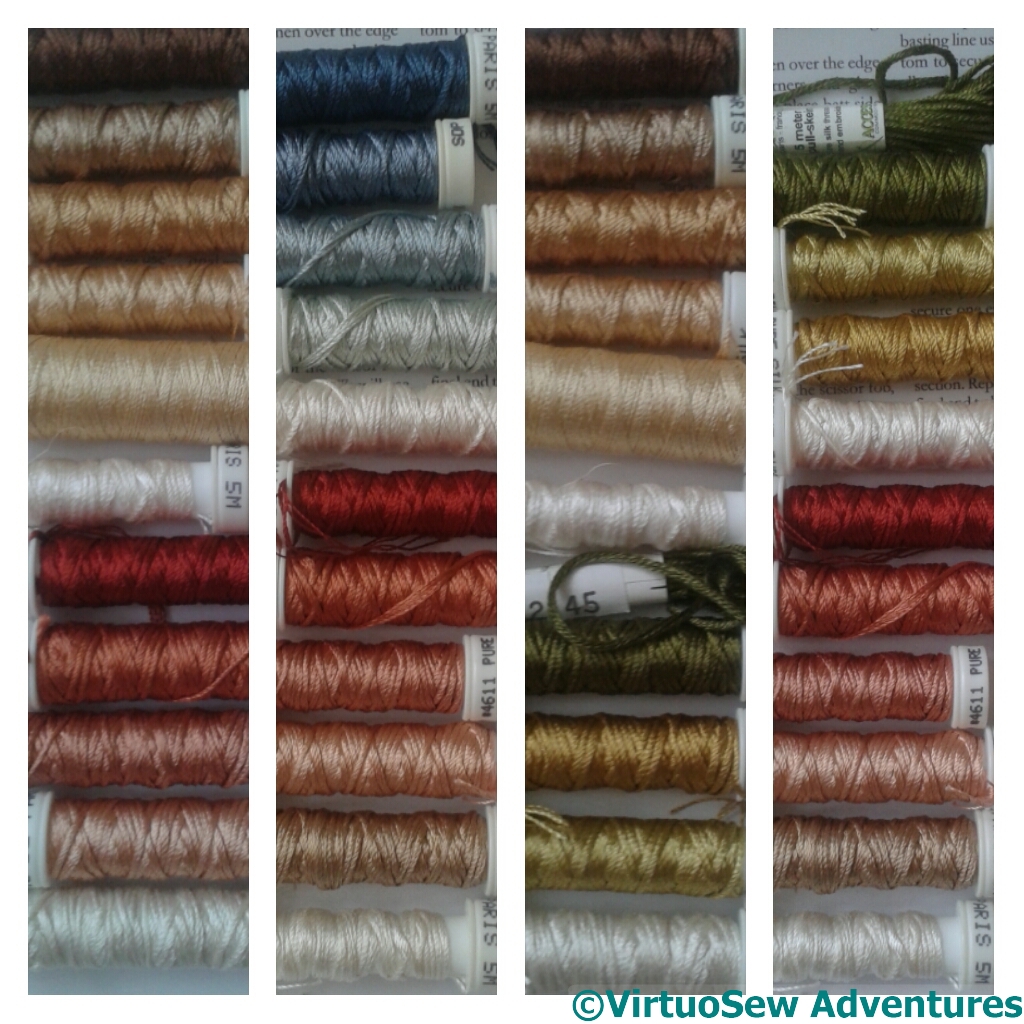
Colour Schemes
The next decision was colour scheme. As it happens, I don’t have the colours specified, so I decided to play around until I had something that looked interesting.
I’ve decided to go for green and brown.
Suddenly Re-Thinking
Drawing Design
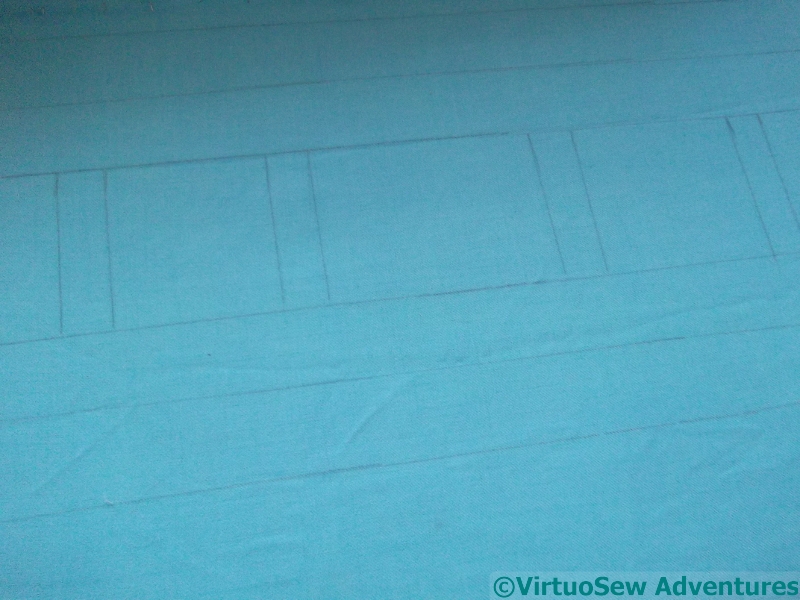
I bought the turquoise pashmina with the intention of working one of the Stitch-Off designs on it, but as I was playing around with colours, I had a sudden thought…
It’s an absolutely gorgeous faience colour, so why don’t I choose colours inspired by my Dreams of Amarna project. And while I’m about it, create a design inspired by those patterns I’ve been playing with…

That famous bust of Nefertiti
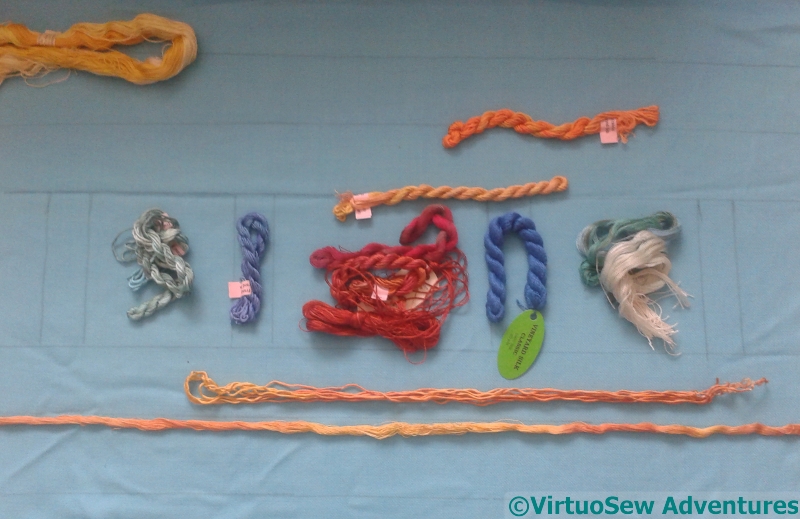
In the end I’ve decided to take my inspiration from that famous bust of Nefertiti, discovered by Ludwig Borchardt in 1912. It would therefore have been known to Mary Chubb. This picture is a Creative Commons-licensed image I found online, but in this particular case, all I wanted it for was to check on the distribution of small and large segments and colours.
So that’s garnet or carnelian coloured sections, lapis-coloured sections and jade-coloured sections, all outlined in gold. In this case, I don’t want to use metallic thread, so the gold will be rendered in golden-yellow.
Choosing Colours
I’ve been working on making a design printing and transferring board, so I pinned out the end of the pashmina I want to embellish on the board, and simply drew straight lines as a guide.
Then I had a wonderful time fishing out jewel-coloured silk threads.
All I need now is some idea of the stitches I intend to use!
Something Simple(-ish)
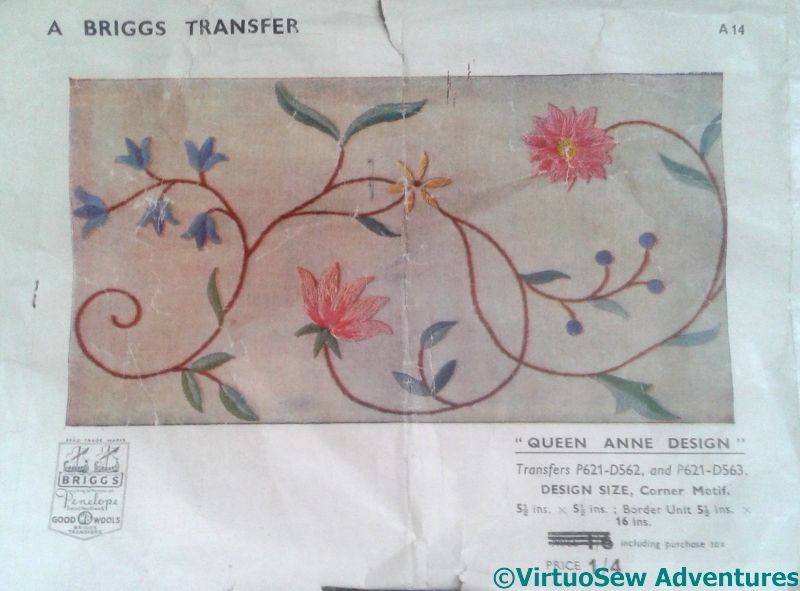
Briggs Transfer
The Azorean Cutwork was not a very successful travelling project, as it needed to be precise, and the poor light of the average hotel-room made precision difficult.
I think this tea-cloth came from the same lady responsible for my fragment of the Quaker Tapestry, and the extra embroidery frames I knew I hadn’t bought. The instructions suggest a welter of unlikely colours and an excess of satin stitch, and I was nearly weak enough for follow them.

Blanket Stitch Fans
Then my mother pointed out that I’ve just done a single-stitch project, and should maybe cut loose a bit.
No sooner suggested than taken up! The wild colours are staying, but the stitchery will be a little more diverse…
After doing yellow satin stitch daisies with orange centres, I used blanket stitch fans for the next flower. I’m sure I’ve seen this before, or used it before, but I can’t remember where!

Nested Fly Stitch Petals
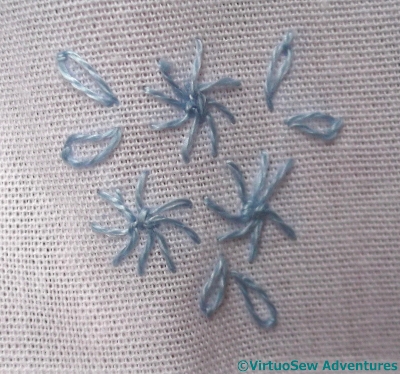
The design is composed of four corner designs and four straight sections which are all the same. I’m working each bit as I decide on it, rather than working one whole side and then copying it three times. That means that the puzzling and decision making is alternating with the stitching, rather than an orgy of decisions followed by the tedium of doing the same thing over and over and over again.
The purple flower is part of the corner motif, and alternates fishbone stitch (the dark petals) with nested fly stitches. The centre is a circle of blanket stitches with some random interlacing to fill them in.
Still more work on Topsy..
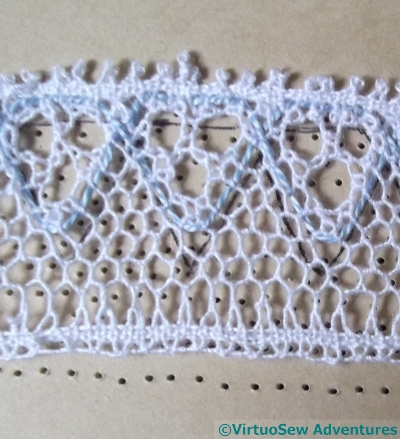
Sleeve Lace
Report Number Three, including a hiatus or two…
The choice of this lace pattern is teaching me to use two gimp threads and to create a honeycomb effect – training me for the more complicated lace for the edge of the dress. I had a bit of a problem with this as I have the designated pairs of 15 bobbins plus the gimp and seem to be one pair short in the ground. After taking it out three or four times, changing where I hung the bobbin pairs to see if that made things right, the problem didn’t disappear so I developed my own fudge which seems to work!
(Inset: I even asked for help on Twitter, and everyone was as flummoxed as we were!)
Embroidery For Dress
Despite the complications above, I completed the first stretch of fudged lace for the sleeve in two weeks! I think that is because I am now lace-oriented, so that instructions are more readable, need less working out! Obviously, I’ve misread something, or I wouldn’t have to fudge – maybe the second piece of lace will resolve the matter. This project is taking less time than I thought it would, though I can see the final stretch of lace for the dress itself taking a lot longer.
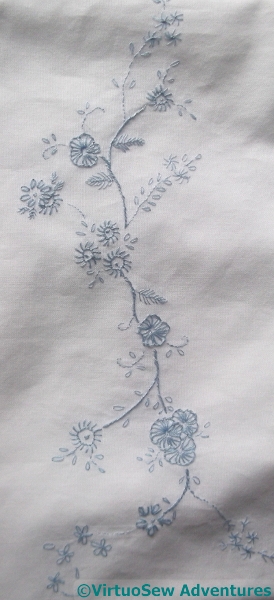
While I was working on the lace for the dress, I made and embroidered it. Topsy’s long dress is embroidered across the skirt and on the sleeves. I kept the embroidery on the dress simple. Blue is my favourite colour and it goes very well with her dark skin. The design is built up of small transfers arranged to give a pleasing flow – and the stitching not too varied. As she is a baby doll, a light touch in the design and in the stitching seems appropriate.
Sleeve Embroidery
So, the larger flowers are either Blanket Stitch or Reverse Blanket Stitch, the smaller ones suggested in Lazy Daisy, as are some of the leaves. The larger leaves are in Feather Stitch. The main stem is, not surprisingly, in Stem stitch while the thinner ones are Backstitched.
Long-standing readers may recognise the flower forms from the Flowered Blouse I embroidered using transfers from one of my issues of “The Needlewoman” inherited from Grandmama….!
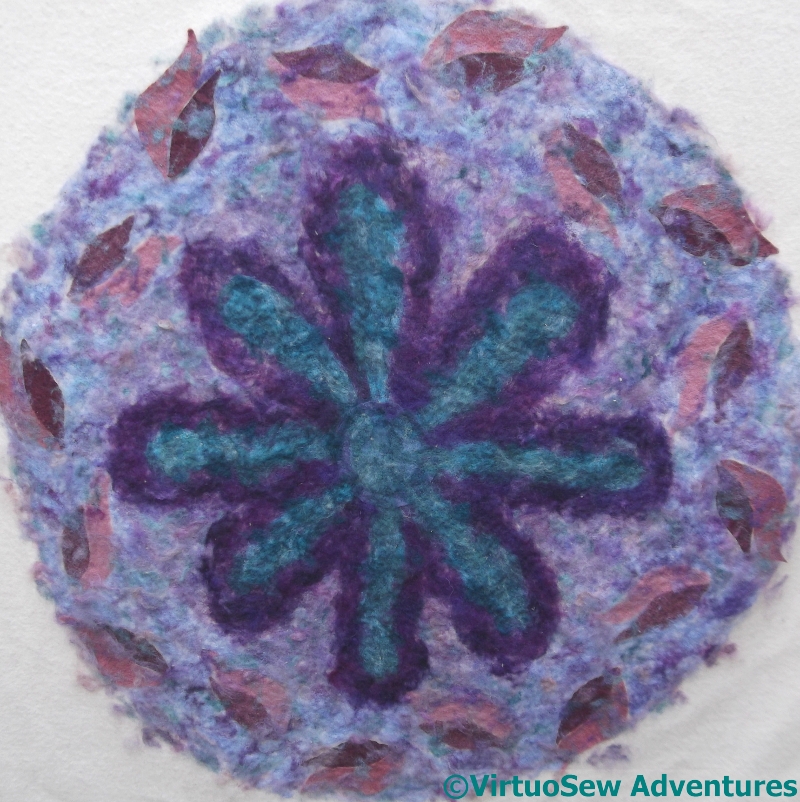
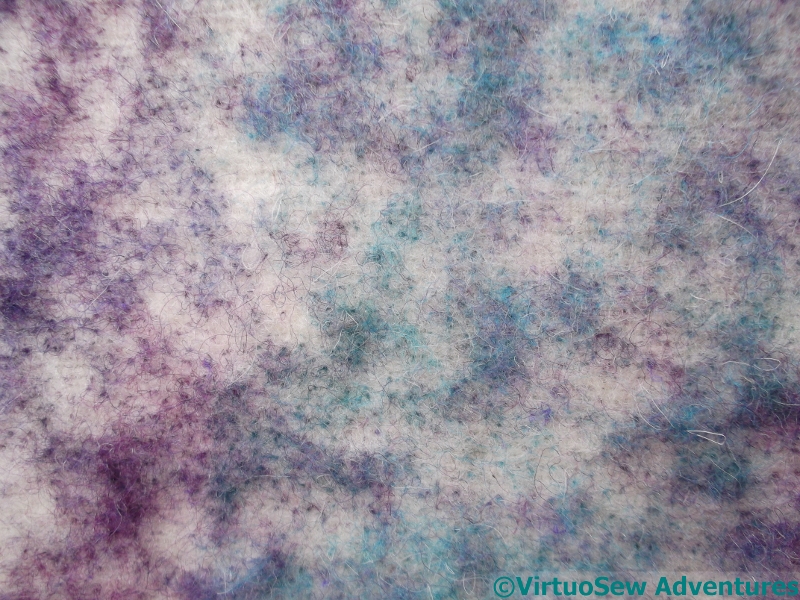
Inspired By Spring Flowers – 3
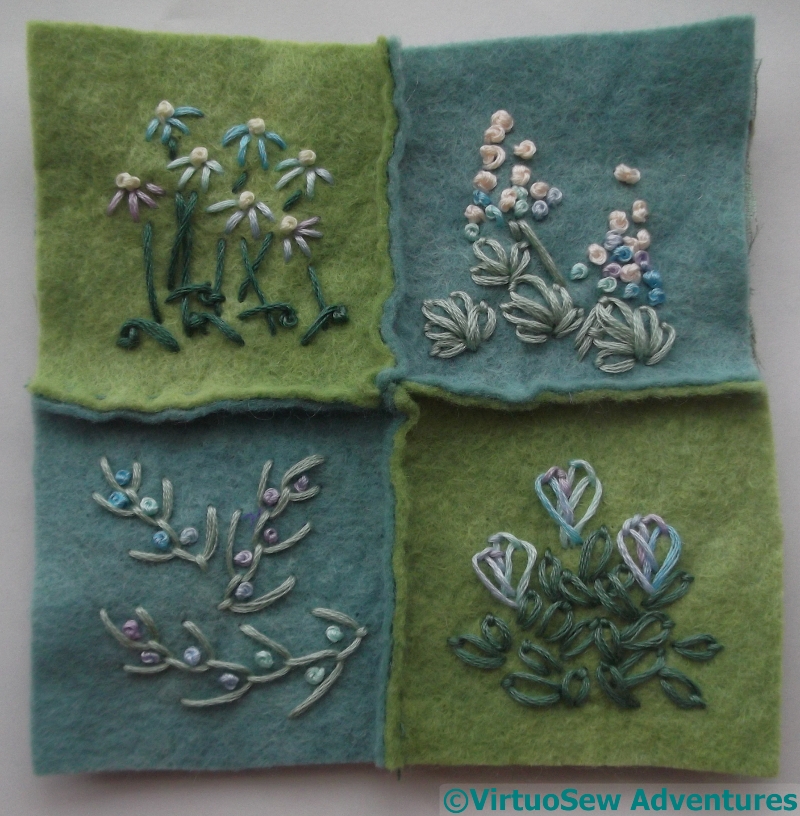
Four Stitched Panels
I decided to create a chequerboard effect for the pincushion. The four panels are stab-stitched together with the raw edges visible. I think that makes for an interesting effect, although it can be over-used.
The first panel has a few French Knots, lots of straight stitches, and some singleton scroll stitches around the base of the stems.
The second is lots of French knots, and palmate leaves made of lazy daisy stitches.
The third is primarily lazy daisy stitch, with the flowers made using blanket stitch.
The four panel is feather stitch with French Knots.
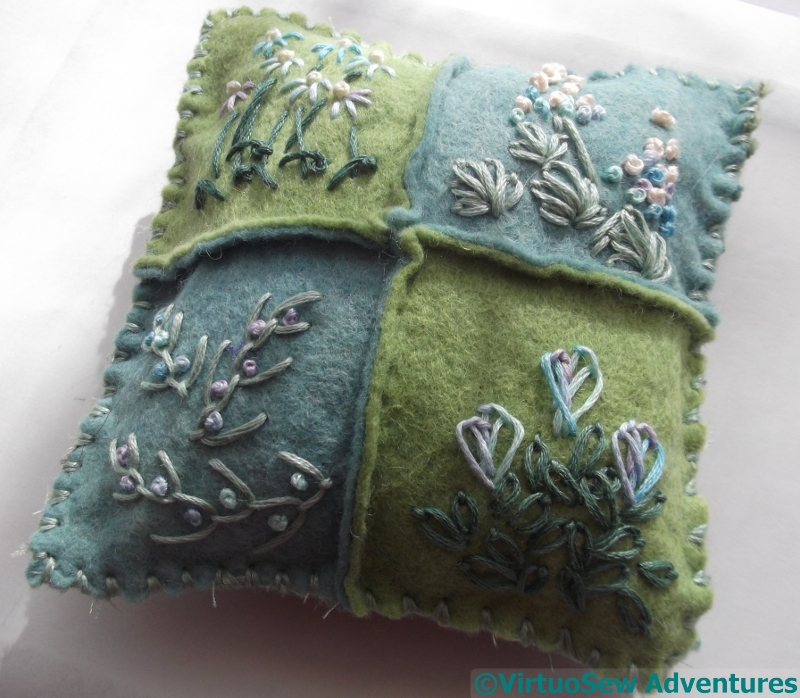
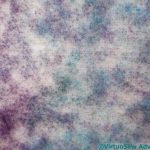
The pincushion
The pincushion is only lightly stuffed. I felt that somehow stuffing it to the point of solidity wouldn’t be quite right, although I don’t know why.
In this case I closed the edges with glove stitch. This is really a sort of variant on overcast stitch, so it isn’t difficult, but – even with shaggy bits of embellished fabric appearing around the edges! – it gives a slightly more “finished” effect.
One of those details that most people don’t consciously notice, but it still has an effect…
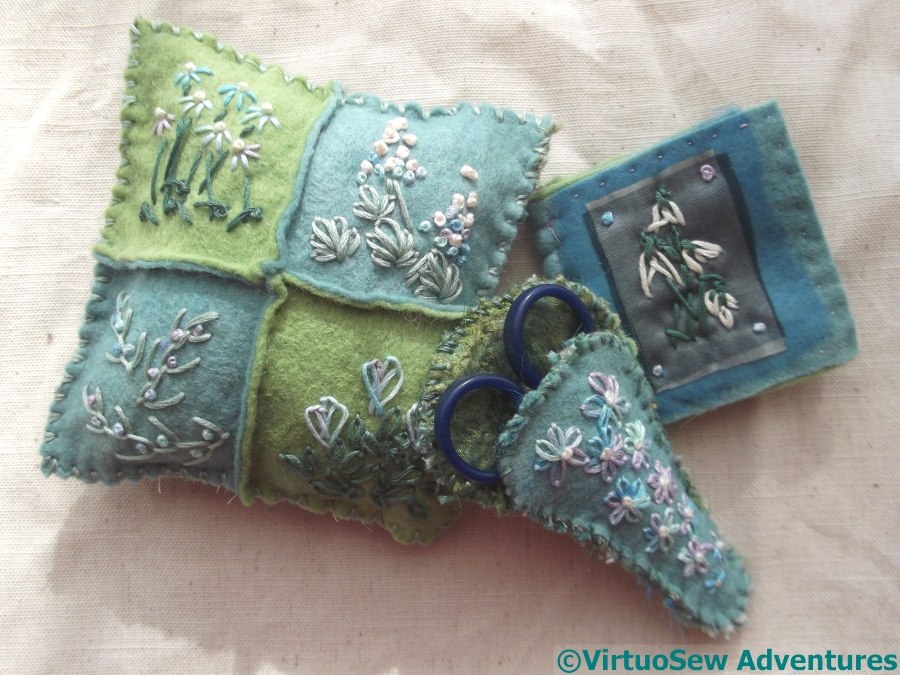
The Set
The finished set looks cheerful and springlike, in spite of the increasingly distant relationship between the stitchery and the spring flowers that inspired me.
I’m rather pleased; even if it took me months to find the inspiration, the final result makes me smile!
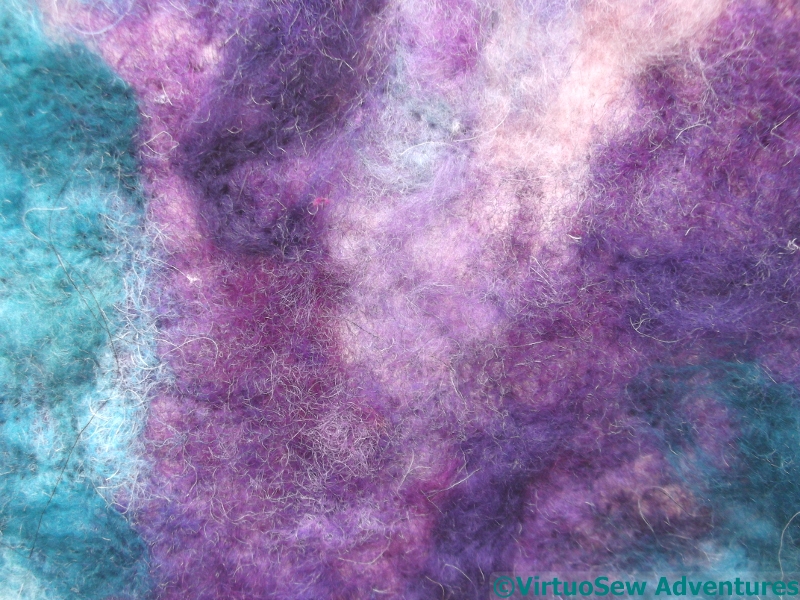
A Pause In The Modern Stitch Off
From The Back
I’ve reached a sort of sticking point with the Modern StitchOff project, so I’ve decided to pause and think about it.
I took the blanket outside (all four and three-quarter pounds of it!) and hung it on the washing line to stare at, and photograph for you.
This is the reverse side – that is, the side you don’t see when sitting at the embellisher, trying not to break needles.
From The Front
This is the front. It can be quite fluffy – the hexagonal net keeps fibre in place while embellishing, but at the cost of sometimes failing to realise it hasn’t been firmly enough attached. I’m learning that I need to make a first pass with the net, trying to be thorough, but then take off the net and go over the same area again.
I’m also noticing that although I used two different types of felt for the leaf shapes, and they behave differently under the needles, the effect on front and back is sufficiently similar that in future I will pick the felt which felts easily (if you follow me!).
-
- Detail – Back
-
- Detail – Front
The reverse has a rather intriguing spotty effect. When there’s only one layer of embellishing it is easy to see that it is one tiny dot of colour for every needle (which makes sense!). The front varies rather more, sometimes flat and densely textured by the needles, sometimes fluffy and fly away.
My challenge now is to work out how to extend the colour and texture to the rest of the blanket, and then to decide, do I add some lines of roving, and if so, how. Although if anyone suggests using a hand-embellisher, my howls of outrage will be heard by NASA’s “Juno”!
Lady’s Magazine Stitch Off – A Traycloth
Don’t Do This
One of the few things that made being poorly tolerable when I was a small child was the way my food arrived – on the good china, on a tray, covered with a traycloth. A hand embroidered traycloth, no less!
It wasn’t enough to encourage me to malinger, I hasten to add. But anything to give the invalid a lift…
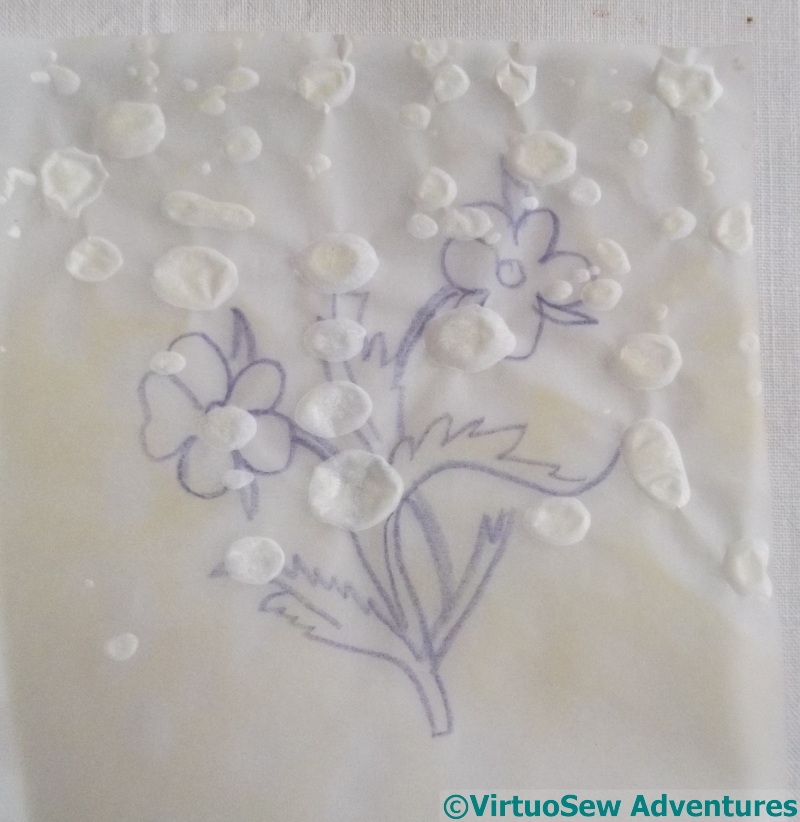
Not surprisingly, the family stock of traycloths is somewhat reduced since those days, many of those traycloths having disintegrated after long and faithful service, so I though that I would use some of the flower sprays found among the Lady’s Magazine Stitch Off patterns to embroider some more.
I decided to make my own transfers, and promptly discovered a forgotten hazard that I should have added to that post on Transferring Designs. Whatever you do, if you are using a steam iron, Switch Off The Steam! Not only is the transfer not usable again, it didn’t work the first time!
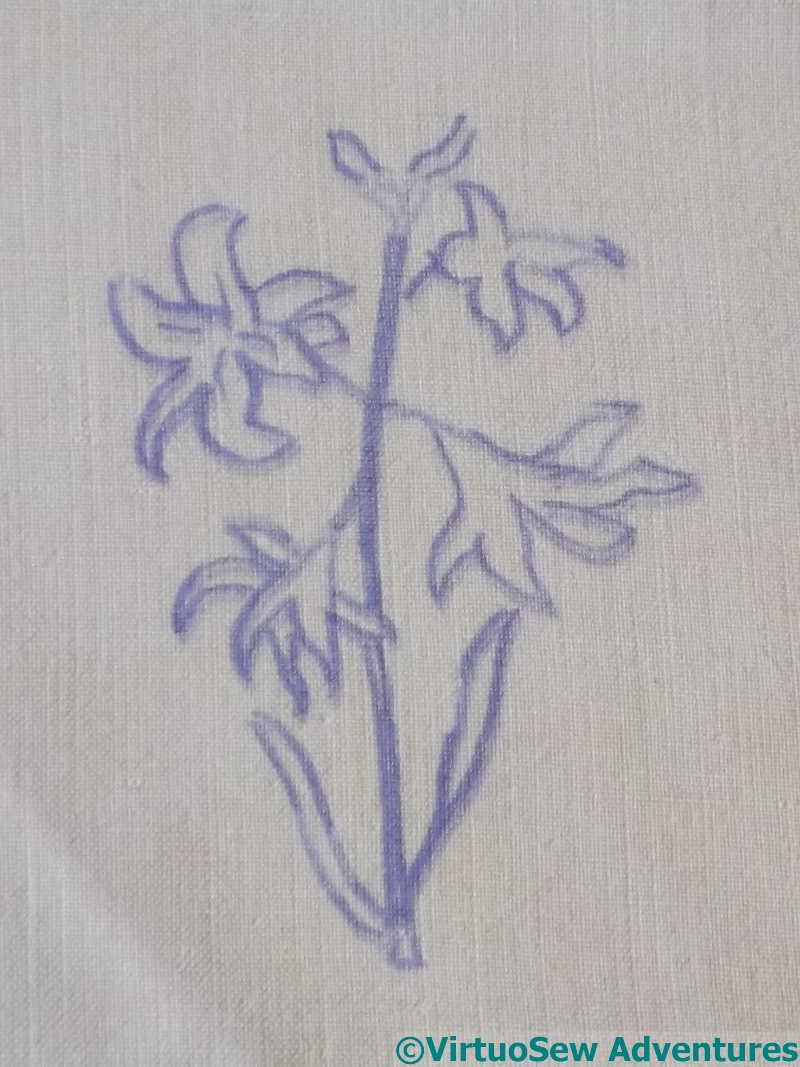
Flower Spray
Once I’d got the steam switched off, things improved, and I got two sprays transferred onto diagonally opposite corners of a traycloth I found lying around, unadorned. It’s linen, too, so I’m amazed it has taken me this long to embellish it!
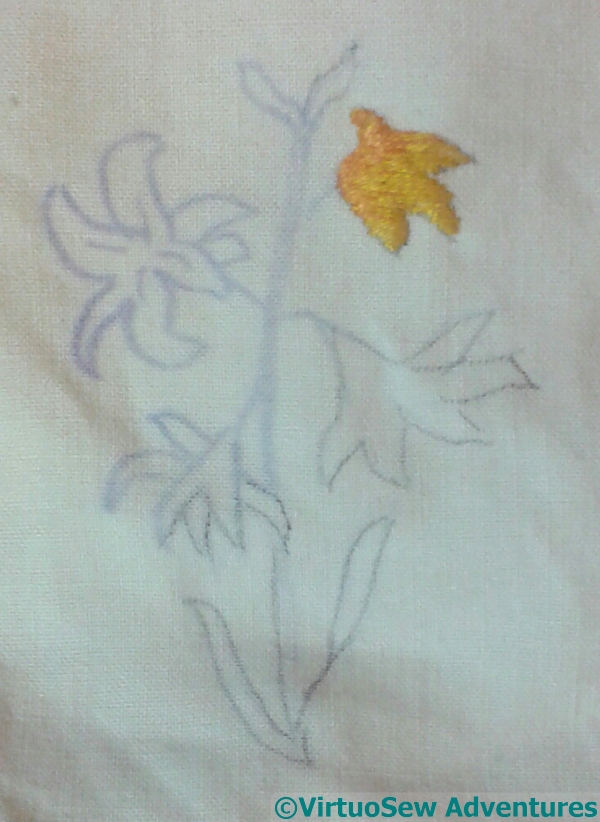
Starting The Spray
I’m no botanist, so I can’t hazard a guess at the flower this is intended to be. It may not be intended as anything up a pretty combination of shapes, of course, in which case any eccentricities of stitching are unlikely to matter very much..
I’ve decided to go for some bright, cheerful yellows – to cheer up any invalids who might see it!