Category: General Embroidery
Progress on the Thistle
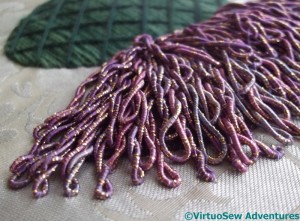
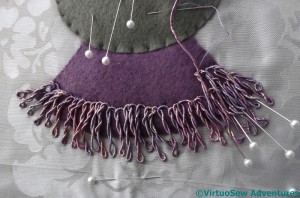
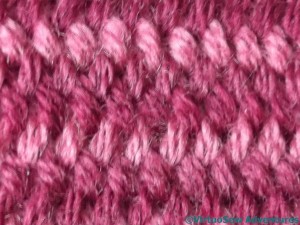
I rather like the texture of the layers and layers of viscose gimp, in this photo. Every now and then an oblique view is exactly the right one, and it’s a gorgeously over-the-top effect, isn’t it!
I did find myself beginning to feel rather tied in knots by all the twisting and turning, and progress slowed noticeably as the number of layers increased and the difficulty of holding the strands just firmly enough also increased.
Worth it, though, I think!
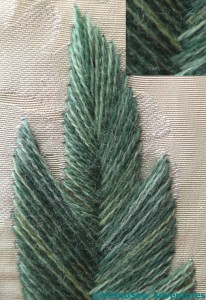
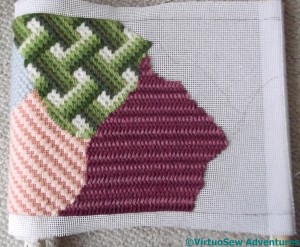
The leaves required some slightly careful management. I wanted to use fishbone stitch, because I wanted a simple leaf so as not to detract too much from the flower. However, fishbone stitch does use rather a lot of thread, and I was just a little nervous about whether I would have enough of my lovely wool to do the job.
So I thought, first of all, that I would use the light and medium shades together. They aren’t flat, solid colour; they shade a little either side of the main colour, and this brings a little variation to what might otherwise have been a somewhat monolithic element.
Then, secondly, instead of taking the thread across the back from side to side, I devised a variation which changed slightly the pattern of the crossing in the centre. You can see in the detail in the top right hand corner, that there are two sets of threads in each section. There are only small back stitches running down the outside edges, and down the vein in the middle, so the amount of thread on the back has been minimised.
I originally hoped to use the layers and layers of viscose gimp as the base for another layer, of silk wrapped pearl purl, and of coloured wire purl.
Unfortunately, when I’d done it, I decided that I really didn’t like it at all.
It adds nothing to the design, and in fact, it even detracts from it. Out, out, out!
So having taken it out, rather grumpily, I sat back to consider whether or not I have finished the piece at all….
An Experimental Thistle
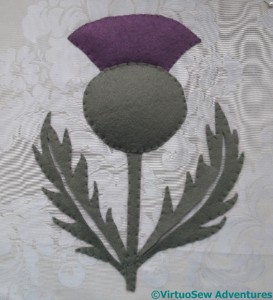
After I’d (mostly) finished Loading The Felucca, I found myself temporarily lacking inspiration for the Dreams of Amarna, so I thought I’d have a go at an idea that has been burbling around in the back of my mind for a while. I’m hoping a change of scene, as it were, will “reboot” my imagination.
The background fabric is a silk brocade, and I’ve padded the thistle itself with wool felt, in several layers (three under the topmost green circle, in fact).
I drew the whole thing freehand, and I think I will remove and replace the lefthand leaf with a reversed version of the righthand leaf. It will look more balanced and altogether happier if I do.
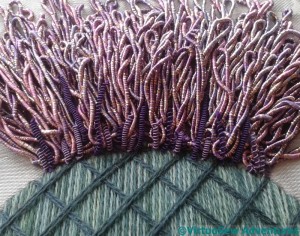
I’m intending to use silk purl and coloured wire purl for the thistle flower, but I wanted something for those to be embedded in. I’ve chosen to use a gold and viscose gimp, and I’m couching it down in a series of fringes zigzagging across the flower.
Each fringe is twisted back on itself – I used a pin as a sort of handle – and held down with small stitches at each end. As each additional layer went on, the “free” ends were held down a little less firmly. It’s a delicate balance between controlling the thread sufficiently (and remember gimps are very stiff and have a mind of their own!) and leaving it looking free and springy!
More Unfinished Objects
I keep on finding things that I’ve not quite finished, don’t I – and in some cases I had completely forgotten about them.
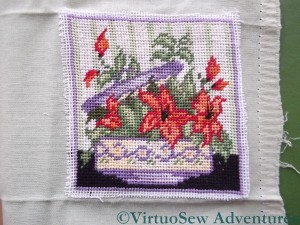
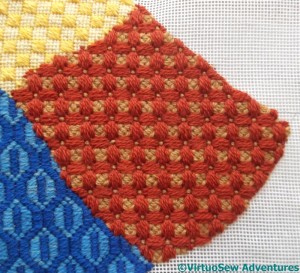
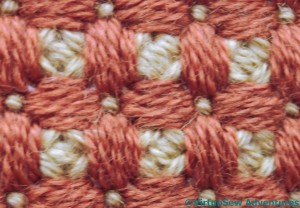
Like this one. I know it was a kit – stranded cotton worked in half-cross stitch on canvas, – but I don’t know why I bought it.
And I clearly had something in mind for it, because I have attached it to a cotton furnishing fabric. Equally clearly, it wasn’t going to be a cushion centre, or I would have centred it on the fabric. It is only about three inches square, so I suspect I had in mind making it into a needlecase.
But before I do anything else with it, I have to find some way of covering those raw edges of canvas with something that looks deliberate!
Any suggestions?
In other news, though – I’ve finished the second Crane!
Actually, you may recall that it was the first, but I decided it looked too overheated in the pot it was destined for, and set it aside for another version.
I found in when I was looking for something else, and finished it. At least, the embroidery…
I will probably mount it on a circle of card, and put in that famed Winter Decoration corner.
At least I know what I’m going to do with this one!
Dressing the Second Labourer
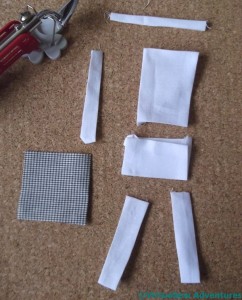
Since I decided after dressing the first labourer that using rectangles of fabric was the way to go, when I started on the second I began by cutting out every bit that I expected to need.
That meant:
two pieces for the legs, a piece for the body of the top, a piece for the section of the top below the waist, a piece for the turban, a piece for the sleeve, and a piece for the cloth thrown over the shoulder.
I bought myself a mini-iron to make the job of folding in the edges easier, lighter, and less perilous. Fortunately there are two more labourers to dress, so I will have plenty of time to improve my skill!
The trick to a successful applique is the order in which the elements are layered.
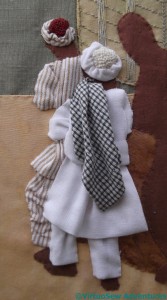
So in this case, the first pieces are the trousers. They are stitched down each side, and tweaked in the middle to create some impression of a body underneath. The bottom edges aren’t held down, so in storage this piece may be a bit delicate.
The turban is done in just the same way as the first one, but this time I used a cream linen thread for the central disc.
The sleeve was next, and then the “skirt” of the top, which is gathered to give it a sense of bulk. It is tethered by the underlayer, but not attached at the bottom edge. The right-hand edge isn’t tethered, either, because in due course the Third Labourer’s clothing needs to fit underneath..
Finally, there was the body of the top, and the fabric thrown over the shoulder. I don’t understand why he didn’t use it to pad his shoulder against the packing case, but the photo says he didn’t!
More Experiments!
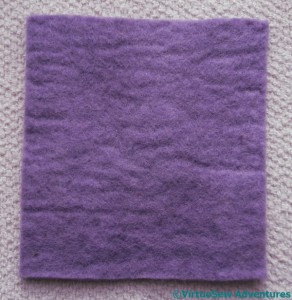
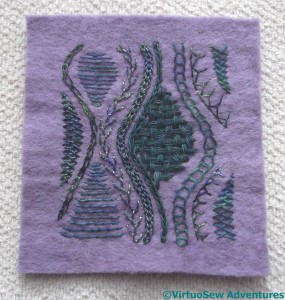
You could be forgiven for thinking that I had finally lost all common sense. We’re all interested in fibre, fabric, and stitch, but even so, expecting you to take an interest in a photograph of a plain piece of felt seems a little extreme.
Especially a very ordinary, single-colour, and entirely unadorned piece of felt.
So what am I up to?
Mischief, of course!
Does it help if I tell you that it’s really quite a thick piece of felt?
Or does it help if I tell you that this is the front?
I bought an “inspiration pack” of threads, and this thick square of felt at “Sewing For Pleasure” a while back, with absolutely no idea of what I expected or intended to do with it.
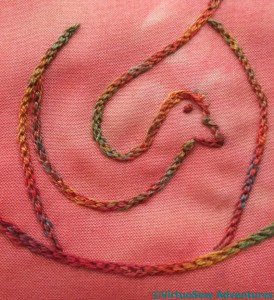
While I was wondering about it, I remembered reading about a medieval satchel that had been made by sewing the pieces together within the thickness of the leather. I didn’t feel quite willing to attempt something structural, but it gave me the idea of trying to work a sampler of stitches without the back showing.
I even managed to work some of my favourite stitches.
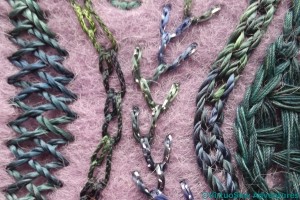
I originally began with a wavy line of Shell Chain stitch, and then built up the design from there. Some of the threads were too heavy to use in this context, and there was a wonderful heavy slub that I couldn’t find a use for (never fear, I will!) but I had great fun alternating texture and shine, space-filling and line, and just playing.
I have absolutely no idea what I’m going to do with it, but I’m rather pleased with how it turned out!
Gabrielle, the Christmas Angel – Part Two
And now, the Finale…
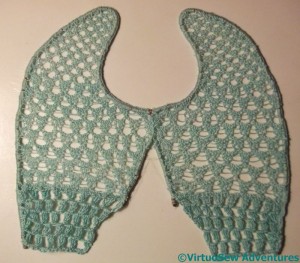
“Angels need wings. I have never made big wings before, only gauzy ones, so these grew a bit like Topsy! I had, fortuitously, a ball of crochet cotton which exactly matched Gabrielle’s dress, but I had already used crochet to make the lace on the overdress. Needlelace seemed an option if I could find a suitable former to hand. Wire proved to be too thin, and the thread slipped about, so in the end I made a frame from one strand of the plastic coated wire of electric cable. Yes, I know you can buy purpose made formers but I wanted to do it now.
After drawing the shape on heavy card, and arriving at a good shape was an interesting exercise in its own right, I couched on the wire at widely spaced intervals, then covered the wire and its plastic coat in blanket stitch using my turquoise crochet cotton. Not only did this cover the wire but it provided a anchor for the needlelace itself. I used pea stitch at first then increased the number of loops in each group first to five and then to seven to add “weight” towards the lower edge. I hadn’t provided a former across that edge as I didn’t want it to be rigid, but needlelace requires just such an edge! A single thread helped a bit but a piece of applied crotchet finally did the trick.
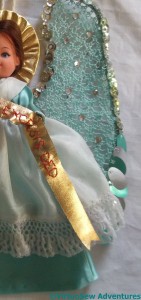
She looked balanced, if a bit subfusc for Christmas, so I added sequins, left over from one of Rachel’s childhood projects, mainly cup-shaped but the lower ones are long ovals to suggest pinions. Again, the colours, turquoise and silver, were a perfect match. Some people have all the luck. Rachel added crystals to increase the “bling”. The halo is a cardboard former covered with cloth of gold. I used the gathered side to suggest an aura of radiating holiness and backstitched a banner “Gloria in excelsis Deo” in red on cloth of gold, too.”
We timed our photography just right, too – the last sunny day of Autumn, before the weather turned thoroughly nasty on us…
Outside, hanging from a fir branch in the garden, Gabrielle made a remarkably effective member of the heavenly choir.

