
Category: General Embroidery
A real treat

Last week, not less than three of my assorted interests combined to give me a real treat.
The Queen’s Gallery in London is holding an exhibition called “In Fine Style“. The exhibition uses portraits of the Tudor and Stuart period to show the changes in fashion during the period, and there was a lot of embroidery and passementerie used, so the painters had a lot of scope. I’m interested in painting, too, so I’m always intrigued to see how a painter depicts texture, structure, and colour. Furthermore, major exhibitions these days often have additional events – not just a Private View on opening, but outreach events for schoolchildren, evening openings, tie-in events with other artists. An additional event caught my eye – an evening opening, followed by a recital of the music of John Dowland (contemporaneous with the paintings) given by the lutanist Jakob Lindberg.
Now, I’m an early music girl, so what with the chance to be nose-to-nose with some famous paintings and then to listen to music of the period surrounded by paintings of the composer’s assorted patrons…
I had a great time. There were some very familiar paintings – Elizabeth I as a princess, in a rose-red gown, with sleeves dripping gold embroidery, and a couple of pearl pendants you could swear you could pick off the canvas, van Dyck’s triple portrait of Charles I, Frances Stuart looking seductive in satin, with an entirely superfluous billow of fabric behind her. Familiar in reproduction, and fabulous. But, my goodness, the painting is even better when you can see it for real! Fur, gold thread, damask figured weaves, embroidery, gleaming pearls, glinting gems.
Then there were some unfamiliar ones. Edward IV, who I’ve read described as a blond beautiful giant, six foot tall, charismatic and something of a party animal. The portrait showed me a thin-faced, introspective man with dark red hair and a marked resemblance to the famous portrait of his brother Richard III – I suppose sitting for a portrait encourages introspection. Frances Stuart, in a buff coat like a man’s, her hair dressed to look like a man’s wig. Various unnamed men and women in the fashions of their time, in masque dress, fashionable clothes, clothes to make a statement. One lady wore a beautiful embroidered gown with a silvery gauze overdress set with crystals – imagine how many tiny brushstrokes you would need to bring a single crystal to life!
There were also some real examples – an embroidered jacket (not the Margaret Laton jacket, but very like it), a nightcap, and some gloves. And a Casket. And what a casket. It had a whole grove of needlelace-leaved trees planted on its’ lid, not to mention a horde of people frolicking around the side. And if I’ve learnt anything it’s that my detached buttonhole stitch is nothing like fine enough or tight enough. Sigh.
And the evening wasn’t over yet – after gloating over all that fabulous painted and embroidered finery, the recital! Jakob Lindberg is a great lutanist and a charming and knowledgeable man, so his introductions illuminated the music, and entertained the audience as much as his playing did. Though I did find myself wondering whether the composer had so attentive an audience when he played in the courts of England and Denmark!
Azorean Cutwork Project – starting to stitch
Finally Ready To Start
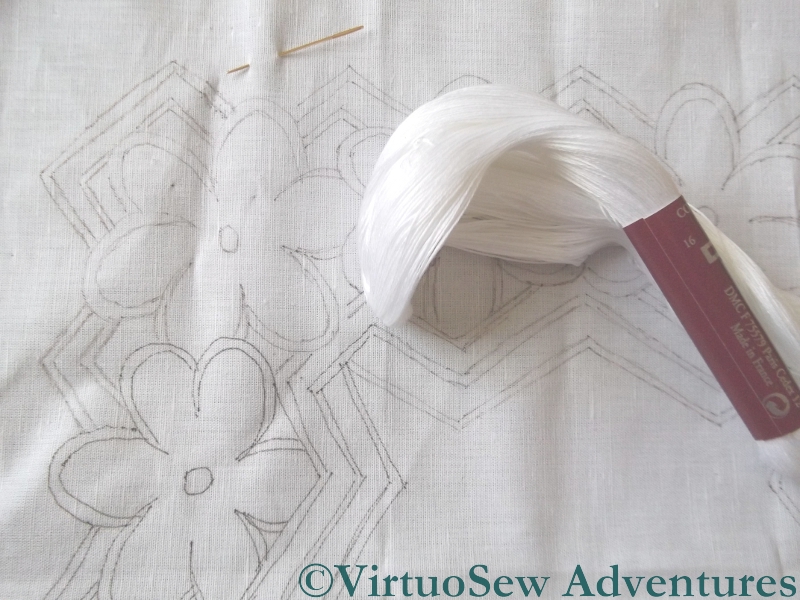
At long last, after much drafting, redrafting, pricking, pouncing, and outlining, the cutwork design I have planned to work using one of the patterns I found in the Azores is ready for me to start the embroidery.
After all this effort – the prick and pounce transfer method isn’t good for a healing tennis elbow! – I do hope I enjoy working it. It is only the second cutwork piece I’ve ever attempted – and the first came by accident in a bundle from eBay!

Making Progress
One of the things that attracted me to the design was the chance to get to grips with multi-ended buttonhole bars. I know that somewhere in my shelves of embroidery books, there is one detailing how these Y-shaped buttonhole bars should be worked, but in which?
I’m going to start by working the external edges, while I spend time rummaging among my references. This will ensure that it will not matter how long the rest of the piece takes, because the edges won’t be able to fray – although in fact I think there is little danger of that. It is a very good quality, firm fabric, and I’m rather enjoying myself.
I’ve even done my very first eyelet, using a bone stiletto from the set Elmsley Rose gave me for a birthday present a few years ago.
So glad I live now..

Photocopy Mosaic
I have been working on my Azorean embroidery of late.
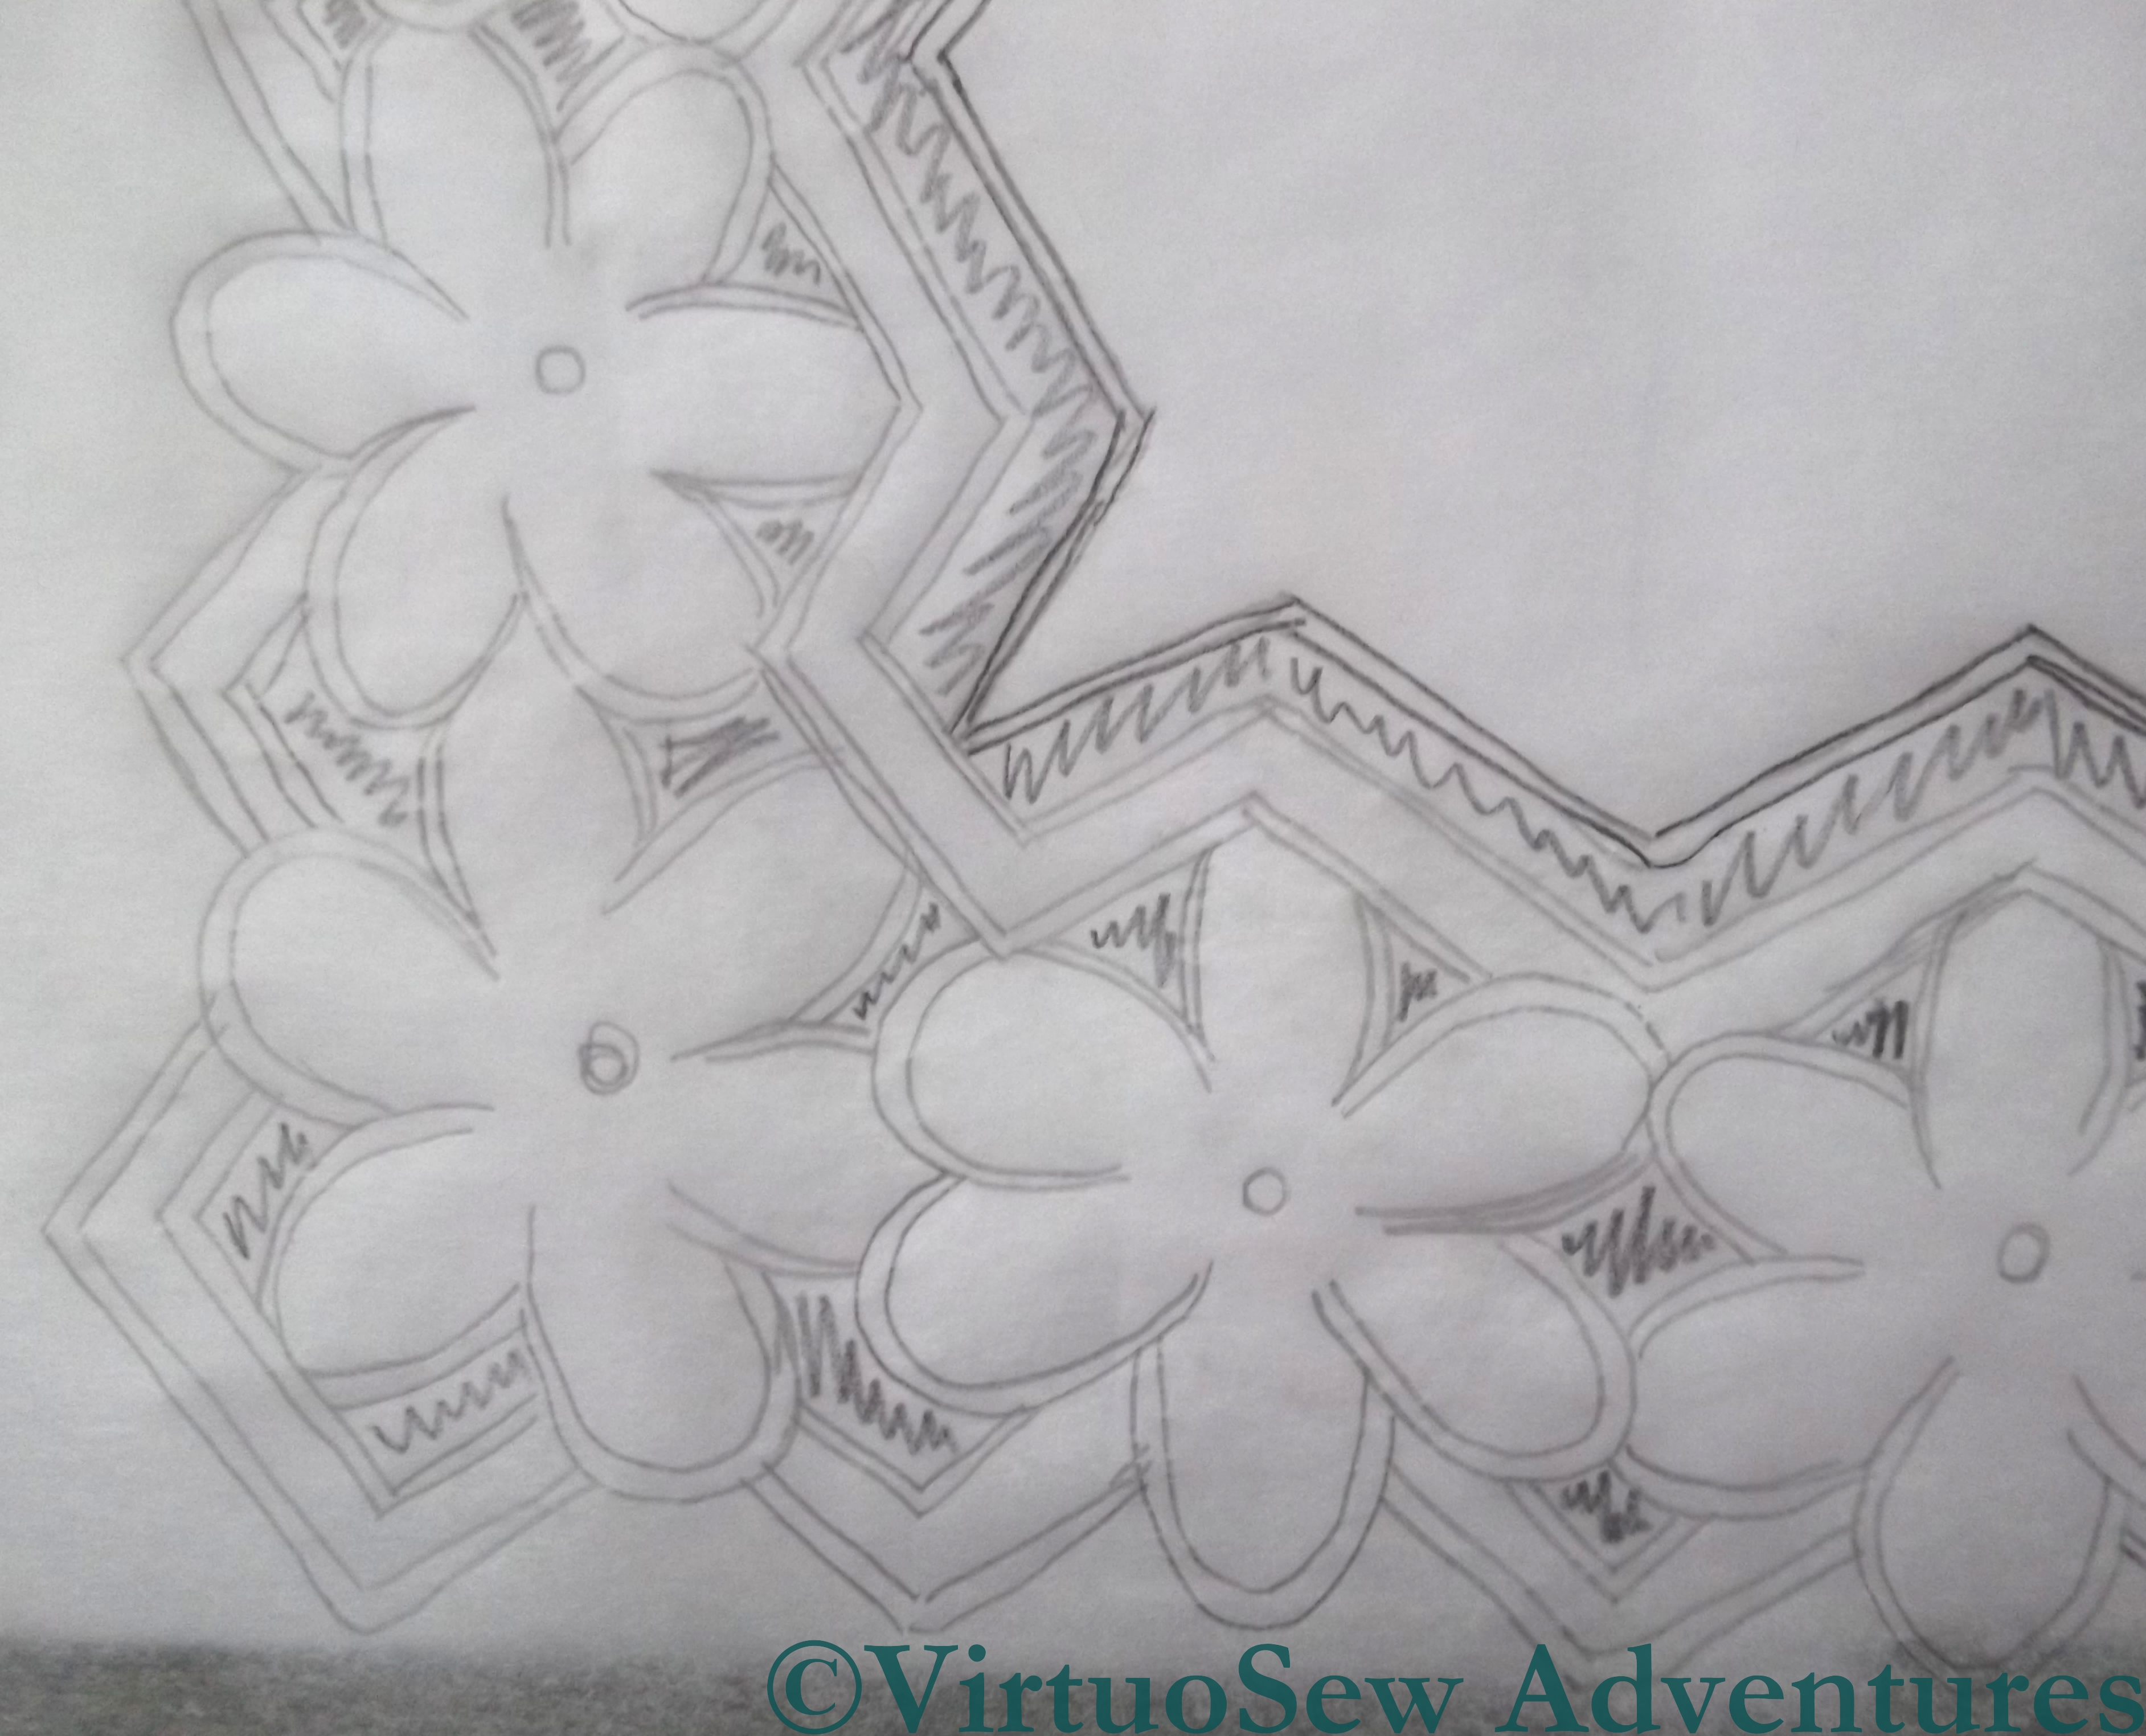
By this I do not mean that I’ve been actually using my needle and thread. No, I’m not there yet! Remember, what I bought in that enchanting little shop in Ponta Delgada was a pattenbook, in effect. It included no tracings, and no guidance for creating the design I will work from. The design isn’t drawn out, but simply photographed – in each case there is a corner of the finished article showing in the photograph, but not how each section joins on. What is more, I have discovered that there are subtleties in the way the designs are put together. I couldn’t simply run the design around the piece without paying attention!
Tracing Cutwork
In fact I have photocopied and traced, and retraced, and re-retraced(!) the design several times, trying several ways to create the complete circuit of the design, and it has reminded me of just how lucky we are now, with easy access (usually) to prepared designs, tracings, and computer software that can help us assemble the designs we create ourselves.
By the time I finally have the design drawn on that lovely cotton fabric I am so looking forward to embroidering, I will have drawn and redrawn each line at least eight times!
Yet another new project!
My husband The Australian was at a conference in the Azores last week, and I managed to tag along. It made a lovely change from grey, chilly England, where Spring has been especially tardy this year. It was sunny, most of the time, pleasantly warm rather than cold or too hot, and when the rain did come it came in exhilarating ten-minute bursts that bounced off the pavements and vanished as quickly as it had come. Since the subject of the conference was a little beyond my reach, I spent some time sightseeing, and found a delightful needlework and haberdashery shop, right in the centre of the town, near the harbour. If only embroidery shops were so easy to find in England! Furthermore, it was so busy there was a ticketed queuing system, and four assistants to serve the customers.
My new Azorean Project
My Portuguese is limited to “Please” and “Thank You”, but in the Azores it seems that almost everyone speaks English, so I was able to explain that I am interested in embroidery and was looking for an Azorean or Portuguese project as a souvenir of my visit.
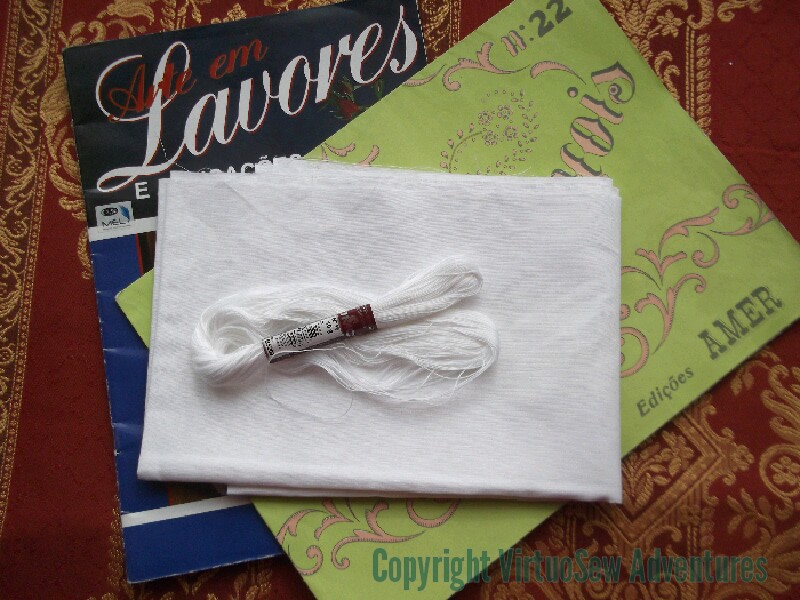
We found some patterns, and some suitable fabric and thread for the cutwork design I had chosen – a lovely crisp, fine cotton and a hank of DMC floche.
Book on Punta Yugoslavo
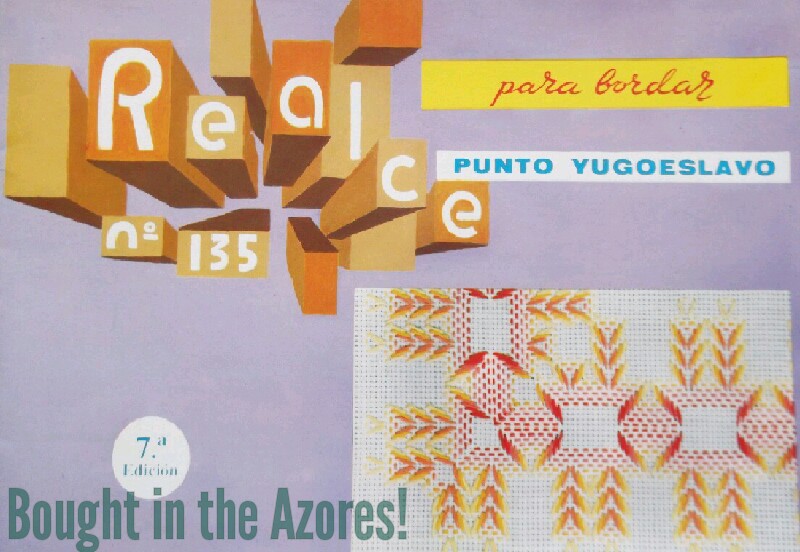
Then I found something else, and couldn’t resist it, because the eccentricity of travelling halfway across the Atlantic and then buying a book of patterns from Yugoslavia rather appealed to me!
So, in total, I came back with two pattern booklets for a variety of Portuguese and Azorean embroidery styles, some fabric and thread, and an entirely unrelated booklet about a form of embroidery from Eastern Europe. As if I didn’t have enough to do!
Happy Holidays – The Sea Tractor At Burgh Island (part two)
The Sea Edge
Continuing the Saga of the Sea Tractor…
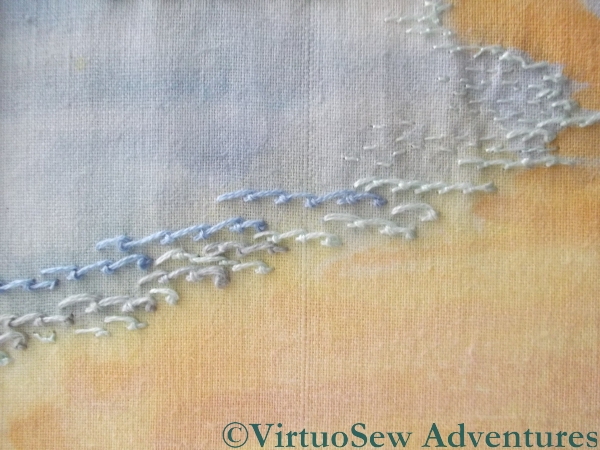
I worked the sea edge in short lengths of scroll stitch in close pastel blues. The idea was to create the sense of the ripples at the edge as a wave settles and flows back down the beach – but only on one side of the sandy bar that leads out to the island. I wanted to create the sense of a prevailing wind that came at an angle so that the waves would be more noticeable on one side than the other.
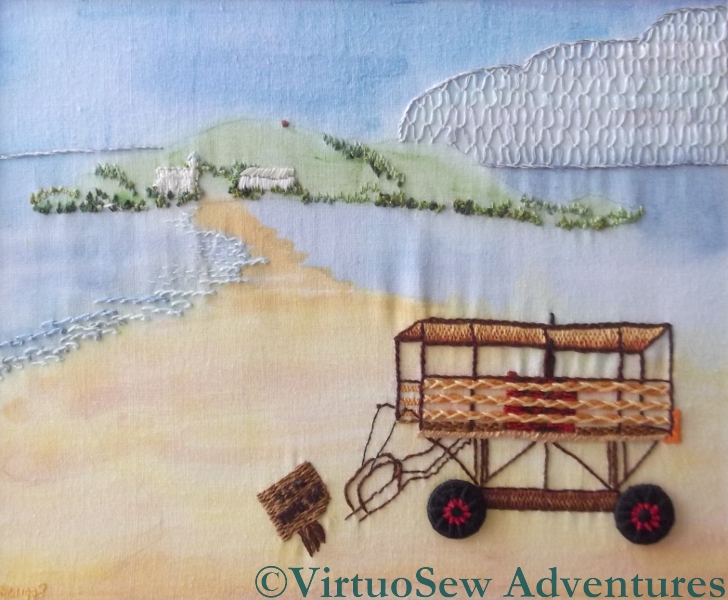
Cloud, island, and sea suitably depicted, I could leap in and render the Sea Tractor in all its outlandish and spindly glory.

The Sea Tractor
The Sea Tractor was great fun to do. I worked bi-coloured Dorset Buttons for the wheels, to evoke the painted metal hubs – pretty ambitious for my second and third Dorset Buttons ever!
The canopy and the base of the chassis seem to be in Brick Stitch, the main structural elements are either stem stitch or back stitch – the latter in particular for the terrifyingly spindly steps. Notice, by the way, that the steps themselves didn’t actually make it into the embroidered version. I wish I could say that was to emphasie the spindliness – that would be why I would do that now – but I have a strong suspicion that it was really either forgetfulness, or simply not being able to get the angles quite right.
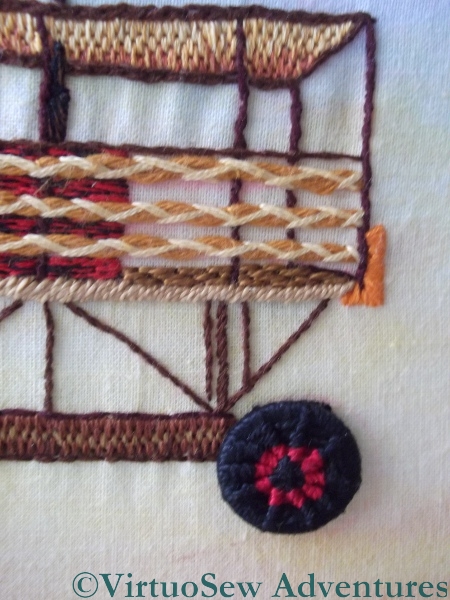
Detail Of Sea Tractor
I used heathered stranded cotton (red and black) for the engine-mounting, and ordinary black for the exhaust pipe that goes up through the roof.
The planks that create the side barriers were a bit of a challenge. In the end I settled on two long stitches in one colour, couched down in herringbone stitch in a lighter colour. I think they make pretty convincing planks, and looking at the detail, I even added the bumper at the back.
I didn’t include the barriers of the back or far side of the sea tractor, but I do recall thinking about that point. Even a painter – even a photo-realist painter – has to edit their image to make sure that it “reads” properly. Often this is a matter of making sure that the colours of things in the background recede sufficiently, but sometimes that isn’t enough. In this case I decided that adding those details would make the Sea Tractor even harder to work out, and discretion would be the better part of valour.
There really wasn’t enough stitching on this piece to qualify for a needlework competition, but I enjoyed working it!
Happy Holidays – The Sea Tractor at Burgh Island (part one)
The Sea Tractor At Burgh Island
This piece was intended as an entry in a competition run by “Needlecraft” Magazine about 25 years ago. The brief was to recreate “A Holiday Memory”, and as it happened, that year we had had a great adventure – a ride on the Sea Tractor at Burgh Island in Devon.
“Needlecraft” had also run an article shortly before, describing and teaching Dorset Buttons, and they seemed perfect for the Sea Tractor’s wheels. Since time was short and the complexity of the Sea Tractor likely to be time-consuming, I also experimented with a painted background on my cotton fabric.
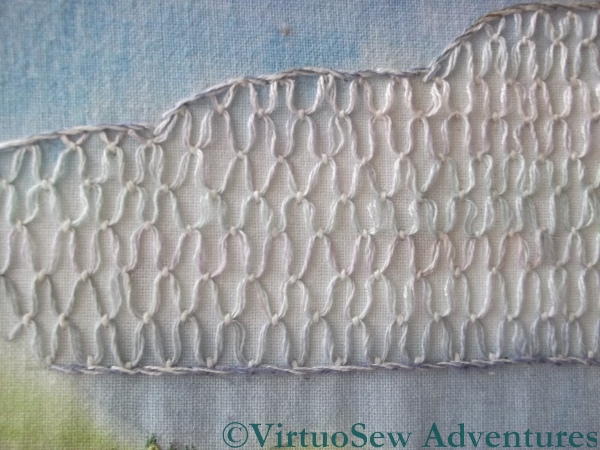
The Cloud Stitch Cloud
In retrospect, the painted background isn’t hugely successful, and it doesn’t have enough stitchery to qualify for high marks in an embroidery competition, but I enjoyed adding those details I did create, and so often in these early pieces, you can see “Rachel-Now” and her ideas prefigured in the stitch choices of “Rachel-Then”.
Looking at it now, I might have done better to work the cloud filling smaller, in white rather than pastels, over a painted base, and without outlining it. Still when you consider that the whole thing was an experiment….!
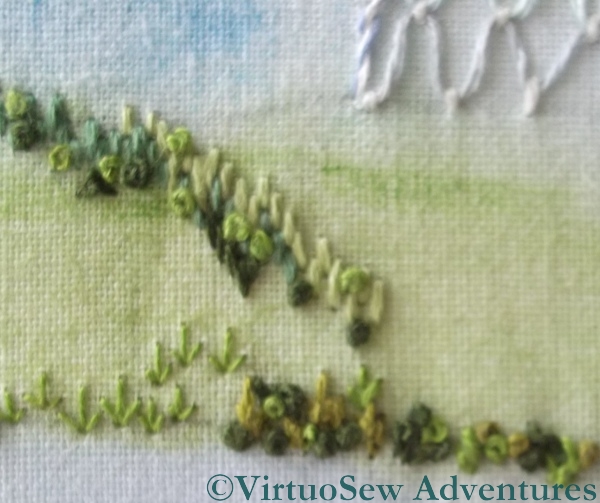
Hillside Stitch Details
The hillside details involved a lot of different stitches in lots of different greens. There are straight stitches, French Knots, chain stitches, and arrowhead stitches (upside down to look like shrubs). Again, if I were to work this now, there would be a great deal more stitchery in it, but I suspect that the combination of lack of time, and a disinclination to work areas of repetitive stitching led me to stop before I should have done.
What I can’t, now, recall, is whether I was pleased with it at the time. I’ve had it propped up in my living room since I rediscovered it, and I’m very tempted to crop it to show just the Sea Tractor itself – which would at least afford me the opportunity to re-block the piece and get rid of the ripples!
Making It Up As I Went Along – The Big Reveal
Stiletto And Mellor
The last time you saw the case I planned for the wooden mellor and stiletto, I’d cut the slits and described how I finished assembling it, using chain stitch down each spine, and blanket stitch around the edge.
When I put the tools in place, though, the whole thing seemed rather flimsy, somehow. I wracked my brains for a bit, and then thought that maybe if I were to needlefelt the layers together, it would give it a little more body.
I have a needlefelting tool with five needles in a single holder, so I fished it out, and stared at it pensively for a while. Fortunately it has a plastic guard around the needles, so I left the tools in place, and needlefelted around them. From both sides.
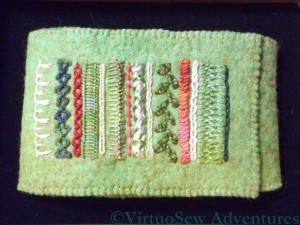
Finished Piece
Then I took out the tools, and felted between the loops so that the fabric behind the tools would stay in place and only the loops themselves would be free of the backing.
Finally, I needlefelted around the edge of the sampler panel and across all of the back, so that the whole case would have the same sense of solidity.
Here is the finished piece. You can zoom in on the picture to get a better view of the stitches, and the needlefelting that gives the piece its body.
I’m very pleased with how it turned out, and I hope my cousin will have many opportunities to use it, and will find the sampler panel inspiring and intriguing.
Making It Up As I Went Along – Part Three
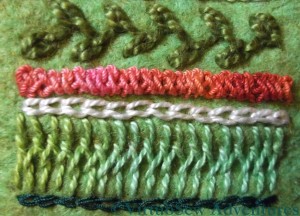
Close Up 3
The final set of stitches for the sampler panel starts with Chained Feather Stitch, using very heavy plain pearl cotton
Braid Stitch (number eleven) is another stitch I’m fond of – I used it on the Frolicking Teddies Cot Blanket. It’s a stitch with a huge personality, so it needs to be used with care, but it’s a good one to have in the repertoire. The thread is another overdyed mercerised round yarn, and because braid stitch uses so much thread, it cycles beautifully through the colours and shows them off very well.
Stitch number twelve is Reverse Chain Stitch. This is a stitch I’d never used before the Goldwork Masterclass, but it is a very useful one, because for some threads it is much easier to work than conventional Chain Stitch.
Stitch number thirteen is Cretan Stitch. This is a great border stitch, but because the thread I chose – an overdyed soft cotton – was in a green that was rather close to the colour of the felt, I decided to add a row of Chain stitch in a very dark green silk to define the edge. It balances the cream Up and Down Buttonhole Stitch at the other end beautifully.
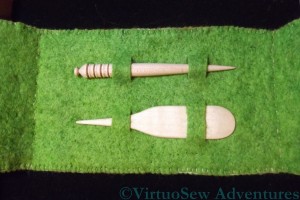
Layout For Tools
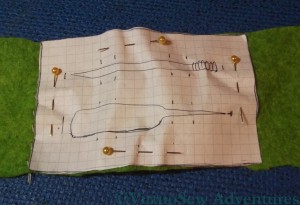
I double checked that I was happy with the layout for the tools by pinning an outline of the two wooden tools onto the felt.Since I used squared paper for the templates it was also very easy to plan where I would place the slits that would allow to tools to be held in place, and to line them up properly.
Then all I had to do was to make use of my mother’s buttonhole cutter to cut the slits – straight through the paper template – and reassemble the two layers. That was harder than I expected. I’d forgotten that felt is a very flexible material, and it bent and stretched itself, and needed to be coaxed back into shape, and then pinned firmly back into stability. Then I chain stitched down each spine, and blanket stitched around the edge….
Making It Up As I Went Along – Part Two
The idea of the sampler section was to give my cousin some inspiration for her own embroidery, and the chance to see what stitches look like in real life, since however good the book or the photo, it doesn’t come close to having the stitch there in front of you in real life! So I decided that it would consist of a sequence of stitches using a variety of threads. Naturally, I included some of my own favourite stitches!
Close Up 1
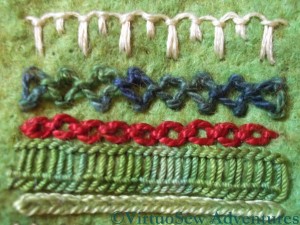
Here, the top one is Up and Down Buttonhole Stitch, using a stranded linen thread from DMC. I first used this stitch in the Persian Fantasy, and I’ve loved it ever since. In this case I’ve added to the ornamental effect by alternating long and short upright stitches.
The next is Diamond Stitch, using an over dyed pearl cotton from Stef Francis. This is a stitch I’ve never used before but often wanted to. I’ll use it again, I’m sure – it was rather fun!
The third – in standard Anchor pearl cotton – is Cable Chain Stitch, which is my favourite chain stitch variation. It isn’t always suitable, because it is a stitch with a very strong character, and sometimes something more subtle is needed, but I always enjoy stitching it.
The fourth is Ladder Stitch, which I struggled with so much on the Tudor and Stuart Goldwork Masterclass course. Here I have used an overdyed soft cotton (Stef Francis again) and found it so much easier to do!
The fifth is Heavy Chain Stitch, which I have found very useful a number of times. It produces a smooth, clean line, definition without texture, which can be hard to achieve in embroidery, which after all is a very textural form of expression!
Close Up 2
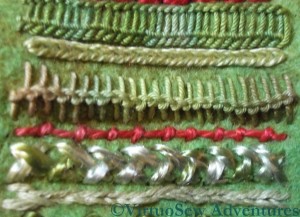
The first new stitch in this photo (sixth in the sampler panel) is Loop Stitch, this one in a round mercerised cotton. It’s another stitch I’ve not often used, but it provides a great contrast in texture with the Heavy Chain Stitch above it.
Stitch number seven is Coral Stitch (remember I used it for the little girl’s hair in the Holiday Traycloth?). I used another overdyed pearl cotton – one of my favourite threads, because it brings stitches to life.
Closed Herringbone Stitch is next, using an almost untwisted rayon thread. This produces a dense plaited effect – very glossy and dramatic.
The final row in this second photograph, number nine in the sequence, is a combination of Stem Stitch set beside Outline Stitch. I know it looks a lot like chain stitch, but the two stitches are mirror images of one another!
Making It Up As I Went Along – Part One
Since Christmas is over and the present duly received, I can at last show you the present I made for my cousin. She’s become interested in embroidery, and when I saw some hand made, beautifully-finished wooden tools (a mellor and a stiletto) at the Knitting and Stitching Show in Harrogate, I decided that I would give them to her for Christmas.
That was all well and good, but I couldn’t think of a suitable way to present them, so I decided to make a case for them. I spent some time sat in the picnic area at the show, sketching different possibilities and trying to work out what other supplies I needed to buy, and when, between mid-November and Christmas Day, I would be able to make it since I was still suffering from tennis elbow (I still am, but not nearly as much!). I was beginning to threaten to put together a kit and giving her that when one of the other ladies at the table pointed out that I would still need to make one as a proof of concept (a phrase I never expected to hear at the Knitting and Stitching Show!). She was right, because it evolved considerably in the process!
Final Layout Plan
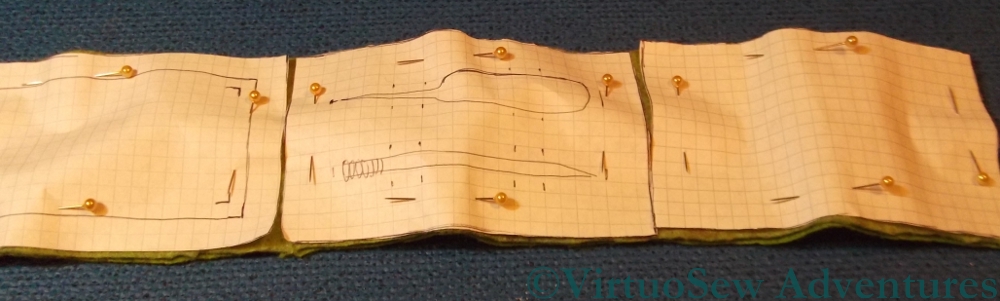
In the end I decided to make a case with three panels, using two layers of felt. I drew out paper patterns for each panel, and pinned them on to the piece of felt I had decided to use. I had considered putting a panel of canvaswork stitches on the front – I even bought a piece of congress cloth to use – but then decided that since she is interested in embroidery, it should be a panel of embroidery stitches.

Layout For Sampler Panel
As you can see, I also had second thoughts about the size of the sampler panel, and made it slightly smaller. That meant that there would be a wider border around the panel – always an improvement!
I ran tacking stitches around all the design elements to make sure I knew what was where, and then started thinking about the stitches to use for the sampler panel.