
Category: General Embroidery
An Experimental Thistle

Preparatory Felt
After I’d (mostly) finished Loading The Felucca, I found myself temporarily lacking inspiration for the Dreams of Amarna, so I thought I’d have a go at an idea that has been burbling around in the back of my mind for a while. I’m hoping a change of scene, as it were, will “reboot” my imagination.
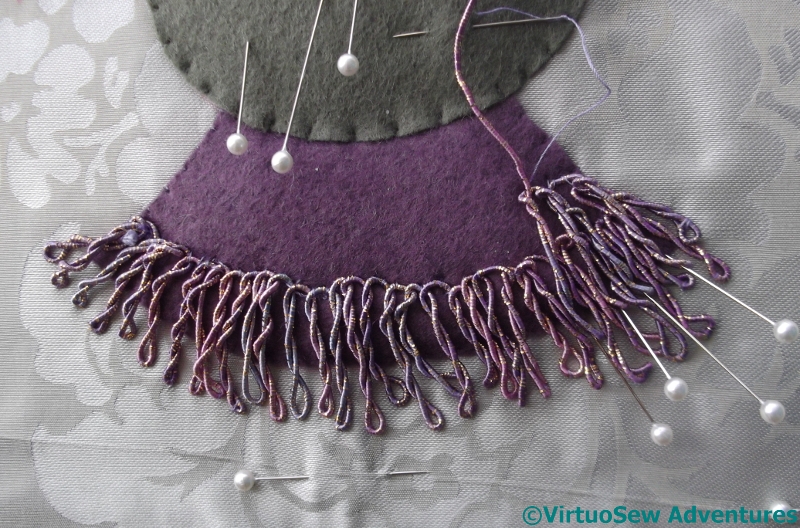
The background fabric is a silk brocade, and I’ve padded the thistle itself with wool felt, in several layers (three under the topmost green circle, in fact).
I drew the whole thing freehand, and I think I will remove and replace the lefthand leaf with a reversed version of the righthand leaf. It will look more balanced and altogether happier if I do.
Working with Gimp
I’m intending to use silk purl and coloured wire purl for the thistle flower, but I wanted something for those to be embedded in. I’ve chosen to use a gold and viscose gimp, and I’m couching it down in a series of fringes zigzagging across the flower.
Each fringe is twisted back on itself – I used a pin as a sort of handle – and held down with small stitches at each end. As each additional layer went on, the “free” ends were held down a little less firmly. It’s a delicate balance between controlling the thread sufficiently (and remember gimps are very stiff and have a mind of their own!) and leaving it looking free and springy!
More Unfinished Objects
Tent Stitch Flowers
I keep on finding things that I’ve not quite finished, don’t I – and in some cases I had completely forgotten about them.
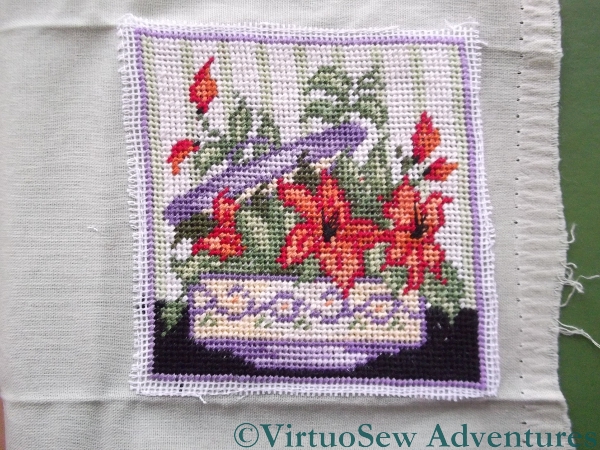
Like this one. I know it was a kit – stranded cotton worked in half-cross stitch on canvas, – but I don’t know why I bought it.
And I clearly had something in mind for it, because I have attached it to a cotton furnishing fabric. Equally clearly, it wasn’t going to be a cushion centre, or I would have centred it on the fabric. It is only about three inches square, so I suspect I had in mind making it into a needlecase.
But before I do anything else with it, I have to find some way of covering those raw edges of canvas with something that looks deliberate!
Any suggestions?
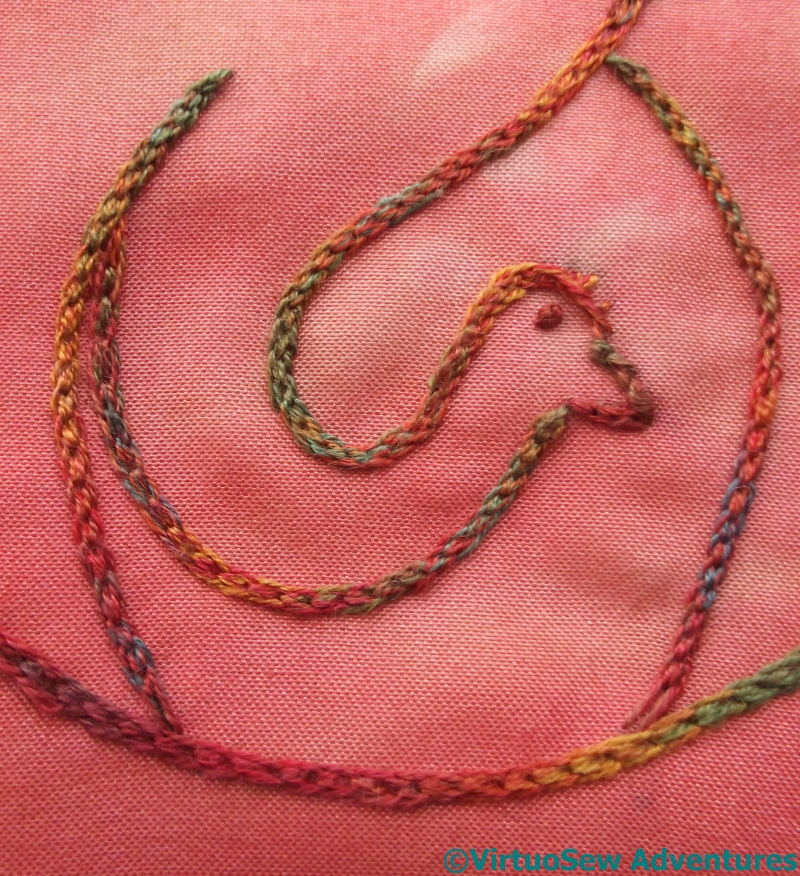
Coloured Crane
In other news, though – I’ve finished the second Crane!
Actually, you may recall that it was the first, but I decided it looked too overheated in the pot it was destined for, and set it aside for another version.
I found in when I was looking for something else, and finished it. At least, the embroidery…
I will probably mount it on a circle of card, and put in that famed Winter Decoration corner.
At least I know what I’m going to do with this one!
Dressing the Second Labourer
Using The Mini-Iron
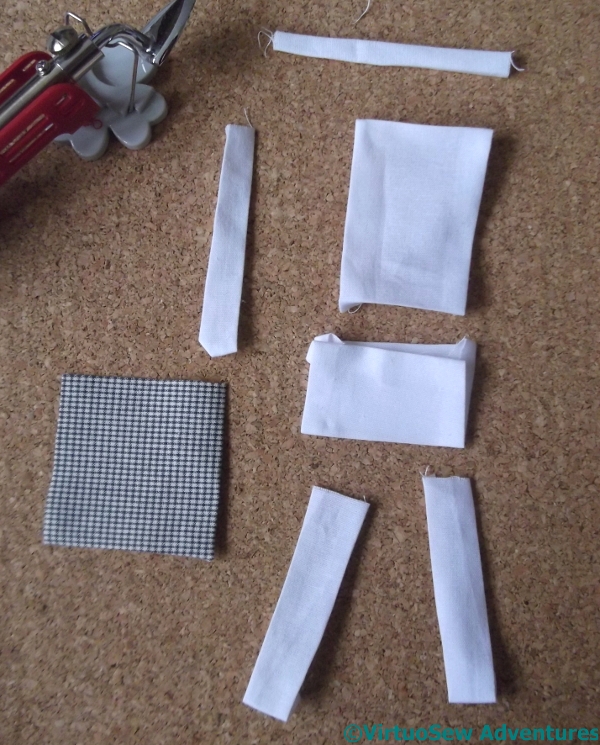
Since I decided after dressing the first labourer that using rectangles of fabric was the way to go, when I started on the second I began by cutting out every bit that I expected to need.
That meant:
two pieces for the legs, a piece for the body of the top, a piece for the section of the top below the waist, a piece for the turban, a piece for the sleeve, and a piece for the cloth thrown over the shoulder.
I bought myself a mini-iron to make the job of folding in the edges easier, lighter, and less perilous. Fortunately there are two more labourers to dress, so I will have plenty of time to improve my skill!
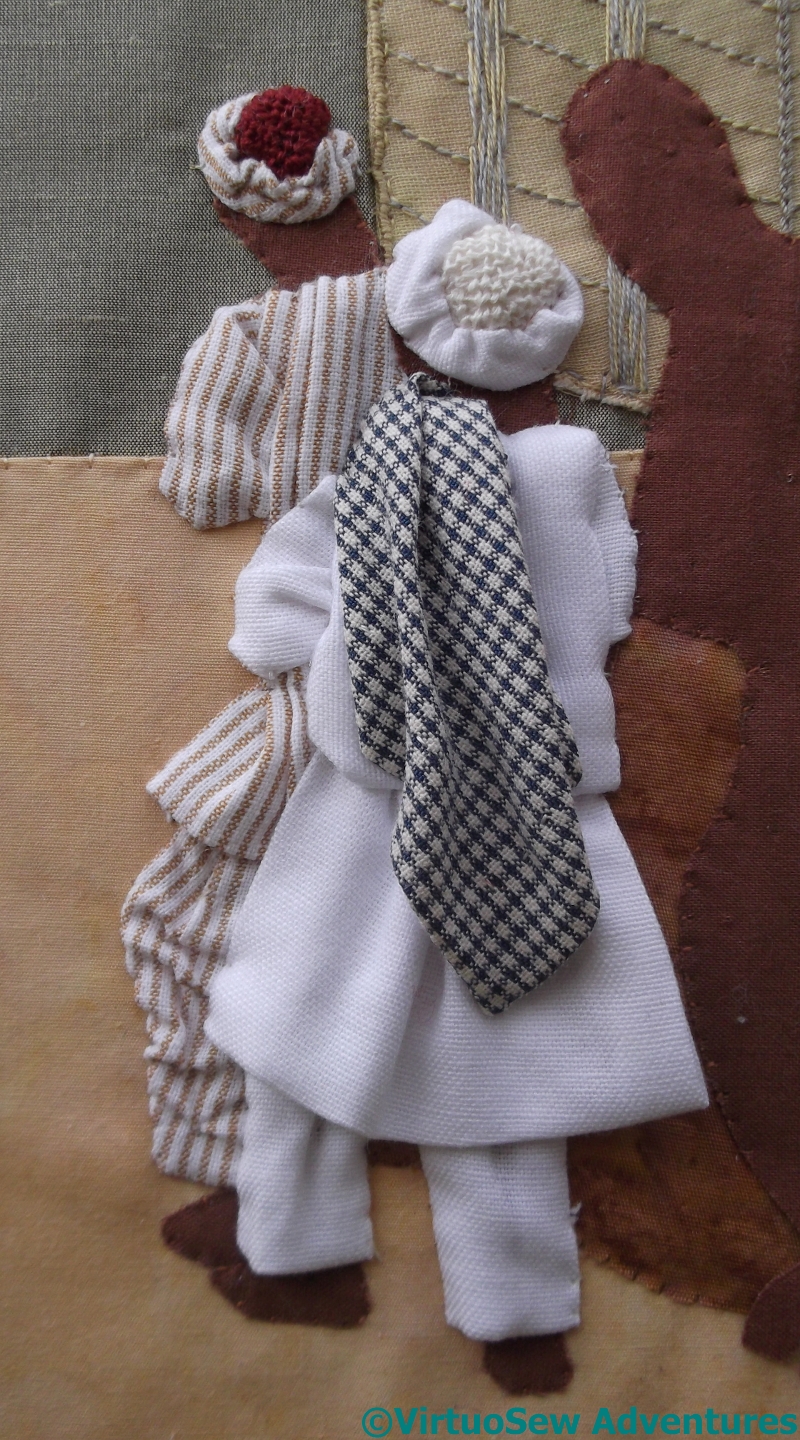
Two Labourers Clad
The trick to a successful applique is the order in which the elements are layered.
So in this case, the first pieces are the trousers. They are stitched down each side, and tweaked in the middle to create some impression of a body underneath. The bottom edges aren’t held down, so in storage this piece may be a bit delicate.
The turban is done in just the same way as the first one, but this time I used a cream linen thread for the central disc.
The sleeve was next, and then the “skirt” of the top, which is gathered to give it a sense of bulk. It is tethered by the underlayer, but not attached at the bottom edge. The right-hand edge isn’t tethered, either, because in due course the Third Labourer’s clothing needs to fit underneath..
Finally, there was the body of the top, and the fabric thrown over the shoulder. I don’t understand why he didn’t use it to pad his shoulder against the packing case, but the photo says he didn’t!
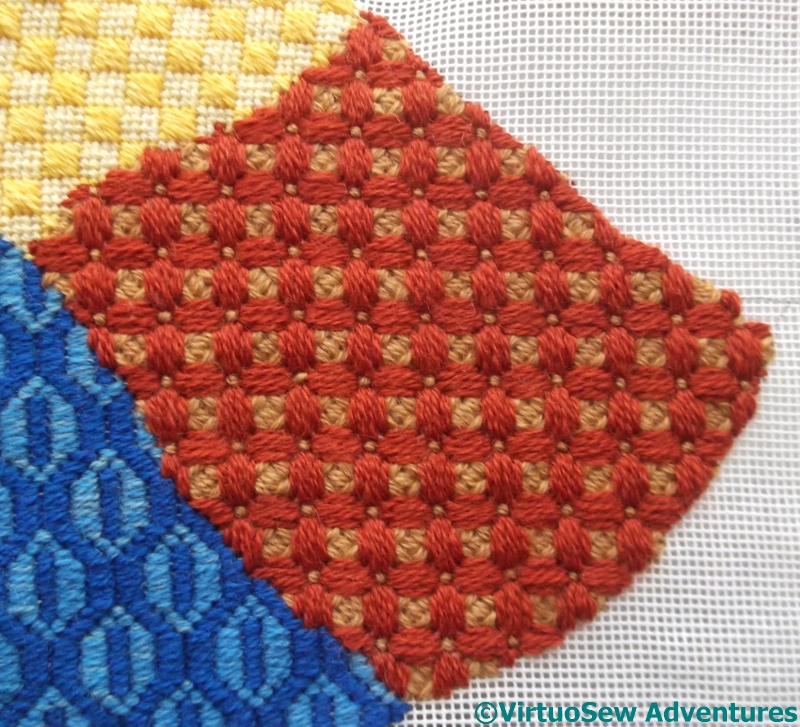
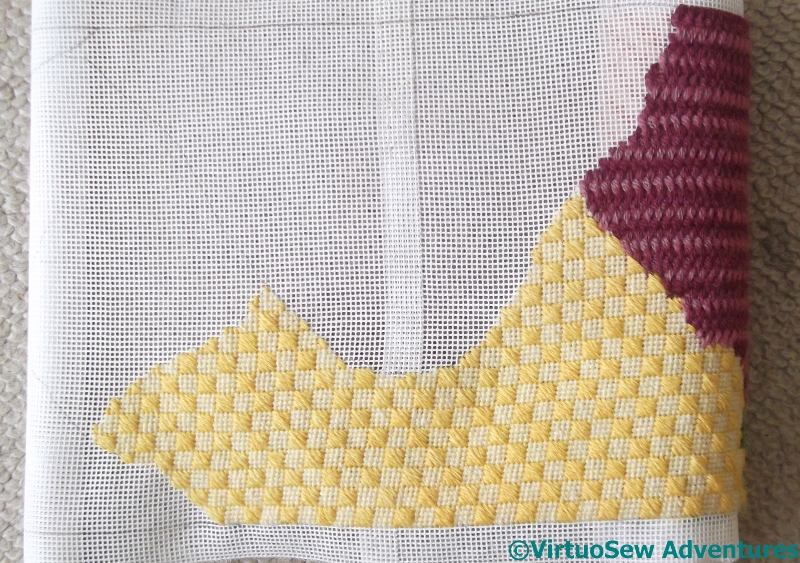
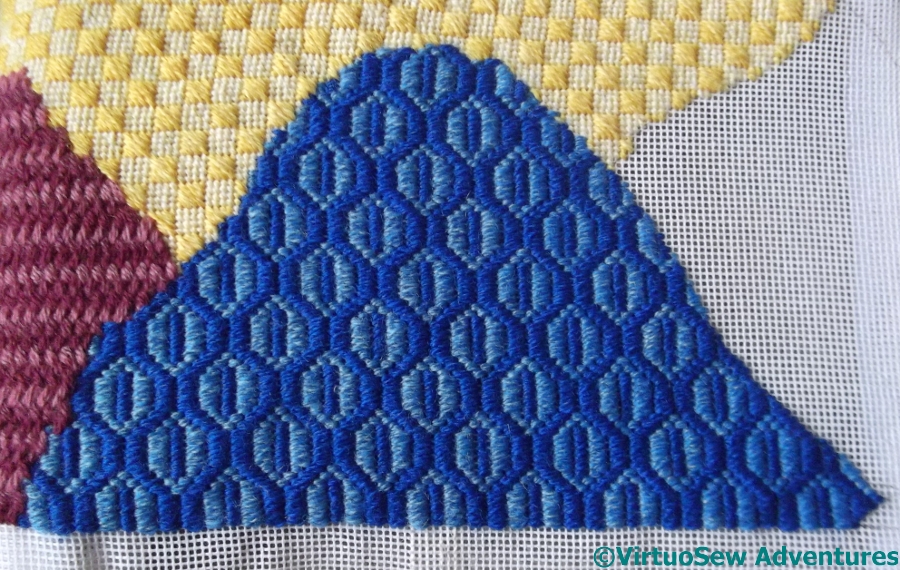
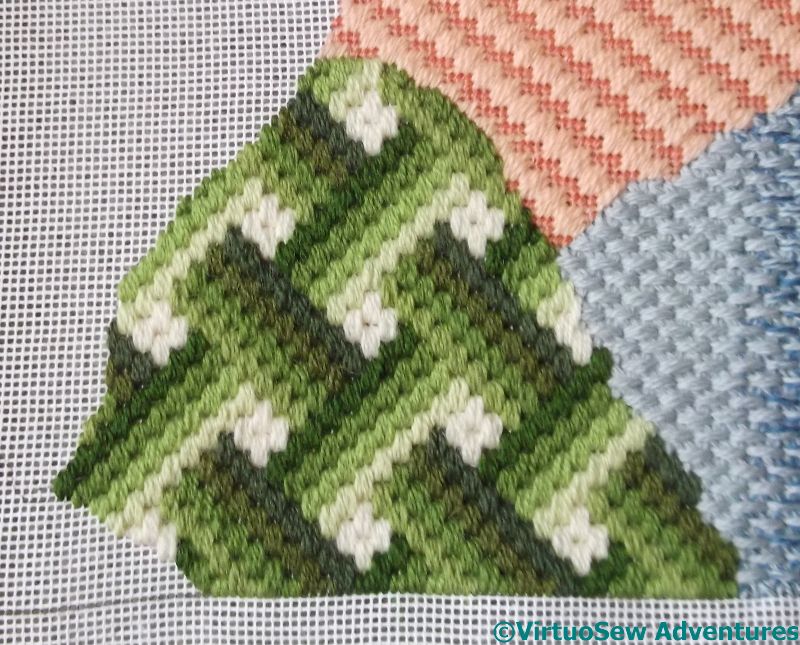
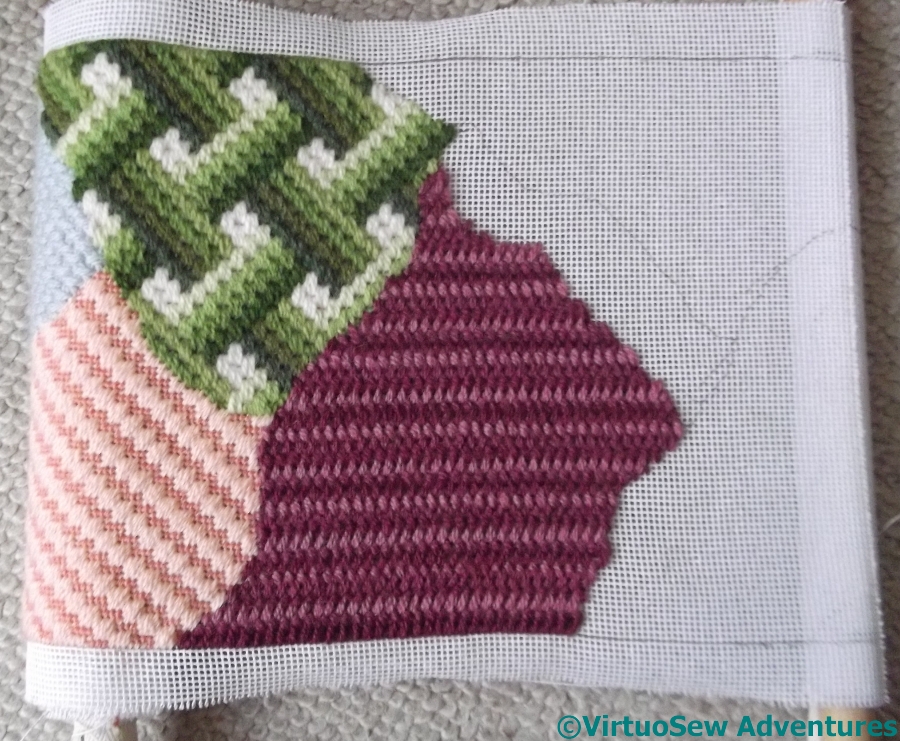
Crazy Canvaswork Cushion – Part 10
Section Sixteen
The last section, Section Sixteen, gave me a lot of trouble. I suppose that is partly because the end was in sight, and I wasn’t quite as focused as I could have been!
I was originally looking for a crossing stitch, but every single one I tried either looked wrong, or simply failed to cover the canvas. I sent several tweets enumerating my trials, with one or two strands being too fine, and three strands too heavy, and in the end I abandoned the crossing stitches entirely.
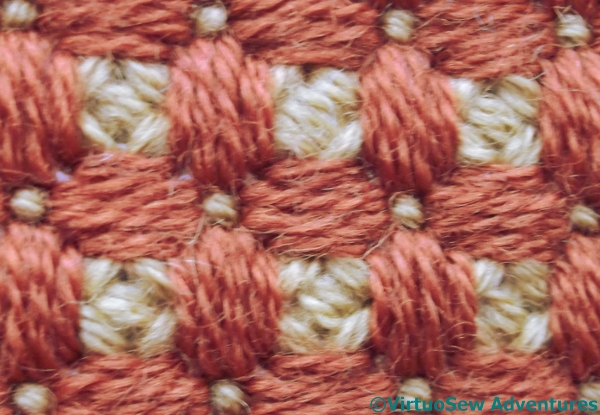
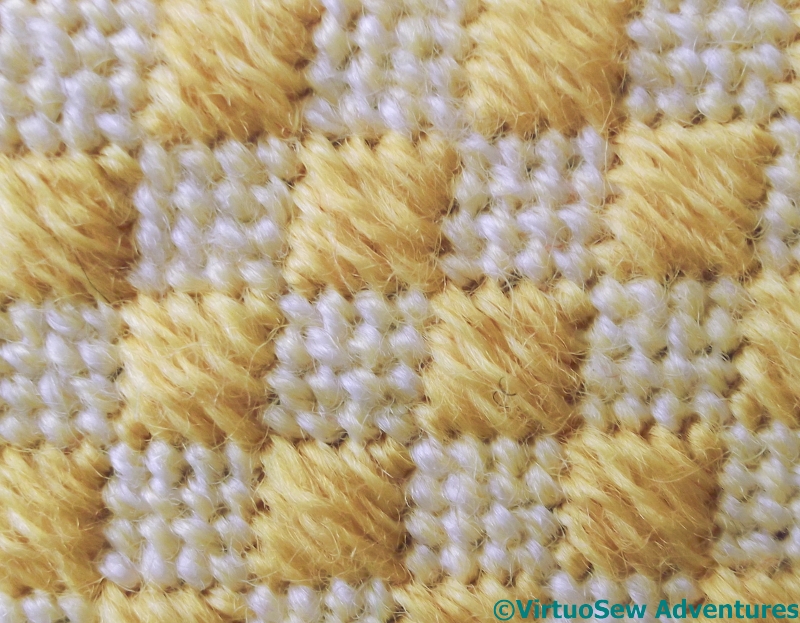
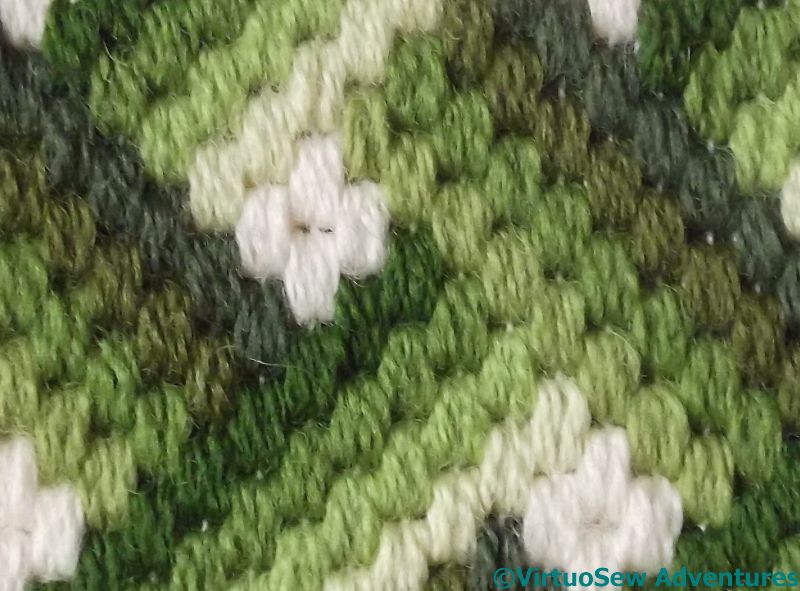
Framed Triangle Stitch
In fact I devised my own variation on Triangle Stitch, which I’ve called Framed Triangle Stitch. I rather like the way it has turned out. It is a bit of a trial to stitch economically, but since I am attempting to reduce my stash, that is scarcely a problem!
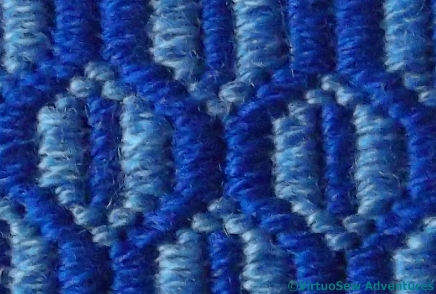
Although I like the pattern it creates, I’ve been somewhat concerned about the scale of the pattern, which is perhaps a little too similar to the blue pattern of Section Thirteen.
However, I now have the challenge of unrolling the whole piece, blocking it, and working out how to finish the cushion.
As they say – watch this space!
More Experiments!
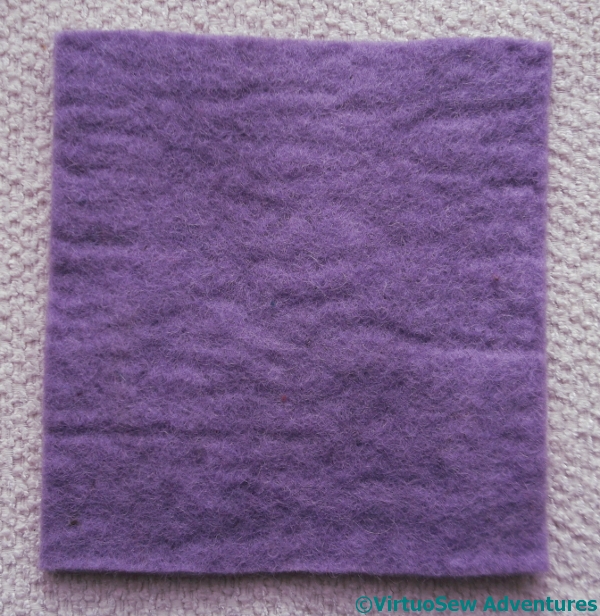
Back Of Sample
You could be forgiven for thinking that I had finally lost all common sense. We’re all interested in fibre, fabric, and stitch, but even so, expecting you to take an interest in a photograph of a plain piece of felt seems a little extreme.
Especially a very ordinary, single-colour, and entirely unadorned piece of felt.
So what am I up to?
Mischief, of course!
Does it help if I tell you that it’s really quite a thick piece of felt?

Front Of Sample
Or does it help if I tell you that this is the front?
I bought an “inspiration pack” of threads, and this thick square of felt at “Sewing For Pleasure” a while back, with absolutely no idea of what I expected or intended to do with it.
While I was wondering about it, I remembered reading about a medieval satchel that had been made by sewing the pieces together within the thickness of the leather. I didn’t feel quite willing to attempt something structural, but it gave me the idea of trying to work a sampler of stitches without the back showing.

Detail Of Sample
I even managed to work some of my favourite stitches.
I originally began with a wavy line of Shell Chain stitch, and then built up the design from there. Some of the threads were too heavy to use in this context, and there was a wonderful heavy slub that I couldn’t find a use for (never fear, I will!) but I had great fun alternating texture and shine, space-filling and line, and just playing.
I have absolutely no idea what I’m going to do with it, but I’m rather pleased with how it turned out!
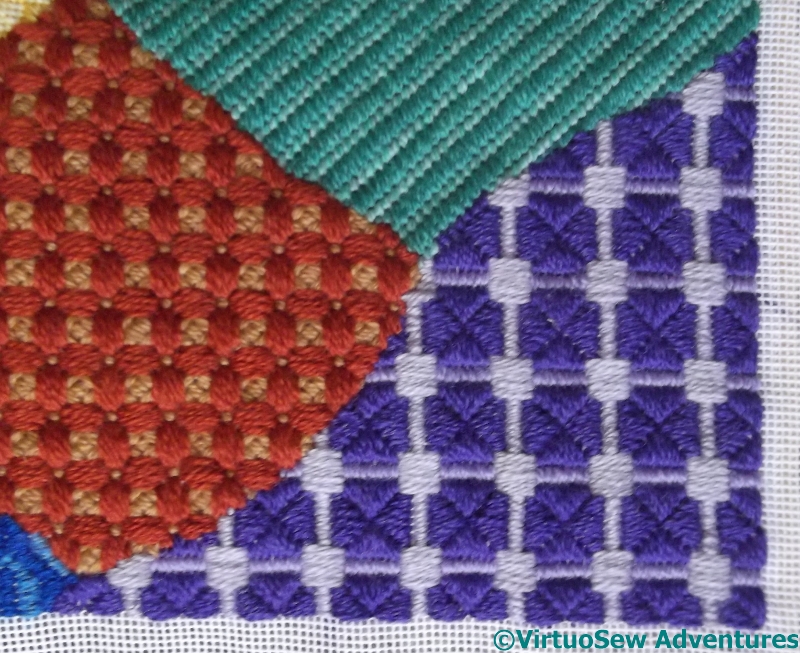
Crazy Canvaswork Cushion – Part 9
Section Fourteen
As I mentioned in Part Eight, I gave myself a framework for the patches, alternating crossed, diagonal, and straight stitches.
Looking at the photograph now, there is a slight look of Victorian floor-tiles about the combination of the blue and yellow of the previous sections, and the brown and beige of this one. The proportion of brown isn’t correct for Victorian floor-tiles, but still…
It occurs to me that we might have a lot of fun looking at this cushion when it’s done, looking for other things that it reminds us of!
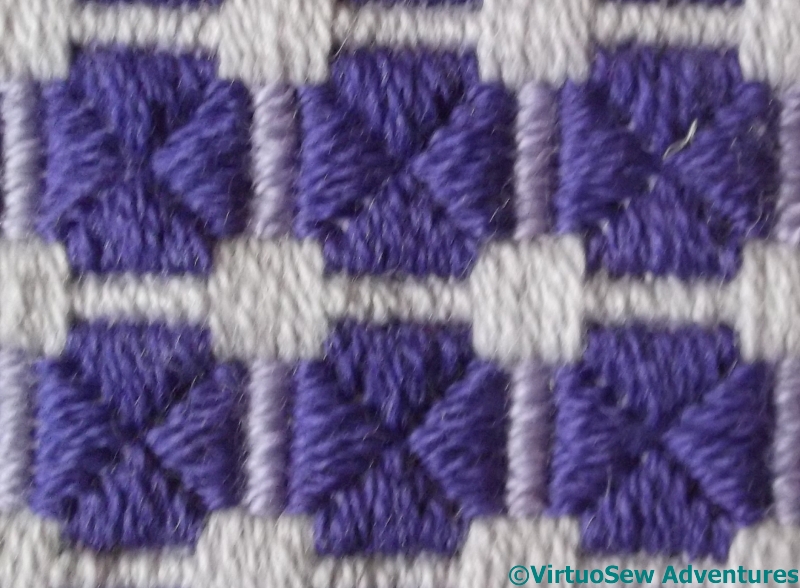
Caged Rice Stitch
I chose a Rice Stitch caged with straight stitches. I suppose this could be regarded as a combination of crossed stitches and straight stitches, which may throw my scheme slightly off-balance. I like it, though – the straight stitches look nicely padded, even though they aren’t, and the rice stitches add texture. I can imagine it looking “floral” in some colour combinations, but in this version, I think it emphasizes the “Victorian Floor Tile” feel I mentioned before.
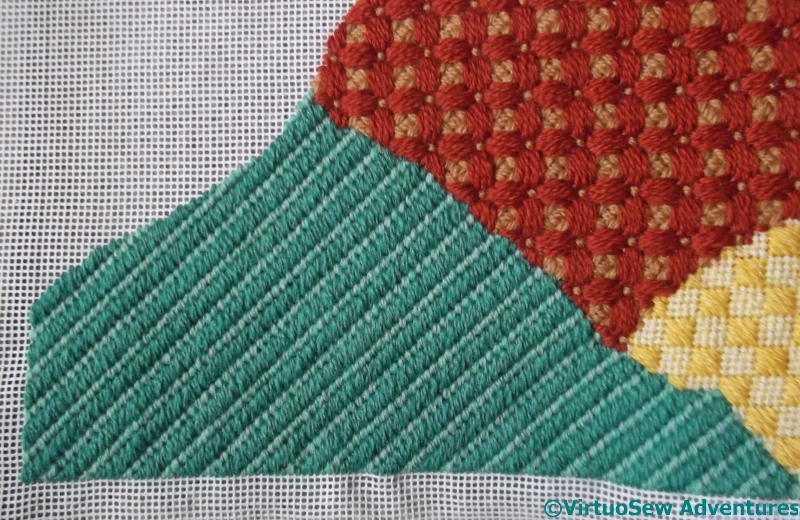
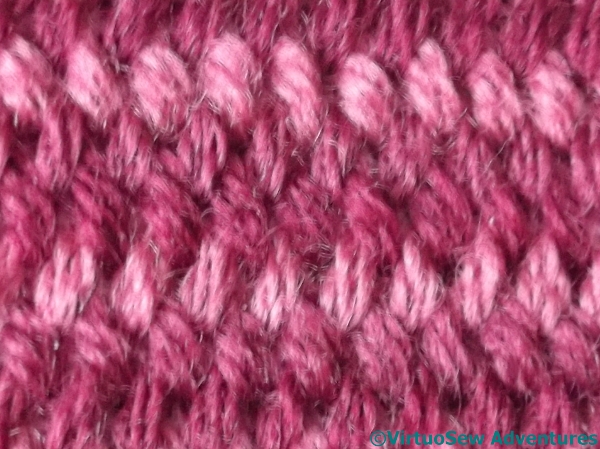
Section Fifteen
I am getting really close to the end now – Section Fifteen is the last but one, as you can see by the square corner. Since I didn’t work on this project over the summer, I’m a bit surprised by that. I wish the project had been as good at stash busting as it has been at growing!
You might have noticed that teal is one of my favourite colours and wondered why you haven’t seen more of it, but my stash is partly inherited and I don’t have very much of some colours.
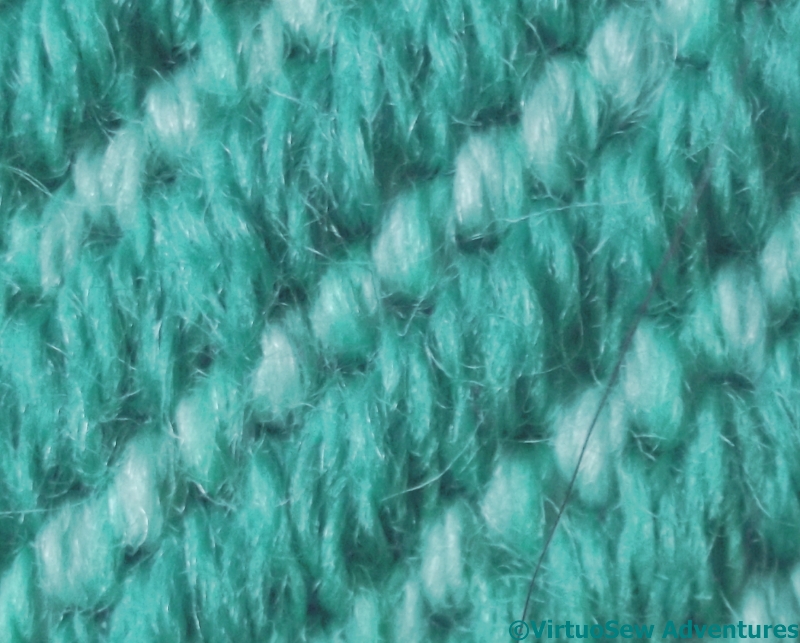
Double Twill Stitch
After the complexity of Caged Rice Stitch (which, while fun, is on the complex side!) I went very simple indeed for Section Fifteen – Double Twill Stitch.
So now I need to work out what colour – and what stitch – to use on the last section. And then how to finish the cushion…
Easy, right?
Crazy Canvaswork Cushion – Part 8
Section Twelve
Moving on…!
I’ve made something of a principle of alternating the types of stitch as I progress along the Crazy Canvaswork Cushion, so as far as possible a crossing stitch is followed by a diagonal stitch, and a diagonal stitch by a straight stitch. This is part of my strategy for making an abstract, random piece slightly less random, and more under control.
Chequer Stitch
In this case I also needed a sturdy stitch that would help to confirm the “weld” of the canvas, since although it had been tight when I first worked it, the pieces of canvas moved against each other as I worked the earlier sections.
I picked Chequer Stitch because it alternates squares of tent stitch – which will control the two layers of canvas very firmly – with squares of diagonal straight stitches.
Section Thirteen
Section Thirteen is actually a fairly simple Bargello lozenge pattern. I realise – rather late – that this may be the only place in the cushion in which I have used a straight stitch pattern, with the straight stitches oriented parallel with the long sides of the cushion. I am going to have to hope that this doesn’t make the section stick out like the proverbial sore thumb when I finally unroll the whole thing!
Bargello Lozenge
I found the Lozenge pattern in the “Dictionary of Canvaswork Stitches”, by Mary Rhodes, which I must have picked up in a second-hand shop somewhere, and a quick look inside shows it was a library book before that. It’s marked “Copyright 1980”, but I think there is a rather 1970s feel to this pattern. Thank goodness I didn’t choose to work it in brown!
Crazy Canvaswork Cushion – Part 7
Section Ten
It has been ages since you saw the Crazy Canvaswork Cushion – I got stuck and fed up with it and threw it aside in a huff, but since I’ve now sorted out the frustration I can cry “Onward and forward!” and show you Section Ten, which against my original idea, mentioned in Part Six, of choosing a horizontally striped pattern, I chose a basketweave bargello pattern. This is a pattern I have been longing to use and never had a use for.
Basketweave Bargello Pattern
What hadn’t quite registered with me was the scale of the pattern. It’s easy to work, although getting the colour progression right is a little tricky when you’re stash-busting!
I did maintain the orientation of the dark to light in both of the colour sections, but I wonder whether the light squares are too light. One of the advantages of this project is that it will give me references in the future to help me to remember what I need to think about when I choose to use some of these stitches and patterns.
Section Eleven
Section Eleven was the problem that caused me to make disgusted noises and set the whole thing aside. I started the section using and interlocking and crossing stitch, but it didn’t cover the canvas thoroughly enough, I didn’t enjoy working it, and it was using a lot of thread. Now, I want to use up as much of my thread as possible, but I also want the shapes and sizes to balance nicely.
All of this made me downright grumpy with the whole thing.
Plaited Stitch
Finally, over Christmas (having packed everything else away so I would have to solve the problem!) I unpicked the stitch I didn’t like, and started again, leafing though my books of stitches and patterns. Finally, I chose Plaited Stitch. It creates the horizontal stripes I had first thought of for Section Ten, but it is a diagonal stitch, so it contrasts with the Section Ten I finally did, and it is a crossed stitch, which contrasts with the diagonal stitches and straight bargello stitches of sections Nine and Ten.
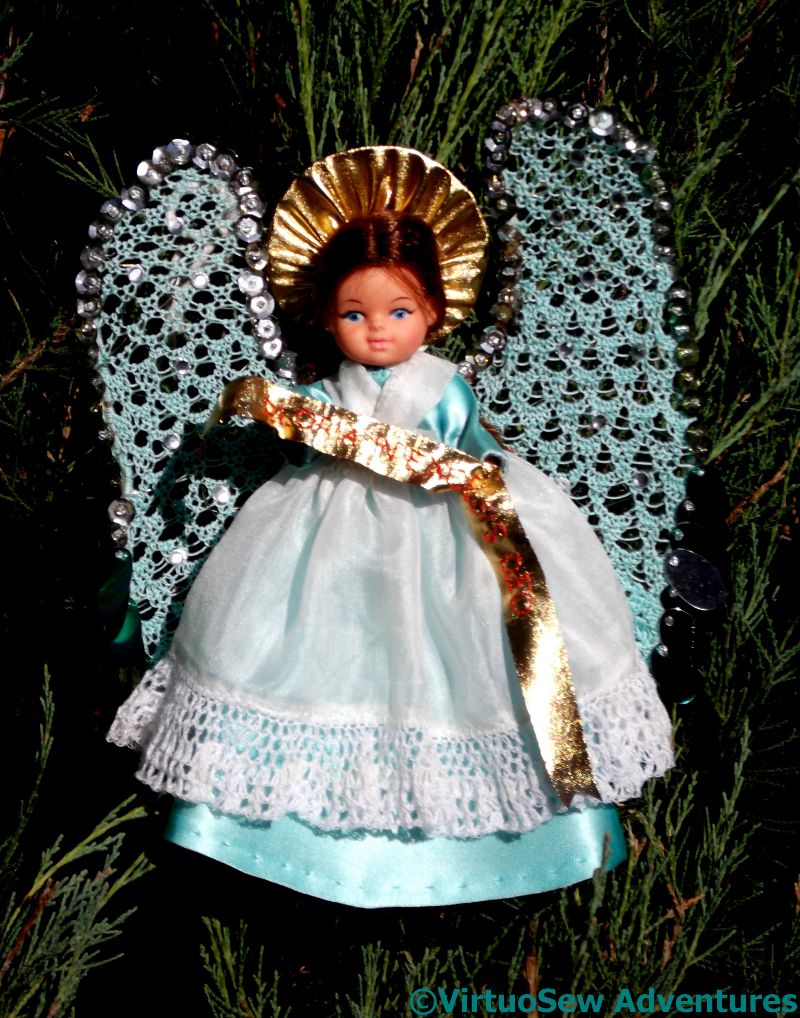
Gabrielle, the Christmas Angel – Part Two
And now, the Finale…
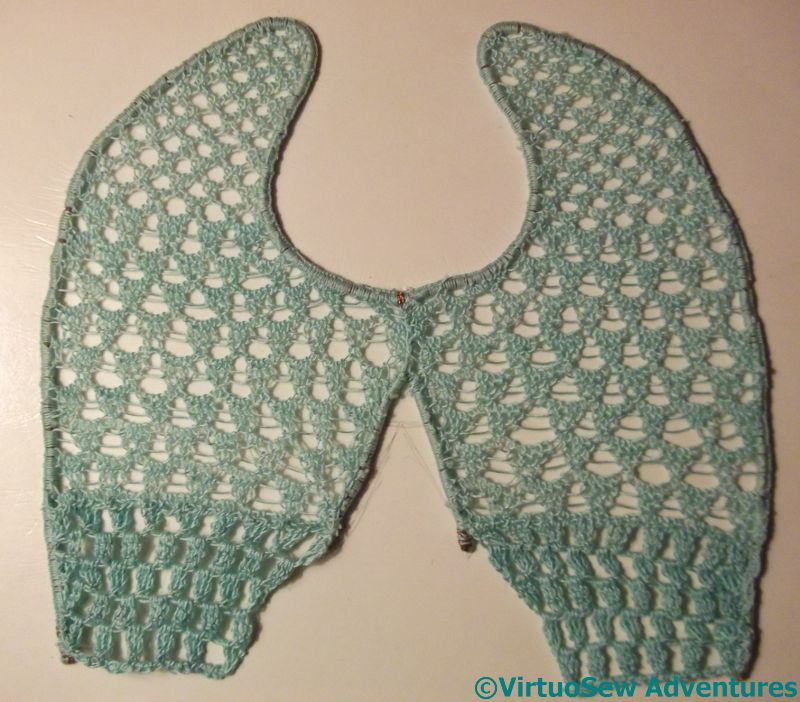
Gabrielle’s Wings – first stage
“Angels need wings. I have never made big wings before, only gauzy ones, so these grew a bit like Topsy! I had, fortuitously, a ball of crochet cotton which exactly matched Gabrielle’s dress, but I had already used crochet to make the lace on the overdress. Needlelace seemed an option if I could find a suitable former to hand. Wire proved to be too thin, and the thread slipped about, so in the end I made a frame from one strand of the plastic coated wire of electric cable. Yes, I know you can buy purpose made formers but I wanted to do it now.
Sequins, crystals, and wire support
After drawing the shape on heavy card, and arriving at a good shape was an interesting exercise in its own right, I couched on the wire at widely spaced intervals, then covered the wire and its plastic coat in blanket stitch using my turquoise crochet cotton. Not only did this cover the wire but it provided a anchor for the needlelace itself. I used pea stitch at first then increased the number of loops in each group first to five and then to seven to add “weight” towards the lower edge. I hadn’t provided a former across that edge as I didn’t want it to be rigid, but needlelace requires just such an edge! A single thread helped a bit but a piece of applied crotchet finally did the trick.
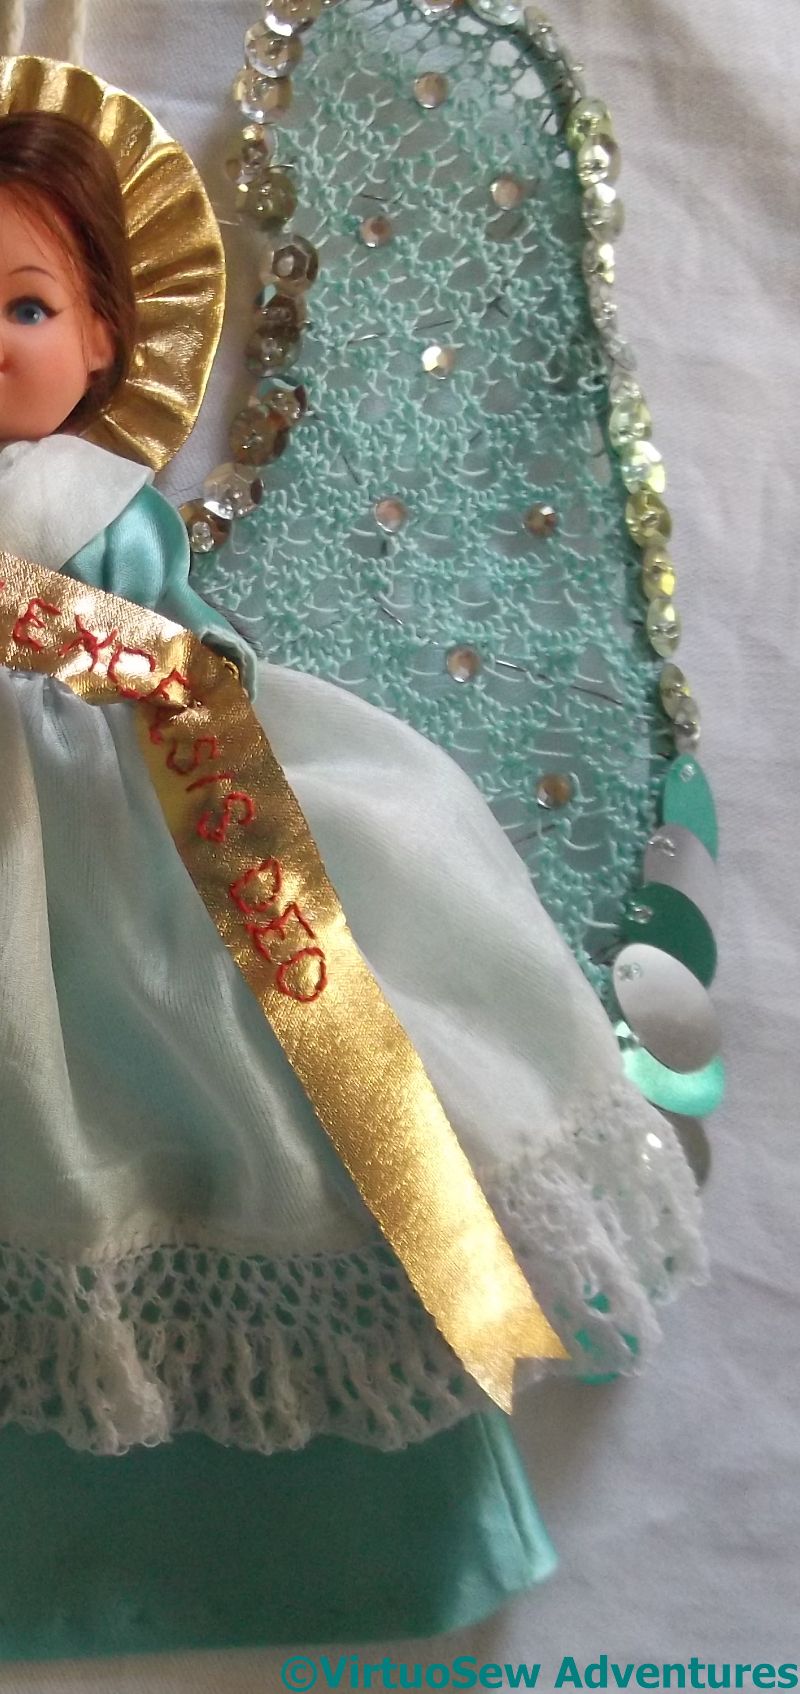
She looked balanced, if a bit subfusc for Christmas, so I added sequins, left over from one of Rachel’s childhood projects, mainly cup-shaped but the lower ones are long ovals to suggest pinions. Again, the colours, turquoise and silver, were a perfect match. Some people have all the luck. Rachel added crystals to increase the “bling”. The halo is a cardboard former covered with cloth of gold. I used the gathered side to suggest an aura of radiating holiness and backstitched a banner “Gloria in excelsis Deo” in red on cloth of gold, too.”

Gloria In Excelsis Deo
We timed our photography just right, too – the last sunny day of Autumn, before the weather turned thoroughly nasty on us…
Outside, hanging from a fir branch in the garden, Gabrielle made a remarkably effective member of the heavenly choir.
Gabrielle, the Christmas Angel – Part One
Gabrielle, the Christmas Tree Angel
Lest you imagine my talent for complex projects sprang out of nowhere, I have asked my mother to write a couple of guest posts about one of hers – Gabrielle, the Christmas Tree Angel. Gabrielle figured on our Christmas cards this year, and she took nearly a year because she was being improvised as she went along.
—
“Looking at my collection of crochet hooks, I decided that I needed to do something quickly if I wanted to use the smallest one before my eyesight made it too difficult. I am becoming increasingly long sighted as the years progress, and my myopic Impressionist wonderland is receding. Coincidentally, it was Christmas tide, and we had just rejuvenated Bethlehem. (Ask Rachel!) A Christmas Angel for the top of the tree seemed the next proper project.
Gabrielle herself is one of Rachel’s dolls, rediscovered when we were tidying the loft. She is just the right size for our Christmas tree. A rummage through my stash of cloth provided enough satin, a beautiful turquoise, and a square of fine silk which had been the Virgin’s veil when we made a crib one year using Rachel’s dolls as the cast.
To make the dress I cut out a cross shape wide at the top and bottom narrowing towards the crossing place out of the turquoise satin. The cross piece itself, which formed the sleeves, was short and narrow. I hemmed the cuffs and a small opening for her head before folding bottom to top and sewing the side seams.
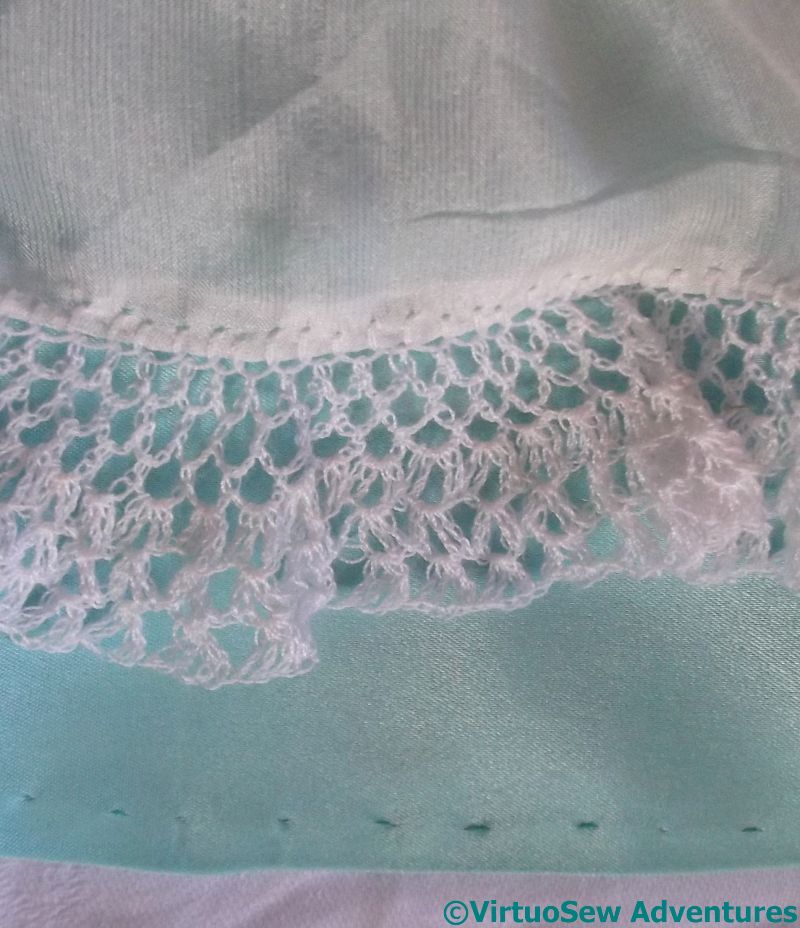
Lace Edging in sewing machine thread
Next I tackled the silk over-dress. A line of open blanket stitch along the selvedge gave me a base for the crochet work I so wanted to do. Again, I used ordinary sewing thread and kept the design simple. It was surprisingly easy to work. In no time I had a sizeable length of delicate lace.
The original intention had been to make a cottar such as altar boys used to wear, but the very small size and filmy silk made my stitching look crude. Instead I used two pieces of folded silk over the shoulders fastened lightly to the satin and covered the raw ends with the very gathered edge of my lace bordered silk. It looks more like a pinny, but billowing satin displays the lace beautifully.”