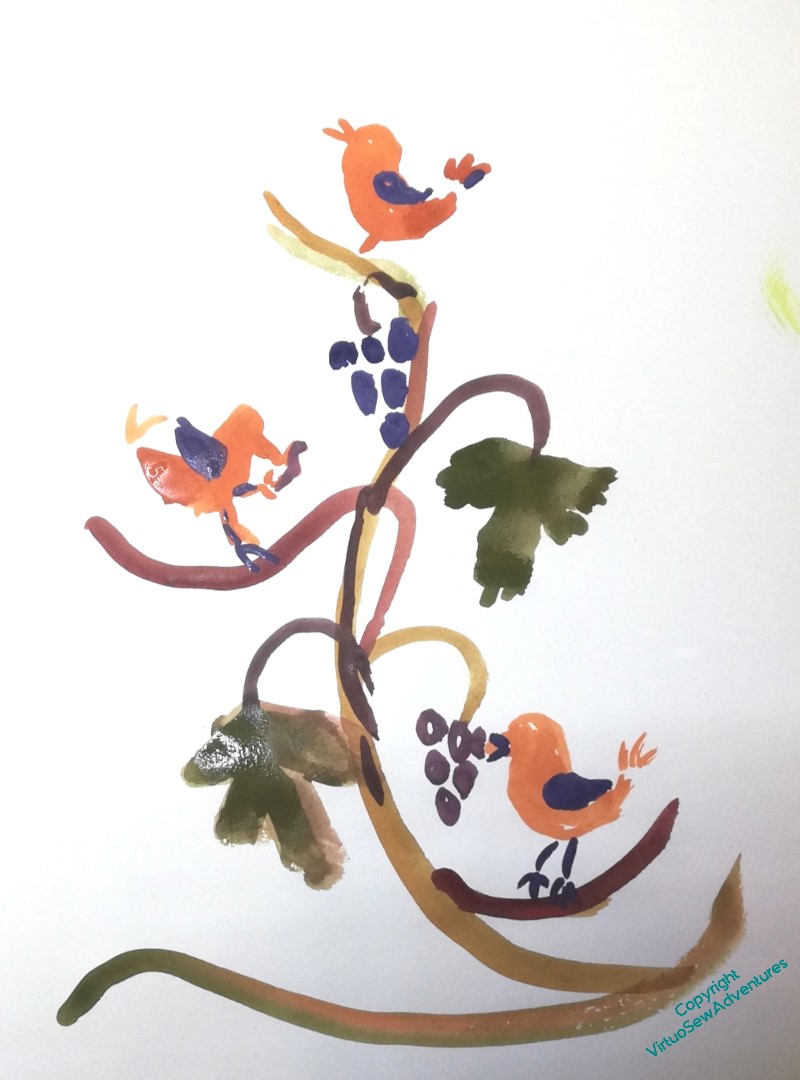
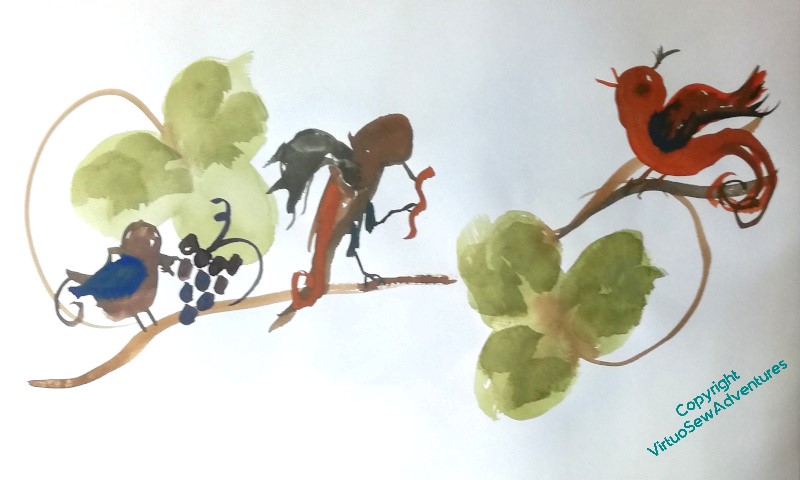
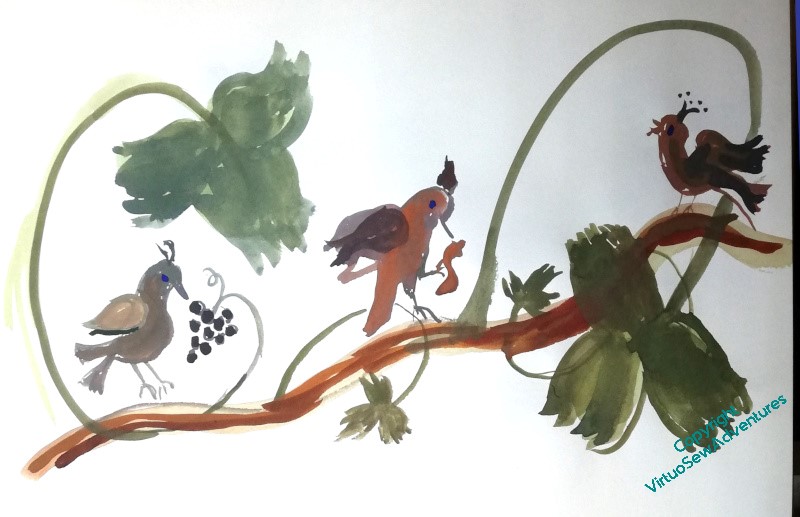
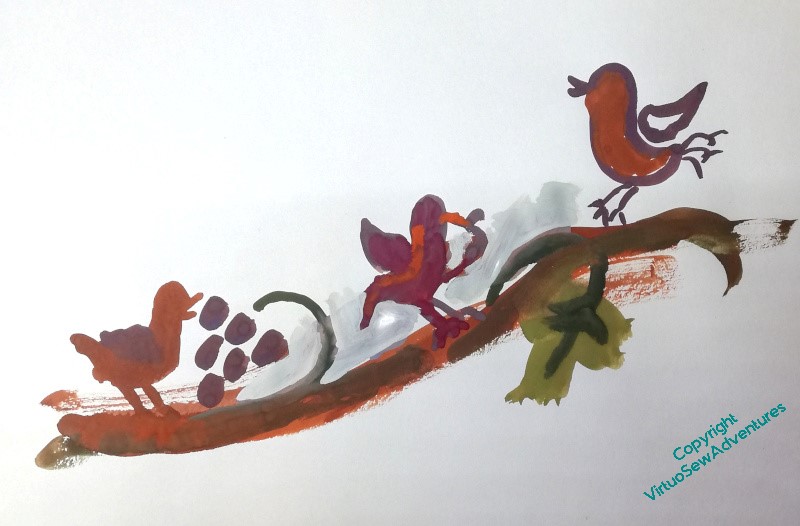
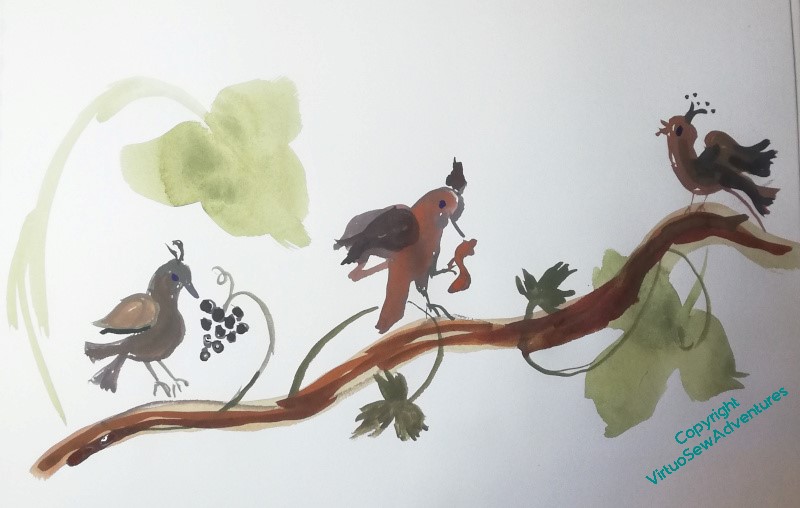
You may recall that I said last time I mentioned the design I am trying to work out here, that it was proving very difficult to balance three birds not looking the same way, and that making them look the same way didn’t work at all.
Then it occurred to me that – obviously! – the two earlier birds would be facing towards the one that’s singing. Partly because we always turn to look where the noise is coming from, and partly because that is their aspiration.
You will notice that all of the rough designs I’m playing with here are in colour, which is not at all in keeping with my idea of using Mountmellick work. That’s because at present I want to find it easy to distinguish parts of the design. When I’m a little clearer about the shapes and their flow, I’ll start moving towards a more tonal patterning that will help me to think about stitch choice.
In the meantime, I am playing with shapes and layout in very vague terms.
Eventually, I want the birds to be quite medieval and slightly mad in appearance, and I’m thinking of trying to find some suitable thread – a round, matte cotton in two or three thicknesses – in a variegated colour that will help me to create the look of carved wood. The challenge is in finding it. This is not something easily bought online with any confidence, and so many of the thread companies don’t go to the shows anymore.
As regular readers are well aware, when in doubt I have a policy of benign neglect which allows ideas to ebb and flow until something filters to the surface as The Right Idea. Sometimes this takes longer than others, although I have noticed that recently I’m getting ideas a bit more quickly.
Head Of Nefertiti
Or maybe it’s just everything coming to a head, all at once!
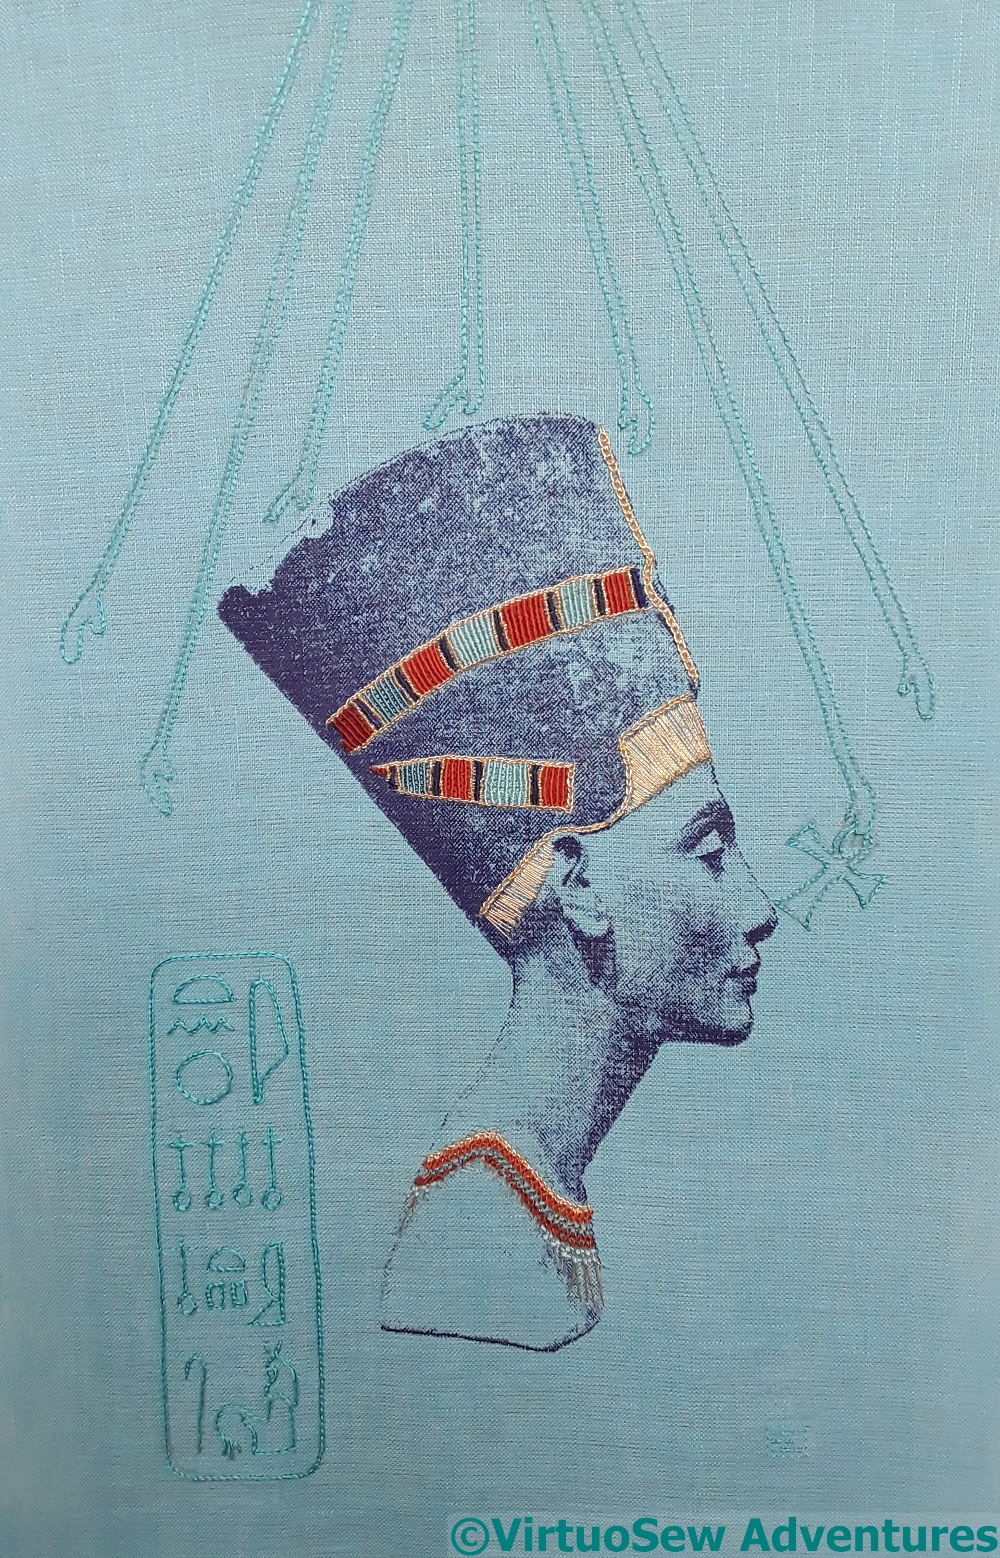
Nefertiti came off her frame after I’d finished her (in 2017, dear heavens above!), and then went into a box while I tackled such hair raising adventures as the Colossus of Akhenaten and the Amarna Family Group. This was partly because that seemed safest, and partly because I hadn’t the vaguest idea how I was going to display her. She certainly couldn’t be mounted on anything that would move, or suffer abrasion, not with the sort of gold thread I had used, but I have a deep aversion to mounting embroidery behind glass, except in particular circumstances.
So what I needed to find was some way to mount, frame, and display the Head of Nefertiti in a way that would be satisfying and sufficient, that that would allow her to stand alone, with no glass, no frame, but nevertheless complete. I’m not sure when the idea finally swam to the surface, but I had a thought that maybe what she needed was cloth-of-gold.
Then I found some!
Not the real thing, unfortunately, but at least I found something rather spectacular, that clearly had the idea of cloth-of-gold somewhere in its family tree. Then the difficulty became how to make the assembly work. The wretched stuff frays, pulls, and crumples. Then it didn’t iron nicely – but it responded well to being steamed under tension and ironed on the back, so that was well in the end! Next, the frame my friendly carpenter made had a front of foamcore attached, with slots corresponding to the slots in a separate piece of card attached behind Nefertiti, through which I had threaded cotton tape. The foamcore was covered with padding and then the “cloth-of-gold”, and then, with some trepidation, I cut through the padding and the gold from the back. I’ve reinforced the cuts with fabric glue, to inhibit fraying.
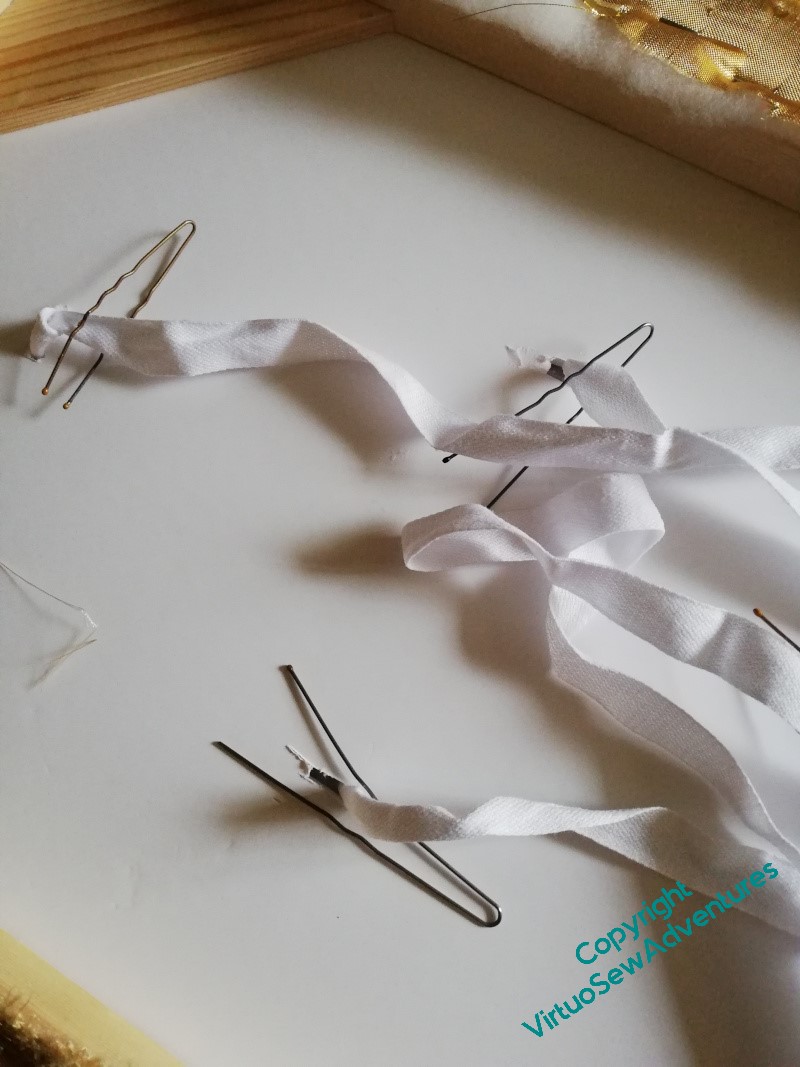
Then I resurrected a hairpin-as-hook trick I used to use to fasten my character shoes in ballet class (buttonhooks being no longer available, in these degenerate days!) to pull the ends of the tape through to the back, pulled the tapes tight, and tied two bows.
This of course skates over a lot of fussing and measuring, stretching and stapling, anxiety and tension, but I’m sure most of you have had similar experiences and don’t need every detail!
However, the final result is what you see here – Nefertiti, The King’s Great Royal Wife, At Whose Coming One Rejoices – on set at Bernard Rose’s studio, ready for her close up and commanding the stage.
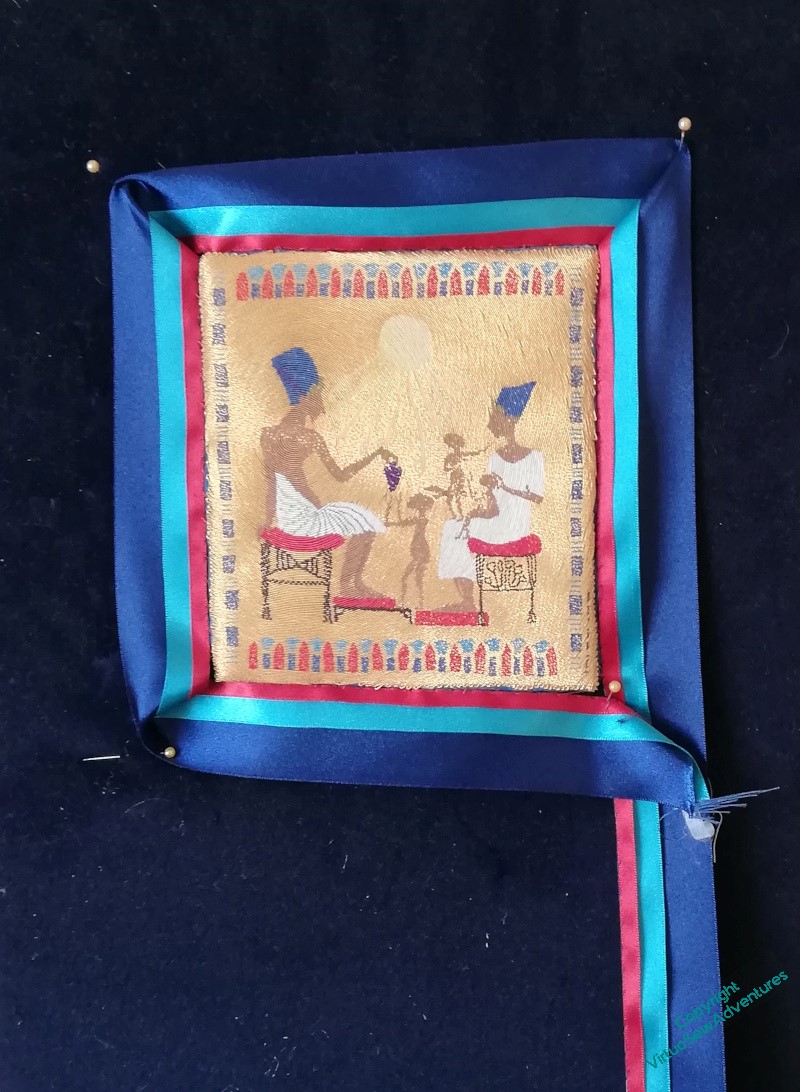
We left the Amarna Family lurking at the far side of the living room, surrounded by coloured ribbon. I was very certain it was better than the gold, but I wanted to be sure I was happy that there was nothing better somewhere at the back of my mind.
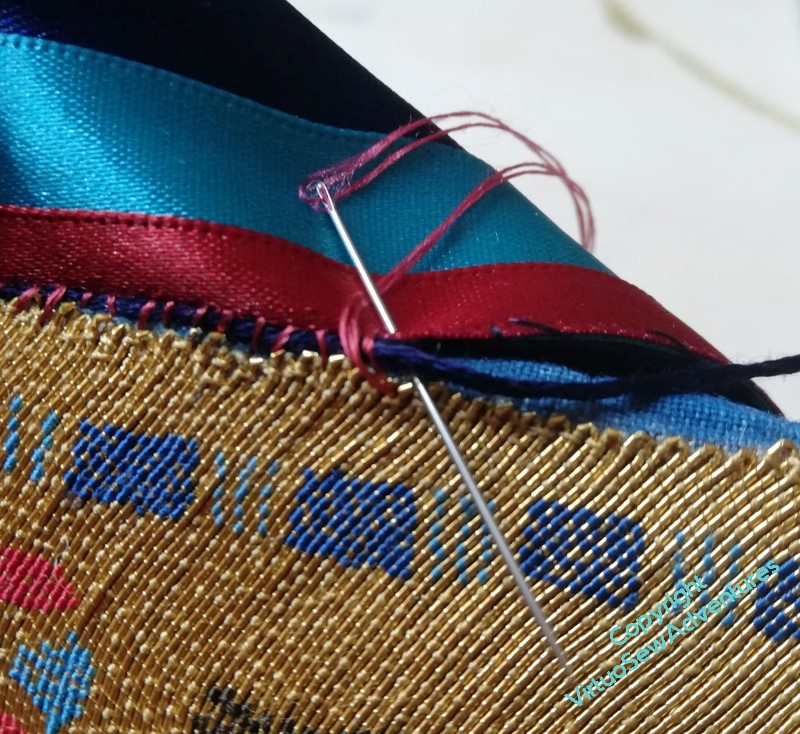
After rather longer than is evident in the gap between the posts on the subject (doing and writing often get thoroughly out of sync, for me), I decided that it was probably the best presentation I was going to invent, and needed to be done properly. The ribbons were already attached, so the next stage would be to make sure the corners were made neat and square, and the attachment was secure.
Secure, and not too noticeable.
I was a little afraid that the join might leave the fabric showing, or otherwise draw attention to itself, so after a little thought, I decided to overstitch a navy thread (stele-coloured, as it were) with red silk. I’m hoping that because it’s not a single colour, the join will be slightly camouflaged. I did consider gold, but decided in the end that camouflage-by-lighting was not my aim!
The whole process took a couple of days, because holding the navy thread at the right angle and tension was something that required frequent breaks to avoid cramping fingers.
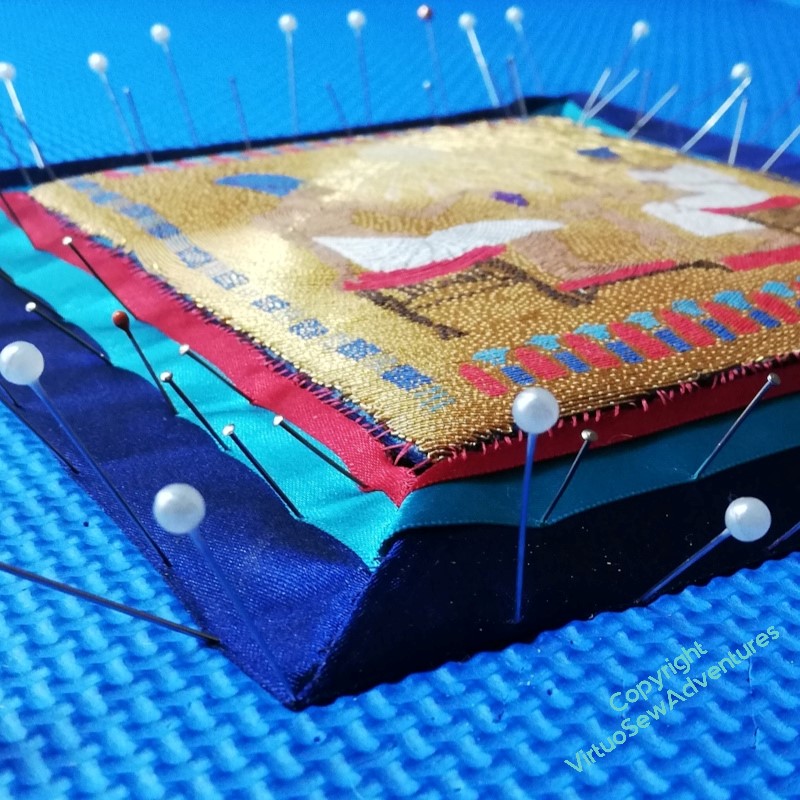
Each corner then required some manipulation to make it work, so once I felt I had the corners mostly settled, I pressed them (not the goldwork!) very, very cautiously.
And then pinned them down very thoroughly, and turned my back for a few days!
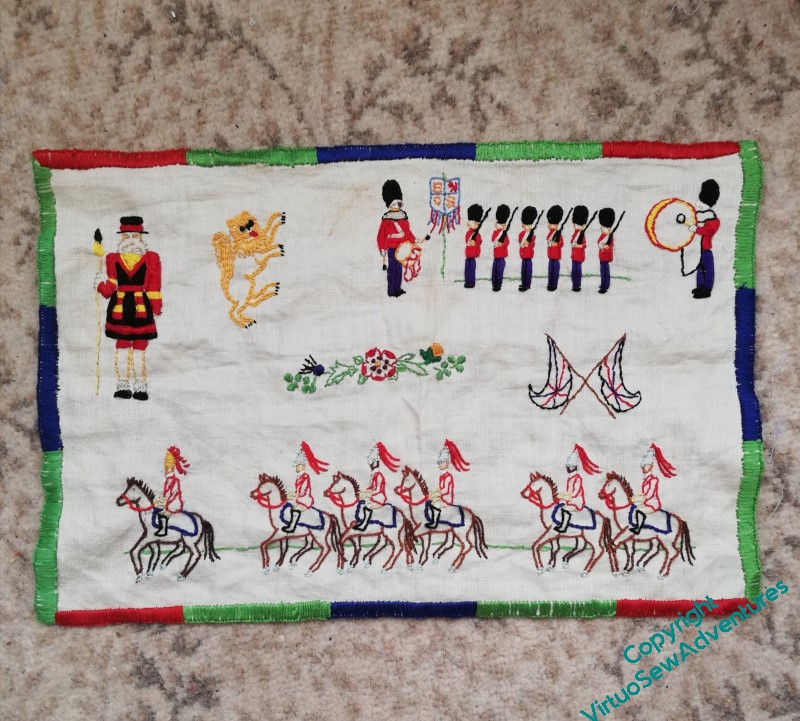
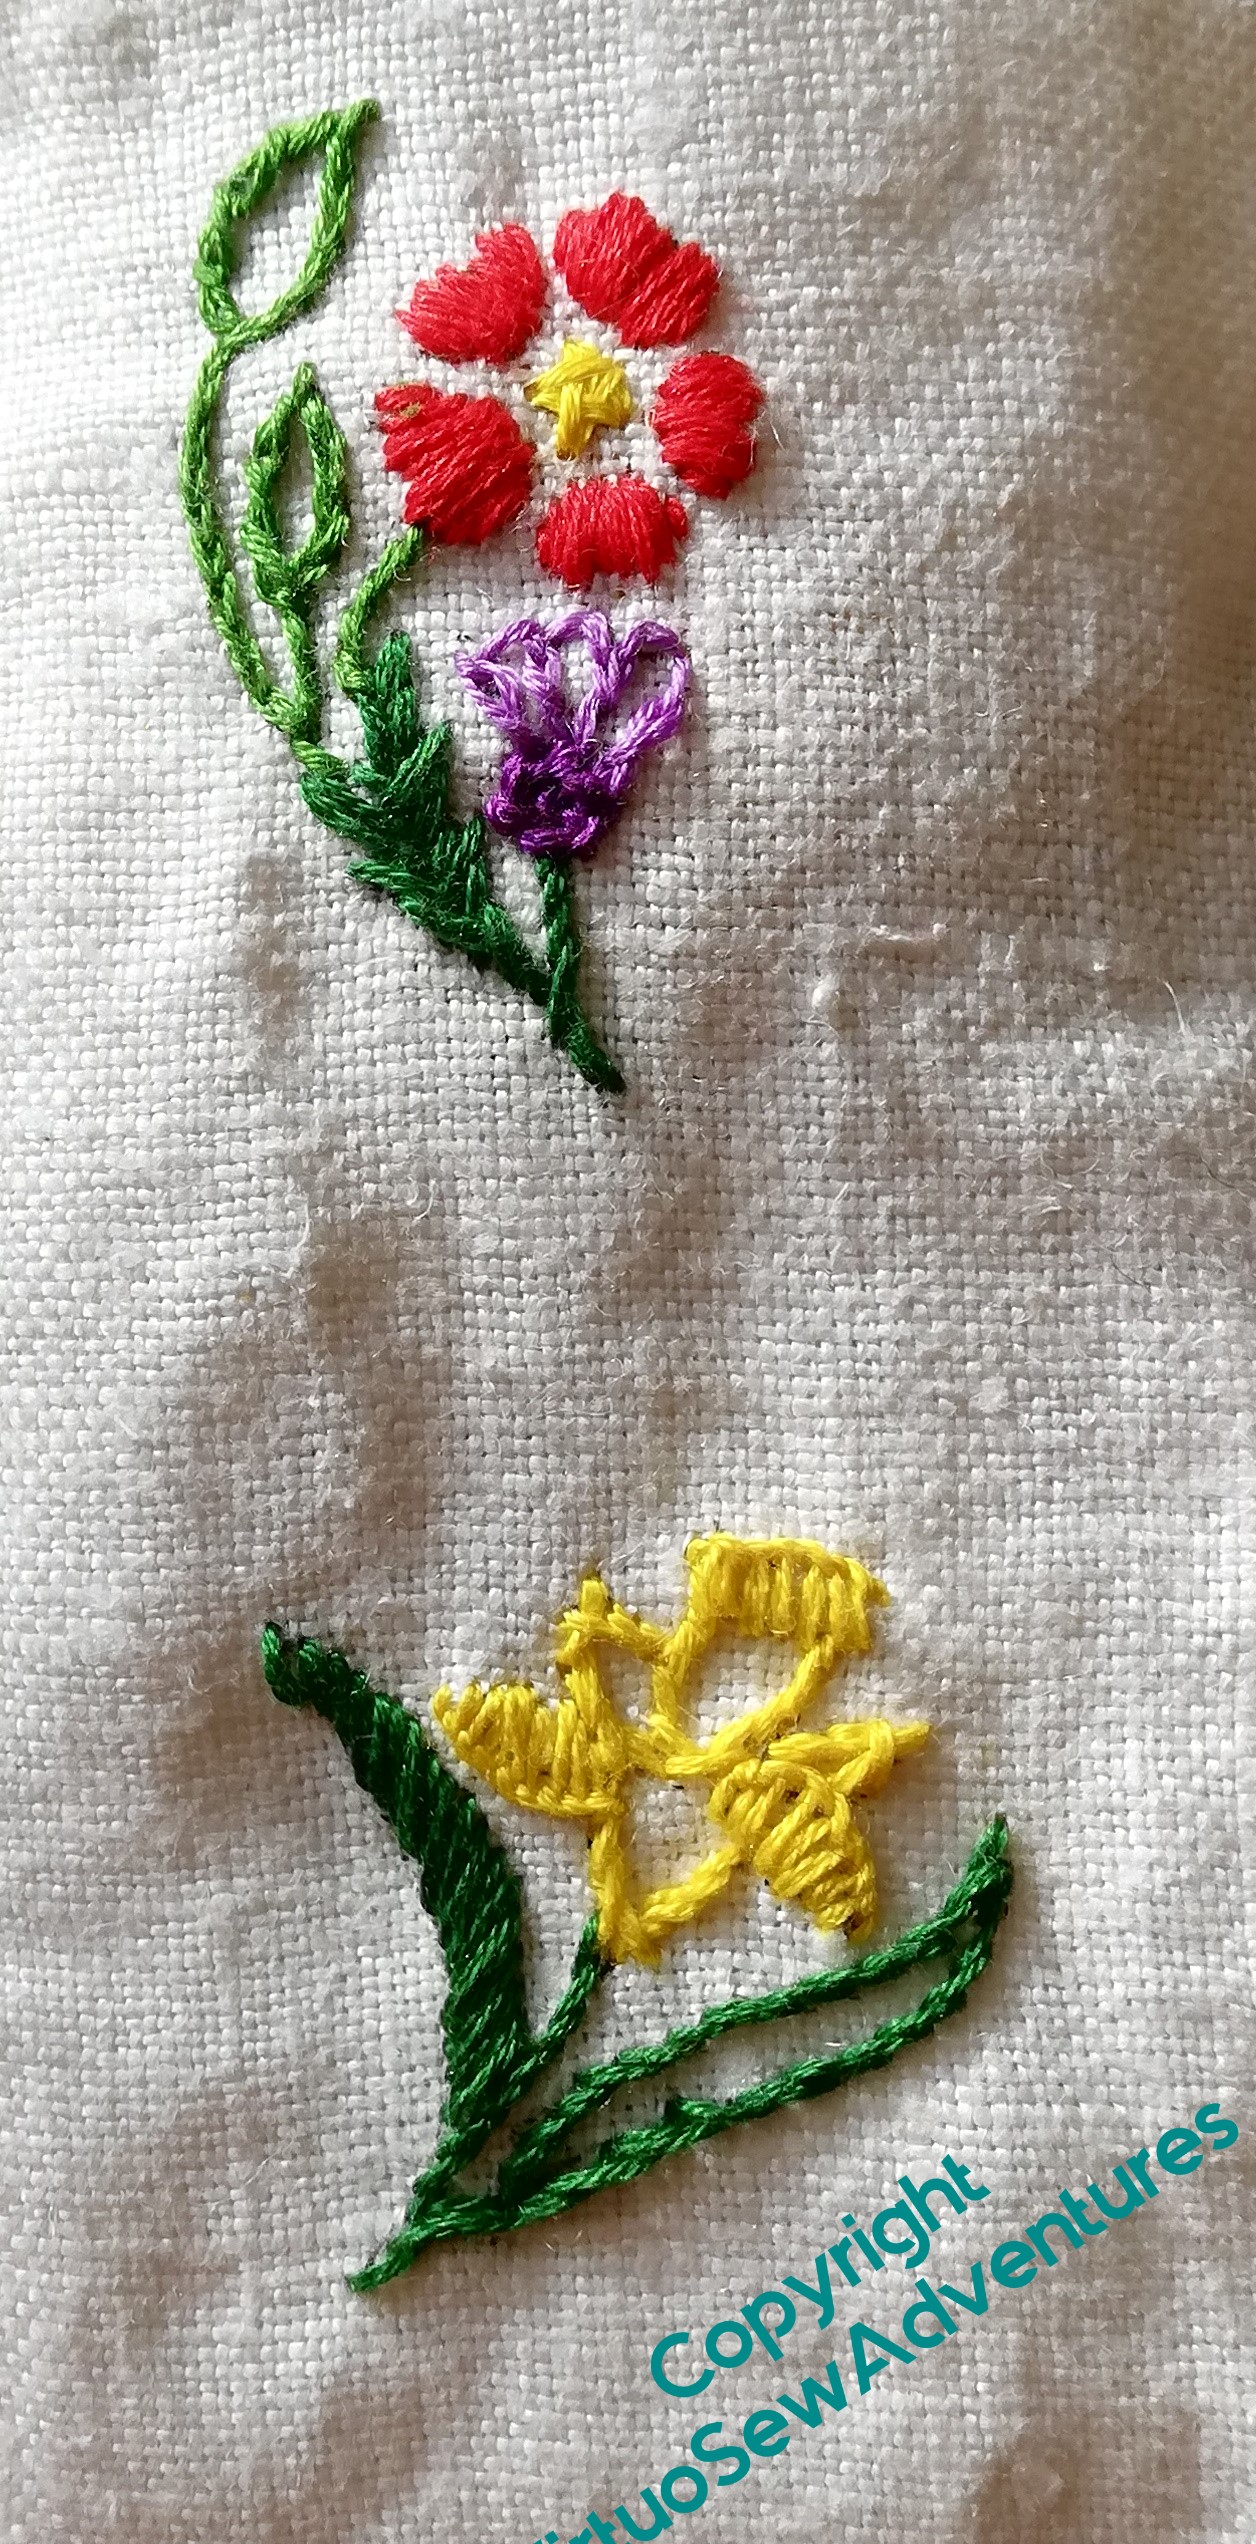
Since I did, in fact, manage to finish the traycloth I found half-begun, which I believe was designed for the late Queen’s Coronation in 1953, within her reign (if only by a few weeks), I thought I should do something in stitchery to commemorate the Coronation of King Charles III.
Nothing of the quality of those beautiful screens, or any of the other stitching (I can’t have been the only person muttering, “I want to hear more about the embroidery!”), but something simple, embroidery in the hand, like this traycloth, a return to my stitching roots.
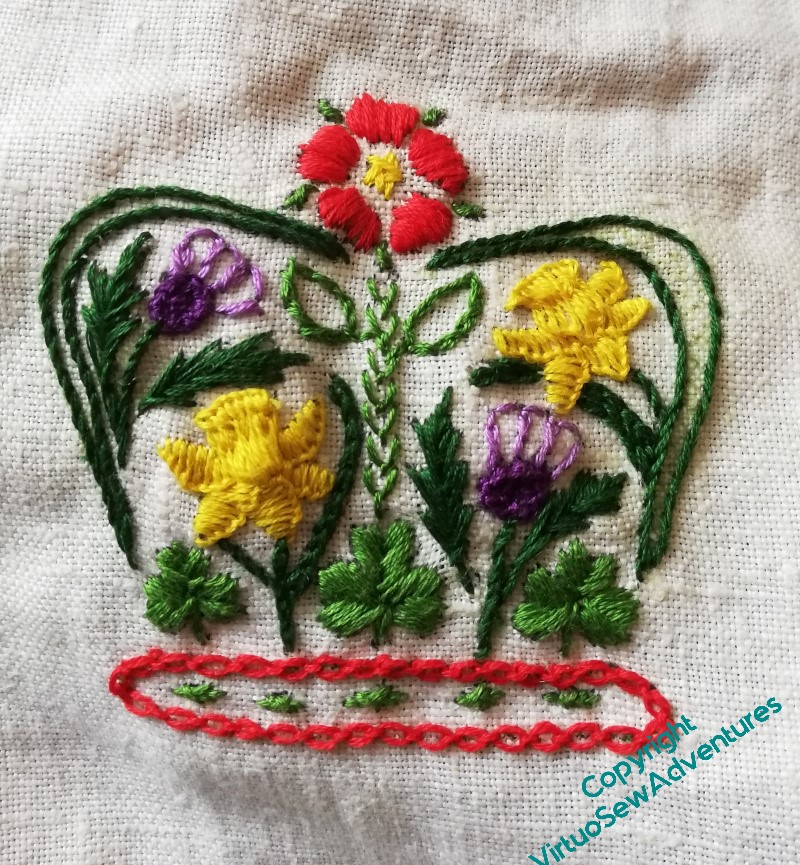
I’ve not really had the time, or the ideas, frankly (too much else cluttering up the “designs” part of my head!) to develop anything of my own, but since the Palace had gone to the trouble of creating a rather charming Coronation logo, making use of the heraldic flowers of the United Kingdom to bring together the nations, and the King’s well-known love for the natural world, I decided to take elements from that, and put them together into a traycloth or runner.
The crown is in the centre of one short side, and I’ll put His Majesty’s cipher at the other end.
The long sides are going to be decorated with more elements from the Coronation logo. It’s all very simple stitchery, but it has been an excellent companion to the Coronation itself, and to Patrick Grant’s wonderful documentary about Kashket’s, Hainsworth’s, and the other companies involved in making elements for the Coronation.
That documentary made me positively homesick for my postgraduate days, visiting spinning mills in Lancashire and Yorkshire, surrounded by the smell of wool, and the passion and dedication of the people working in the mills. It’s an odd thing, but I’ve never met a cynic in the textile industry. People who are anxious about the future, yes, concerned about loss of skills, yes. But none of them pretend not to care, and if you show any interest, their eyes light up, and soon you are engulfed in a great flood of enthusiasm, knowledge and ideas.
Yes, I know what people say about dour Yorkshiremen. That wasn’t my experience of them, not at all!
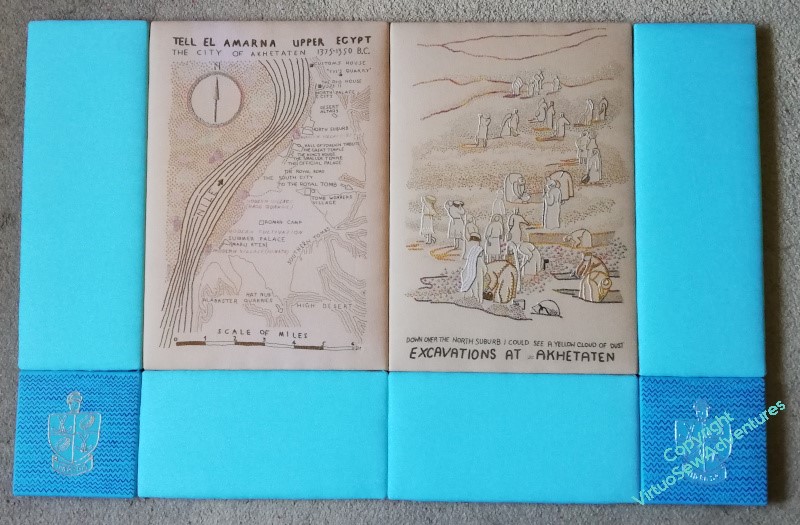
Finally, it occurred to me that I hadn’t signed the panels – either of them! Soon rectified, but as I didn’t notice until after the panels were mounted on their frames, the stitching itself was a bit harder than it would have been had I been more alert.
Never mind, the Map is now signed at the end of the scale , and the View of the Excavation is signed just before the A of “Akhetaten”.
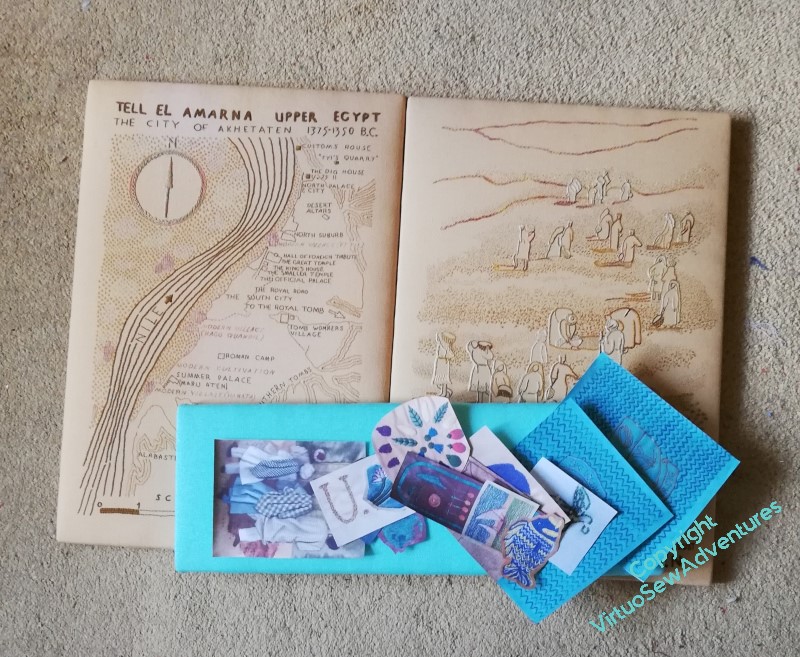
Now I have to plan the spots.
I’ve taken photocopies of the various “spots” that will be attached to the side panels, so that I can use them to play with layouts and avoid too much handling of the real things!
Among other things, I’ve not decided whether to trim close but square, or to trim to shape (the Glass Tilapia, for example).
I think the two panels stand up to each other much better now, and better again in real life than in photographs. The next stage will be a whole series of shuffling of the photocopies around the faience coloured pieces, to see what sort of balance I can create. I’m not even sure that all the pieces will be used – some may end up being mounted in some other way.
When I’ve had a bit more of a play, I will show you how I’ve been thinking…
Embroidery, as many of us have cause to know, can be extremely difficult to photograph successfully. I’m much better at it than I was when I started this blog, but mostly because the technology has improved enough to make up for my deficiencies! So I decided that it might be a good idea to get a Real Photographer to take photos of the Amarna embroideries for me.
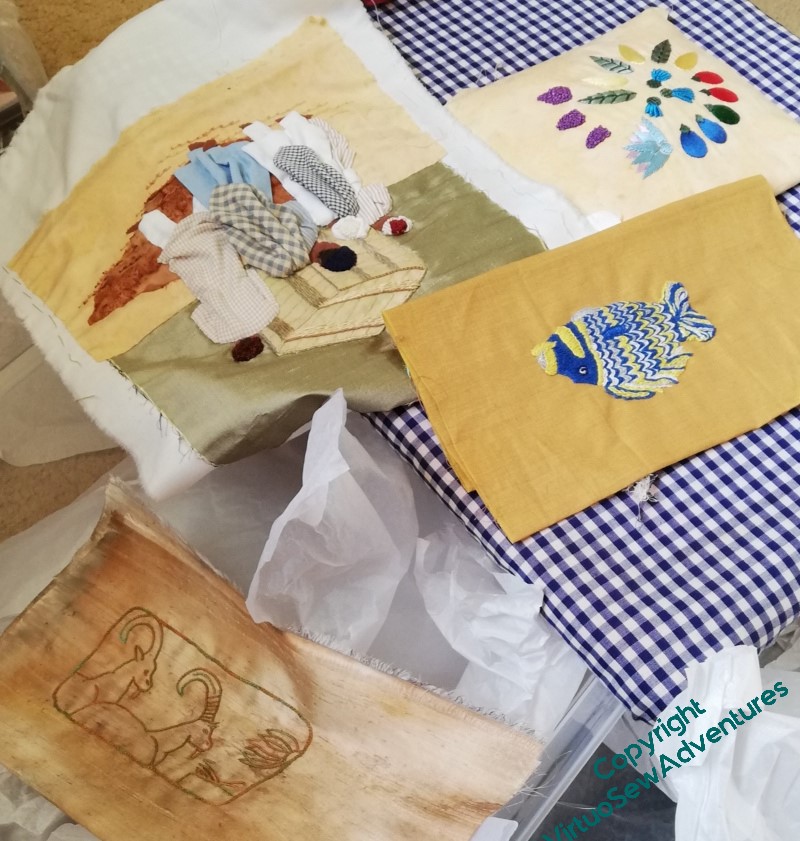
It’s going to happen in two stages, the first covering as much as possible, and the second the finished assembly of the colour block panels, and anything else that needed final details. So the first thing for me to do was to get all the “spots” for the main panels stretched over card so that they could be photographed before I assemble the colour block panels. Then I bundled them up with the Amarna Felts and the two main sandy panels, and went to visit Bernard Rose in his studio.
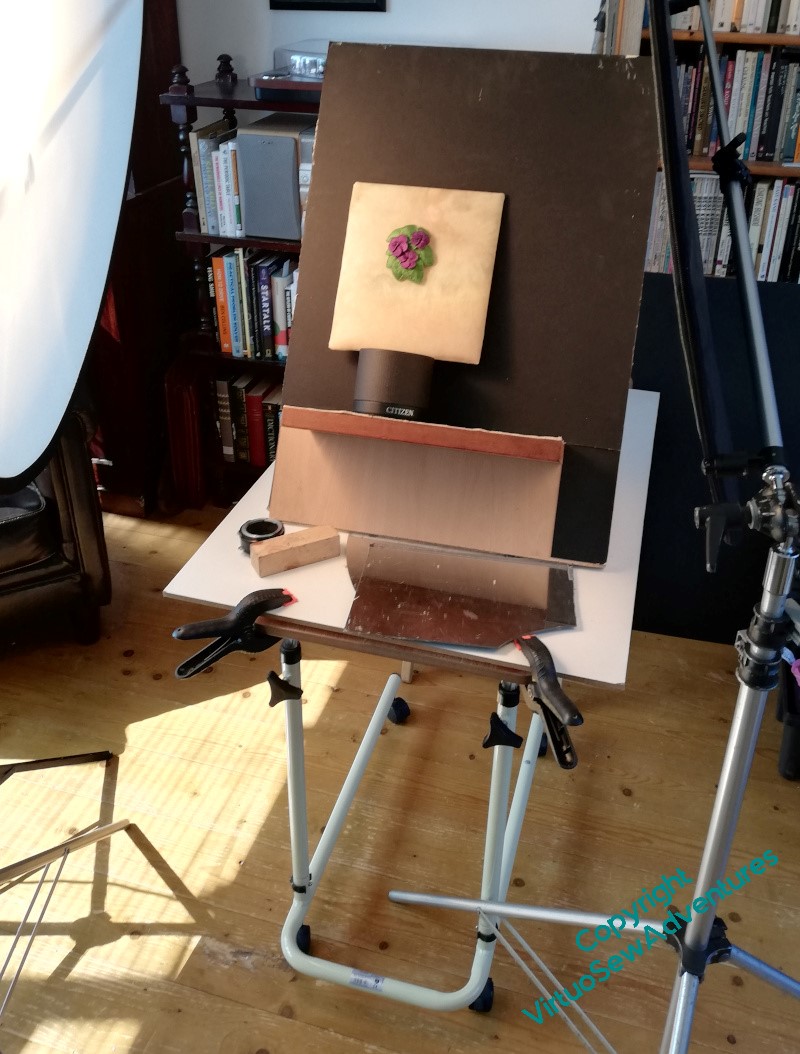
We’d already met to talk about what I was doing, and so that I could show him what, precisely, the challenge involved (to say that The Colosuss of Akhenaten offered scope for experiment doesn’t really cover it!), so when I arrived, he had already set up lighting and a table with an easel of sorts on it, so that the embroideries on their temporary mounts could be easily set up, and easily interchanged. There were also a whole range of different reflectors to add in as each piece demanded, some of them wielded by me, some by him, some propped or clipped to the table.
Here you can see that the Clump of Violets is in place. I made a separate, sandy-coloured card for the Violets and the String of Beads, because I think these will end up together, but I’ve not got How quite sorted in my head.
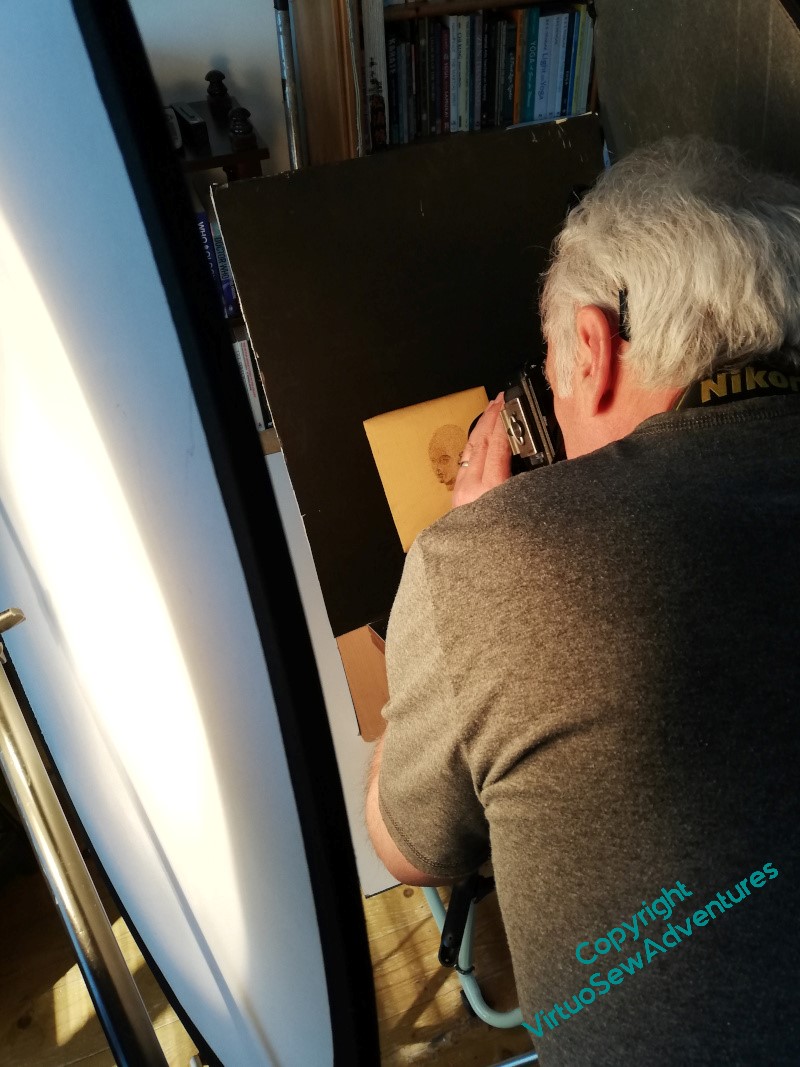
Since Bernard seemed to enjoy himself more every time an embroidery proved particularly difficult, we had a tiring but successful and rather entertaining morning. Here the Head of Ankhsenspaaten is the focus. I’d forgotten how tiny she is, and wasn’t at all surprised when he abandoned his tripod and took the camera in hand!
I’d also rather forgotten how much I’ve done that’s Amarna inspired.
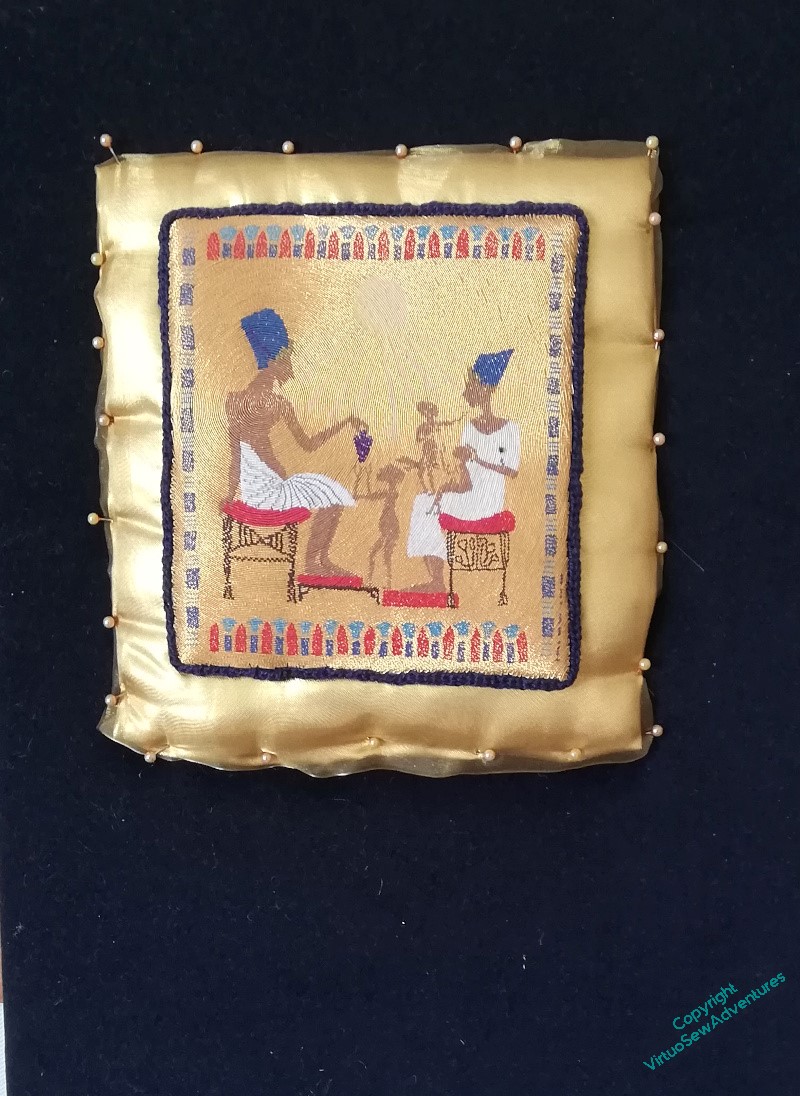
You may recall that when I had finished the or nué I started to apply it to the stela and was very upset because it did not look at all right.
Oddly, it seemed to need backup, as it were. So I thought – Ancient Egypt, gold, let’s give it a gold cushion, as it were.
Only to be less than thrilled with the result. I will grant you that merely pinned in place and without smoothing out the “cushion”, it wasn’t going to look its best, but still..
It has been leering at me across the living room for some months now, and every time I’ve caught sight of it, my head has dropped.
But then I had a thought – maybe what I need to do is pull out the colours in the border.
So I bought a couple of metres of satin ribbon in decreasing sizes, and spent quite some time attaching them to one another down one edge.
This is the result, attached in a very off-hand fashion, to be stared at for a while..
As a family, we have always made and remade, mended and upcycled, garments, furnishing and furniture. There is a tale of five year old me, accompanying my mother to buy fabric for a dress in the now long-gone and much-lamented fabric shop in town, and piping up, as she was paying, to ask “What will it be _next_?”, so you can tell this is deeply ingrained!
Usually this is something I let pass without comment, but two episodes lately seemed worth mentioning, in case they give someone else an idea..
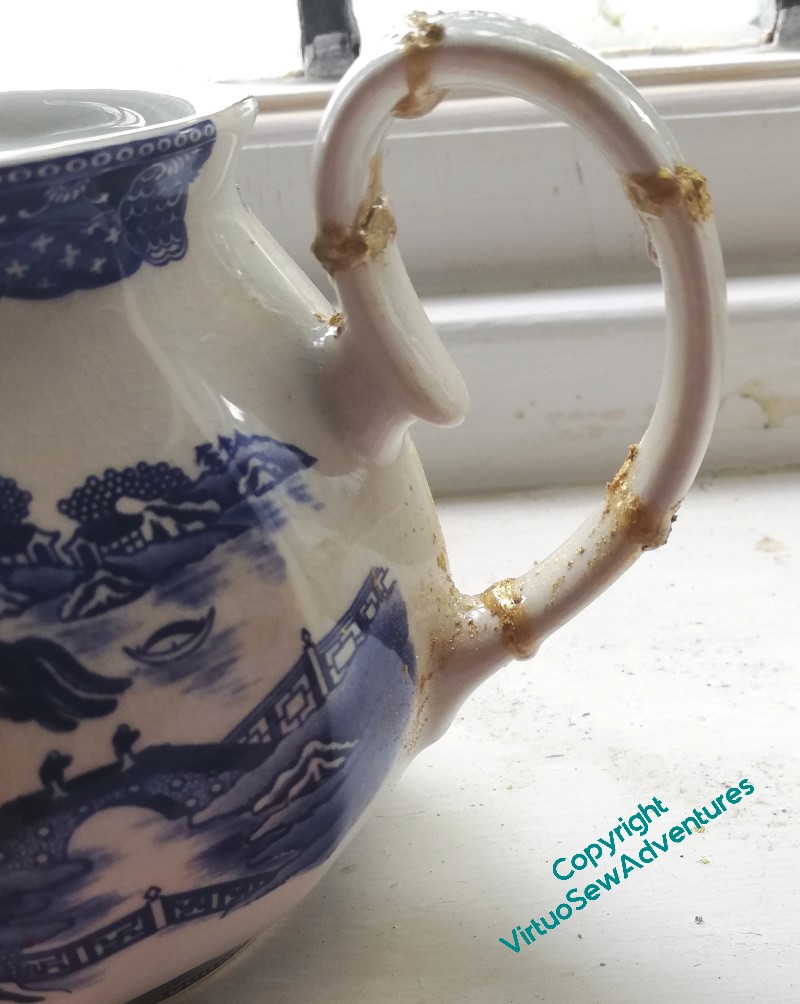
The Japanese mending technique for pottery, “kintsugi”, involves highlighting the mends with gold, so as not to obliterate the history of a piece. I can’t say I’m very good at it, but I had an entertaining afternoon with a kit that enabled me to play with the idea, at least.
And then my cousin mentioned a footstool she had with an entirely unsuitable cover for the surroundings, and a few oddments of furnishing fabric from earlier work on the room. Cue a Kintsugi-inspired crazy patchwork footstool cover, with all the seams emphasized with gold piping! This took some work and collaboration, as my sewing machine isn’t up to the task, but Mam’s was.
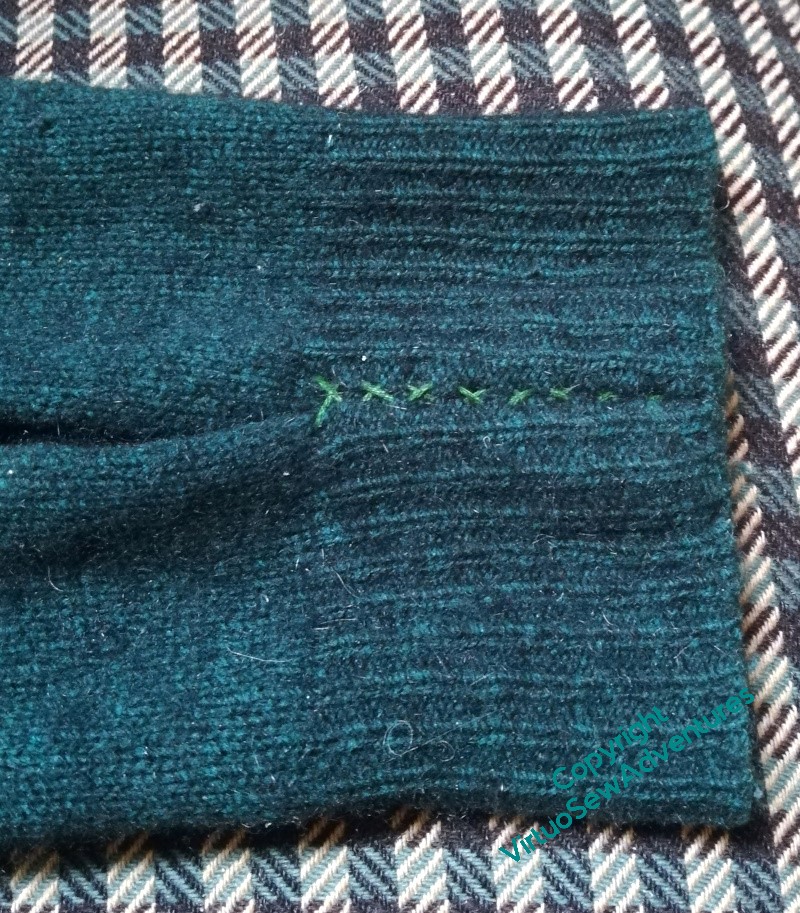
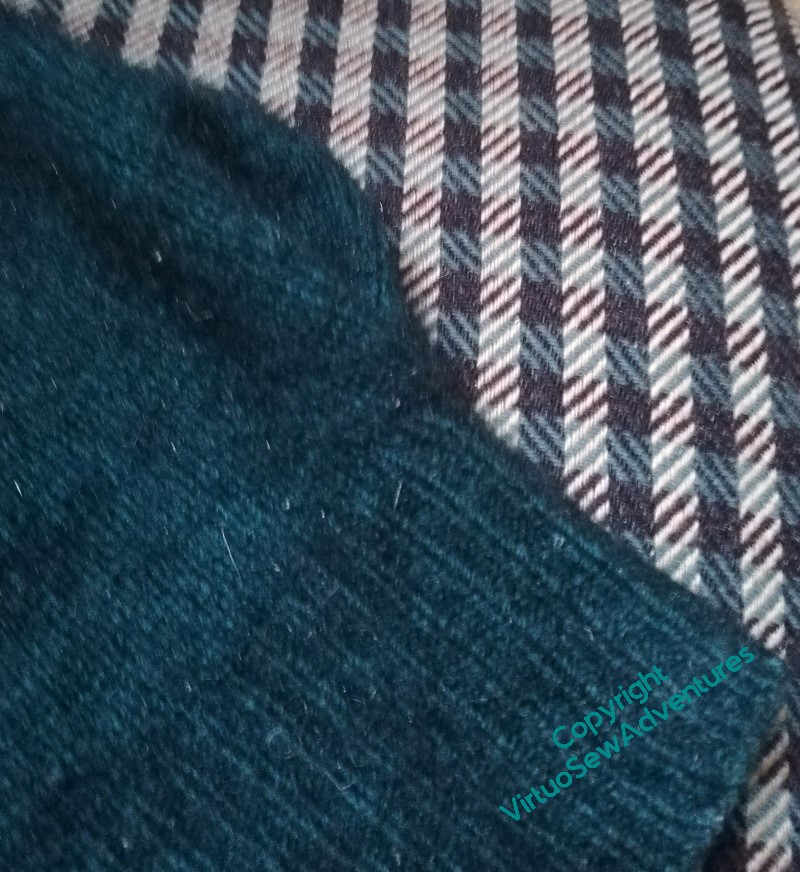
And on an entirely different scale – one of the problems with older knitwear is the way the ribbed cuffs seem to lose all their elasticity, and what was once a trim and neat shape, will often become shapeless and saggy with age. I’ve tried in the past adding elastic, but I couldn’t make that work (if anyone has – what’s your trick?), so it rather nags at me.
Then this winter we made a dress with rather extravagantly tucked sleeves, and I thought I had an idea that might work. I’ve created an inverted box pleat in the cuff here – it’s just held with stranded cotton at present, something that will show up so I can play with it until it works, and then do it properly (or not!) – and held it together, starting at the sleeve end, with crossing stitches. Then I caught down the side of the box pleat.
You can see in this picture how the cuff is now neat and close, and the sleeve has a bit more shape, and rather less “flop”. I’m very pleased with that, and I may extend this to other, similar garments.
The crosses in place, and the whole border looking very much like a Book of Hours, or at least, a rather tame Book of Hours, I sat back and drew breath.
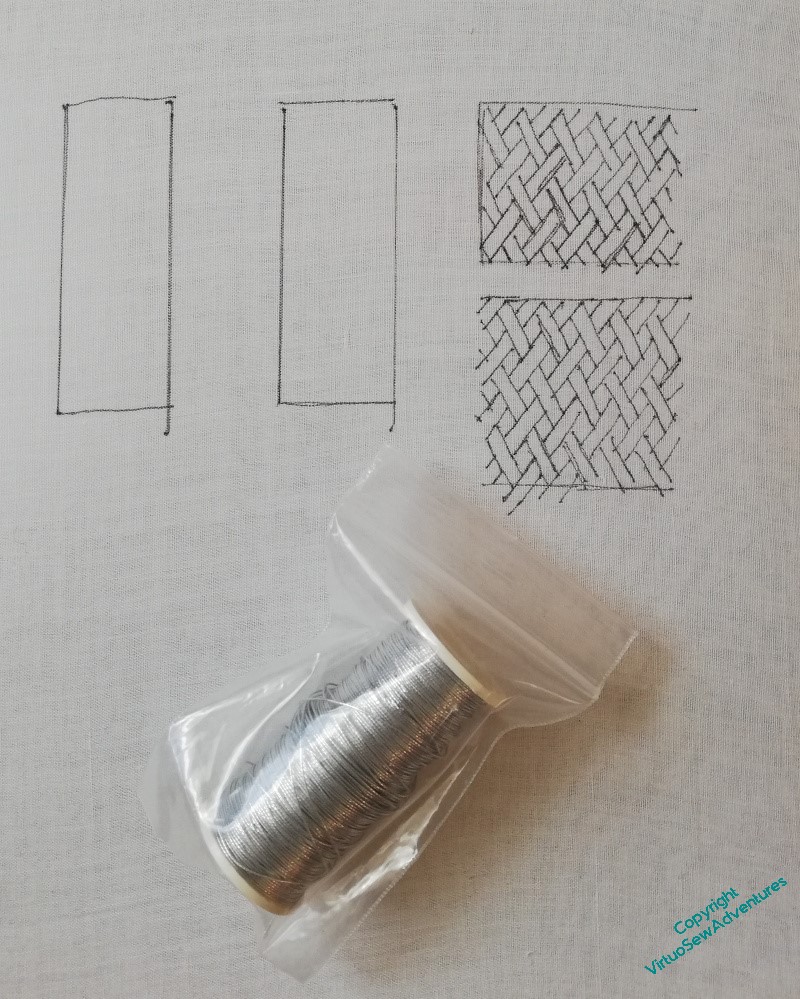
Having got William and his border done, and being really very pleased with how he’s turned out, I now need to tackle the sky. And from the first, I have intended the sky to be in basketweave pattern underside couching, which is an entirely new technique to me.
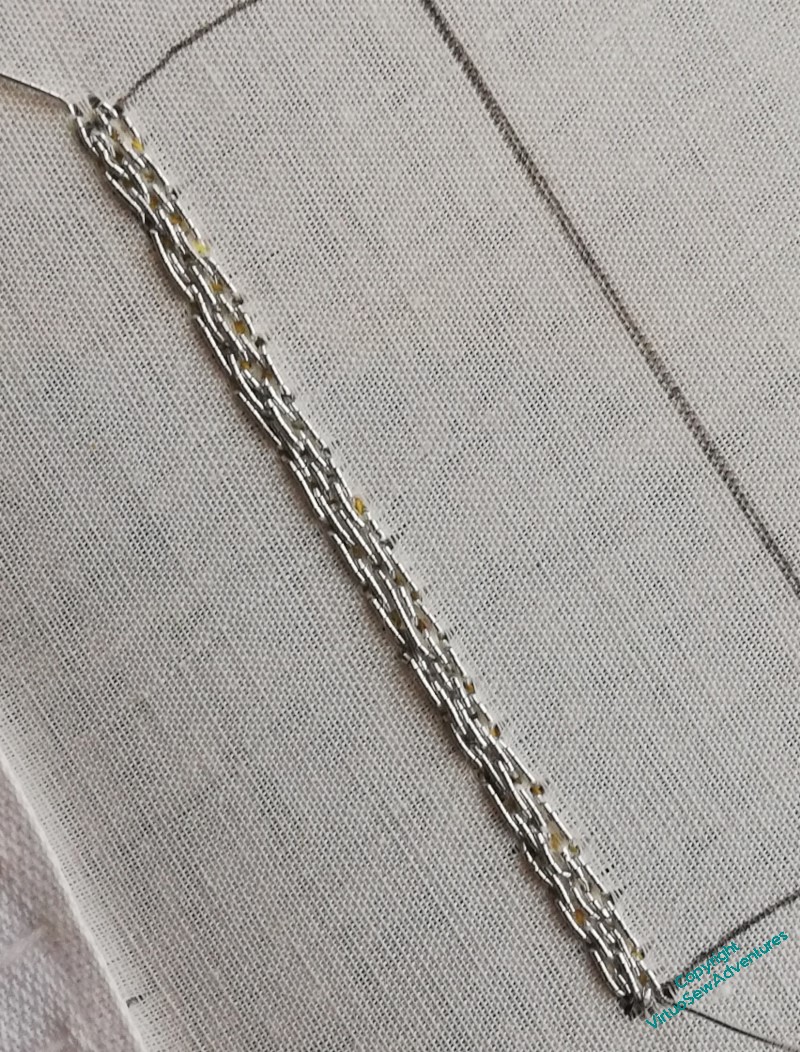
Regular readers may have spotted that I only rarely practice beforehand, regardless of the technique, preferring to throw myself headlong into the novelty, mind concentrated by terror. The exception tends to be in goldwork, when an exception occurs, and indeed, I had some of the fabric stretched in a frame, ready to practice, well before I had got William to that stage of finishing. Mindful of the advice from Tanya Bentham’s Opus Anglicanum book, however, I decided not to try practicing while I was still working the silk. In winter it is hard enough to keep the hands from catching on silk without making it worse by using metal threads!
I’m using silver for my practice pieces. One could practice with silk, or pearl cotton, but they would both spread and cover any failure to keep the lines close. I think this silver is the same size as the gold I intend to use, so it will make a better practice material.
It’s easy enough to understand the principle underlying underside couching, but there are all sorts of hazards, As always, I suspect that once the management of the thread becomes second nature, all the difficulties will fall away, but packing the thread closely without cramming, making sure the stitches lie happily on the surface, and stopping the couching thread (a sturdy linen, beeswaxed before use) from showing, are all proving challenging at present.
I am determined to practice this properly, so I’m going to do this inch-wide strip before even considering practicing the basketweave pattern.
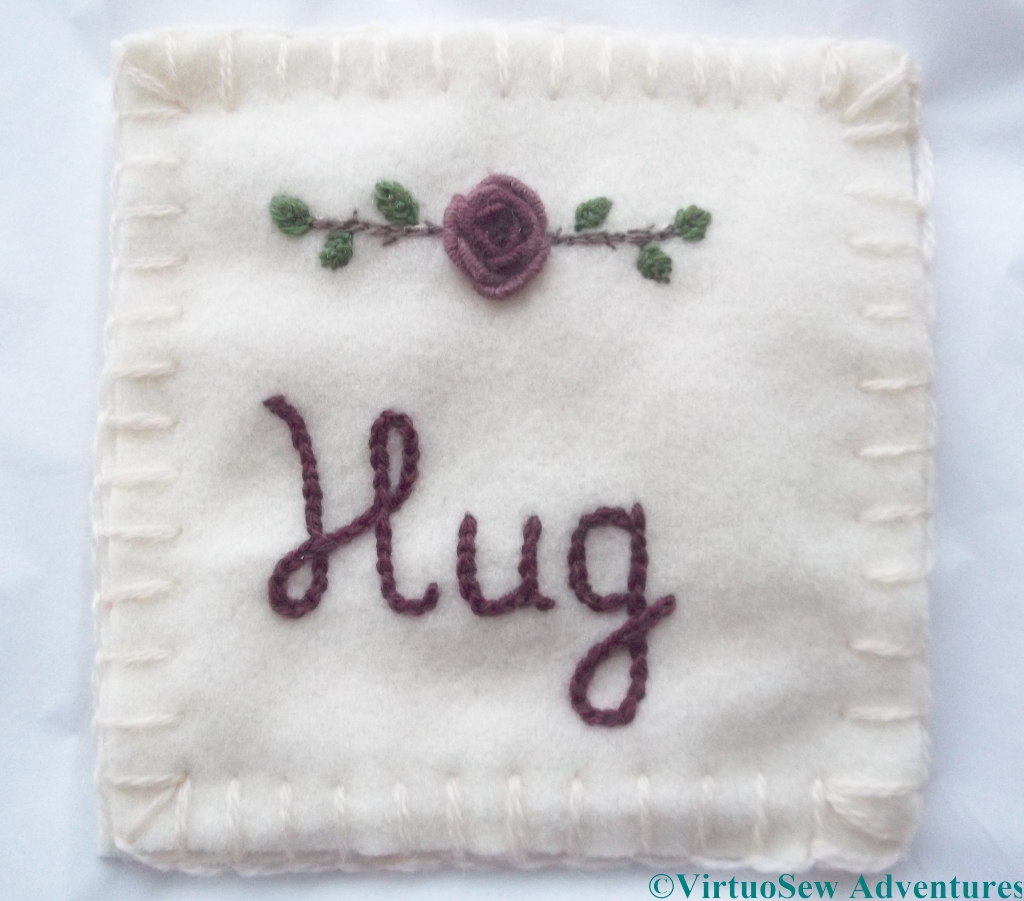
Rose Hug
I have been looking further at Ko-fi, and how it might be used as a shop front, at least for digital items, and as an experiment, I’ve uploaded the Hug For A Handbag instructions to my Ko-fi Shop as a free/pay what you feel download. If anyone would like to go through the process and tell me what it’s like, and give me the opportunity to see what happens from this side, I’d be very grateful!
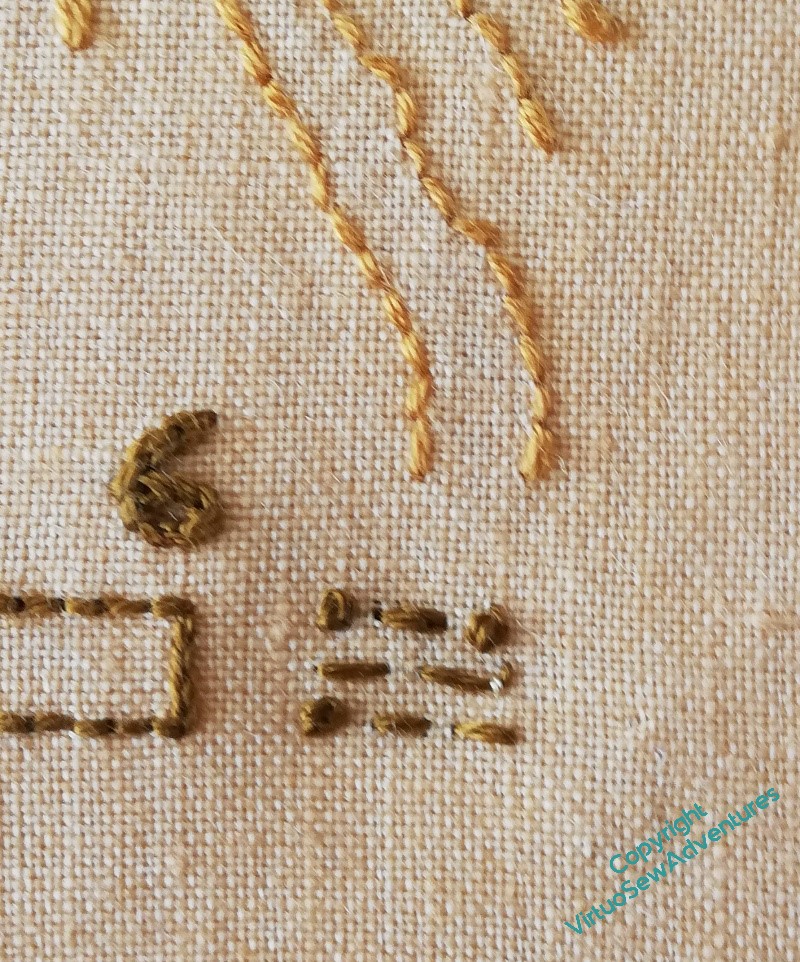
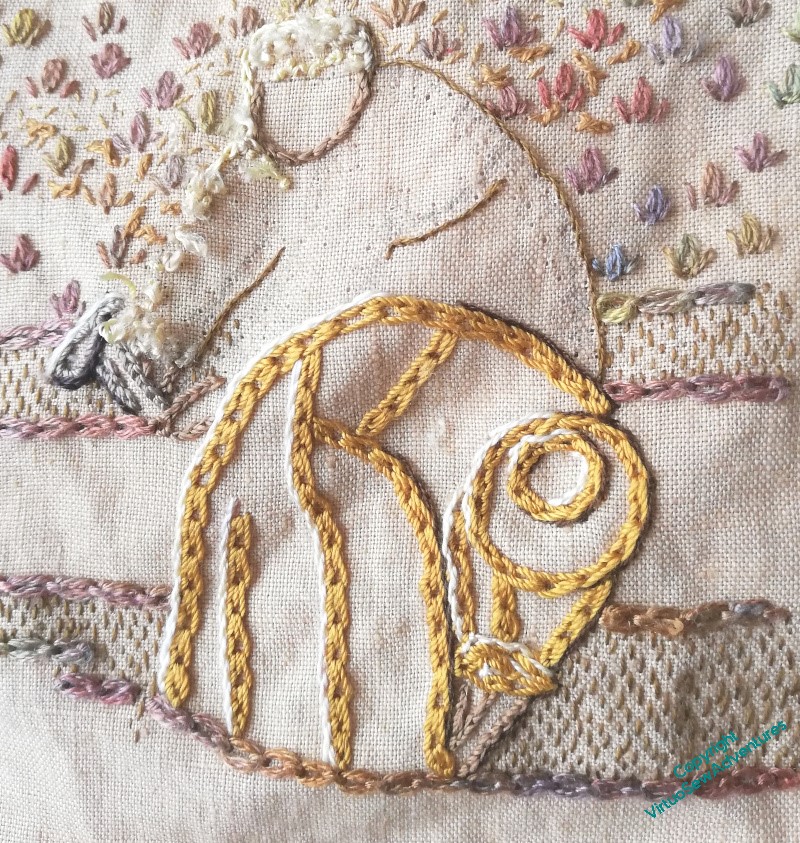
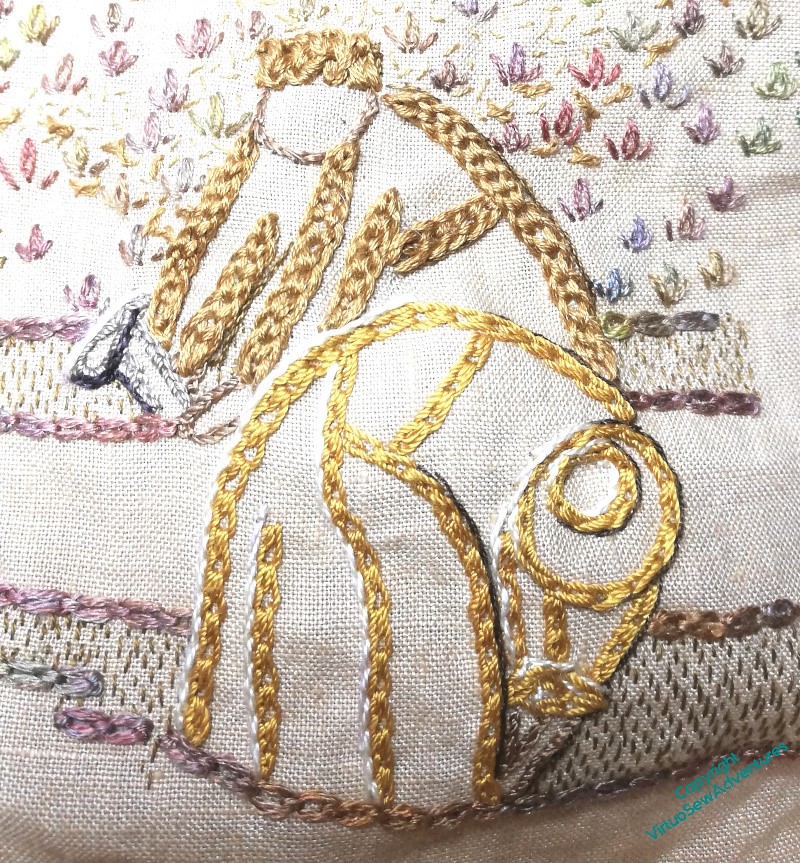
I’ve been a bit bothered about this pair of workmen ever since I finished them. The pale stone coloured thead is a bit too close to the background colour, and the squarish stitch looks too spiky, too contorted, and very uncomfortable.
What’s more, no matter what highlight and shadow I have added, I’ve not liked it more. So while I’ve been working on sunlight and shadows, I’ve been thinking about it.
Out it has come, and good riddance!
However…
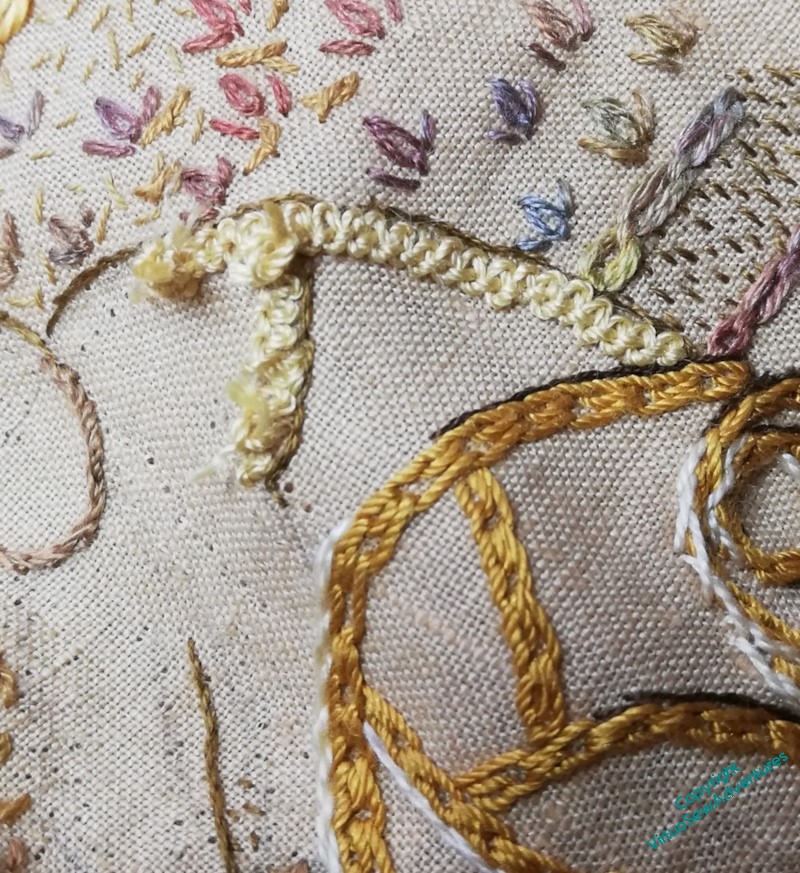
With what should it be replaced? Clearly not Braid Stitch/Cable Plait Stitch (depending on which dictionary you have beside you!) in pale yellow. Only about half of the workman was reinstated before being swiftly removed.
Well, the decision was swift – the action, rather less so!
Fortunately all that playing and wrestling with it brought something else to my mind.
Hungarian Braided Chain is an old favourite, and I had been dismissing it because I’d already used it, but in one of the finer threads. Here in undivided stranded cotton, it has enough authority to back up the Shell Chain of the workman in front, and the slightly darker shade of gold helps too.