A little while ago, we were in Paris – a trip planned last year, and carried on with, sanitiser in hand, in spite of the certainty of quarantine when we got home.
Amid a variety of adventures (we were staying with family) we went on a Textile Tour of Paris with Rebecca Devaney.
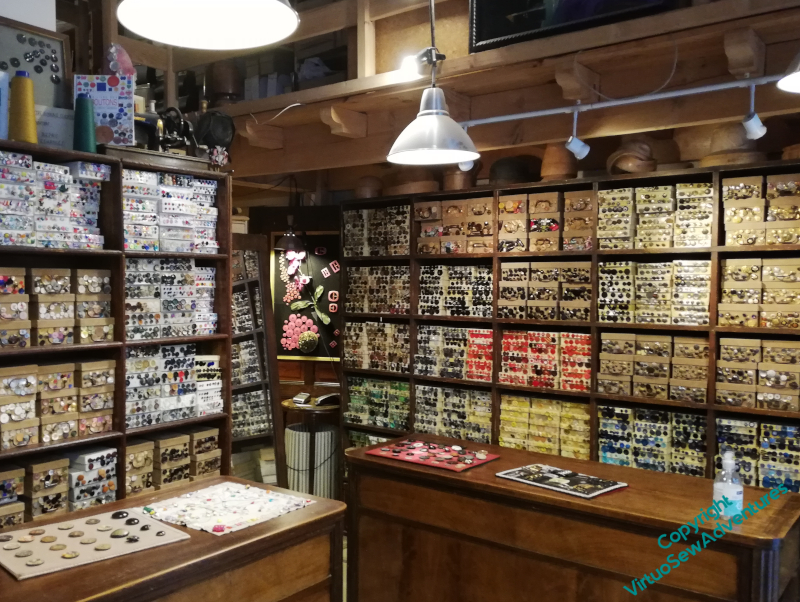
Ultramod – buttons
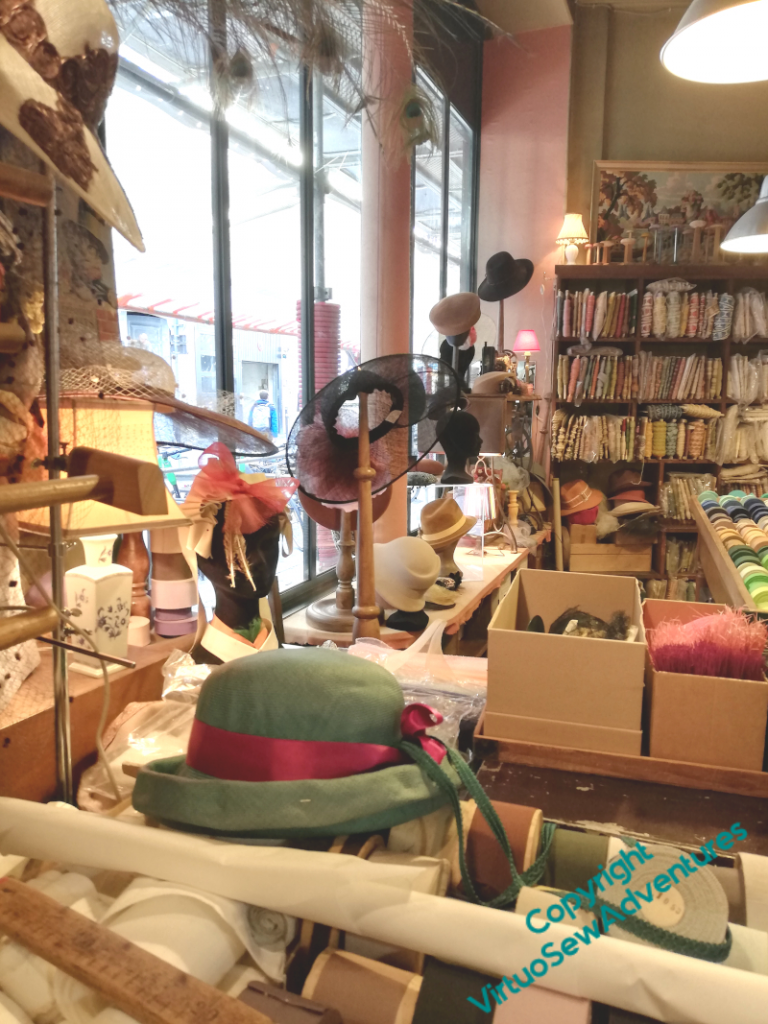
Ultramod – Hats
La Droguerie – Colour wall
We met at Metro Quatre Septembre, and Rebecca guided us to the various shops, telling us about the history of the atelier system and the particular histories of the various shops as we went. Even my non-embroidering engineer uncle found things to interest him – there was a poster for a manufacturer of sewing machines which pivoted (to use the modern term) to aero engines during the first world war! – but in fact, all of us found something to respond to our particular interests.
Mokuba Collection
Au Ver A Soie
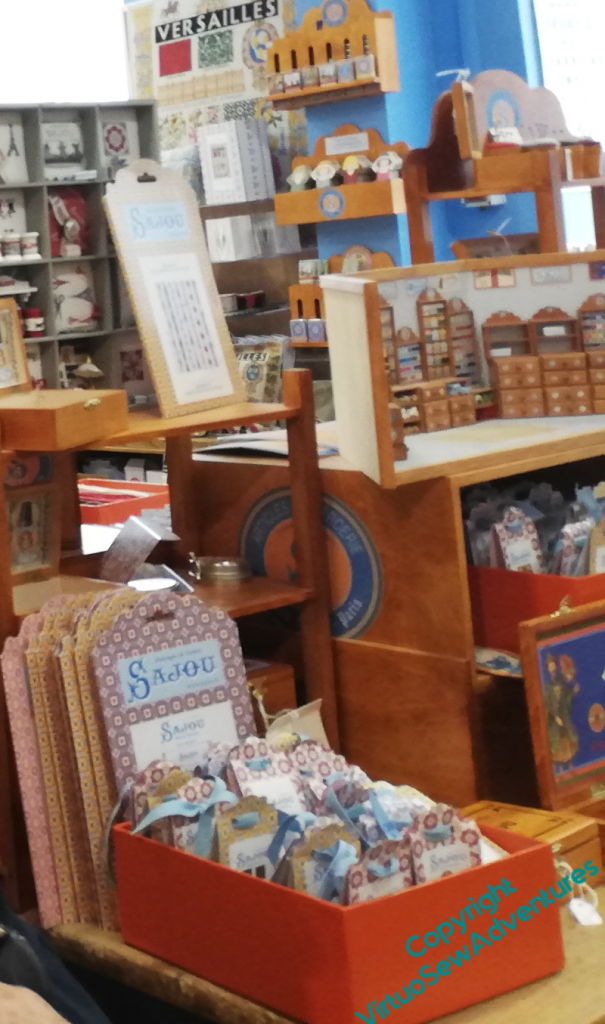
Boutique Sajou
The shops are all very different, and now I’ve visited them I will be better prepared for another visit, perhaps with plans in mind. What they share is knowledgeable and enthusiastic staff – in fact one of those in Au Ver A Soie is doing an RSN course. Online, in these days, naturally, but it was a great delight to see someone else’s work, if only on their phone.
If you get a chance, when travelling is easier, do take a tour with Rebecca. She’s delightful, knowledgeable, and enthusiastic, and the extra bits and pieces of information you have, not to mention some sense of all the interesting materials you can find, are all well worth the effort.
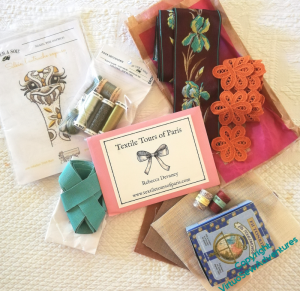
As you can see, I was fairly restrained in my purchases, because I had not travelled with extra suitcase space, or planned in advance. The grosgrain ribbon matches the stone in my engagement ring, the brown ribbon with irises is for a hat, and so is the orange flower lace, the silk thread from Au Ver A Soie and the fil dentelle from Sajou are just to play with, and the little ostrich kit is my entertainment for the period between Christmas and New Year!
And in other news, Episode 27 of SlowTVStitchery is now live, and discusses reaching an important turning point, and the delights of solving embroidering puzzles.
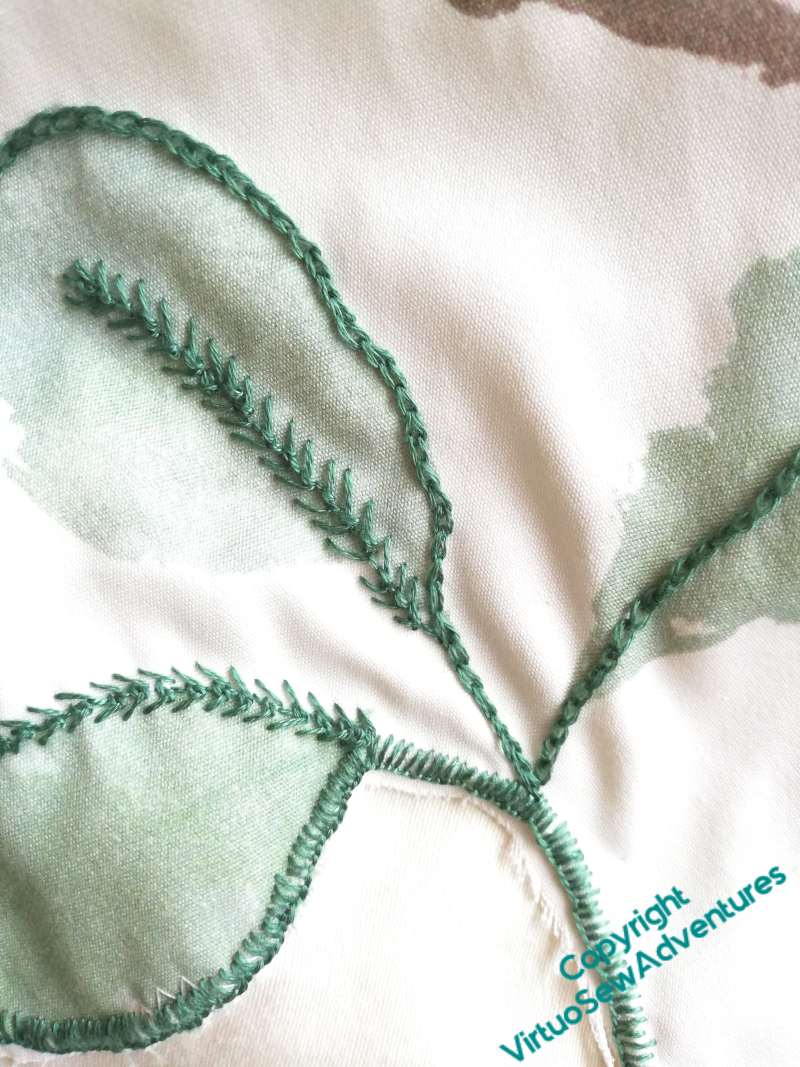
There’s plenty of variety in the stitching on the bedcover, although the choice is limited to those that can control a fabric much inclined to fray.
You can see here some close blanket stitch, nested feather stitch, and chain stitch used to add details.
The interesting thing that my mother has found as she’s worked on this one is that the spashy, “watercoloury” feel of the original print is becoming something slightly blockier, and more like an oil painting or a pastel. Since as a painter, oils are her first love, I suppose we shouldn’t be surprised…!
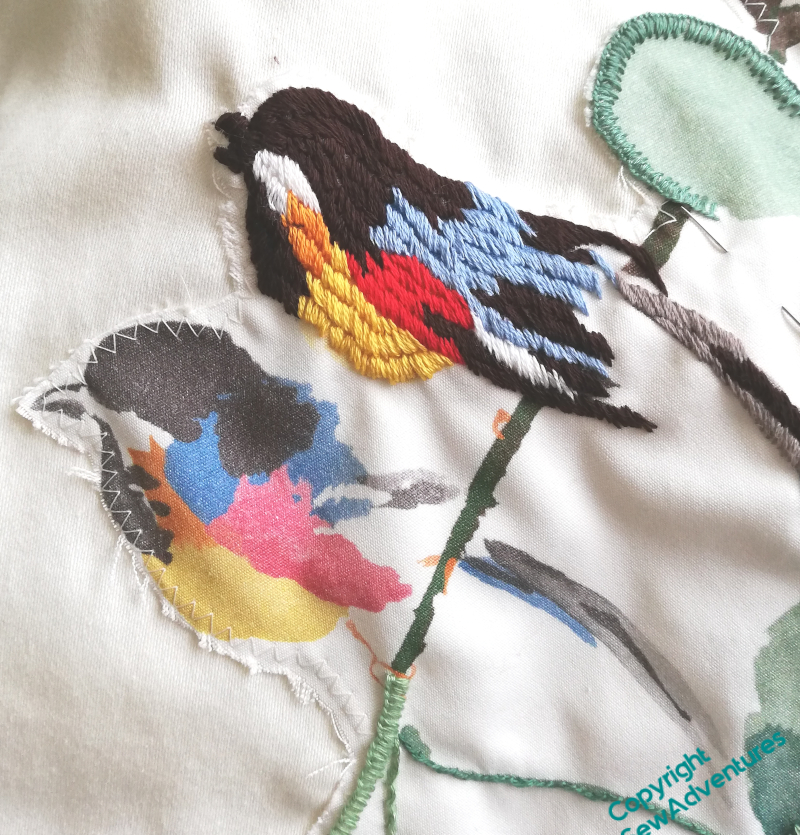
Birds in progress
The birds, here, are a case in point. The slanted satin stitch seems to me an effective cross between feathers and brush strokes, and make for an emphatic motif. We looked hard at this photo, and then went rummaging in both of our stashes for more pinkish reds. It’s safe to suggest that there’s some unpicking ahead…
And while that is in progress, I can report that Episode 26 of SlowTVStitchery is now live! It concerns the distinction between bugs and features, and the siren call of shiny new projects – something we all know about, I think!
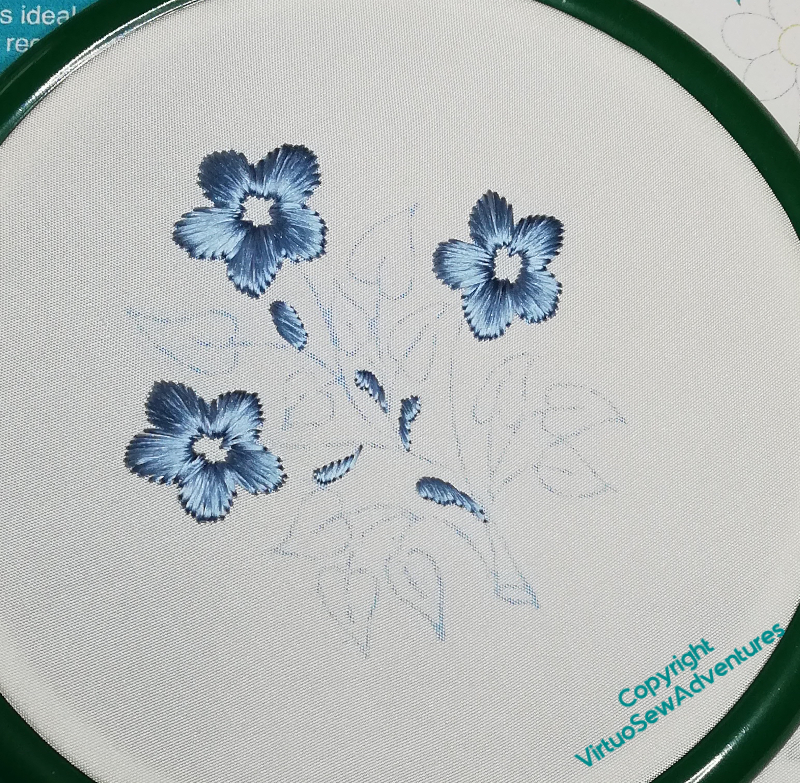
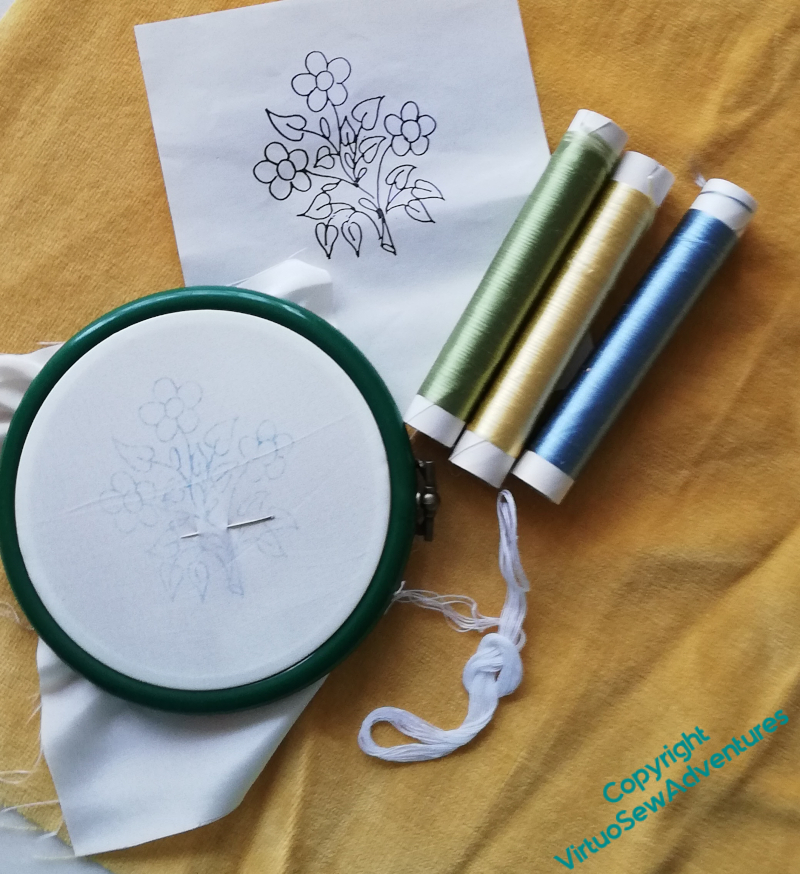
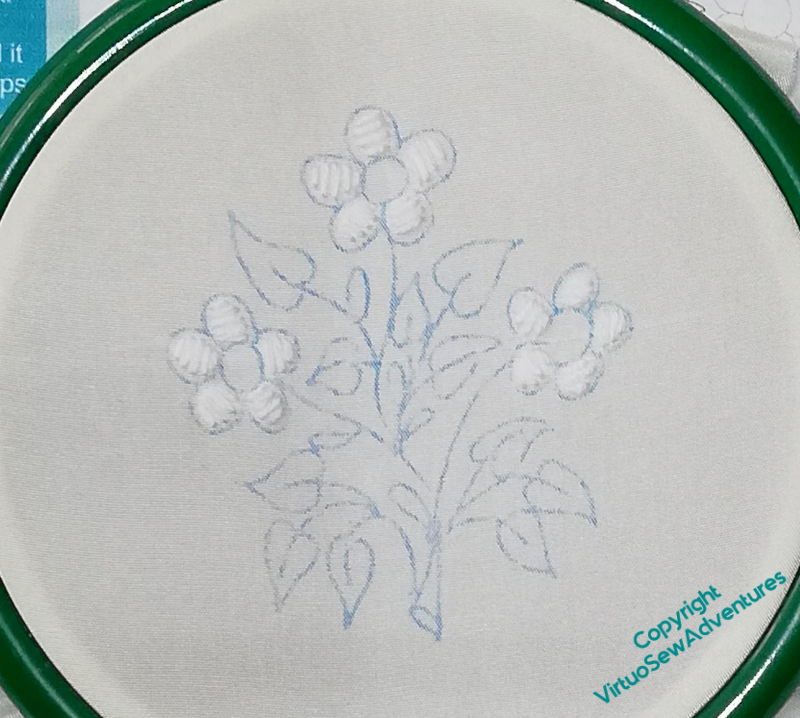
Once the padding was done, the next stage was the flower petals. These were fairly quickly done, in satin stitch. I tried to keep the stitches in the right orientation by starting in the middle of each petal and working the halves separately.
Have I mentioned before how much I love the effect you get with flat silk? The stitches almost glow, even in poor light!
Flower Centres In Place
The instructions for the other elements weren’t quite as clear as I expected them to be, although I can’t quite put my finger on why. That said, I could fill in the gaps with a bit of guesswork, so it’s all good.
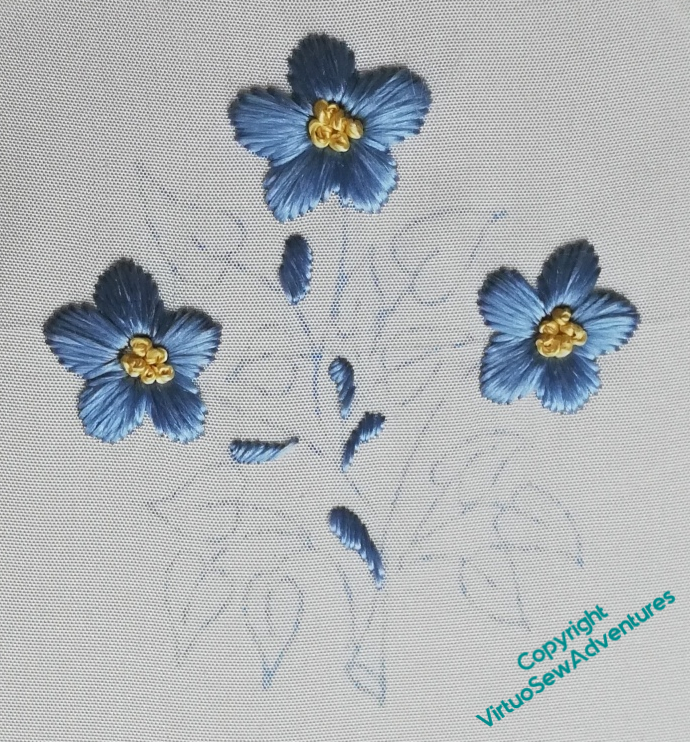
French knots for the flower centres, using hand twisted thread. I found the needle harder to thread here, because the twisted thread was quite heavy, and it untwisted easily, too. This is a problem I’ve noticed with my hand twisted thread before, and I’d love to know whether there is anything to do to avoid it!
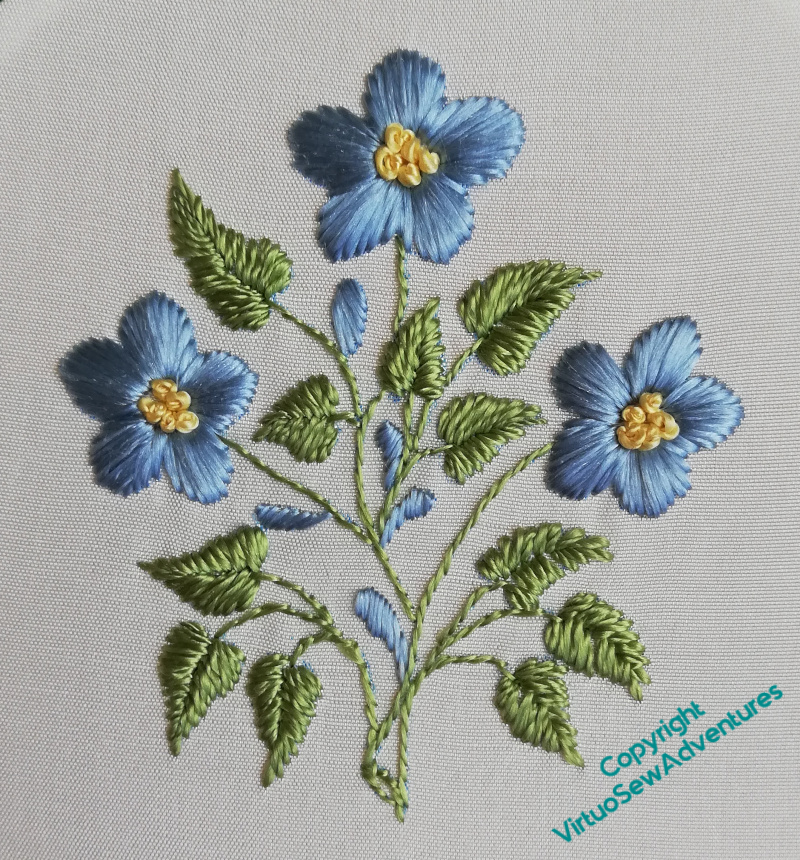
Forget Me Nots
The leaves were satin stitch, again in twisted silk, while the stems were in stem stitch. The pattern didn’t specify, but I took absense of specification to indicate using the silk untwisted. It keeps the stems light and delicate, anyway.
So, finally, after nearly thirty years, I’ve finished the forget-me-nots!
Now I just need a pot to put them in….
The next episode of Slow TV Stitchery is up – Episode 25 – on reaching the fourth border, and the pleasures of lute music. Do go and have a look!
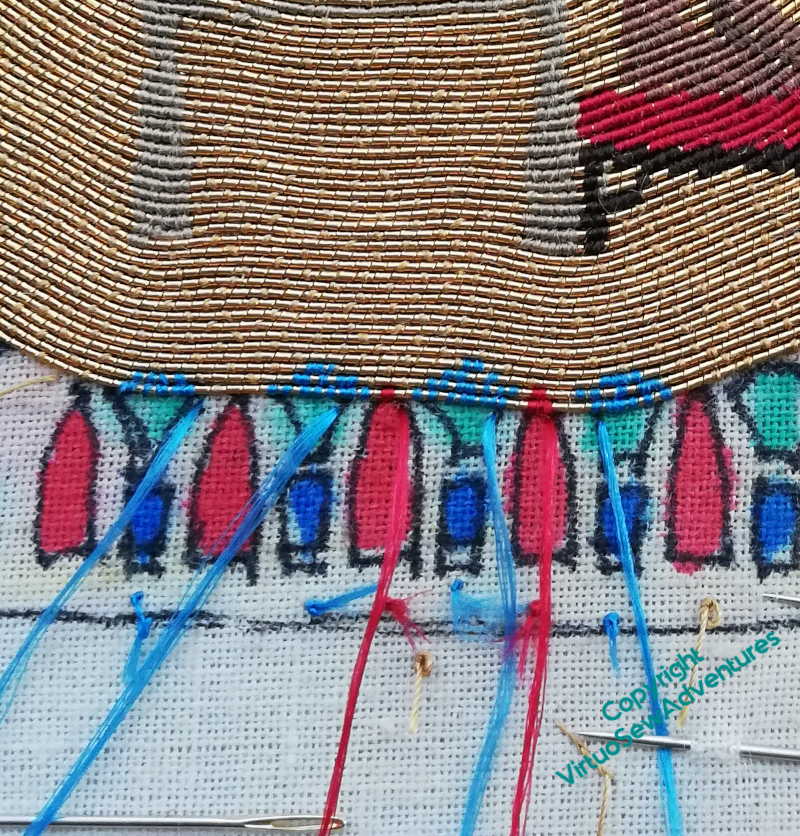
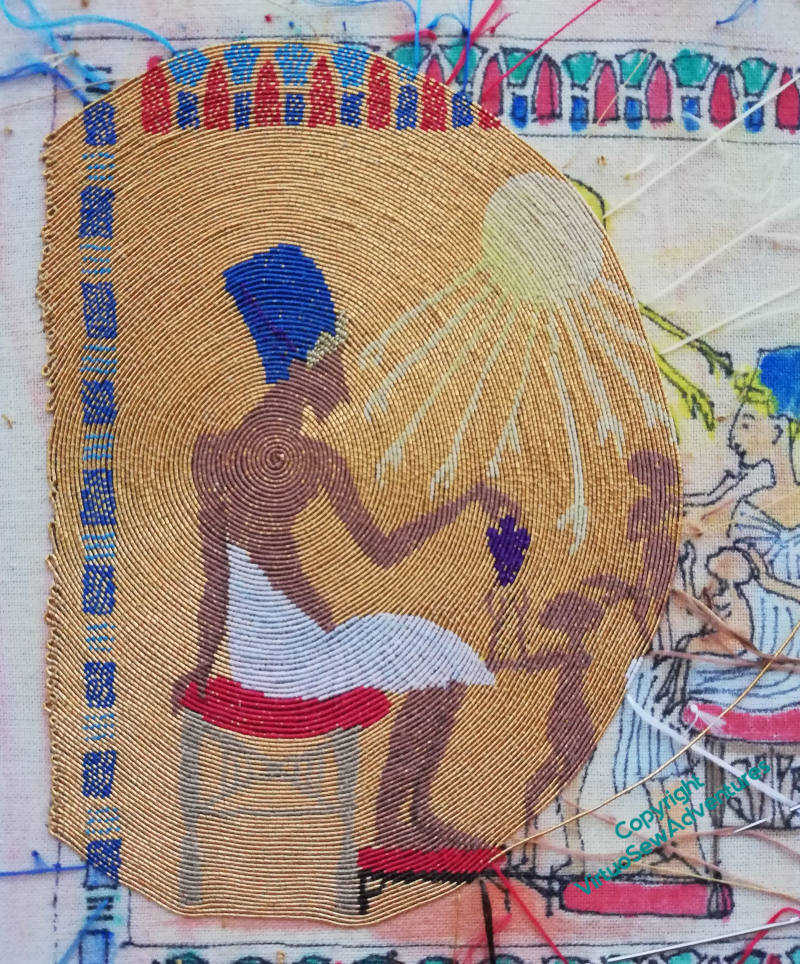
So, edges. Obviously, with the straight version of this technique, the edges are simple – either every single one is plunged, or maybe every other one, if the threads are used doubled. I have a strong aversion to plunging threads, I hate waste, and I just couldn’t face the tangles I experienced when I was working on Christus Natus Est.
So the edges of this piece are being done simply by turning the thread back on itself. I will, of course, have to cut the thread to fill in the corners, but that’s much less fuss, and I am intending to oversew each end very firmly, and not plunge the threads at all.
I began on Nefertiti’s dress intending to do something like I’d done with the pleats on Akhenaten’s kilt, but making the lines more definite.
Having started, though, I decided it wasn’t at all satisfactory. Whether it was the wrong colour, the wrong resolution (not that I can make the lines any narrower!), or simply not simple and crisp enough, I’m not sure. I was sure that it needed to come out.
So that’s what I did.
Unpicking is really not fun, and some of the white silk fell victim to my unpicker, so the raggy bits had to be eased to the back and tidied up before I could even think about reinstating the white.
Notice, however, that the little girls are making pretty good sense just as they are!
The next episode of Slow TV Stitchery is up – Episode 24 – which covers Looking ahead to The Next Epic Project, lessons from the Impressionists, and the trick of making a design’s evolution look “meant”. Do go and have a look!
It would help, of course, if I could remember why I was doing it – other than that I’ve always loved grape hyacinths!
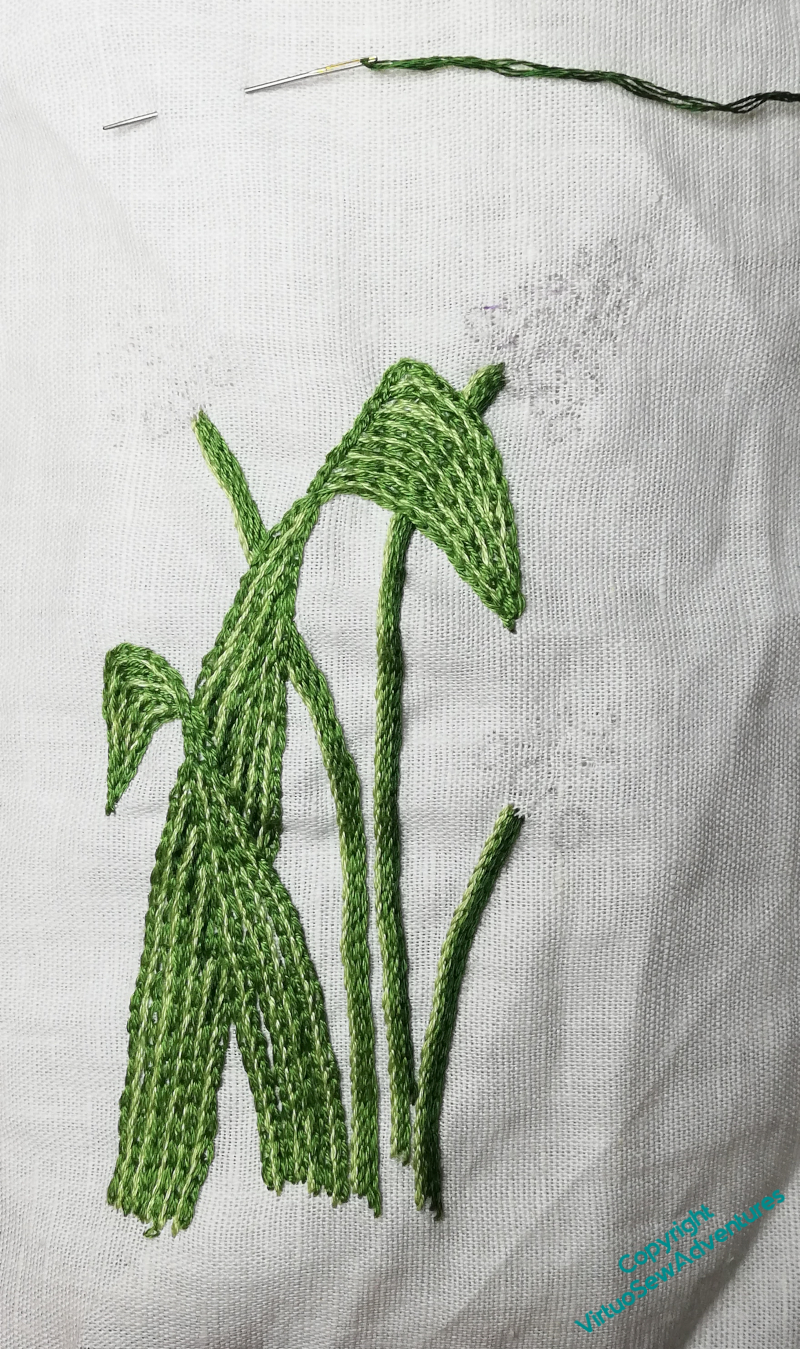
Clearly the leaf needs to be finished, but looking at it again, I’ve decided that I don’t like the way that I originally worked the flower heads, and I need to unpick them and start again.
I don’t know how I’m going to do them, or what I’ll do with it when I’m finished, but at least I have a starting point.
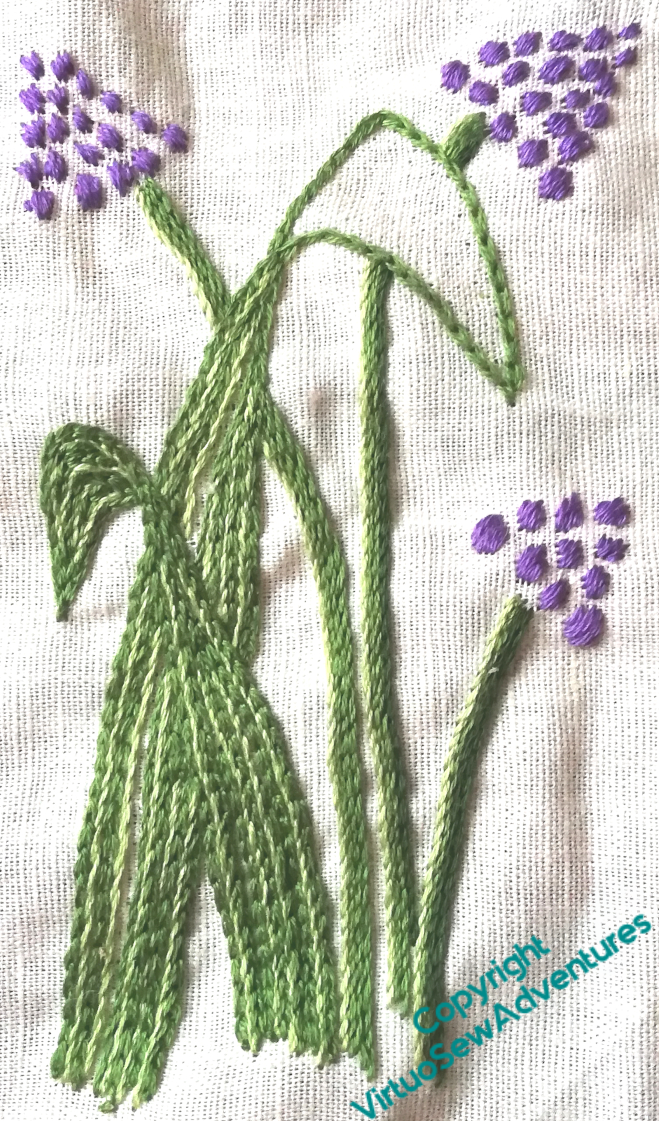
Leaf Completed
So here we are – the leaf is completed, with some added darker stitching to help throw the smaller leaf forward a little. The stitching is a mixture of chain and reverse chain, stem stitch and outline stitch, and I’m quite pleased with how it conveys the texture of the leaf.
Then, out with the scissors and much snipping and pulling out.
I’m still not sure how to do the flowers.
However, I’ve been keeping on with the Amarna Family, and the video – number twenty three, would you believe! – is now live. It contains musings on fabric to cover a stele.
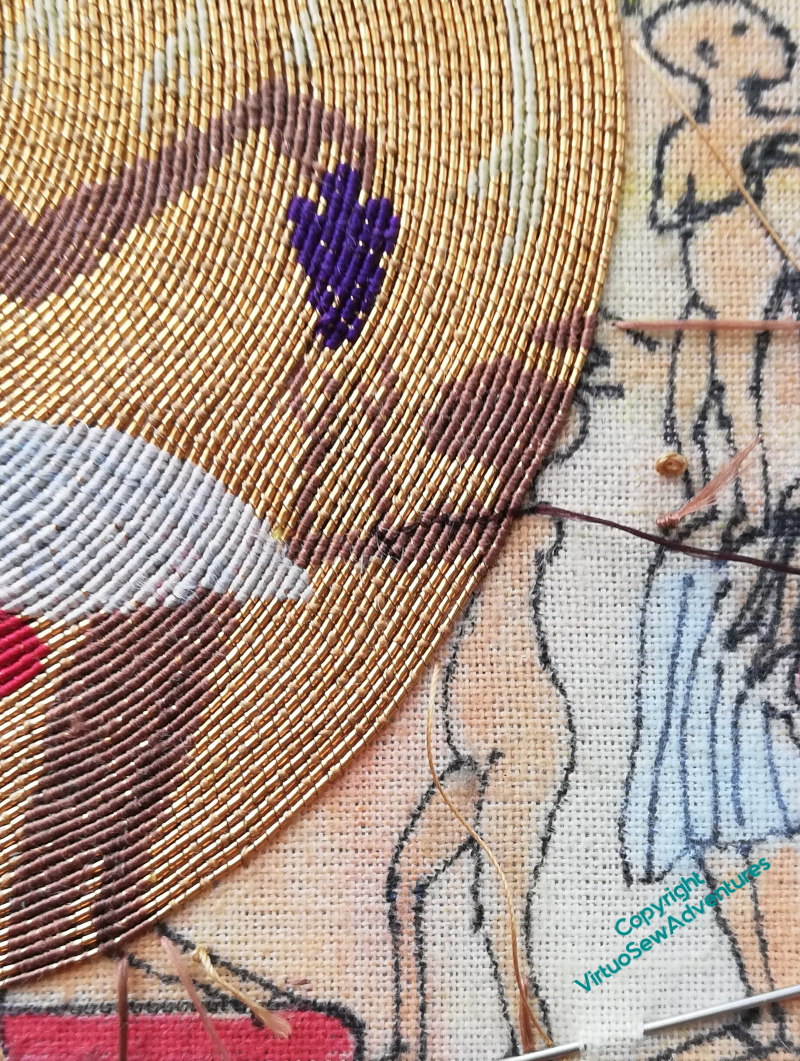
In the end, I sighed, consigned the Cretan memories to perdition, and decided to do the little girls in the same colour as their parents. However, while I was looking at the tangle of limbs and bodies of the two smaller girls on Nefertiti’s lap, I thought that something definite would need to be done to keep them from turning into an amorphous tangle of limbs, something like one of my early memories of my two big cousins. I’ve since got my cousins separated in my head, but I thought it would be nice to keep Nefertiti’s daughters individual from the start!
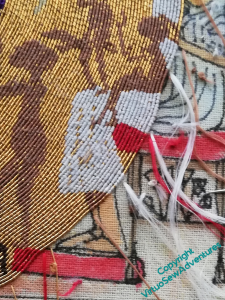
With Outline Section
So I started putting in an outline on the eldest daughter, using a fine, very dark brown thread from Devere Yarns.
Only to stare at it with hostility, because it somehow managed to look a bit too clunky!
Considering that Devere silks are really very fine, this is quite an achievement, although I’ll admit it wasn’t one I particularly cherish.
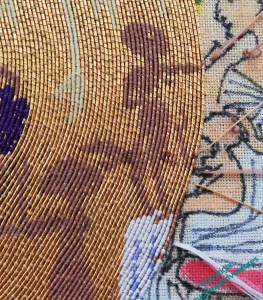
Little Girls Making Sense
So I decided to just keep working on the “block colours” of the design and trust to later inspiration to find out how to keep the girls from blurring into an undifferentiated shape. I’ve left a few deliberate gaps where limbs cross, to help the design “read” properly.
And I’m not sure, now, that they really need anything else…
The video is well in advance of these posts, because I lost the photos I was going to use. Heigh-ho. Anyway, enjoy Episode Twenty Two, in which, among other matters, the mathematical concept of “triviality” is discussed…!
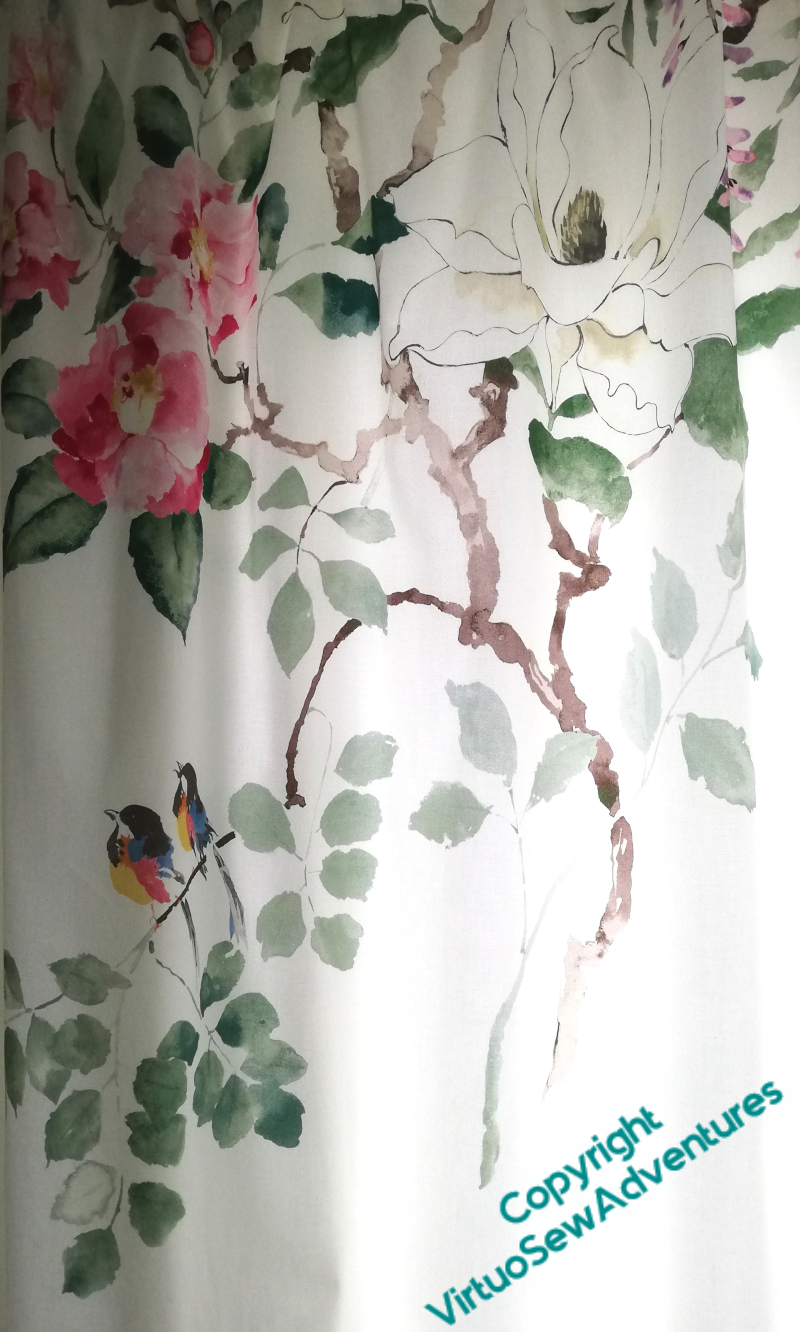
It’s always mildly disconcerting to find myself consulted for advice, but as I inherited Grandmama’s enthusiasm as well as her skill, perhaps I shouldn’t be surprised.
This is the curtain material in my mother’s bedroom. The print is big, light, and painterly, with the small, vividly coloured birds to stop it becoming saccharine. There was enough left for her to make a cushion for the blanket box, and to make an applique of some of it to put on the bedcover.
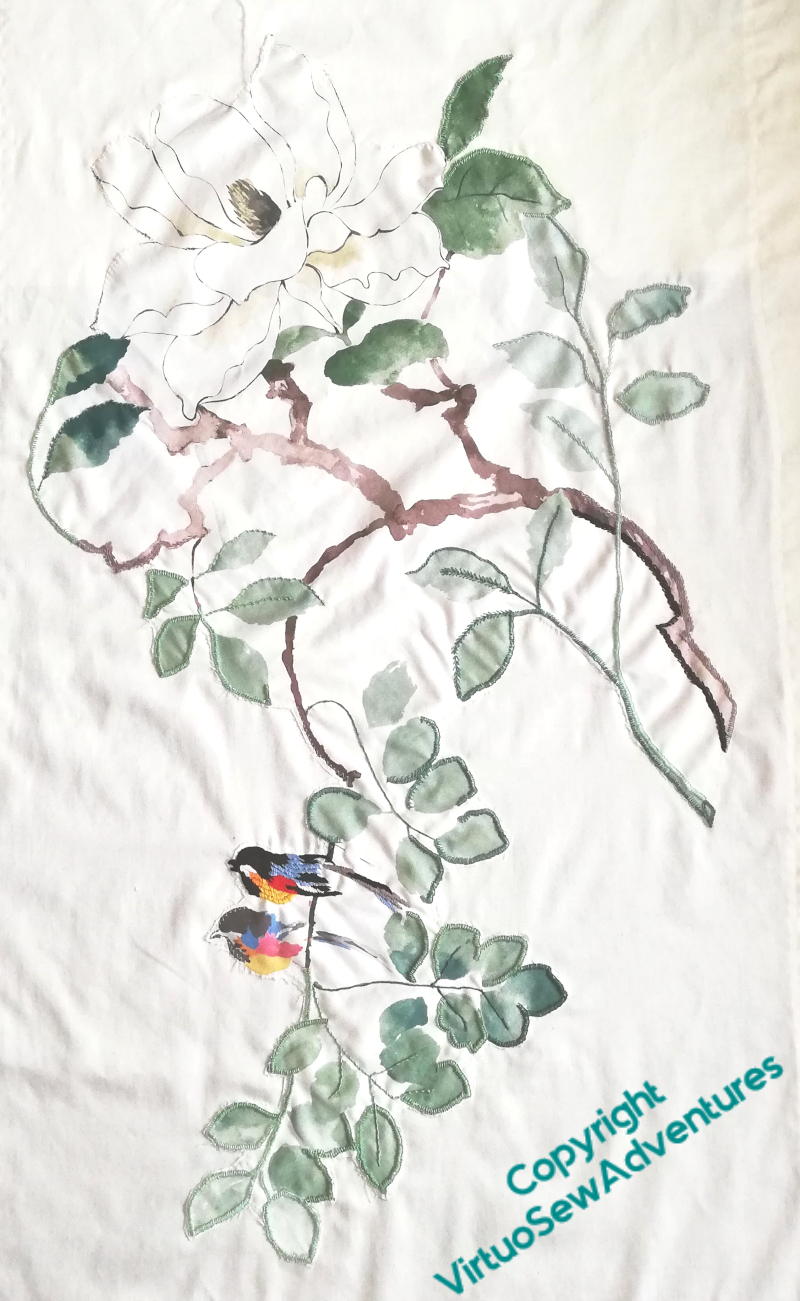
Section Applied
This is the section she’s applied. She wasn’t, originally, intending to do very much to it, and asked me to suggest a few interesting line stitches for the odd detail (portuguese knotted stem, double feather, chain, twisted chain…). Then, however, it revealed itself to be a demon for fraying.
No, seriously. It doesn’t look it – it’s a cotton satin, closely woven – but it started to prove truly infuriating.
So, suddenly, every raw edge has to be either machine satin-stitched (which didn’t appeal), turned under (likewise) or Properly Covered.
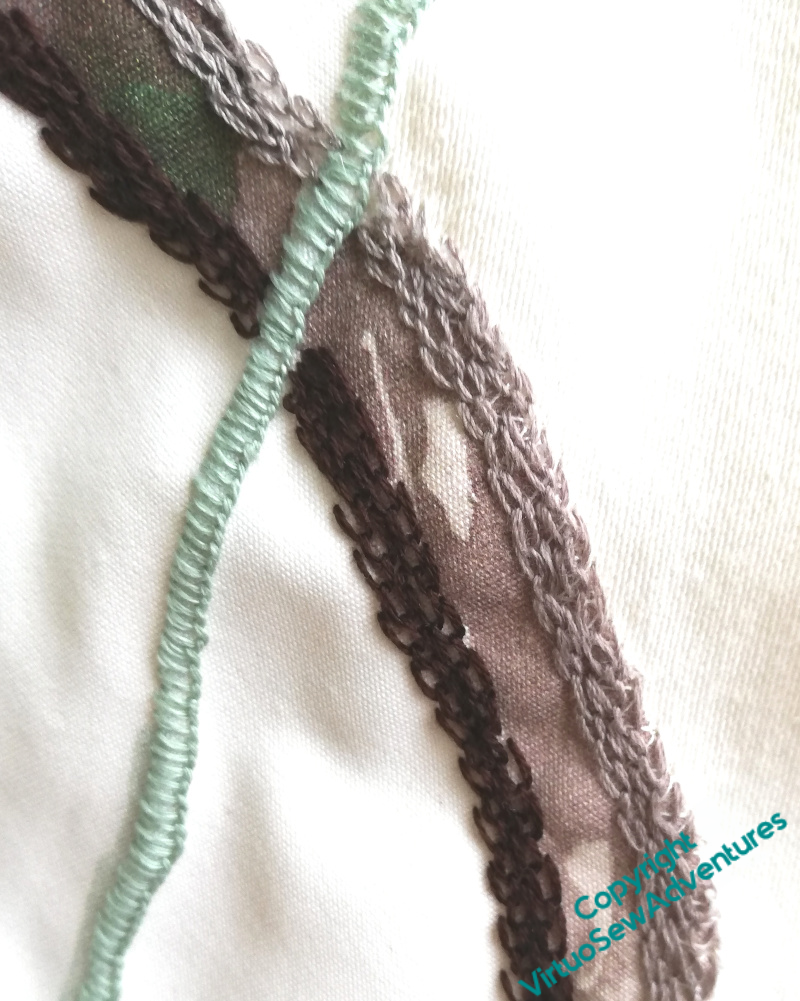
Stem Details
We fished out a variety of suitable threads, and she got started.
As you can see, in some cases she’s not just followed the line of an edge, but decided to add some further details. The blanket stitch line started off following an edge, but would have looked simply silly if she’d stopped when it started careering across the print, so she carried on.
For those craving more SlowTV Stitchery, Episode 21 is now up, in which is considered false starts and the avoidance (or not) thereof..
I found this, languishing in a box. It’s a kit for a Japanese embroidery design, complete with spools of flat silk and a handmade needle (which didn’t register with me as it should have done, I admit!)
What I didn’t have was the instructions, but I remembered that we bought two kits, one for my mother and one for me, so I asked…
Very Old Needlecraft Magazine
And look what she came up with! As it turned out, her kit was safely packed up, together with the magazine that the instructions were in. So I’ve photocopied them, so as not to deprive her, and I intend to get along and finish it.
Then I’ll only have to decide what to do with it. Perhaps I’ll actually source a little box and put it in the lid, as suggested by the magazine! (Yes, I know, me, doing as suggested – the world has turned topsy-turvy!)
Still, onward, ever onward!
Cotton Padding Stitches
The first stage is to put in some padding stitches under the flower petals.
I’m always a bit reluctant to use my Japanese needles – I’ve found them tricky to thread, and I’m very conscious of their rarity, and don’t want to break them – but every time I’m reminded that they are really lovely to use. Although I’ll admit to finding them slightly disconcerting, because, being shorter than I’m used to, they balance differently!
Meanwhile, Amarna Family Group continues to make progress: Episode Twenty is now live, and chiefly concerns Nefertiti.
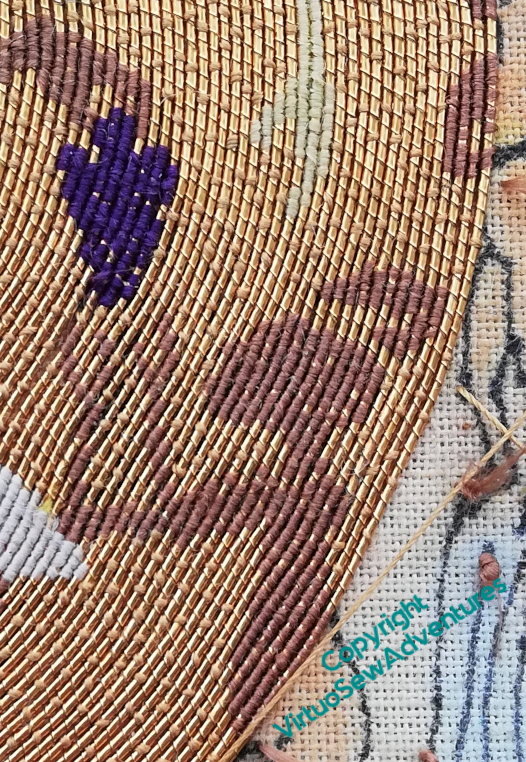
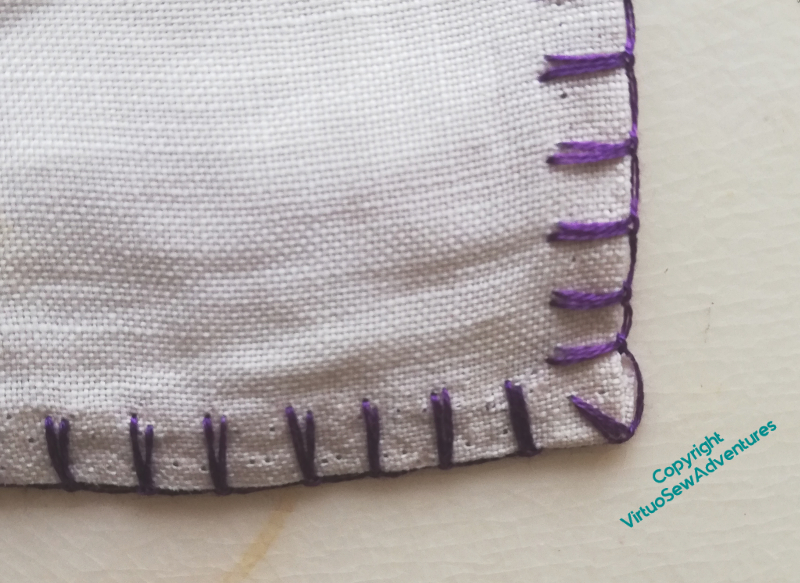
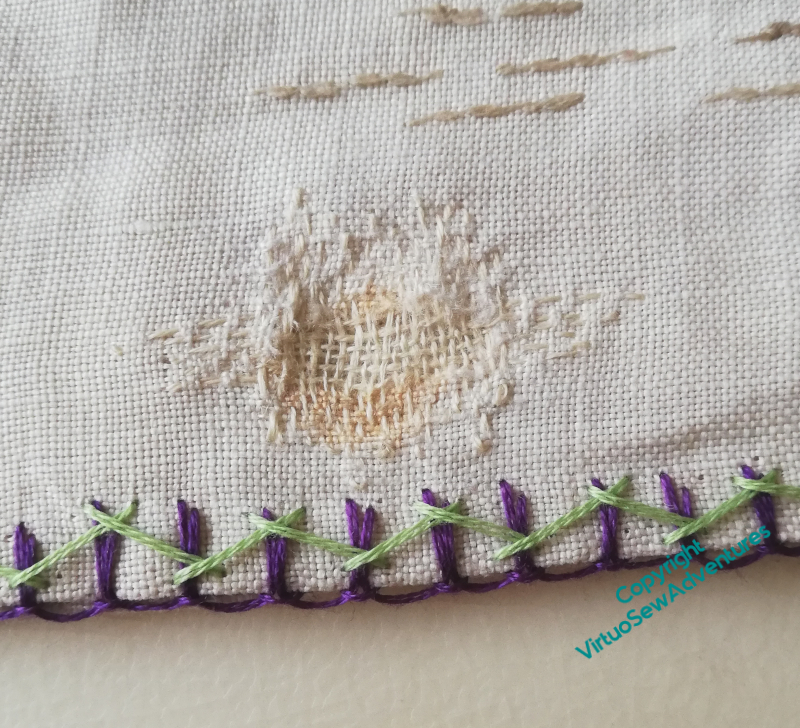
In a slight variation of what Grandmama did, I used Up and Down Blanket Stitch, which is one of my favourites, to work the purple section of the edging. It’s not as comfortable to work as an edging stitch as it is as a surface stitch, but I enjoyed it (as usual), and I’m pleased with how it looks.
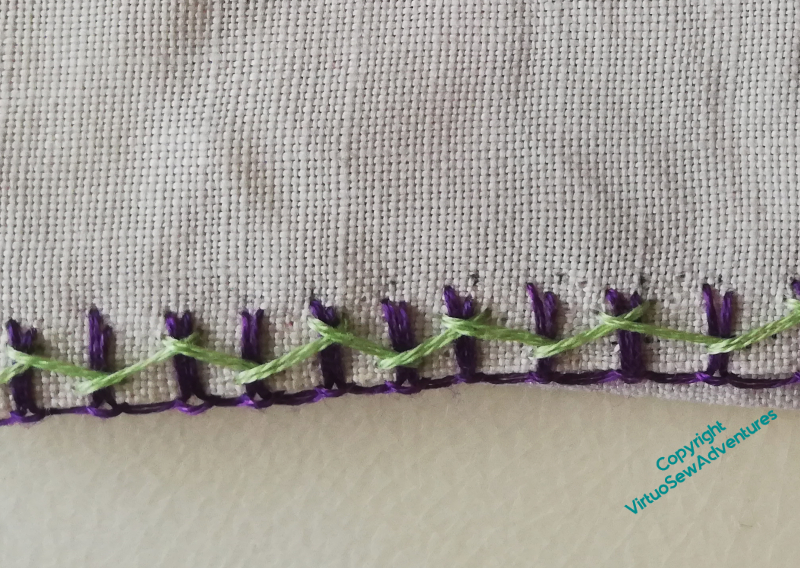
Green Herringbone
The second layer of the edging was in herringbone stitch, just as Grandmama worked it, but using a pale apple green instead of the pink. It will work much better in Mam’s room that way.
I’ve used two strands of cotton, which is what Grandmama did. I suspect that’s why the edging has collapsed in spite of not being used for decades!
Darn In Place
I’m not as satisfied with the darn, but I think it should stop the hole getting worse, and I’ve had a variety of suggestions for tracking down a suitable material to patch it with. At the best of times, that would be a tricky task, and in the current situation, it may well be years before I find something!
Progress continues in other areas, too – Episode Nineteen of SlowTV Stitchery is now up. It concerns, among other things, flyaway thread and the importance of writing things down…
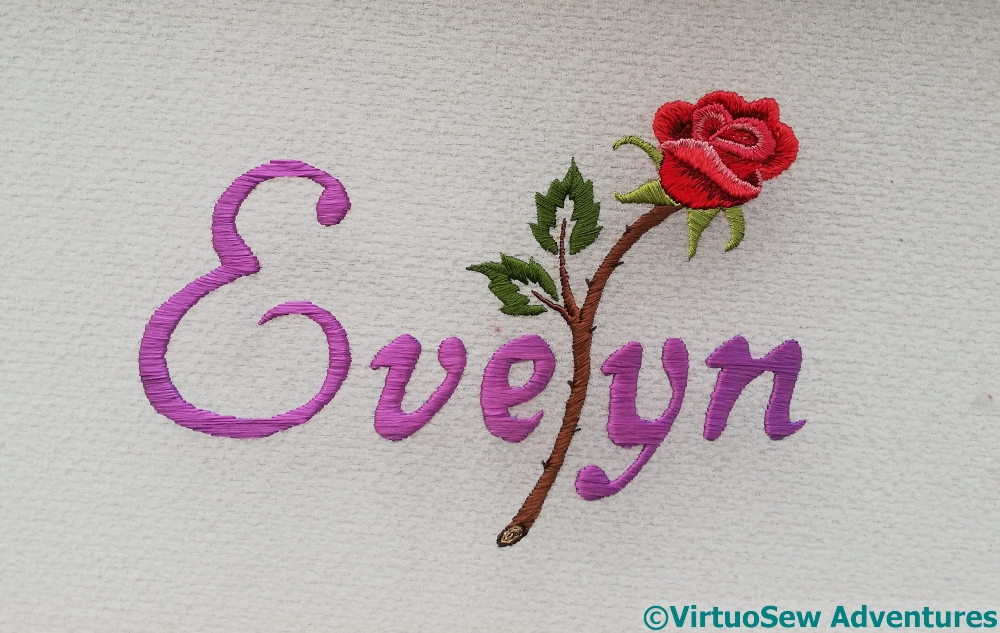
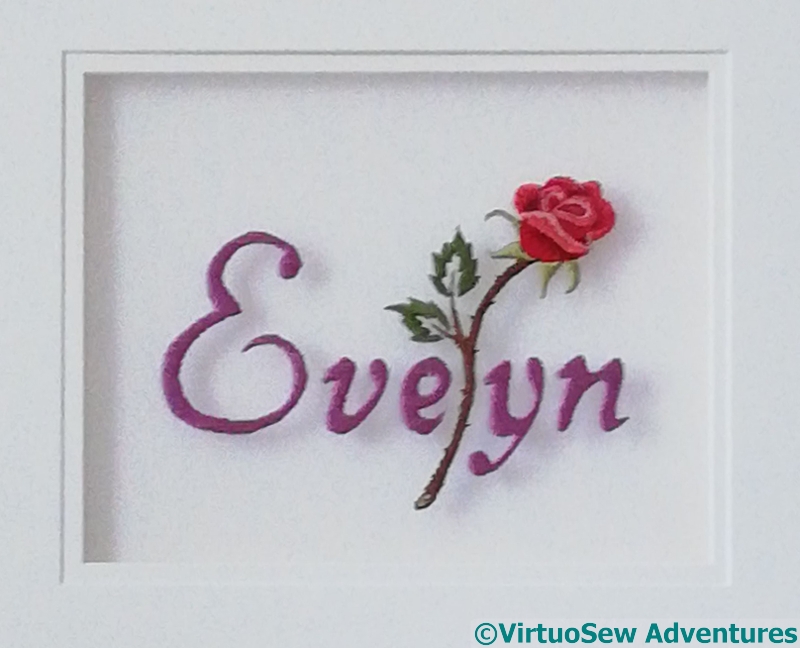
I’ve only just realised you’ve not seen the finishing of Evelyn Rose – I wrote the post then didn’t schedule it!
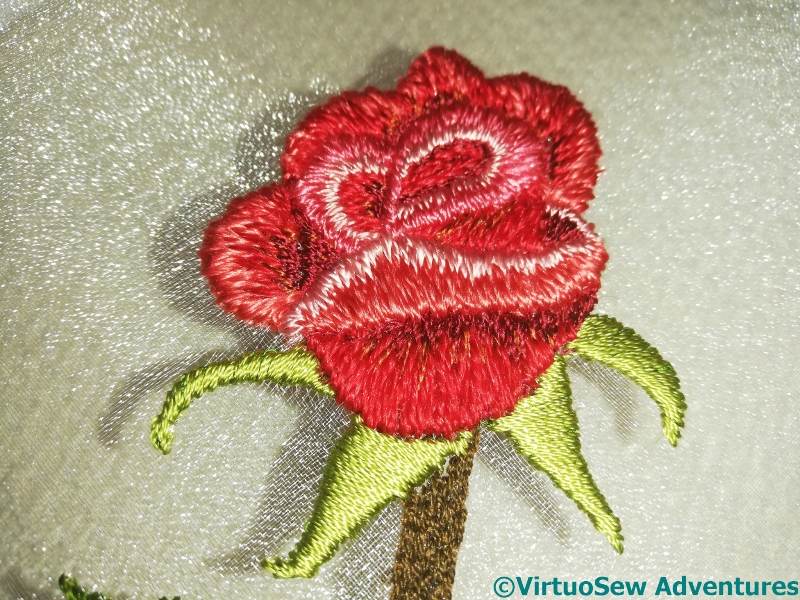
Rose Shadows
The glint of the gauze shows up particularly well in this photograph of the rose, and you can see, too, the various different silk threads I’ve used to get the effect and shade I wanted. Tricky, because I didn’t want a naturalistic, Redouté-style rose, but – because, as I said, they don’t work with stems – I didn’t want a canal-art style rose, either. I think I got it right, and I’m rather pleased!
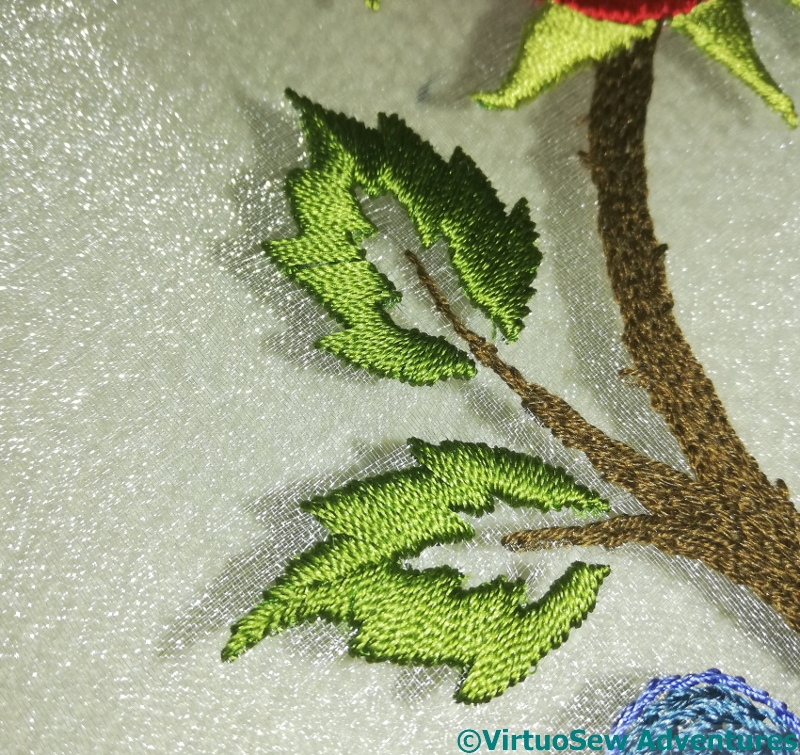
Leaf Shadows
This slightly “stencilled” type of leaf helps to keep the balance between “naturalistic” and “stylised”. It also provides an opportunity for some rather striking shadows when the light is right, and I was delighted, throughout the stitching, to have moments like this, when it became clear that the idea was going to work just as I had hoped!
Evelyn Rose Finished
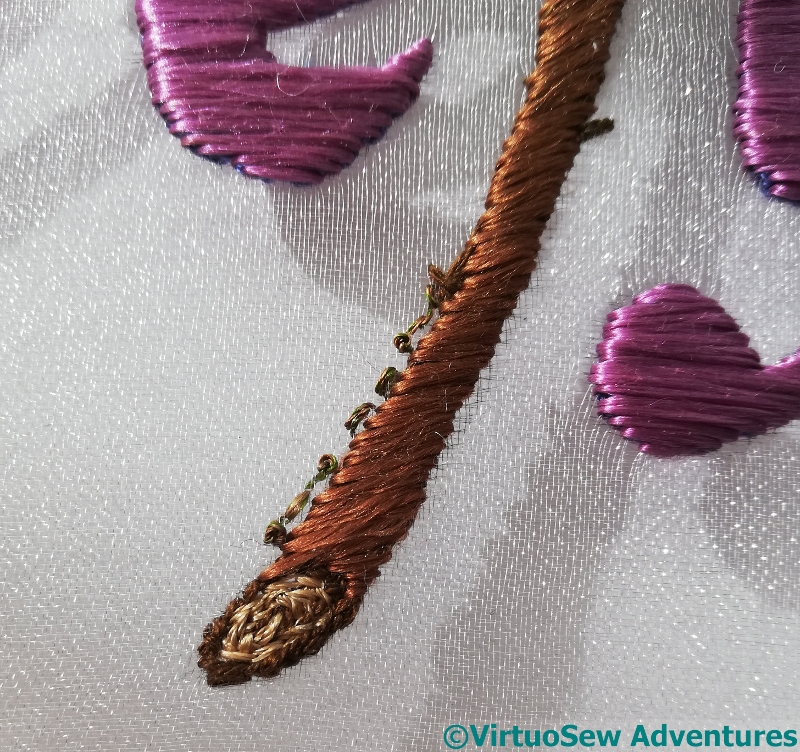
Signature Caterpillar
I knew that Evelyn’s father, in particular, would be very disappointed if he discovered later about my usual Morse Code signature, and I hadn’t done it for Evelyn, but making it small enough, and neat enough, and showing the stitches at the back as little as possible, was a little tricky. I twisted together several colours to get a fine, caterpillary thread, and worked my stitches as close to the stem as I could get them. In real life, it’s very hard to see my signature, but I promise you, it’s there!
Evelyn Rose, double mounted and casting a shadow
The next challenge was to mount it. All this was happening only just pre-lockdown, so I went to see my wonderful framer, who goes by the (entirely deserved) name of Framing Genius. Between us, we came up with a way to create a sort of “sealed unit” of the embroidery and the mounts, so that I could post it overseas to our friends, who would then have something displayable until they can find a framer when such things are possible again.
Now, the next post in SlowTV Stitchery is now live – Episode Eighteen – on the desirability of imperfection and the likeness of mathematicians to cats!