Grandmama worked this pyjama case for my mother when she was a little girl. It’s beautifully worked, but slightly faded now, and the decorative stitching over the edges has all but disintegrated. Mam has asked me to reinstate that stitching.
It’s a good thing that my collection of stranded cotton includes some of Grandmama’s threads and that of various great aunts. That gives me a chance of finding something not a million miles removed!
Damage To Repair
There’s some damage to repair as well. I’m not quite sure how I’m going to do so – there’s nowhere with spare threads to repair to attempt an invisible darn. So for now, I have outlined the area in split stitch, and I am going to concentrate – or try to concentrate – on putting in place a suitable border. The original was purple blanket stitch overlaid with pink herringbone, but we’ve decided that purple overlaid with green will work better in the room it will live in.
Multithread Edging
But we’ve already made a discovery. This slightly Art Deco looking border is the internal edging. It’s still undamaged, and I’m leaving well alone, but my Mam says she never remembers registering the detail here when she was a little girl!
We are pretty sure that the legendary Miss Hunter was involved in the stitching of this, so I’ve got a lot to live up to!
Meanwhile, in other news, Episode Fifteen of SlowTVStitchery is available, and concerns ideas for managing details, and the management of Very Long Projects.
In the end, I unpicked both of the previous attempts, and used a mass of French knots, worked again in hand twisted silk, this time combining some of the very fine silk from a Frostings box with my Japanese Flat silk.
I think these work well, especially at the small scale of the piece.
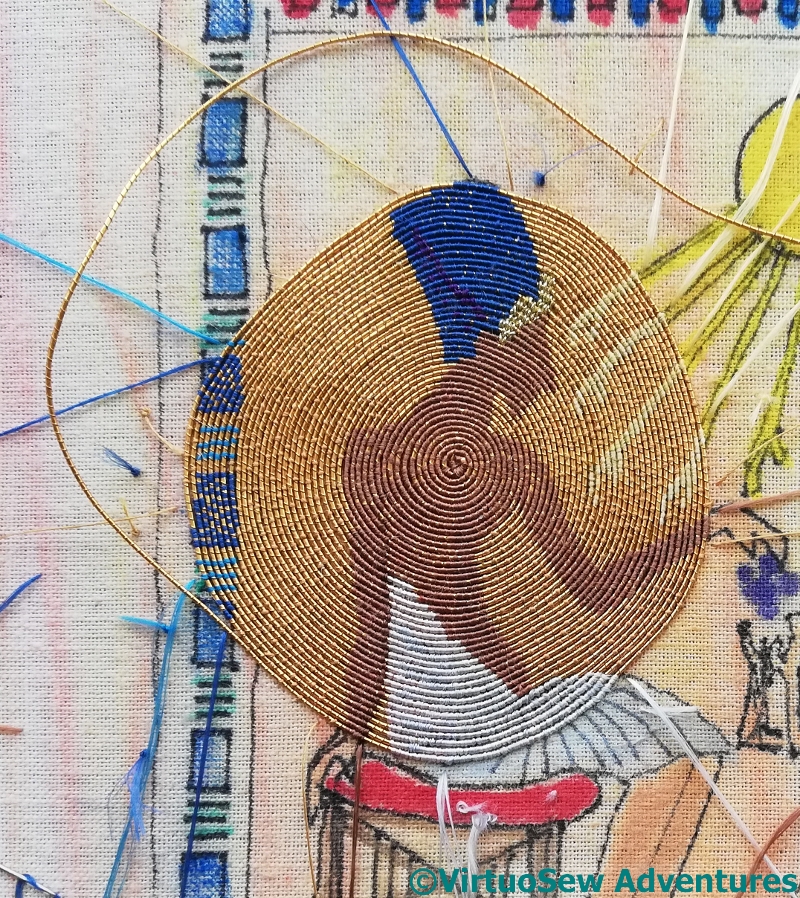
Lotus Flower
I’d been rather dreading the large lotus flower, representing the shaped endpieces of a broad collar necklace, because I was remembering the struggle I’d had with the “Fragment of Tile That Started It All“.
Then I had an epiphany of my own, and used the difference in appearance and reflectance of twisted silk compared with flat silk to help distinguish the shapes of the petals and bring the foremost ones forwards. I’m very pleased with how that turned out!
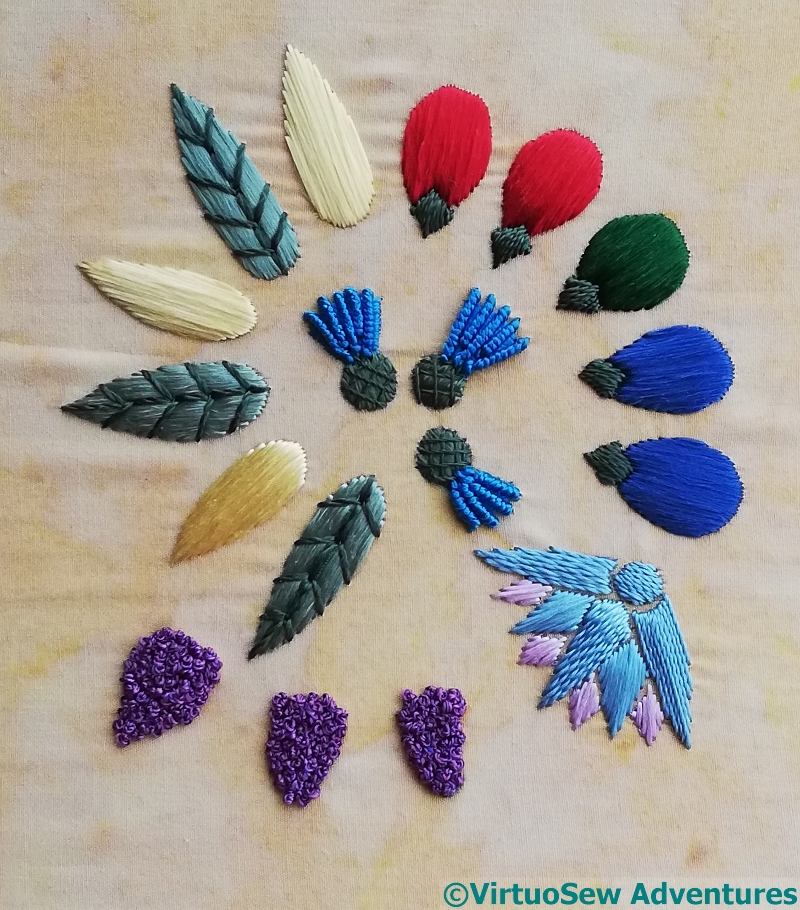
Finished Faience Necklace
And now, finally, it’s done!
This one is almost certainly going to be one of the “spots” around one of the big panels, because although I like it, and it represents what I want it to, I don’t think it has the visual strength to stand alone.
But then, if all the pieces could stand on their own, I wouldn’t be able to assemble the panels I want to, would I!
Finally, Episode 14 of SlowTV Stitchery is now live, discussing design thoughts, music and musicians. Do drop in and see how I’m getting on!
Each time I decide how to do a particular element, I do all four appearances. I decided on this very early on, because I knew that working a whole side and then copying it three times would drive me absolutely mad!
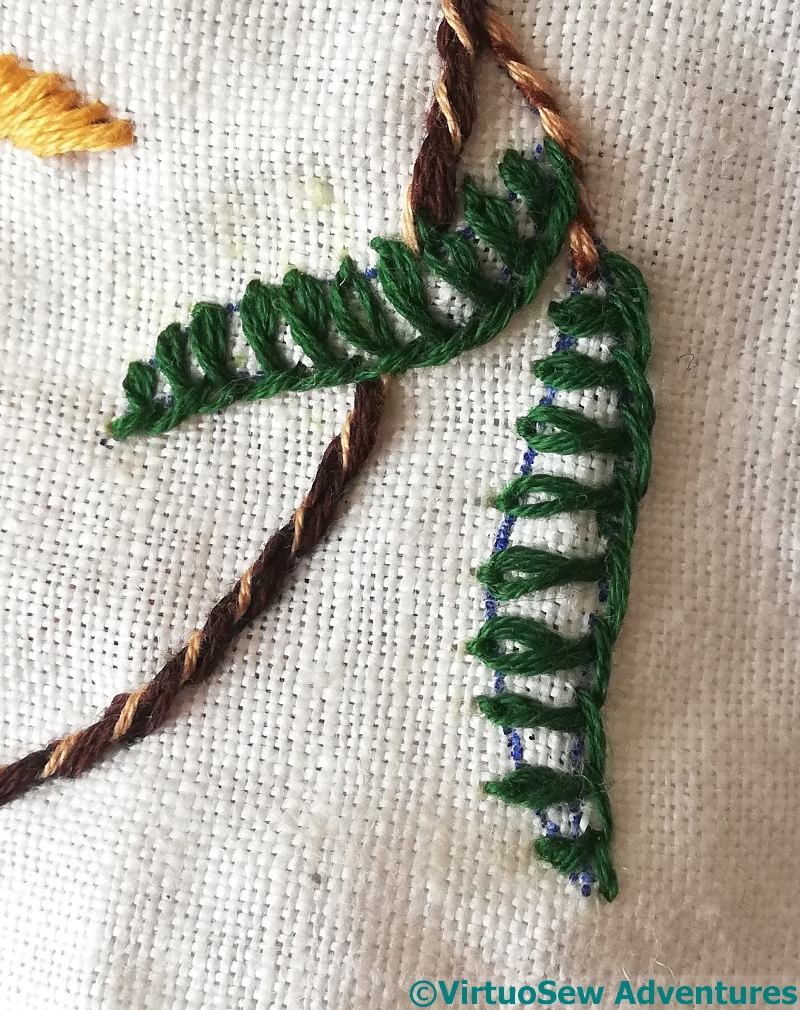
Raised fishbone stitch creates a nicely embossed effect, providing a good contrast with all the open stitches I’ve used. It requires a bit of concentration – this is a little raggier than I’d like – but at this point, I want the wretched tablecloth done, so I’m likely to just move on..
Grouped Blanket Stitch
I’ve been looking at other embroidery styles of late – one can’t be wallowing in gold all the time, and one of these days I will be able to think of doing something else – and I’ve been reminded of just how effective groupings of blanket stitch or buttonhole stitch can be. This is the simplest variant I could think of, but I must remember that simple stitches like blanket stitch offer endless possibilities for variation..
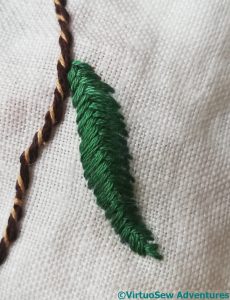
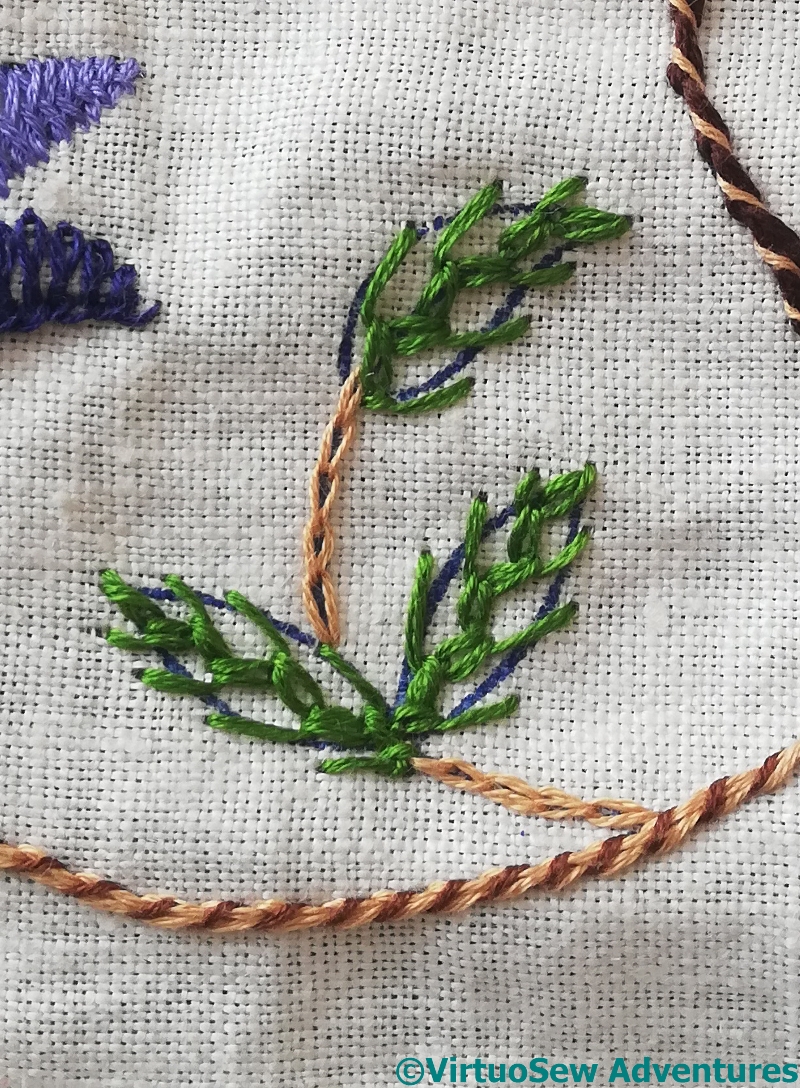
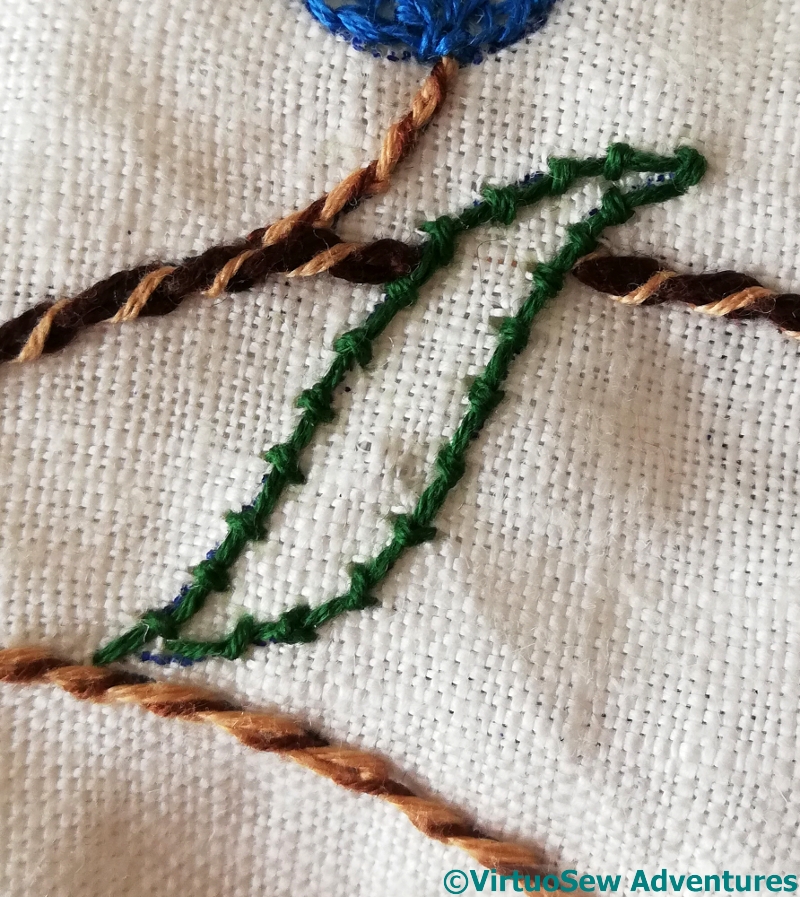
Feathered Zig Zag Chain Stitch
One of the attractions of surface embroidery is the possibility for stitches to evolve themselves into being. I’m calling this one “Feathered Zig Zag Chain Stitch”. I can’t believe I’ve invented it, but neither can I remember having seen it before, and I think it works rather well. It certainly flowed familiarly off the needle, like an old friend.
The photograph has reminded me, however, that I need to finish whipping my chain stitch stems!
And new in SlowTVStitchery, Episode Thirteen is now up. In which, at long last, a Decision is made….
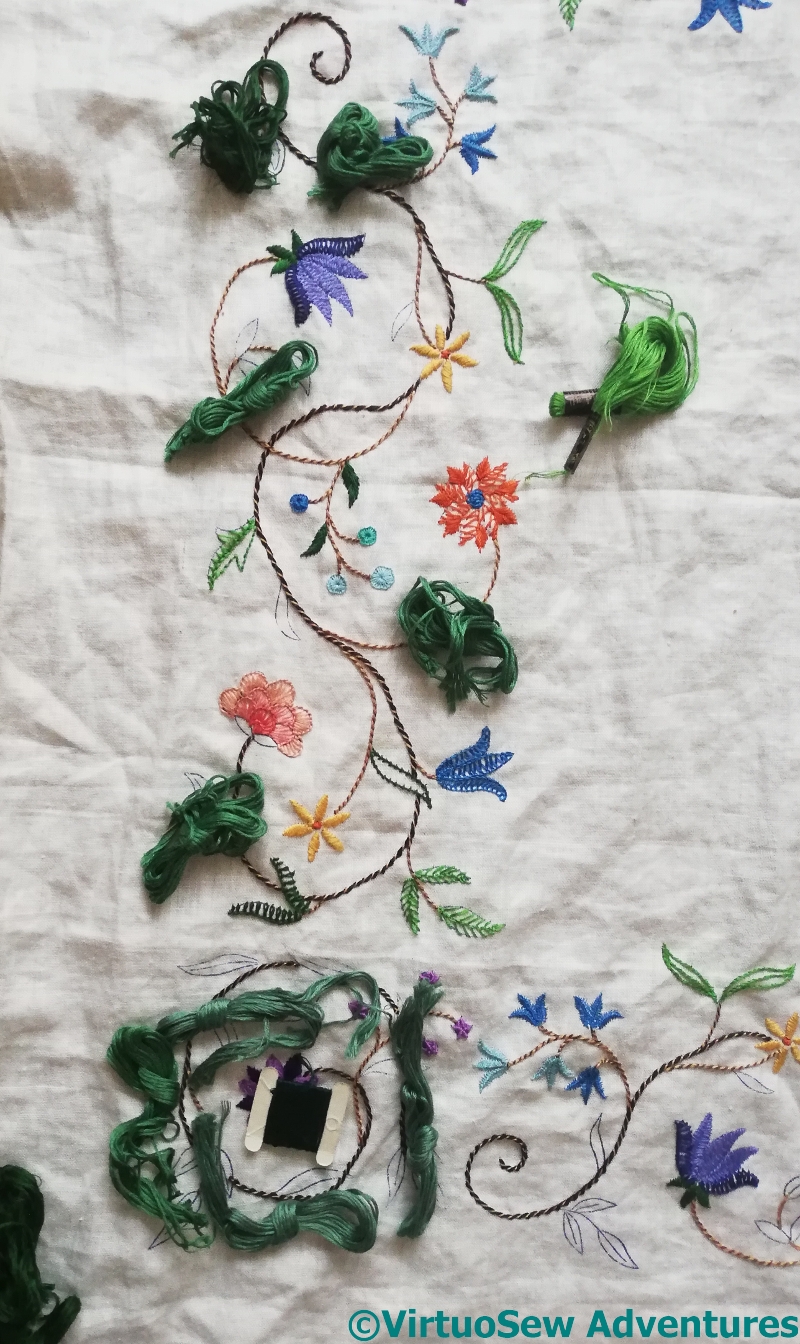
You may recall this tablecloth, which I won in a job lot of things in an auction on eBay, a long time ago. I regarded it as my “traveling project” for a while, but didn’t travel much, or when I got there, found I couldn’t settle to it, and it’s been lingering and hanging over my head rather. It may well be that the current situation will give me the opportunity to get it finished. It will make a change from the details of the Amarna Family Group!
So, since I’d forgotten what I’d planned (or if I’d planned!), I laid it out on the floor and played around with skeins of cotton, to see what I could come up with.
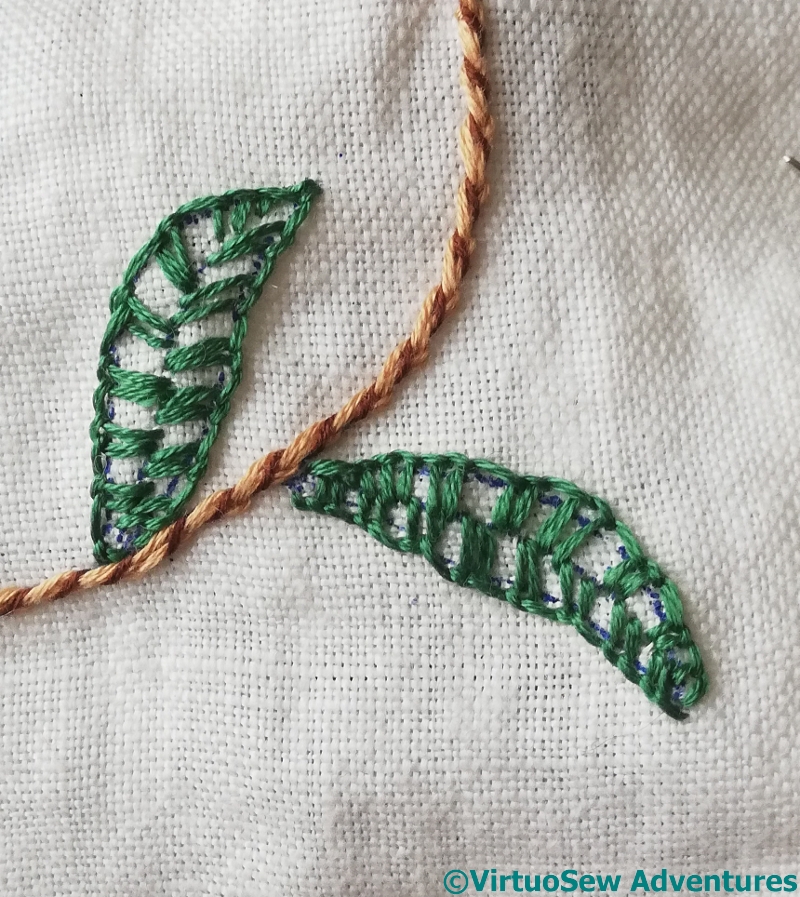
Basque Stitch
The way I’ve worked on the tablecloth is that as I’ve what to do with each motif, I’ve worked each instance, and that way the whole tablecloth advances at once.
The Basque Stitch of these leaves is rather more spaced out than in the previous appearance of that stitch in the tablecloth – spacing, as well as scale, plays a part in altering the appearance and emphasis of a stitch.
Coral Stitch Outline
Coral Stitch is nice and simple. Such a nice rest…
Yes, I know the concept of or nué is simple, but the execution isn’t, believe me!
And, speaking of or nué, Episode 12 of SlowTVStitchery is up! Do go and have a quiet half hour with me…
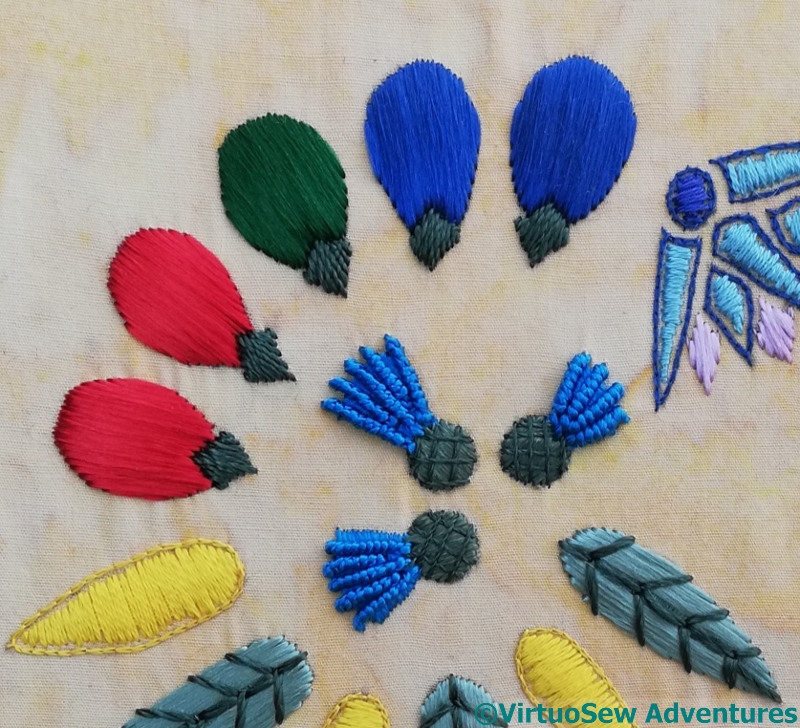
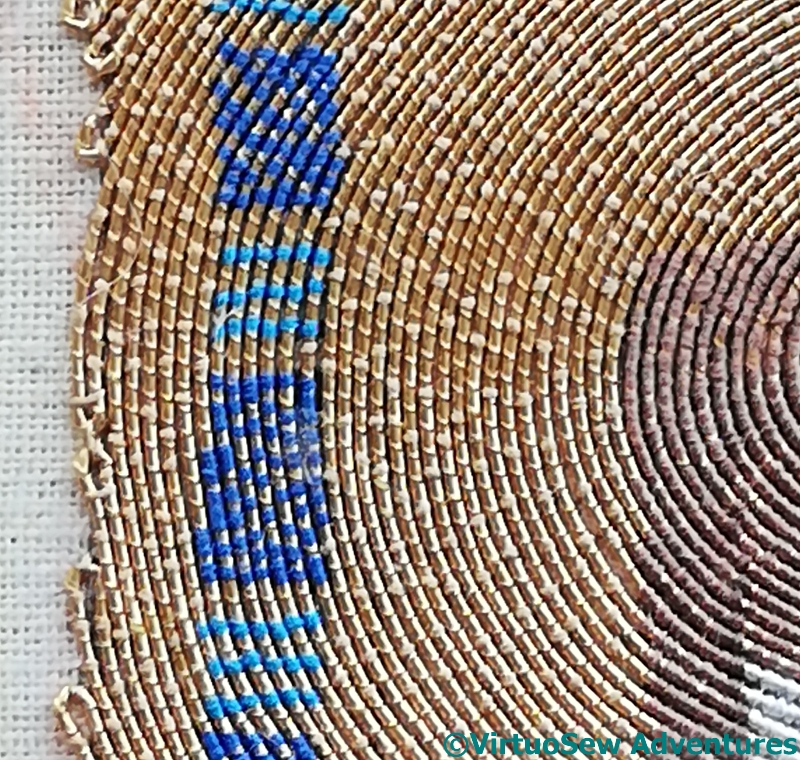
The necklace description that Mary Chubb was asked to transcribe, after her epiphany in the cellar, includes a row of dates in a repeating colour pattern of two red, one green, two blue.
So here they are, in satin stitch in flat silk for the main fruit, and more satin stitch, but this time using hand-twisted threads, for the stem. I found a rich and vibrant green for the main green fruit and used a greyish-green for the stem. Again, I’m trying to balance echoing the faience with echoing the real fruits, leaves and flowers, which is making for some interesting puzzles!
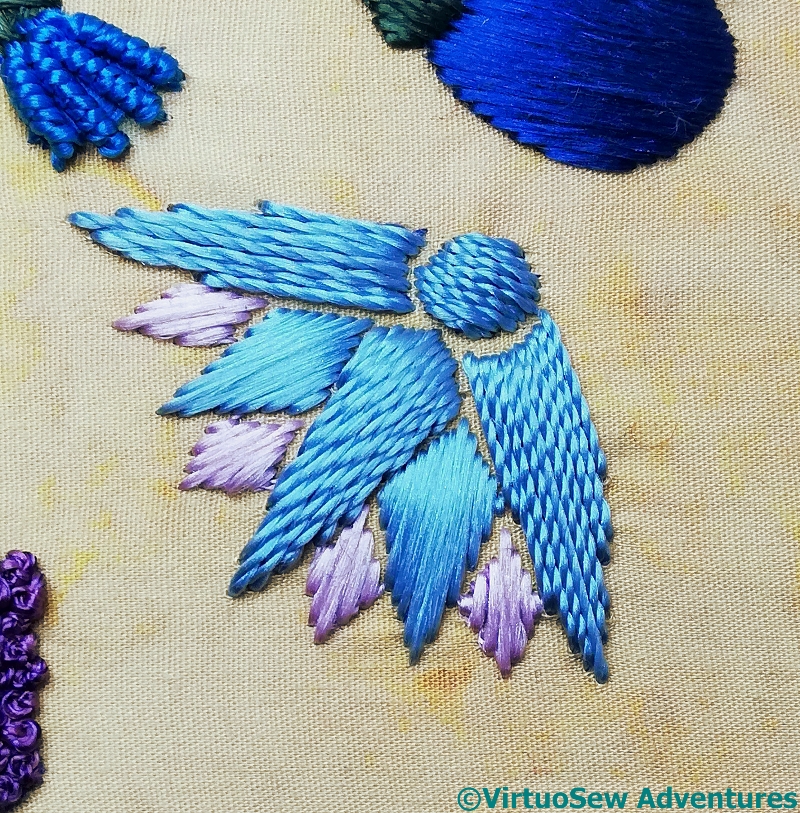
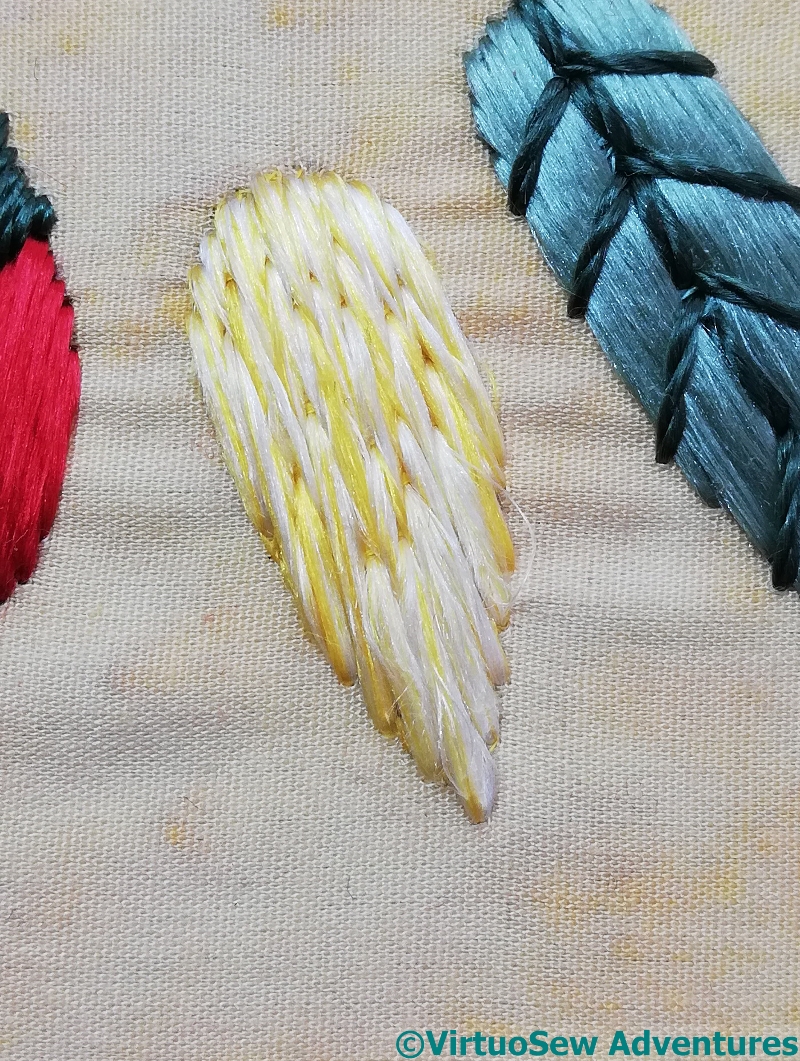
First Lotus Petal Trial
I wanted to try blending the silk filaments for one of the elements, to help recall the slightly iridescent effect of some glazes, and spent a wonderfully painstaking (exasperating!) afternoon splitting my silk. And then recombining it, and using it to stitch the first of the lotus petals in long-and-short stitch.
Only to sit back and glare at it. It’s looking congested, chunky, and not at all what I was looking for. What’s more, it’s buckling the fabric in spite of the calico support.
Snip, snip, out it comes, and now I need to think again.
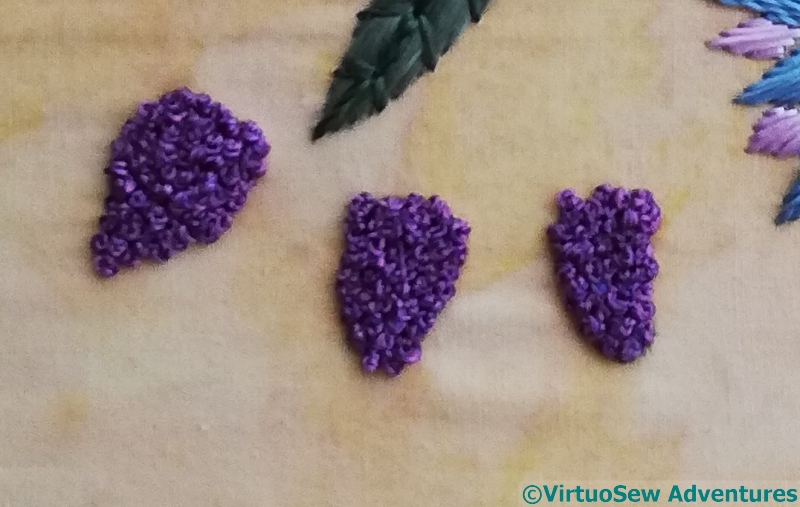
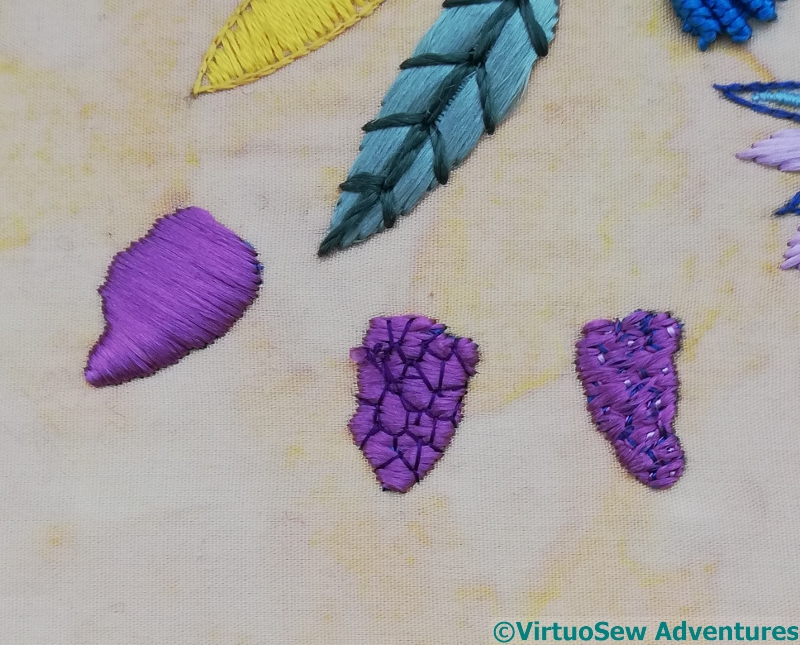
Faience Grapes Compared
Meanwhile I have another element to think about as well. You can see the underlayer of satin stitch on the shapes which are supposed to be recollections of bunches of grapes, and then two attempts to give them a more defined appearance. I think I prefer the middle version, which was the second I did.
That, however, means I have to unpick my first attempt. Sigh.
There was a problem with uploading my video last week, so here it is, somewhat delayed: Episode 10 of SlowTVStitchery. And, just so we don’t get too far behind ourselves: Episode 11 as well!
I recall from both the Hittite Amulet and Christus Natus Est that Or Nué projects are rather difficult to write about. They’re a little like those novels in which Nothing Happens, because one edges slowly forward, with the piece growing imperceptibly – until all of a sudden, it gallops to a conclusion. I am nowhere near that point as yet, but for the benefit of those who prefer reading to watching, I will attempt to provide occasional updates…
Progress So Far
Here is one of the progress shots.
There are a few details I will have to come back to, as you will see if you click through to the larger image. I may have to adjust Akhenaten’s arm, for a start, and the pale blue I used to mark the creases on his kilt isn’t dark enough to do the job, so I will have to do find another thread and add some stitches.
However, the metal thread on the front of Akhenaten’s headdress shows up rather better than I feared it might. Although, as I said on one of the videos, gold thread couched with gold thread is pretty much Peak Ancient Egypt. Even Louis XIV, never an advocate of moderation in design, would take a step back, crying, “Here, I say, steady on!”
To which I reply, I am steadying on – it’s staying in!
Half-Tone Border
This is a close up from slightly more recently. You can see that I’ve reached the designated edge of the design, and that rather than cutting and plunging my threads, I’m doubling back on myself, so all the gold remains on the surface. My intention is that this will be edged with some sort of braid when it is complete, and attaching a braid through the gold as it stands will be quite hard enough, without attaching it through plunged ends as well!
I’m also leaving the royal blue blocks in a sort of half-tone, with some of the gold showing through. I may decide, when the whole thing is finished, that the border designs need to be full strength if they are to frame the scene properly, but I felt that this might work, and would be an interesting experiment.
But, occasional reservations aside, I think this is going to be a very successful piece!
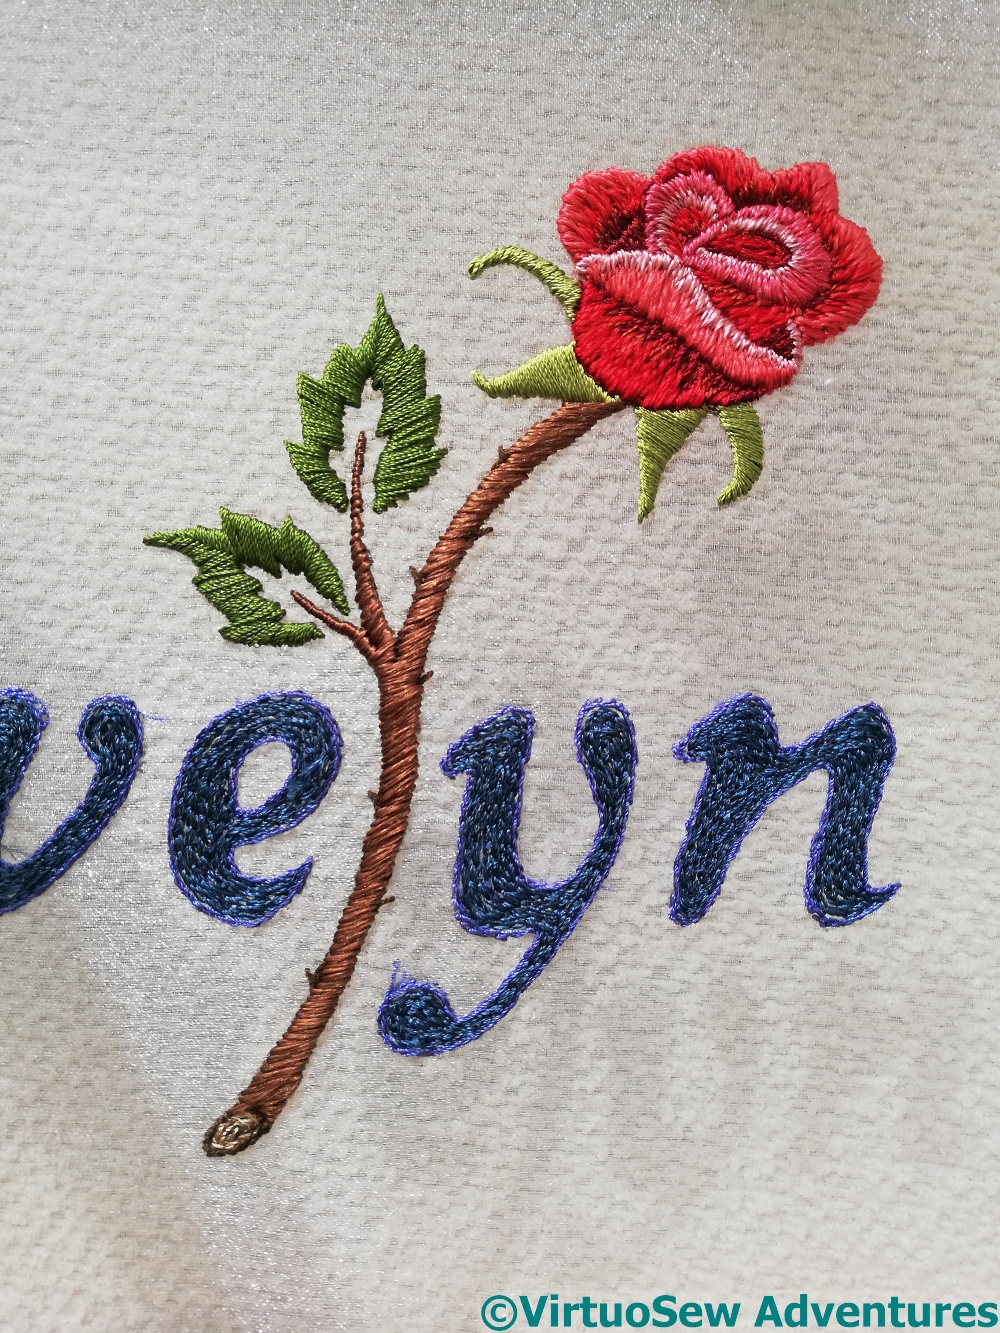
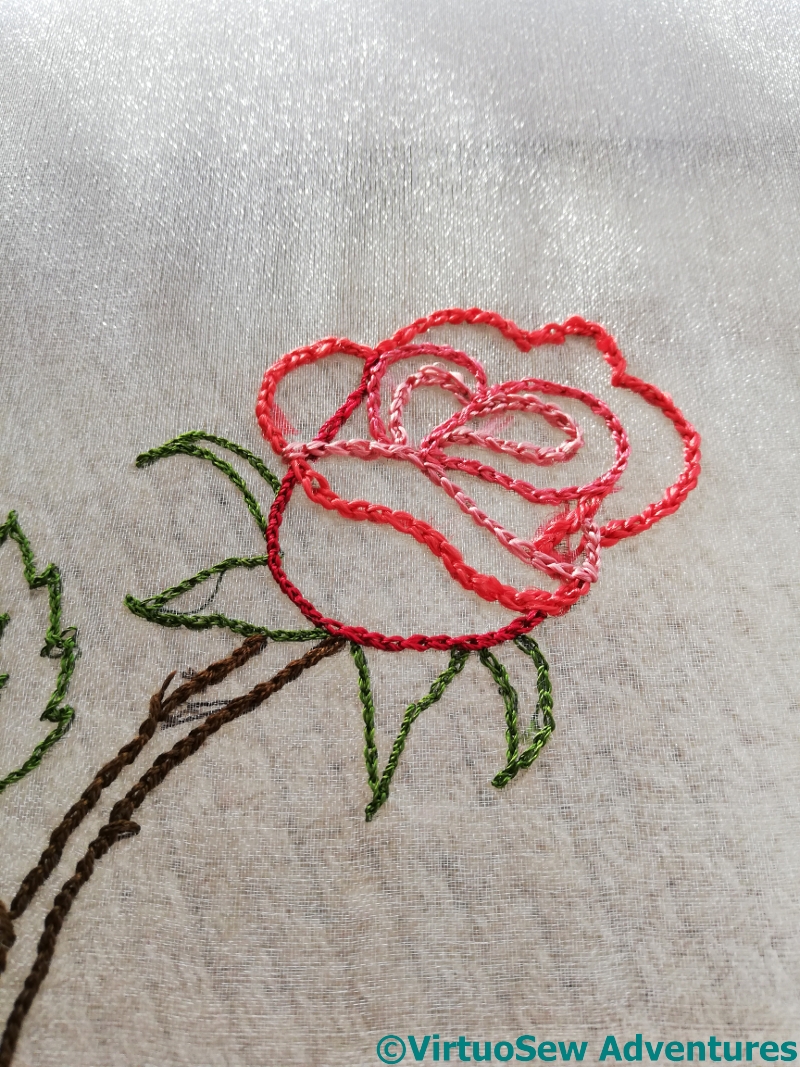
I decided to understitch all the elements, and then concentrate on the rose, stem and leaves.
However, in this photo, you can see not only the finished rose on its stem, but also the understitched lettering, and the beginning of the effect I want, with the sunlight casting a shadow through the gauze to the surface beneath.
Then I had to decide how to stitch the top layer of the lettering.
Horizontal Trial
Slanting Trial
I took a photocopy of my painted design in black and white, printed it out twice, fished out a white gel pen, and began to experiment with stitch direction. I decided that the constantly changing angles of the slanting version would end up terribly “busy”.
So, horizontal it is, then. And I’m using Japanese Flat Silk, which at least makes the satin stitch easier to make work!
And while you think about how that is going to go – Episode Nine of SlowTVStitchery is now up, in which the first edge is reached, and it is agreed that the sight of colours against gold is worth getting up for!! Happy watching, happy stitching, and stay safe.
More progress on SlowTVStitchery – Episode Eight is now up. It contains intimations of dilemmas to come… Enjoy!
View Of Lining
After washing the pashmina for the lining several times (it dyed the water bright turquoise the first three times at least, with no discernible fading in the fabric), ironing both of them, and pinning them together with safety pins, I settled down with my turquoise silk thread and ran simple running stitch quilting along all the gold lines of the design. This was easiest to do, I found, by cutting the thread to a little over the width of the pashmina and starting in the middle of both the thread and the shawl. Once the main lines were in place, I went back to the polychrome band and added the extra lines of stitching to delineate the frame.
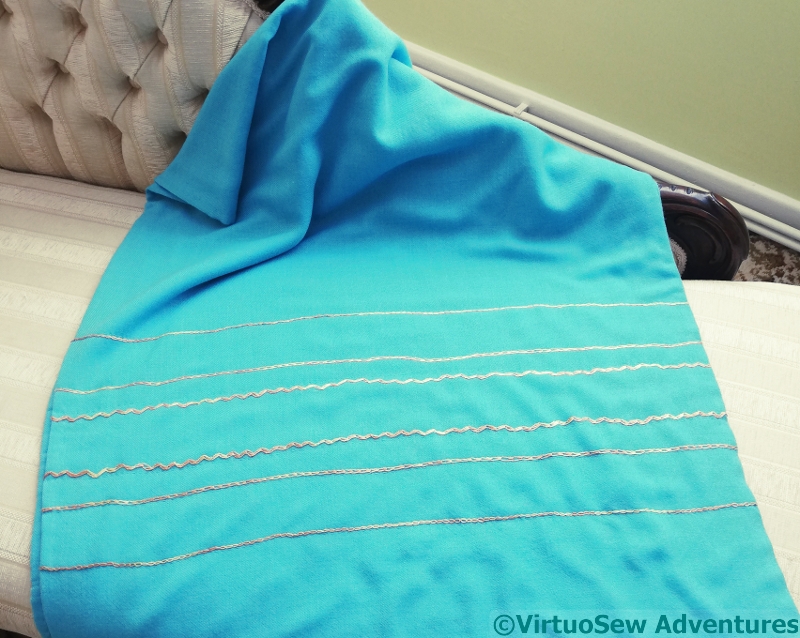
Gold Stitch Band
It’s not easy to see, although I’ve done my best with this photo, but I’ve worked several rows of variegated golden lines across the pashmina on the otherwise undecorated end. I felt, when I finished the polychrome band that the whole thing looked a little unbalanced, and needed something to prevent the impression of something just fading out. I used Wavy Chain, Shell Chain, and Cable Chain, which are used on the other end, too.
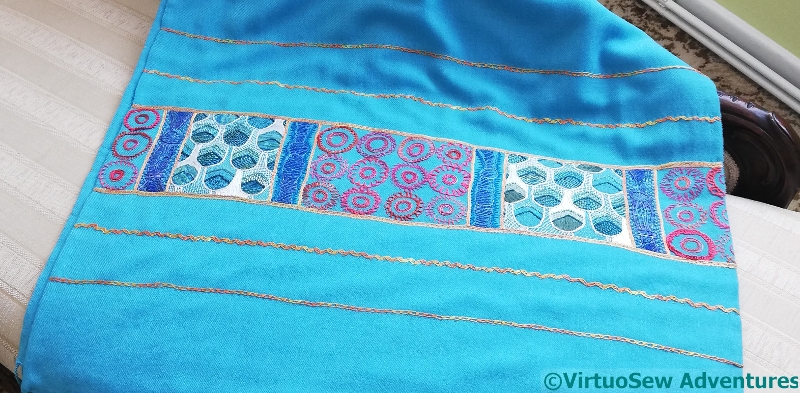
Polychrome Band Laid Out
And here is the polychrome band. You can see that the proportions aren’t quite perfect, but it is very much in the spirit of the StitchOff that the pashmina was originally bought for, in that it is intended to be worn and enjoyed, not stuck up on a wall. It wasn’t quick to do, but that is the fault of my own talent for over complication!
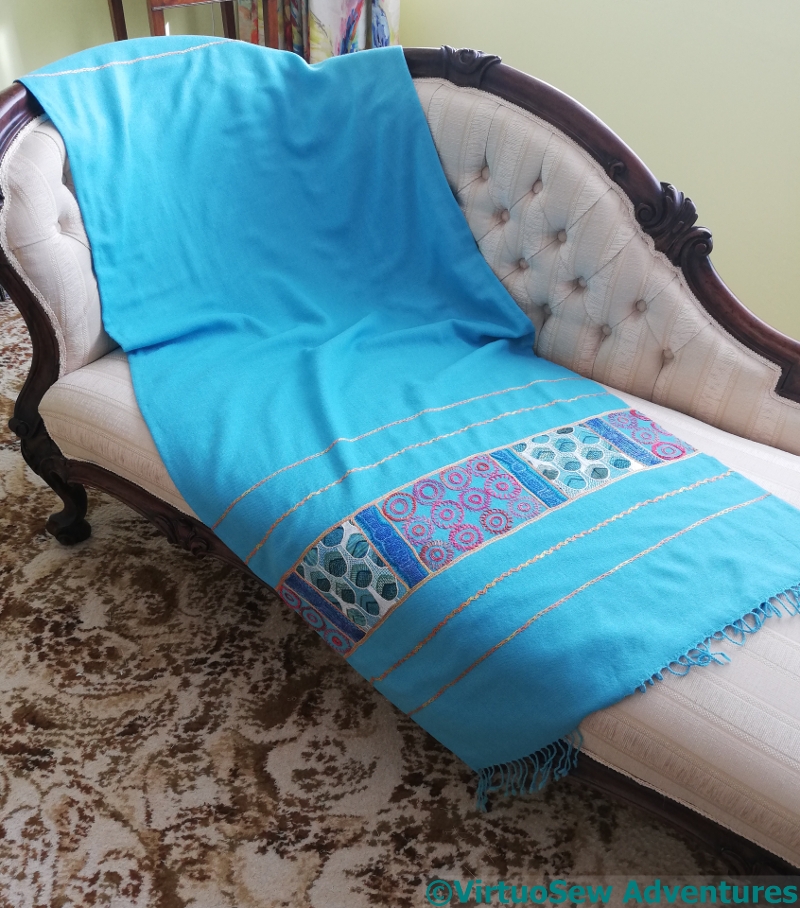
Nefertiti Shawl Finished
At long last, the Nefertiti Shawl is finished and lined, the lining has been controlled with lines of stitching, and the whole thing has been pressed. It should be seriously cosy – the lining is another cashmere pashmina, and it clings slightly as I wrap it around myself. It’s not an easy piece to photograph, hence the languorous drape over the sofa!
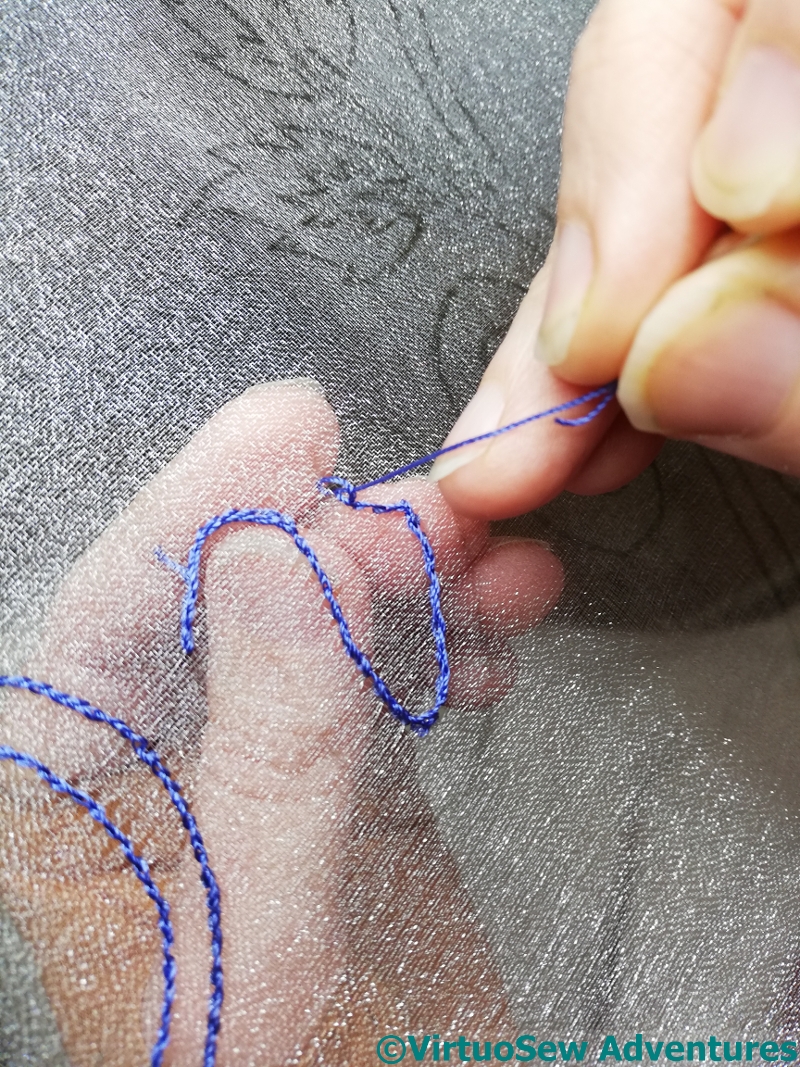
I found a gauze with a slight glint to it, stretched it on my frame and drew the design on to it. And at this point, the primary challenge I was going to face made itself felt – finding the angle from which to see the lines on the fabric, so that I could do the stitching. Add in the glint on the fabric, and sometimes I could see the lines, sometimes I could see the fabric, and sometimes I wasn’t sure I could see either… I knew it would be this difficult, by the way, but I thought the end result would be worth it!
Glint On Fabric
The stitching is going to be very simple, mainly satin stitch (yes, I know!) because the main characteristic I want here is the magical effect of the embroidery floating above the backing surface.
Obviously, the first thing to do was to outline every element. I’m using a mixture of silk thread, some vintage, and some from Thistle Threads courses.
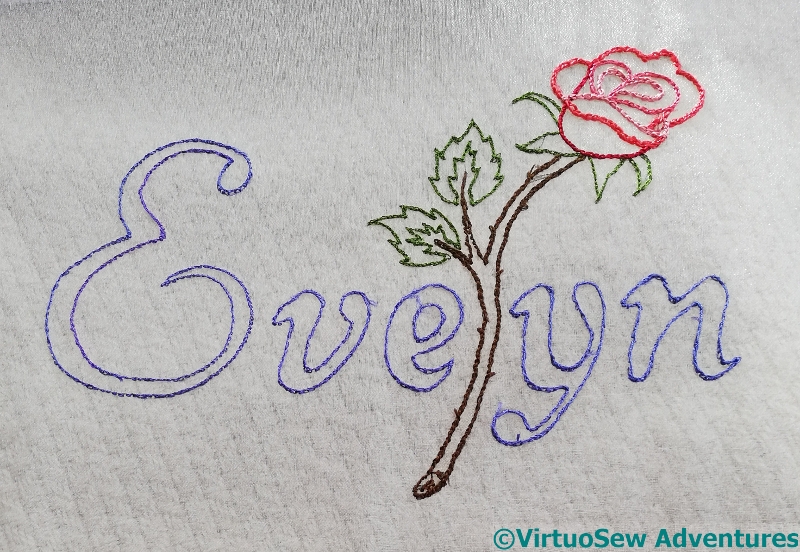
Evelyn Outlined
So here you are – all outlined, and the thorns already in place on the stem. You can see the fabric I have over my worktable through the gauze in this picture, and you can see that glint in the sunshine as well.
The next episode of SlowTV Stitchery – Episode Seven – is now up. It explains why “Slow TV Stitchery” and offers memories of an astronaut. I hope you enjoy it.
Earlier this year a dear friend and his wife produced a baby girl, who they’ve named Evelyn Rose. We were, of course, thrilled for them, and sent many congratulations, and even managed to speak to them (they’re in a different time zone). During that conversation, they said, “We love what you do, and we’d love you to do something for Evelyn!”.
Design Sketch
Well, I didn’t have another commission looming, and the Faience Necklace wasn’t framed up ready to go yet, so that fell very pat. I asked what they had in mind, and this is the sketch that came back.
Painted Roses
That gave us a lot to think and talk about. I played with a variety of typefaces, and finally settled on a cursive style. Then I thought about roses. My first thought was stylised canal art roses, but they never have stems, so I thought some more. Unusually for me, at this point I got out my paints, found some photos of roses, and started experimenting with simplifying them and really understanding the forms of them and the way the petals fold.
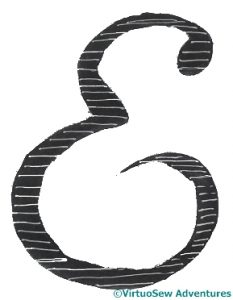
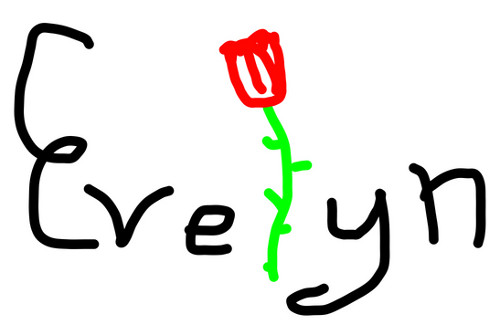
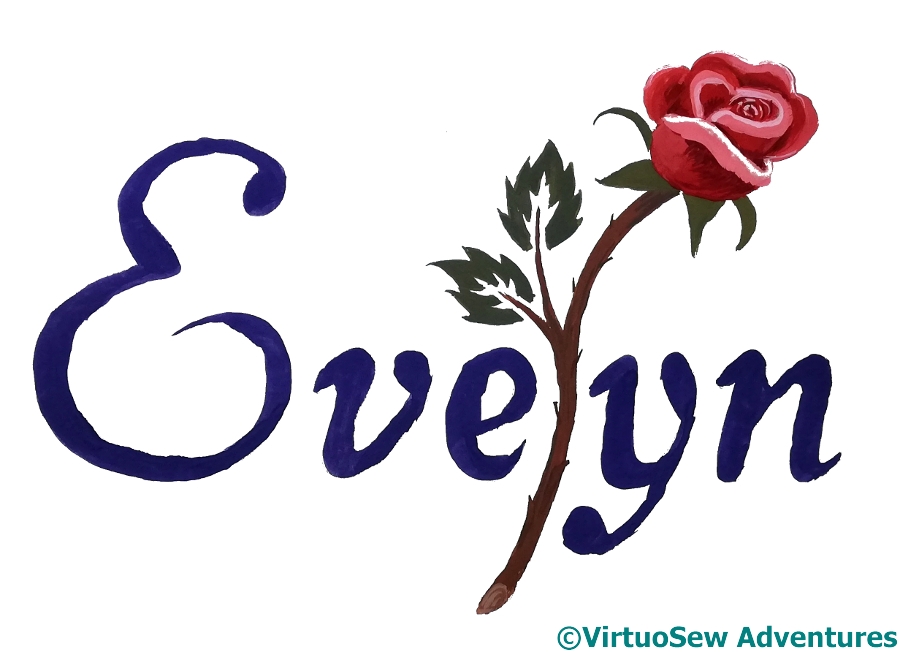
Design for Evelyn Rose
I ended up with this basic design – the name in an elegant cursive font, and the “l” replaced by a single stemmed half-open rose. Then I thought of the embroidery on gauze I experimented with a few years ago. It seemed to me that this was a perfect opportunity to play with this technique, and it has the advantage of producing something sufficiently grown up that in 20 years time, Evelyn probably won’t be embarrassed to have it on show…
Episode Six of “Slow TV Stitchery” is now up. Please take a look, and ask me any questions that occur to you…