Now, if your memory reaches back to the beginning of Akhenaten (no surprise if it doesn’t – that was in 2017!), you may recall that at the very beginning there were four layers – the calico, polyester wadding, light cotton padding, and then the silk. The first stage was then to outline Akhenaten and cut away all of the light polyester padding that wasn’t behind him.
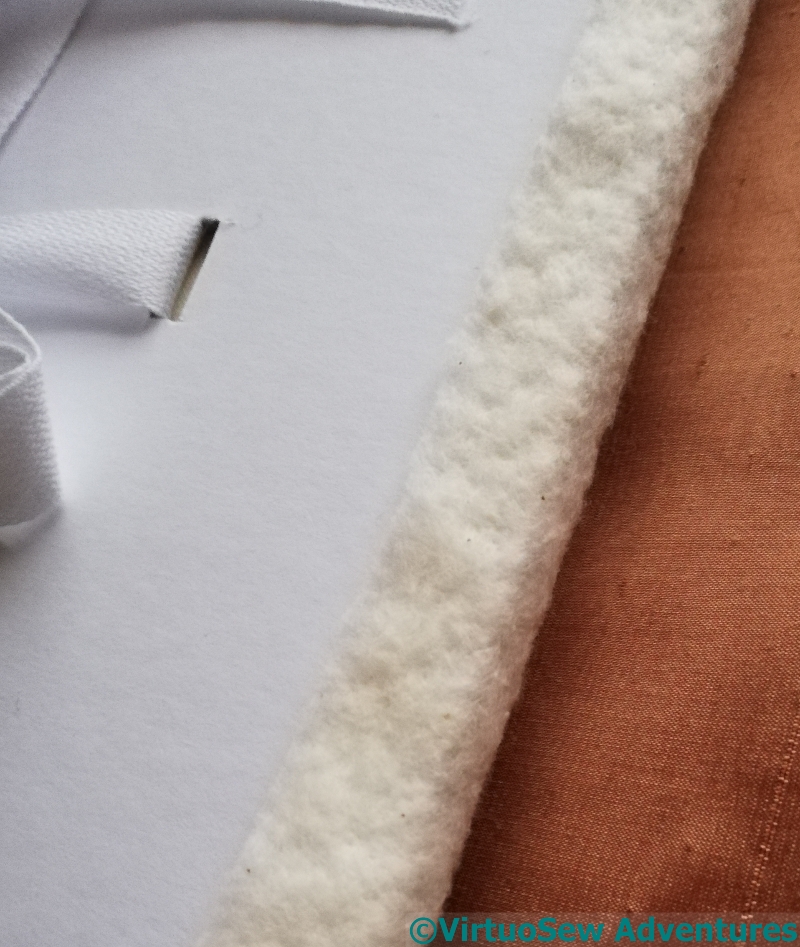
So once the calico was laced into place, the next layer to be dealt with was the cotton padding. The eagle eyed may have noted that there’s a new piece of card here. That’s because this card has slots in to carry cotton tape. I’m intending to lace the finished panel to the middle of a larger fabric covered panel, and these tapes will help to support the weight. I hope. This is not a method of mounting I’ve ever seen before, and I’m making it up as I go along!
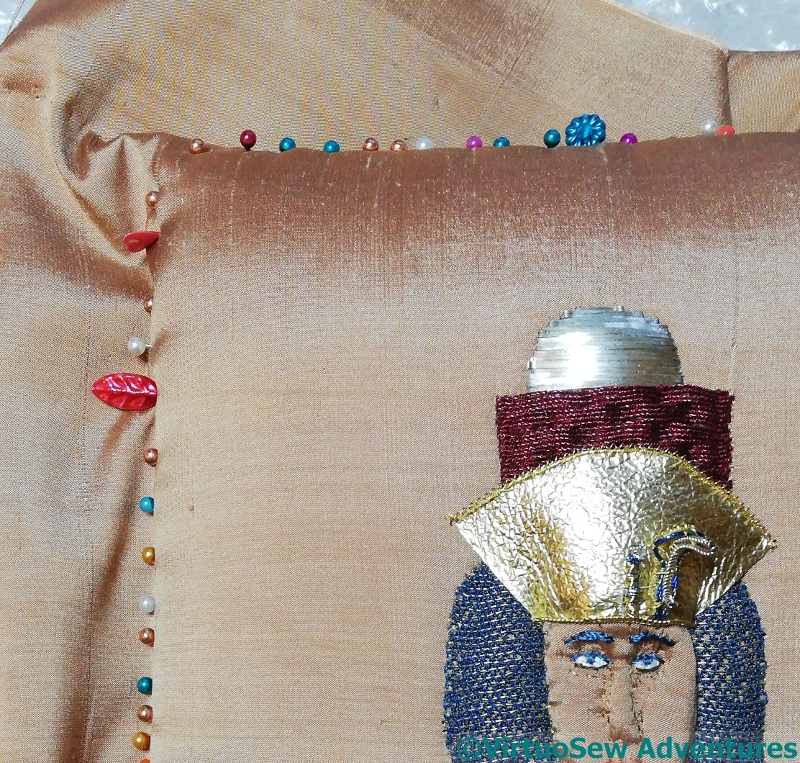
Copiously Pinned
Then I pinned the silk into place, carefully, and not too tightly. Once I’d finished that, I turned over the whole thing and breathed a sigh of relief – the uraeus is still undamaged!
Then I wrapped him in acid-free tissue paper and put him away in a box. There are two reasons for this – firstly, because fibres and fabrics, particularly delicate ones, don’t like prolonged manipulation (yes, honestly, fibre in spinning mills is often left to “relax” between processes!), and secondly, because I’m still thinking about the details of the next stage.
The next stage is to fix the silk in place, and I’m still trying to work out how to do that without tangling with the cotton tape. I may decide to use double-sided sticky tape, but that is more likely to degrade and give way than lacing, and I really don’t want to do this job twice!
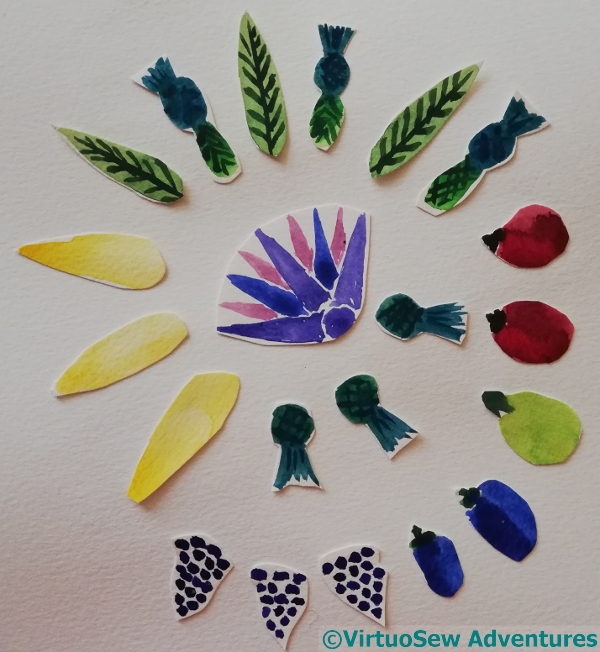
When, after my holiday with the Hounds, I came back to the Faience Necklace designs I’d created with my painted cutouts, I found that the version I’d liked then no longer appealed. Instead, it was the various spirals that sprang out at me, so I began to play with them a little more, tweaking and varying the design.
I must remember paper cutouts as a future designing method. It makes it much easier to play with a lot of variants in a relatively short space of time!
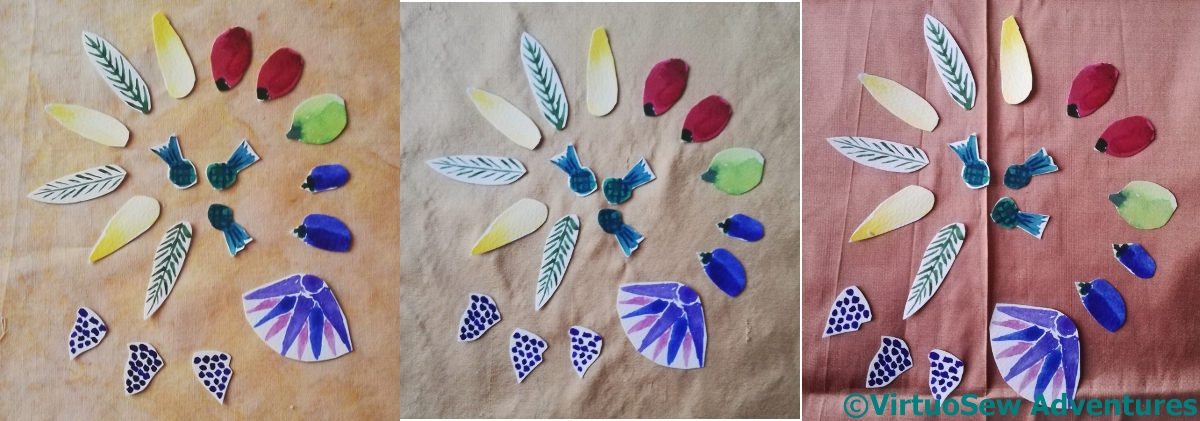
Various Fabrics
Then I had to decide on a fabric. No, I hadn’t ironed the silk on the right. This was very much an improvisation! From left to right – a quilting cotton I used in “Loading The Felucca“, a leftover of the silk I used for the “Head of Ankhsenpaaten“, and a silk in a shade very similar to that used for the “Colossus of Akhenaten“. In the end I decided that the sandy print on the cotton would help to evoke that sand in which they were digging, and framed up. I’ve put a calico backing in in the frame, and attached the cotton over the top.
Outlining Done
Since it’s winter, I’ve been working under my craft light, and it does rather wash out colours. I’m using Japanese flat silk (not sure why, it just seemed to be what I wanted to do), and I’ve started by hand-twisting some fine thread and outlining each element in reverse chain stitch.
This does two things – it covers the design transfer lines and it allows me to think about how I’m going to tackle it. Originally I was going to work each element in satin stitch, to echo the high gloss of the faience, but now I’m beginning to think more and more of using stitch to echo the natural elements the faience depicts. Remember what I said, when I finished the Hounds, about returning to my first love, the effects of stitch and thread?
The Spiders Web Wheels in this case aren’t Spiders Web Wheels at all, but a needlelace variation. I think they are both worked in a spiral, and I’m not absolutely sure that they are the same: the slight difference in appearance may be purely a result of a different working tension or spacing.
I’ve only just realised that the small leaves aren’t worked stacked fly stitches, but in close, long-armed feather stitch. In fact feather stitches and their variations show up a lot in Grandmama’s embroidery – she must have enjoyed them!
I don’t think it has ever occurred to me to work needlelace stitches in bands, as she has here, but I can see myself trying it, one of these days! I do have a book, somewhere, full of needlelace stitches, ready for when I have a suitable project and the opportunity to Experiment…
Very Tiny Roundels
When I was working on the lifebelts for the ship in “Leaving The Tyne”, I used the technique of a buttonhole wheel on thread, and discovered just how fiddly they are to make. Grandmama’s are even smaller and fiddlier, and sewn onto needlelace and not fabric!
The two embroidered leaves in the middle remind me just how effective simple stitch length variation can be. Much as I love my complex, textural stitches, sometimes all you need for a border is a blanket stitch variation!
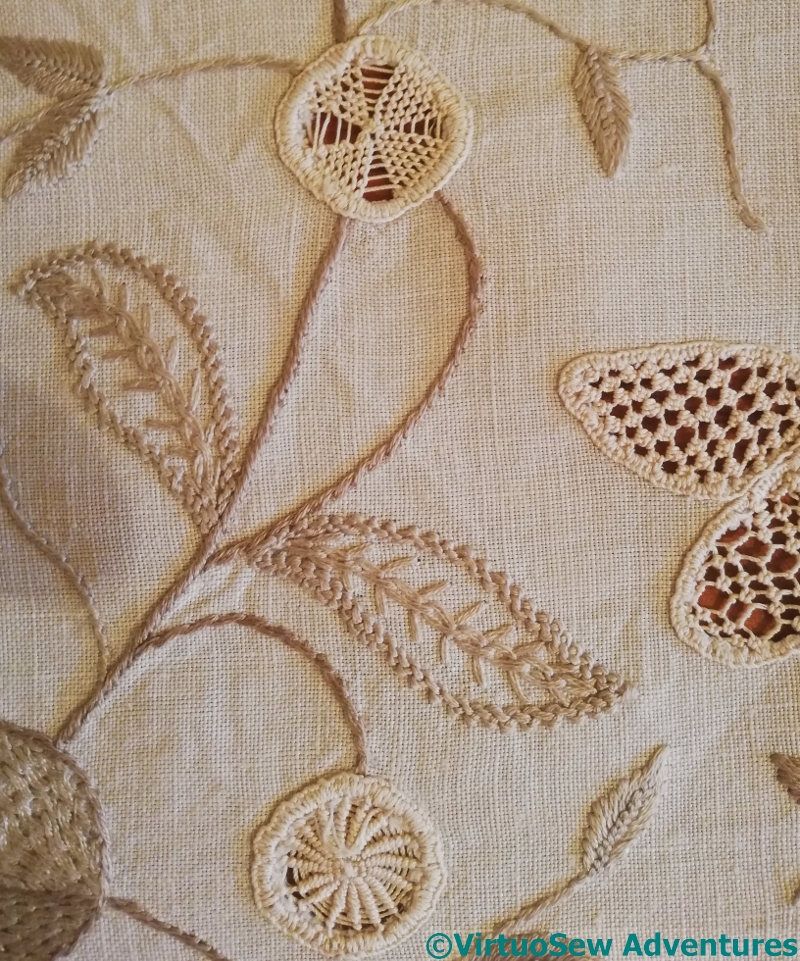
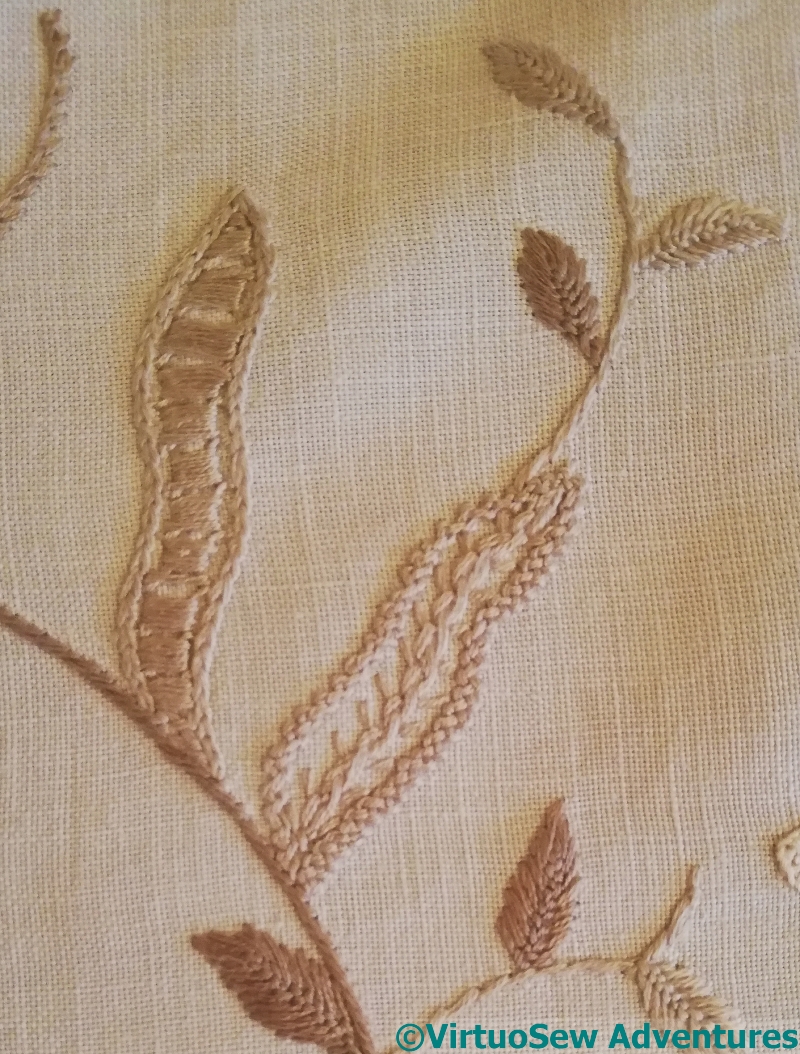
More familiar leaves
The variations possible to fill a circular shape seem to be endless, don’t they – a sort of beginning of a Maltese Cross at the top, a really dense Spiders Web at the bottom.
And this time, I think the two central leaves are in Wheatear Stitch, outlined with very close and small feather stitch outlines.
I really must try some of Grandmama’s stitches one of these days. Somewhere in the house I have the notes she took on a course, and I’m pretty sure they included sketches of stitches I haven’t seen in all my shelves full of needlework books….
I’ve used stranded and floss silks, in variegated and plain colours.
The stitches are Woven Stitch, Bokhara Couching, Trellis Couching, Burden Stitch, and Darning Stitch, and wherever it’s possible to use two different threads in a stitch, I have done so, usually contrasting a plain with a variegated colour, or (sometimes and) a stranded with a floss silk.
Oh, I forgot – there was stitch orientation, too – vertical, horizontal, right-facing diagonal, left-facing diagonal!
Second Green Panel
Okaaaay. That made the “duality” idea a tad daunting, but not half so confusing as starting without any plan at all!
Anyway, the result is that the areas of high stitch density and high reflectance have been moved around a bit, and the details of the patterning have changed a bit, too.
I’m going to drape the panel somewhere I can see it for a couple of weeks, to be sure I’m happy with how it’s turned out, and then I’m going to line it with another pashmina. I’m planning to stitch in self-colour along all the gold lines, which will provide a slightly quilted look, and control the fabric a bit better, too.
Not to mention, making for a seriously cosy shawl!
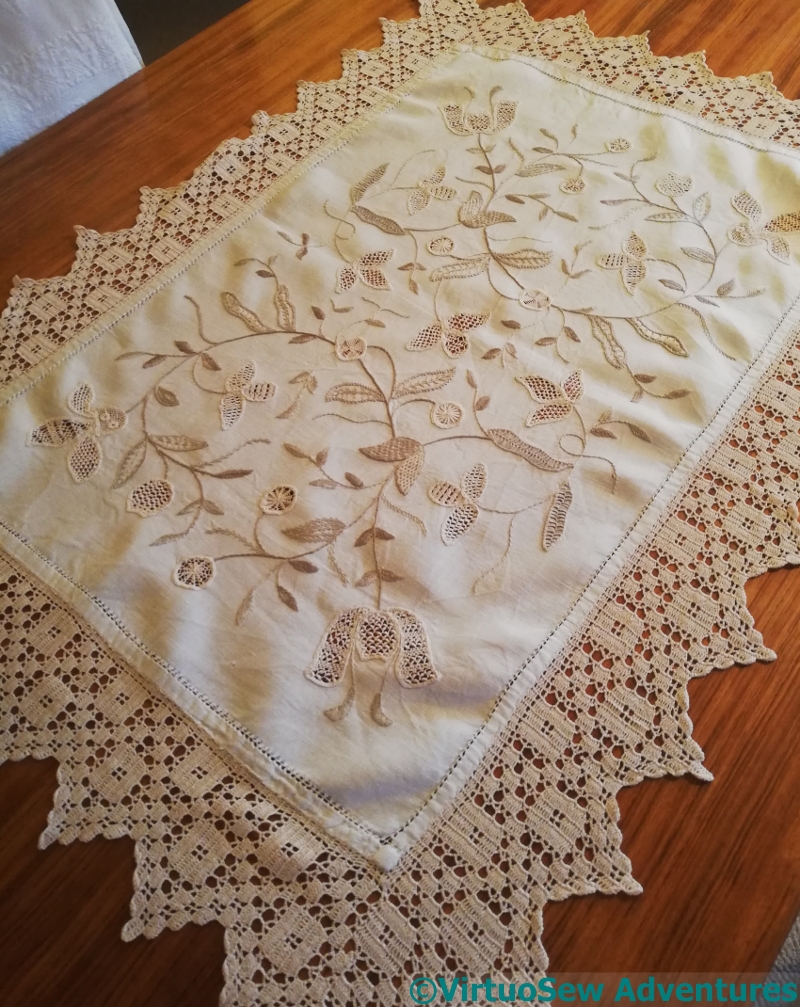
You might recognise some of the motifs on this teacloth..
Grandmama worked it, we think during the War, and it involves some motifs I used for the Coat of Many Colours.
In fact, even if I don’t use the exact motif, this teacloth, and a tablecloth (a sort of extended Director’s Cut!) are frequently the first places I look for inspiration when I am trying to put together a design for something stylised but floral. I suspect Grandmama would be laughing like a drain, as the family puts it, at the mere idea of being an inspiration all these years later!
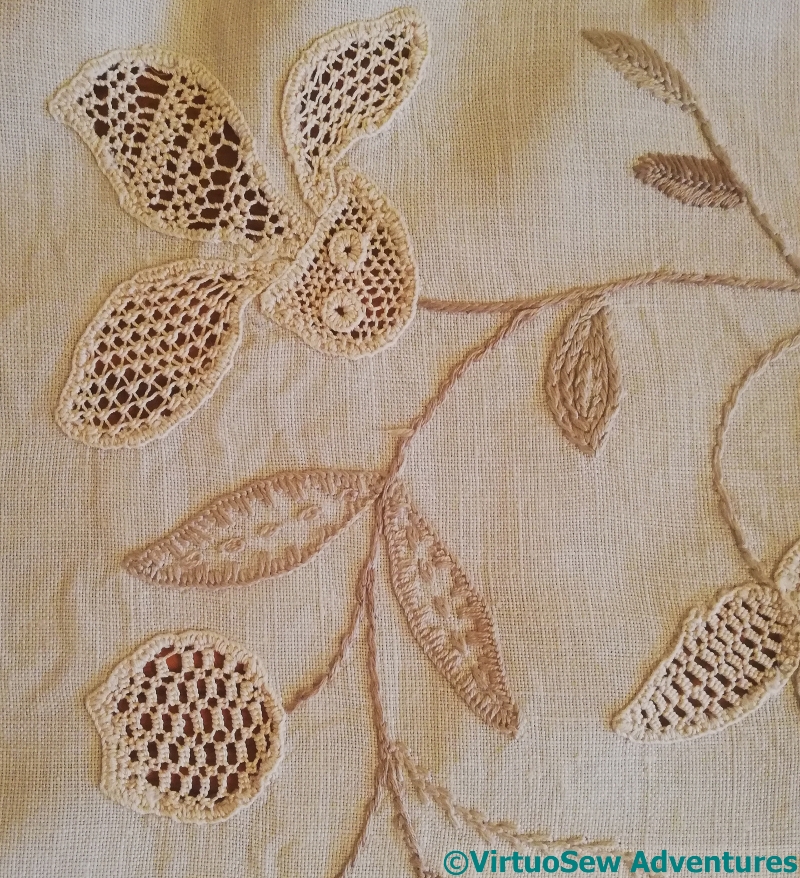
Two leaves detail
I’ve also learned an even greater respect for textile and embroidery historians, examining and cataloguing design and stitch use over the years. It’s all too easy to assume, complacently, that one’s first assessment of a stitch was correct, and I learnt when I looked at this photo that I was definitely wrong about the second of these two leaves. It might be Wheatear, but I suspect I will have to look at the back to be sure.
And I’m far from convinced that Grandmama didn’t simply make up the other one as she went along. It’s a whipped or wrapped Something, but it looks like a more complex composite stitch to me…
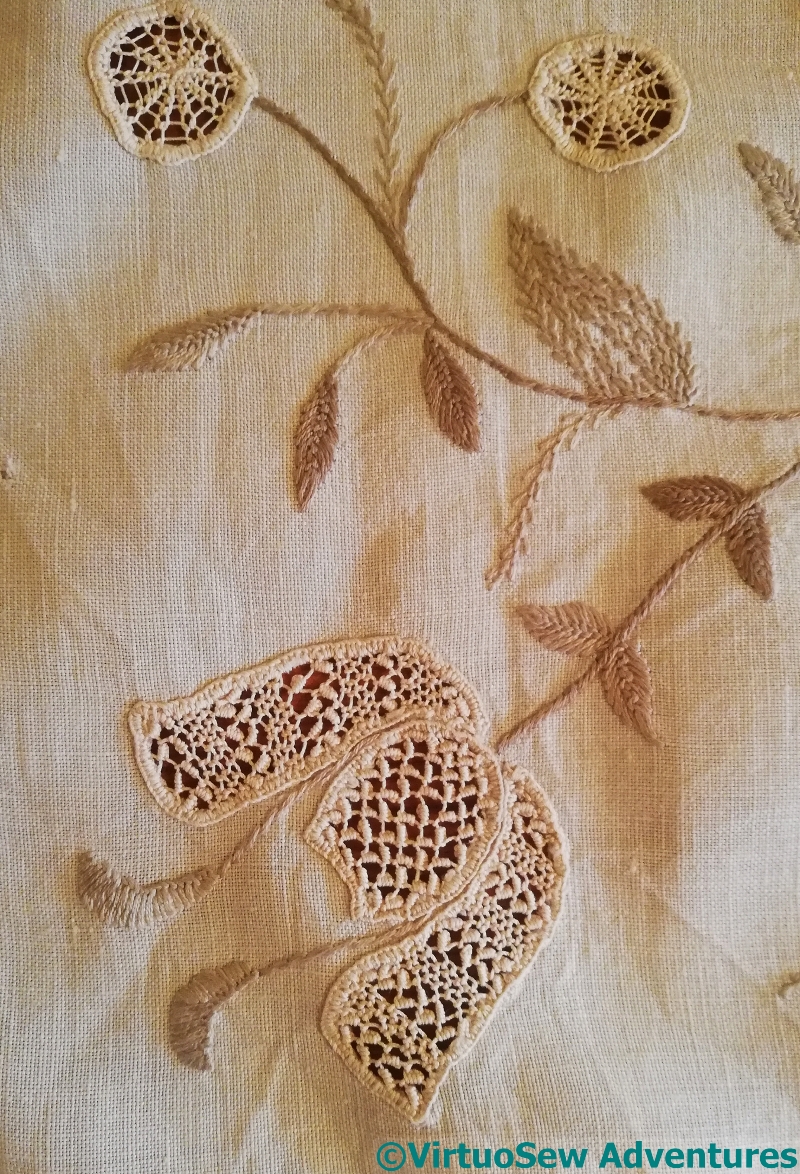
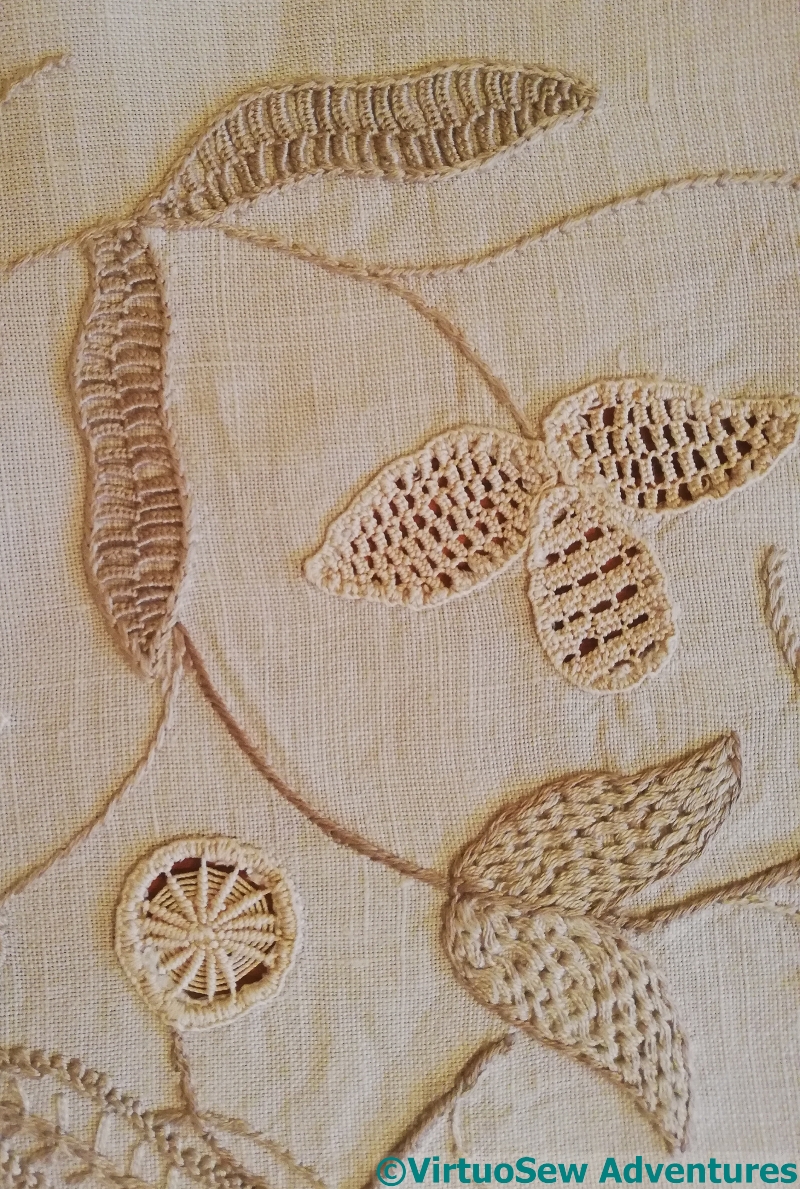
Needlelace variations
Whipped Spiders Web Wheel as a needlelace stitch, a sort of floral motif of needlelace, and a pair of leaves in the top left that I thought for a moment should have been cut away. However, looking more closely (aren’t smartphone cameras really useful on occasion!), I see that the edging isn’t buttonhole, but chain, so, no.
And that pair of leaves in the bottom left? They’ve been puzzling me for a while. The stitch looks a little as though it’s a whipped or wrapped stitch. Maybe stem stitch worked over foundation stitches?
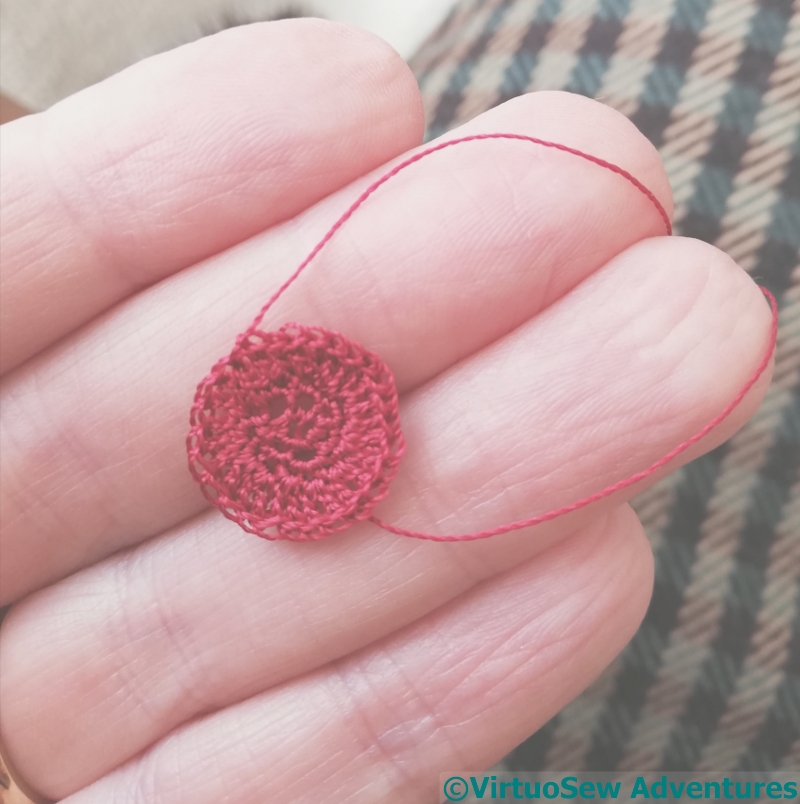
The point at which the four seam treatments joined looked a little untidy, so I decided to cover it with Something.
After some thought, and given that I don’t have a box of ready-to-go trims and buttons for the purpose, that Something turned out to be a disc crocheted using Soie Gobelins, a fine steel hook, and my magnifier.
I felt a little cross-eyed when I’d finished, in spite of the magnifier, but satisfied with it, all the same!
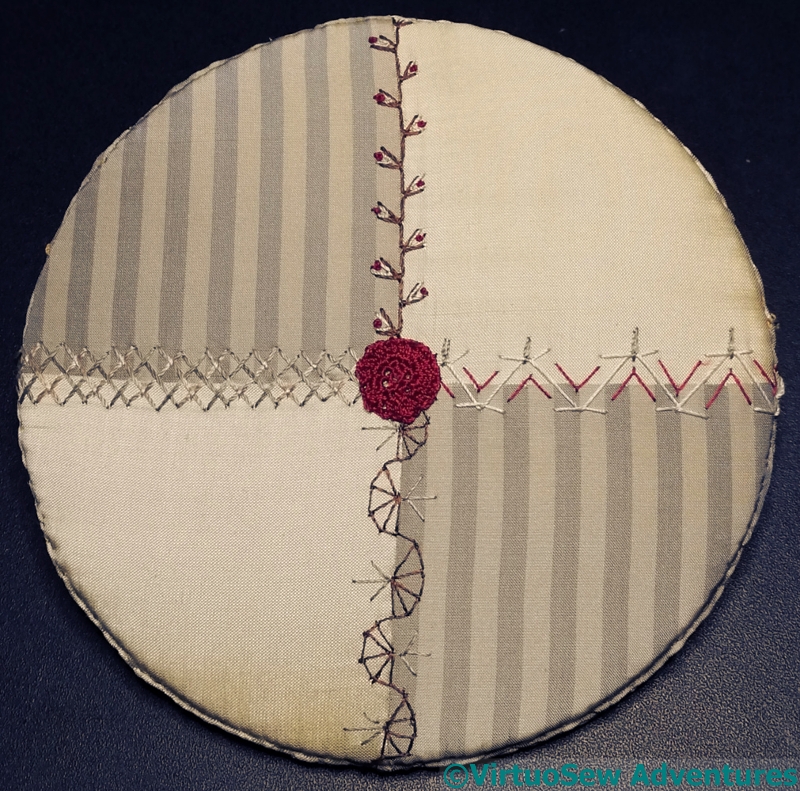
Tame Crazy Patchwork
Then I only had to attach my little disc over the centre point to camouflage the meeting point of the seam treatments.
Once the Tame Crazy Patchwork was completed, I gathered it over the padded disc of card that matches the one the Robin was stretched over, and ladderstitched the two discs firmly together.
Using silk sewing thread. My, how my attitudes have changed since I’ve done all those Historical Embroidery projects!
I need to provide a hanging loop and cover the edge with cord, and then the Robin will be properly finished at last!
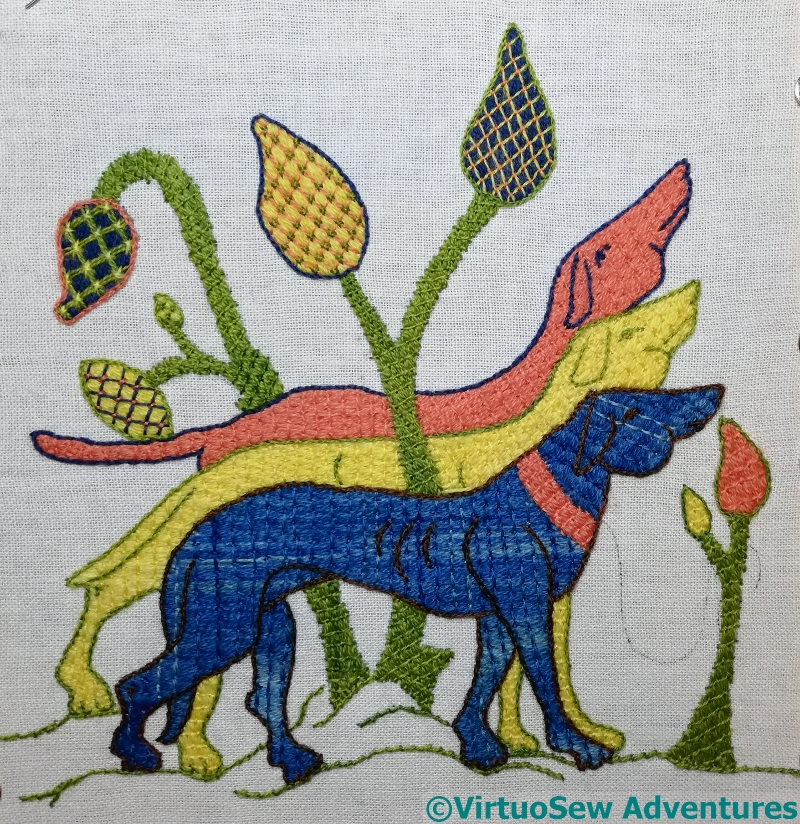
The next task was to work the outlines and the ground.
Each hound is outlined in a contrasting colour, as is each leaf shape.
The outline colour is also used for the little details – mouth, eyes, ears, and at the point at which I took this photo, I’d stitched all the ground (in twisted chain, which I don’t think is at all historically accurate, but it was fun!) but not yet outlined the tree trunks.
More Variations
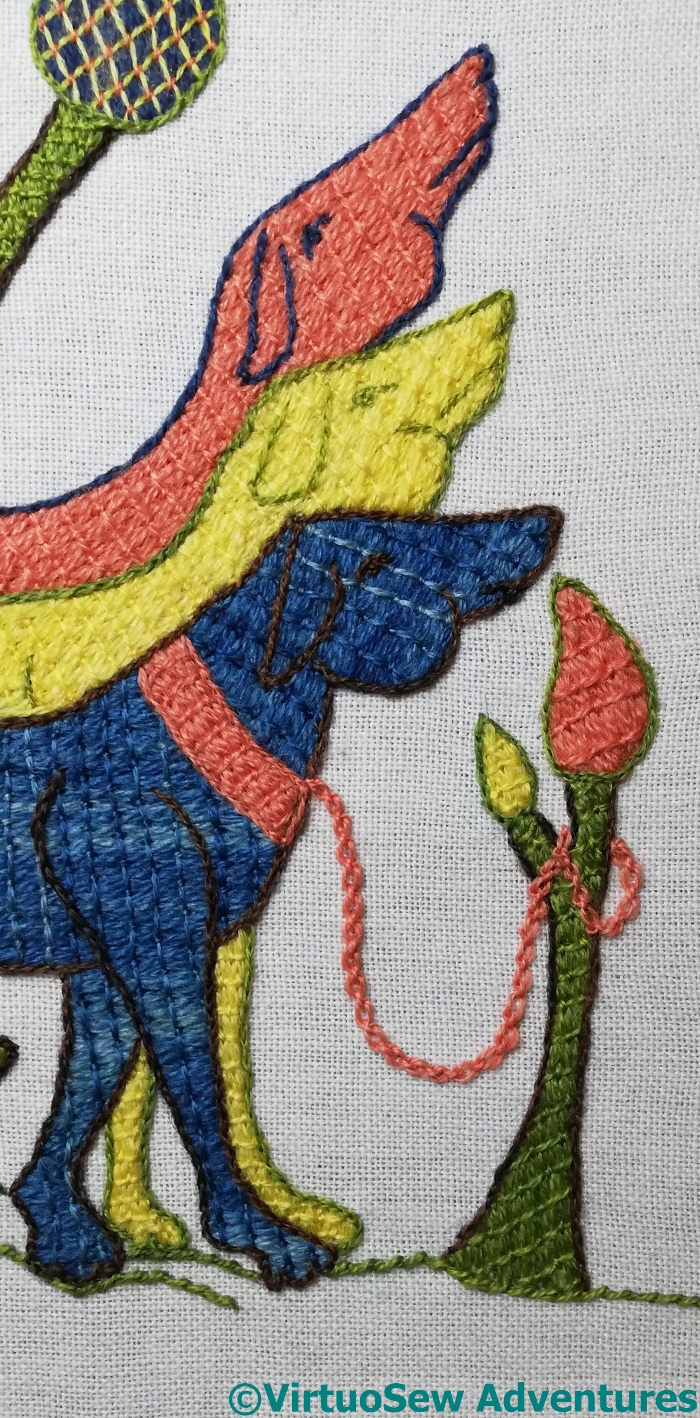
This photo gives a sense of the effect of the chocolate brown outlines around the green trunks, and affords you a nice close up of the leash on the front hound, worked in cable chain stitch, very small and neat. This is another one where I doubt the historical accuracy, but I was so pleased to find myself thinking up ideas like that I was in no mood to spoil the fun.
I don’t usually go in for such overheated ideas as New Year Resolutions, working on the principle that if I want to change something, I don’t hang around waiting for the new year to do so. However, stitching the hounds has given me something a bit like one – I need to go back to my first love, to the effects of stitch and thread, and the use of them to denote the textures or the ideas I want to convey. Let’s see how that pans out!
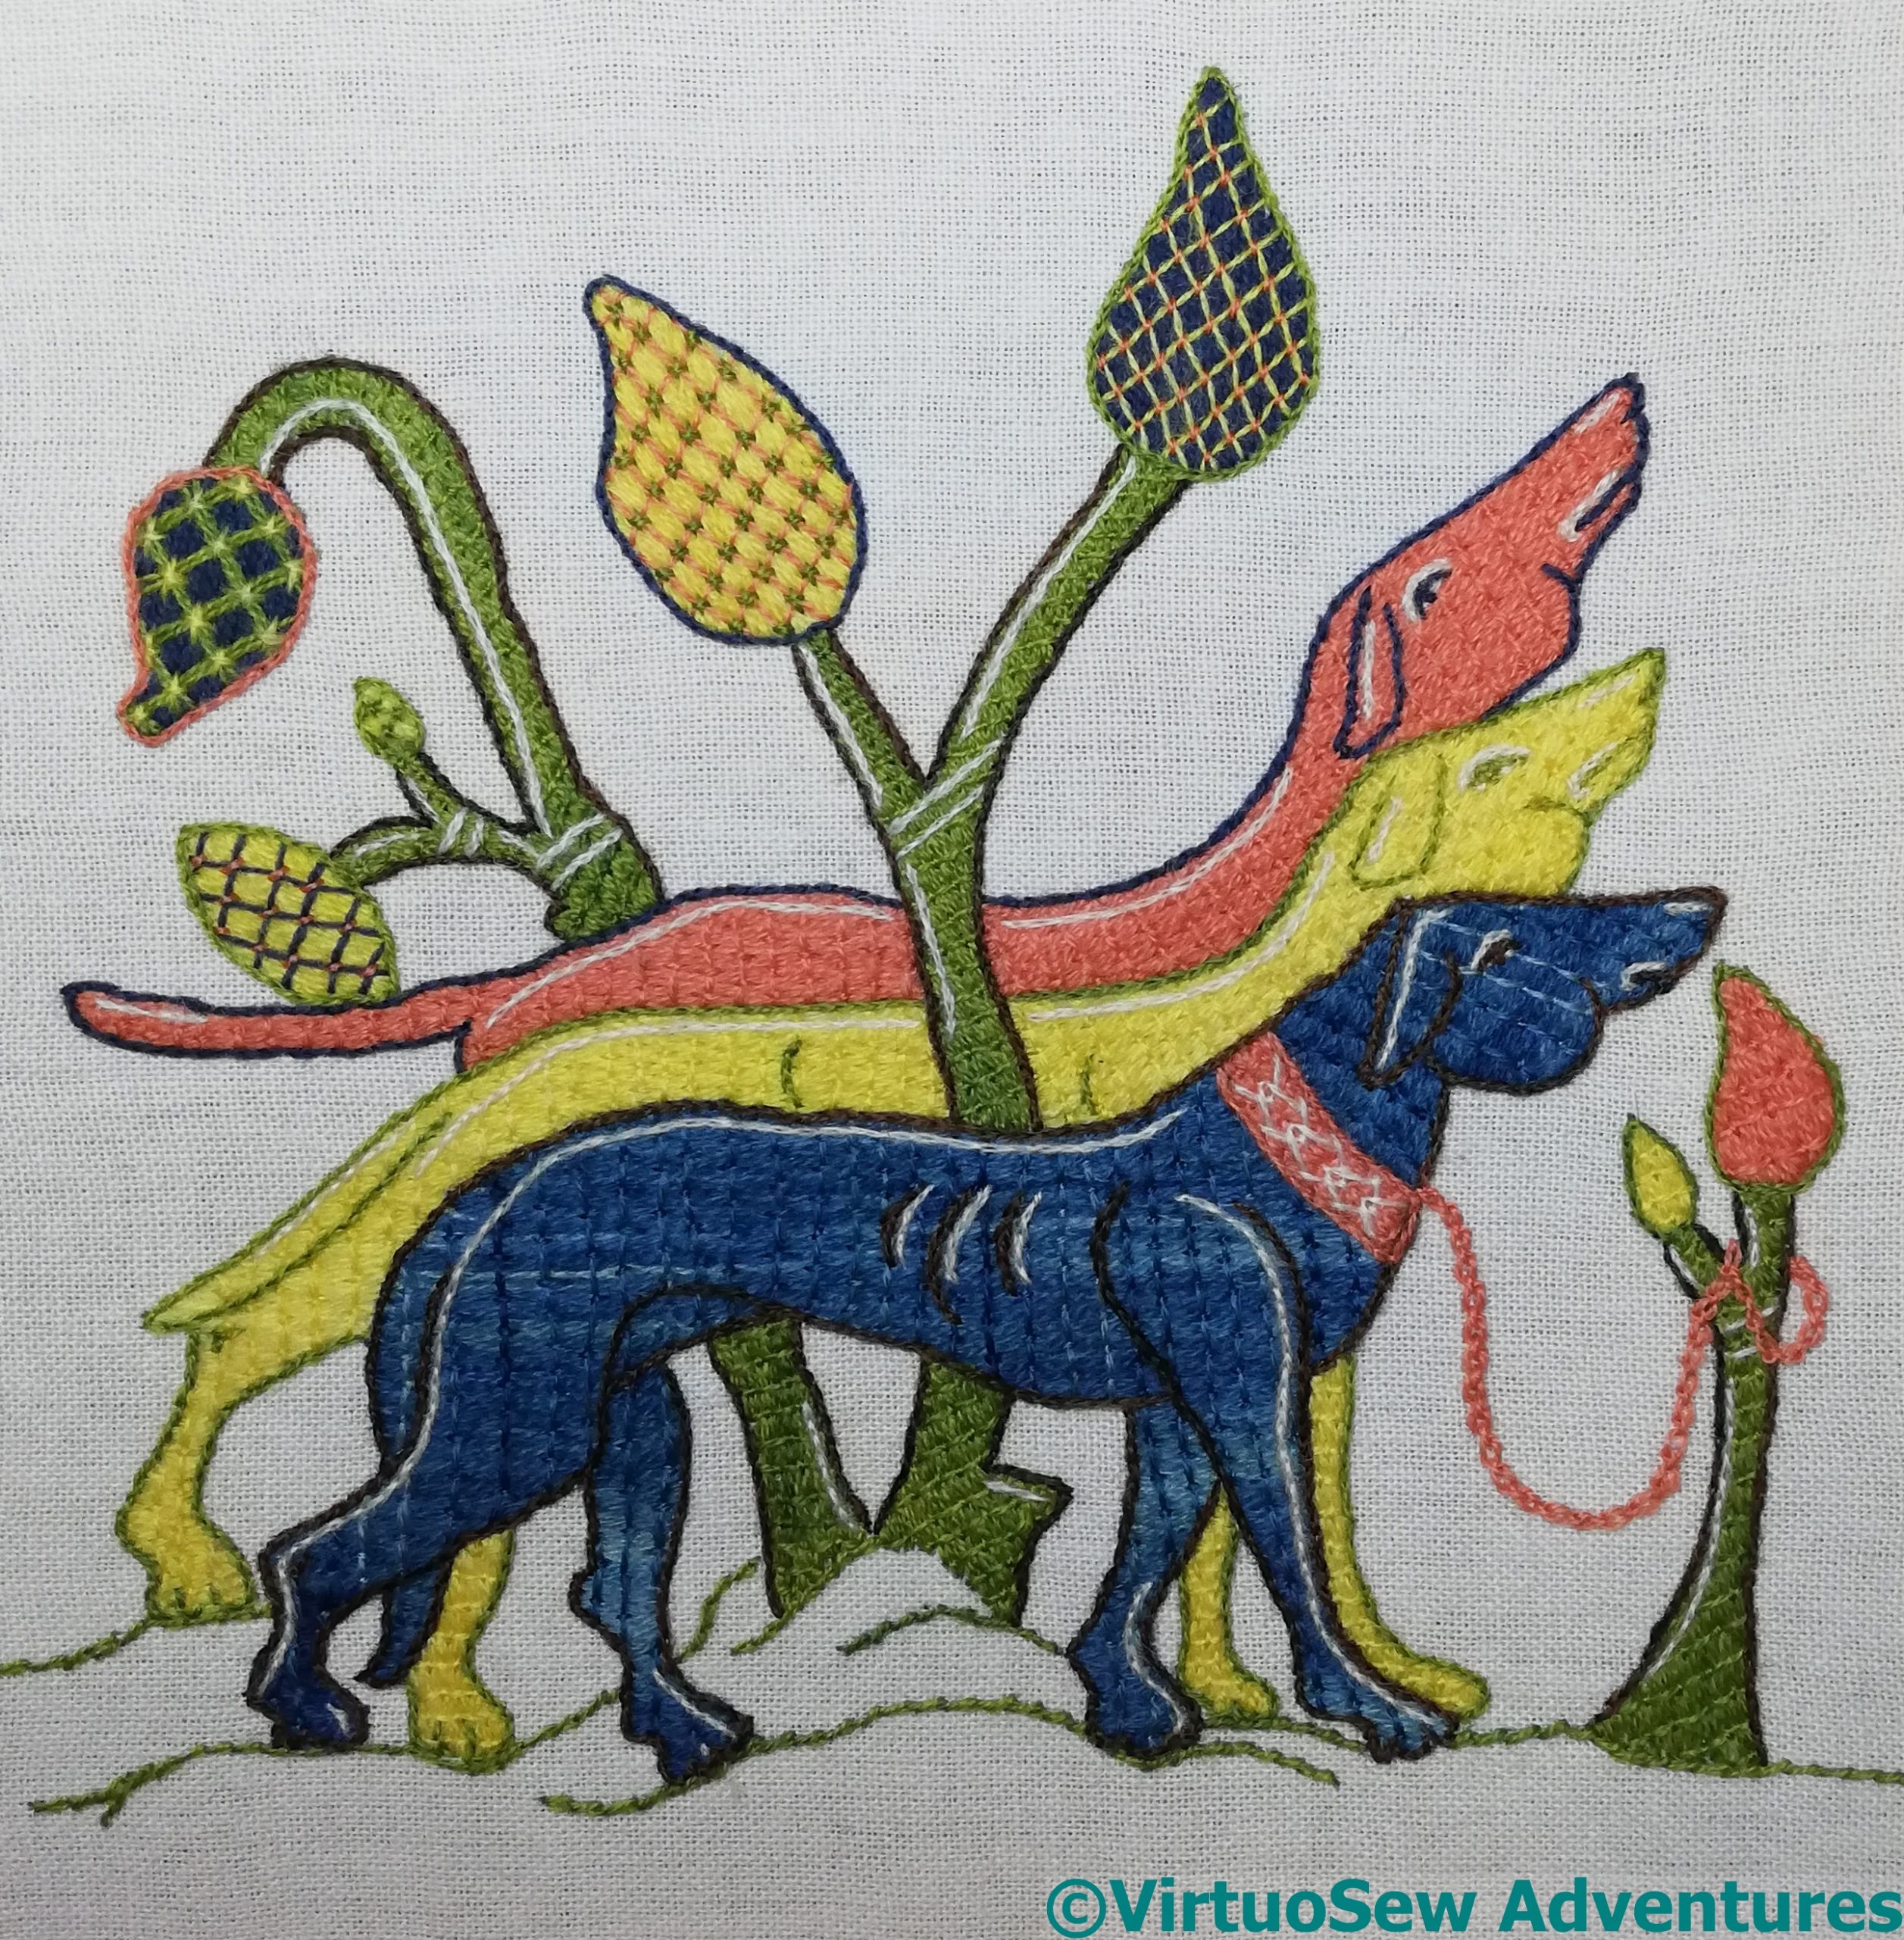
Highlights And All
I give you The Three Wise Hounds, design by Tanya Bentham, stitched by me. I didn’t quite finished them by Twelfth Night, but since Epiphanytide lasts until Candlemas, on the second of February, I think I can get away with it!
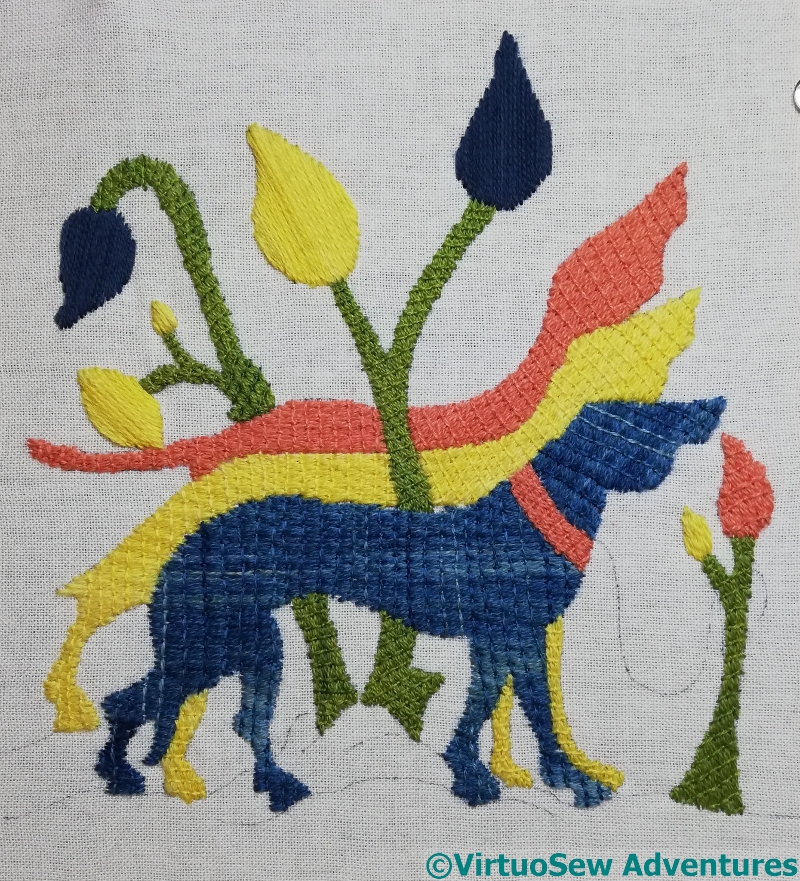
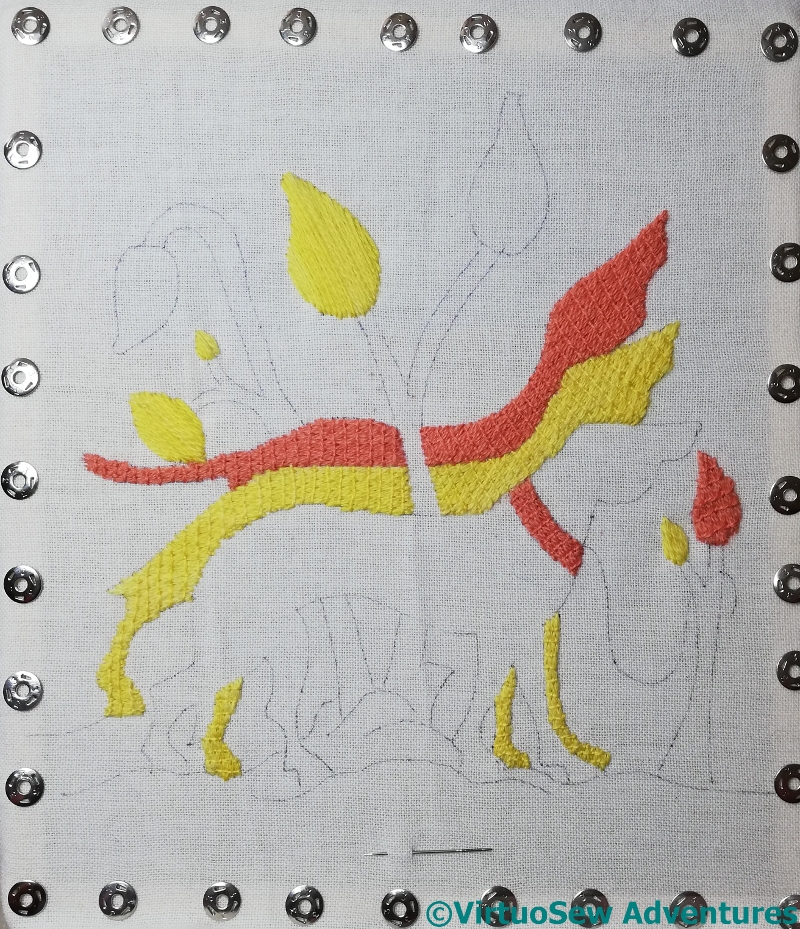
One of the delights of Laid and Couched work is the slight sense of a return to childhood, but with added skills, as it were. The first layer consists of the threads laid and couched (hence the name), and is rather like “colouring in”: it produces a layer of flat colour, which will be tweaked and detailed later.
Or in this case, not quite flat colour. The thread Tanya includes is wool that she has dyed herself using natural dyes, and there are unevennesses in the colour that only adds to the charm. As you can see from the two large blue leaf-shapes. I was a bit over-determined to pack in the stitches on the frontmost hound and didn’t have thread leftover for the leaves. This being a holiday project, I went rootling in my stash for an indigo wool, and they only one I have is both much darker, and a different structure. But that will matter less when the details are added, so onwards!
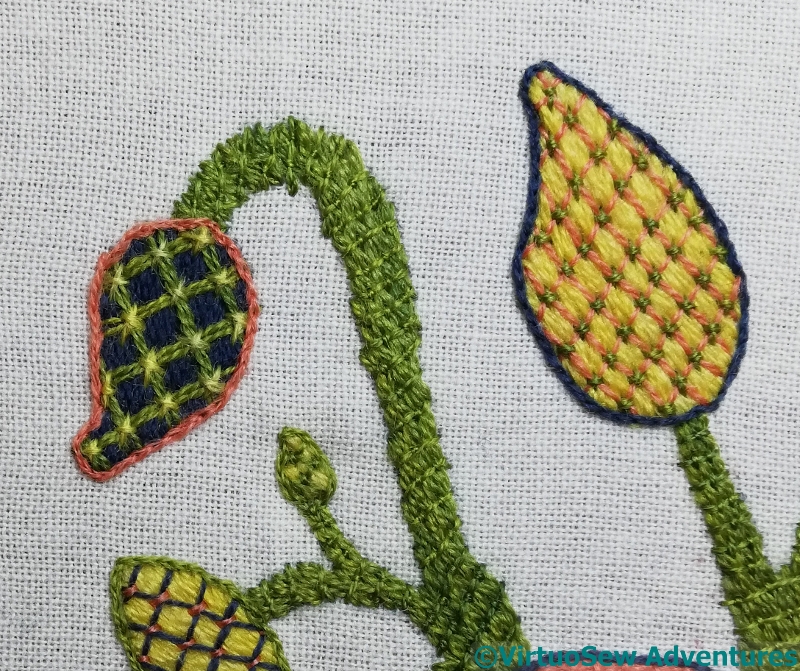
Trellis Variation
Each leaf-shape used the other colours in a different way – as grid, as outline, as couching stitch. The outlines are in split stitch, and each of the grids is couched slightly differently, with a horizontal stitch, a vertical stitch, and upright cross or a diagonal cross.
In addition, I experimented with grid spacing for the blue one shown here. I like this variation, even if it does produce a rather loud plaid effect!
I was quite glad to find the variations slipping in. They might be a sign that I’m recovering from Akhenaten!
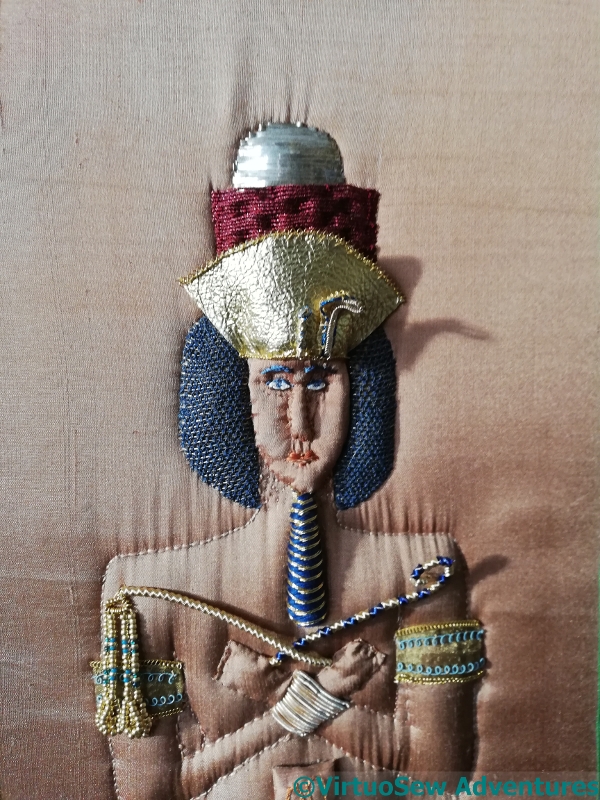
Akhenaten has been glaring at me autocratically (well, that’s in character, at least!) from the far side of the living room ever since I finished him, and I decided he needed to be off the frame and hidden away for a while. At the moment, I’m rather out of love with him, not even sure he’s come close to my original conception. I need to hide him away so that I can move on Other Things.
I took this photo just before I cut the thread holding the fabric in place, and you can see from the shadows just how strongly raised some elements are.
I think he’s looking pretty anxious about what lies ahead, as well!
Bubble Wrapped
I don’t think Akhenaten can possibly be as anxious as I am. We have a phrase in our house – “exporting stress”. There was a lot of that going on. In fact, I banished The Australian from the room lest I prove contagious!
However, I read, a little while ago, of using layers of bubble wrap to protect a raised piece while mounting, with holes or popped bubbles to alter the amount of padding so that the most highly-raised elements don’t also suffer the highest pressure. Considering the fragility of the uraeus, that’s important.
So I decided to give that a try. I’ll report when the whole process is finished!
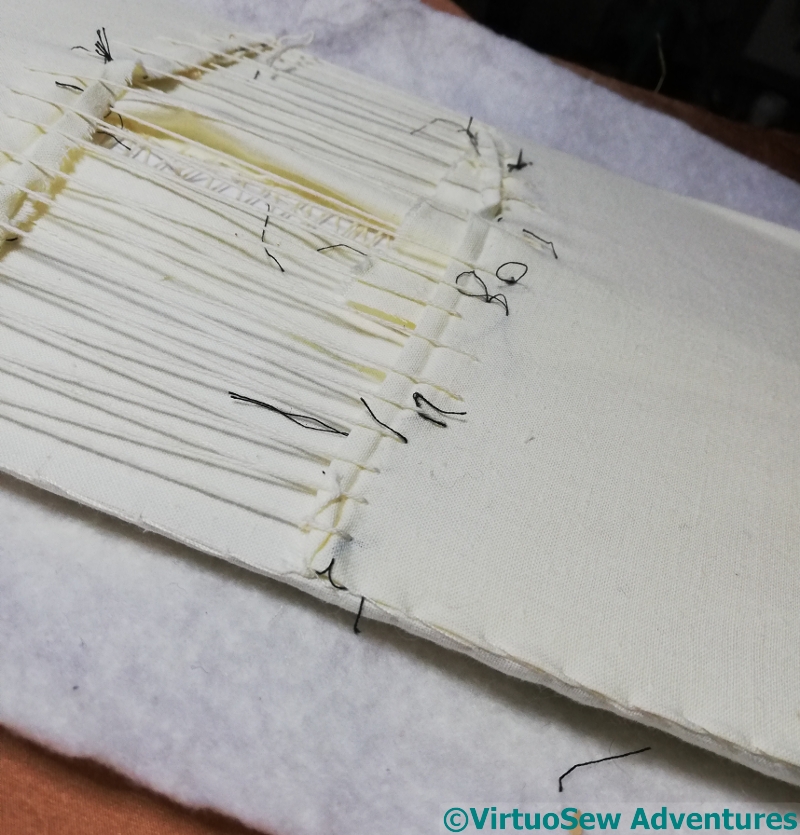
Lacing Calico
And it’s going to be quite a process, because there are three layers of fabric to wrangle, and I’m not going to frame him under glass, so the mounting is going to be on display, at least to a degree.
I’ve started by lacing the long sides of the calico supporting layer, quite closely, to spread out the tension, and then the short sides. These were spread out a bit more, and I also stitched the edges of the folded-up short sections to the calico sides.
Finishing Akhenaten this year has left me rather wiped out. It’s not helped by the fact that he needs to be got off the frame and mounted somehow and that is proving Not Entirely Trivial, as The Australian would say, so I’ve been getting a 1000-watt glare every time I enter the room.
So I thought I would tackle something smaller and friendlier over the holidays, something that would help me gather my thoughts, and give me a change of scale and emphasis. Tanya’s gorgeous laid and couched work hounds seemed just the thing. I lost my heart to them months ago, when Tanya first showed them, but Akhenaten was such a dog-in-the-manger that I didn’t buy a kit.
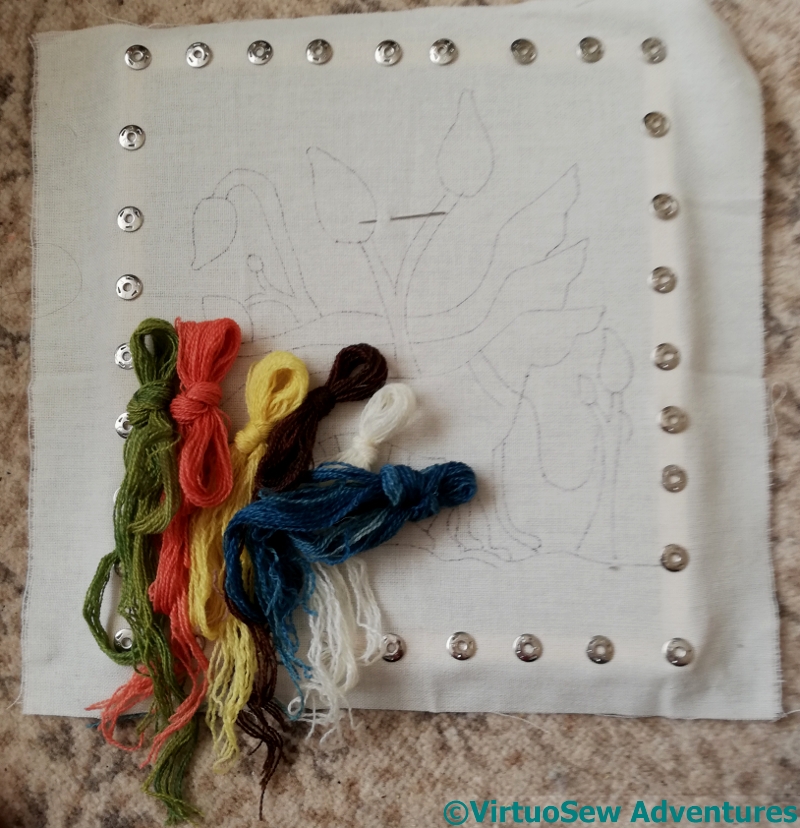
Starting The Hounds
However, by the time I went to Harrogate, he was finished, so I decided he didn’t have a vote any more, and indulged myself. After metal threads and silk, wool is a lovely change, and the medieval habit of using the direction for the lower layer that makes for the longest stitch on the surface means that each section is slightly different, and stops me worrying about what I’m trying to represent. Which is also a lovely change.
I’ve decided that they are called Caspar, Melchior, and Balthazar, in honour of the season in which I am stitching them.