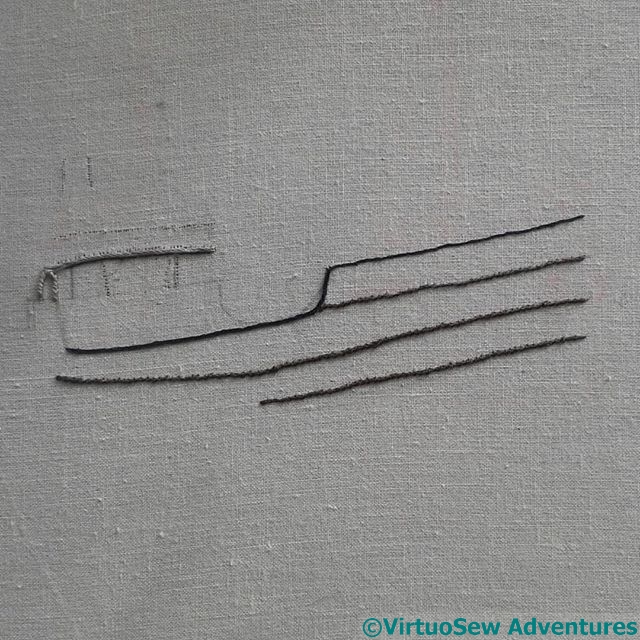
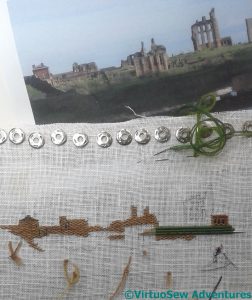
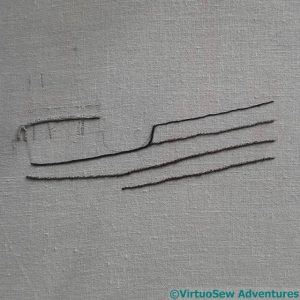
I began by transferring the outline of the headland and priory to a piece of linen, and then paused to puzzle over it.

Starting Headland And Priory
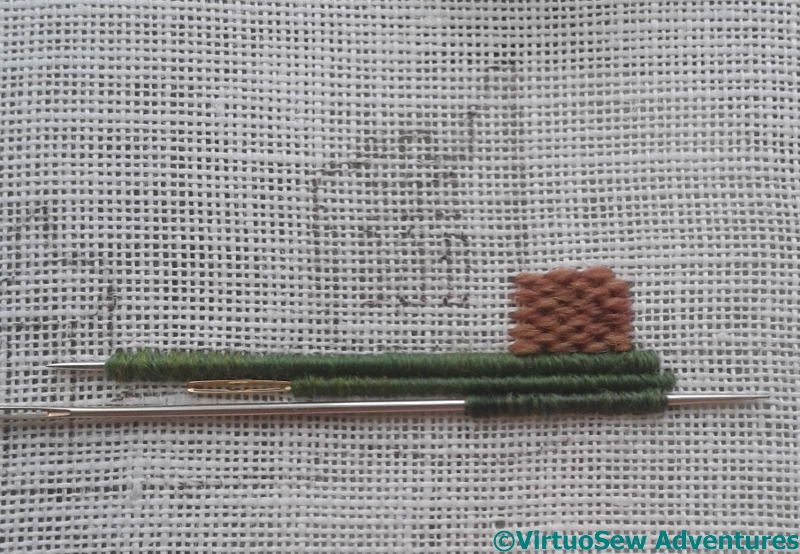
I want a slightly matte effect as the basis of this layer, so I’ve used crewel wool. For the base layer of the buildings, I’m using brick stitch. It won’t be quite even, because although it is a square fabric, the linen thread is quite slubby, making it a less-than-evenweave. That doesn’t matter, as the details aren’t going to be especially fine.
For the grass, I’m using the technique I learnt with the ground of “Eve in the Garden of Eden“, but using tapestry needles instead of knitting needles.
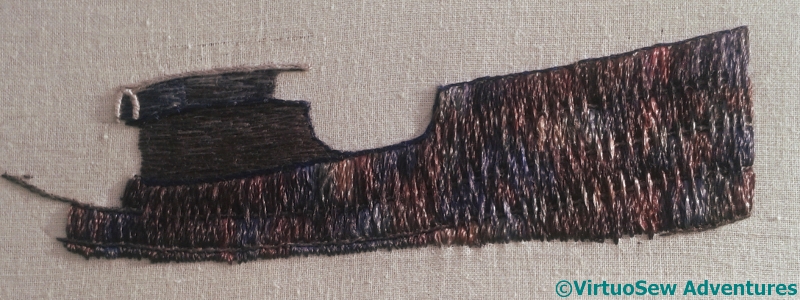
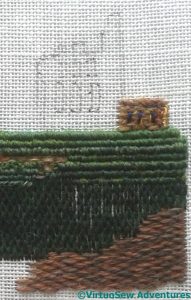
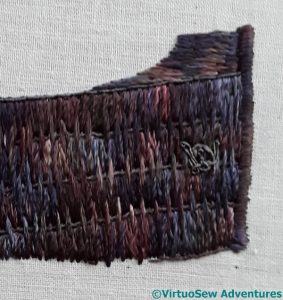
Comparing Photo And Embroidery
I am using one of the photos I took as the reference for my stitchery. If you click and zoom in on the embroidery, you will see that I have already begun to add more stitches in different threads and colours on top of the base layer of brick stitch, even before finishing the green of grass and slope or beginning work on the cliff.
You could say, I suppose, that I am using the oil painter’s technique of beginning very broadly, and gradually tightening up the details, modifying colour and shape, bringing the whole thing gradually into focus. This means that as I make more and more progress, the effort involved will become more concentrated as well – fewer stitches, but more looking before I stitch. When I was watching the BBC One show “The Big Painting Challenge”, one of the judges, Lachlan Goudie, noted that the contestants weren’t really looking at what they were painting, and added that doing so is really much harder than people think. He’s right. What he’d think of doing the same, but with stitchery, I don’t know, but he’d probably think (correctly!) that it is adding substantially to the difficulties!
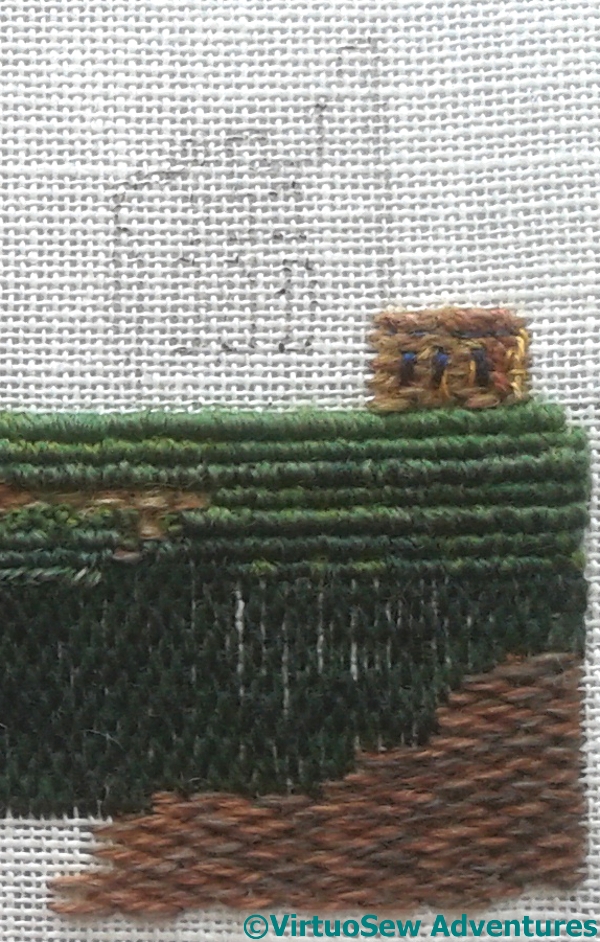
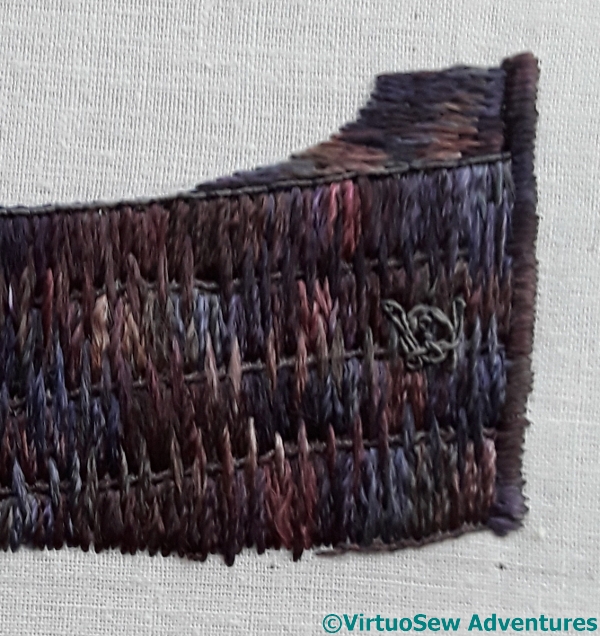
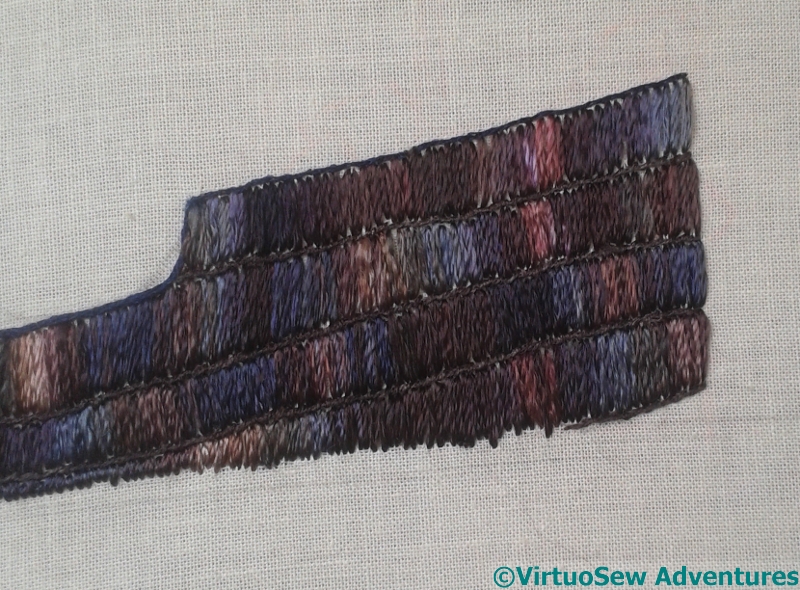
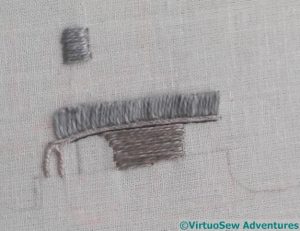
First Layers Thought Out
In the intervals of concentrating on the details, I continued to stitch the various levels of the headland. I used different types of needle to give different heights and thicknesses of ridge on the ground, and then used two different very dark greens for the shadowed area of ground which is on a much sharper slope. I used a sort of random Bargello stitch here, which I hope will create the effect of slight changes in the shadow on the ground. It does when I get the lighting just right, but this area may need more work when I’ve assembled the whole thing, because I can’t rely on precise lighting in the various exhibitions that the Embroiderer’s Guild are planning.
Finally, there is a cliff section going down to the beach and the water. I’ve simplified this section substantially, because it mustn’t compete with the vessel when that is added, and also because my reference photos just don’t provide enough information for me to do a sensible job.
As I got further on with the vessel, I decided I could no longer put off a trip to the north east to have a good look at the Priory for myself. It was a breezy day, so the light changed a lot, and I was nearly blown off the pier into the sea, but I got about 250 photos, so I hope to have enough to provide a basis for my depiction of the Priory.
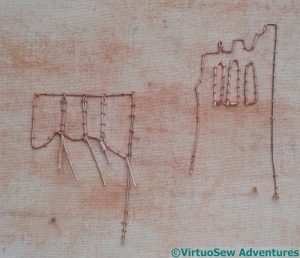
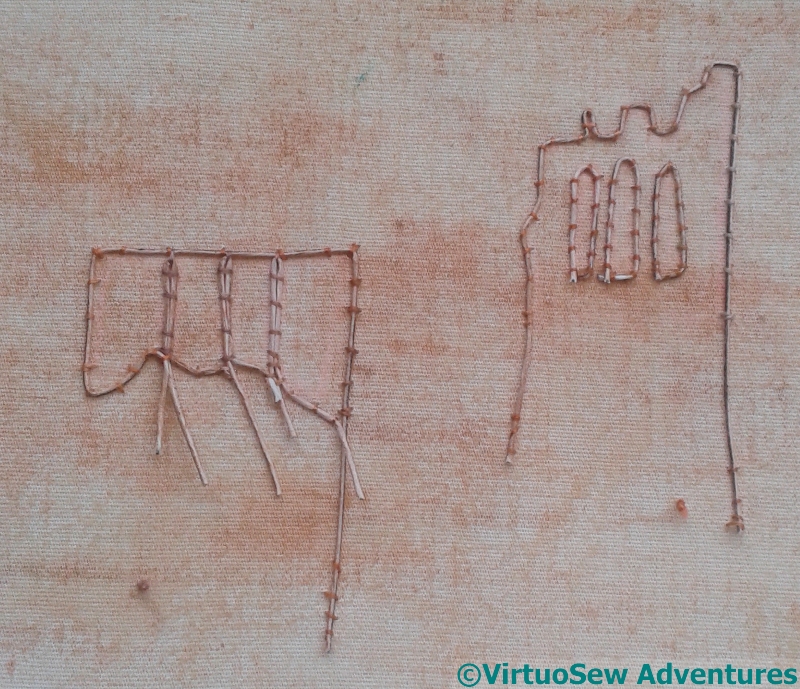
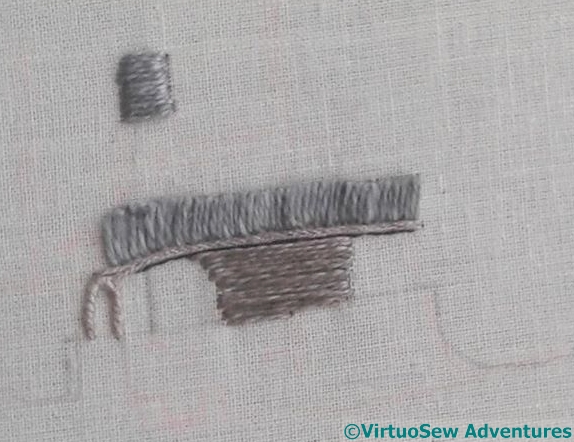
Wire outlining Slips of the Priory
Unfortunately all those photos haven’t really helped me to settle on how I am going to represent the priory. I am going to have to do Something, and see whether the Something unlocks the floodgates of ideas that I need. One thought is to make slips to give the Priory some more of a three-dimensional feel, so I’ve started by roughly colouring the base fabric and the paper-covered wire, including outlining the window-slits.

Wire Covered In Blanket Stitch
In other cases, the wire edging is often done last – as I did myself with the Stumpwork Violets – with the edge of the blanket stitching facing outwards. In this case, I really don’t want the edge emphasized, so I’m hoping to use that looped edge to sew into instead. The edges of the window outlines are rather nestled up to one another, and they’re so small I didn’t even attempt to do separate top and bottom tiers. Quite how well that will work, I’m not at all sure, but then it’s all an adventure, isn’t it!

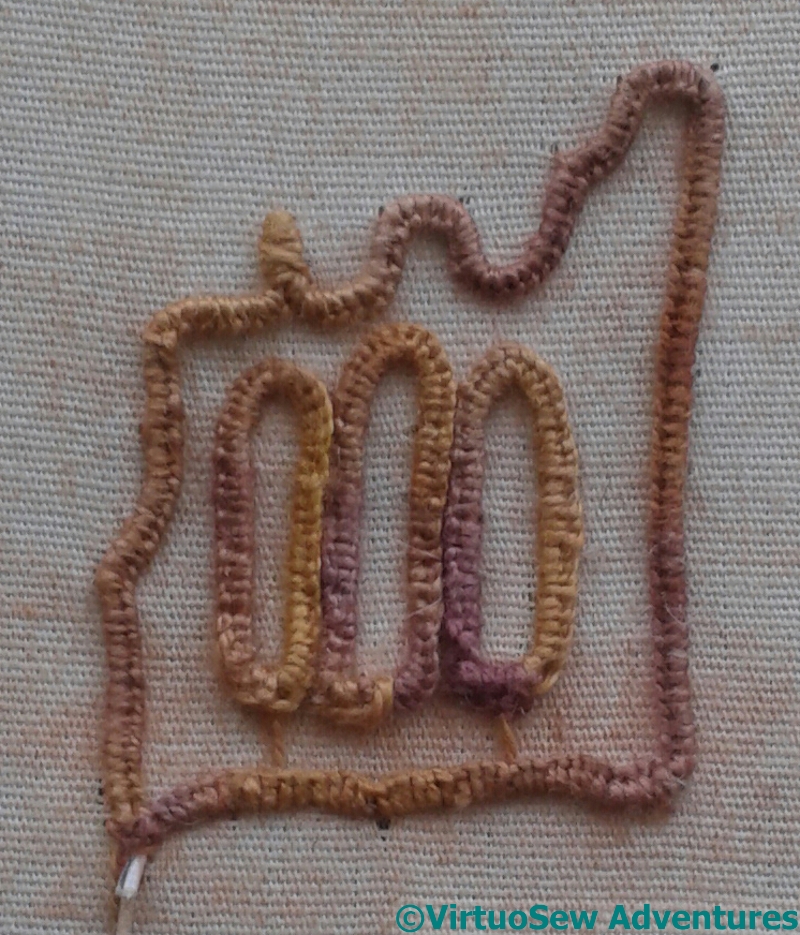
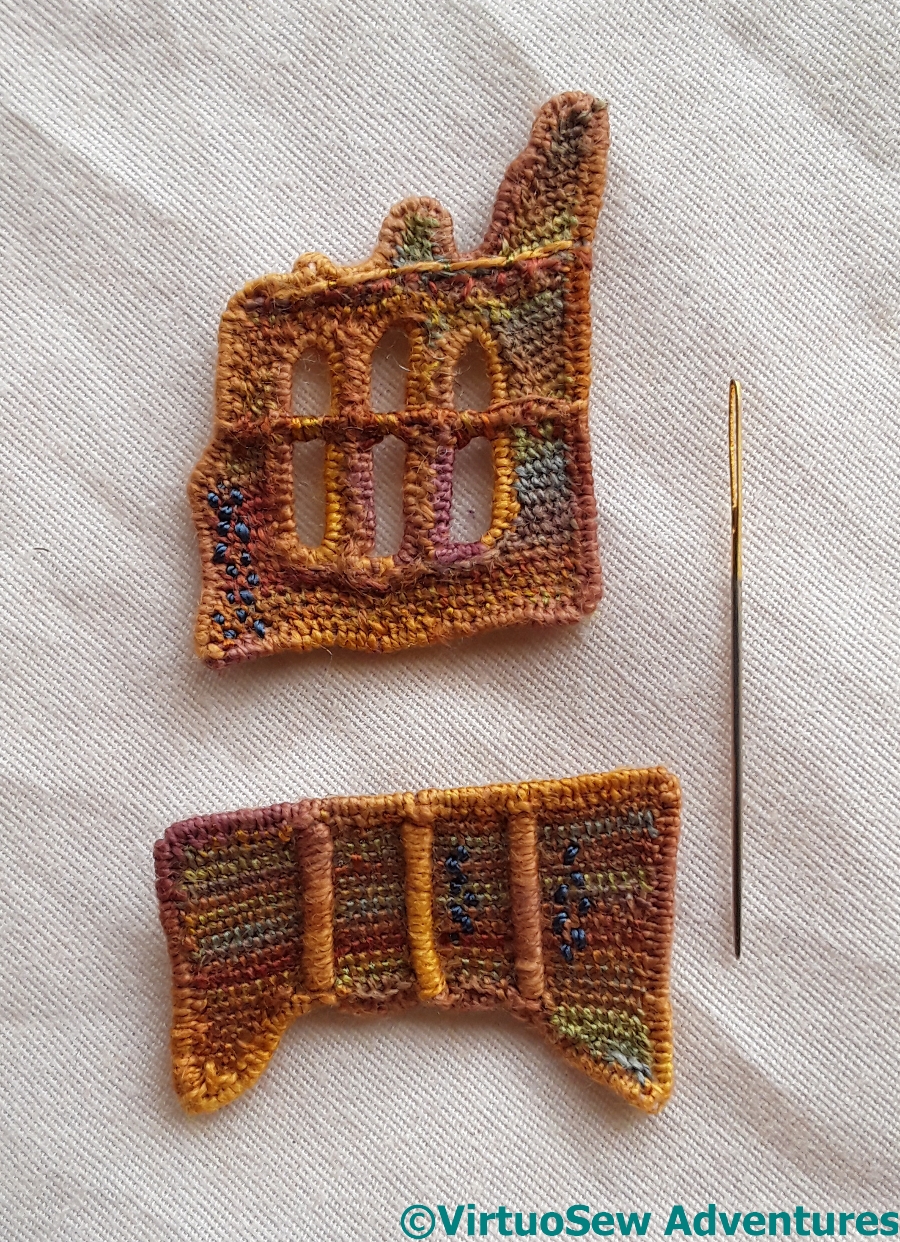
Two Tiny Slips
After a couple of days of concentration, this is what I finished up with, together with a needle to help you get a sense of scale. And after all that care to colour the fabric, I ended up using needlelace. The main thread is a variegated stranded silk, but once I had detached the pieces from the base fabric I stitched in again to add some more detail. Whether it’s enough detail, or the right detail, is another question. That decision can wait until I have the rest of the headland done, I think.
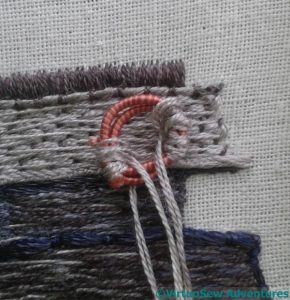
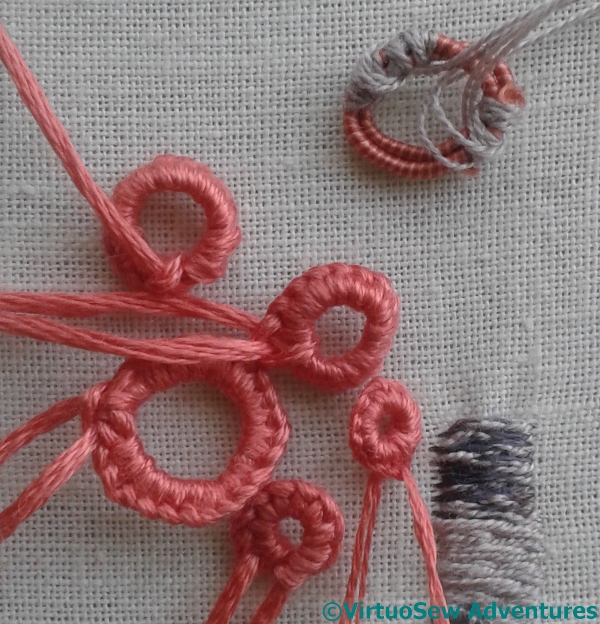
First Lifebelt
Back to the bridge and crew quarters. The photograph shows a lifebelt set on each side of the bridge, so once I had a little more of that section completed, I went looking for ways to represent them. Some rather gorgeous thread from one of the Frostings boxes was my first thought, but it proved impossible to get the proportions right.
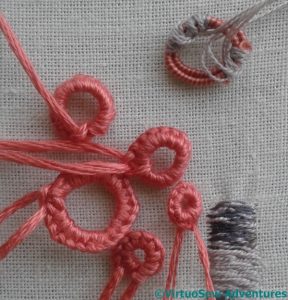
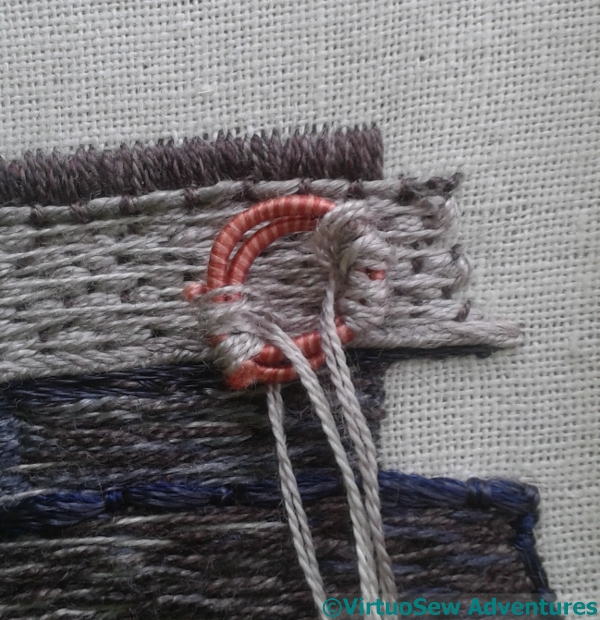
Shrinking Lifebelts
Grrrrr.
Oh well, the number of attempts it took to get there gives a pretty good idea of quite how difficult that is. Each of these rounds is worked in stranded cotton, around different sizes of bone stiletto, using different numbers of strands. They are all simple and straightforward rounds of buttonhole stitch over a wrap of the same thread it is stitched with, but I was beginning to wonder how much smaller I would have to go!
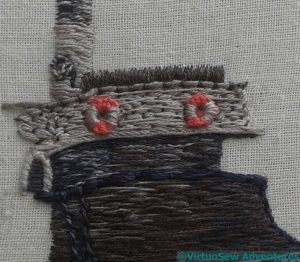
Lifebelts And Other Details
But I do think it was worth the effort. I’ve attached the two lifebelts with satin stitch to replicate the colour alternation, and extra stitching to add details of the funnel, chimney, and the beginnings of the wheelhouse. I can’t finish it until I have the land and sea done, but I’m quite pleased with the results so far!
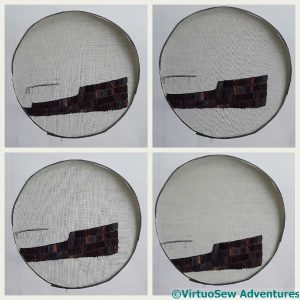
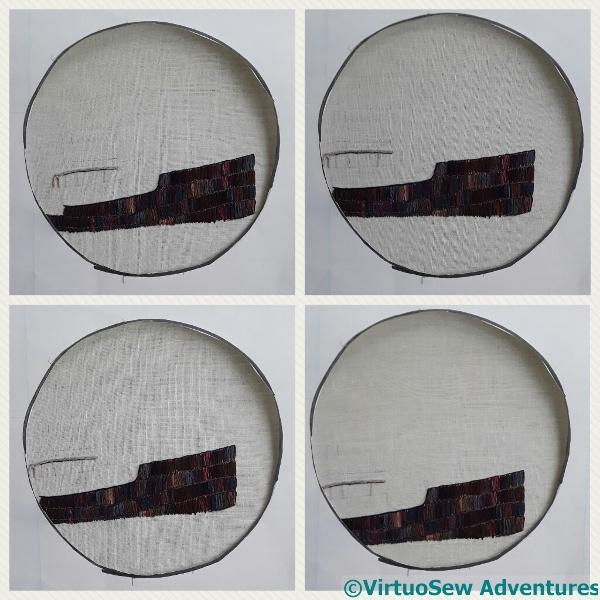
Trial Placements
I had a momentary wobble as I continued on with the vessel, and cut out a circle about the size of the roundel I intend to use in order to check on the possible placement. I’m now reassured that I will get the sort of effect I want. And now I also know that the stern of the vessel will be “out of shot”, as it were, so I don’t want to spend time on it.
Starting Wheelhouse
I did some more thinking, and then got started on the bridge, wheelhouse, and crew quarters. At the moment I am using stranded silks, and simple stitches, primarily long and short stitch. I’m using the black and white photograph as a reference for tone, but as with everything I do, it must look like stitchery. I can tweak colour and tone, but I’m not aiming for photorealism!
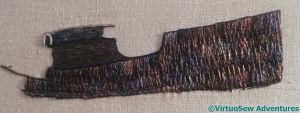
Work On The Bows
Each section will have repeated visits and I hope it will gradually come into focus. Some of the work on the bows, here, should show this. I’ve added the stem, the curve of hull about the tumblehome, and a squiggle of grey silk gimp to represent the anchor.
I’m also beginning to blend out the colours in the hull with a second layer of stitching, this time using a single strand of the same overdyed rayon as the first layer.
First Attempt At The Vessel
Having got the sunrise done, I thought I would have a go at the vessel.
Unfortunately, having made a start at the wheelhouse and crew quarters, I looked at what I’d done, growled, and snipped it out again. I don’t think the colours are right, and I know the textures aren’t.
*fumes*
Starting Again On The Vessel
So, off I went to “the pointy end” as my friends without benefit of sail training call it. That’s “the bows” to the rest of us…
The lines of stitching follow the shape of the hull, but I’ve used a twisted chain stitch, because I’m hoping it will help create an effect slightly reminiscent of rivets. The upper line of the gunwhales is in reverse chain stitch. This may prove to be a lower layer, helping to lift a line of gimp or padding above the base layer of stitching. I’m not sure yet about all the details!

Vessel First Layer
The underlayer of stitching on the hull is in rows of surface satin stitch, using an overdyed stranded rayon yarn. As it stands, I like the colour variation – although I sincerely hope that even in time of war a vessel with that patched a hull would be kept in port – but I think it needs blending out a little.
I’m still working out how best to achieve that!

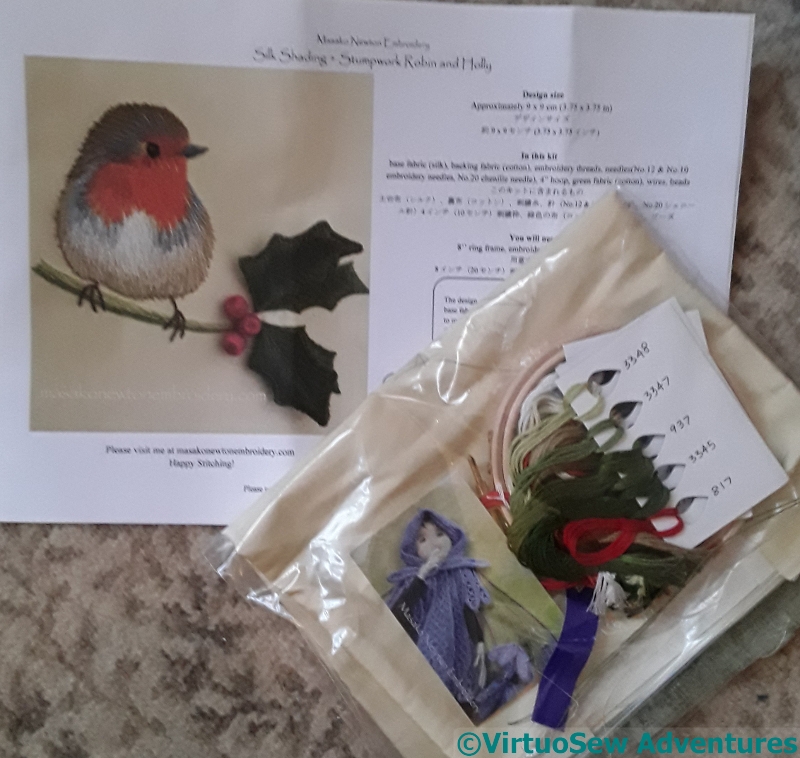
Robin Stumpwork Kit
I’m a very lucky woman. Sometimes, as in this case, I have to say so through slightly gritted teeth…
In this case, I am expressing my good fortune in having a family that takes my embroidery as seriously as I do – and the gritted teeth are because my parents elected to give me a learning opportunity for Christmas.
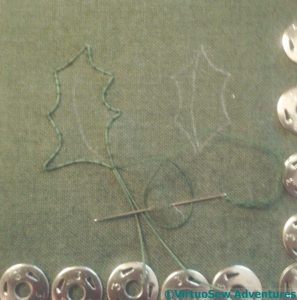
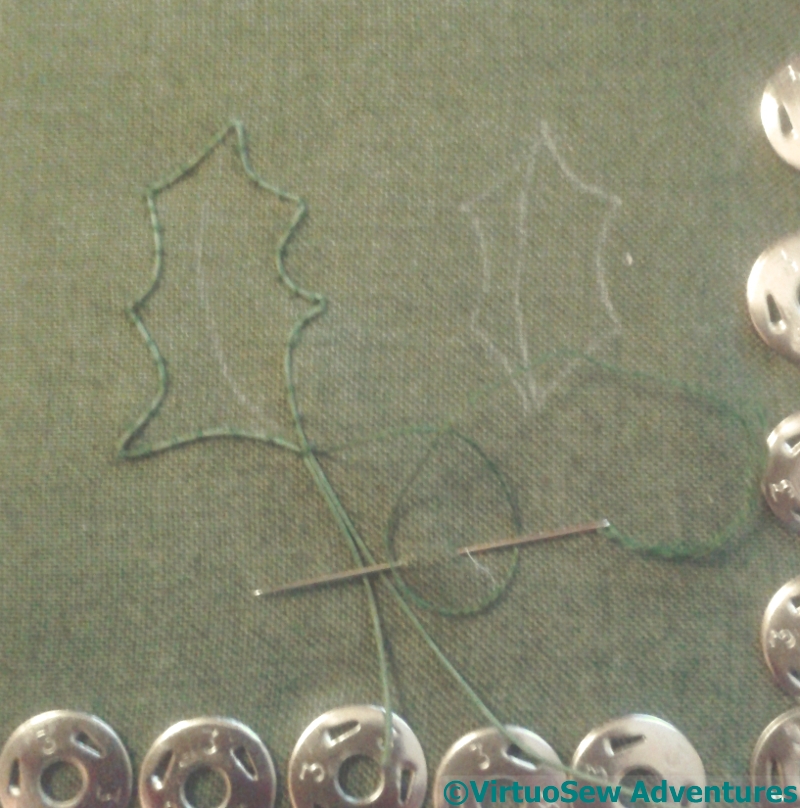
Starting The Wired Leaves
Silk shading is something I know I should work at, but would be most unlikely to choose to do, because the naturalistic representation it tends to be used for is not really my forte.
All the more reason, of course, to make an attempt, at least, to get to grips with it, but I haven’t been able to convince myself to do so!
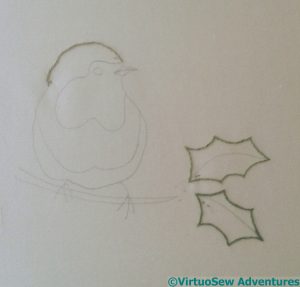
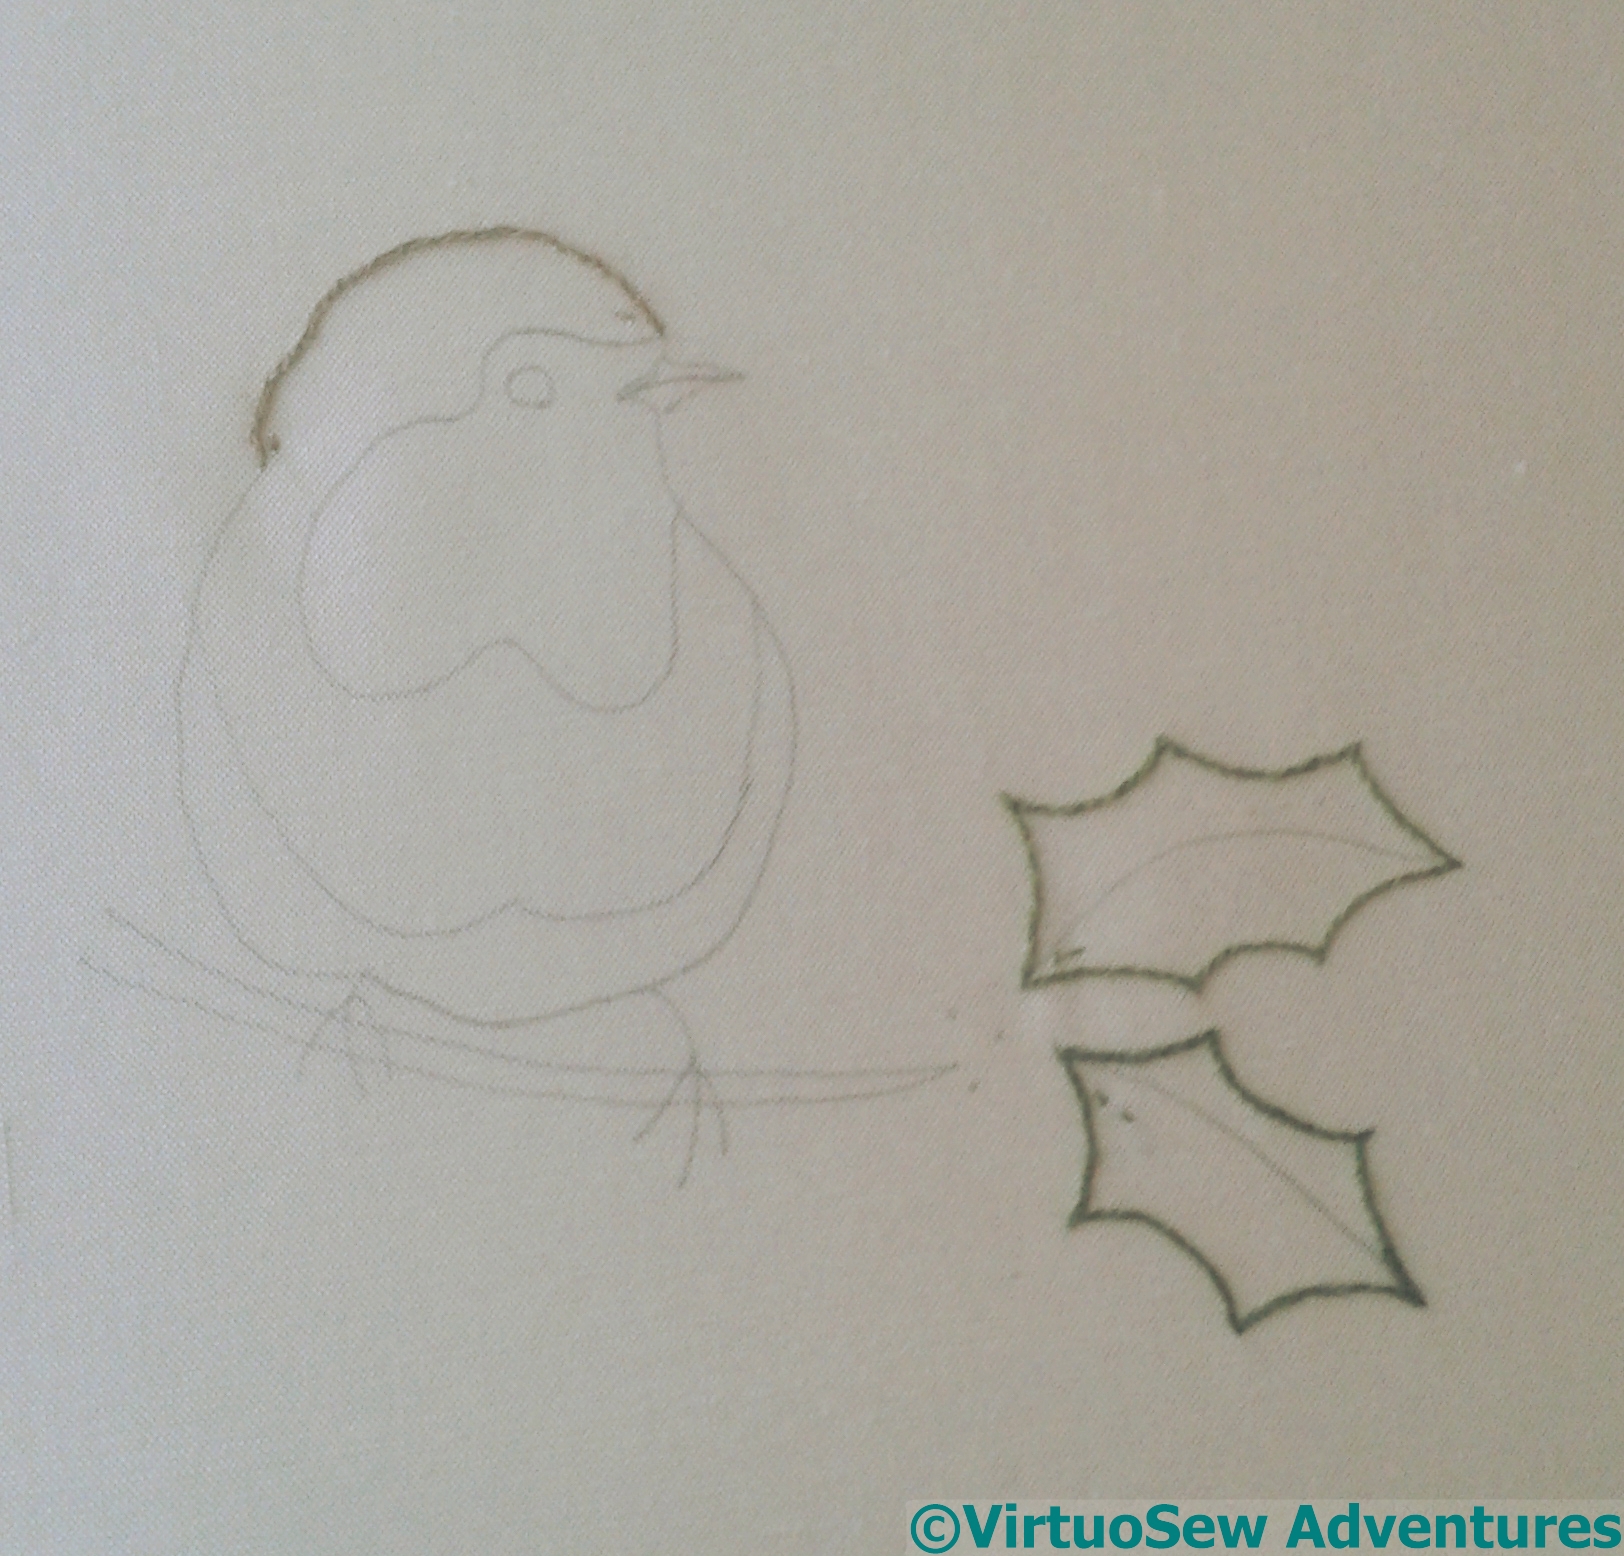
Beginning The Split Stitch
That said, Masako Newton‘s Silk Shading and Stumpwork Robin and Holly is really very sweet indeed, and I am sure I will enjoy working it.
Furthermore, unlike the Jane Rainbow kit my parents gave me for Christmas twenty years ago, there’s no chance of this one being finished quickly.
I will certainly learn a great deal from doing the Robin, and he is going to be classed as one of my New projects for 6 and 6 in 2018.
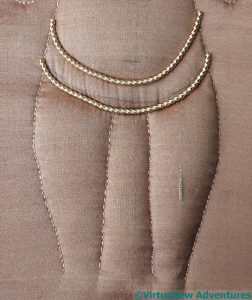
Beginning Loincloth
While I mull over the gold section of Akhenaten’s headdress, I’ve decided to work on his loincloth and belt.
The original inspiration here was for the silver purls to represent the pleats of the loincloth, but when I talked with Sarah at Golden Hinde, when I was buying all the wonderful metal threads, she suggested that I should probably do the belt and fall first, not least, to have somewhere to tuck any untidy ends of the purls while I’m still getting the hang of it!
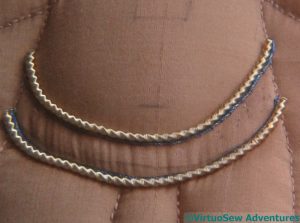
Adding Blue Twist
So I started with a very large gold purl with a sort of twist on it, and settled it neatly into the stitching lines from the quilting. That was followed by a slightly iridescent blue twist. It’s going to be tricky to keep that as visible as I want it to be, and I may very well end up playing around with the placement, or even removing and reinstating it later.
Still, onwards and forwards….!

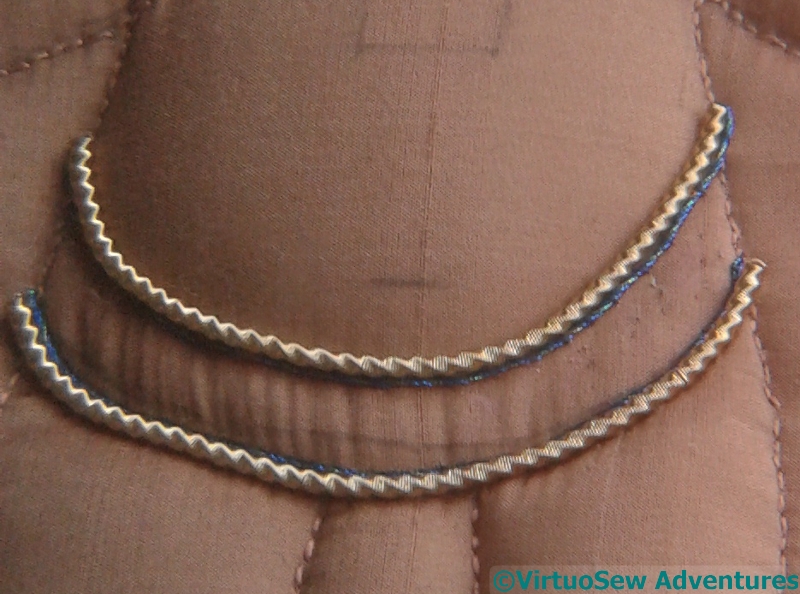
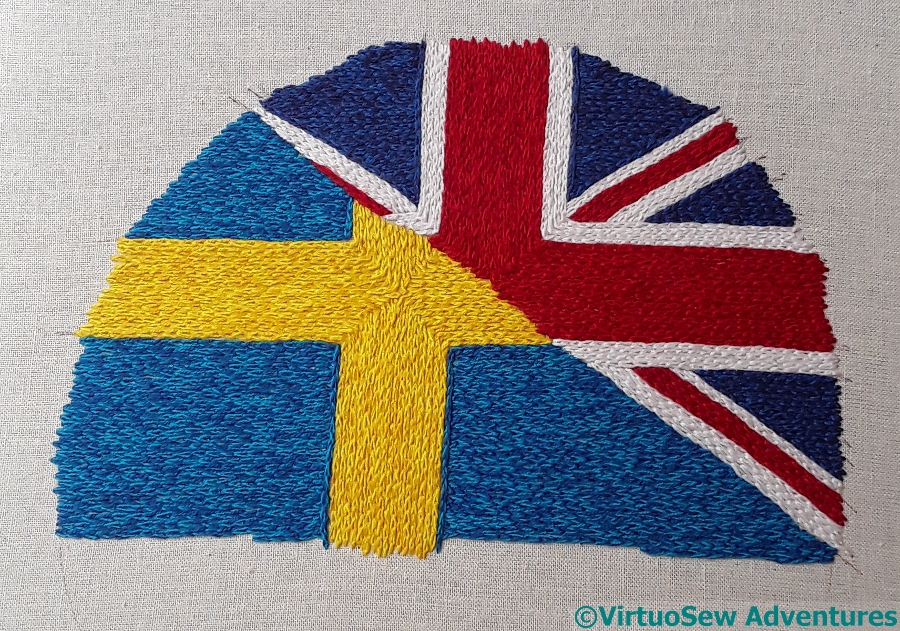
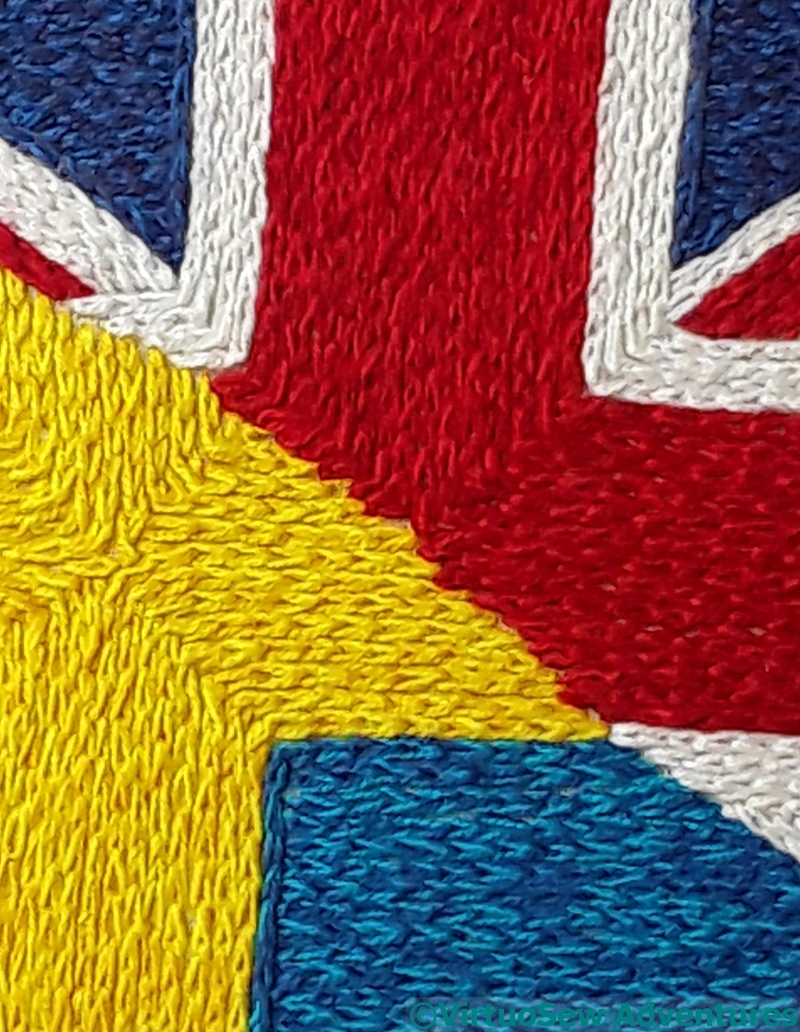
Flag Sunrise
I hope this is going to work as well in real life as it does in my imagination.
The flags provide good, bright, heraldic colours (of course) and I am hoping that I have done a large enough area to create the Roundel in the manner that I have “seen”.
Flag Sunrise Detail
This section has been embroidered on a piece of calico I had conveniently to hand, using Danish Flower Thread, which is not at all shiny. That will help the sunrise to settle back behind the other elements. I’ve used closely-set rows of chain stitch and reverse chain stitch alternately, so as to keep the stitches facing the same way while minimising the number of ends that need to be finished off.
I’ve used two slightly different shades in the needle for each colour. That helped me to get the colours as accurate as I could while keeping within the colour range I had to choose from. In the case of the blues, I used three shades only – the middle shade appears as the darker one in the Swedish section and the lighter one in the British section. I’m very pleased with how that worked, as the two very different blues live very happily together here.
When I read the post on Meredithe’s blog for the March round up of the “6 and 6 in 2018” project, I thought maybe I should do my own. More especially, as I do indeed have progress to report!

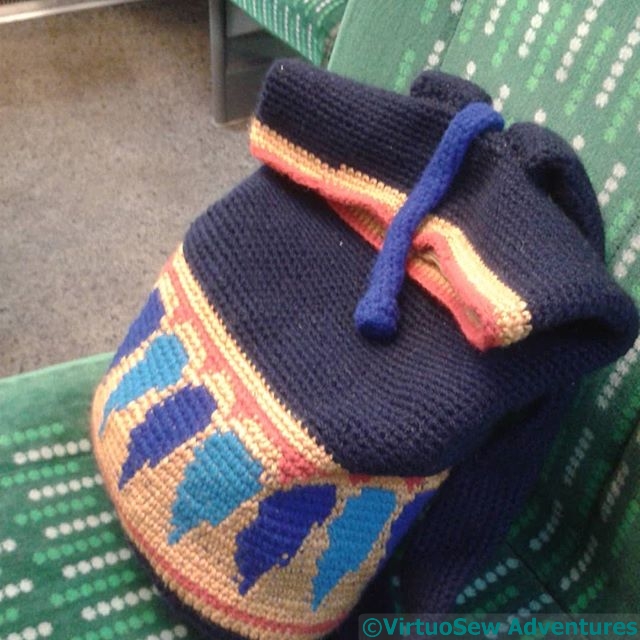
Backpack OnTour
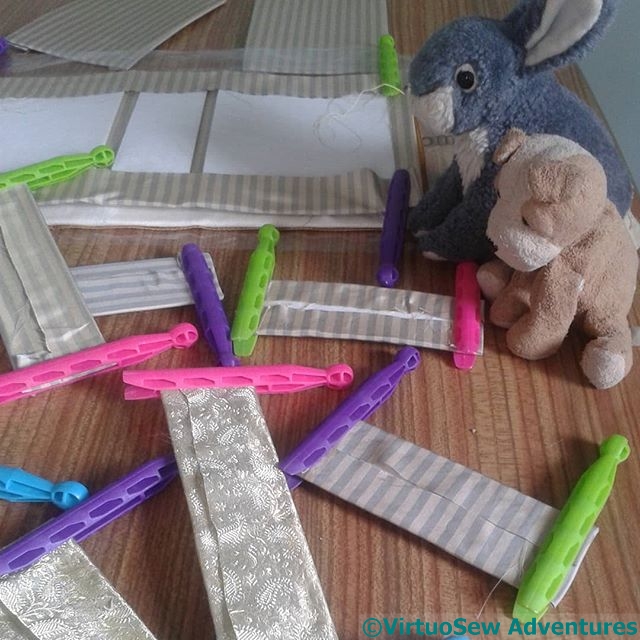
One definite advance this year is that the Amarna backpack is finished. After the straps were attached, it had a very brief trial outing. After which, I decided it needed a lining (a lovely sandy coloured printed cotton) and a zip. The zip was something of a struggle to install, but I managed in the end, and the backpack had its first real outing when I took it with me to “Sewing for Pleasure” in Birmingham.

Glueing In Progress
I’ve started to make progress on Eve in the Garden of Eden as well. Regular readers know that I’m very uncomfortable with using glue near fabric – or indeed, at all! However, my friends Small Rachel and Harry The Hound of the Doleful Countenance came to supervise and encourage, and remind me to take it slow and steady.
Components Piling Up
And the reminders paid off. The glueing is done, and the next phase involves quite a lot of sewing. The box sides are made of an outer and an inner, and while each of those is glued on the back, in the case of the lining over some padding, the outer and the inner are sewn together.
Again, this is happening bit by bit. It’s concentrated and fiddly work, and I couldn’t yet sit down and expect to finish it in a sitting.
But the glueing is done!
As for new projects, so far there is the cover for Maggie the Magnifier, a Learning Opportunity, and of course the Embroiderers Guild 100 Hearts piece.
So watch this space, there will be more!
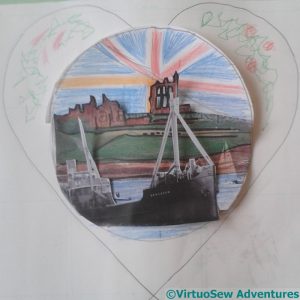
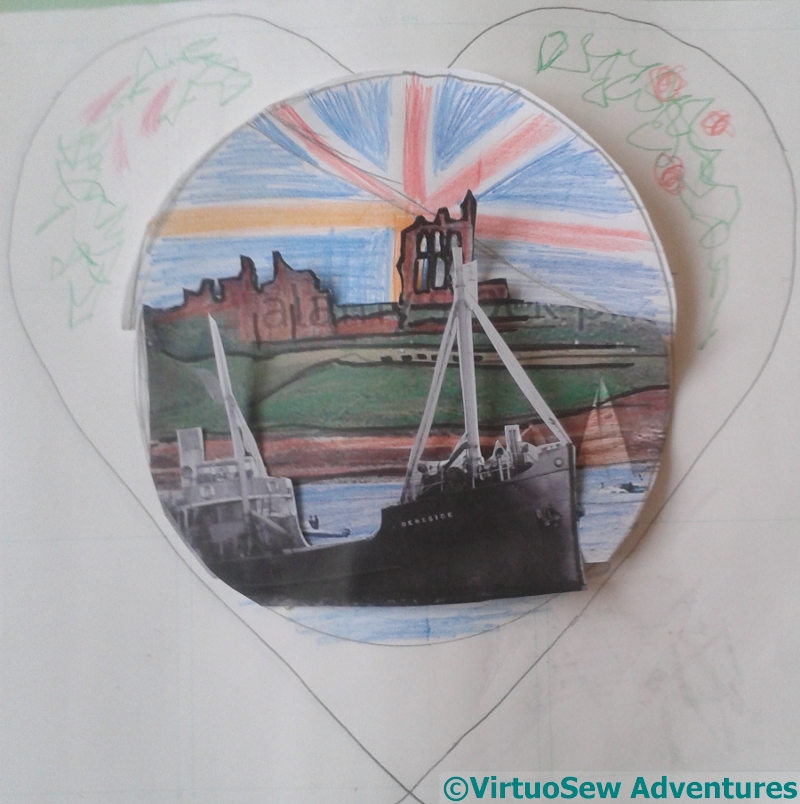
First Draft of my “100 Hearts” project
I found some pictures of Tynemouth Priory online to help me draft my design, and then went rummaging for pictures of vessels built on the Tyne that were in service at the time of the war.
Of course this is all entirely speculative; we have found Great Grandfather on a crew list of 1915, but unfortunately so far we haven’t found any images of the ship. His crewmates include many local lads, of course, but also Danes, Finns, a Russian, and even other Swedes. There must be so many untold stories there…

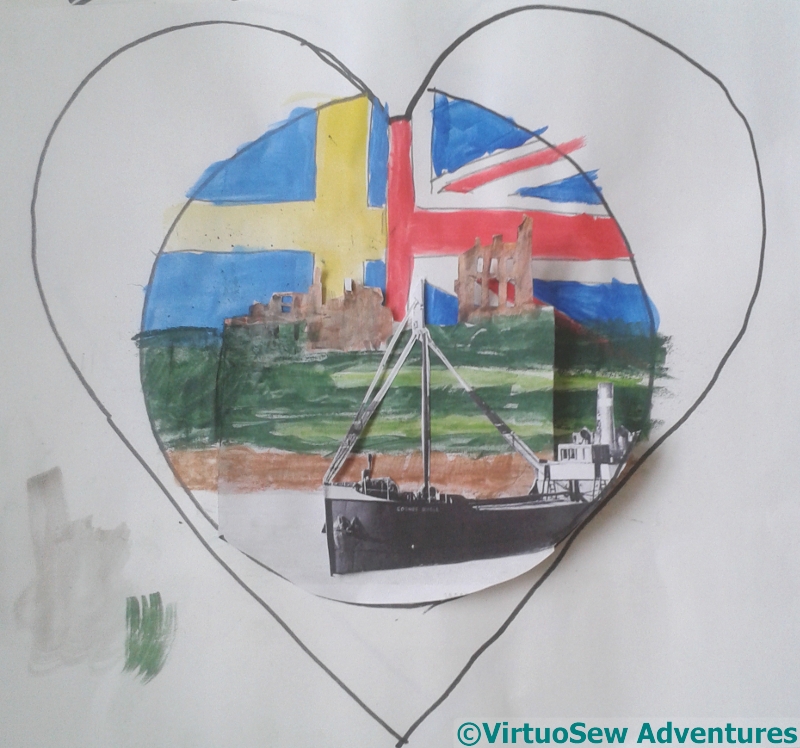
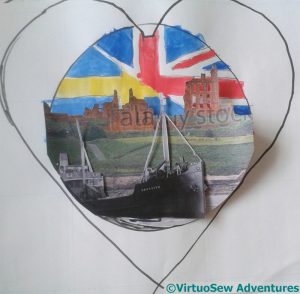
Second Draft of my “100 Hearts” project
In the first draft, I was still working on the idea of the gold cross being like the St George’s cross, and I was very disappointed that the Swedish flag almost seemed to vanish.
In the second, I corrected that misapprehension, trialled a vertical rather than diagonal division, and used a different vessel, this one slightly smaller and coming inward rather than departing.
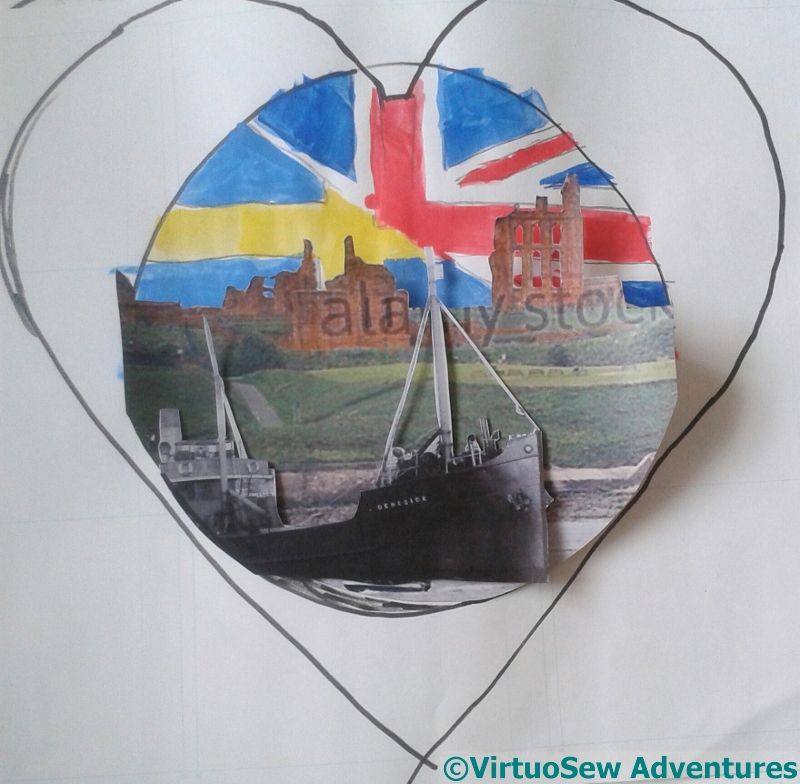
Third Draft of my “100 Hearts” project
I’ve also moved the Priory to the right a little so that there is rather more of a sense of balance.
In the third draft, I reinstated the diagonal, left the Priory shifted rightwards, and returned to the first vessel. I’ve also slightly enlarged the Priory.
As I look at these, I find myself thinking that the design rather resembles naval ship badges, so perhaps what I need to do is to shrink the whole design a little, tweak it a little more, and edge the circle with a wreath or rope motif.
So I’ve not finished thinking yet!