Just when I thought I had no more to do, suddenly my mother asked, would I add a something-or-other to the back of the coat collar.
We thought about it, and decided that since I’m going to do a Morse Code signature that looks like a caterpillar, and there’s already a butterfly, I could maybe add a snail…
The tacks top and bottom show where the seam allowances and turn of the collar leave space for Something. I drew a snail on a bit of tracing paper (loosely based on the one on the Jacobean Firescreen), and tacked on the outline.
A miss-step
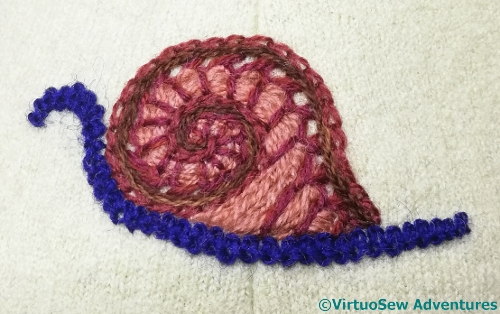
The shell itself came together easily, two rows of reverse chain stitch, then a row of half-cretan stitch which was then threaded with wool to create a slightly raised effect.
Inspiration briefly halted when I came to the critter himself. I tried several shades from among the ones on the coat, and two or three different stitches, and was underwhelmed by all of them.
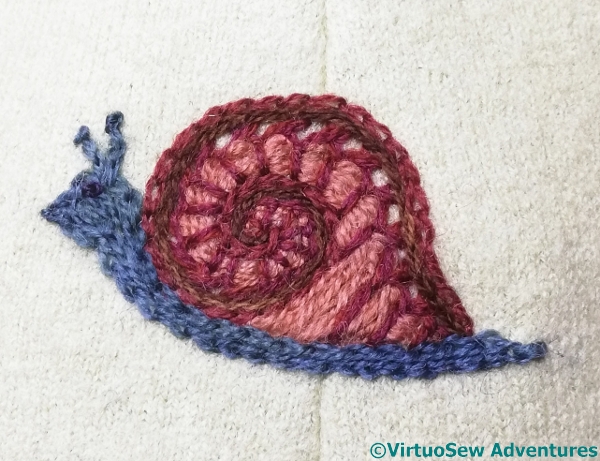
Finished Snail
Finally, I picked the right colour (a middling shade of teal) and the right stitch (chain), and he came together beautifully.
Two tiny antennae, a French knot for an eye, and hey presto, one cute little snail to add the final embellishment to the coat.
Now it’s over to my Mam to sew the whole thing together…
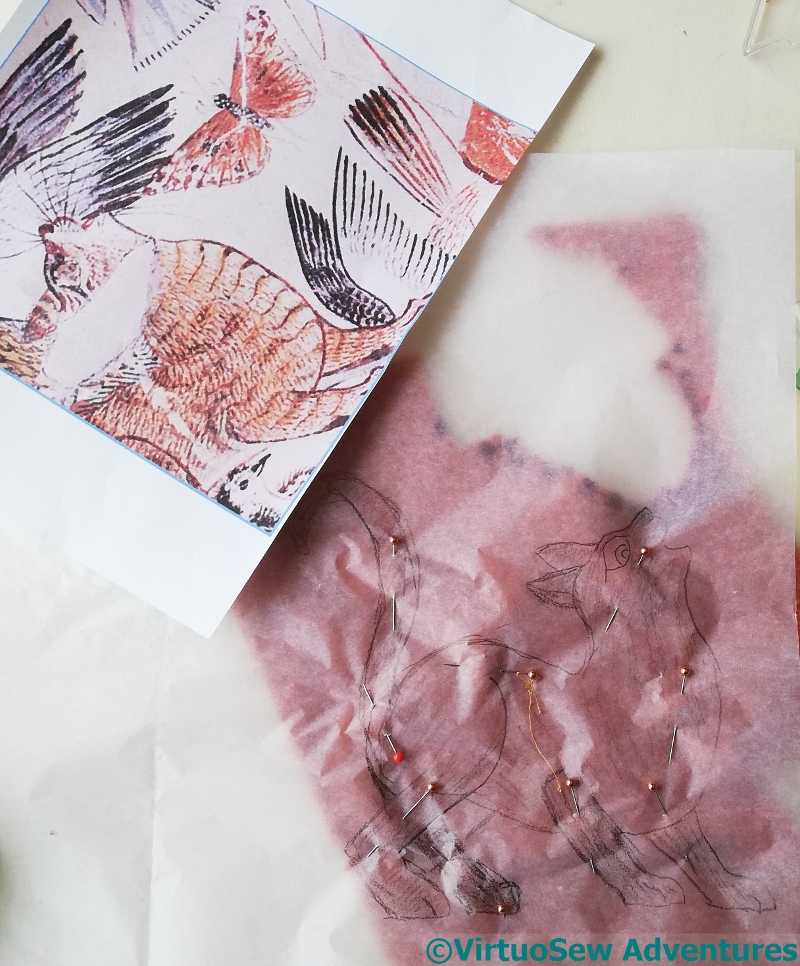
I was leafing through my image sources, looking for some relief from the concentration of Akhenaten, when a fragment of fresco caught my eye. I’d not really registered it before, but it’s full of vitality, and I thought it might give scope for more Fun With Felt.
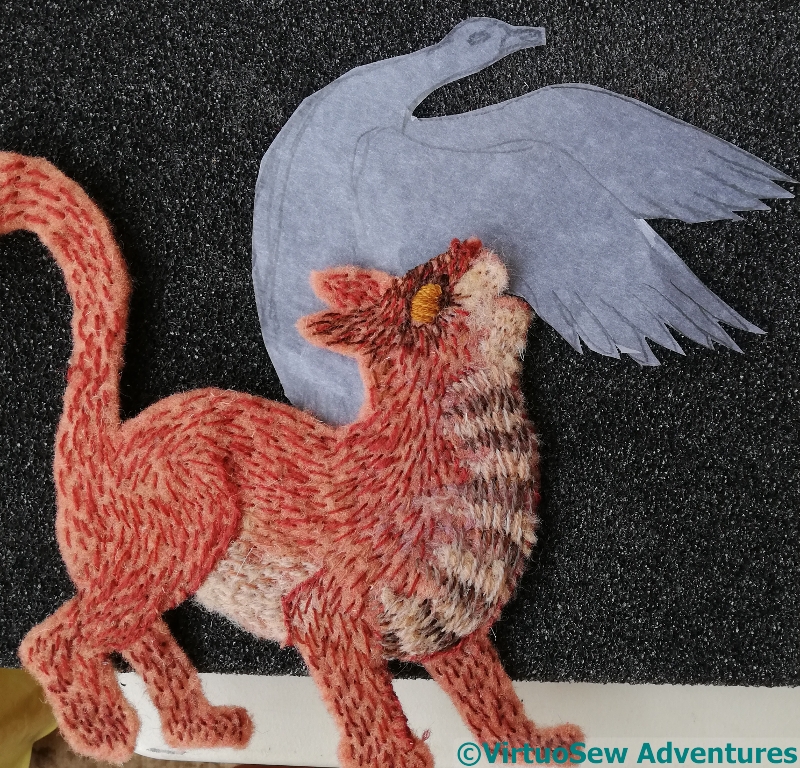
I may simplify – or complicate – my ideas as I go along, but since I wanted to include the whole cat, the first thing I did was spend some time looking at pictures of cats on the internet (which just goes to show that one can find a research excuse for almost anything!) to see whether I could draft some suitable hindquarters to replace what my source didn’t show.
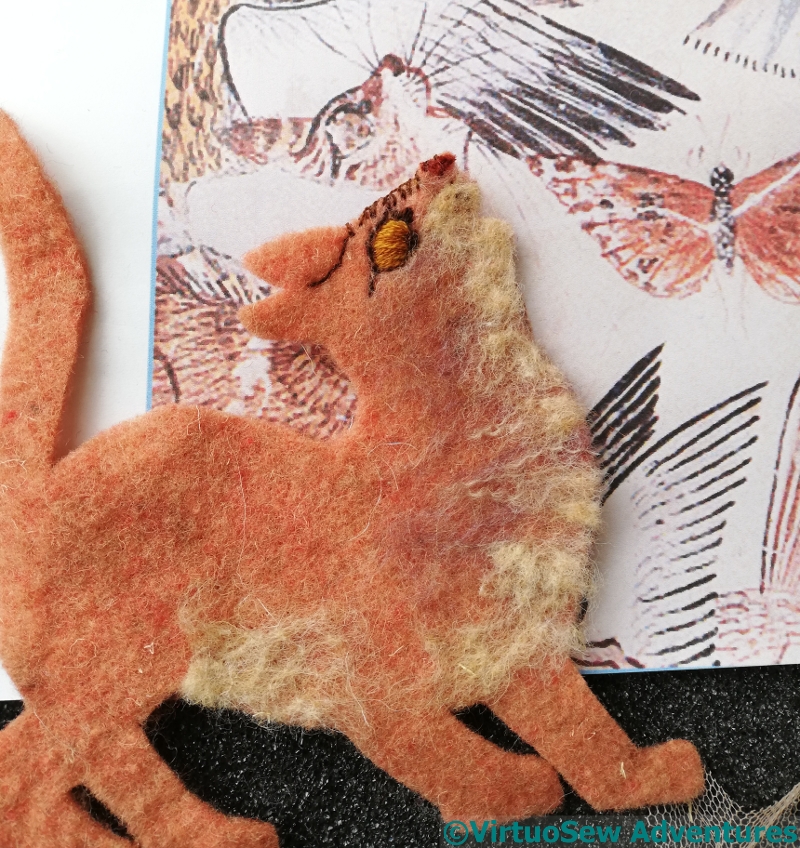
Beginning the felted underlayer on the cat
I’m sure my cat isn’t quite the way the Egyptians rendered him, but as ever, I’m aiming at a “reinterpretation” or “realisation”, not a photographic rendering. As it was, I had to tug at my felt and give thanks that there’s no grain in non-wovens to get it to fit at all. Especially since I had decided to make use of the leftovers of stitching for the cushions for the Two Princesses to give me a head start on his nose.
I began with a few lines of stitching, and a golden eye, and then needle-felted fragments of felt and untwisted plies of thread onto his neck and chest (for some reason I feel as though the cat is a very young boy cat!).
Trialling prey placement
The next thing to do was to do an initial layer of stitching all over my cat. I’ve just used simple straight stitches, to echo both the cat’s fur and the simple brush strokes of the ancient Egyptian painter. When the cat is needle-felted onto the eventual background, that will blur the stitches into the felt, and created a softer effect.
I had to draft a body for the bird as well. This might be less successful, but I think it will do..
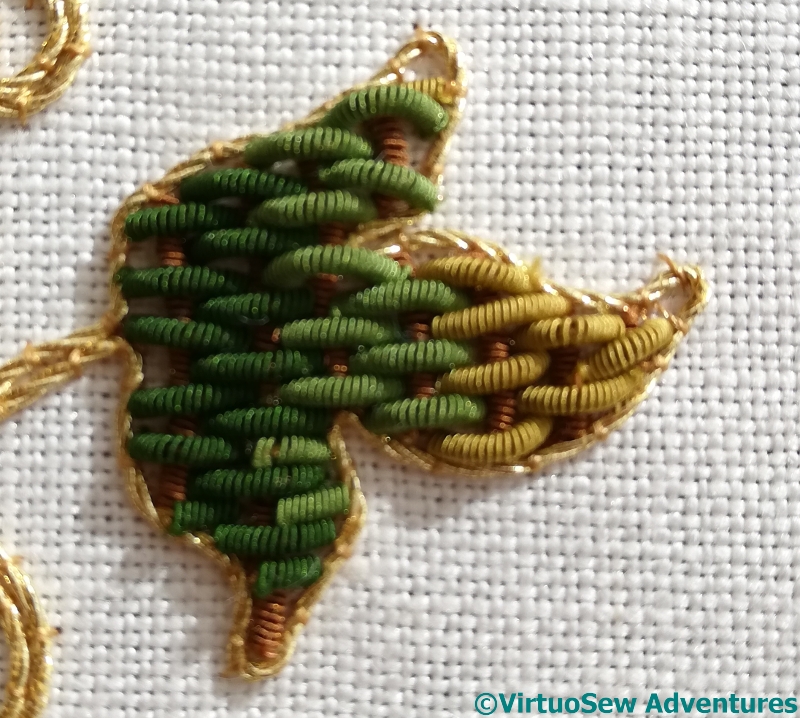
The small leaf was rather “meta”, in a way, because long “stitches” of silk purl were couched down with shorter ones. I’ve likened it to Burden Stitch, or even the couching form used in some opus anglicanum, and it includes colour changes as well.
All of these techniques have been simple enough in concept, but the execution isn’t simple at all. Spacing, angles, and cutting the lengths are all, as The Australian would say, non-trivial (mathematician-speak for “quite tricky”) and practice may make perfect in the end, but it hasn’t done so yet!
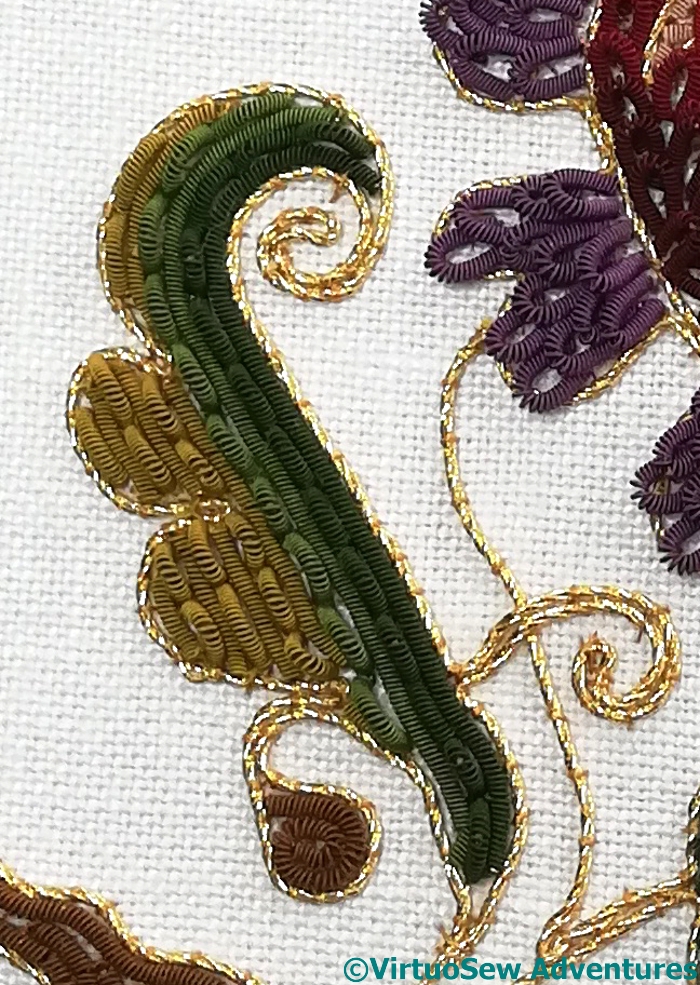
More Silk Purl Textures
The final leaf was worked by alternating the hummocks and simple couched techniques of earlier months. In a way this shows that it is possible to create new textures by “layering” or “overlaying” techniques, so the only limits are in the stitcher’s imagination.
It creates an interesting ribbed effect, although with all my care, the raised hummocks aren’t all raised to the same degree. That said, I defy anyone looking casually at the real thing to notice the fact – at only about three inches by five, that would be a lot of detail to be able to distinguish!
And there are other dazzlements in store…
All spangles added
The final detail is to add spangles, which are reliably confusing and dazzling to the eye.
Just imagine all that flickering in the candlelight and shadows of the silk purl textures casting mysteries over each other!
I’ve thoroughly enjoyed this Online University course. Now I only need the time to sit down and read the extra information and watch the videos!
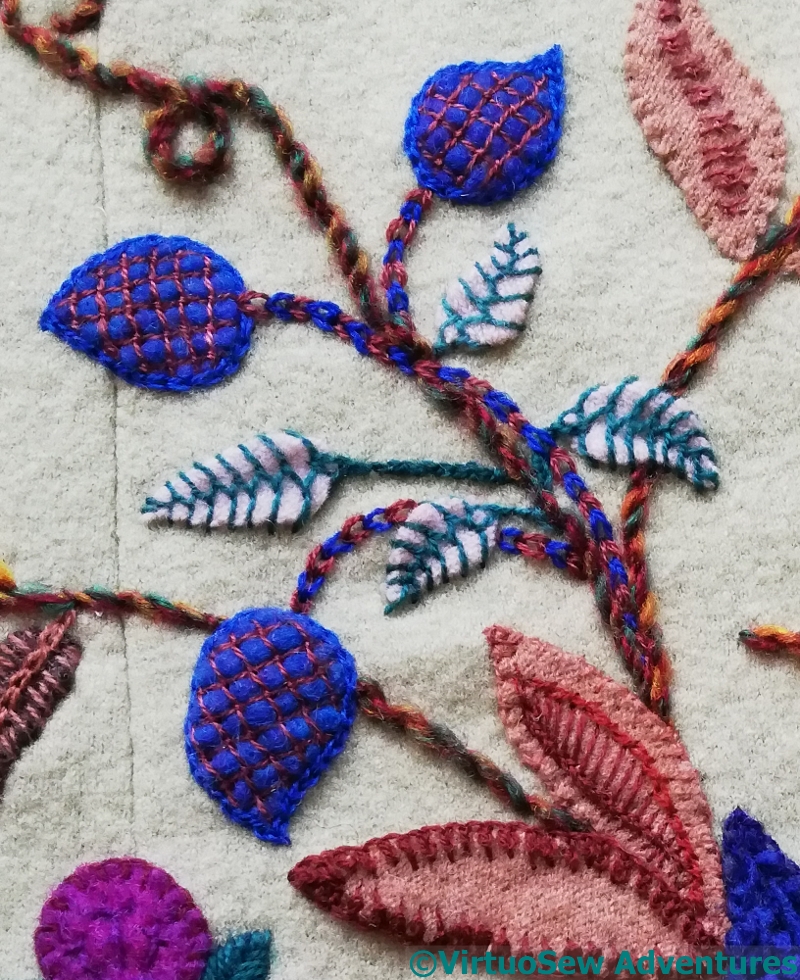
The blue buds are outlined in Chain Stitch and decorated with Trellis Couching, and then, in a final bit of frivolity, the stems uses Magic Chain Stitch. I’ve often wanted to use it, and never really had the space before. Achievement, unlocked!
The cream leaves (from some felted gloves!) are couched with Open Cretan Stitch, and the stem – where there is one – is in Portuguese Knotted Stem Stitch.
You can also see the final version of the two leaves at the bottom, which are just above the blue ones. I’m not quite sure what stitches I used in the end, because I was beginning to create odd little mash-ups of my own!
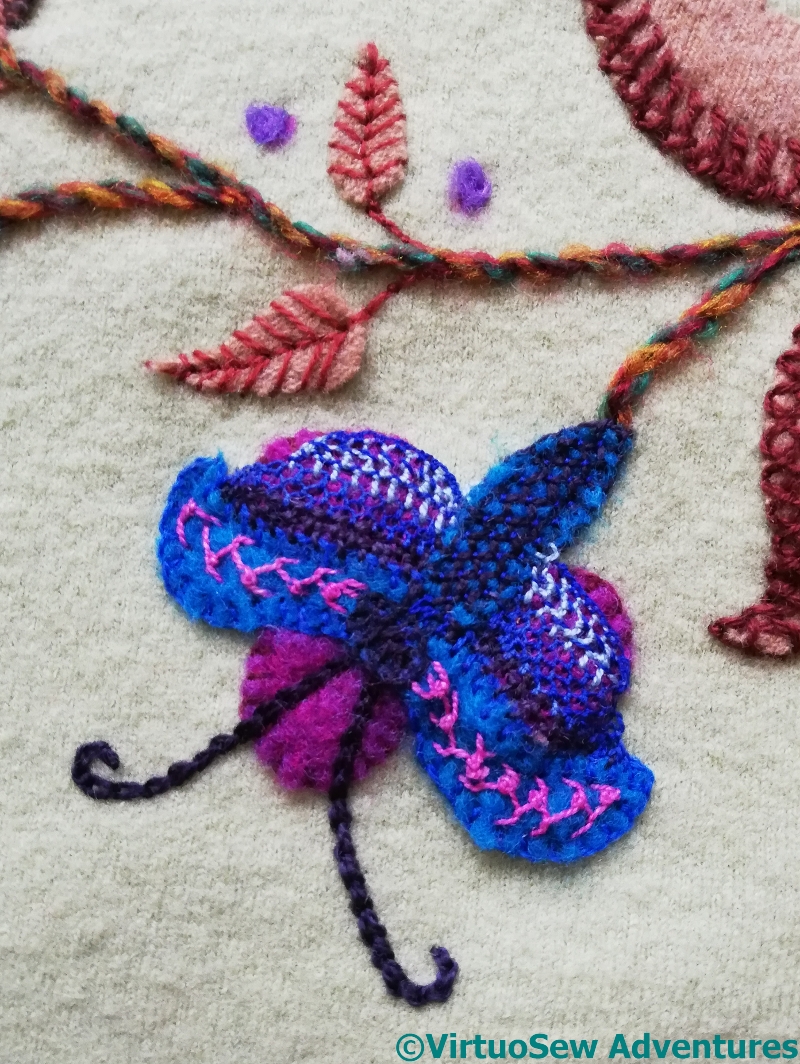
Butterfly
We’ve assumed that the odd element on Grandmama’s embroidery is a butterfly perching on a flower, so that’s what I’ve made it into here, tweaking and altering the pattern as I worked.
The upper wings, in felt, are ornamented with one of the knotted feather stitch variations – I think, Mountmellick Stitch – but then, I simply started to play with needlelace stitches to create more interesting and varied effects.
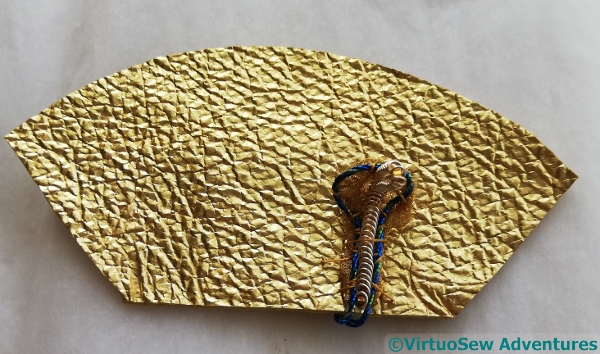
Having decided that all those delicious manipulations of brass mesh weren’t going to help in this case, I cut out the shape of the cobra’s hood from the brass mesh, (not getting too close, in case I cut the thread attaching it!).
At this point I realised it wasn’t quite strong enough, and attached the bent piece of pearl purl from the first attempt to the back in order to provide more support.
Bending back the brass mesh helped to conceal the supporting pearl purl – although whether anyone will be able to notice it is a moot point!
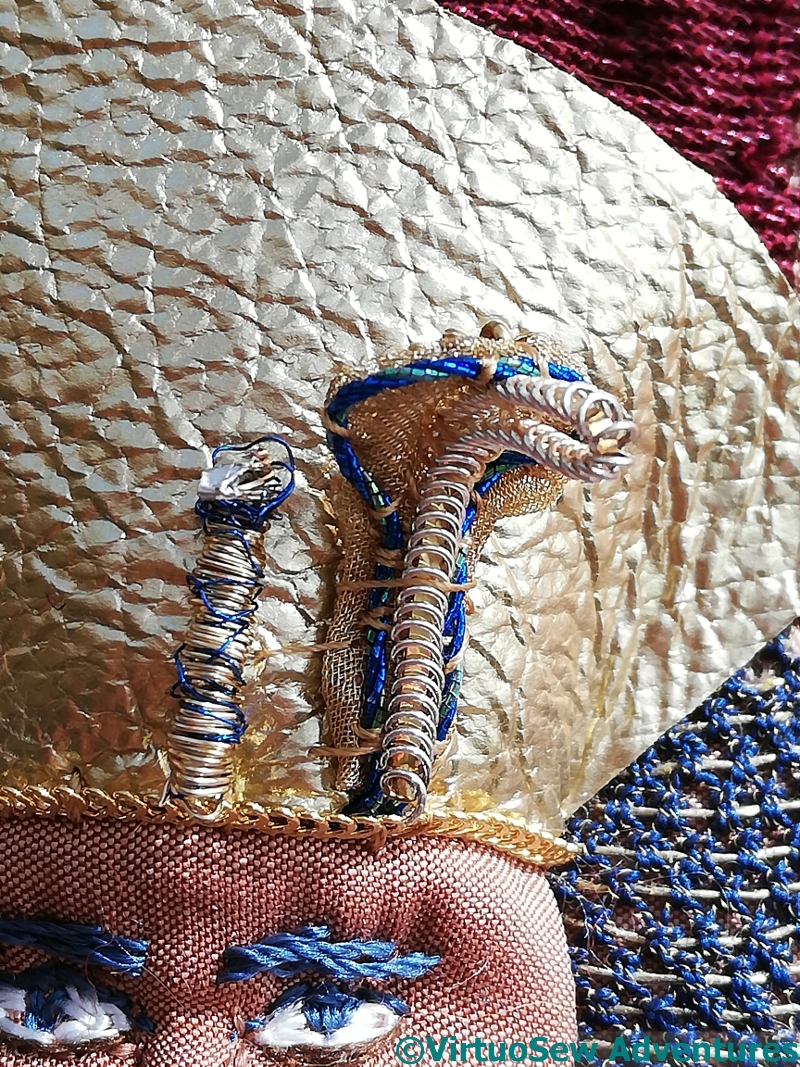
Cobra In Place
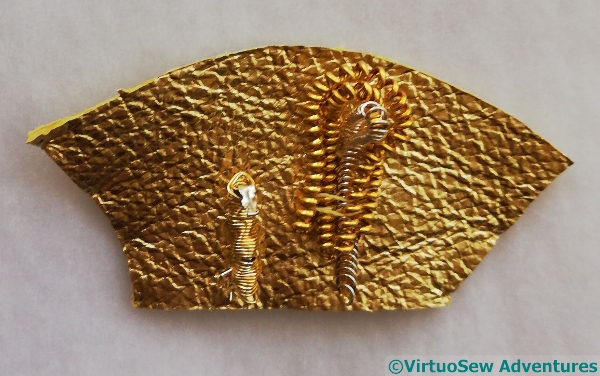
The final stage of the cobra was to attach the same piece of silver spiral with gold band to take the place of the snake himself, in front of the hood and to a new piece of gold kid. This time I looked again at some pictures of cobras, and made sure the hood was set back a little from where the mouth would be.
Cobra and vulture heads in place
I used the same “vulture’s head” as last time, but helped it to stand out slightly by winding some blue wire from a tiny bit of blue purl around the large gold rope I used for the vulture’s neck. You can see how small it is, but it’s surprising how much difference it makes to the final effect!
Once I’d attached the gold kid, I could cover the bottom edge with gold spiral, and then trim the upper edge to create the shape I wanted. This is the stage you see here. However, I then decided that the upper edge needed a trim, so at some point I must tie myself in knots to attach some sort of trimming to a curved shape stretched over a padded base.
Having settled on a smaller circle, but still worried about the stability of the fabric, I paused for thought.
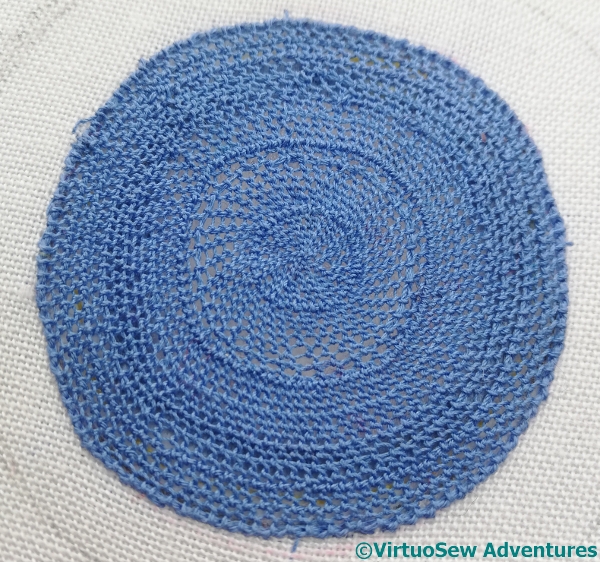
I’ve used tear-out fabric stabiliser underneath the fabric, and placed a circle of it over the previous overcast stitch ring so as to leave trimming out what isn’t wanted until the last moment. It’s now enclosed between two layers of stabiliser, so I shouldn’t catch my needle in it.
And this is definitely a case for using a hoop. Most of my Amarna pieces have been worked in slate frames or bar frames, and the Jacobean coat is being worked in the hand, but a table-sized piece of fabric of which a small element is the focus requires a more limited approach!
Needlelace completed
I decided in the end to use simple cloth stitch for the needle lace, but of course, choosing to work it in a circle rather complicated matters! I had to use several lengths of thread, so it became a matter of concern to make sure that firstly, there was no chance of it coming undone, and secondly, weaving in the ends made sense!
It was also important to bear in mind that while classical, straight cloth stitch has a free “return” stitch, I couldn’t expect to keep control of a “return loop” in my circular variant. So instead of that, I whipped the base of the stitches to create the heavier line.
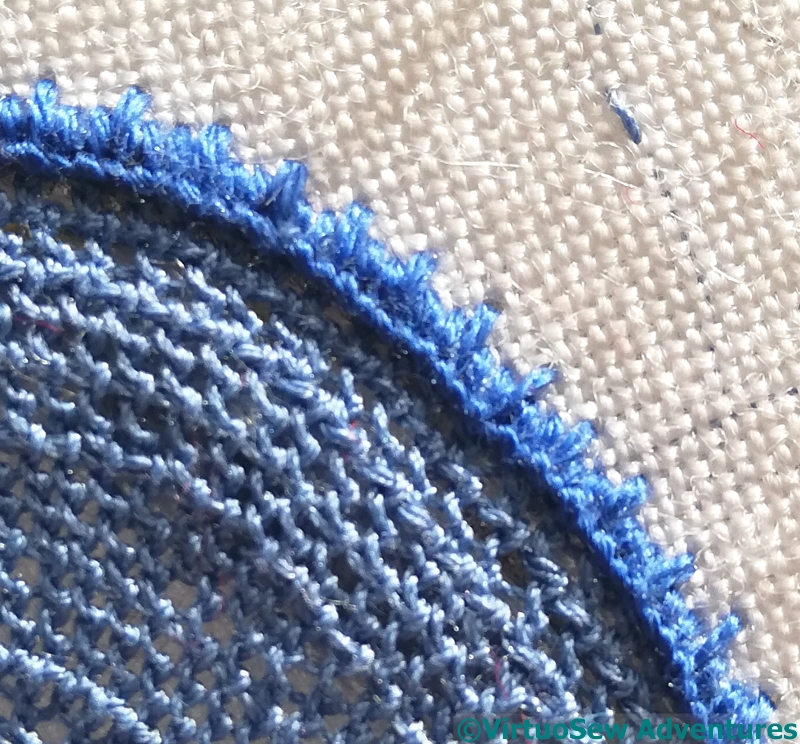
Patterned Buttonhole Stitch
Once the needlelace was finished, I had to consider the edging. The whole aim of this exercise has been to cover the hole in the tablecloth in a manner that looks considered and deliberate – not just a mend, but a thoughtful mend. So the edging had to be thought about too.
In the end I chose to work a pattern in the buttonhole stitch – the uprights of the buttonhole stitch covering the split stitch and the edge of the needlelace alternate one long with two short. I also considered enlivening the needlelace with some daisies in white, reversing the blue on white of the main decoration, but decided that that was going a bit too far!
Of course, I had to take off the gold headdress when I decided to make another attempt (and another, and another!) at the face. Then, when I looked at it again, with my new version of the face in place, and still more new ideas swirling around in my head, I decided that it wasn’t quite right, either in shape or in conception, and needed a little more help…
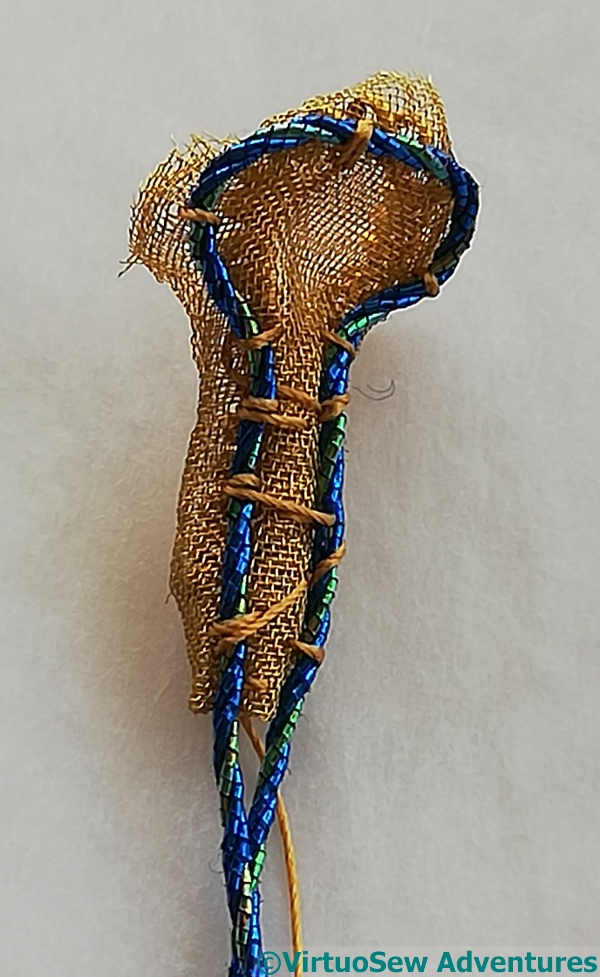
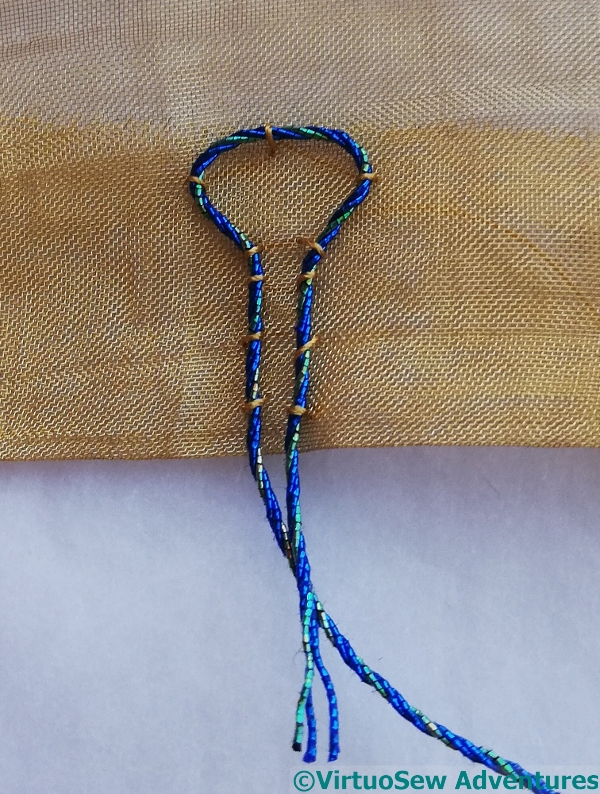
Blue Twist And Brass Mesh
First of all, I think the first piece of gold kid I cut was the wrong shape, but secondly, and more interestingly, the cobra doesn’t really stand out against the gold kid, so I decided to try again.
So I began by folding a piece of brass mesh and attaching to it a loop of the same blue twist I used to emphasize the edging of the belt. I had thought that this might be rather tricky, but the brass mesh is fine enough to take stitching without too much trouble.
At this point I should probably say that from the base to the top of the loop here is no more than a centimetre. This is all very small and very fiddly indeed!
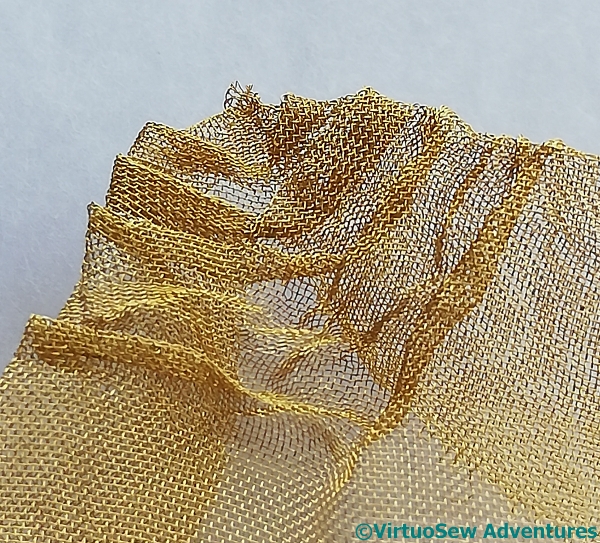
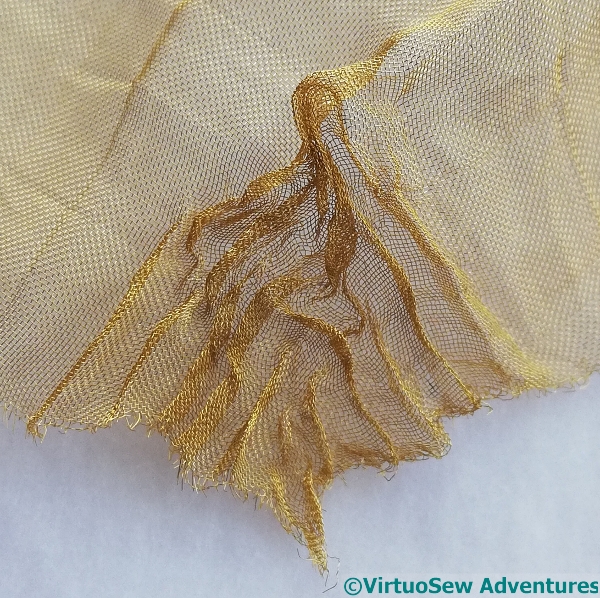
Manipulating Brass Mesh 1
Manipulating Brass Mesh 2
I also experimented with some pleating and crinkling of the brass mesh. I like the various effects, and I’d love to fit them in somewhere, but unfortunately I couldn’t quite work out how to make them work in this context.
The whole piece is so striking that I am finding it particularly difficult with the last little details, because they need to have enough personality not to be overwhelmed, but I don’t want the final piece to feel “spotty”. The eye needs somewhere to rest occasionally, rather than zooming frantically in all directions!
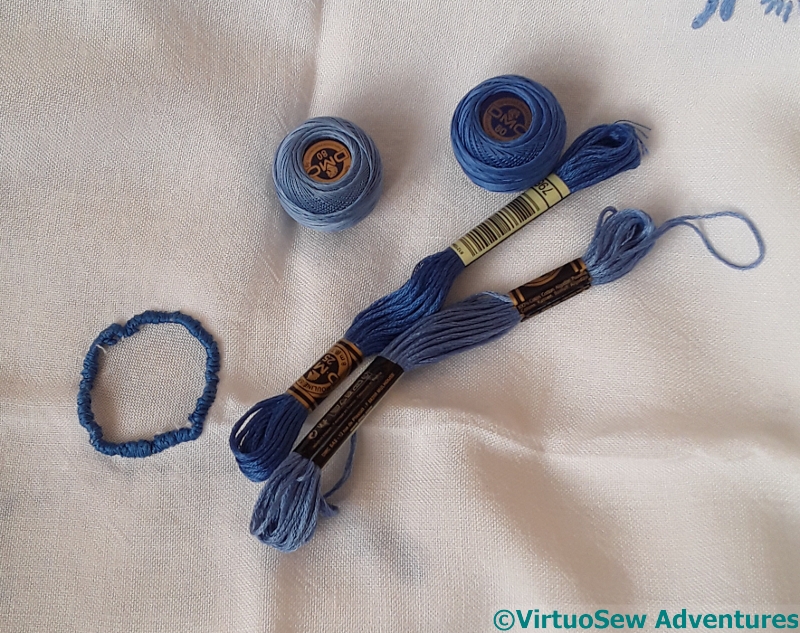
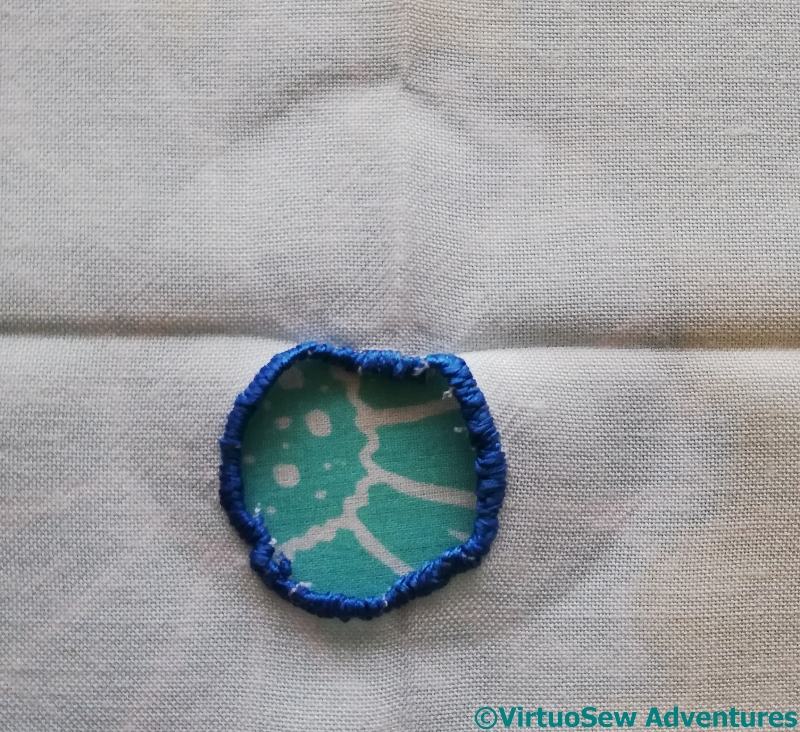
Over the New Year, my cousin showed me a rather charming embroidered tablecloth she’d bought, only to discover, when she got it home, that it had been rather amateurishly adapted for a table with a parasol. She doesn’t have such a thing, and all the ironing in the world hasn’t flattened the buttonhole stitch, so she asked, could I think of something?
Yes, I could. I’ll re-do the buttonhole stitch, slightly larger, and infill the entire hole with a needlelace stitch of some sort. I’ve not decided which of these threads to use, but I’m prepared for when the decision is made!
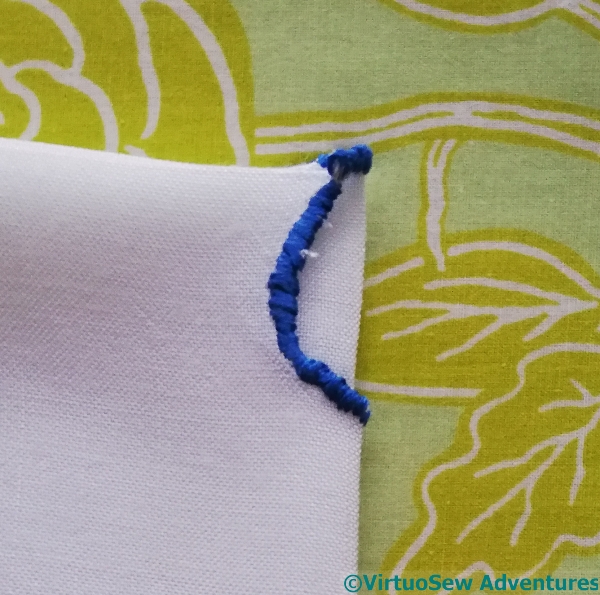
Not at all central
When I got it home, and folded it carefully to check that the hole was central, I discovered that it really wasn’t.
It really isn’t at all, in fact. And this close up gives you a chance to see just how tatty the oversewing around the edge turned out to be.
Oversewing, not buttonhole stitch. I’ll have to do better than that, won’t I!
This will be a very large hole!
In fact, once I’d done a bit of playing around and found a suitable circle that both encompassed the existing hole and placed the hole centrally, it was HUGE – at least three inches across!
That seems too big – even for infill with needlelace, it seemed to me that this would unreasonably weaken the fabric, so I started to think of suitable backing materials, and then emailed my cousin to ask whether she had some thoughts. After all, it’s her tablecloth.
She rang, and we had a chat, and she says she would prefer a smaller, non-central hole, without too many baroque attempts at backing it. So simple it is, then…
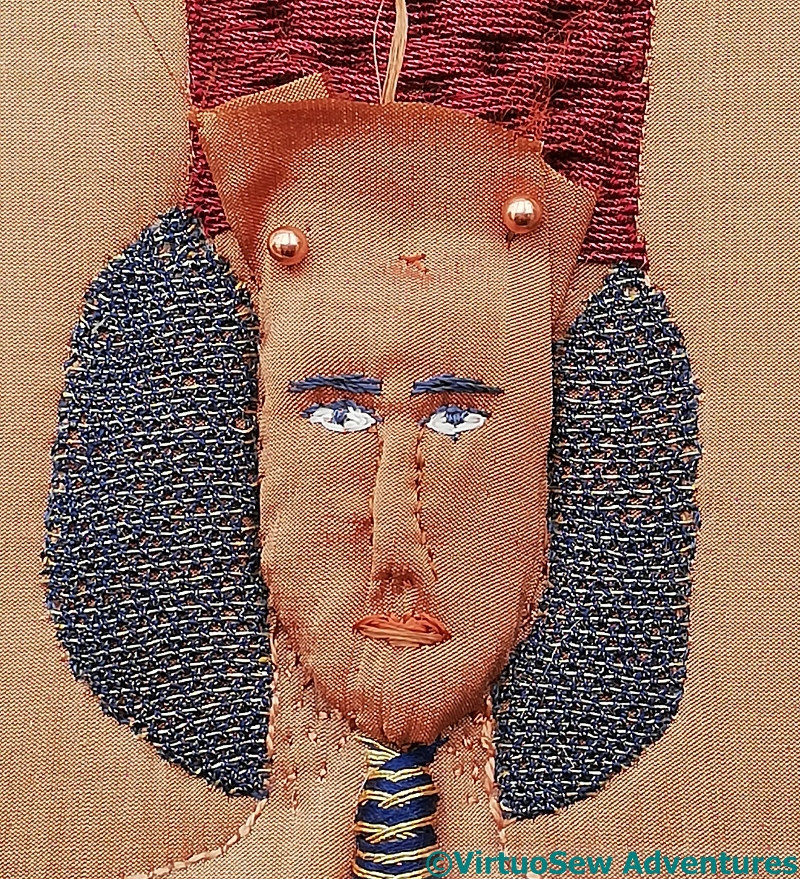
Having found the last attempt didn’t result in quite what I was aiming for, I tried a new approach.
This time I took the outline of the face from the main piece, and needlefelted around it to get the shape to fit. Then I tried to get the features in place again, but having learnt from last time, I tried to leave the felt padding a little softer so as to be a bit easier to embroider. When I was trying the wet-felted versions to be further needlefelted, I used several different wools to see whether it made a difference, but with my level of inexperience, it didn’t, so this time I just used the first that came to hand.
Face In Progress
Then I stretched silk over the top and began to stitch again.
When I tweeted this picture in a frustrated I’ve-had-enough-of-him pause, one of my friends replied “It’s Cassandra O’Brien!”. Which gave me a much-needed giggle – although I have a lowering feeling that Akhenaten and Cassandra might have got along quite well. Not necessarily the most admirable of people, either of them.
And don’t my lovely copper/rose-gold headed pins disappear beautifully against the fabric!
Face In Place
This looks rather better, I think.
I would have been happier if I could have made the brow heavier, and the nose more forward, but by now I feel I’m entering a world of diminishing returns, and may even start to make negative progress, which would be disheartening to say the least.
Now to see how this face copes with all the fuss of headdress and accessories…
You can see here that I’ve reversed the colours of felt used for the same flower shape on the sleeve, and added tiny blue stitches as highlights.
Chained blanket stitch, crested chain stitch, fern stitch, and a slightly freeform variant of feather stitch adorn the various petals. The light blue is used to tie down some trellis couching and for three tête-de-boeuf stitches to lighten the bowl of the flower.
The edges of the fawn leaves are simply caught down with an overcast stitch, but the spines are worked in Siennese Stitch, found in one of my multitude of stitch dictionaries. The circle is one of several, edged with up-&-down blanket stitch, and speckled with what Barbara Snook describes as “Knotted Stitch – Danish origin”. At the extreme right there are two small brown leaves, with reverse chain stitch stems and long straight stitches creating veins. The fabric comes from some thick walking socks which felted in the wash!
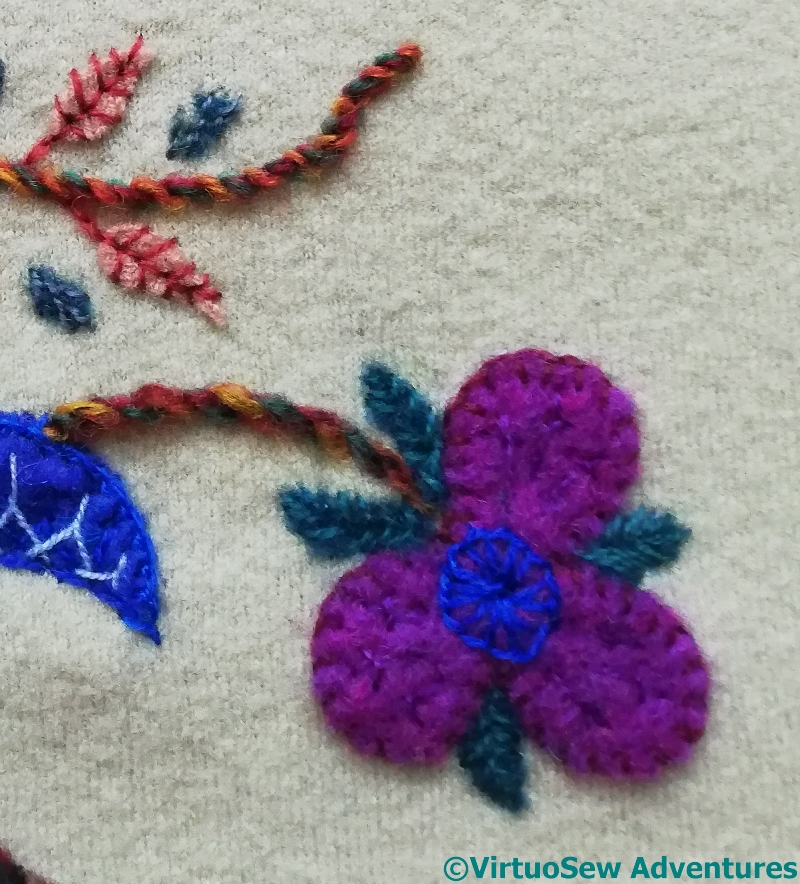
Blue and Magenta
There were three of these three-petalled flowers (if that’s what they are!) and I worked each in the same way – blanket stitch edges, sword stitch for texture, blue central circle in buttonhole stitch, and teal leaves in fishbone stitch.
As you can see, deciding to keep some elements the same, or similar, has spread beyond the smallest leaves!