Having found the last attempt didn’t result in quite what I was aiming for, I tried a new approach.
This time I took the outline of the face from the main piece, and needlefelted around it to get the shape to fit. Then I tried to get the features in place again, but having learnt from last time, I tried to leave the felt padding a little softer so as to be a bit easier to embroider. When I was trying the wet-felted versions to be further needlefelted, I used several different wools to see whether it made a difference, but with my level of inexperience, it didn’t, so this time I just used the first that came to hand.
Face In Progress
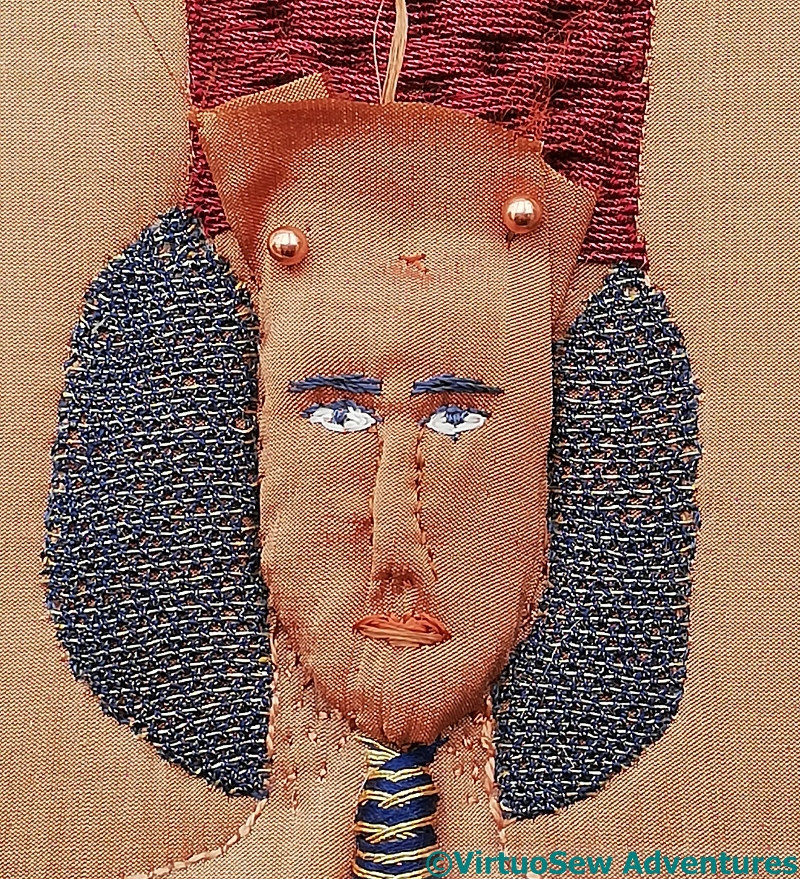
Then I stretched silk over the top and began to stitch again.
When I tweeted this picture in a frustrated I’ve-had-enough-of-him pause, one of my friends replied “It’s Cassandra O’Brien!”. Which gave me a much-needed giggle – although I have a lowering feeling that Akhenaten and Cassandra might have got along quite well. Not necessarily the most admirable of people, either of them.
And don’t my lovely copper/rose-gold headed pins disappear beautifully against the fabric!
Face In Place
This looks rather better, I think.
I would have been happier if I could have made the brow heavier, and the nose more forward, but by now I feel I’m entering a world of diminishing returns, and may even start to make negative progress, which would be disheartening to say the least.
Now to see how this face copes with all the fuss of headdress and accessories…
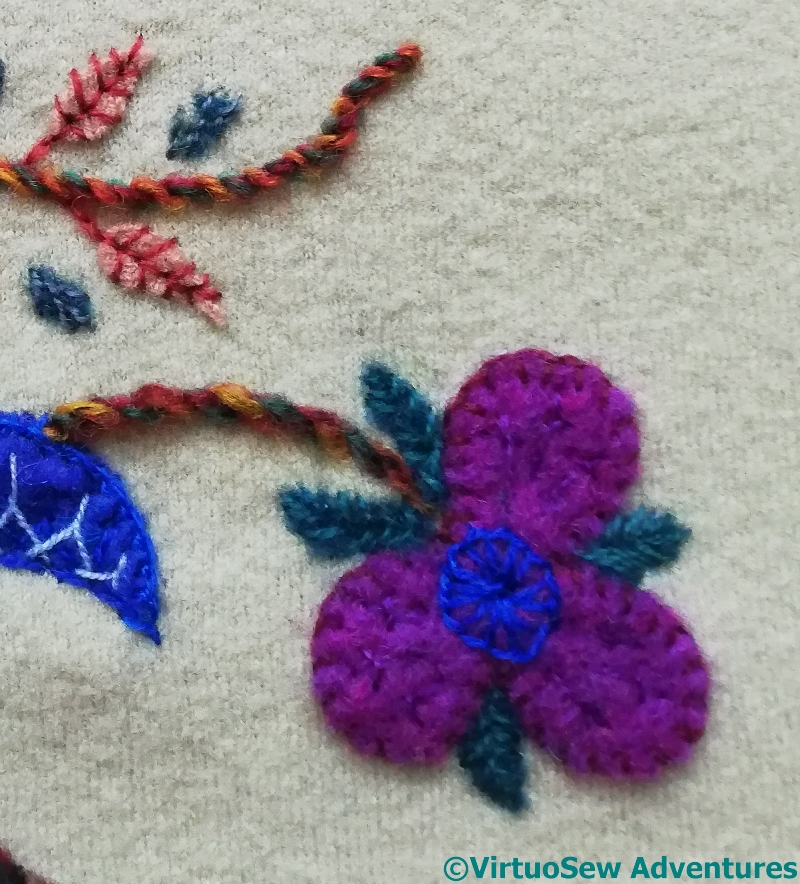
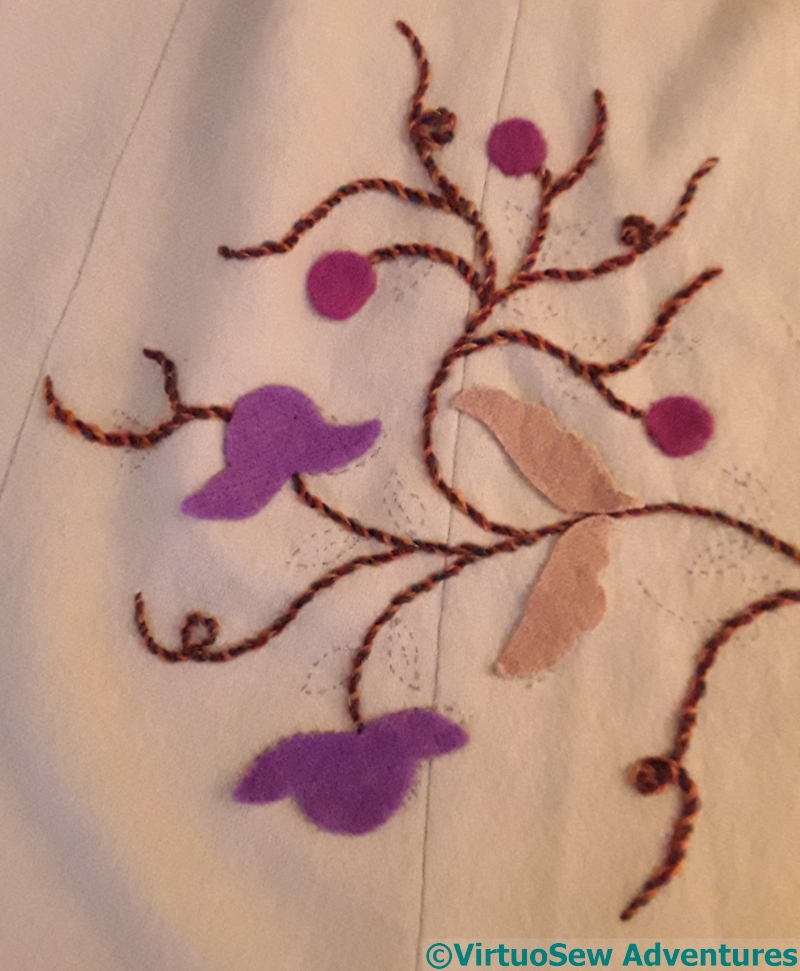
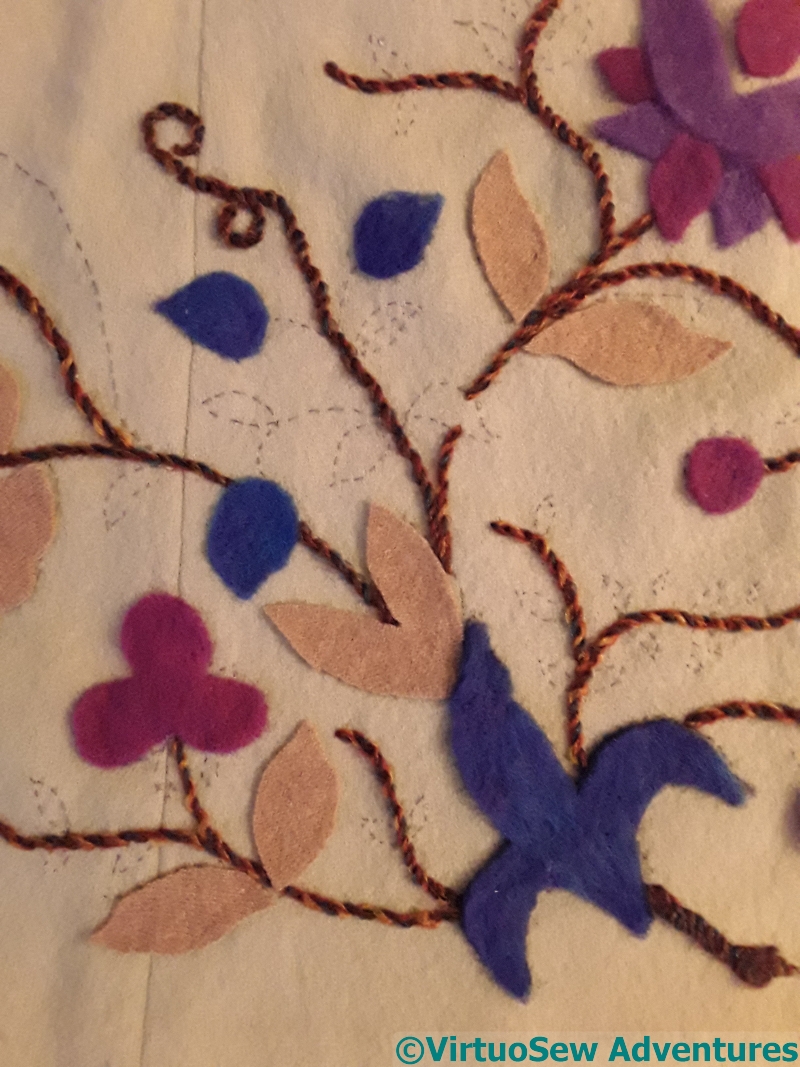
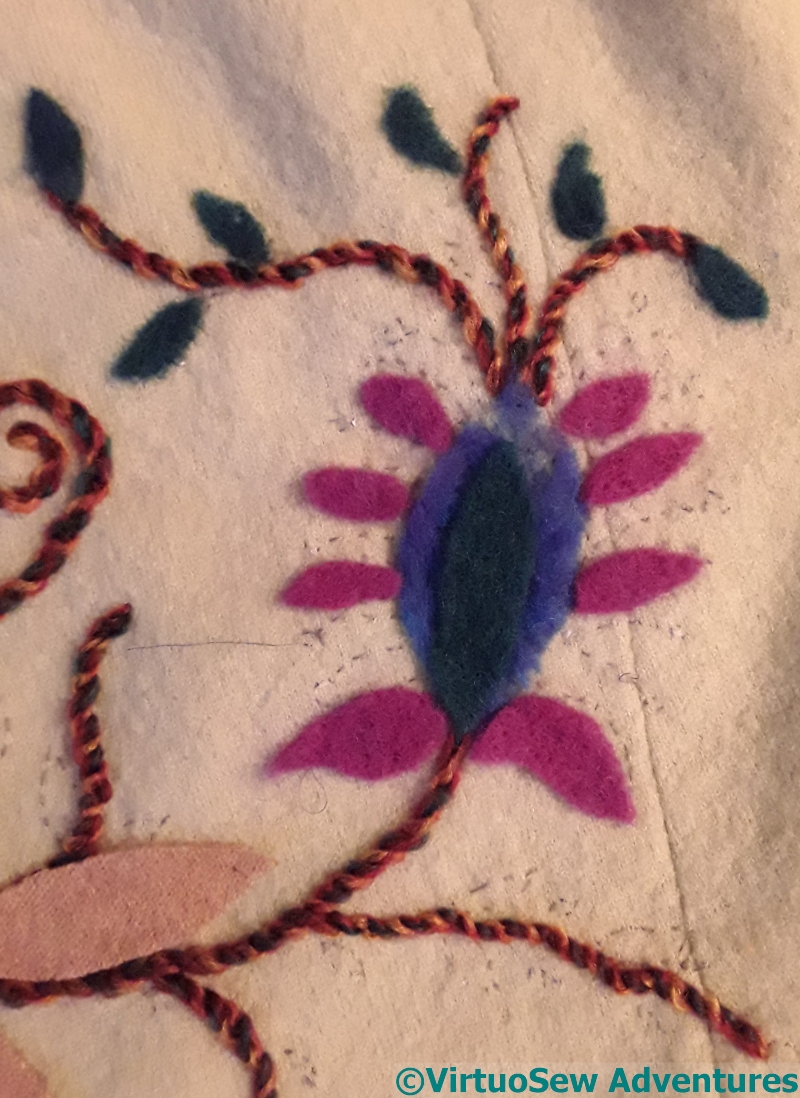
You can see here that I’ve reversed the colours of felt used for the same flower shape on the sleeve, and added tiny blue stitches as highlights.
Chained blanket stitch, crested chain stitch, fern stitch, and a slightly freeform variant of feather stitch adorn the various petals. The light blue is used to tie down some trellis couching and for three tête-de-boeuf stitches to lighten the bowl of the flower.
The edges of the fawn leaves are simply caught down with an overcast stitch, but the spines are worked in Siennese Stitch, found in one of my multitude of stitch dictionaries. The circle is one of several, edged with up-&-down blanket stitch, and speckled with what Barbara Snook describes as “Knotted Stitch – Danish origin”. At the extreme right there are two small brown leaves, with reverse chain stitch stems and long straight stitches creating veins. The fabric comes from some thick walking socks which felted in the wash!
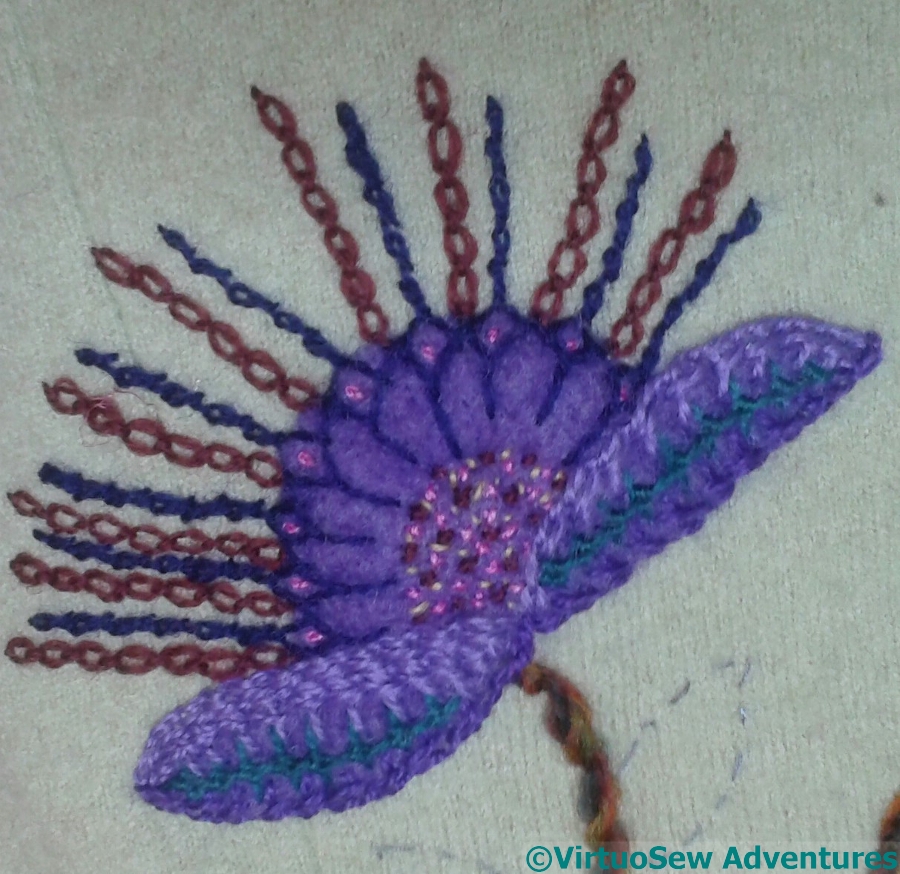
Blue and Magenta
There were three of these three-petalled flowers (if that’s what they are!) and I worked each in the same way – blanket stitch edges, sword stitch for texture, blue central circle in buttonhole stitch, and teal leaves in fishbone stitch.
As you can see, deciding to keep some elements the same, or similar, has spread beyond the smallest leaves!
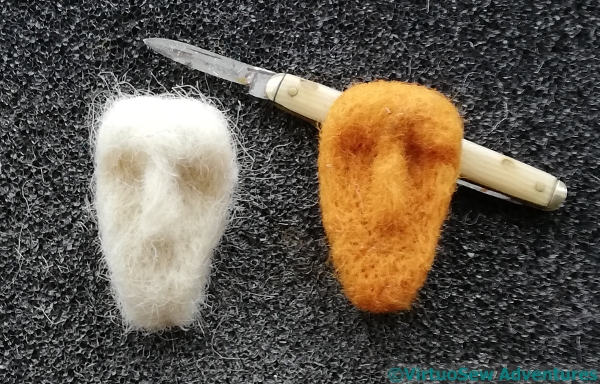
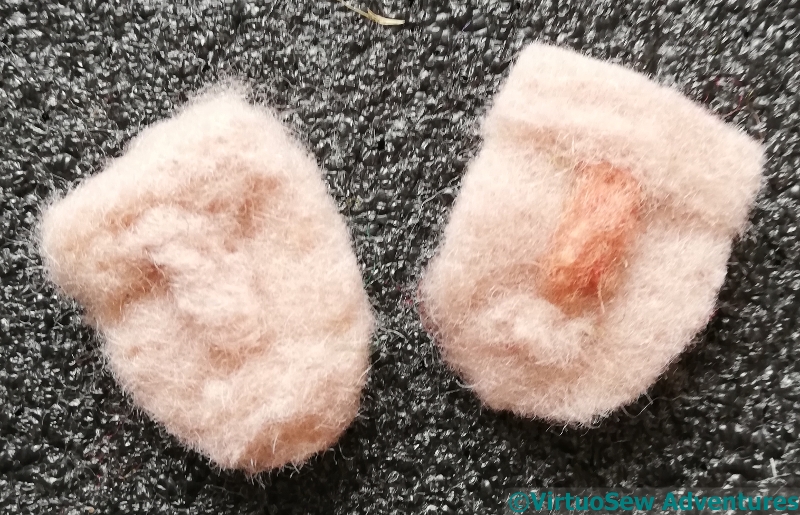
As you may recall, my last attempt at a face for Akhenaten wasn’t entirely successful, so I started again… This time I needlefelted the shapes very fiercely (which I enjoyed more than I expected to!) until they were quite solid and strongly shaped, only to discover that they were far too deep and I had to saw off the back half with a penknife!
Another Face Attempt
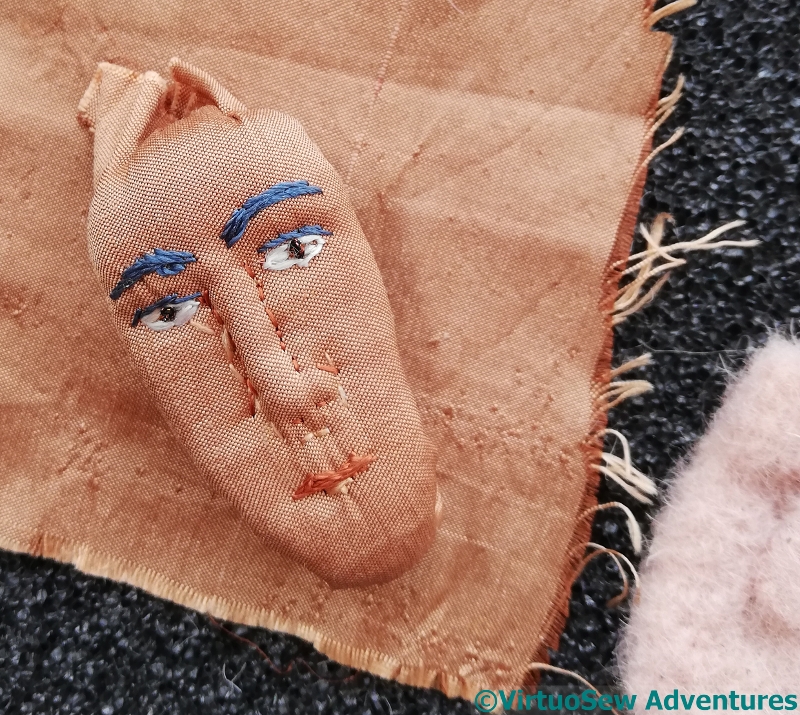
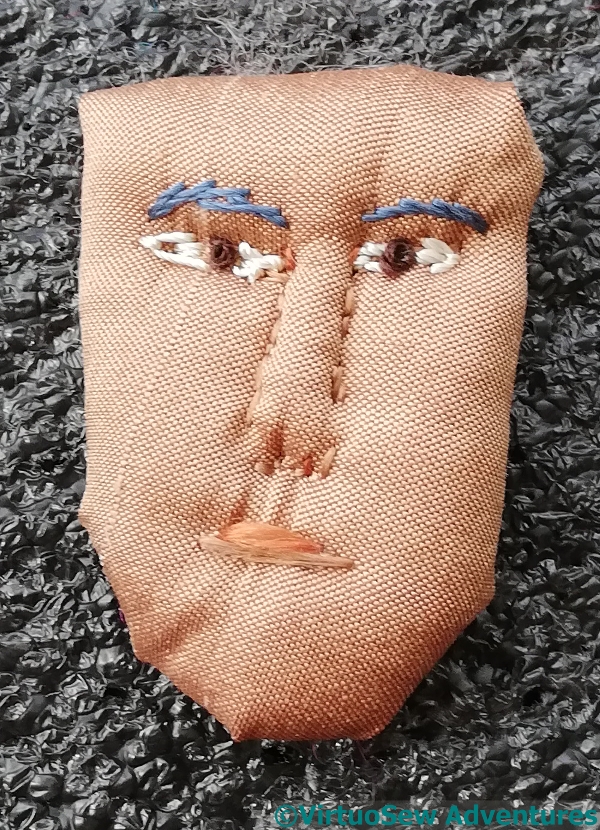
Then I stretched another fragment of silk over the top and worked the features.
When you consider how deep the eyesockets are in the felt, I’m a bit surprised that the eyes on this version don’t appear more deep-set, but he does have nice heavy brows, and the rest of the features aren’t too bad..
The face is also as narrow as it appears in that purple watercolour from a couple of weeks ago, so I felt quite optimistic when I turned back to the frame he sits on.
Too Narrow A Face
However, you can’t say that this face is much better than the apoplectic trumpeter – it has turned out by far too narrow for the space left for it, and I suspect that the detached buttonhole stitch with return used for the wig has done too much damage to the fabric to take it out.
So this is not the one to use, and I have to try again.
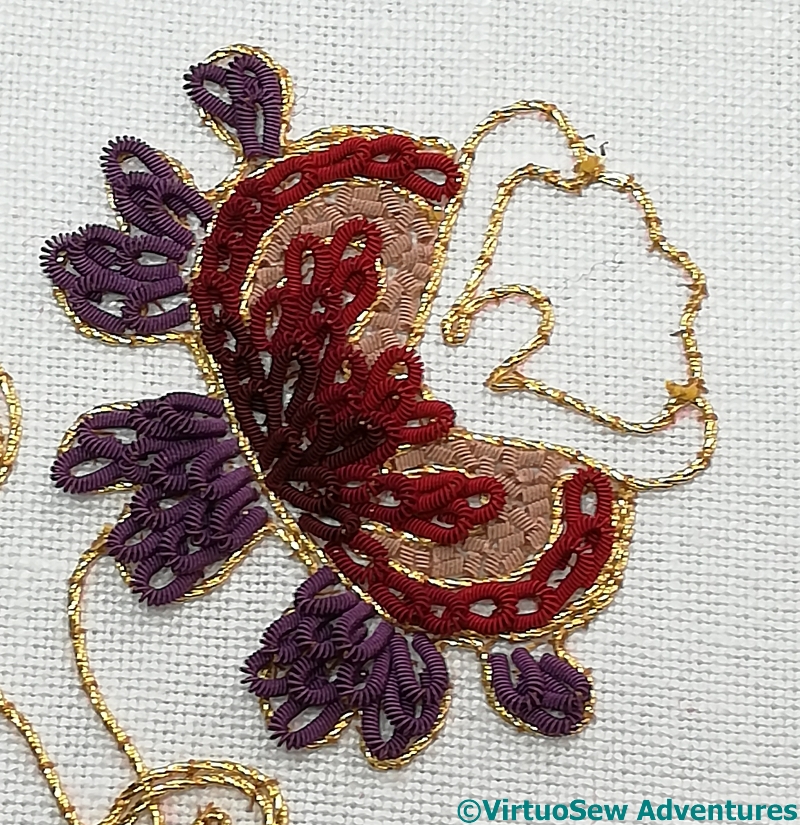
There was quite a lot to do in the second month, learning new ways to wrangle silk-wrapped purl.
The first element was composed of the loops of purple, short lengths bent in two and controlled by an extra small couching stitch to hold them in place.
This is a technique I’m sure I’ve seen before, and I must say I rather like the effect, although I found it rather worrying to do. The purl is small and fragile, and I think that at the moment I still don’t quite have the headspace to do as well as I would like.
Shaded Loops
I do think, however, that the time for just not doing it is passed. If I want my skill to come back to me, I will have to use it! Who was it who said, “the more I practise, the luckier I get”? I would like my embroidery to be good because I have worked at it, not because I “just got lucky”!
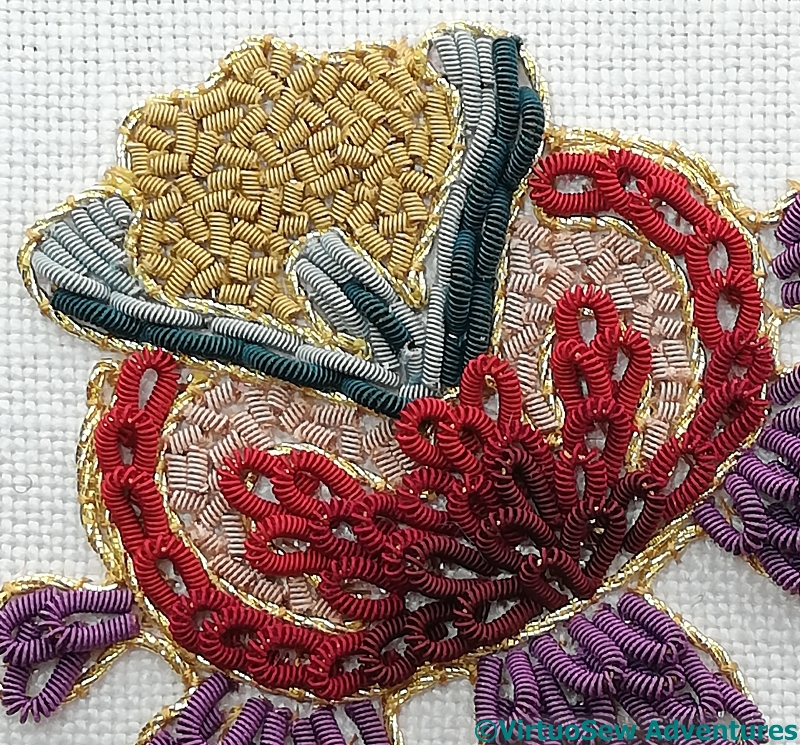
The next was chipwork, which is just like chipwork in ordinary purl except for the added terror in case the silk wrapping comes off..
And then I got more practice with those nested loops, with the added adventure of adding shading as I went along.
Couched humps and chipwork
Finally, there was more chipwork, and some little raised humps. These are made of purls stitched on like beads, but with a stitch slightly shorter than the length of purl chosen.
Again, these are not quite as consistent as I would like them to be, although I carefully used the ruler provided in the instructions to cut the lengths.
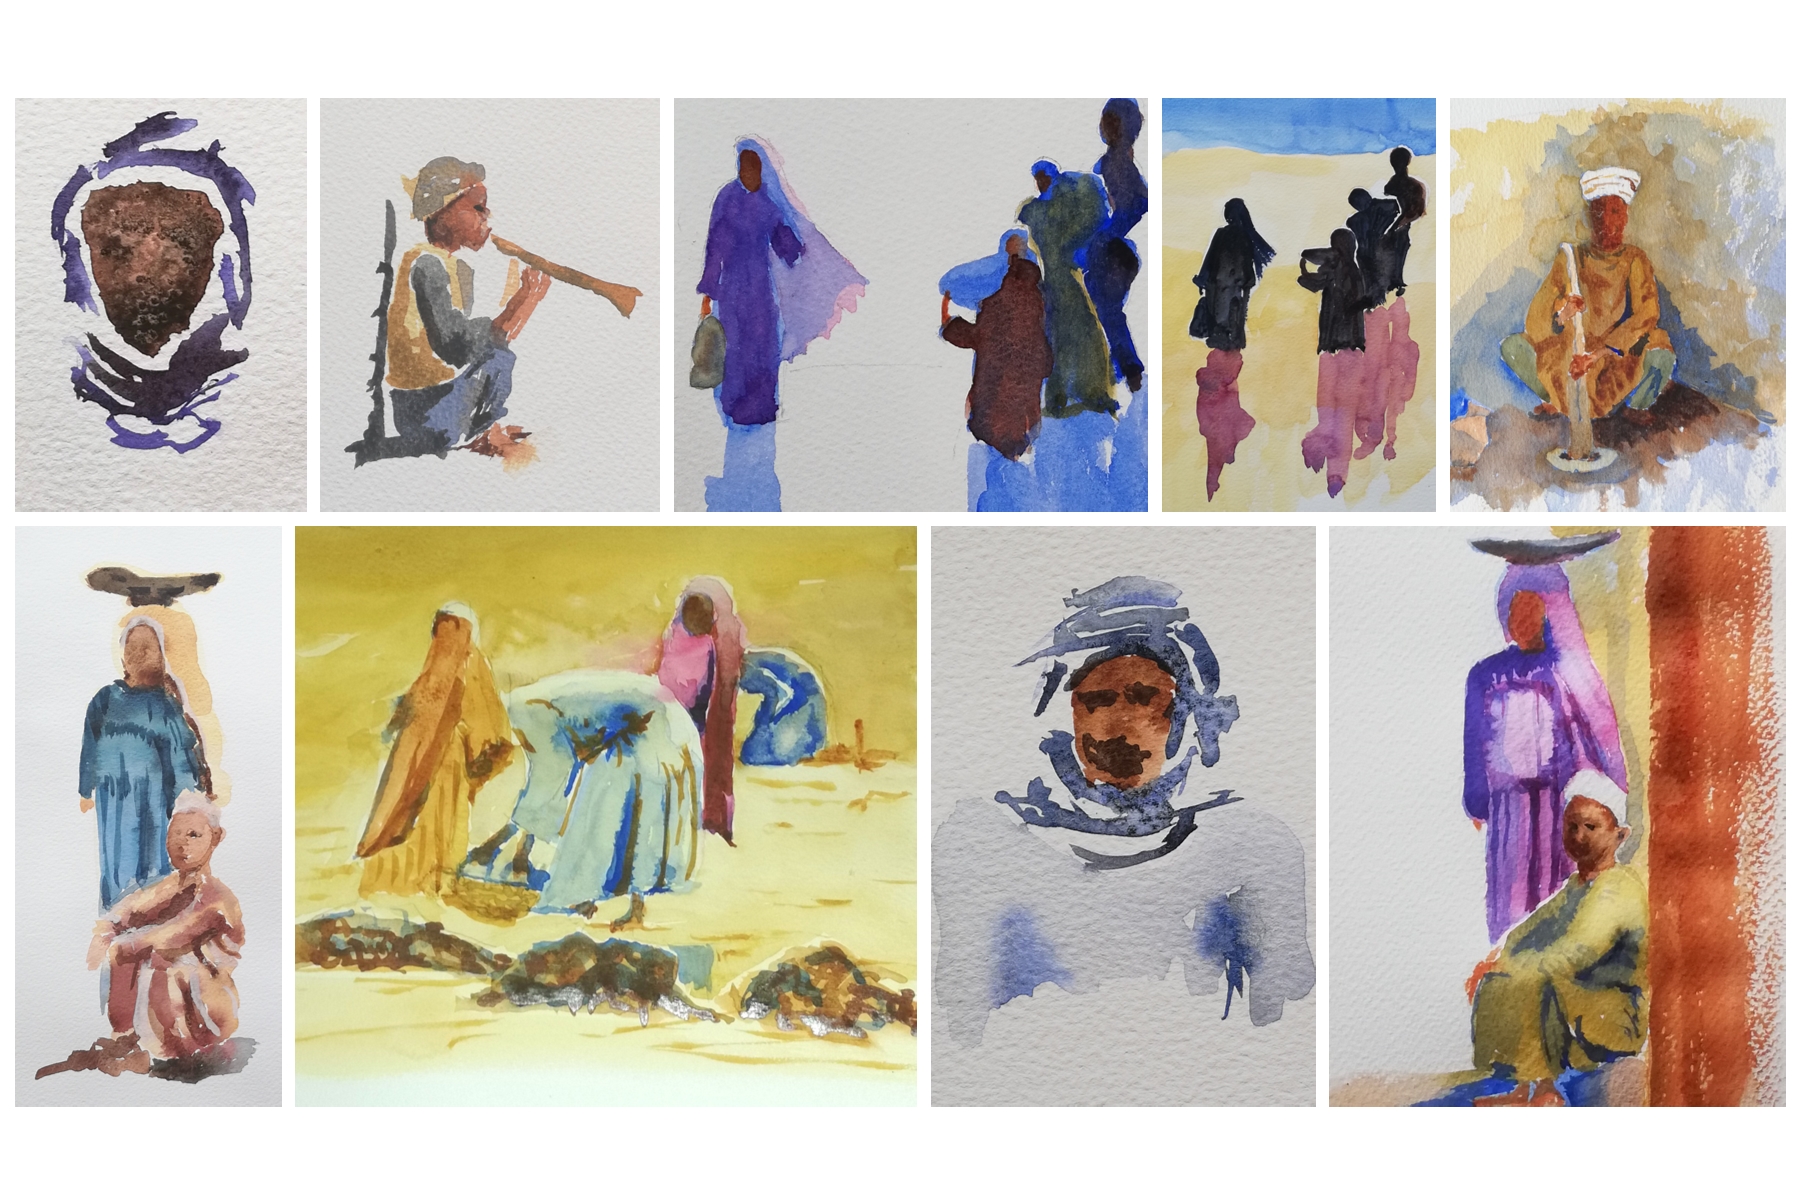
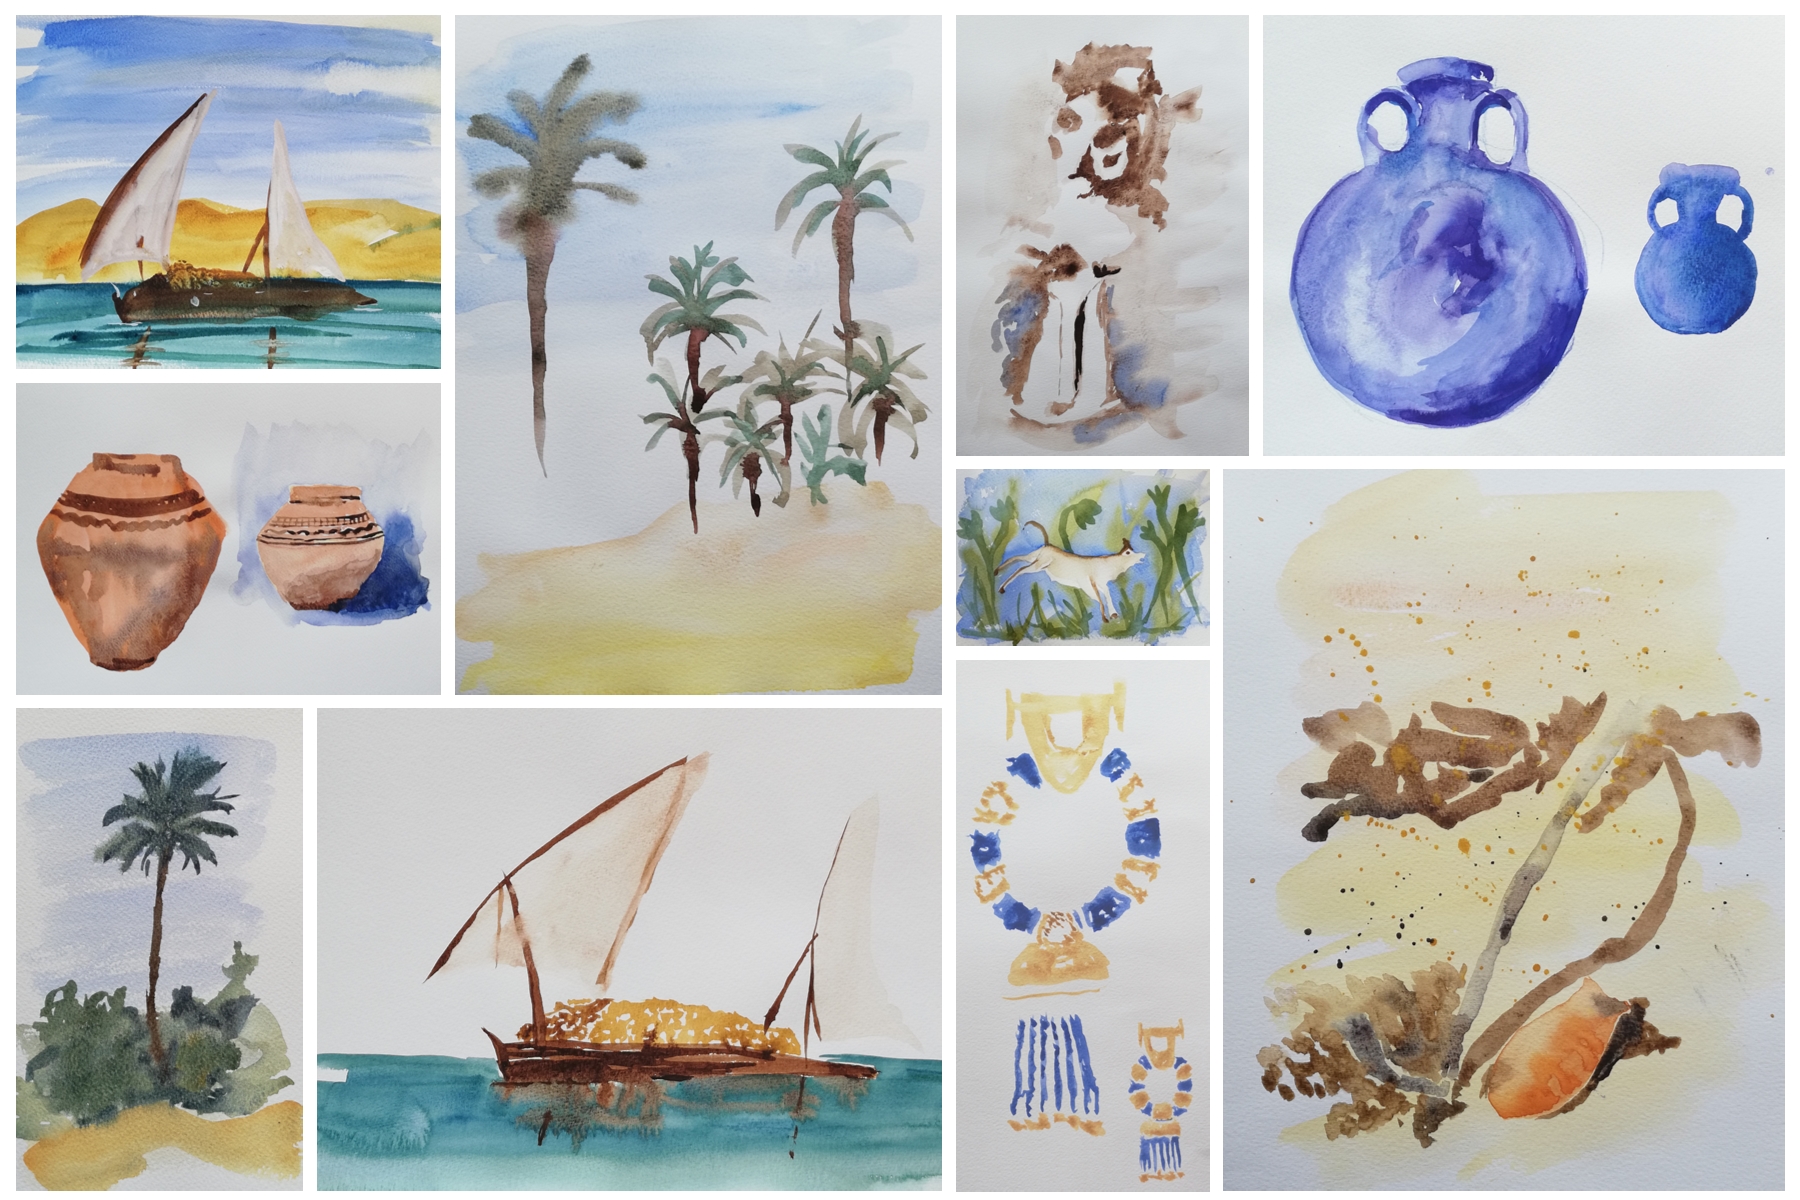
There’s more than one way of thinking about a project. I’m still trying to feel my way to an understanding of Akhenaten’s face, and this is one way of doing so. The purple one in the middle is the most recent, and most clearly shows the strong shape of the face. So I might be making progress.
People
But the watercolours also give me a chance to show things that I’m not at all sure I want to attempt in embroidery. Of course, I’ve already done “Loading The Felucca”, which shows people, and the background of the second panel does too, but in all honesty, I think that difficult as they are, the watercolours were actually easier than the stitching!
Artefacts
The felucca, and the Hittite Amulet have both appeared in stitch already. I’d like to do more of the jewellery (I’ve got an assortment of goldwork supples to play with, after all!). I’m planning to do some more fresco fragments, and I’m sure another idea or two will occur to me soon!
One of the exasperating elements of this project is that the lovely clear, delicate green of the fabric isn’t showing on any of the photos I am taking. This strange, rather disheartening cream fails to reflect one of the pleasures of working on it.
Here you see the side of the coat with the two lilac half-circle motifs. There are also three circle motifs, and two huge leaves, not to mention all the little teal leaves that I’ve not even applied yet.
The circles have been relatively easy, but both the fawn leaves and the two lilac motifs are giving trouble…
About to be undone..
The first one of the two lilac motifs has rather lost the way home.
Somehow it is fussy, tired, and full of the wrong sort of detail. It’s also too dark. I need to reduce the dark blue and dark maroon stitching.
I’m not even sure that the felt will survive.
That said, I like the blanket stitch variation of the lilac stitches, and the green Reverse Palestrina Stitch.
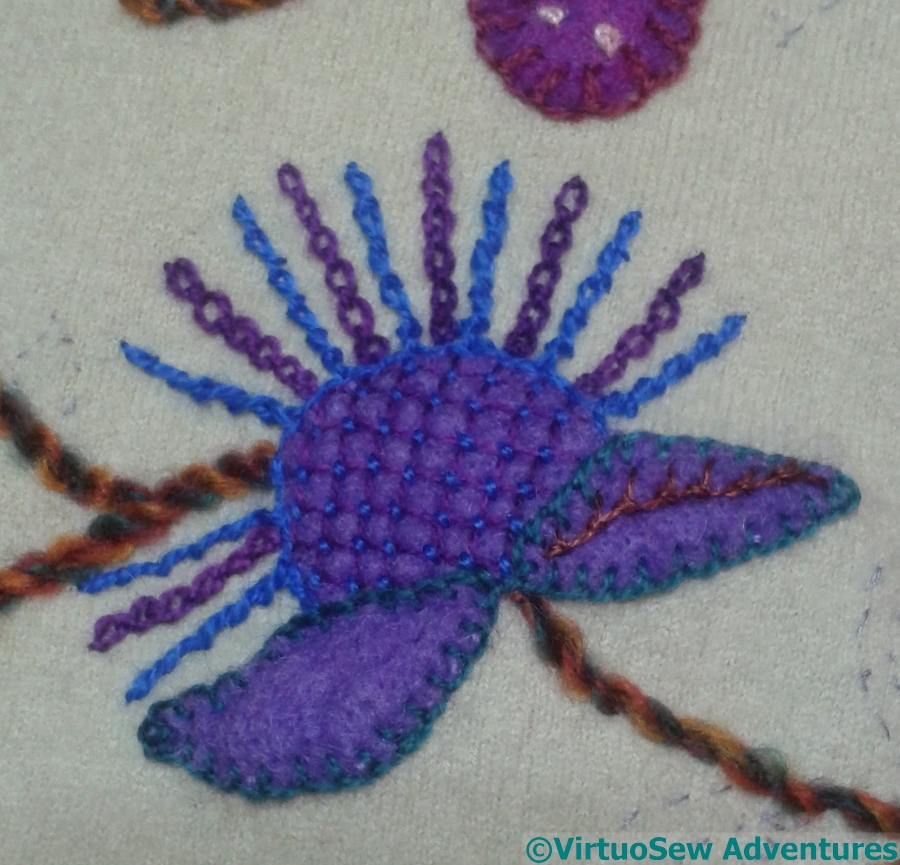
A better version..
This is a better version.
There aren’t as many colours, or as many stitches as in the version I’m not happy about. The fronds are in Cable Chain and Twisted Chain, and the purple trellis is couched with the blue.
Now I need to unpick the first one and come back to it, informed by the much better second version. I don’t want it to be entirely the same, but closer would certainly be better!
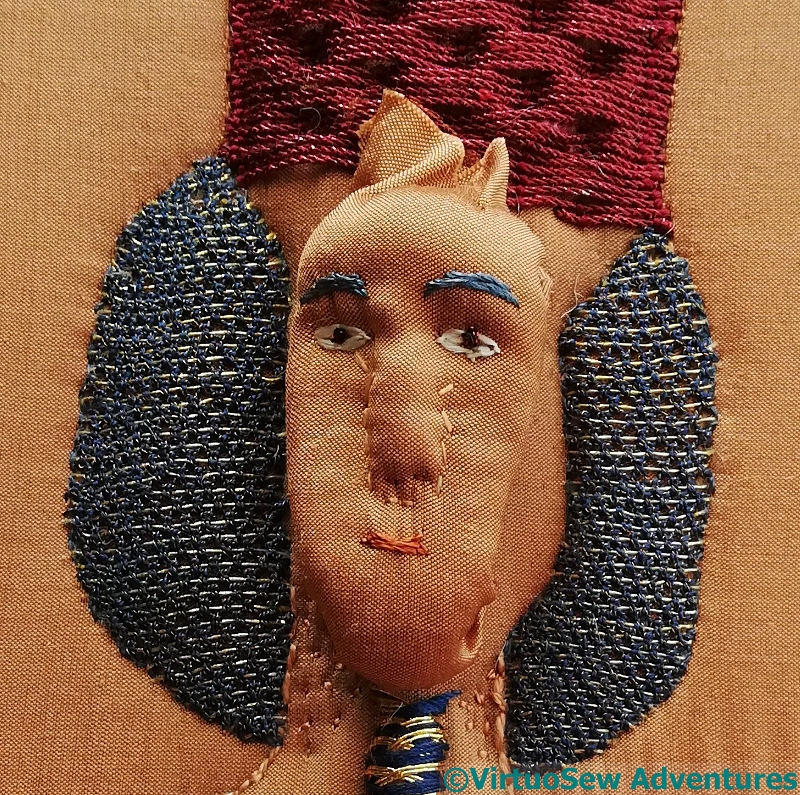
I’ve felt the face was rather weak, so I decided to try again.
This time I needlefelted the padding underneath, to try to get the nose, the heavy brows, and the mouth in place.
Twice.
Separate Face
Then I covered the padding that seemed the better with silk, and stitched the features again. In some ways, this is better than the first attempt, but it still looks a bit twisted. The eyes are certainly staring, but the nose isn’t straight.
In my defense, it became harder and harder to stitch, even though I began to feel that the shaped padding wasn’t shaped enough. Or even padded enough!
I think that before I attempt another version, I need to work out a way of keeping the silk under control while I add the features, without actually attaching it all the way around
In spite of that, I decided to attach this face in place of the last, and see whether I felt that a face “stuck on afterwards” would be a problem.
More work needed!
Well, no, I don’t think it is, although it’s hard to be sure. Not least, it involved removing still more of his headdress. That will need more padding to sit well with a more padded face.
I am sure that I need a new version, though. At present he looks like an apoplectic trumpeter, and that is not a good look for the Heretic Pharoah!
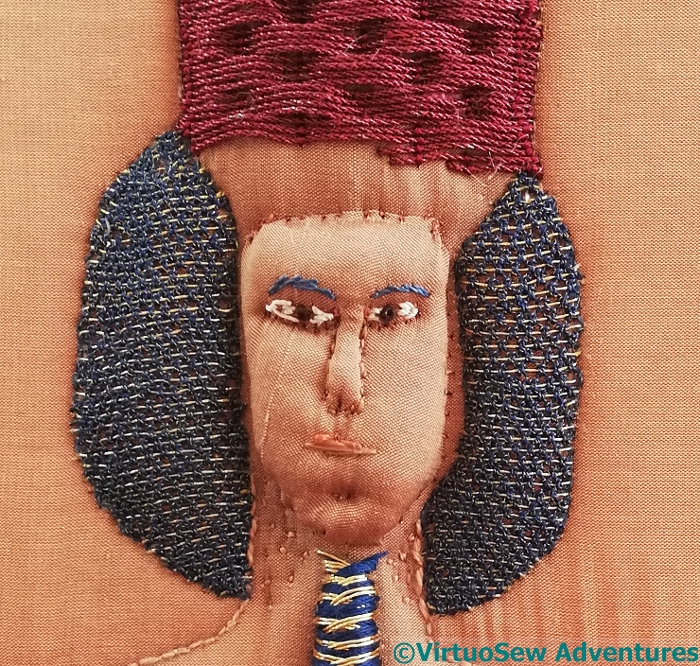
This photo shows the central section, with the major felt sections in place, and the minor ones left until later. That in turn means that the colour range is not quite right, because the greeny-teal is missing.
What it does show, however, is that the disheartening spotty effect I experienced with the Piano Shawl is entirely prevented by the couched stems!
Since my blue felt was made using layers of blended wool sliver it has some slight variation of colour, which I was hoping to pull out in my stitching. That may not quite work, but at least I can try.
I also want to make the fawn leaves much more varied, so although there are several successful treatments I could choose to use in all cases, I’m going to try to be more experimental.
Interim Version
This photo is already out of date, because I’ve unpicked the fawn leaves once already, and I’m not entirely sure about some of the details on the large blue leaves. The light blue half-Cretan stitch may not survive to the finished garment!
There is a mid-blue knotted edging stitch on the top edge of the two outer blue leaves which I may have invented at the time, and certainly can’t reconstruct in the cold light of day. The spine of the central leaf is Square Chain, with the corners couched down with a darker thread, and the edge is closed feather stitch. There will probably be a lot of closed feather stitch – it is a useful stitch for the edges of these shapes.
I’ve not written about the Colossus of Akhenaten for a while, but that isn’t to say I’ve stopped thinking about it. Unfortunately Akhenaten is proving obstreperous (as in life, so in embroidery…!)
The Crook
I decided to try to sneak up on him by playing with details such as the crook and flail regalia.
I don’t want these to be couched to the fabric in bits, I want them to seem like miniaturised regalia, so I’m planning to thread various coloured purls onto wire and then poke the end of the wire through the fabric to the back.
This heavy purl – called “Rope” on the Golden Hinde website – seems to work perfectly for the crook, but single wire wasn’t strong enough to support it, so much of the experimentation was to get the right number of strands. I’m so glad I have proper goldwork scissors – the rope is tough and springy stuff.
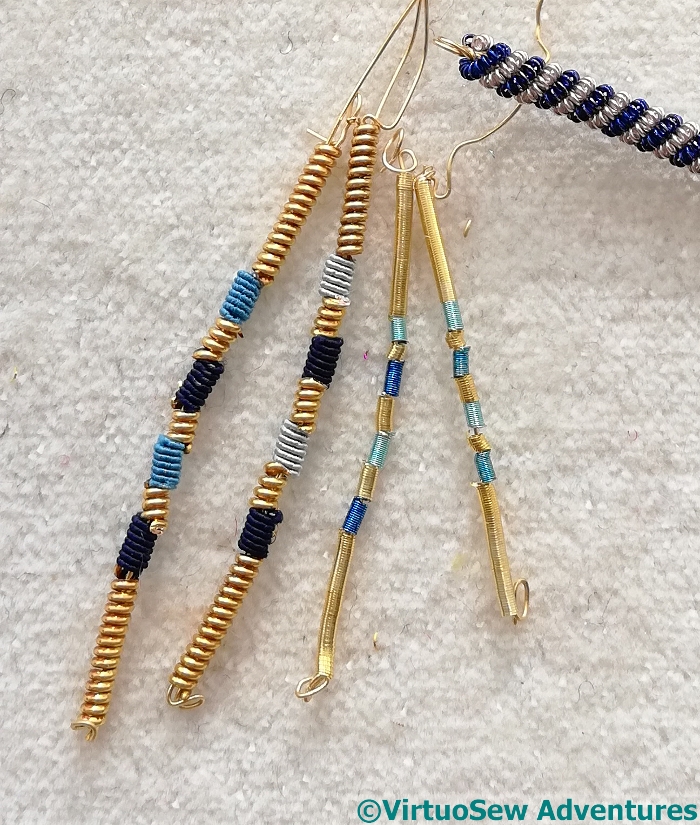
Flail Experiments
You may recognise the materials in some of these experiments for the flail!
The two on the left use silk-covered purls in blue, with heavy gold pearl purl. The two on the right are coloured and gold purls, some of those used in the chipwork on the belt.
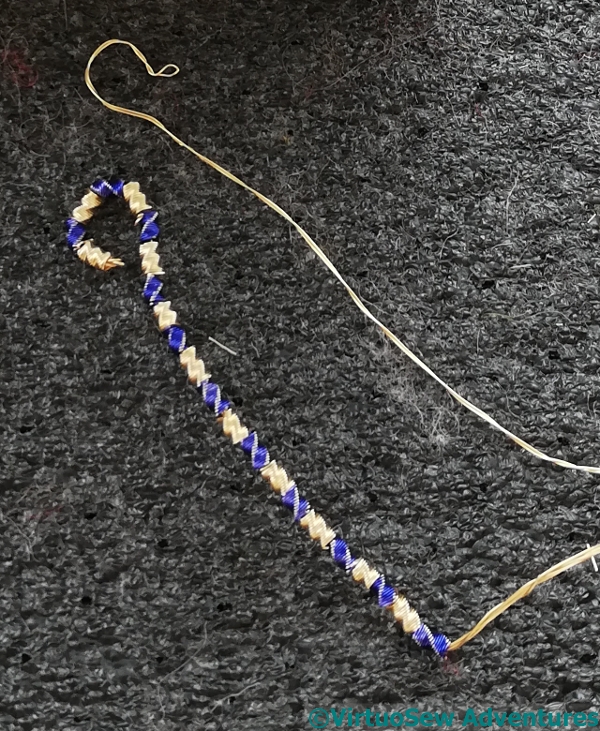
The potential handle is a gloriously stiff, over-the-top purled pearl purl in blue and silver, named something like “winter spiral”. I have my doubts about it in this context, because it’s silver rather than gold, but we’ll see…
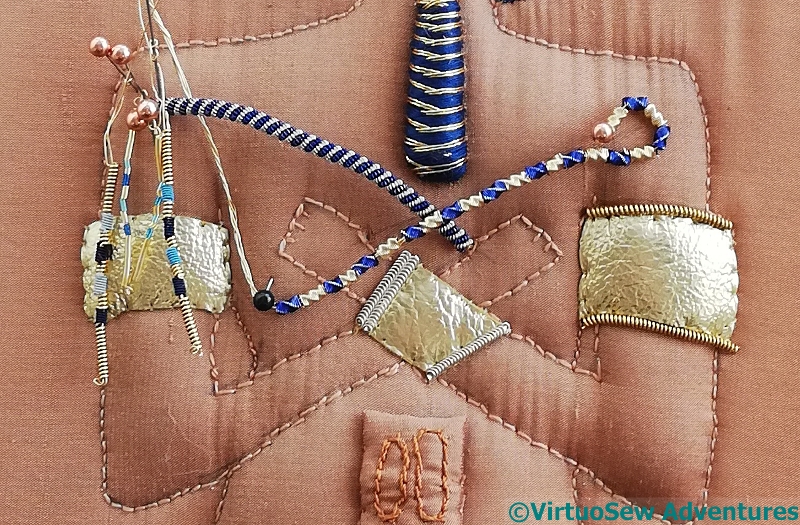
Regalia Placement Experiments
I couldn’t resist trying the crook and flail trials in place.
I’m happy with the crook, but the flailing bits of the flail are giving trouble. None of the options really looks the right scale – the purls are too small, the pearl purl may be a bit too heavy, and the “winter spiral” handle doesn’t look quite right, either.
I haven’t put all the felt pieces all around the coat, because apart from anything else I have limited tolerance for cutting out bits of felt, but I have a good start made, and I can start playing with stitches, which is much more fun!
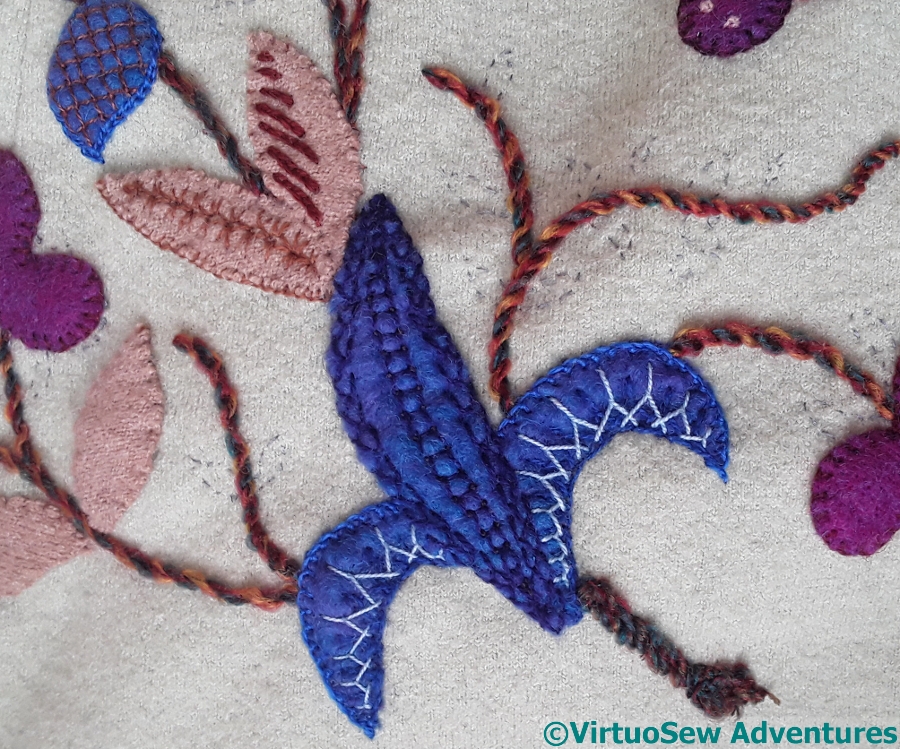
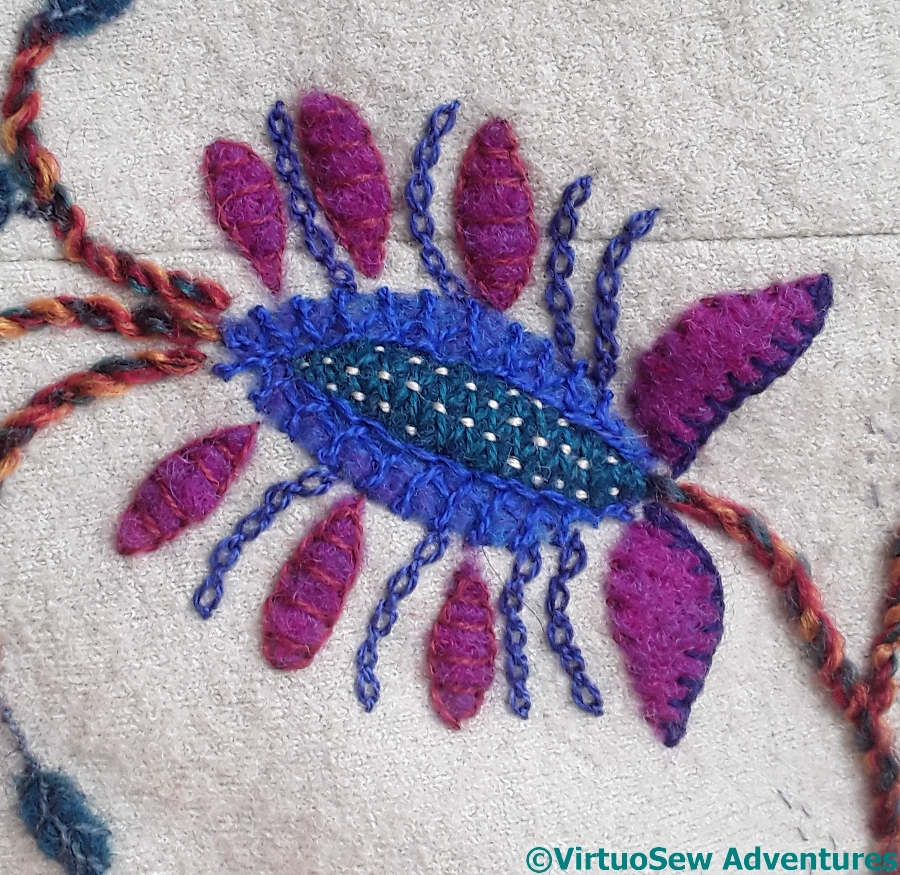
This is one of the most complex motifs.
The blue felt is one I made myself, because I didn’t already have a suitable one – which explains the thin patch at the top. Wet felting is not as easy in practise as it seems in theory!
The teal leaves were easy, of course, because I have already decided to use feather stitch. After that, some thought was required..
Still don’t know whether this is a fruit or a flower..
A teal trellis, couched with pale yellow, provides the “lift” here, and one of my favourite stitches, cable chain, provides the fronds. I’ve reduced the number of fronds – I think there were two between each petal – because I thought it would look fussy otherwise.
The blue stitching on the blue felt is Crested Chain. The colours are close enough to create texture, rather than contrast, rather as the slightly rusty pink square chain modifies the petal colour in a different direction to the dark blue chained blanket stitch of the leaves at the base.
As with all the elements of this design, when I have the whole piece more or less finished, I will expect to add further details and tweaks to balance it all across the piece. We’ll see…