
Tag: apparel
More Thoughts on a Coat..
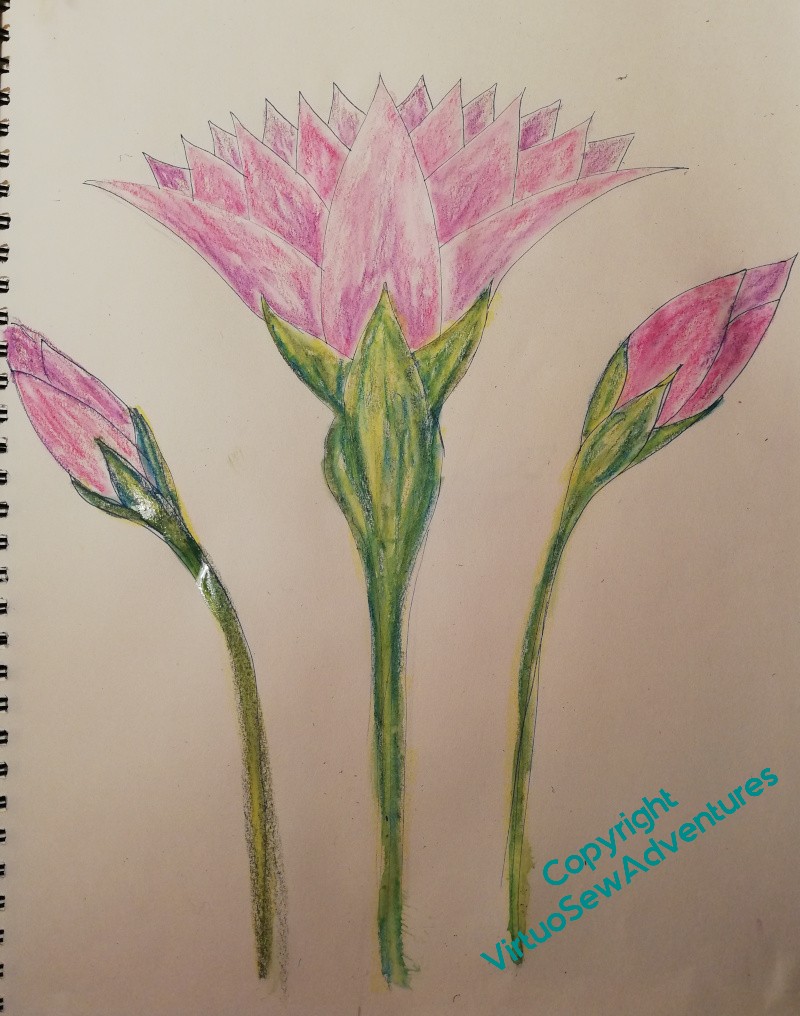
I want my design for the Lotus Coat to be big and bold, maybe a bit blousy, so what I have here may be a bit formal, and need rethinking.
Well, happy to do that, I had a lovely morning in the studio playing with these ideas, and I think what I have now is a good point for further play.
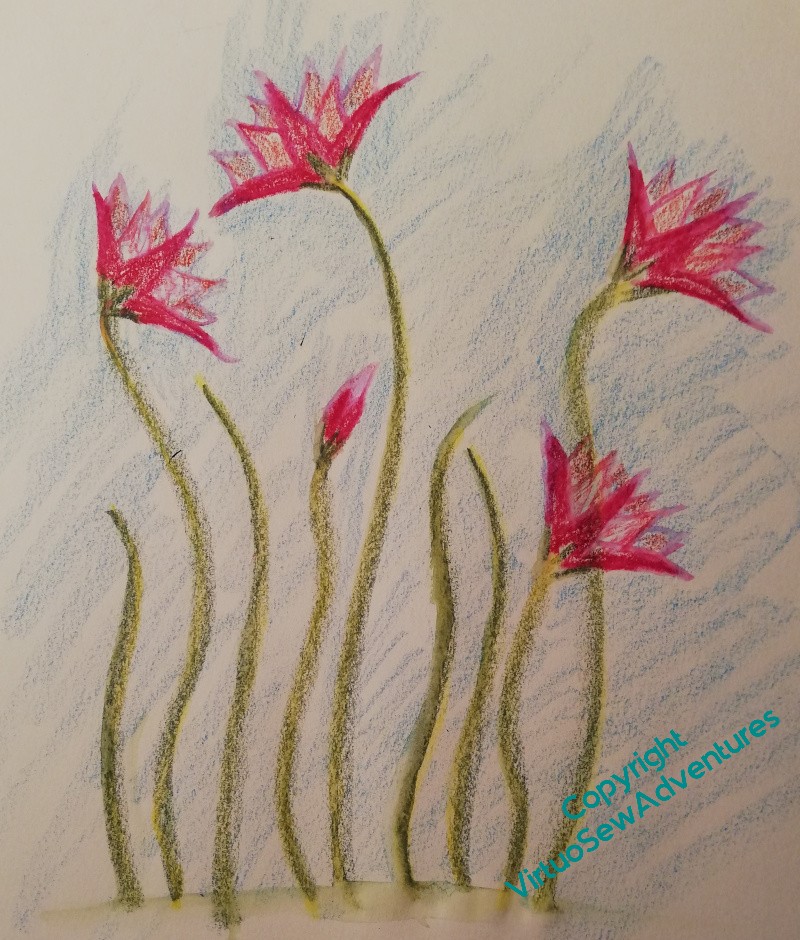
The idea of this set of designs is that the single lotus in the image to the right here will reach almost the whole way across the top of the back, from one seam setting in the sleeve to the other, while the supporting buds will be set in fact a little lower than they are shown.
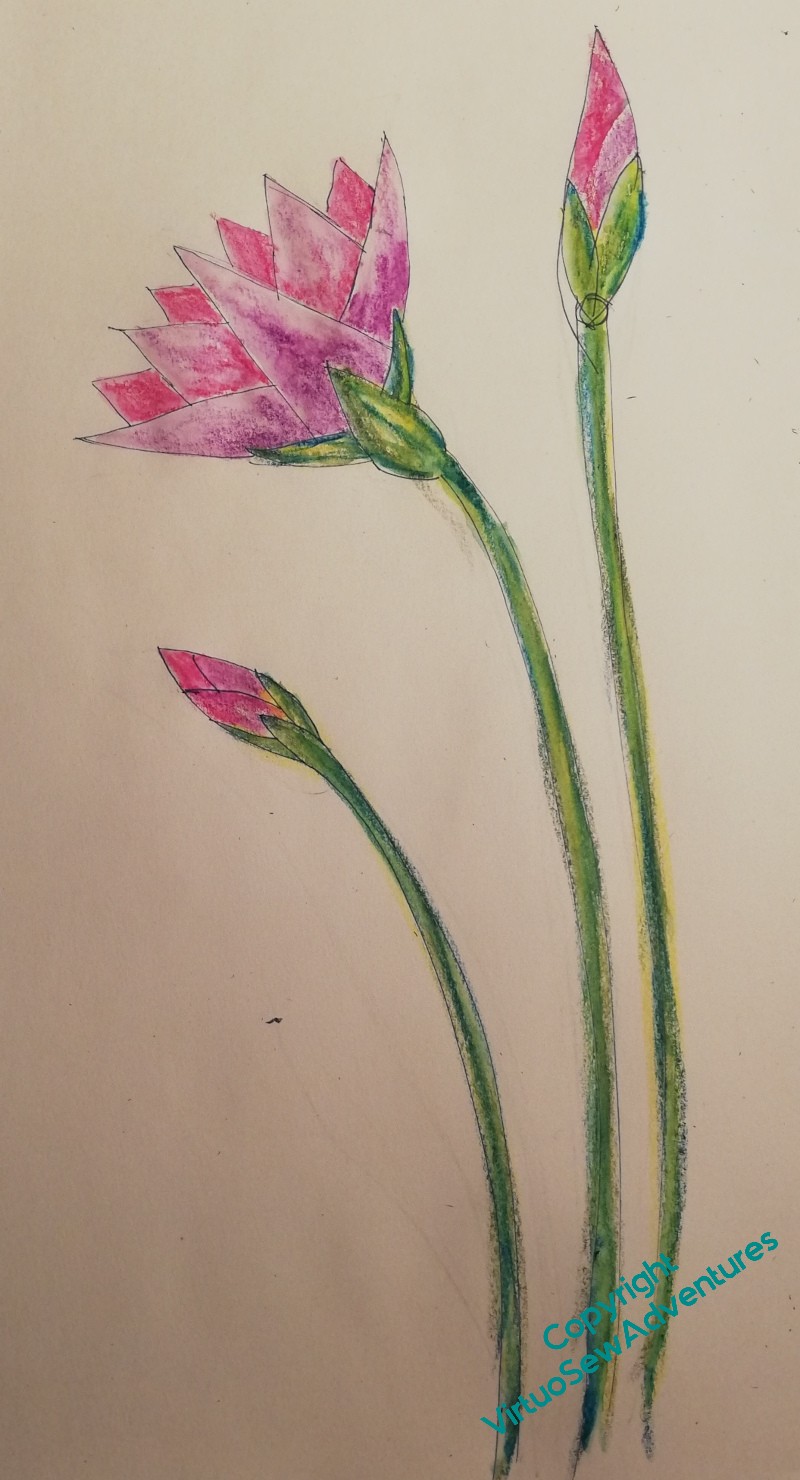
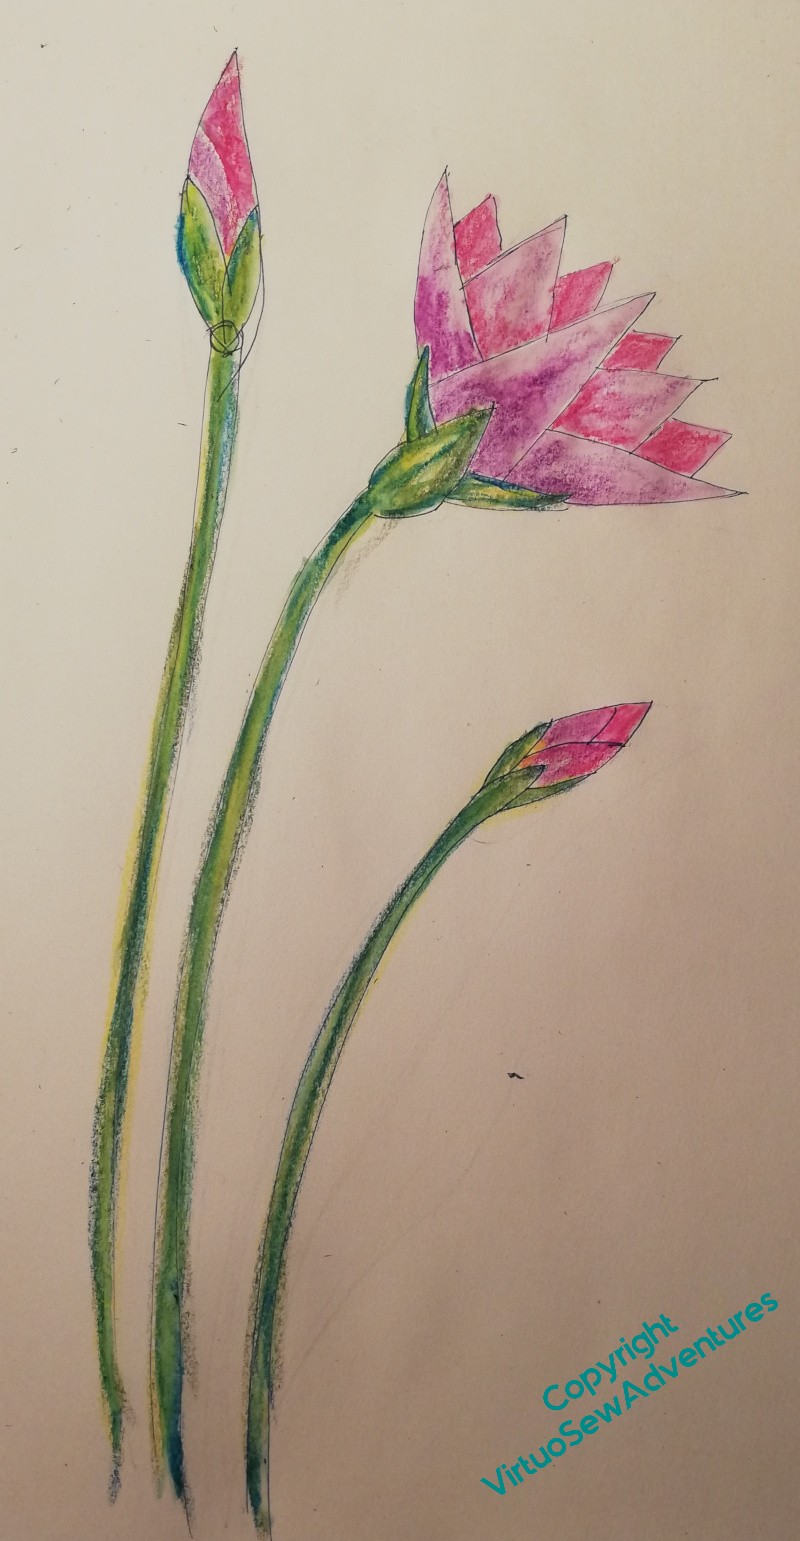
Meanwhile, on the front there will be something very similar on the left and right front.
I don’t want to make these identical – that would be too formal. So I want to create something that looks balanced, that doesn’t make me look as though I have one shoulder higher than the other.
I’m also planning how to actually achieve all this. At the moment, I’m thinking that I will try to find a light, loosely woven silk fabric that I can dye to match the tweed and stitch on that. Then I can do the stitching and be making the Coat at the same time. I’m not much of a dressmaker, so it might take a while. So I’ve ordered some samples from Whaley’s of Bradford, to try stitching on.
And for the stitchery? At the moment, I think, lots of line stitches in varying shades of white, lilac, and pink, using relatively heavy threads (at least in comparison with Aethelflaed’s filament silk!). Opportunities to use my favourite chain and feather stitch variations, to layer up stitch and effect – I might even find some angora or similar for some slightly fluffy areas. Not so densely stitched, perhaps, that you can’t see the silk, and through it, the tweed.
Of course, by the time I get to doing the stitching, I may have an entirely different idea…
Lotus Flower Coat – starting to plan..
When we visited last year, my aunt gave me a lovely length of faience blue tweed, and although I could, of course, make a skirt (another skirt!), the idea eventually came to me to make it into a sort of cross between a cardigan and a jacket – something that I can wear with lots of things, that makes a good additional layer in our cold house, but looks cheerful and casually smart.
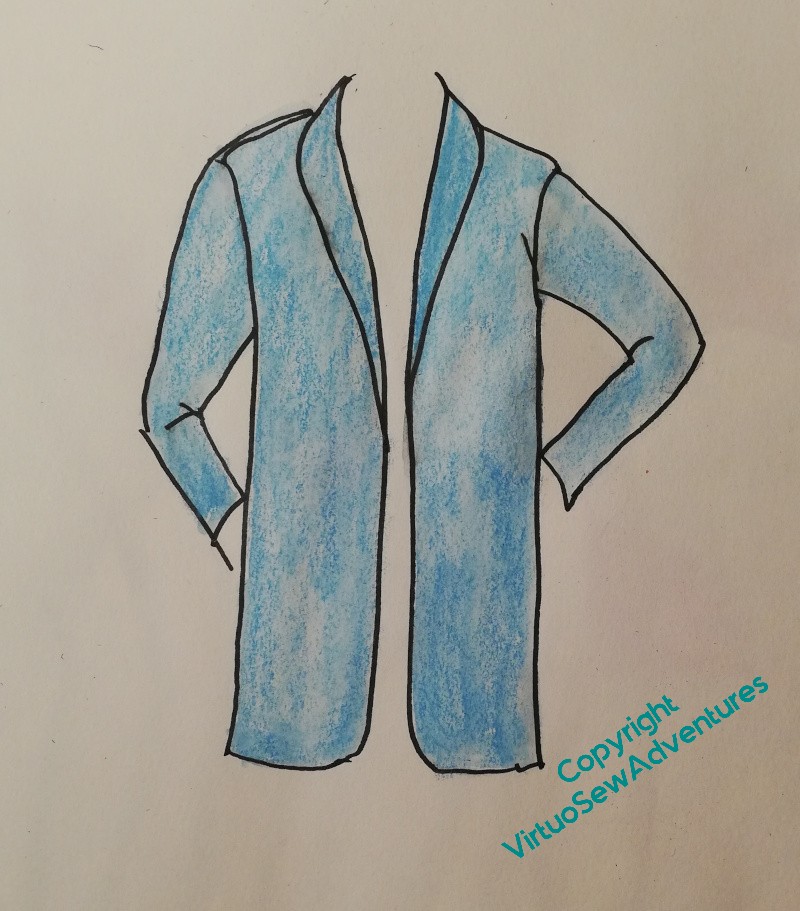
I thought about the colour, and some variant on the Egyptian Lotus Flower pattern seemed like a good start. Then I thought some more, and decided that the very graphic, formalised versions used in border patterns would want to be used formally and make the garment too formal. The tweed is relatively unfulled, and widely sett, so anything too structured won’t work well.
Something like this, I think. It’s a Simplicity pattern from the Seventies or early Eighties, and it won’t be hard to lengthen. It will be lined (which the pattern doesn’t call for), but there are few pattern pieces and almost no shaping.
Naturally, it won’t be going to go undecorated…!
Maybe a border pattern?
Somehow, no. I’ve not done one before – the Coat of Many Flowers has a swathe across the middle, and the Jacket of Many Stitches has the pattern dripping down from the shoulders – but I think it might end up looking a bit obvious, and a bit formal. I’ll still think a bit more about this one, but I’m pretty sure it won’t be this.
Watch this space, as they say…
Another Mathematical Patch
We discovered another thin patch on The Australian’s trousers..
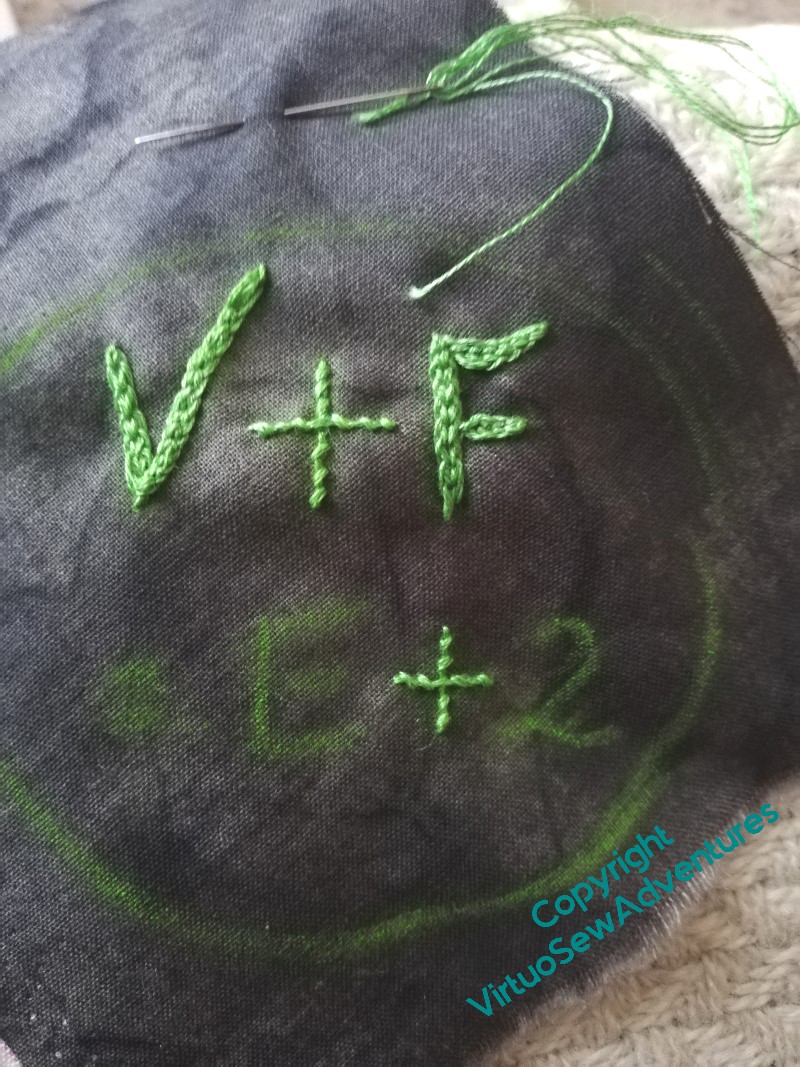
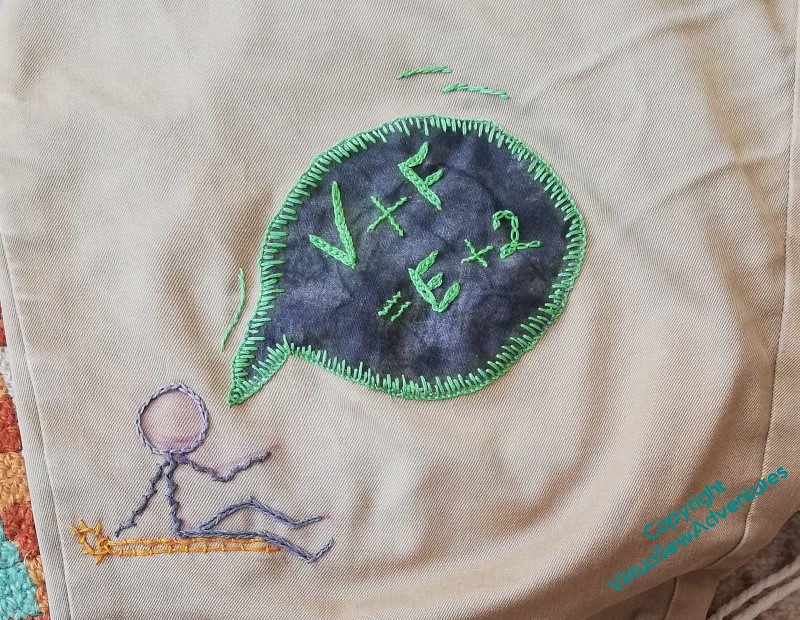
This time I found a slightly darker grey marbled fabric, and got The Australian to write one of the equations I remember from maths lessons at school in chalk.
I’ve done the letters in Hungarian Braided Chain, the plus and equals signs in Coral Stitch, and the “2” in Cable Chain – so that’s several of my favourites all at once! – and then had a thought..
I’ve done the patch as a speech bubble, attached using varied length blanket stitches, and put a few little lines of stem stitch in the same green thread to suggest the speech bubble is moving.
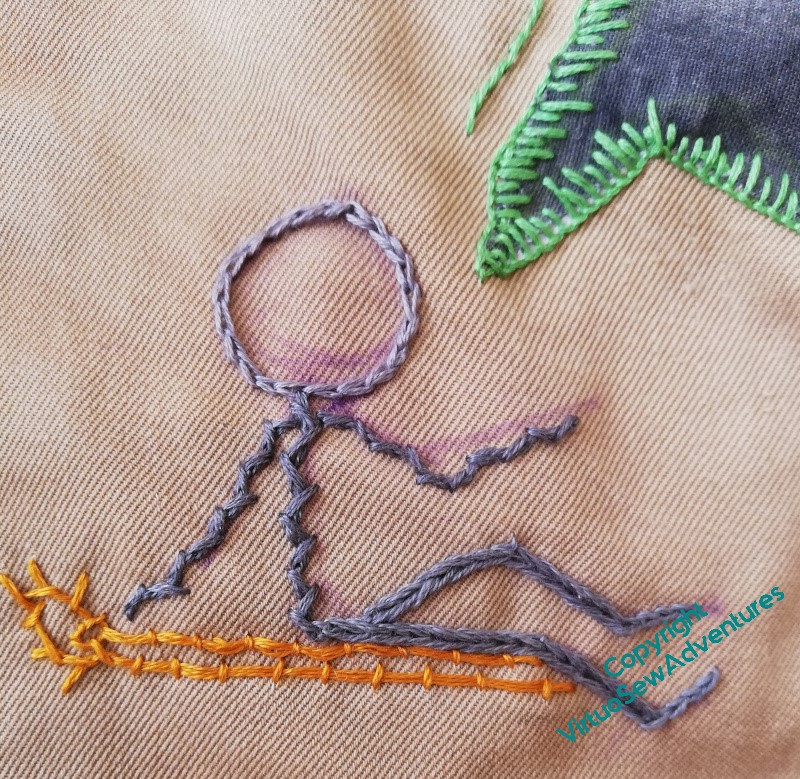
Then I did a little stick figure, sitting on a yellow lounger, declaiming. I found three shades of grey, so make the figure a bit more broken up but still looking “drawn”, and did the head in ordinary chain stitches, the body and arms in Alternating Twisted Chain Stitch (so it looks like a woolly jumper) and the legs in Heavy Chain (a nice pair of jeans). The feet are ordinary chain again.
I hope The Australian’s trousers will survive without further patching for a while!
Final Mathstodon Details
Well, now, it turns out there was more to the Mathstodon than I had first intended!
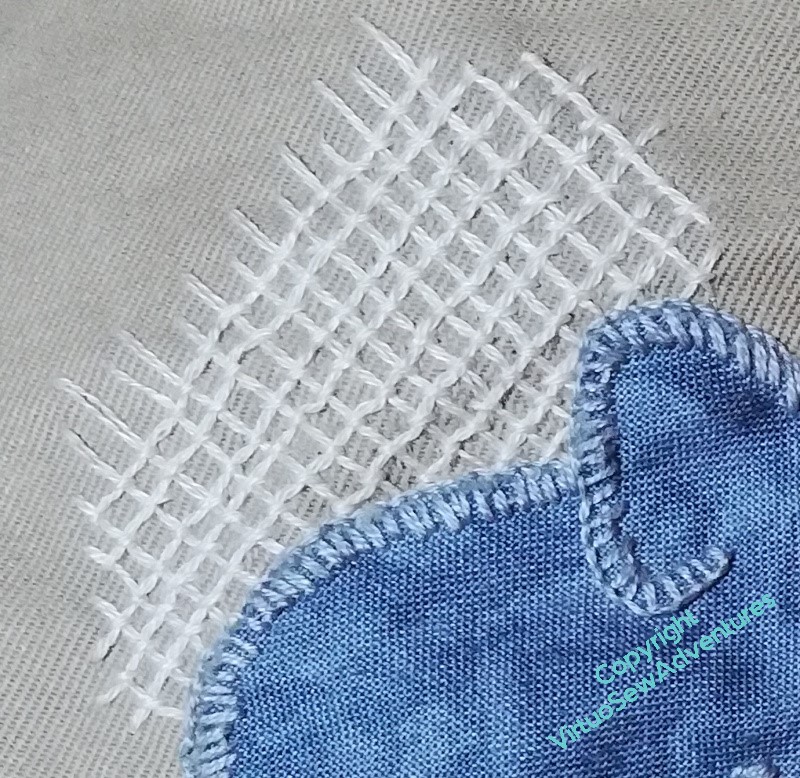
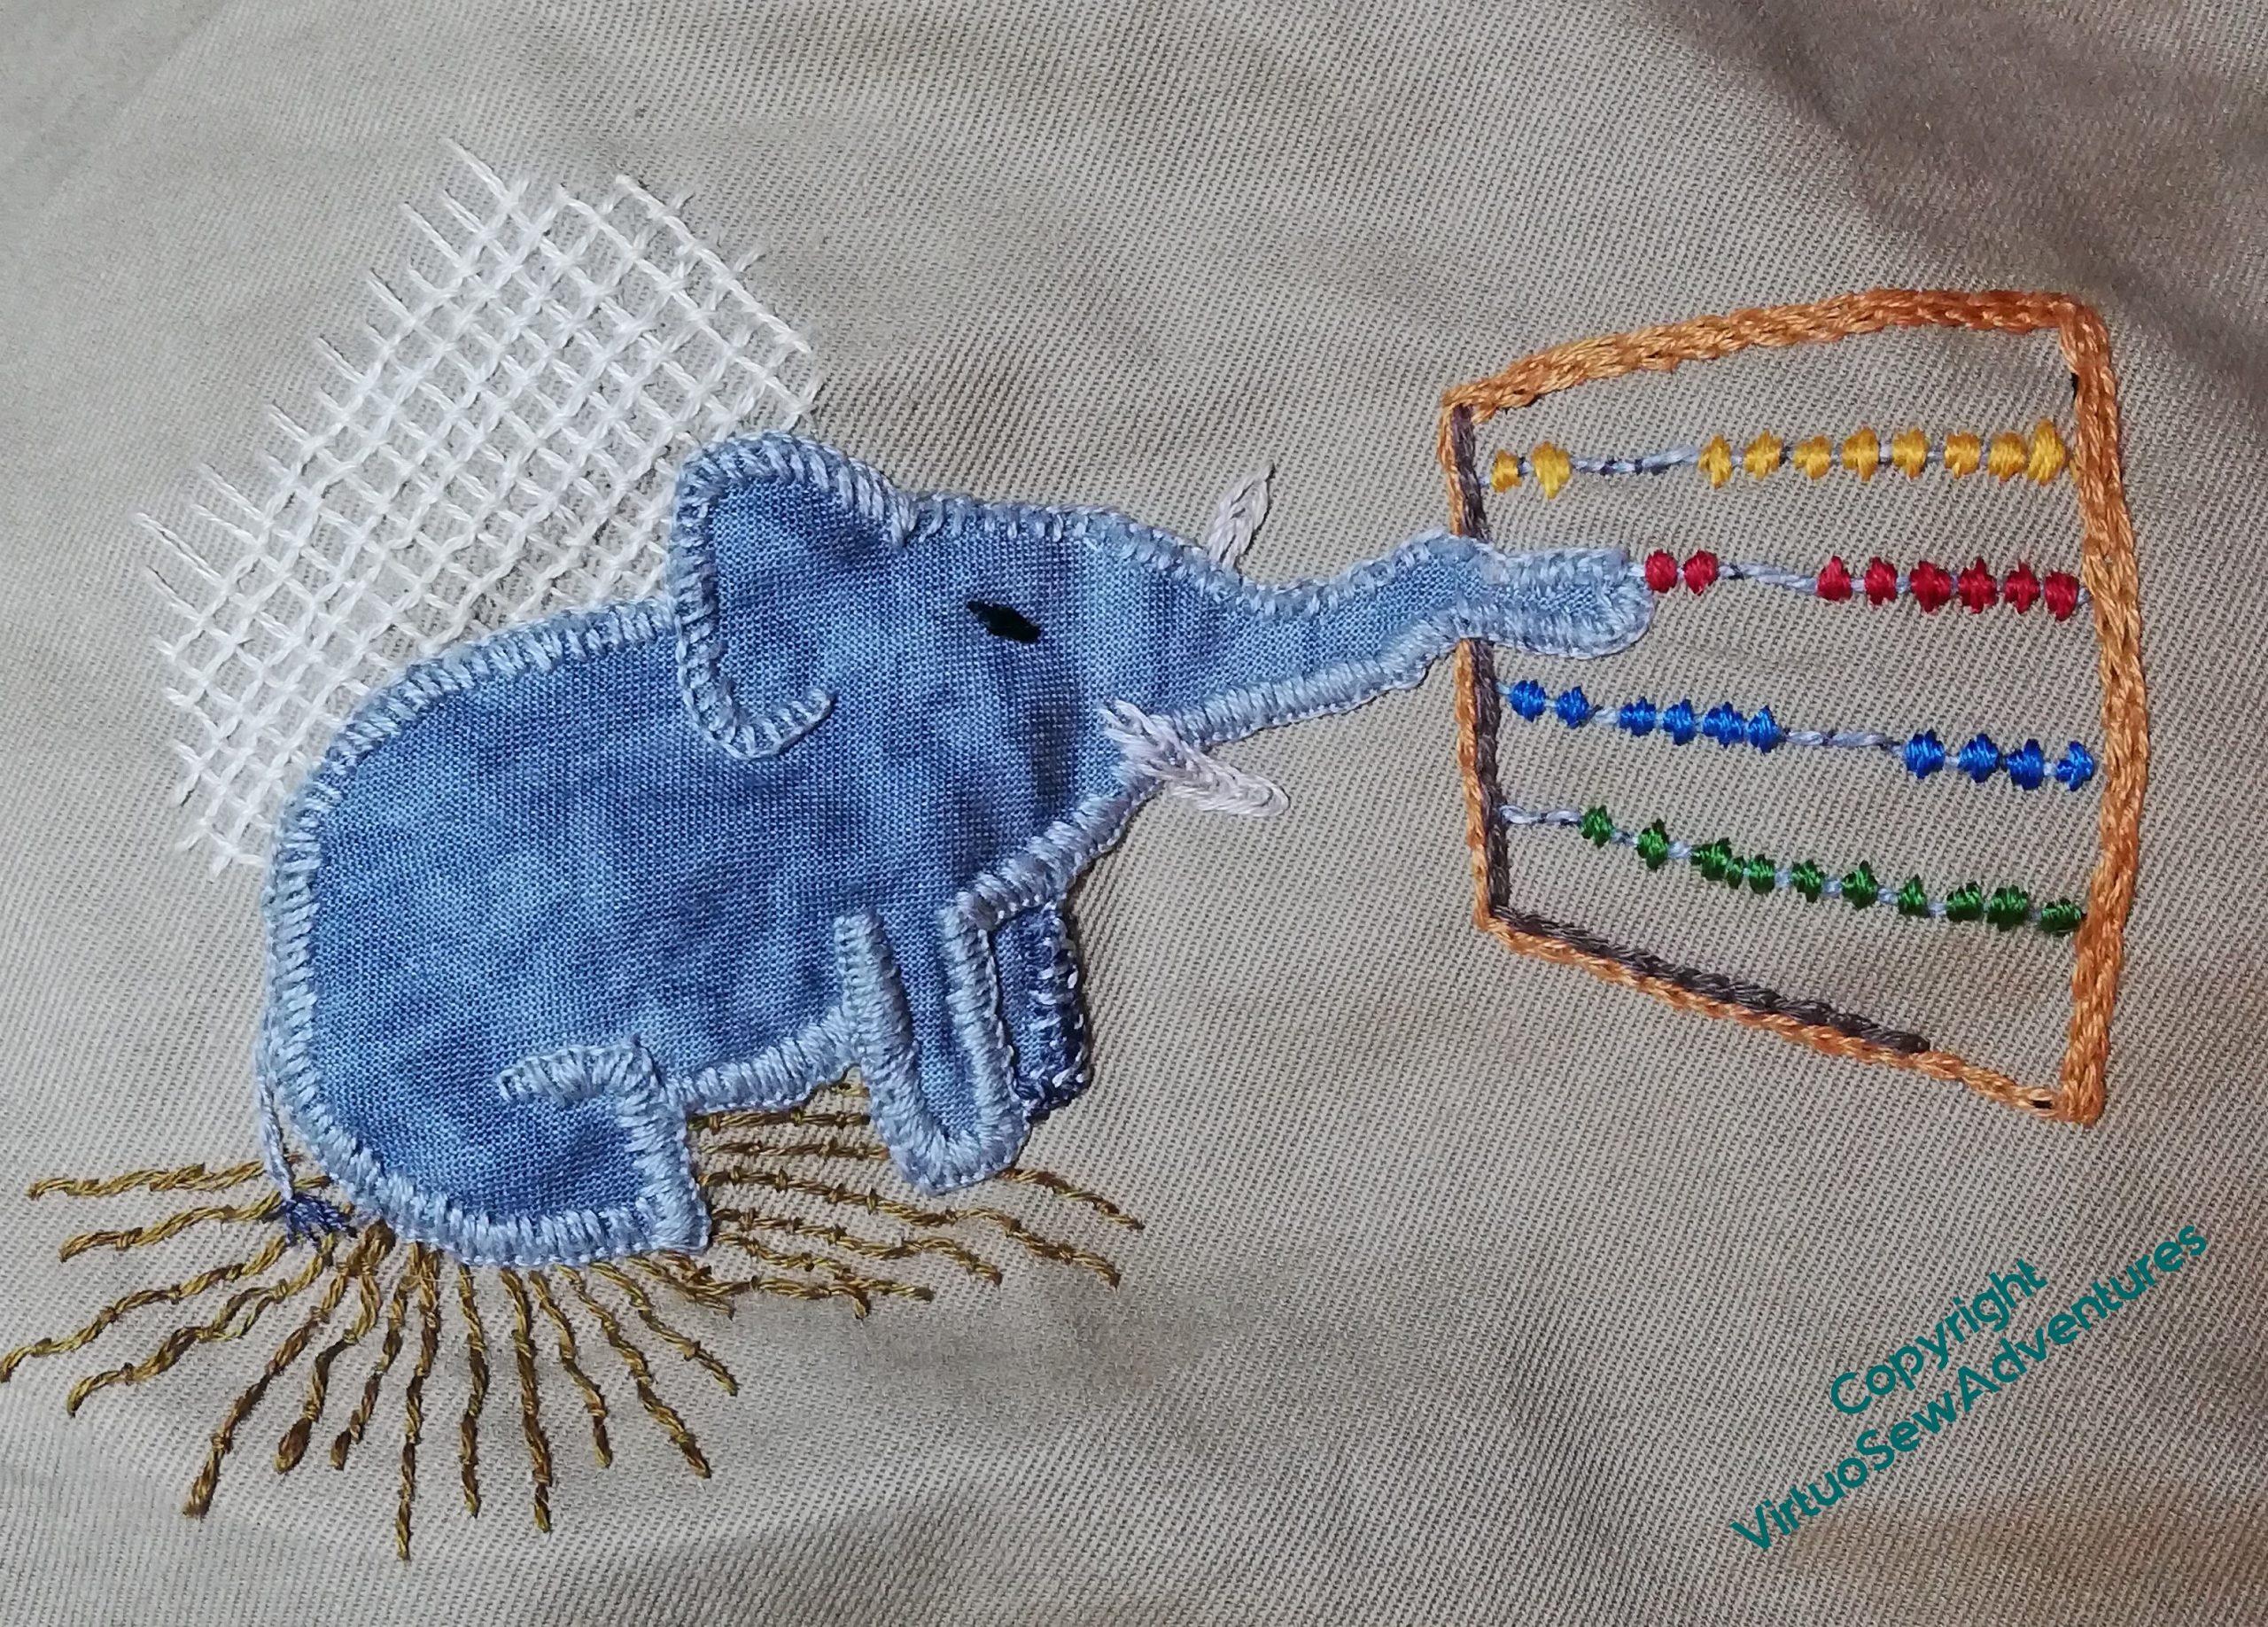
The mathstodon didn’t quite cover all the weakened fabric, so I added some trellis couching behind him to support the parts he hadn’t reached.
Then I felt he looked a bit odd with a wall but no floor, and added a floor in Bokhara Couching. Now I look at it, I feel it rather suggests the poor Mathstodon is heavier than the floor can take, which is a little unfair, as what I want to suggest is a Mathstodon happily using his counting frame for some mysterious purpose of his own!

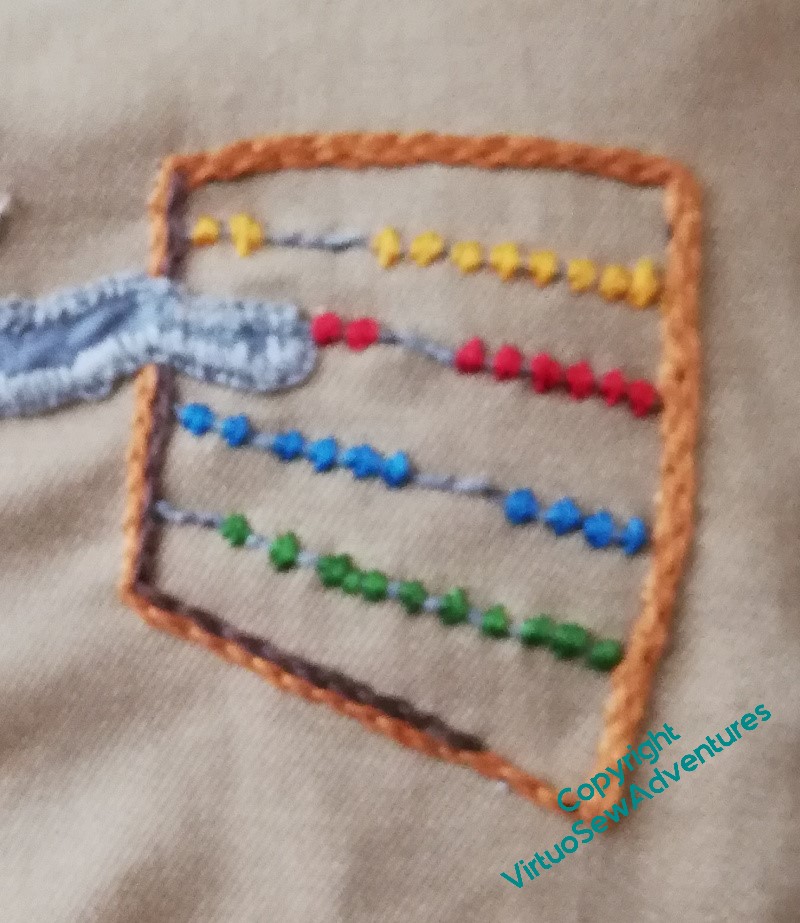
The counting frame is two lines of chain stitch all around, with “wires” make of long stitches in the linen thread I bought for “Leaving The Tyne”. The beads are made with satin stitches. I did think of making them indicate a significant number, but there were two things in my way – first, which number to choose, and second, I was using thread from my Odds and Ends box, and wasn’t sure I’d have enough if I tried anything too exciting!
But he is now finished and has gone toddling off with The Australian for his next speaking engagement!
A scarf called Anthea
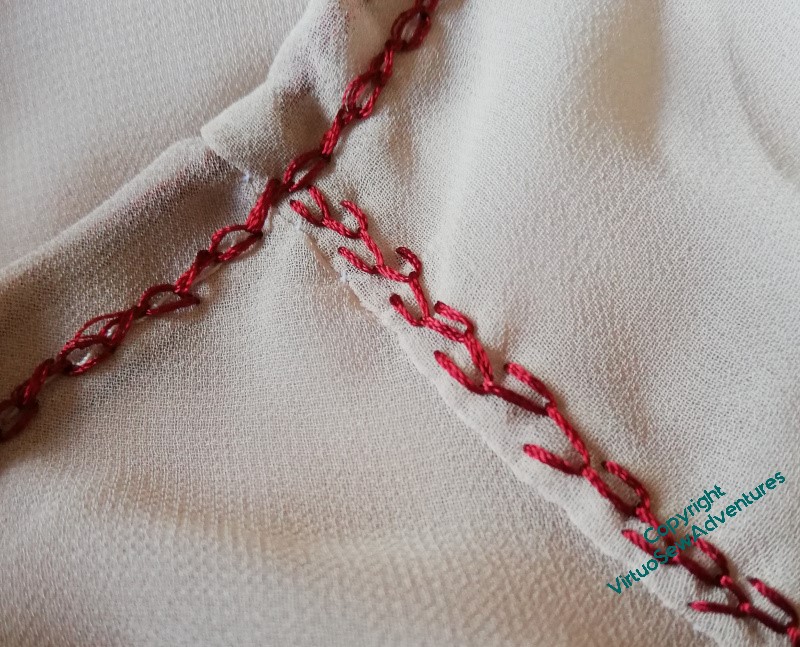
Just recently, I have been feeling rather bereft of the sort of simple embroidery that passes the time pleasantly. I’ve been assembling the Amarna pieces, and while they certainly engender a sense of achievement, it has not been relaxing. I had a couple of periods in the offing when a bit of stitching in public was in order, so I was looking for something that could be worked in the hand, with a minimum of materials.
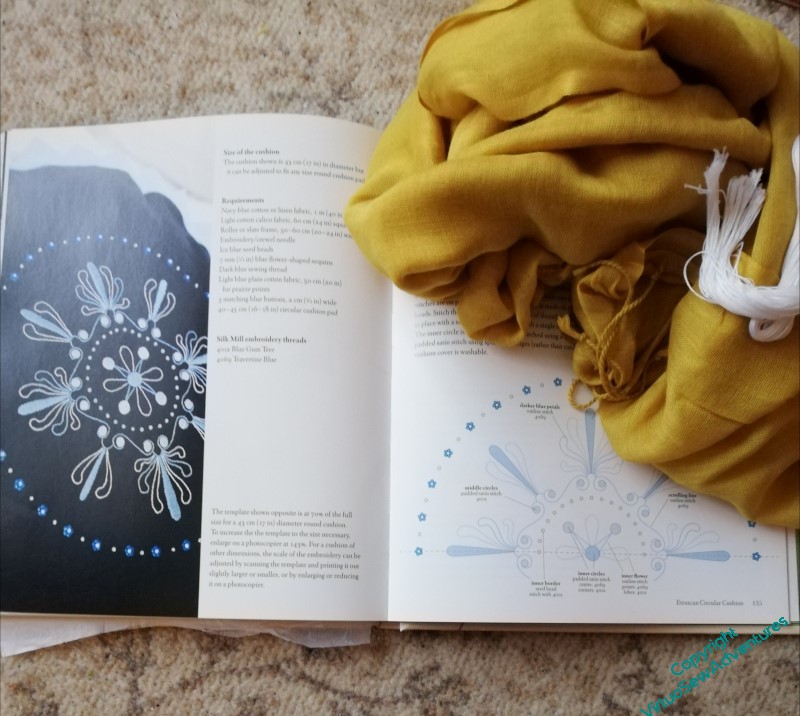
In one of my favourite Georgette Heyer novels, “The Unknown Ajax”, the heroine (Anthea) is seen, in one tiny incident, following instructions from “The Mirror of Fashion” to make a reticule (handbag) in the shape of an Etruscan vase, so when I was leafing through “Jane Austen Embroidery” in search of inspiration for a quick, easy to carry project, and my eye lit on a circular design inspired by an Etruscan design from The Lady’s Magazine of around 1808, it leapt out at me.
But I have a scarf, not a cushion, so the adapted pattern is going to readapted, and what’s more, this is just a little something to remind me that I really do love embroidery. I’ve been spending so much time on finishing the Dreams of Amarna pieces, that I’ve done almost no real embroidery for months, and I miss it. So this is simple, sketched on by eye, not seeking perfection, just, if anything, charm. I’m going back to what I learnt from the Great Lady’s Magazine Stitch Off, drafting by hand and trusting myself to make something that is as close to accurate as I need it to be.
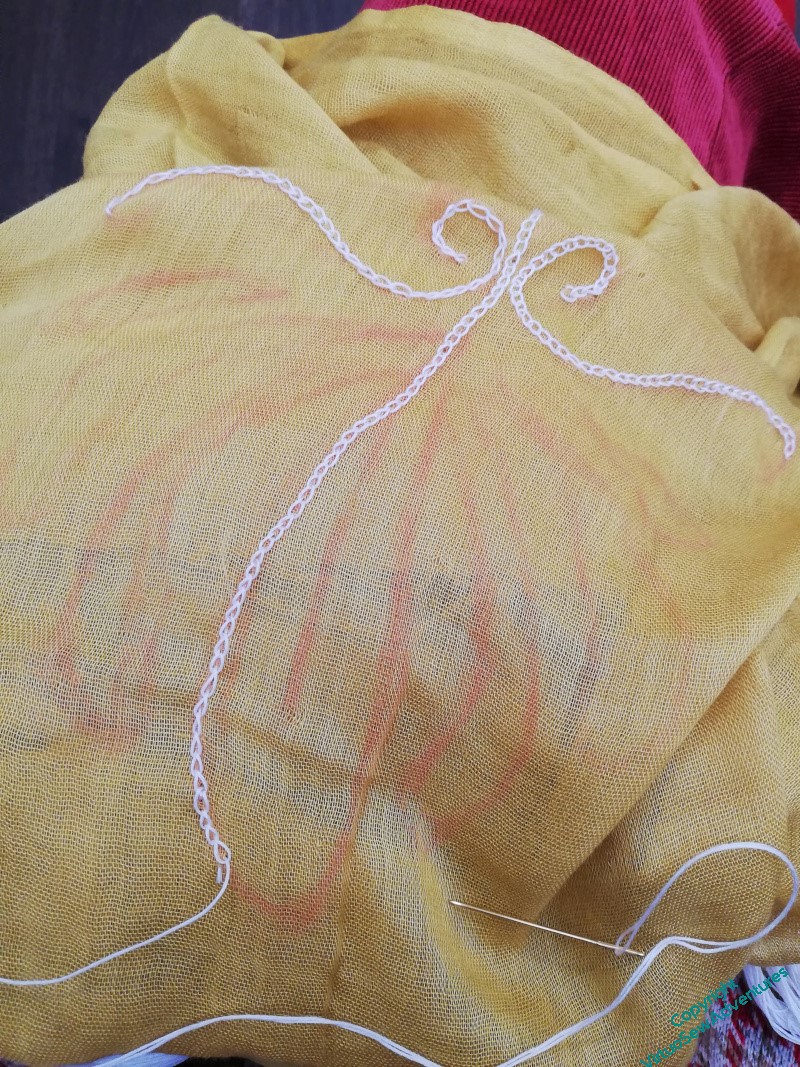
And indeed, with just a needle and my thread (white cotton floche), I was able to travel very light, and sit quietly stitching in the places where I needed to be present but not unoccupied, stewarding an exhibition and waiting in waiting rooms. It attracted attention, of course, but that merely offers the opportunity to evangelise on the pleasures of embroidery.

Since I didn’t even take scissors, I wasn’t able to finish lines of stitching which would take less than a length of the floche, but I can come back to that. I’ve also decided that I’m going to stitch the same pattern (approximately) on the other end of the scarf. I’m fond of this sort of goldeny mustardy colour, and it will be very cheering to wear when I’ve finished it!
My apologies, Anthea – when I’ve finished her, of course!
More Mending with a Mathstodon
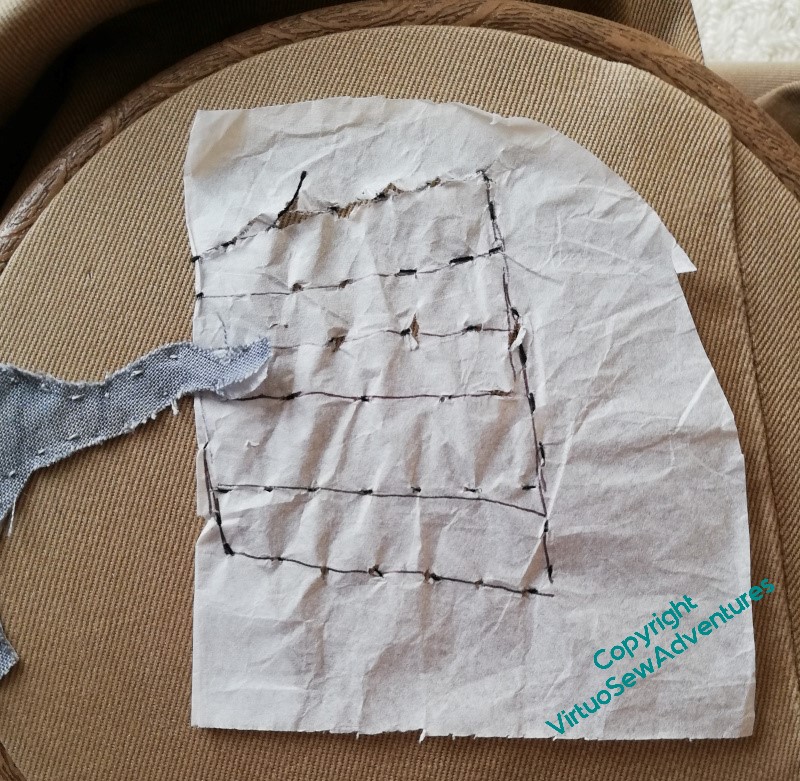
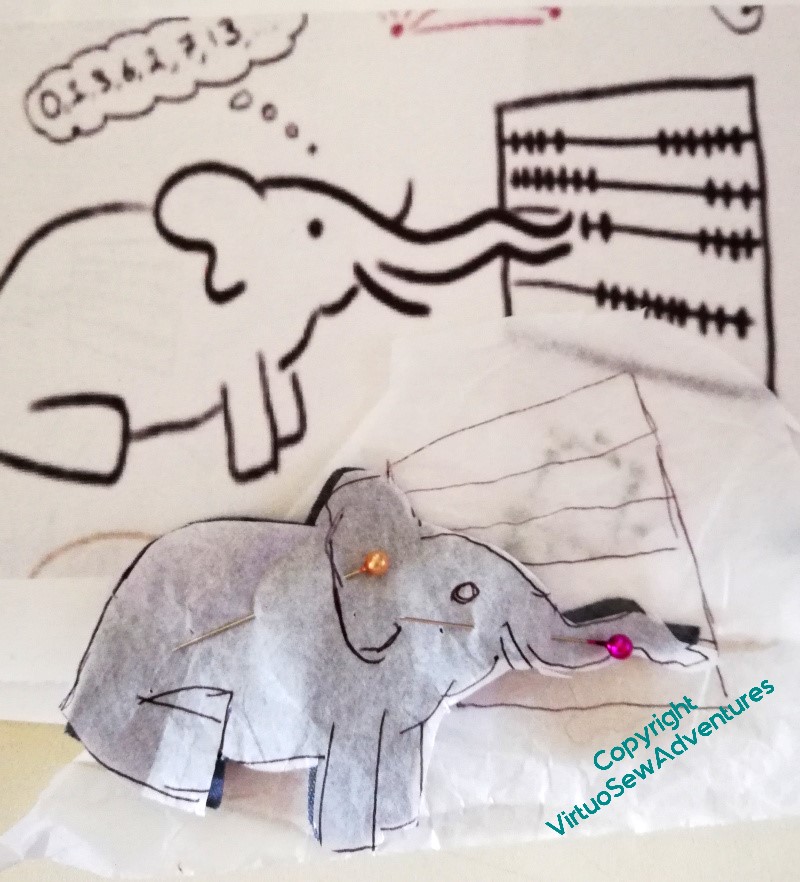
Since I’m not doing the entire design on a single patch, I decided to do the counting frame, not as a separate piece of fabric, but directly onto the fabric of the trousers. So, just to make everything slightly easier, I’ve tacked the outlines of the frame and wires onto the fabric through a bit of tissue paper, now torn away. This is one of the design transfer techniques I’ve come to use the most for this sort of design idea, where absolute precision isn’t at issue (when is it ever, with what I do?)
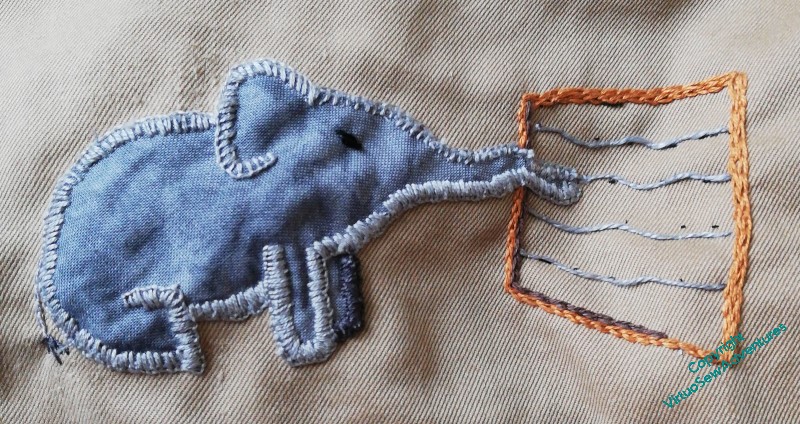
So, progress – the Mathstodon buttonhole stitched into place, and the bare bones of the counting frame in place, chain stitch for the outside, single long stitches held in place with small stitches for the wires. Don’t worry about the long floats, the satin stitch beads will keep them in place!
I do feel that I may have made the buttonhole stitch a bit chunky, at the speed The Australian moves when in full flow, the outlines need to be definite, or noone will make sense of what I’ve done at all!
I was still a bit worried about the fabric immediately above the hole, so I’ve given it a bit of reinforcement with some Trellis Couching in cream. The choice of stitch doesn’t relate to school maths exercise books – it was a matter of finding a stitch pattern that I thought would support the fabric of the garment!
Mending with a Mathstodon
We noticed recently that there was an unexpected hole in a pair of The Australian’s trousers. Unexpected, because above the knee, nowhere near a pocket, and the surrounding fabric was in better condition than the hole would suggest.
I am sure I couldn’t achieve an invisible mend on a fine cotton twill such as this, so then it became a matter of considering Visible Mending – making the whole thing look deliberate and considered, rather than pulled together any old how. So, I asked, what sort of patch would you like?
Which is how I came to be messaging The Australian’s co-moderator on the Mastodon instance, “Mathstodon.xyz”, to ask for permission to use the header/logo image he had sketched as the basis for an embroidered patch.
I did think of using the whole thing, embroidered on a larger piece of cloth, but I felt it would make the trousers a bit uncomfortable, so I am extracting the Mathstodon himself, and his counting frame, and I can always add more diagrams and formulae if the trousers wear in other places…

I wouldn’t normally use a hoop when I’m mending a pair of trousers, but it did make it much easier to keep track of where the darned bit was.
The Mathstodon himself is cut out of grey quilting cotton with a slightly marbled print, and I’m going to attach him conventionally over the darn, first held in place with small running stitches and then with buttonhole stitch around his edge, and a few extra details on the inside.
Mending, Upcycling, and other adventures
As a family, we have always made and remade, mended and upcycled, garments, furnishing and furniture. There is a tale of five year old me, accompanying my mother to buy fabric for a dress in the now long-gone and much-lamented fabric shop in town, and piping up, as she was paying, to ask “What will it be _next_?”, so you can tell this is deeply ingrained!
Usually this is something I let pass without comment, but two episodes lately seemed worth mentioning, in case they give someone else an idea..
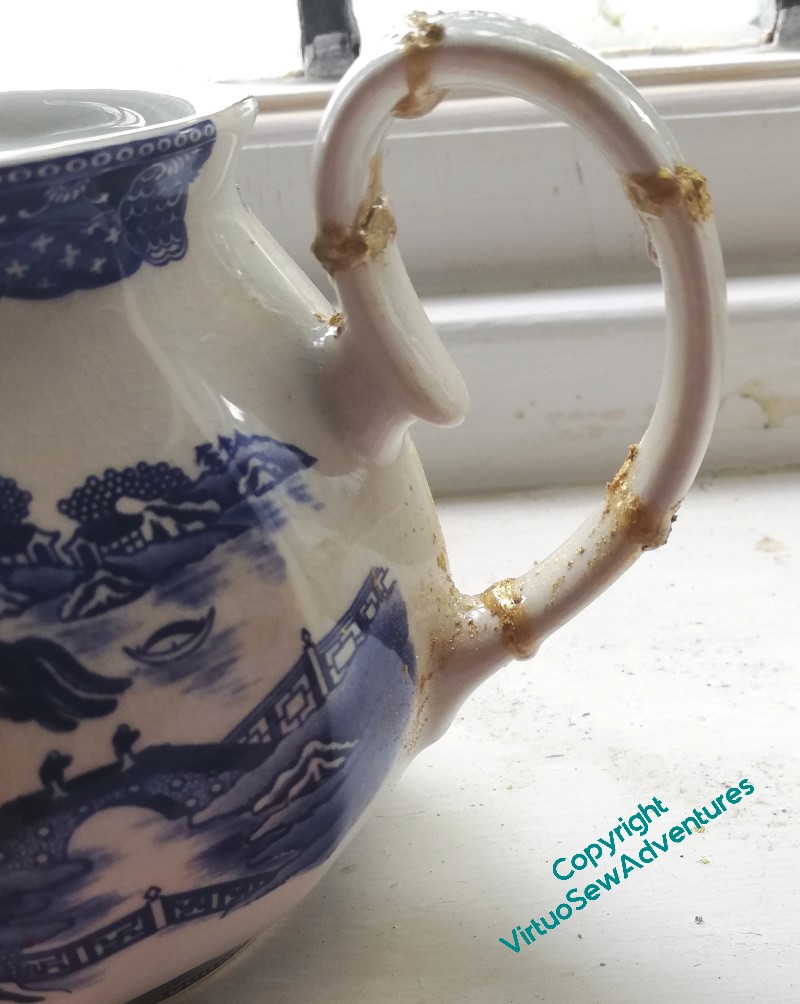
The Japanese mending technique for pottery, “kintsugi”, involves highlighting the mends with gold, so as not to obliterate the history of a piece. I can’t say I’m very good at it, but I had an entertaining afternoon with a kit that enabled me to play with the idea, at least.

And then my cousin mentioned a footstool she had with an entirely unsuitable cover for the surroundings, and a few oddments of furnishing fabric from earlier work on the room. Cue a Kintsugi-inspired crazy patchwork footstool cover, with all the seams emphasized with gold piping! This took some work and collaboration, as my sewing machine isn’t up to the task, but Mam’s was.
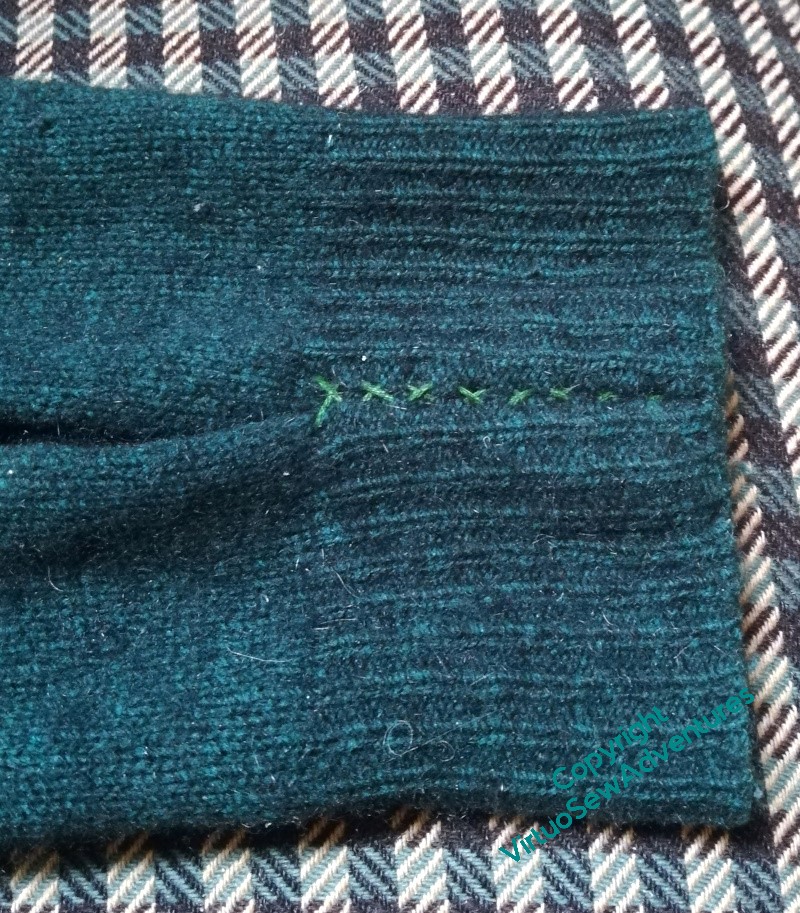
And on an entirely different scale – one of the problems with older knitwear is the way the ribbed cuffs seem to lose all their elasticity, and what was once a trim and neat shape, will often become shapeless and saggy with age. I’ve tried in the past adding elastic, but I couldn’t make that work (if anyone has – what’s your trick?), so it rather nags at me.
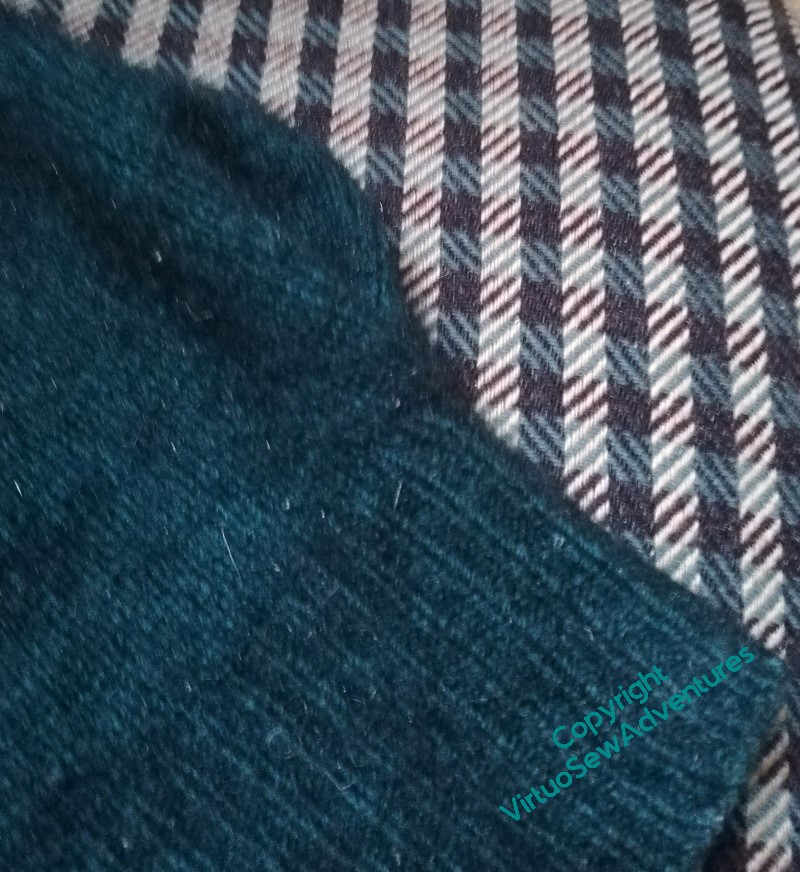
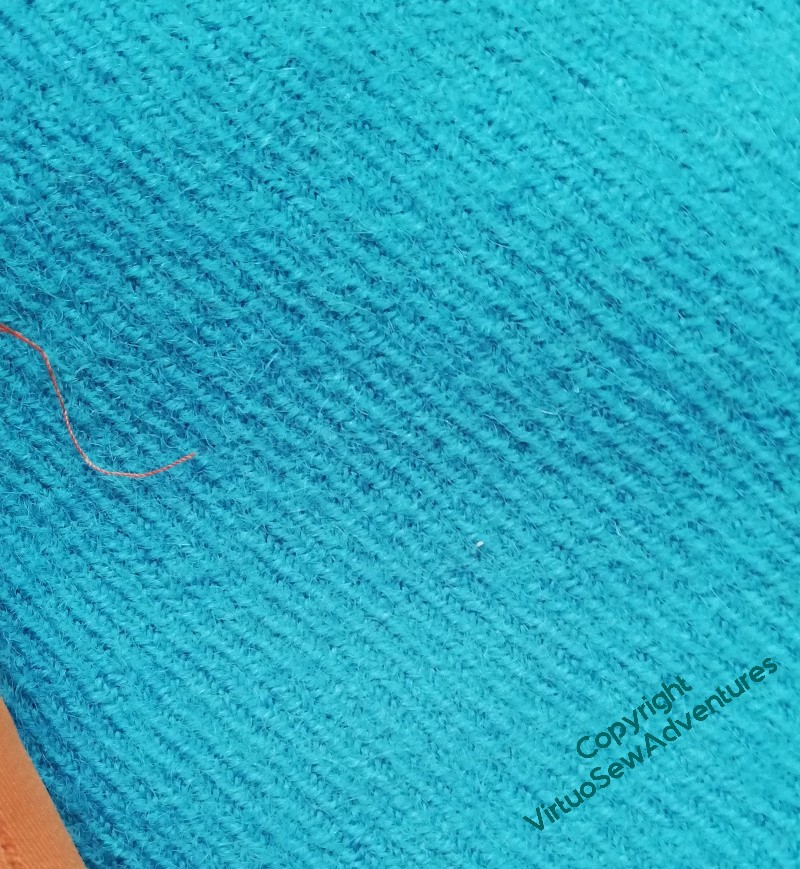
Then this winter we made a dress with rather extravagantly tucked sleeves, and I thought I had an idea that might work. I’ve created an inverted box pleat in the cuff here – it’s just held with stranded cotton at present, something that will show up so I can play with it until it works, and then do it properly (or not!) – and held it together, starting at the sleeve end, with crossing stitches. Then I caught down the side of the box pleat.
You can see in this picture how the cuff is now neat and close, and the sleeve has a bit more shape, and rather less “flop”. I’m very pleased with that, and I may extend this to other, similar garments.
Taking an idea from the past

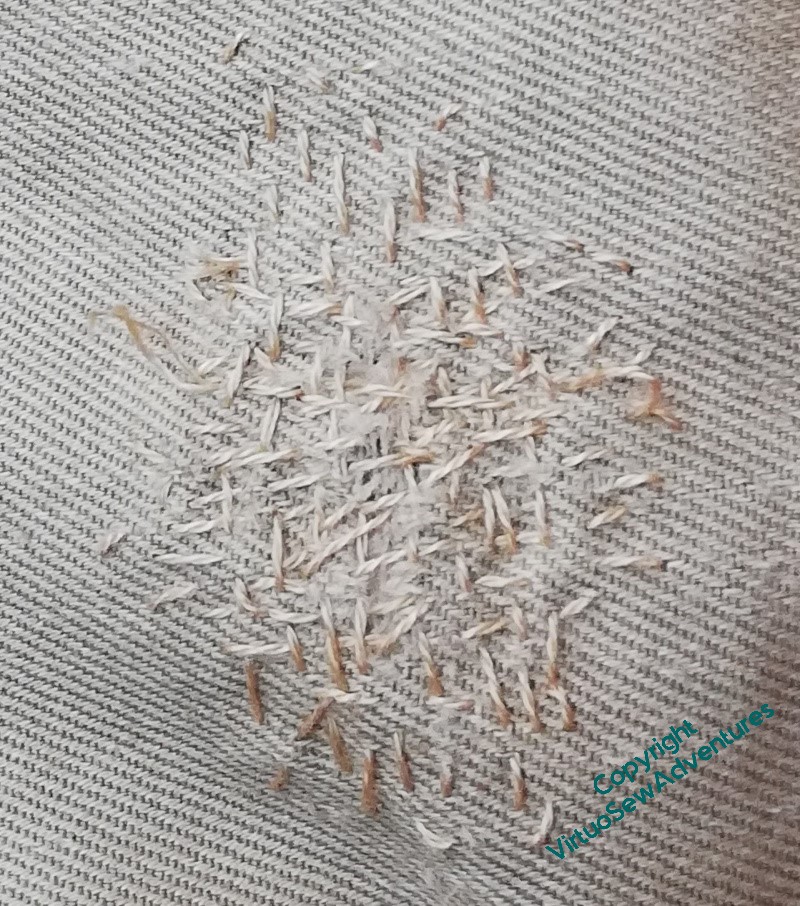
Years and years ago, I bought a white cotton shirt and a long cotton petticoat at a vide-grenier in the Gers, where we were visiting a friend who was restoring an old farmhouse about a hundred yards from the route of the “Camino” to Compostela to run as a pilgrim hostel. I don’t wear either of them much, the petticoat being a little long, and the shirt a bit short in the arm, but I do occasionally just look at them to delight in the work that was put into them.
There is machine stitching on them – they’re not as old as all that! – but there is a lot of hand work too.
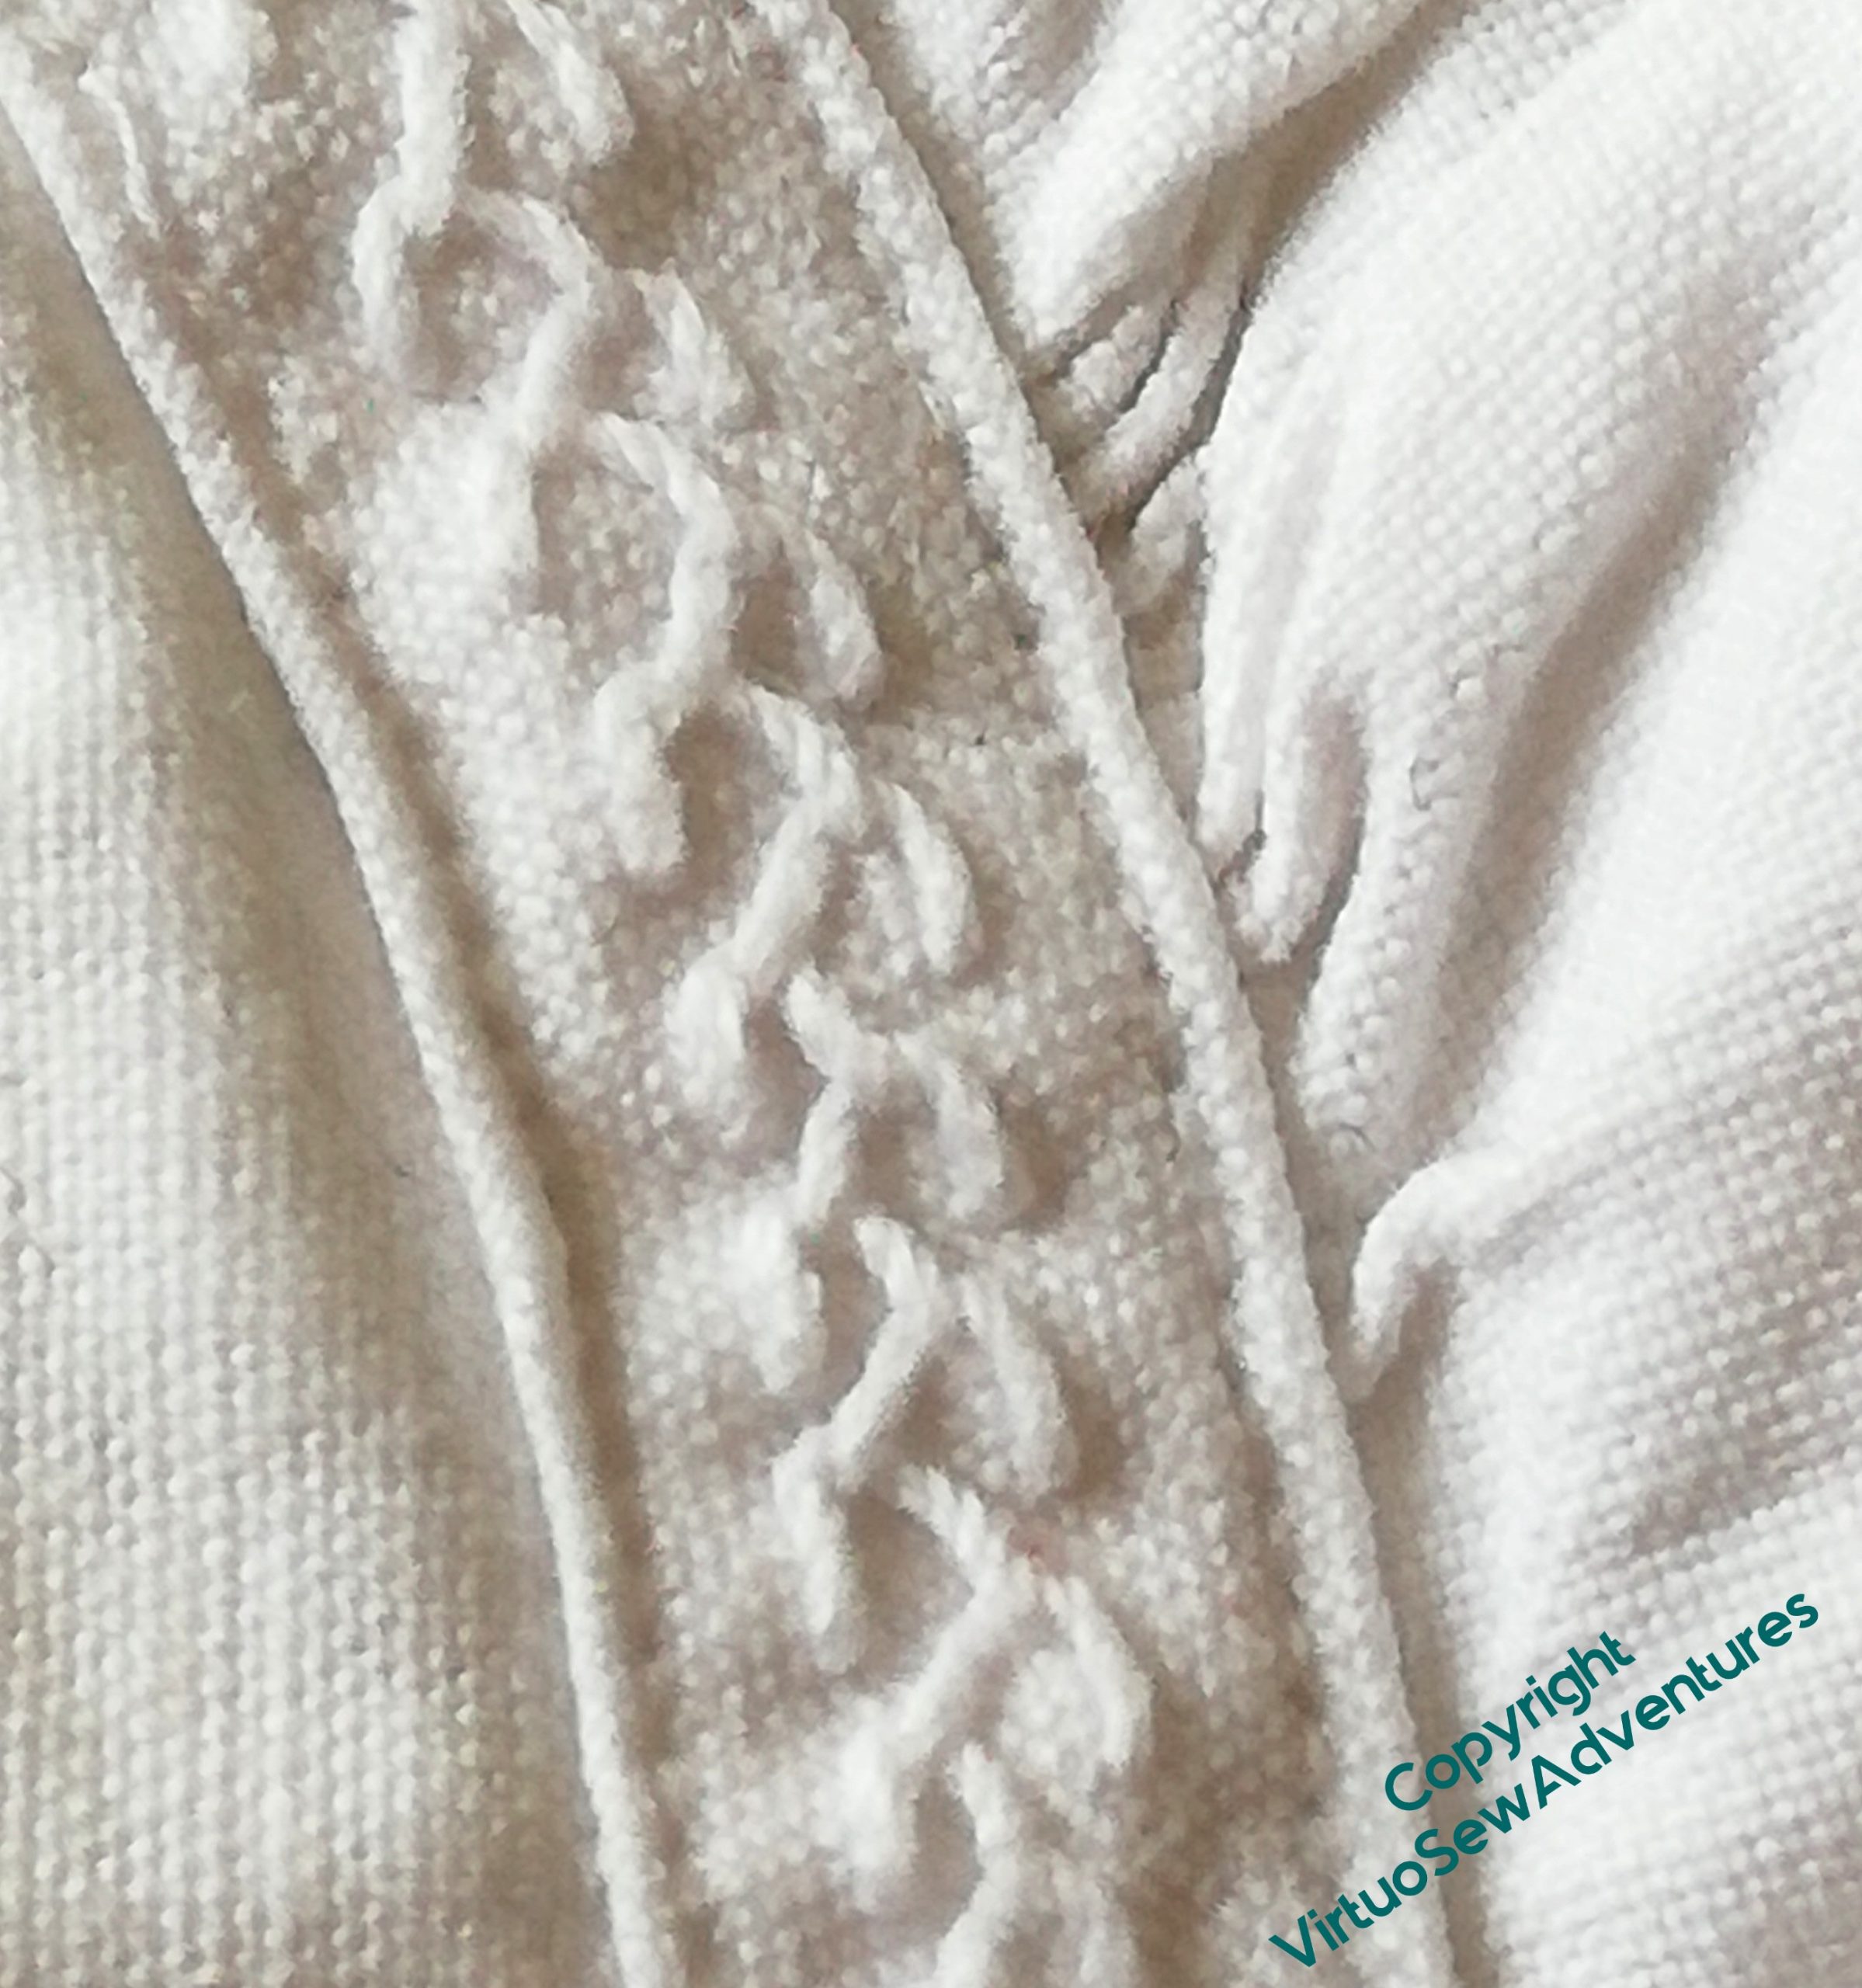
The careful reinforcement between the ruffle and the edge of the garment is a case in point, with a single length of neat feather stitches providing just the variation in texture it needs to stand out, subtly, but definitely. From a distance, it looks almost like a braid, but instead of being bought and applied, it was something the maker could do by themselves.
The ruffle itself is a super-simple version of broderie anglaise, a single eyelet within a pointed edge, hand-finished.
Well, now…
I don’t always do epic garments like the Jacket of Many Stitches or the Coat of Many Flowers, but sometimes I do decide that a garment needs a little bit of lift.
Expect to see rows of feather stitch popping up on assorted garments for the next several years!
The Jacket of Many Stitches
I promised pictures of the jacket being worn, so here they are!
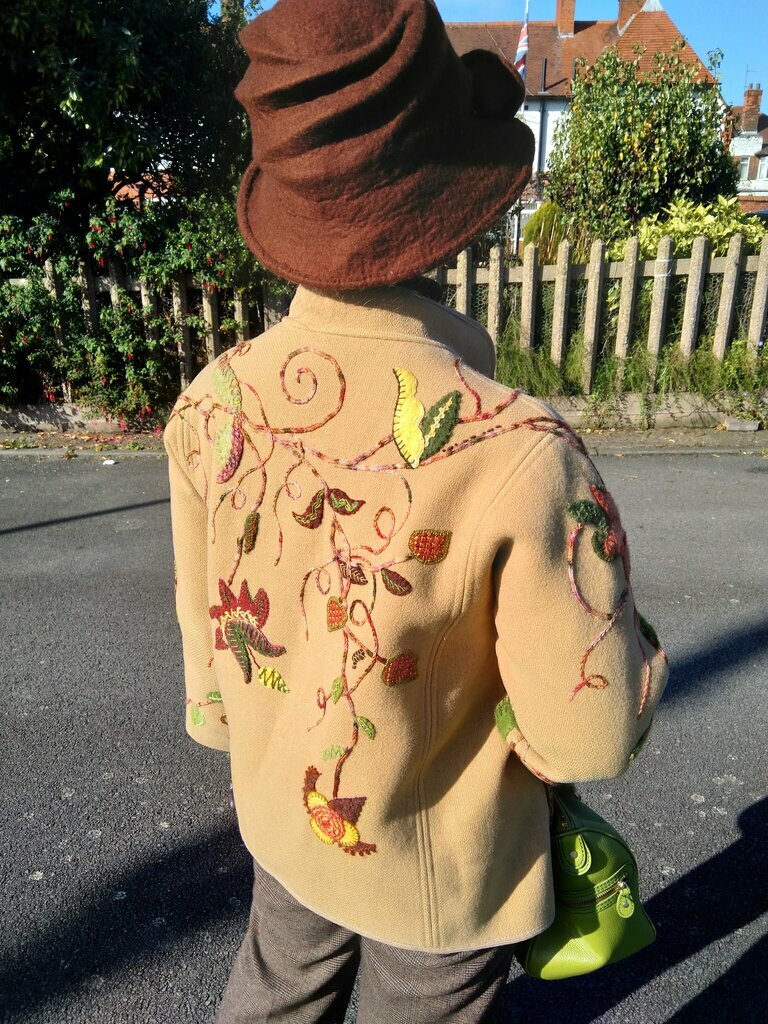
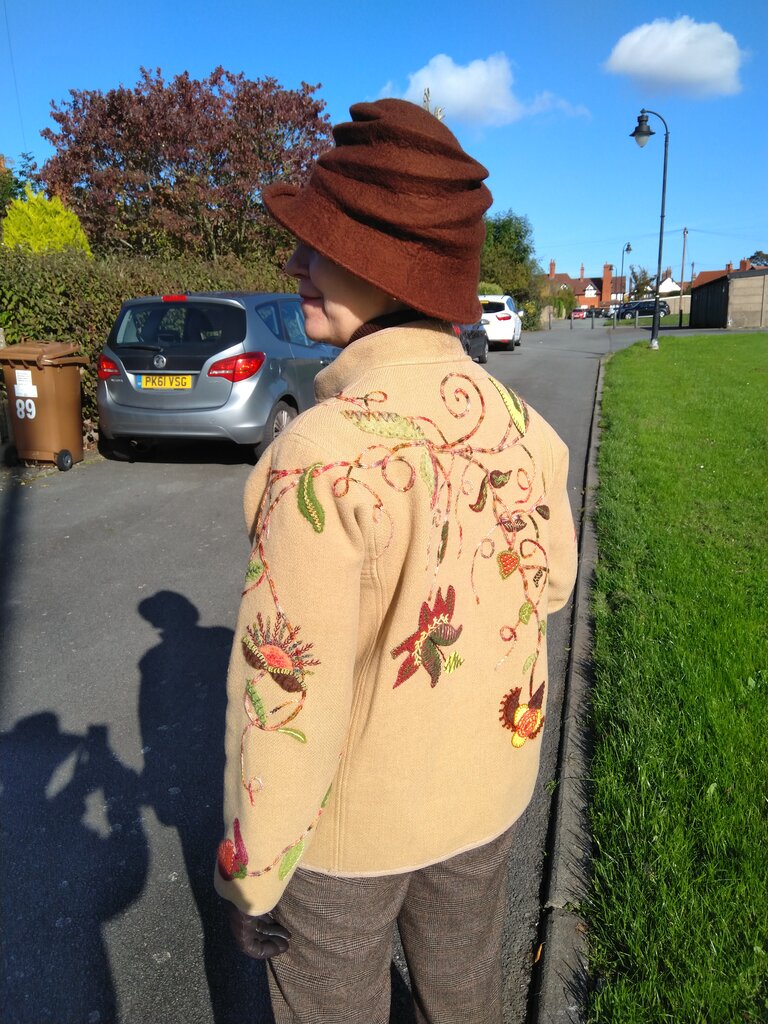

We had some nice weather, and the Jacket smiles in nice weather. The hat is by Felt by Bridget, bought some years ago at the Harrogate Knitting and Stitching Show.
The necklace came from Harrogate too – a stone pendant, with a cord I made myself in kumihimo. It’s the green and orange one on this page.
And finally, another view of the masks!
