
Tag: apparel
The Jacobean Coat – Sleeve One Embroidery
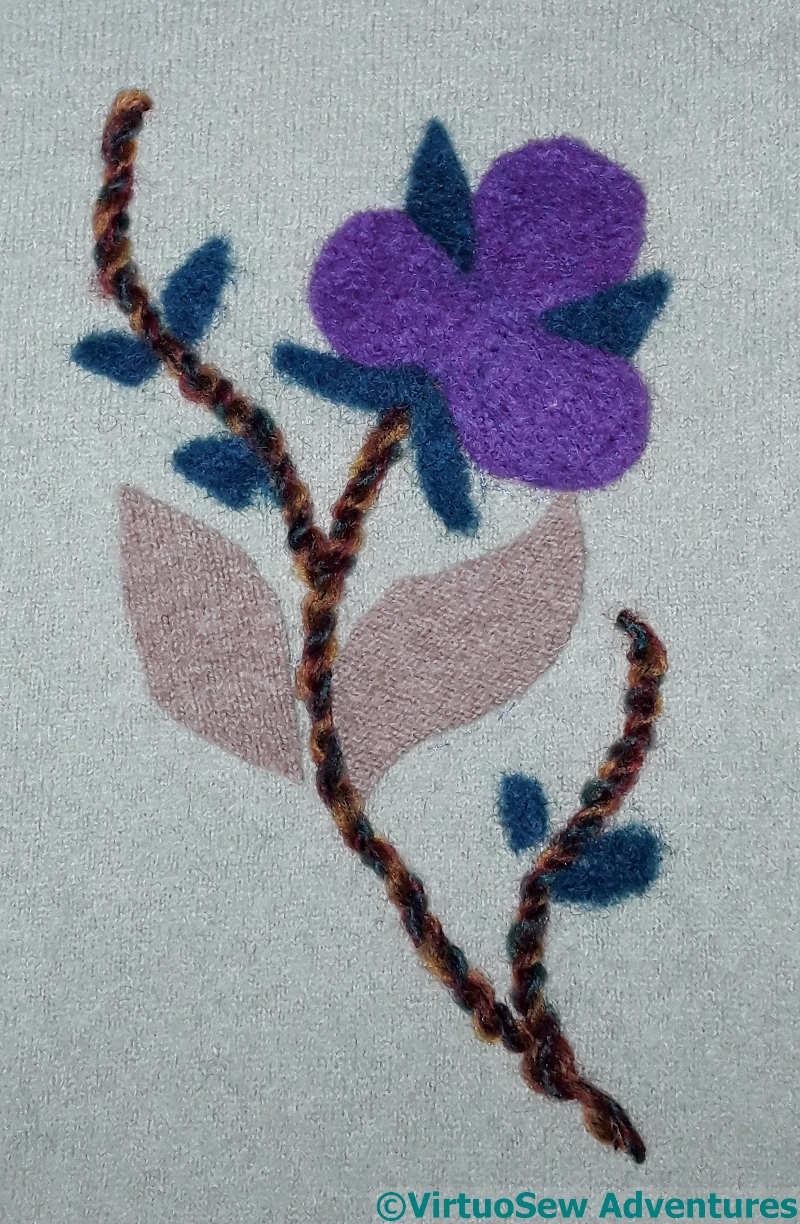
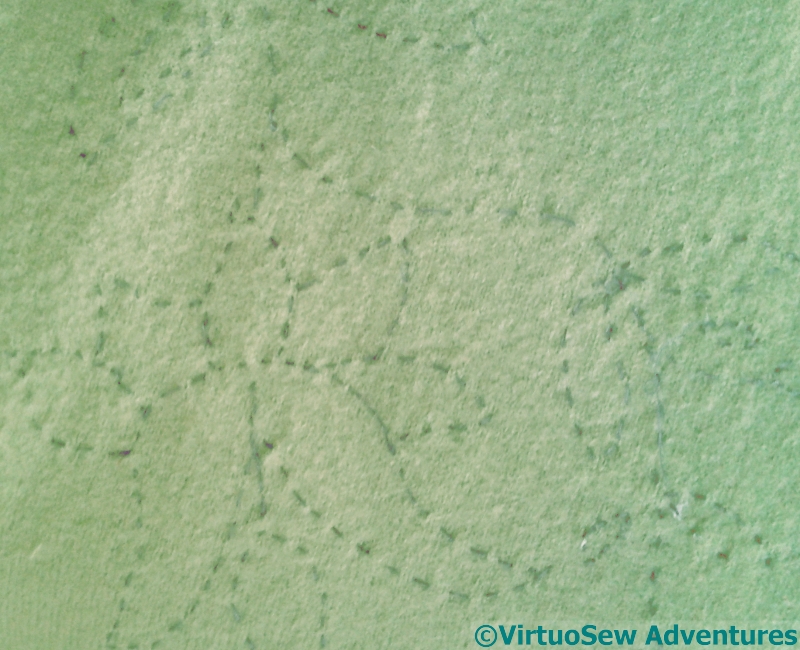
Having decided to start with the sleeves, and with stitch and thread choice for the small teal leaves in place, I could start to think about the other details. This picture shows the basic motif, with no stitching on it and really no idea where to start.
Incidentally, the coat fabric is a lovely clear pale green, and it doesn’t matter what I do, it just doesn’t photograph to advantage – or at least, not in winter daylight. I’m hoping Mam will be able to wear it in the spring, and we’ll be able to get some good photos for you to see!
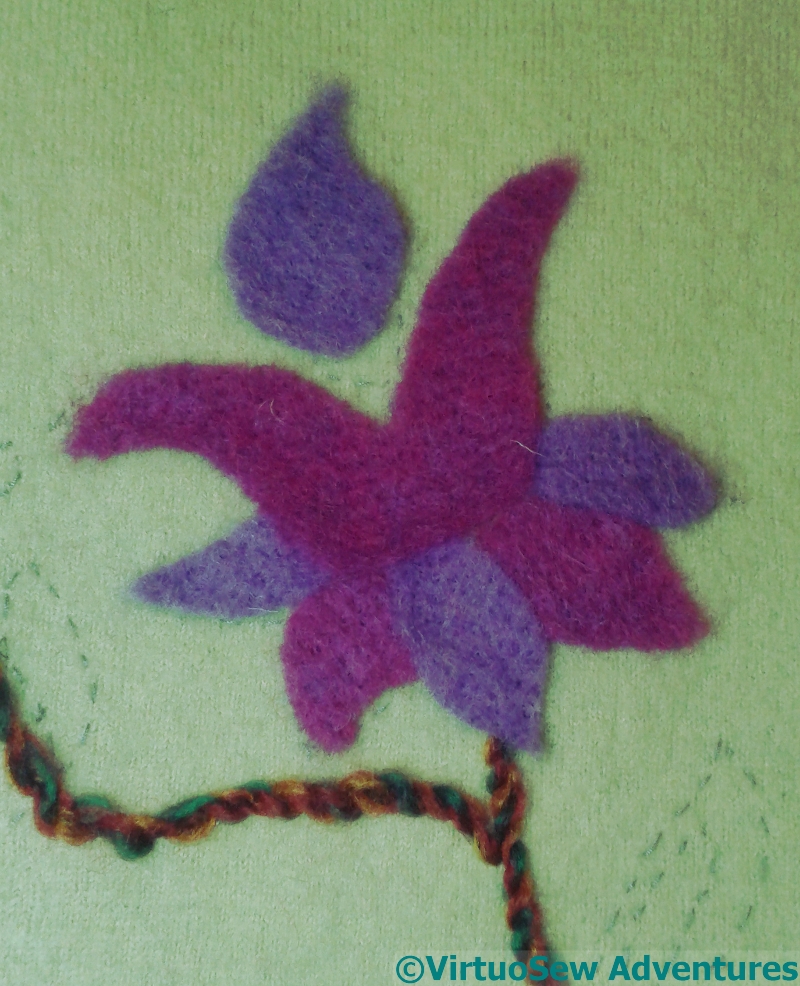
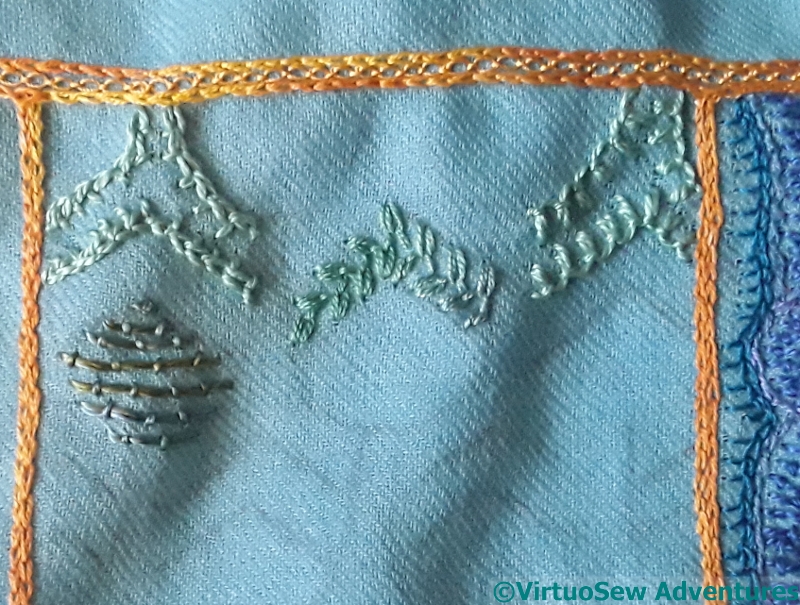
I have decided that each of the motif elements will be stitched around the edge, or – as with the feather stitched leaves, stitched from edge to edge.
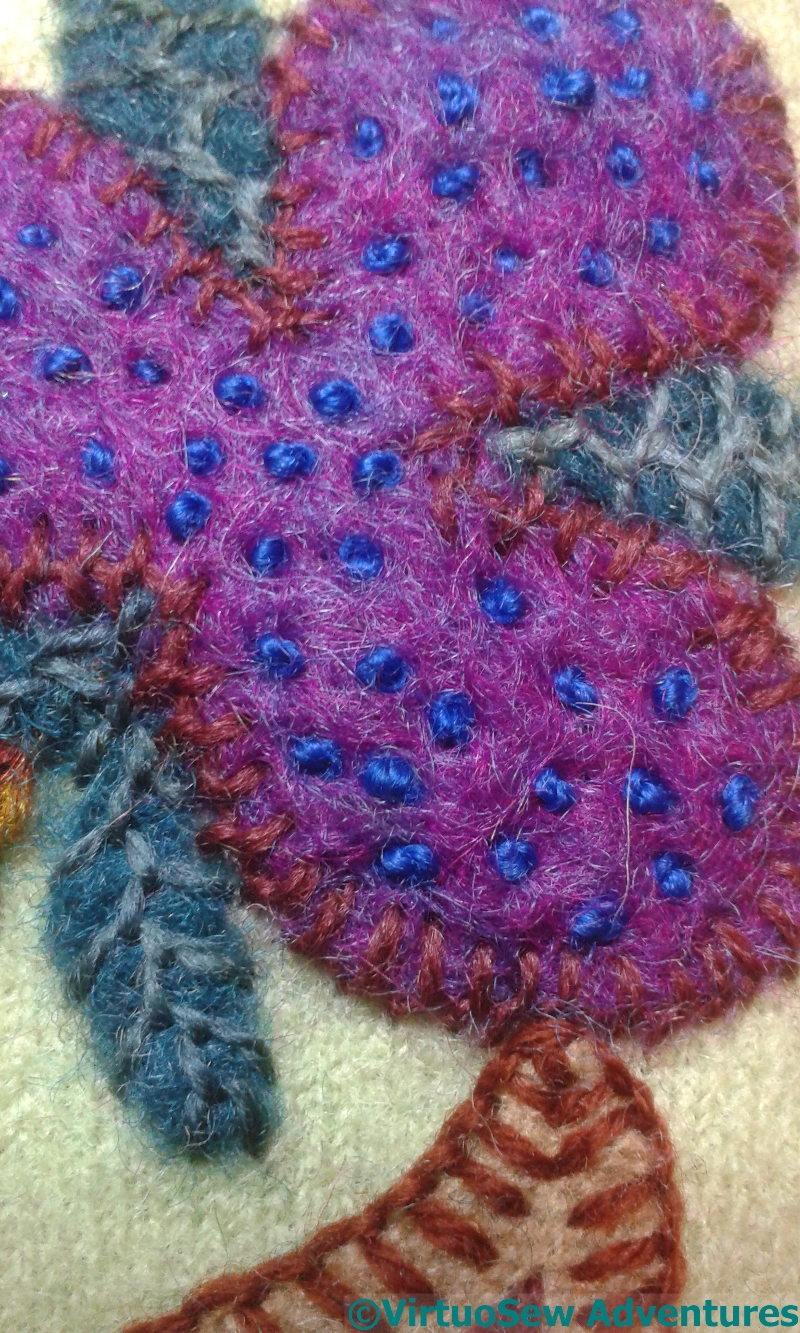
I think the stitch around the edge of the purple shape is called “Loop Stitch”. It creates a “spine” which can have arms of whatever length you want. In this case I wanted them neat and not too big, and they’ve almost disappeared into the felt in some cases.
When I’d added the outline, I felt something more was needed, and added the scattering of blue French Knots. They help to vary the colour and change the tones a little. This is not going to be an exercise in minimalism!
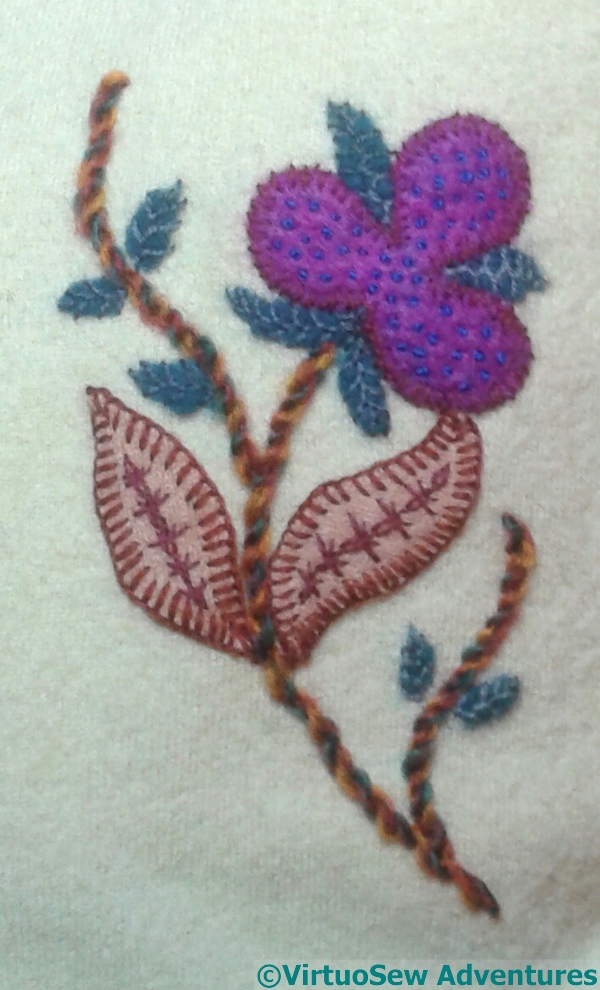
Here you see the – for now – finished motif on Sleeve One.
The large leaves have Blanket Stitch edges, and a large central vein made using one of the un-named stitch variations from my books by Edith John.
The reason I say “finished for now” is that I feel it may need a few light details to add a bit of sparkle, although I’m not sure of colour, or placement. I’m leaving the idea to sort itself out in my head as I continue to stitch.
The Jacobean Coat – colour and stitching begins!
The second stage, after all those stems, is to start adding colour. I’ve started with the sleeves because they are a bit more manageable than an entire coat, and it gives me a chance to feel my way towards the colour distribution of the stitches over the felt.
The purply colours and the teal are from sheets of that lofty felt I used for the princesses, while the beigy-brown was one of my grandfather’s sweaters, found in a box looking moth-eaten and thrown in a hot wash to felt it a bit. We’re a thrifty family…
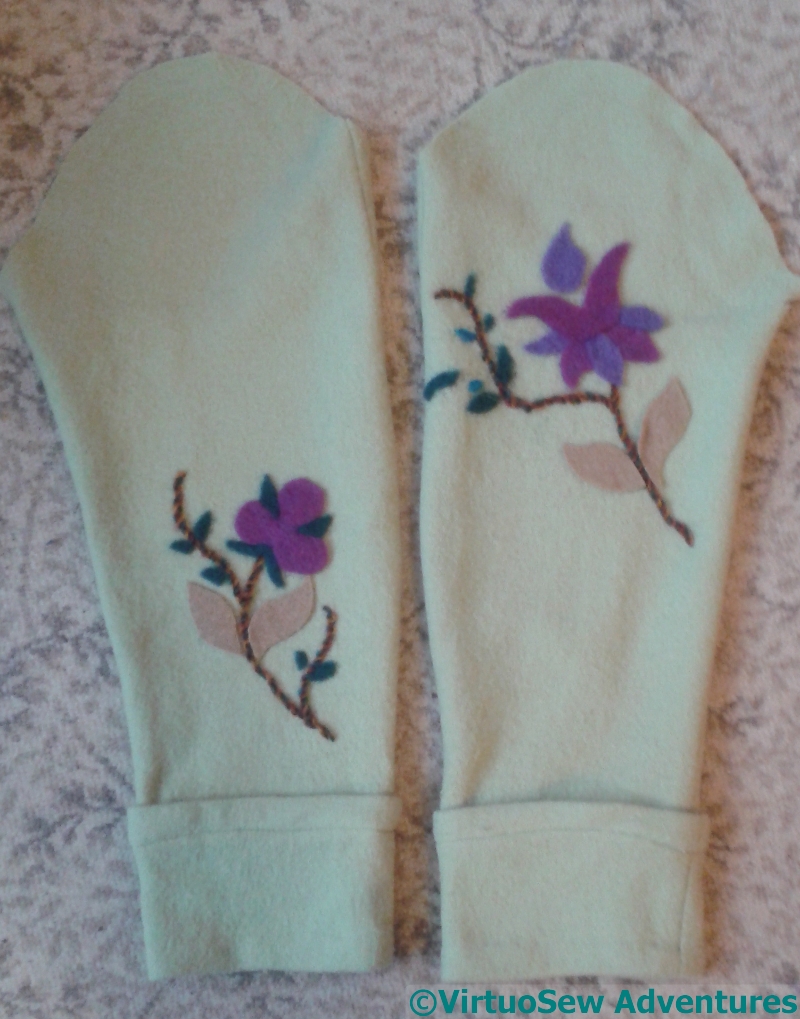
The placement of the motifs is different for each sleeve, one above and one below the elbow, and it isn’t even the same motif. Repetition is overrated!

I think I will probably settle on using feather stitch over the felt for these tiny leaves, which are scattered throughout the design.
The rest of it is going to be a riot of stitches and stitch combinations, so this will provide a moment of rest in embroidery, a moment of reassuring similarity from which the exuberance can take flight.
It will also give me something to be doing if inspiration fails for any of the motifs!
One of the things I have learnt, over the years, about working on these large projects that involves making it up as I go along, is that there needs to be something useful to do while the next bit is being mulled over – it reduces the pressure and gives space for the mind to wander over new and interesting stitch choices.
Stems done!
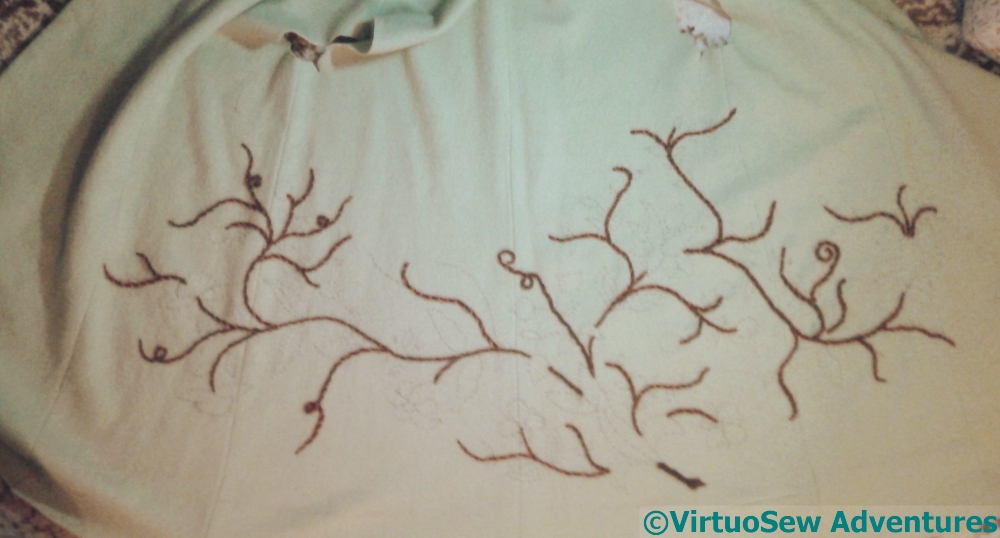
Stems Done!
I’ve got all the stems done on the Jacobean Coat!
Sleeve Motif 1
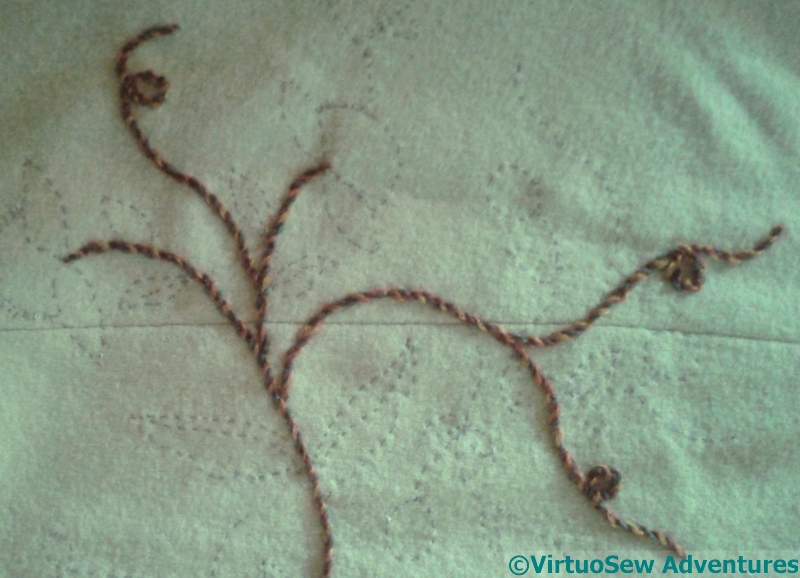
I’ve been quietly attaching the chunky knitting wool along the lines of the stems, and I’m quite pleased with progress so far. I’ve tweaked a couple of tendrils, and there are a few details I’m not quite sure about, but it’s a start.
In fact, it’s better than that, because I have started on the felt appliqué!
Sleeve Motif 2, Stage1
Both of the sleeves have motifs on them, one placed above the sleeve and the other below.
I decided to test the next stage on one of the sleeves, in case it didn’t work, but I rather think it will. I’m using the same lofty, fluffy felt I used for the Amarna Princesses, and I have lightly needlefelted it in place so that I can add the embroidered details without stabbing myself on a pin.
More thoughts on the Jacobean Coat
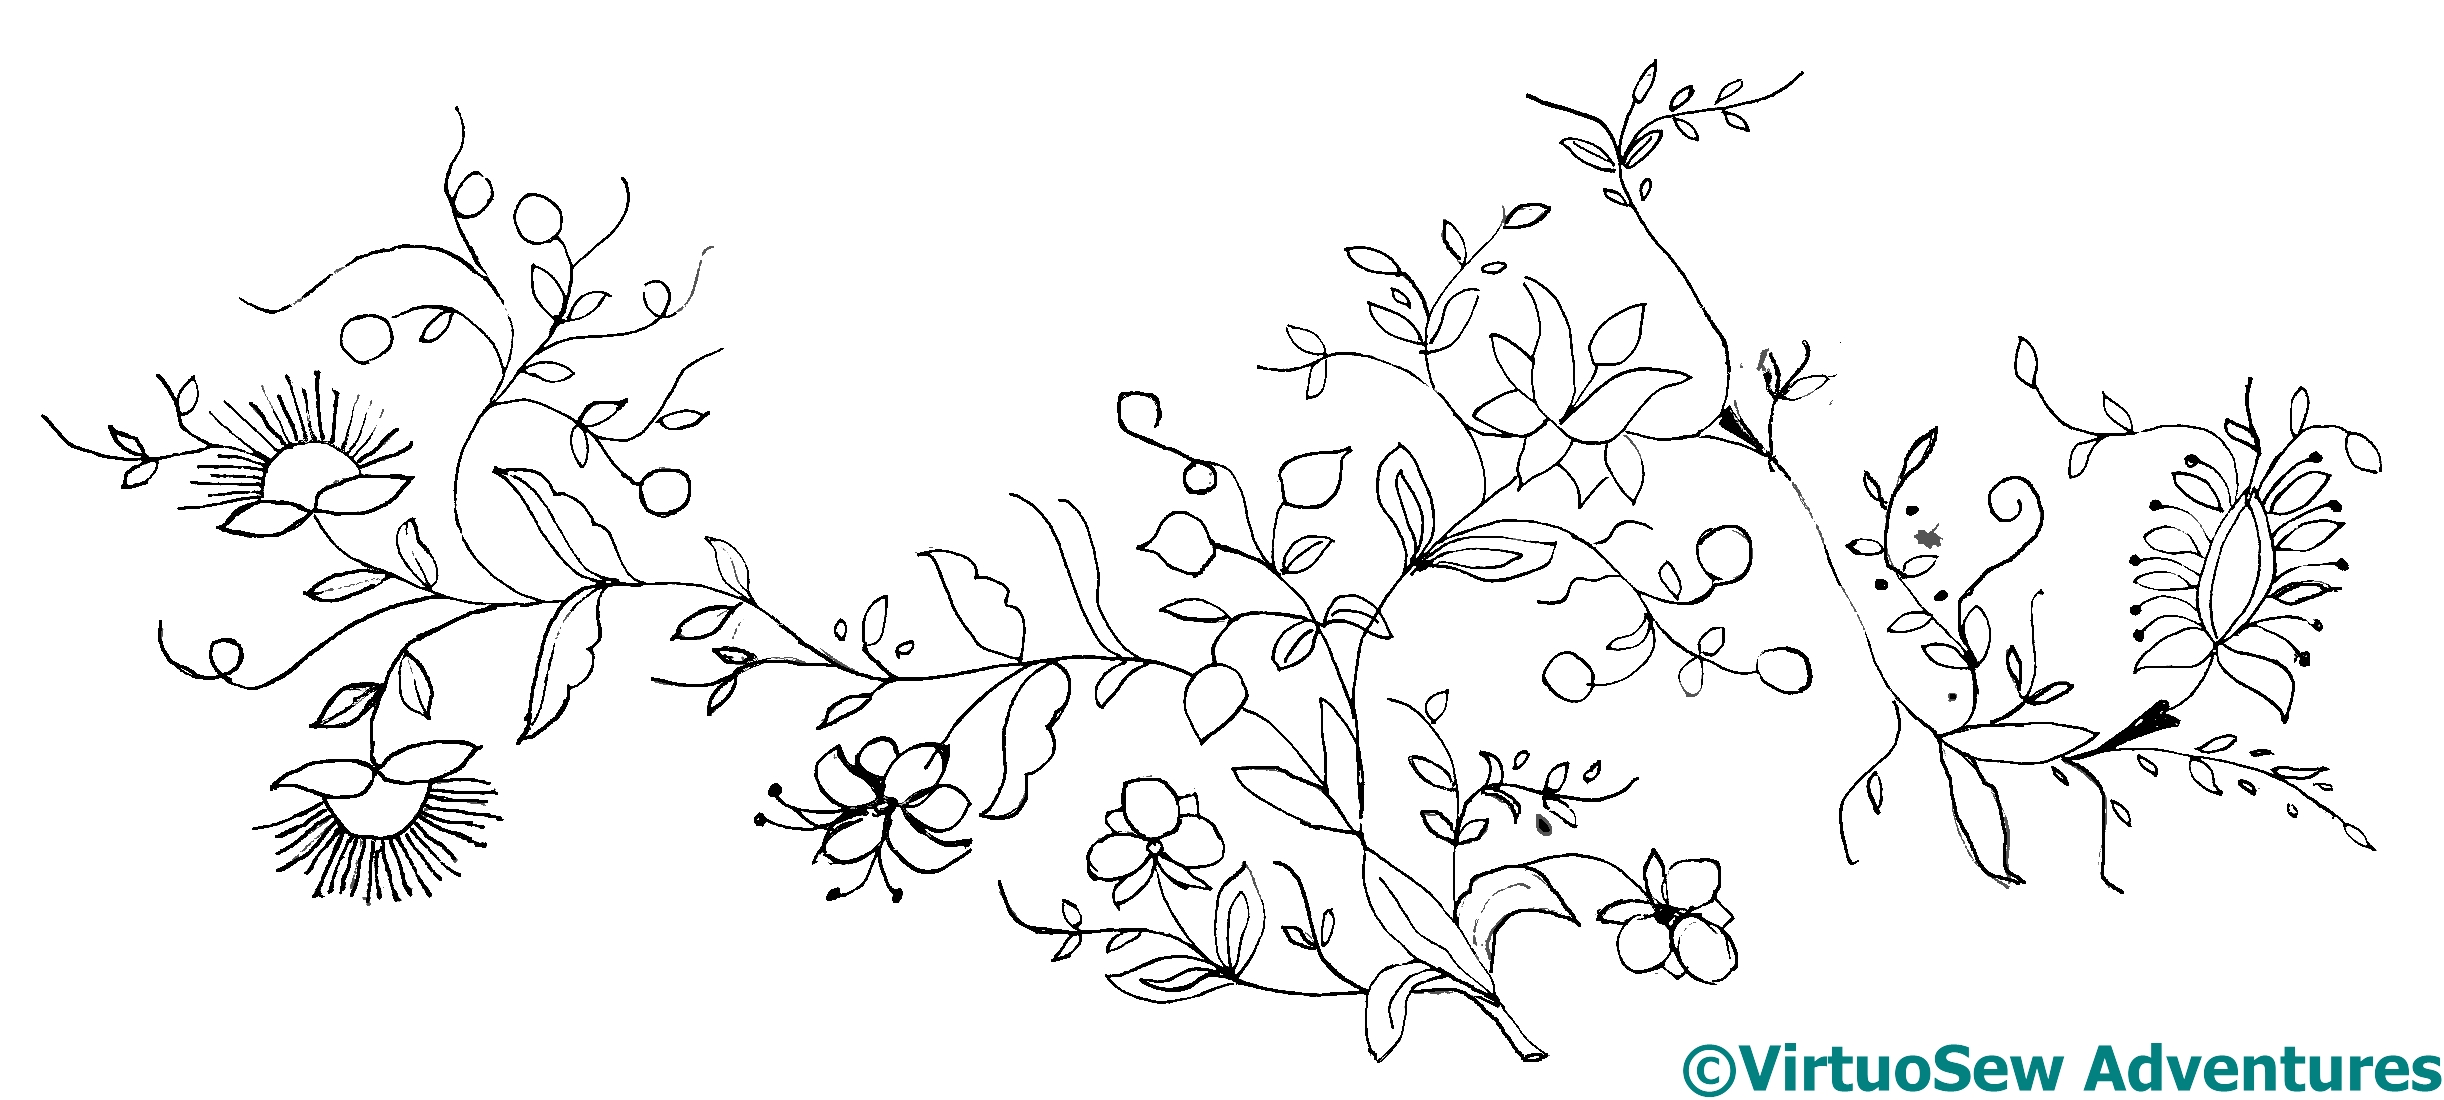
Coat Design
The design wraps around the back of the coat, leaving the front mostly unadorned. There are sprigs placed on the sleeves, too, one of them above the elbow, and the one on the opposite side below it. Remember the comments I’ve made in the past, about taking inspiration from Grinling Gibbons, and aiming for balance rather than symmetry? That goes for the placement of design elements in apparel as well as anything decorative.
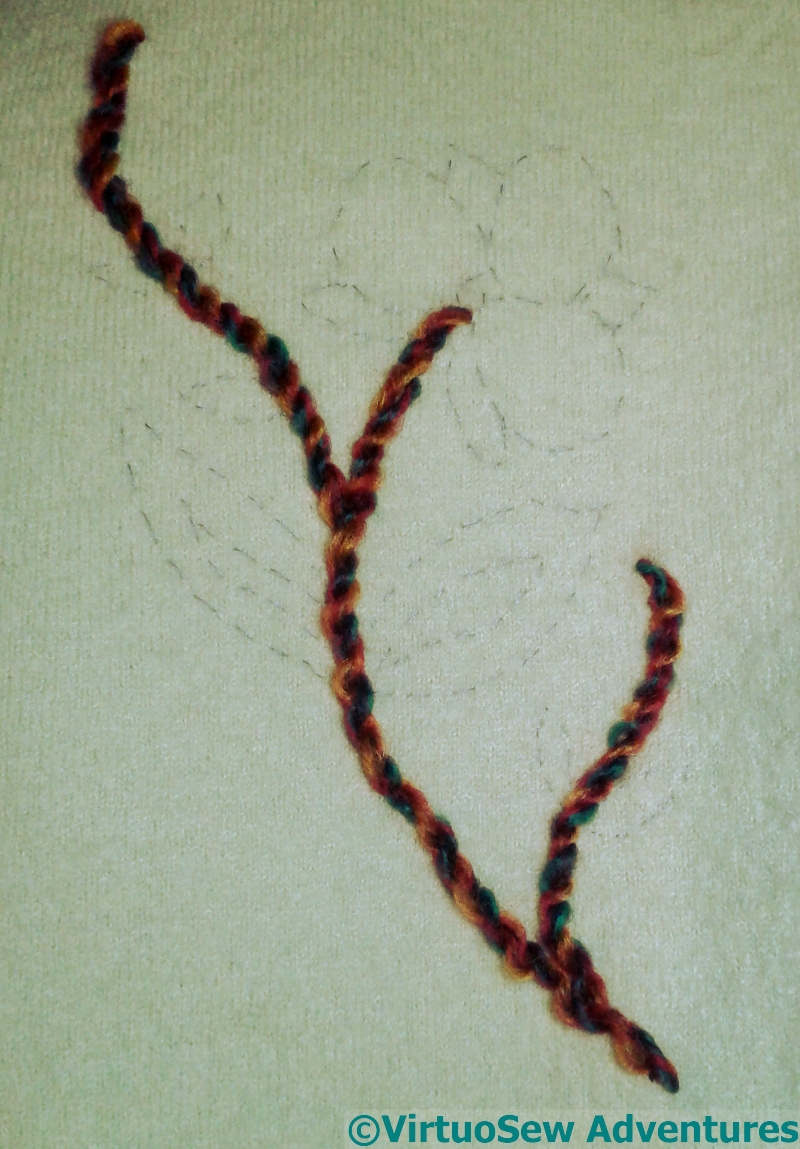
Starting Stems
My mother has commissioned the coat with various other garments and accessories in mind, and one of the ways we thought would help to tie the coat in with them would be to use a knitting wool which is involved in those accessories. Now, as it happens, I have experience with this sort of trailing design (remember the Piano Shawl?), and I remember that it can feel very disjointed and dispiriting as you work individual motifs, and however confident you are of the whole, it’s hard to be motivated when it keeps looking spotty and halfhearted.
However, the stems pull it together, so I thought this time I would start with the stems. It’s a big, chunky, variegated knitting yarn, so I will end up with the skeleton of the design, and all sorts of colours within it. I’m catching it in place with a fine woollen yarn, using small oblique stitches buried within the twist. They should be almost invisible.
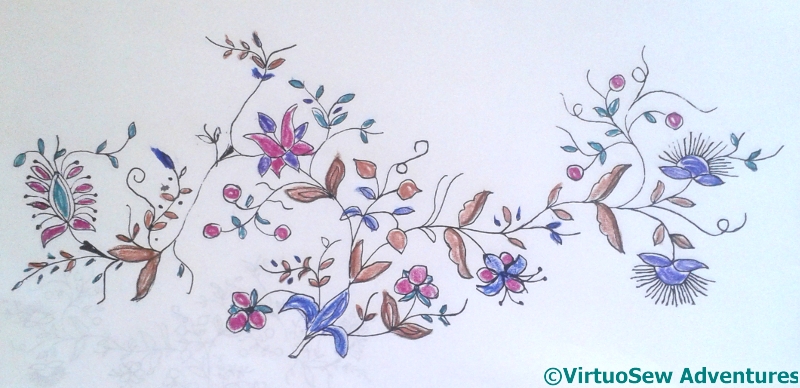
Trialling Colours
However, that too is going to take a while, so I can trial colour placement for the motifs themselves! As you can see, we aren’t aiming for a naturalistic colour scheme. This may not be the final arrangement, and there will be tweaks along the way, but I’m happy with this as a starting point.
The Jacobean Coat – getting started
Coat Designing
This is going to be a truly multi-generational project. The design elements are stolen from a tablecloth my Grandmama did during the war, and I’m going to embroider it on a coat for my Mam (her daughter). I will write a post about Grandmama’s tablecloth one of these days, because it’s an absolute cracker, full of wonderful needlelace patterns I’ve never seen anywhere else. However, as it is stitched in white on white fabric, I will have to become a better photographer first!
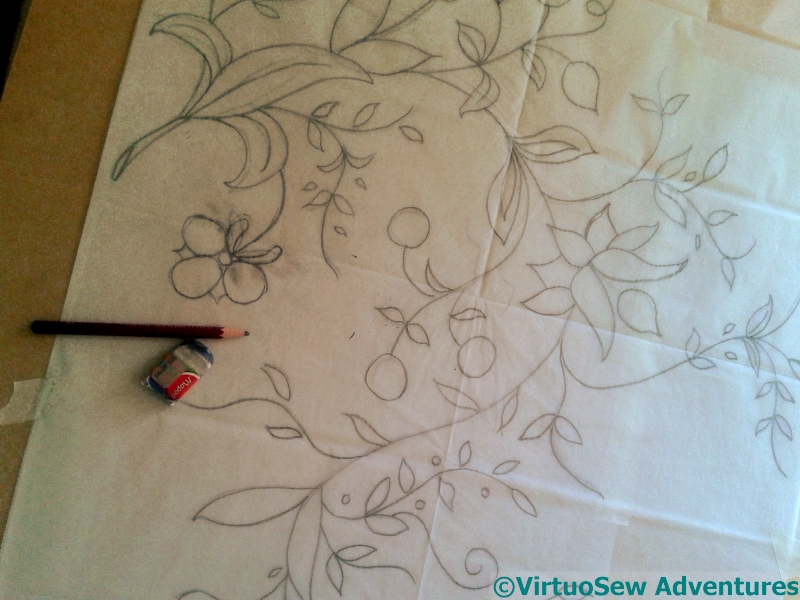
Stage One of Design Transfer
You may recall that during the Great Lady’s Magazine Stitch-Off, I wrote a post about the different methods for transferring designs, particularly concentrating on their advantages and disadvantages in different circumstances. The fabric of the coat (this will be the second incarnation of this fabric!) is a pale green boiled wool. It’s dense enough to have some structure and weight, light enough to be easy to stitch (I think). You might have thought it would accept gracefully any method I chose.
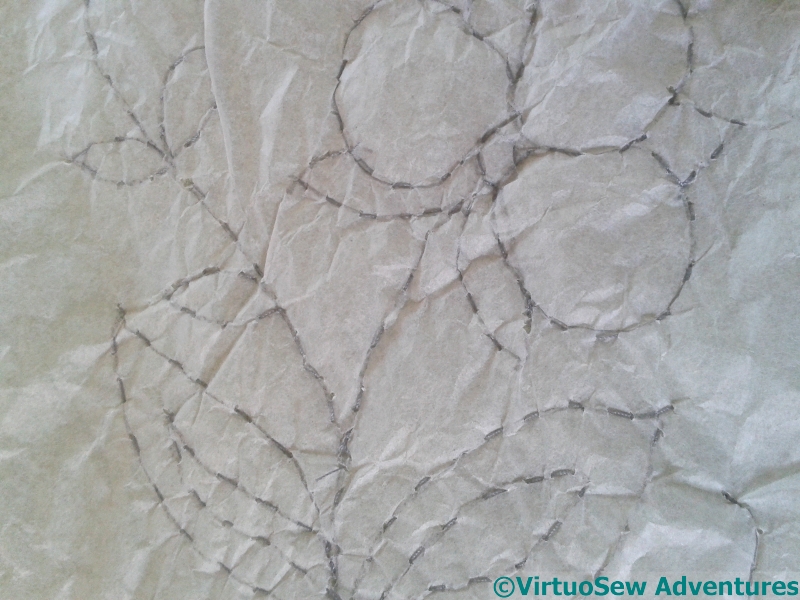
Stage Two of Design Transfer
However, when I thought about transferring the design, I found myself ending up with the most time consuming of the lot! Since the garment is unlikely to be washed, and rubbing may damage the surface, my options are somewhat limited. Transfer pencils spread, sometimes, if the ironing temperature is wrong, the chalks have a nasty habit of not always rubbing off when they’re wrong, and my quilter’s pencil doesn’t work on strongly textured fabrics.
So, running stitch through tissue it is, then. This will take a while…..
Lost Momentum…
Where I had Got To..
I’ve run into a bit of a problem here. I still love the idea, and I still want to finish the Nefertiti Shawl, but I’ve lost all momentum, and all sense of structure.
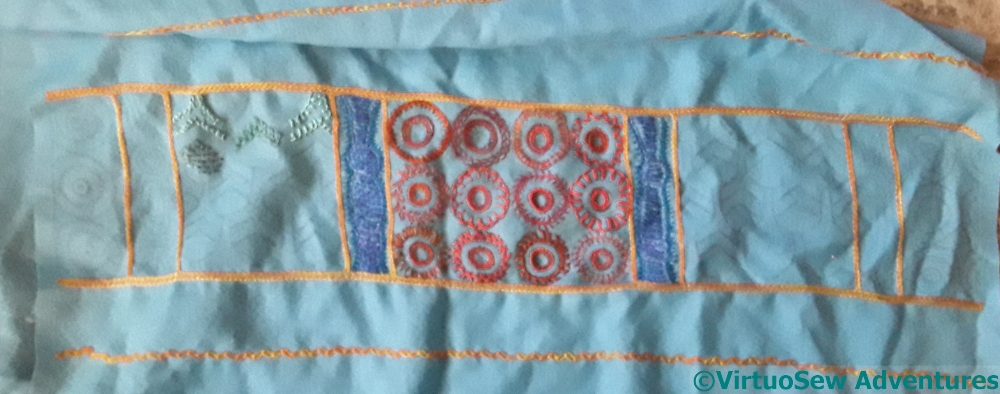
Red and Blue Sections
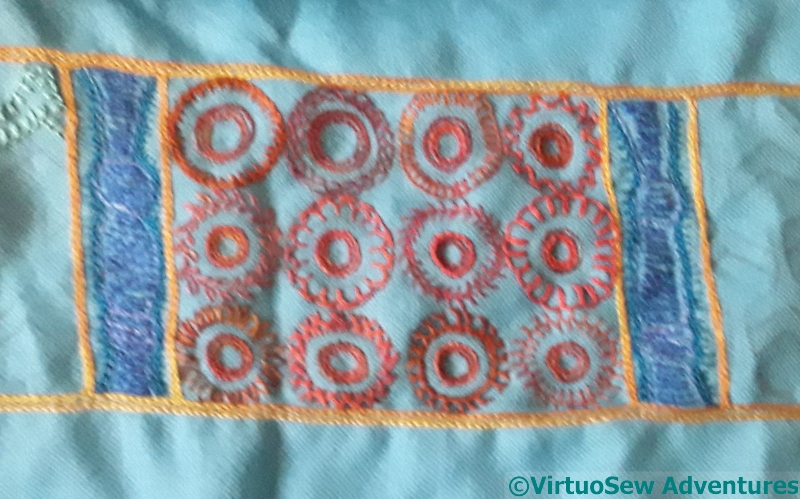
I’m happy with all the red circles. I like the colour variation and the unevenness – in real life, in a half-decent light, which winter in Britain rarely provides, there’s a vibrant, lively feel, and the use of the line stitches reflects the original pattern I used for the filling. Good.

Blue Section
The blue section is where the trouble started. I’ve done two of them already in spite of my doubts because I’ve come across all too many instances where a piece only worked when I’d kept on through the doubts.
I’m not sure whether it is the yarns, the colours, or the stitches that are the problem, or even whether there is a problem at all.
The pashmina is in a lovely twill weave which flows beautifully, but it’s quite fine, and a lot of the threads are thicker.
Green Section
But the problems of the blue section fade into nothing when I get to the green. I love the overlapping scale pattern, and I was really looking forward to stitching it. But I can’t find a pattern of stitching that works, and again, I’m not sure whether this is the colour, the thread, or the stitch.
I have no idea how to sort this one out. Unless inspiration strikes, it will be some time before you see it again.
The Red Panel on the Nefertiti Shawl – Part Three
More Circles
Third installment..
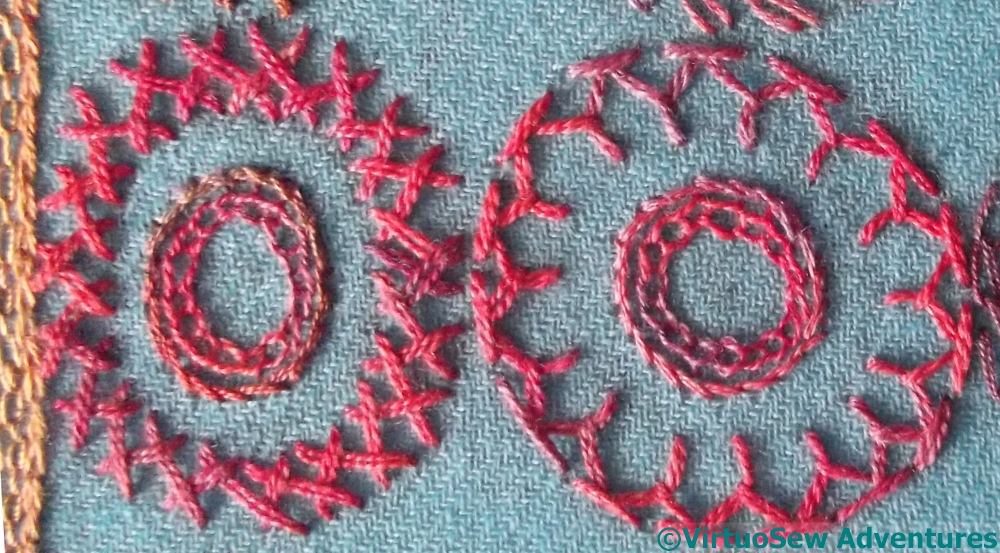
Remember, the two inner circles are always in the same stitches – Open Chain Stitch, and Stem Stitch.
The two outer circles in this case are in Herringbone Stitch, and Half-Chevron Stitch. I’m a little disappointed that neither the counterchanges of colour nor the counterchanges of thread seem to show in this photo. I assure you, they were there when I worked it!

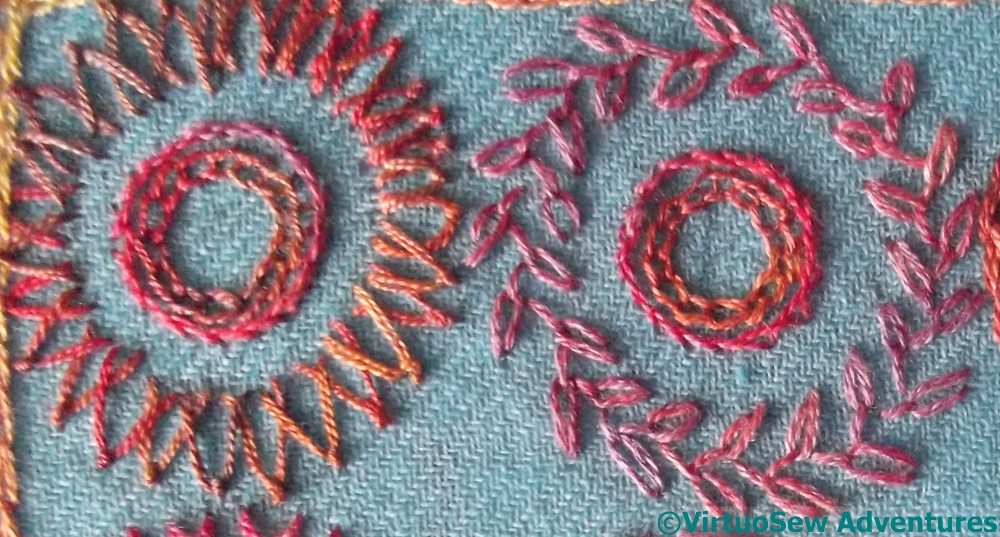
Still More Circles
The first of these is Breton Stitch, which is a little like Herringbone stitch with added twist. I’m sure I could have done it with the twist towards the outside, but I think like this, it will balance some of the other circles which have a strong edge.
The second is Wheatear Stitch, which I have found myself turning to every now and again, although maybe not often enough. It produces a spiky but continuous line, so while it has definite uses, it is also one which doesn’t work in all contexts. That said, I enjoyed working it, so maybe I will be able to tweak either the context or the stitch, so as to use it more…!
This pashmina is going to be quite the stitch sampler, isn’t it!
The Red Panel on the Nefertiti Shawl – Part Two

More circles..
Moving on to the next set of stitches…
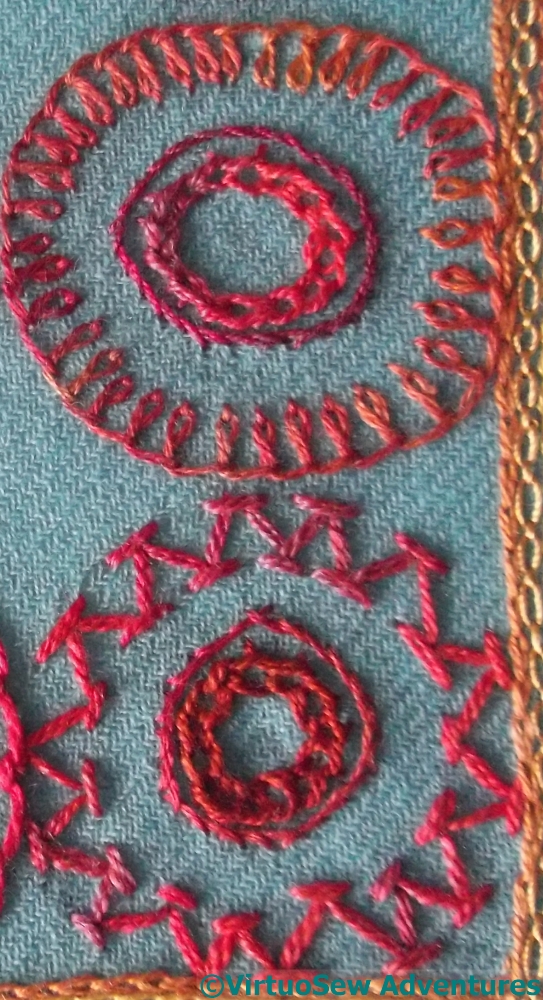
The circles weren’t perfectly drawn, so the slightly wonky appearance of perspective is partly owing to that. The lighter coverage is Cretan Stitch. I often have trouble using cretan stitch in my more figurative projects, so I’m hoping that being reminded of it will help me to find uses for it in future. Up and Down Buttonhole stitch is an old favourite, as long term readers will know. I’ve done it more neatly, but I always enjoy stitching it.
Still More Circles
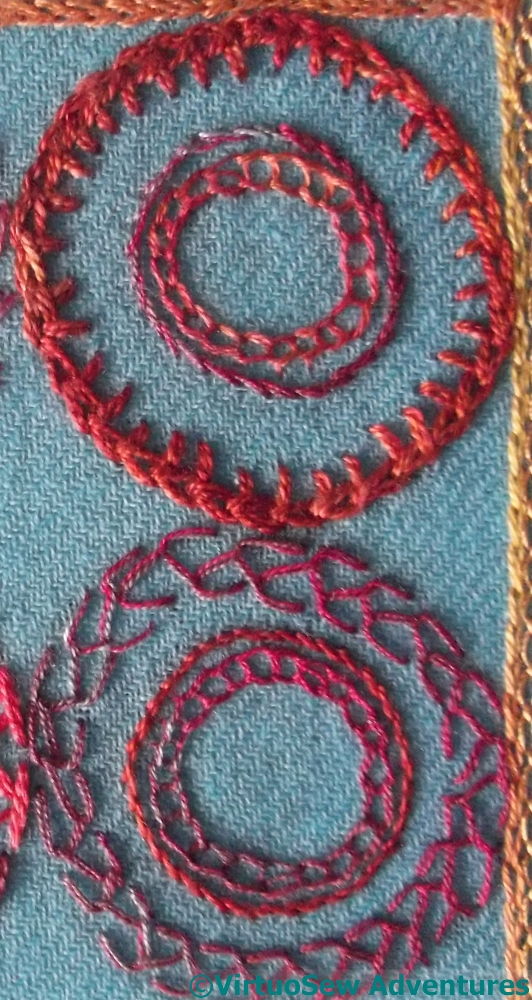
This pair was actually among the last to be finished. Italian Border Stitch can be described as a fly stitch with a French Knot instead of a straight stitch. First I did a single row, and it looked a bit thin, so I added a second layer. Much better!
The second circle is in Chained Feather Stitch. This one curves well around the circle, and has something of the feel of a victor’s laurel wreath about it. Maybe an omen for me finally finishing the Dreams of Amarna in the next year?
The Red Panel on the Nefertiti Shawl – Part One
Two circles
Once the colour scheme was sorted out, I decided that I was going to try my usual trick again. There are elements of the panel which will be the same, and other elements which will change. The combination ensures that there is interest everywhere, but rhythm and similarity to help the eye rest.
So, the two inner circles are open chain stitch for the innermost one – at about the largest scale at which open chain stitch works without decoration, which is tiny! – and simple stem stitch. Furthermore, the open chain stitch always uses the thread used for the outermost circle, and the stem stitch counterchanges to a different weight and tone of thread.
The first circle here is done in Chained Blanket stitch using a silk perle in a warm russett-y red. Chained blanket stitch is one I’ve rarely used, but I’ve decided I like it. It produces a strong edge, and a pleasing texture. The second circle is in a rather finer silk thread, with a blueish tone – counterchange again, you see. This time I used Closed Feather stitch, which is one of the old faithfuls…
Two more circles
The next two continue the theme…
The outer circles are in Basque Stitch (top), which is another stitch with a family resemblance to chain stitch and blanket stitch, this time using two strands of stranded silk, and Chevron Stitch, in another silk perle. Chevron Stitch is an old friend, but as you see, it doesn’t run happily around curves – or at least, not curves as tight as this.
Still, the counterchanges of russet against burgundy, thick against thin thread, same stitches against new stitches, all seem to be working so far…
Playing with brooches again
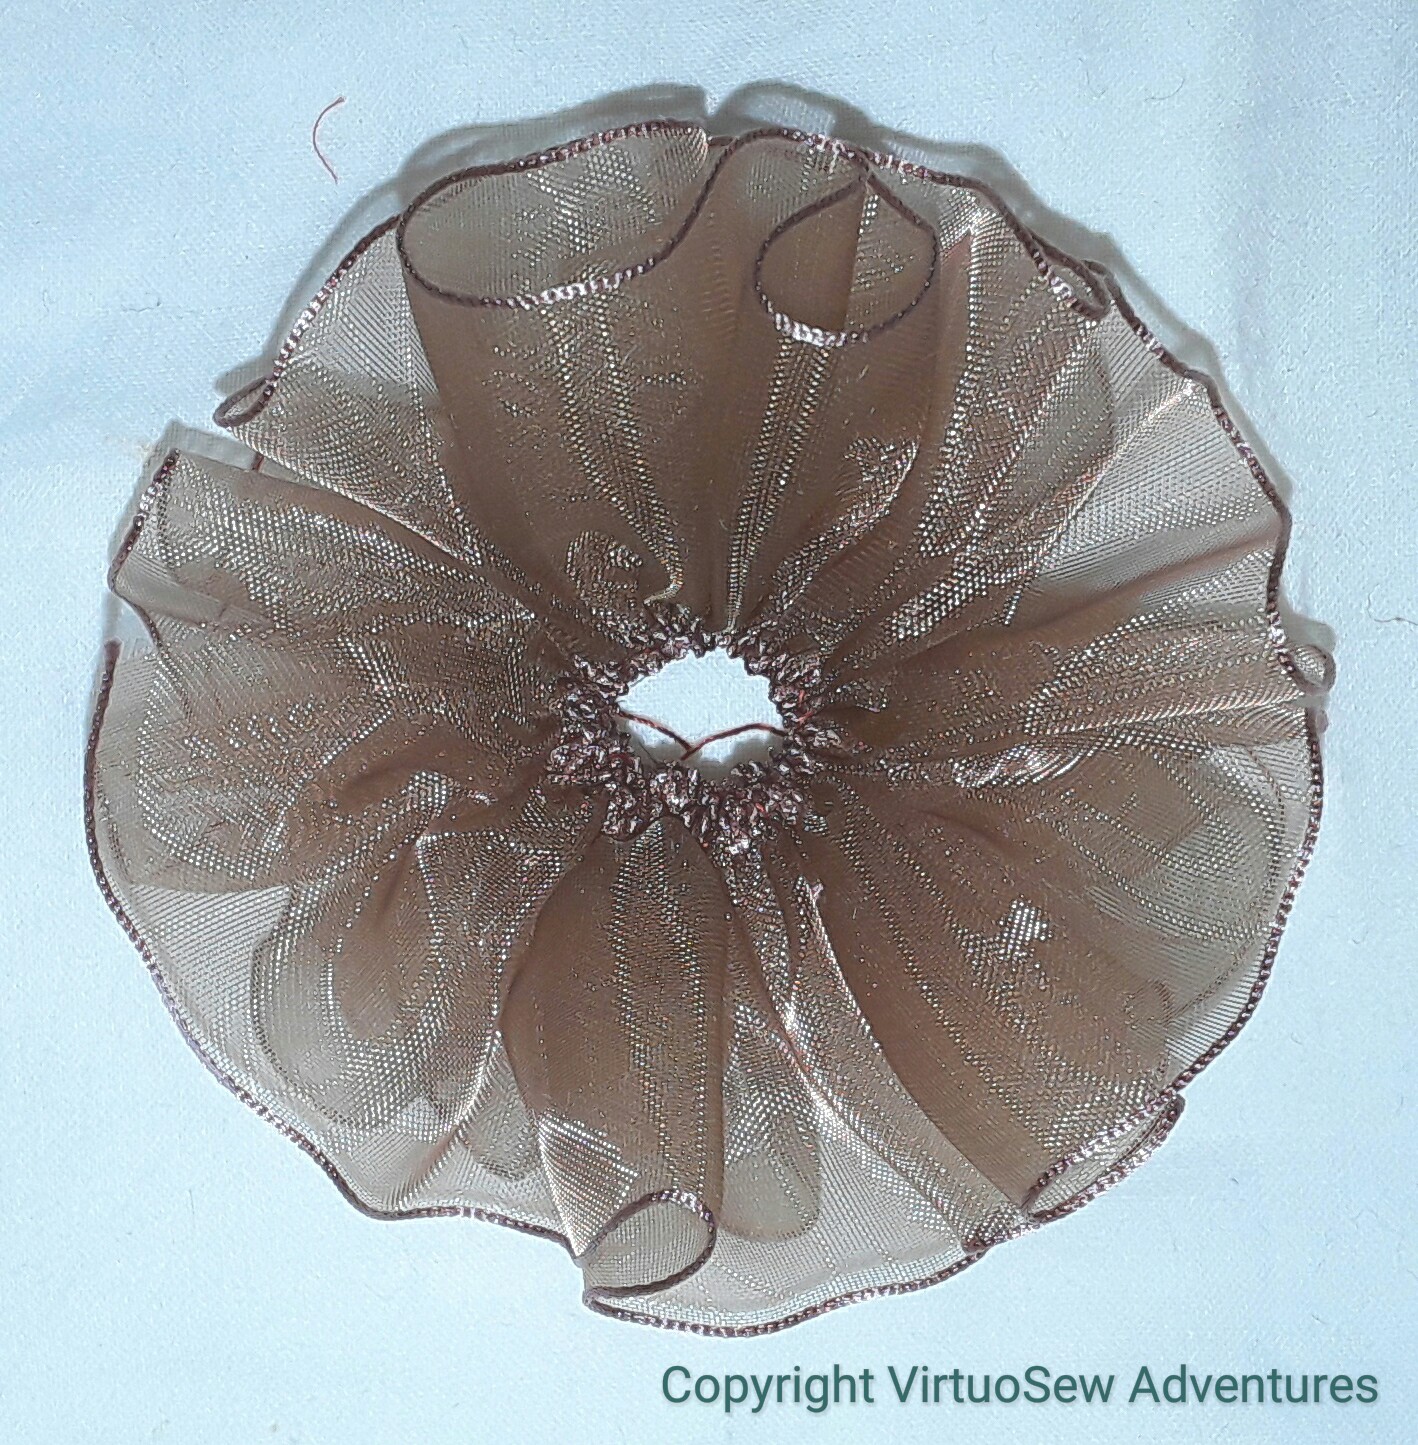
Gauze Spiral
I was very taken with a length of gauze ribbon i found when I was rummaging for bits of teal fabric, and spent an idle moment or two running a gathering thread along one edge. I wasn’t at all sure where I would go from there, but as I pulled the gathering thread up the ribbon settled naturally into a tight spiral reminiscent of an Elizabethan ruff. Hmmm. Promising!
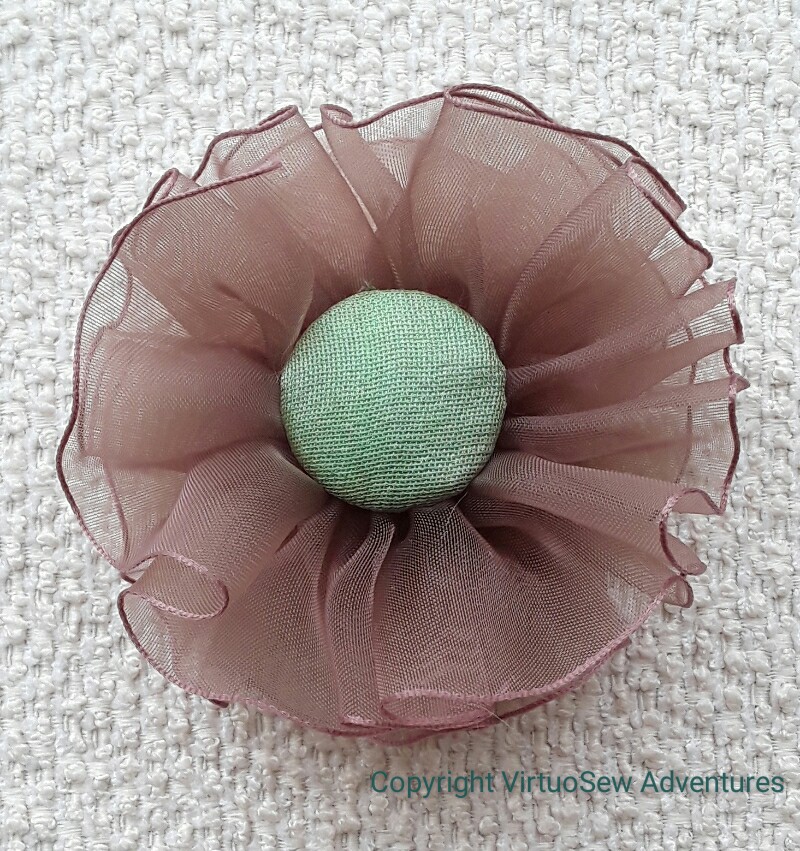
In the end, I covered another self-cover button with two layers of a rather gorgeous silk fabric which I originally bought for my mother to line a bookbox she made for a fine binding of “The Wind In The Willow”, and created a cross between a winner’s rosette and a new species of flower.
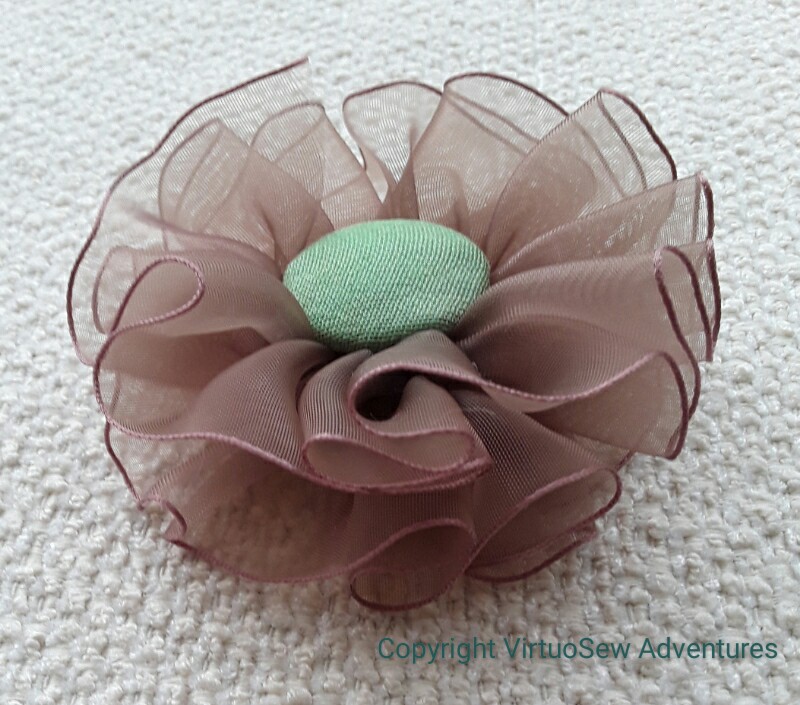
I think it will be fun to wear, but the real delight is the ruffle… It has “loft”, and a gentle glimmer, both from the gauze and from the silk button. More of a spring than an autumn piece, with that light spring green and and the gauzy ruffle, but I’ll look forward to the treat!
Satin and Tweed
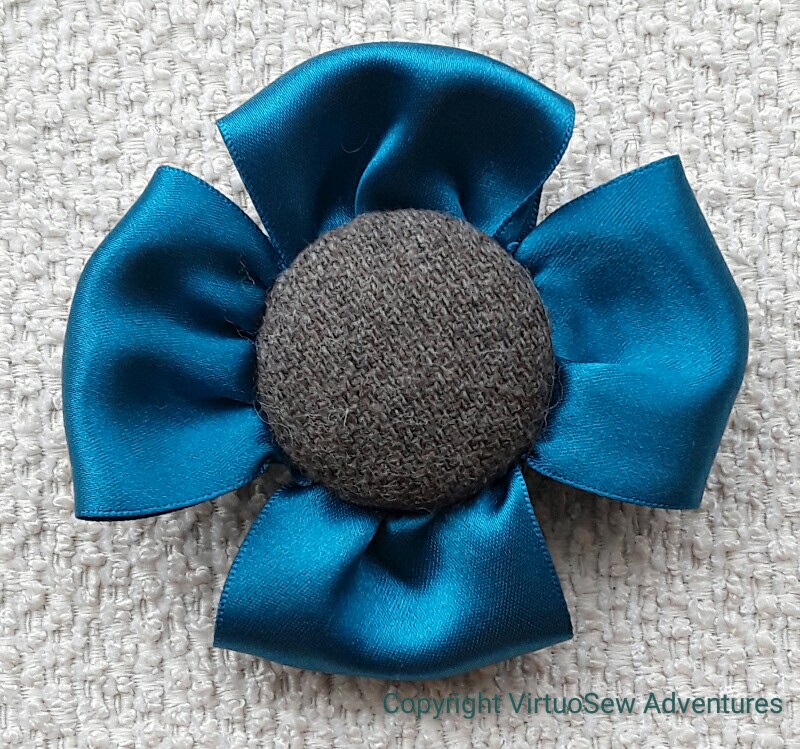
Talking of unnatural flowers….
What I would really like to do is think of something else to do with the tweed fabric in the centre of this. It was cut off a pair of trousers which were too long for me, but it is a nice fabric and I want to create something fun with the scraps.
Thinking caps on, then…