
Tag: experiments
Playing with Flox 3 – a couple of missteps
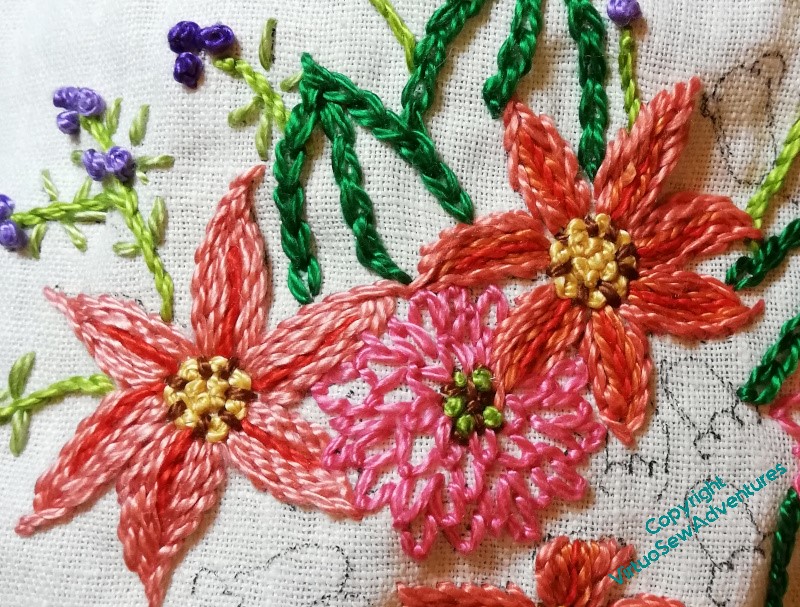
Flox is quite an odd thread to use. It’s tough and almost wiry. I love the shine and brilliance of the colours, but even the fairly loosely woven fabric I chose was a little bit too closely woven for the thread. I had rather a battle with it, and it was a bit tricky to find stitches I liked the look of. I’ve ended up using a very small selection of stitches – chain stitch, stem stitch, French Knots, and fly stitches.
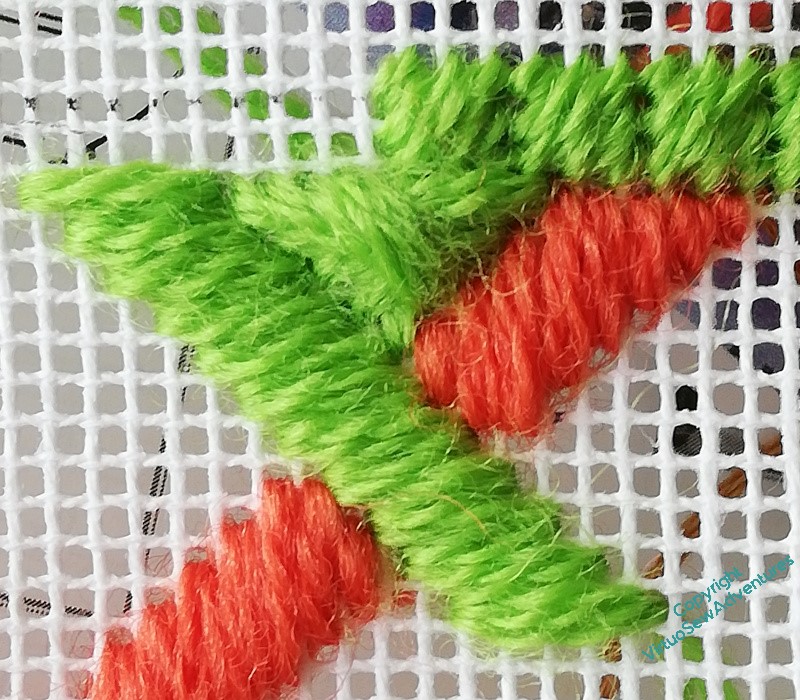
The pink fly stitches on the frilly flower, I decided, were a bad choice. I’ve no quarrel with the stitch, but pink beside the apricot/ orange of the six-petalled stitches looked wrong, too congested and overheated and all in all, Just Wrong. Amid much muttering, and no little anxiety (dear heaven, I’m not used to playing thread chicken to this extent any more!!), out they came.
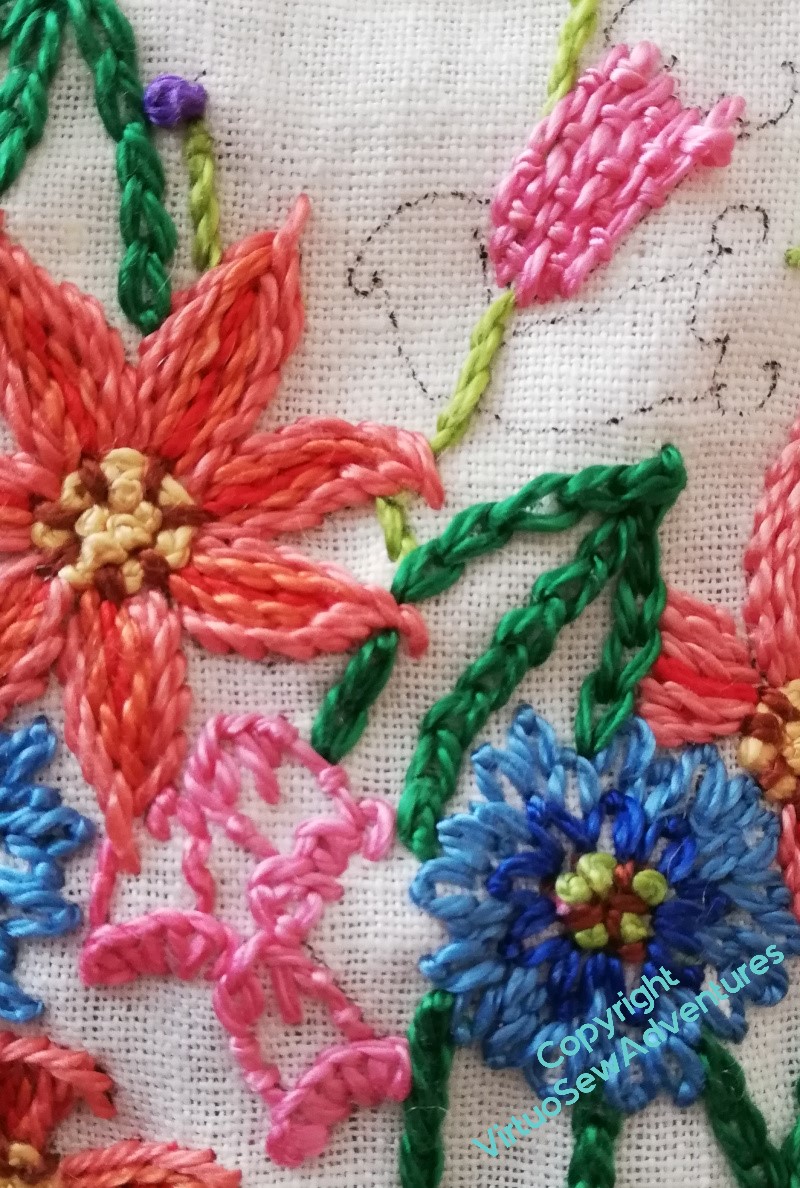
I replaced them with two shades of blue – much better!
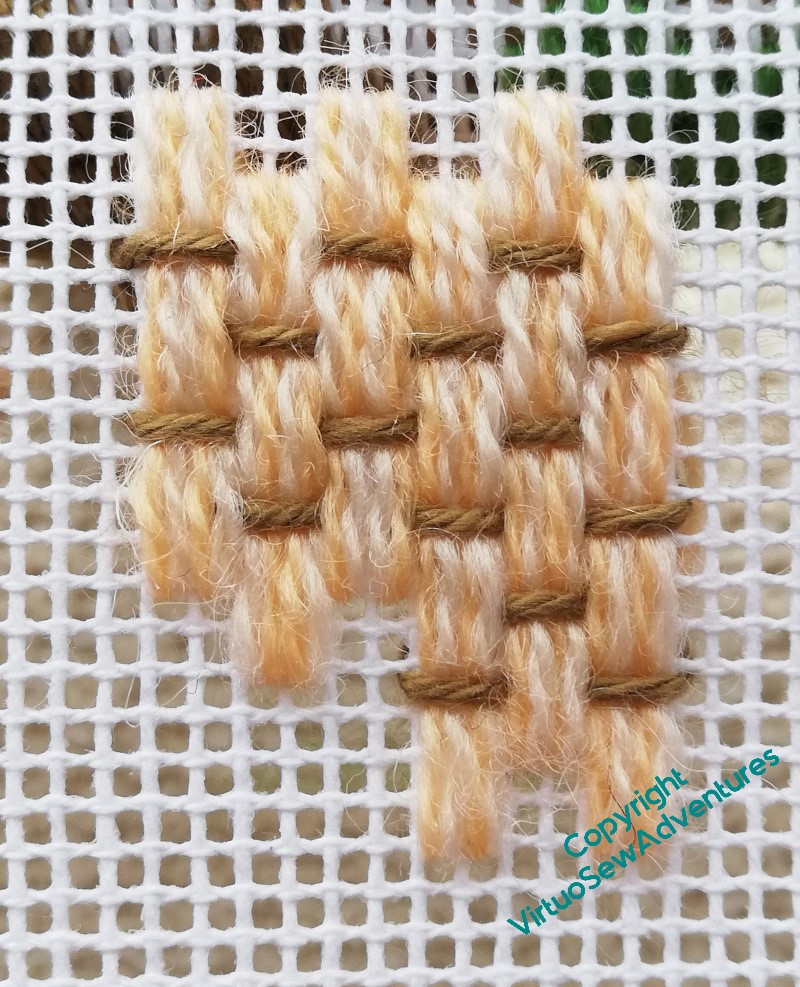
The final flowers were the bell shaped flowers. I did wonder about working them with a full-coverage stitch, such as Romanian Couching or something like it. You can see in the picture at the right that I tried a fully stitched bell. That came out two. But then I discovered that my two pinks were slightly different shades, like the oranges. So I’ve deployed the two shades to eke out my thread a little.
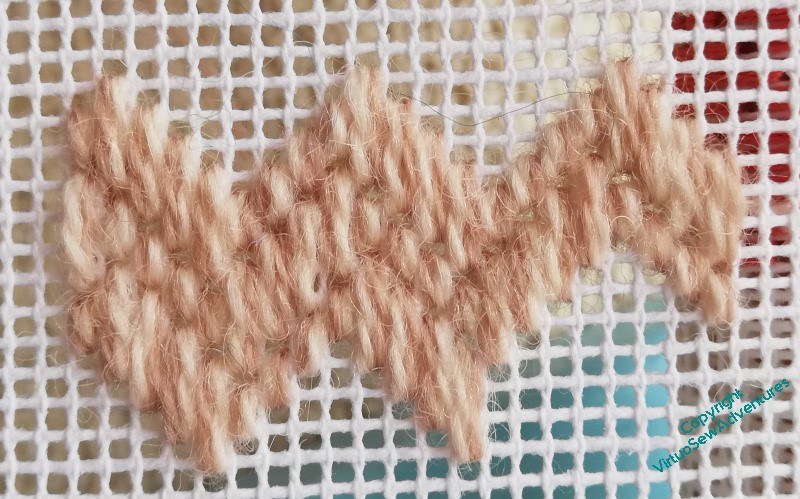
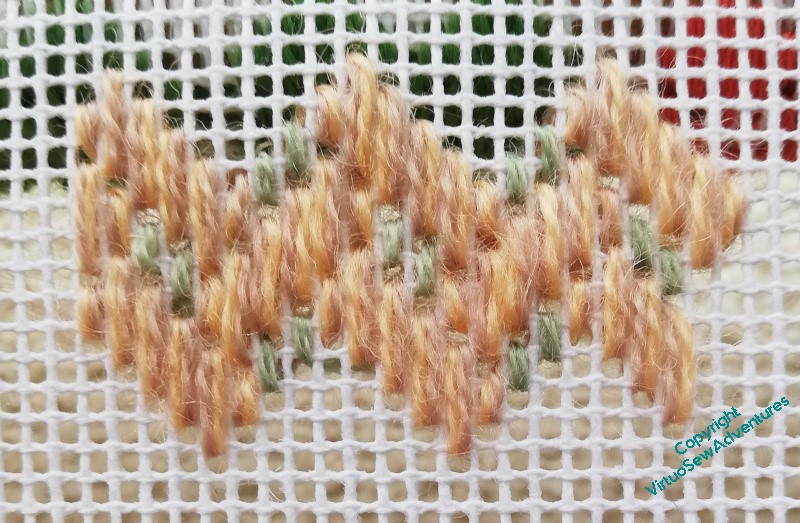
I did the same with the six petalled flowers – each of the four is a different combination of thread shades.
Playing With Flox 2
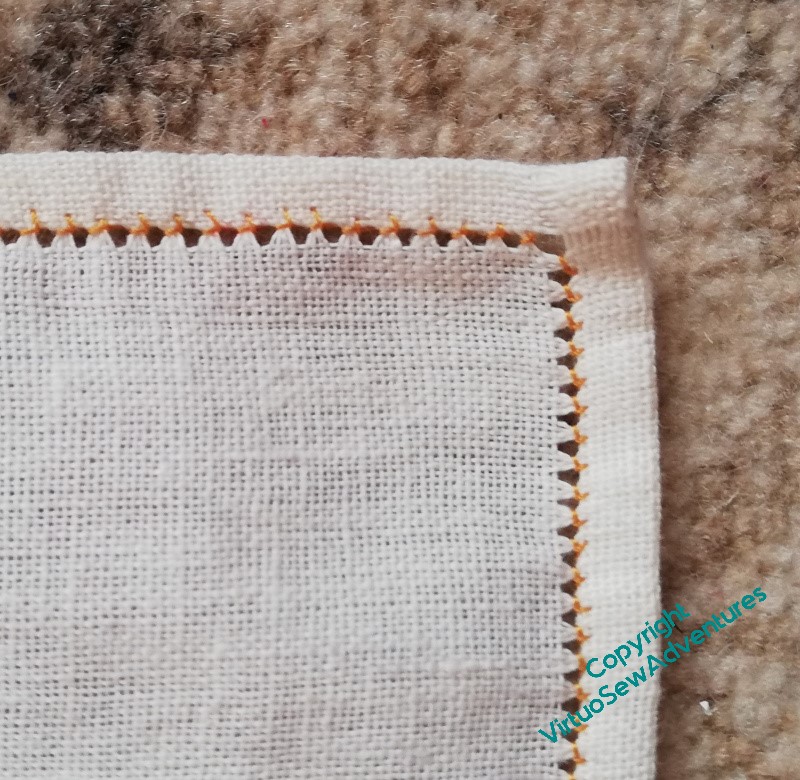
I found a suitable – fairly loosely woven – fabric, and evened up the edges (a lot of unravelling happened!), then hemstitched around the whole thing. In the past, I’ve done the hemstitching last, but as I had a few occasions coming up on which I had time to myself, in public, in which stitching might enable me to be usefully occupied and not loom at people, I thought this was a good use of my time. One reel of cotton, my knitter’s captive blade, and a needle – no other equipment needed, and no risk of losing any of the precious Flox!
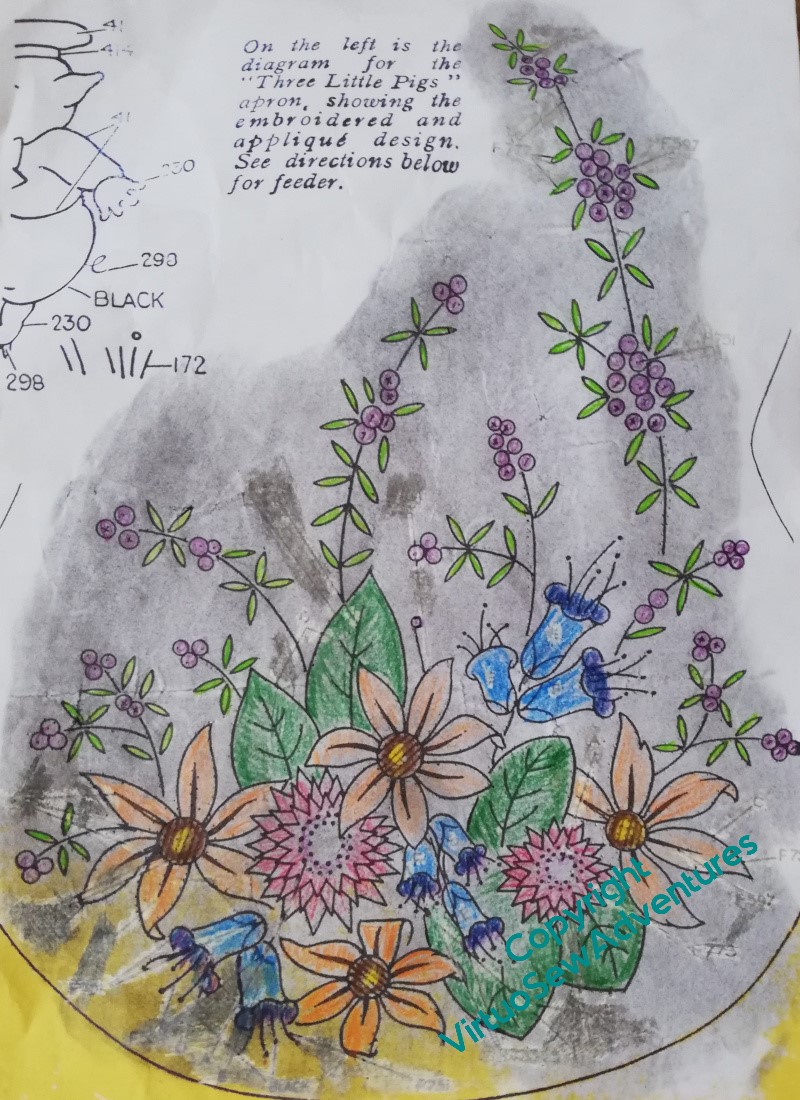
Then I did a colour plan for the chosen design. I don’t usually plan pieces like this so much in advance, but since I have limited thread to work with, I picked out a crayon for each colour I had, and had a go. The background is blackened because I first tried to used prick and pounce to transfer the design. It didn’t at all – possibly because the fabric is too loose and all my pounce ended up in gaps rather than on threads. The next attempt was a transfer pencil. That didn’t work either, not at all, no sign of transfer of anything. I wonder whether transfer pencils degrade with time?
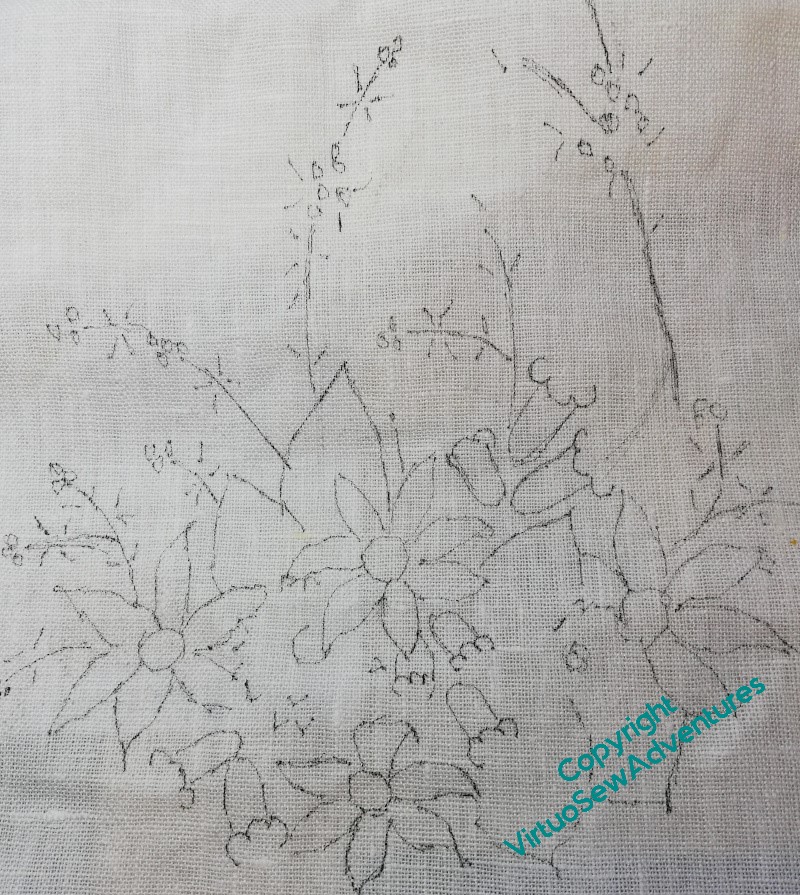
So then, which much muttering, I moved on to my cheap and nasty LED lightbox substitute. If I ever find an old-fashioned one I shall leap upon it, LEAP, I tell you.
You can see that I didn’t transfer all lines in all detail. This is a legacy of the Stitch Off, and a result, also, of the efforts I’ve been putting into painting and sketching over the years. This sort of design doesn’t rely on precision, all of the charm of it comes from the sense of life and profusion, and the fabric and thread are both too chunky to allow for much delicacy. So I’m trying to minimise my reliance on guidelines, and indeed, gradually make the guidance still more minimal. A work in progress, again.
Playing With Flox
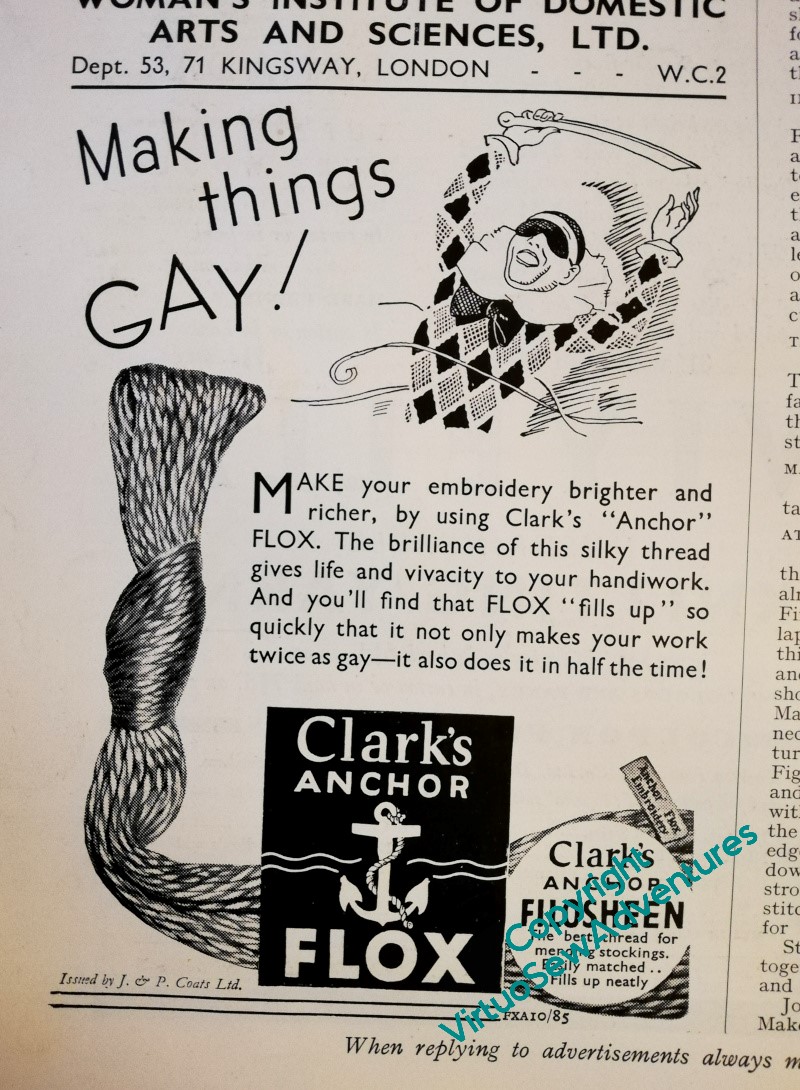
Well, if I had paid attention, forty years ago, to the adverts in those nineteen thirties The Needlewoman magazines, I would at least have known that Anchor “Flox” was a twisted, fairly heavy thread. I might also deduce that it was fairly new, because the tone of the adverts suggests that the reader needed to have the idea of it explained. So it is a fairly heavy thread, glossy and lustrous, and brightly coloured, creating bright, impactful pieces for interiors, rather than tiny delicate pieces for baby’s layettes.
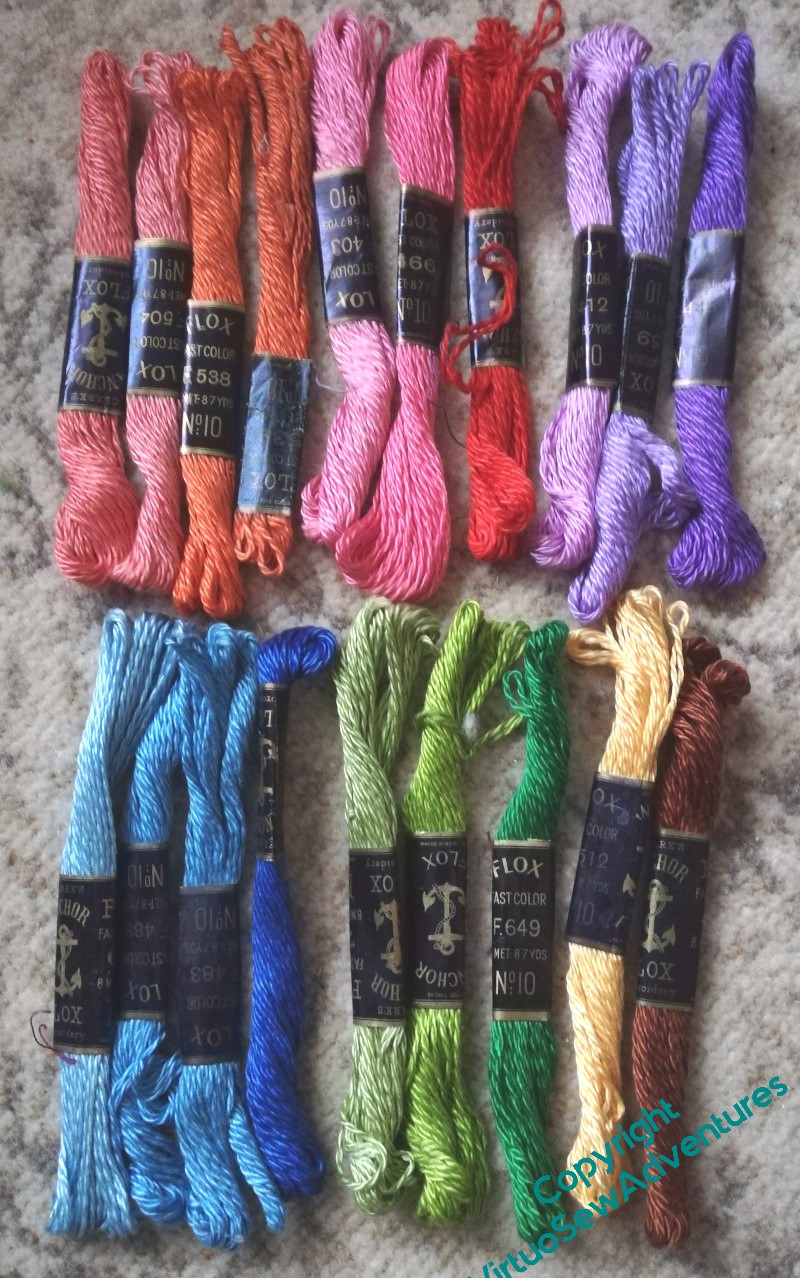
I laid out all my colours from the bunches I bought on the Embroiderers’ Guild stall at the Harrogate Knitting and Stitching Show in colour families to see what I had to work with. Bright, colourful, lustrous, yes – yes, all of that. The thread is a bit heavier than the heavy pearl cottons, but the twist is not so tight. I wonder how it will make up? (Apart from “in half the time”!)
Now I look at it in better light, the red is more of an orange, so it’s misplaced, but there’s a fair range of colour here, as long as I’m not going for subtlety..
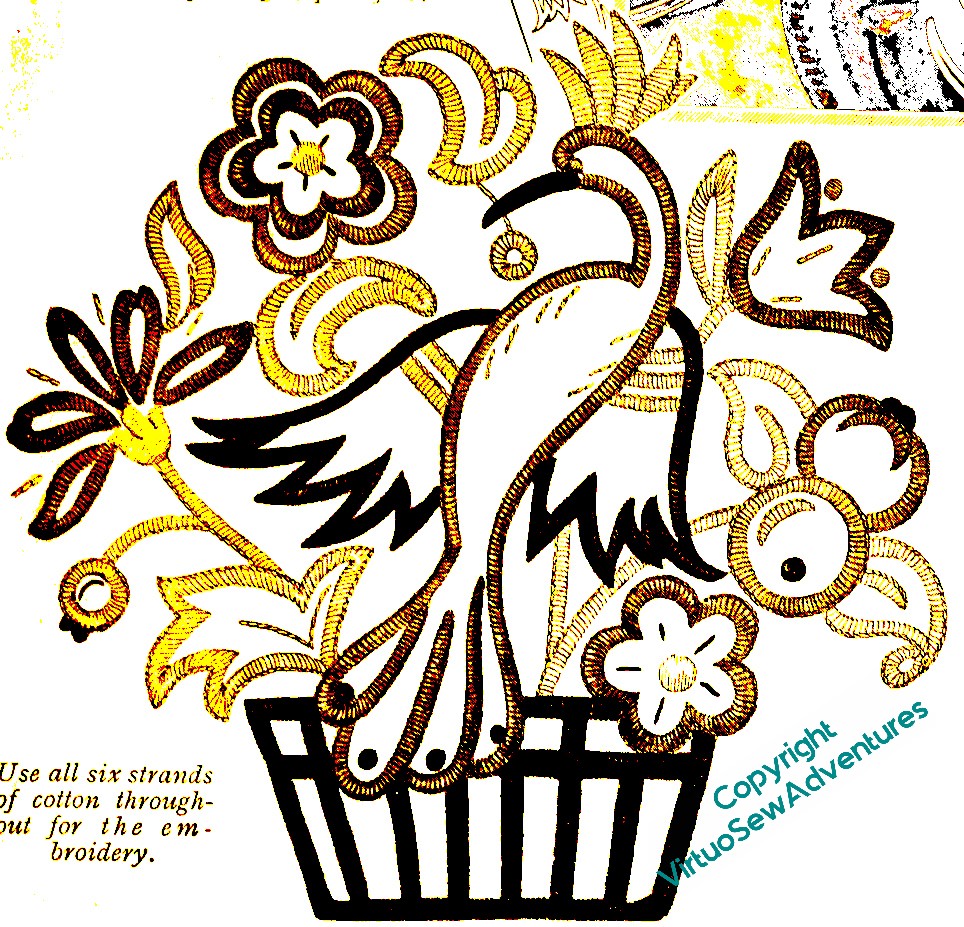
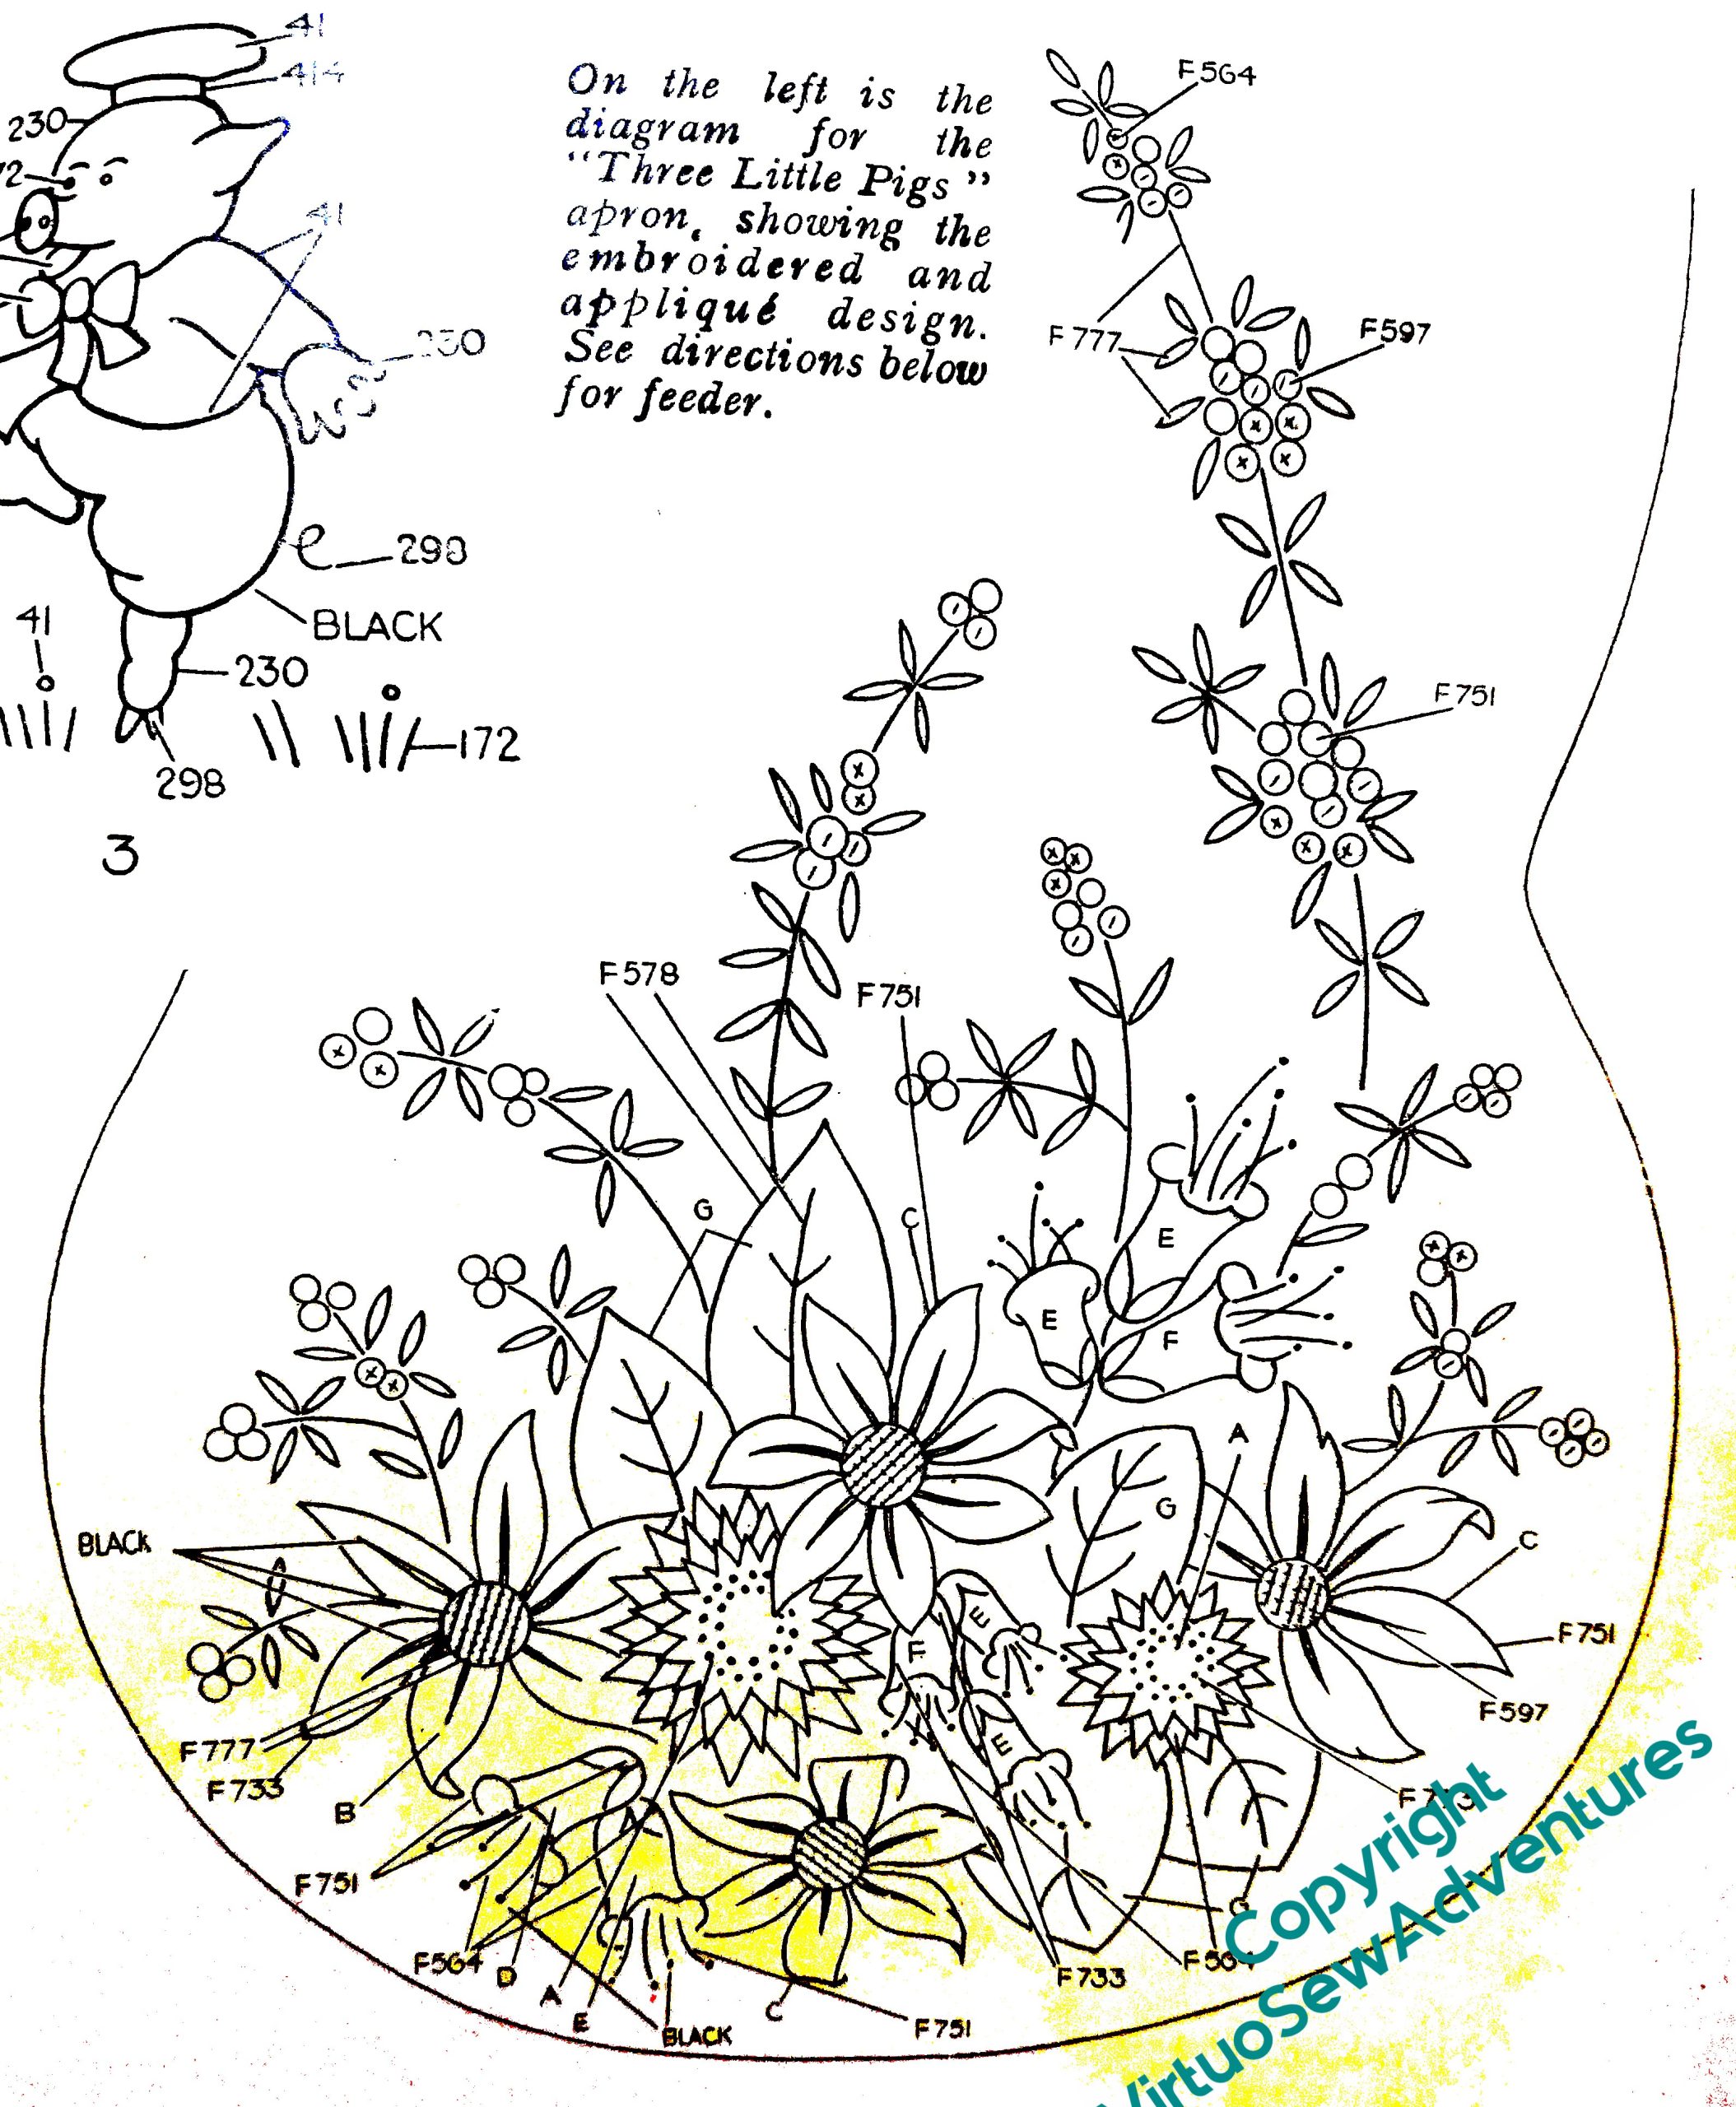
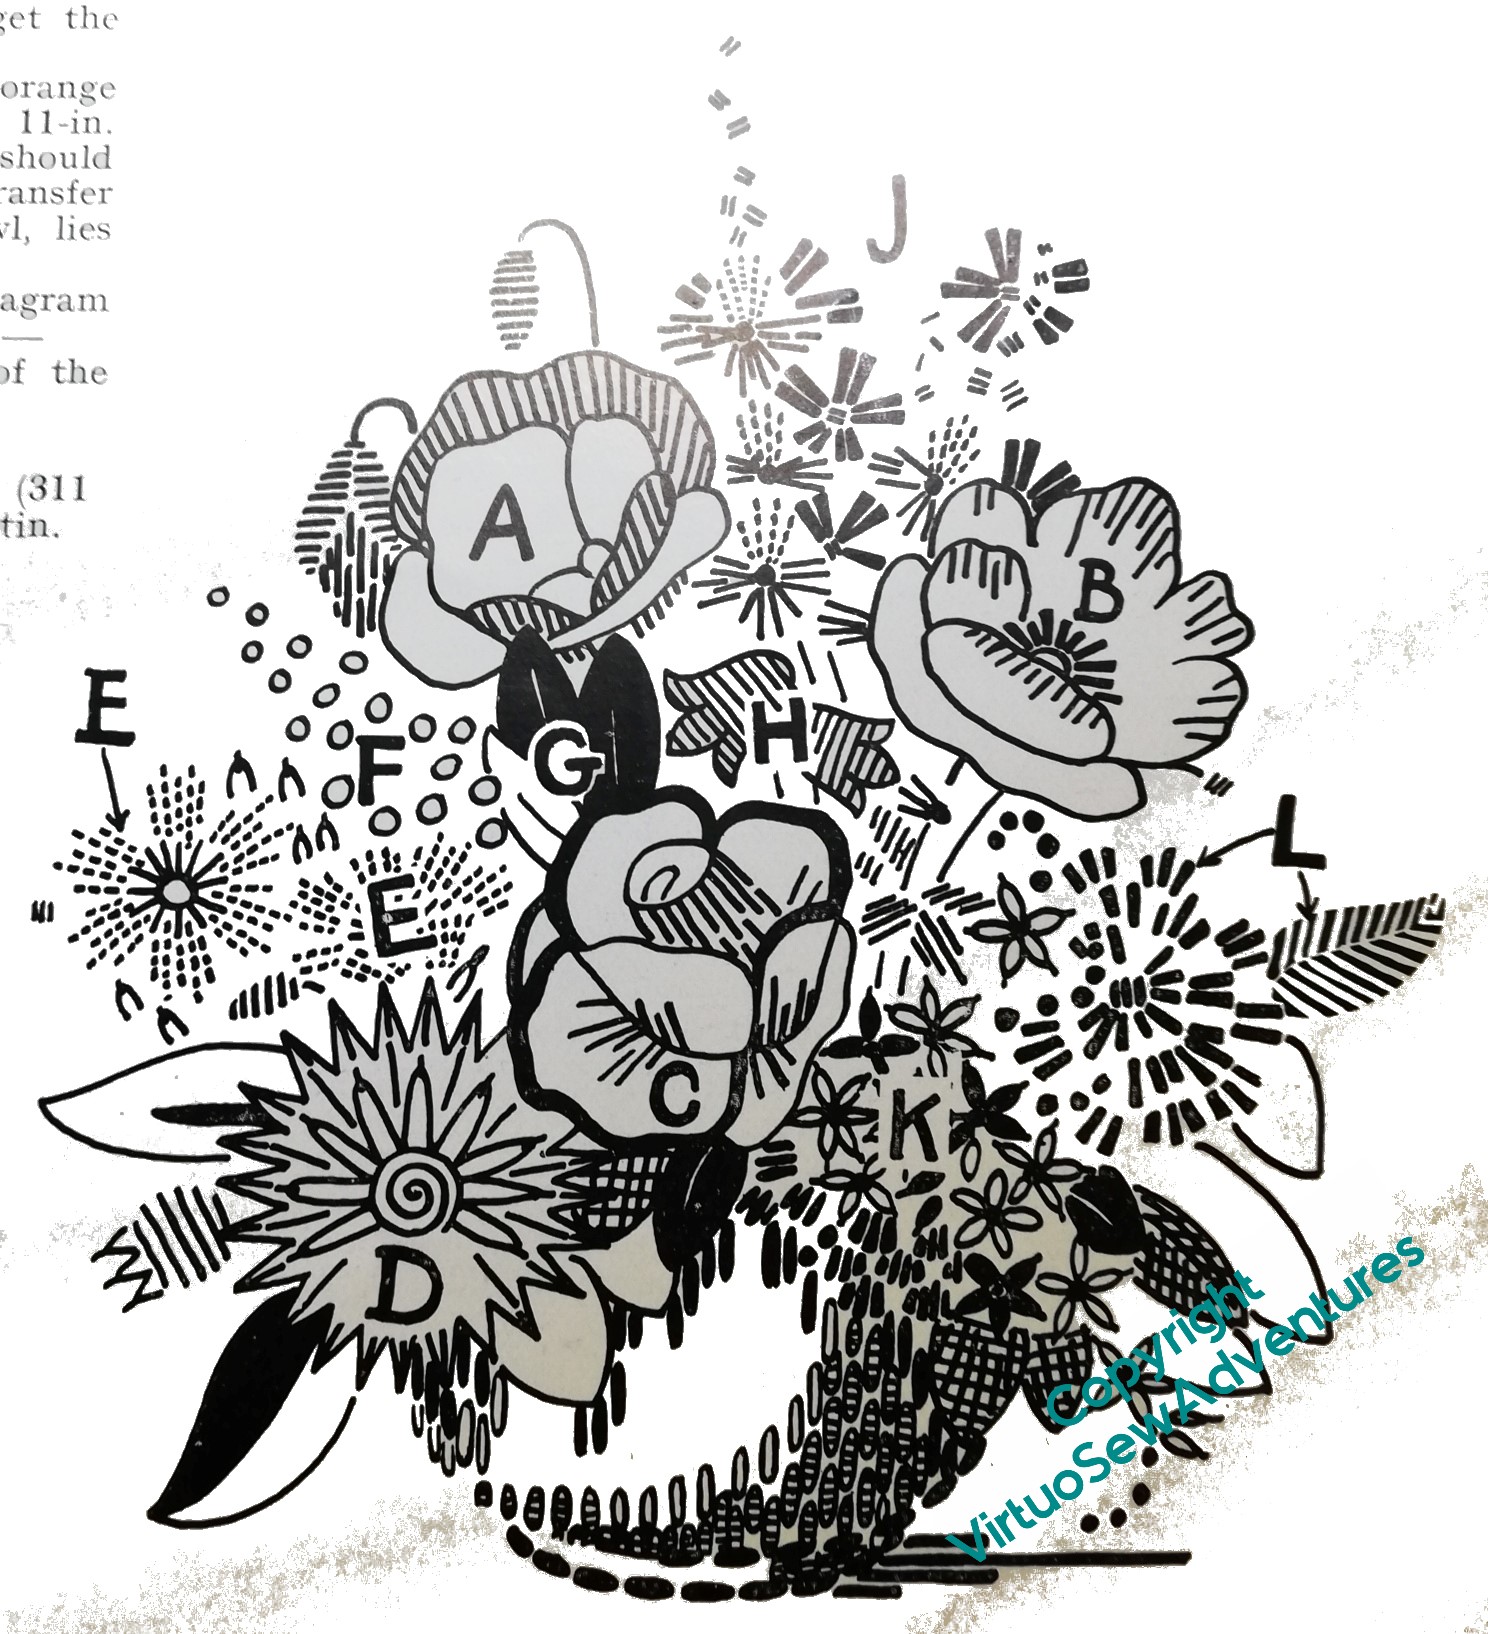
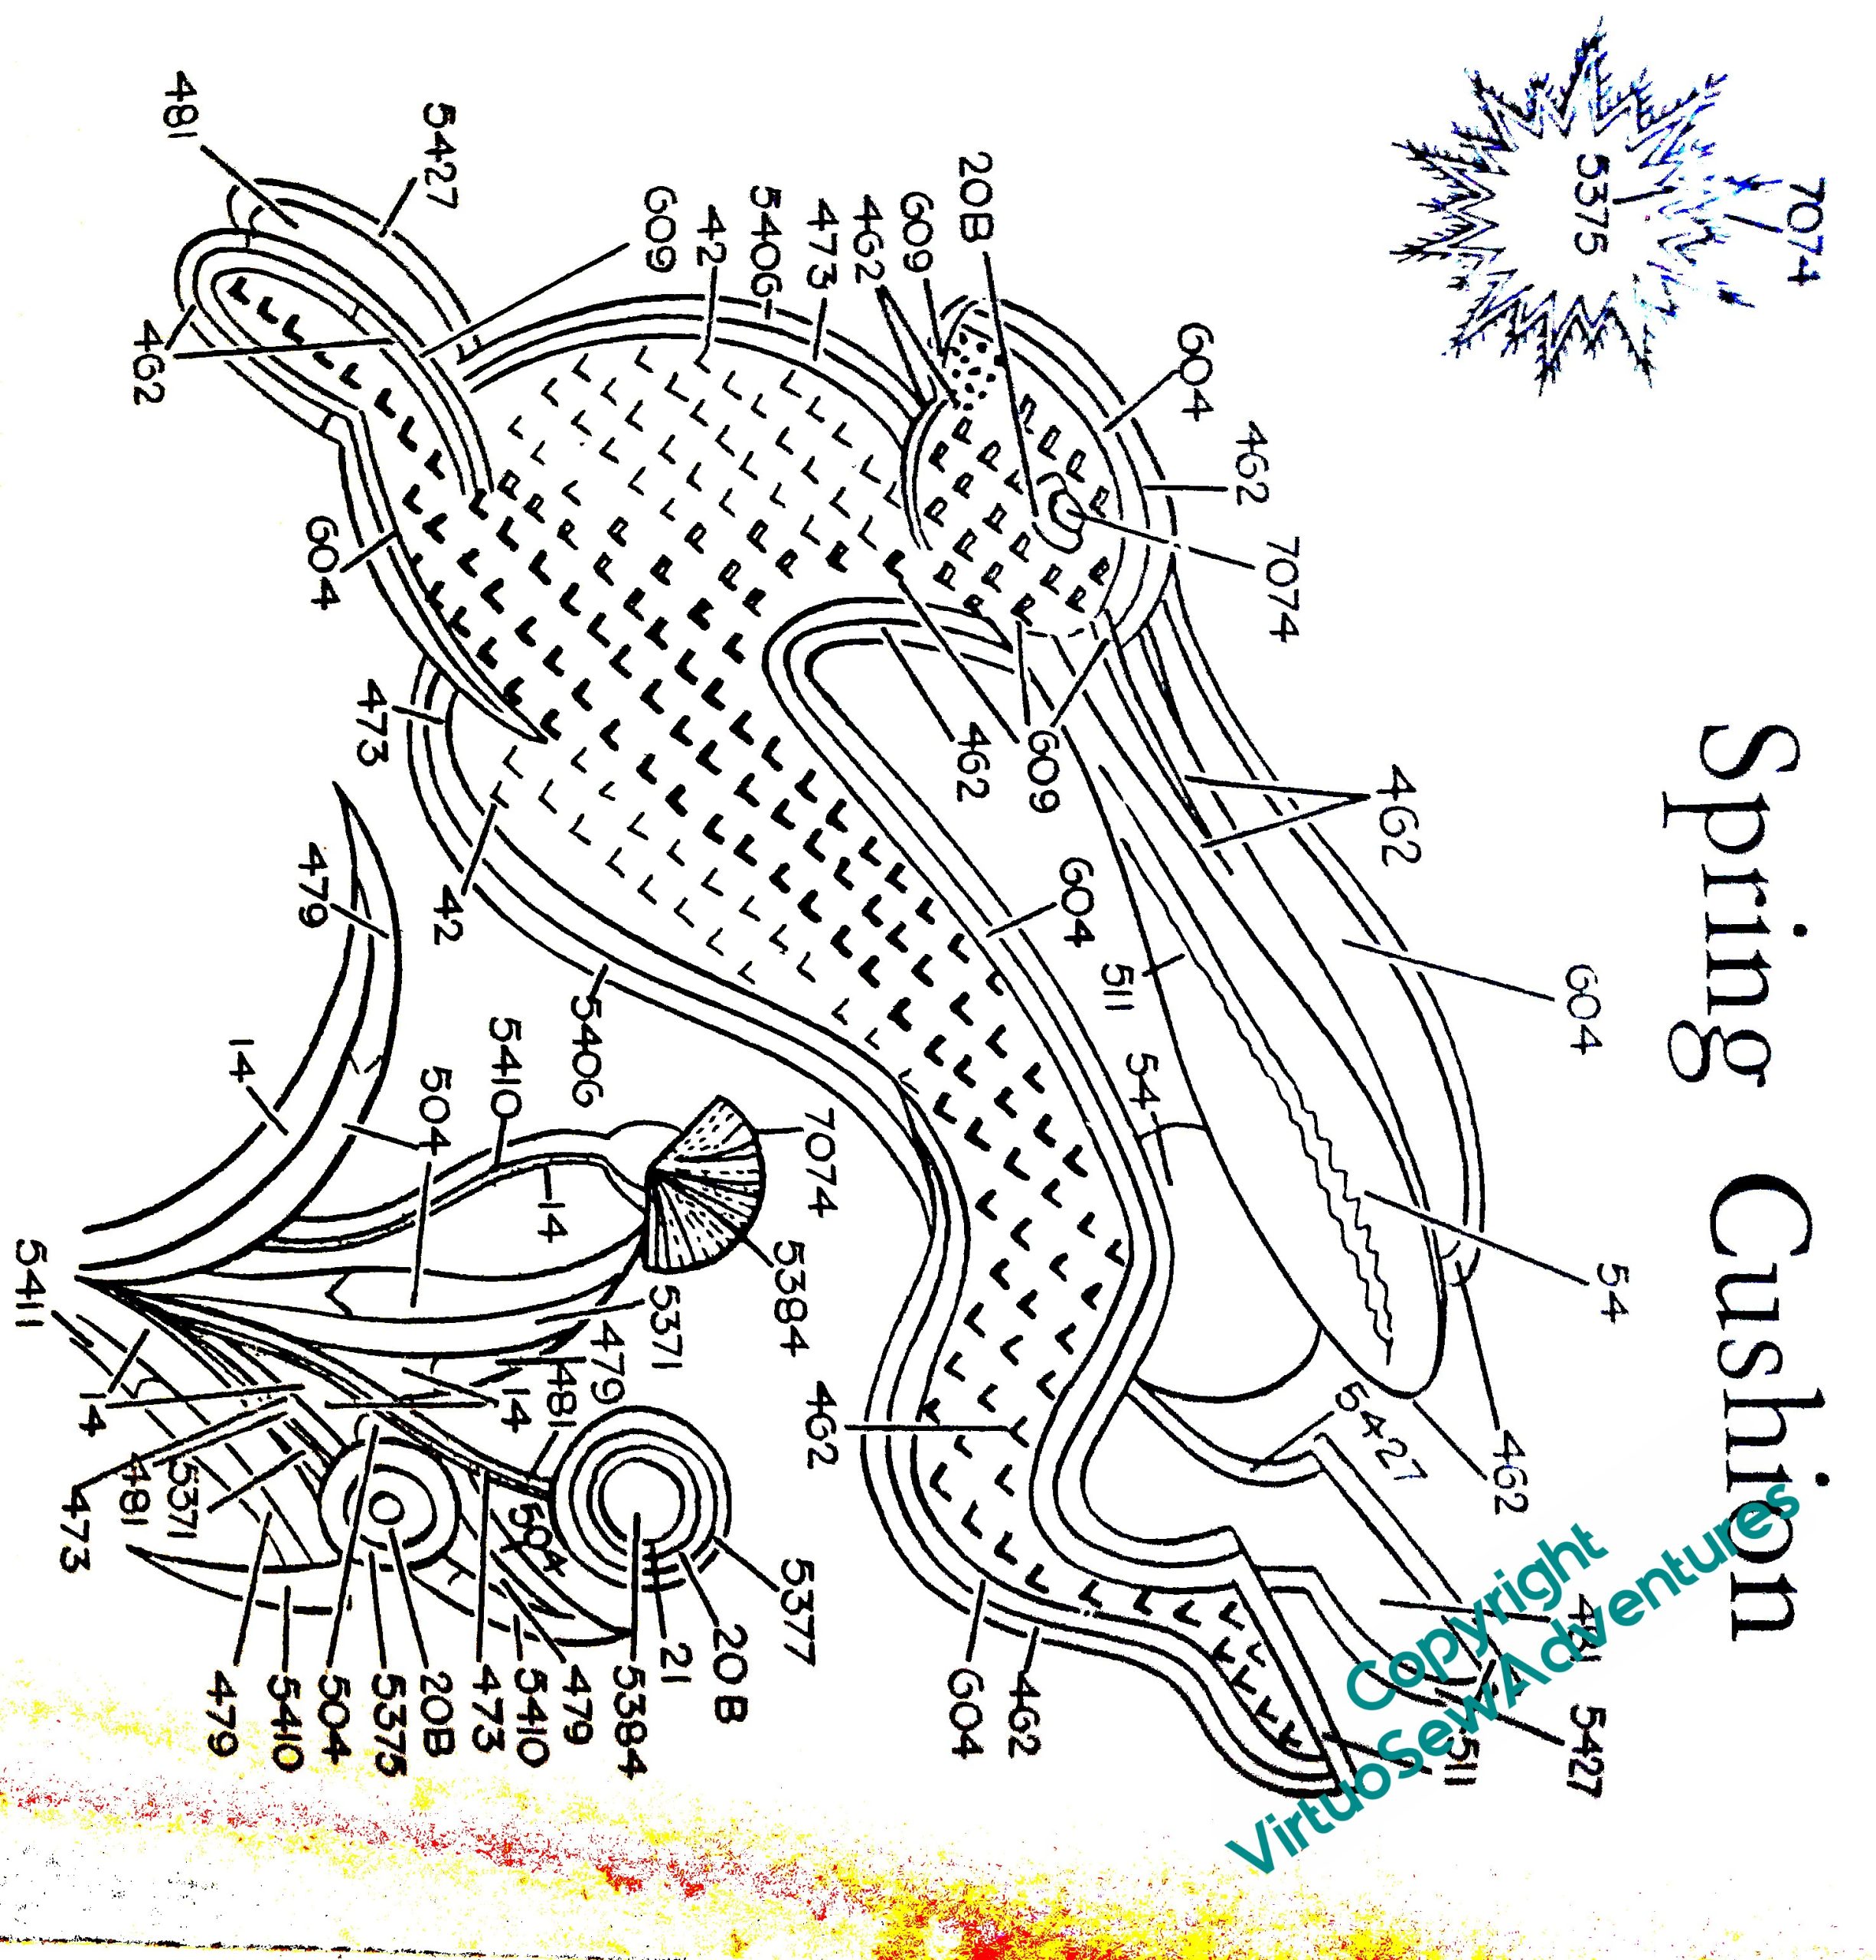
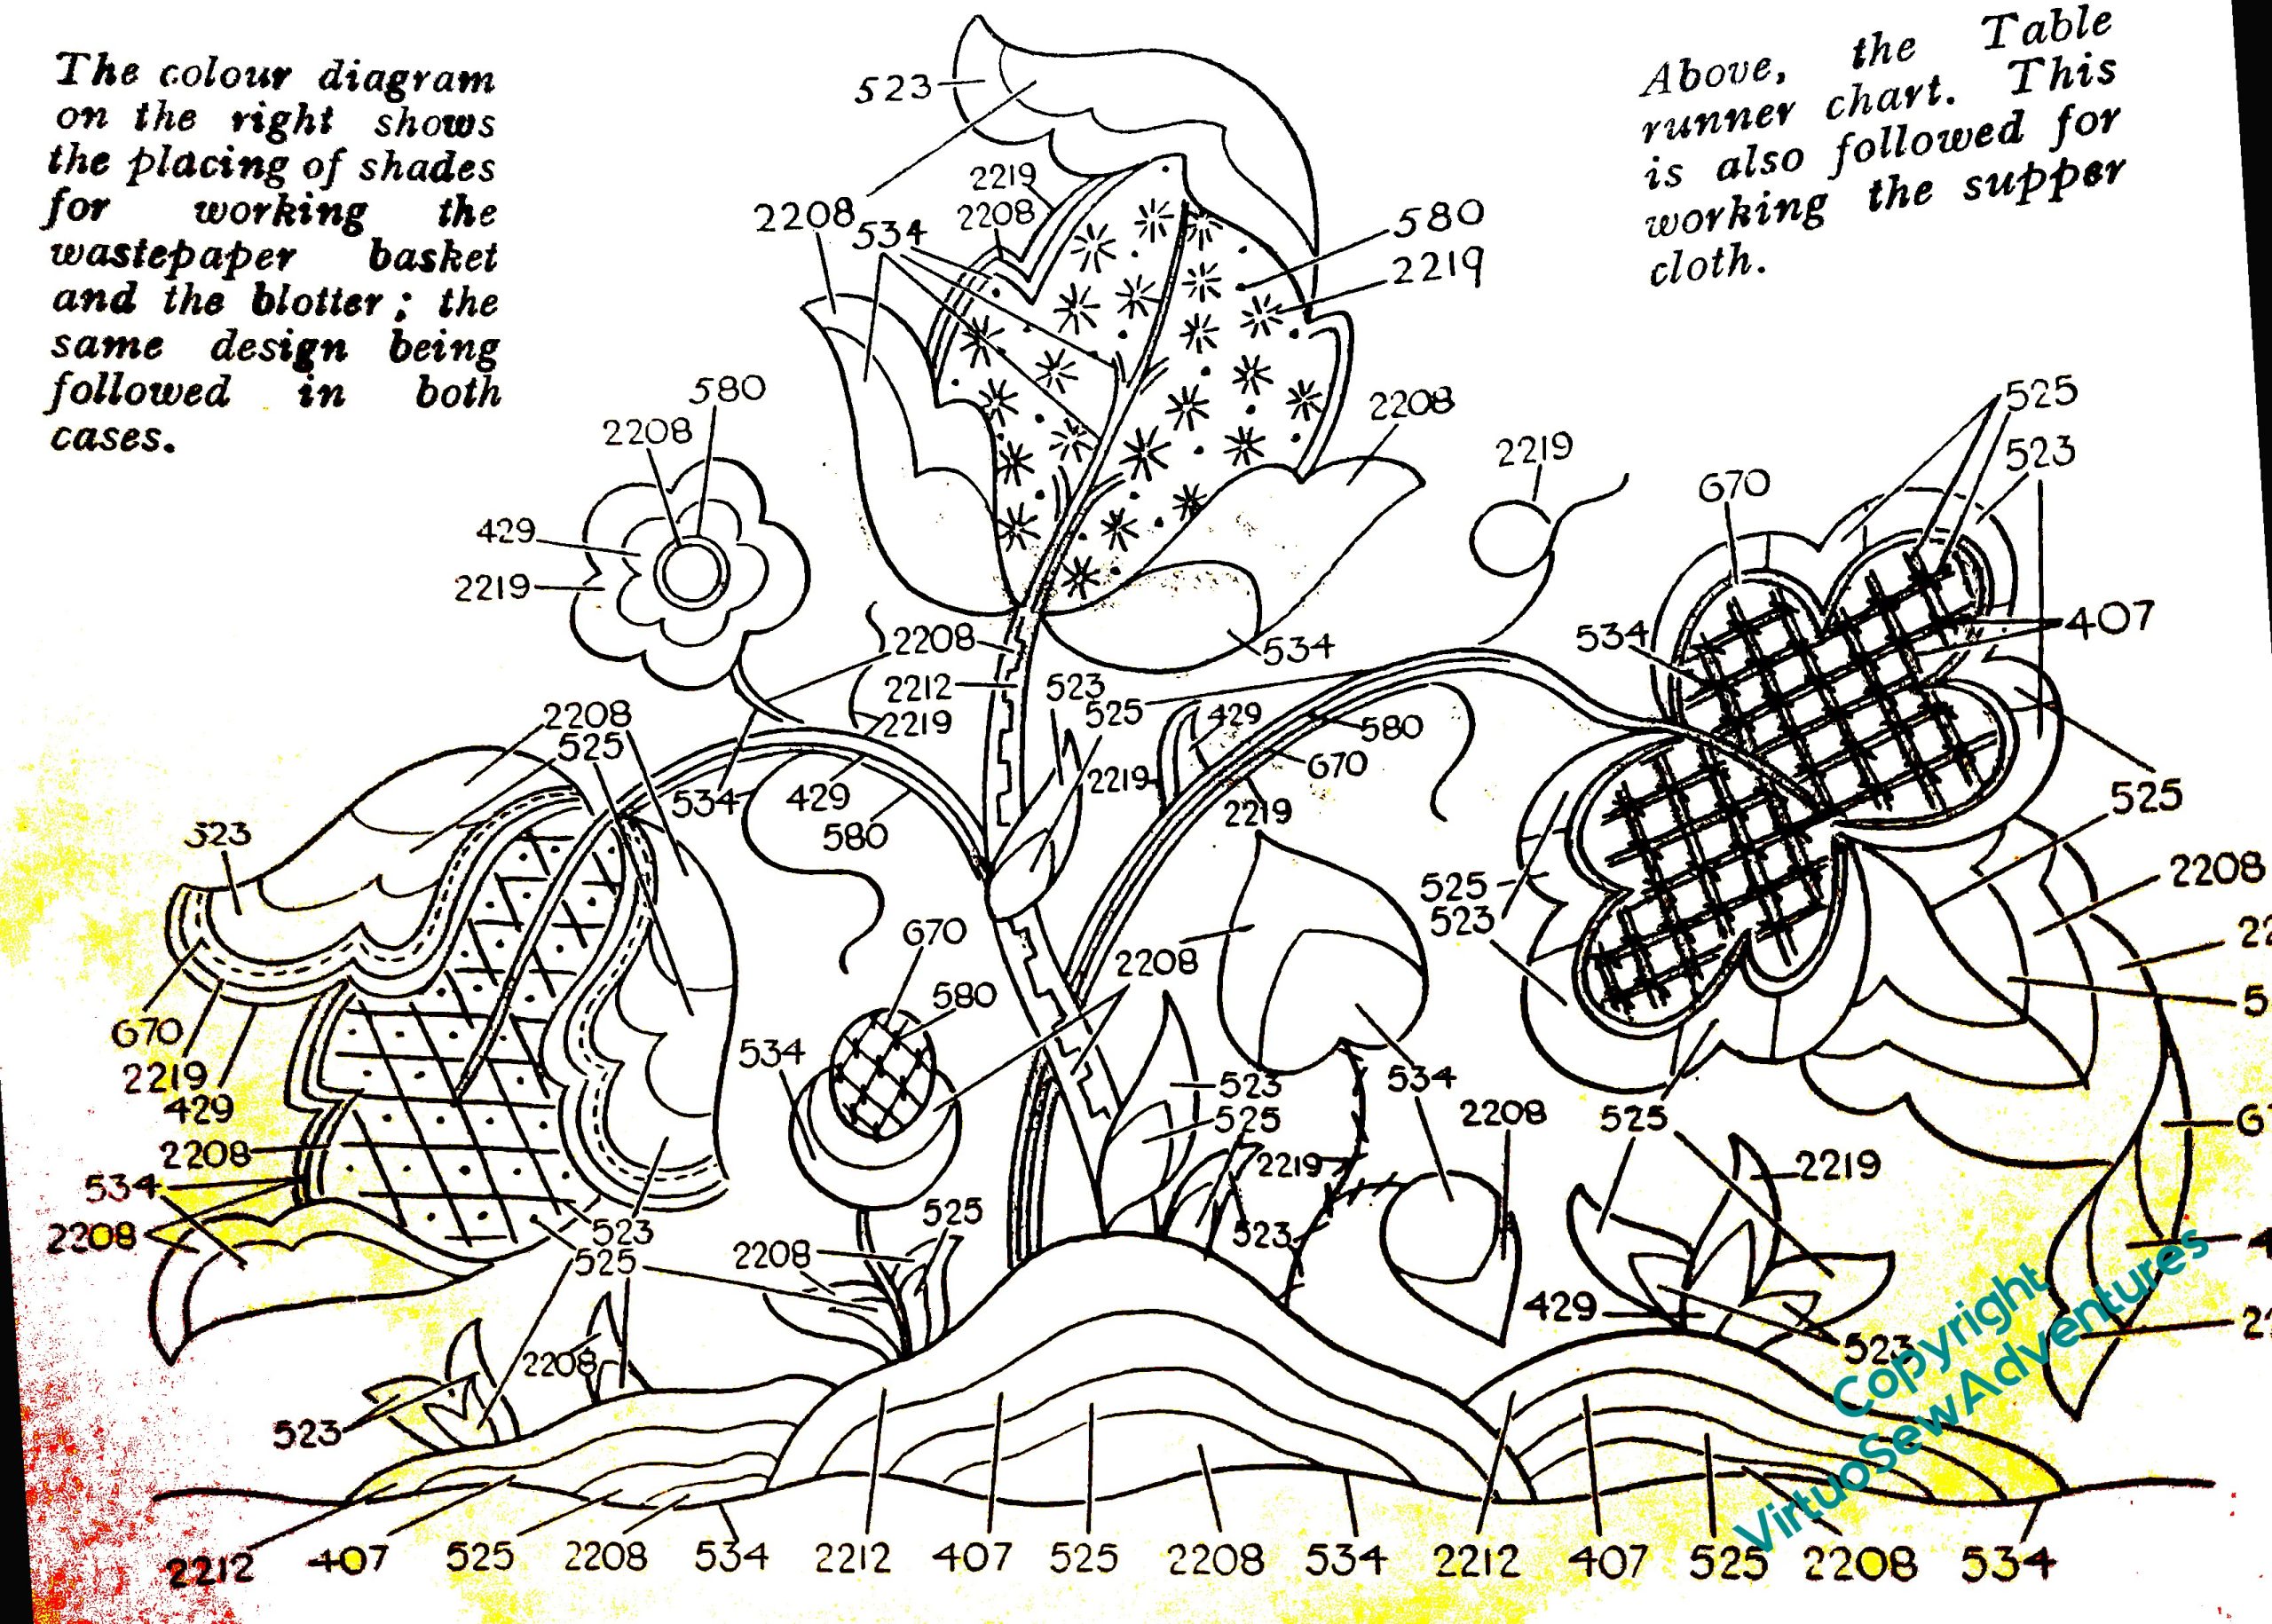
I went through my magazines, to find a selection of designs that were specifically intended for Anchor Flox, but not so huge (the Persian Fantasy Screen was intended for Anchor Flox, and that ends up as five feet by six!) as to demand more thread of each colour than I have.
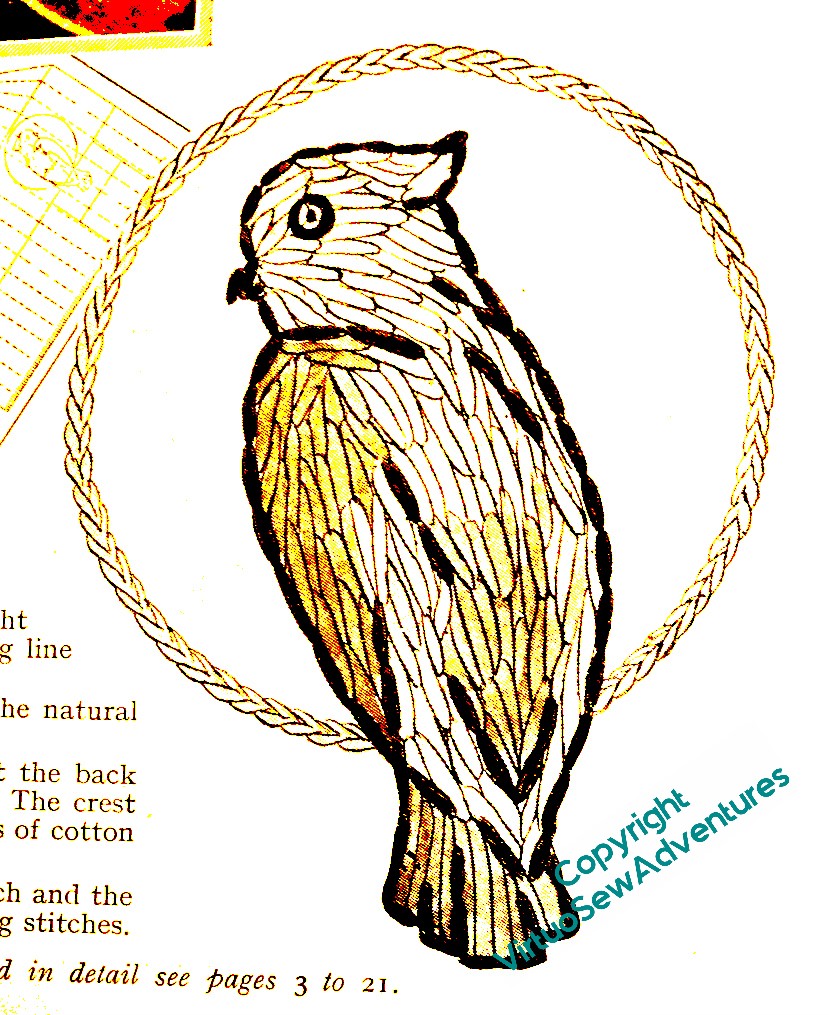
I’ve decided to do one of the floral table runner designs, the middle of the top row here, because I think it will talk nicely to the Queen Anne style teacloth which is presently gracing a side table in the the living room. After that, if I seem to have enough, I am very tempted by that parrot…
Yet another idea!
Long time readers of my blog know that I use it, not just to talk about the embroidery I’m doing at the moment, but also as a place to put some of my ideas, in the hope that the Search facility will help me find them again, rather than having to paw (I use the word advisedly!) through stacks of paper and notebooks. This is one of those posts!

Some of you may recall that the Association of Mouth and Foot Painting Artists used to send out, not just cards, but little sheets that had angels printed on them. You could press them out and curve them into a cone shape, making a charming little Christmas decoration. I was reminded of them when we got the decorations out of the loft, and found a whole boxful!
It occurred to me that I could use a variation on that little pattern to create a needlelace Nativity scene.
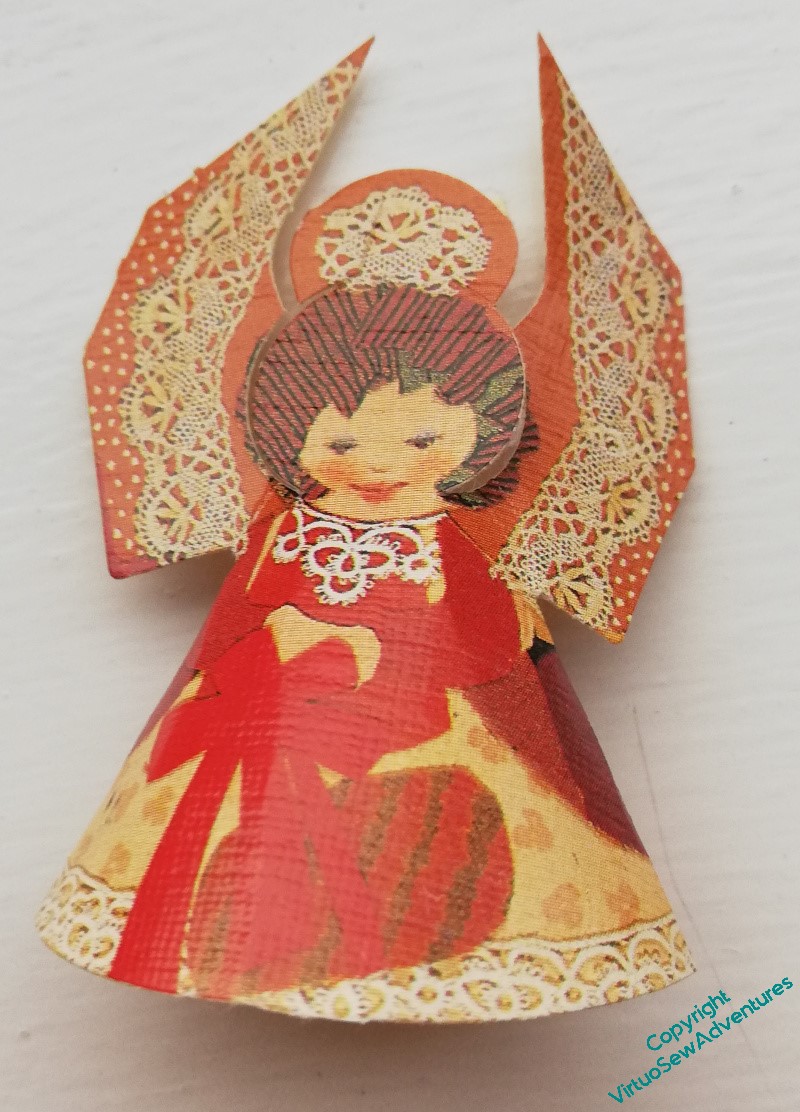
That idea became a bit clearer when I looked at a few of them. If you look at this one, the angel’s wings have clearly been made to represent fabric with a bobbin lace edging laid over it, and if that necklace isn’t based on a piece of tatting, I have never seen tatting before!
Clearly, I would want to tweak the shape a little. Only the angel, of the characters in the Nativity, needs wings, and besides, I think a bit of variation in height would be advisable!
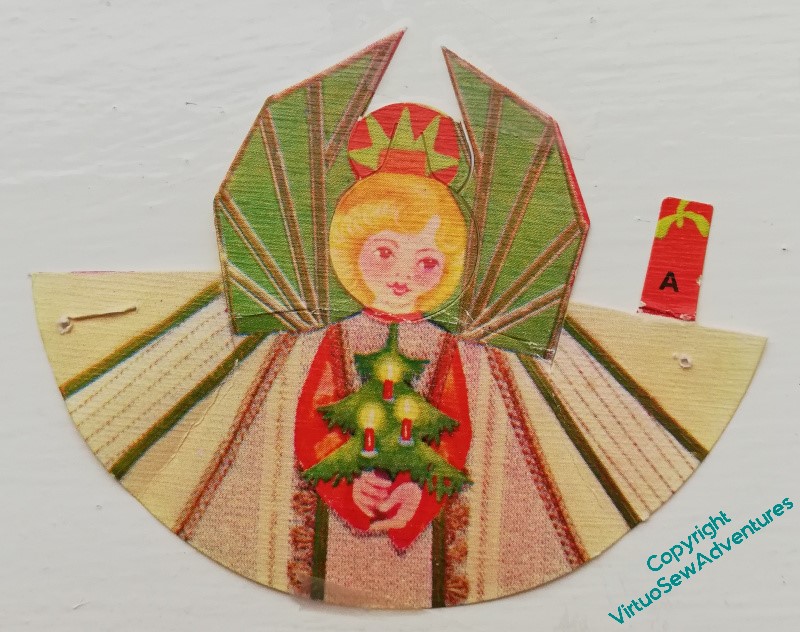
The basic shape can be seen when you open one of them out. The wings wouldn’t be hard to remove, for those that don’t need them. But the shape is fairly simple, and it would mean that I could use really gorgeous thread and stitch, allowing the thread and the stitch to do all the work.
I doubt I will be tackling the idea any time soon – I still have to work out how to create the Baby Jesus in the manger in much the same style! – but I think it would be fun to do.
A tree for the trinkets..
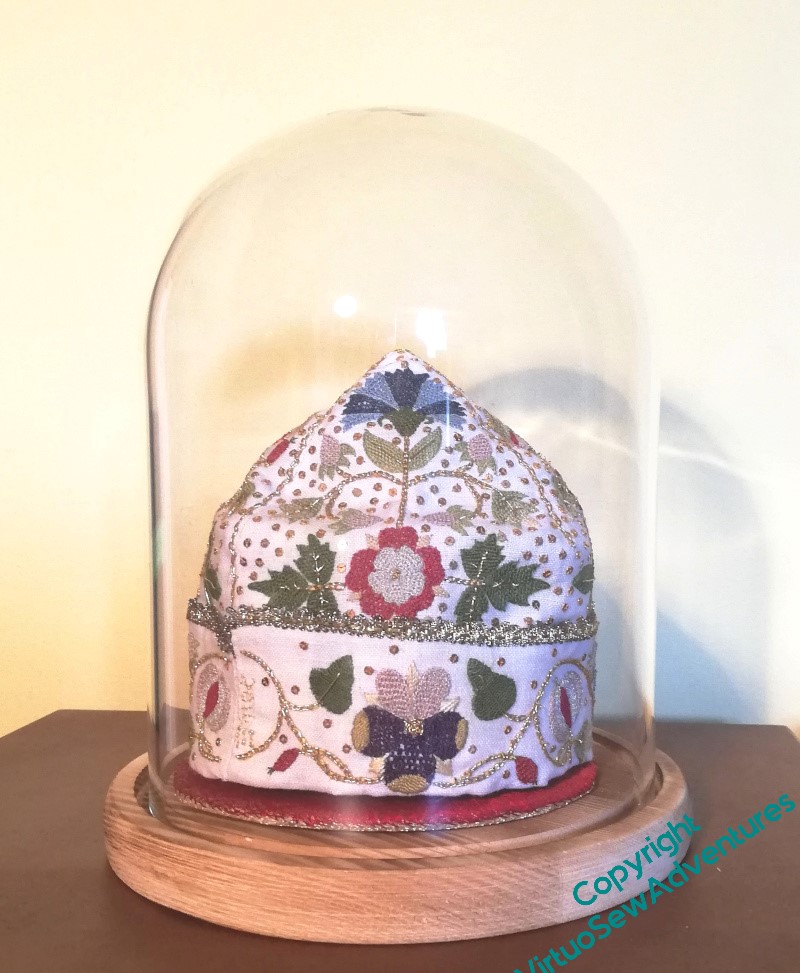
When I had the idea about using a parlour dome for the Violets and for the necklace, I realised that I would need to play with how I displayed them, trialled the Tudor Nightcap in the dome and realised that I could now put it on display.
So what about all the other Thistle Threads pieces?
Well, it turns out you can get parlour domes that aren’t round, so I got the largest I could bring myself to buy and then stopped to think…
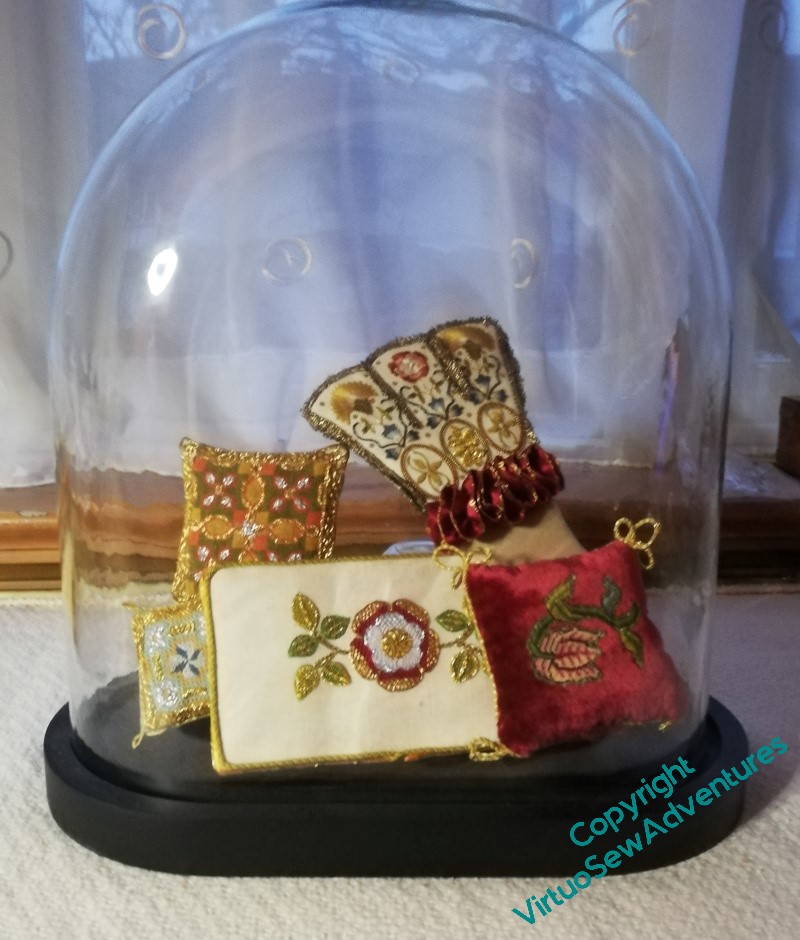
I started by playing around with propping the various pieces I’ve been planning for that Winter Decoration Corner against one another within the dome. It’s a flattened oval, and quite high, but anything I could improvise seemed not to have the height I wanted without taking up all the display space.
I think this shows the idea will work, but it doesn’t really have the presence that the pieces deserve.
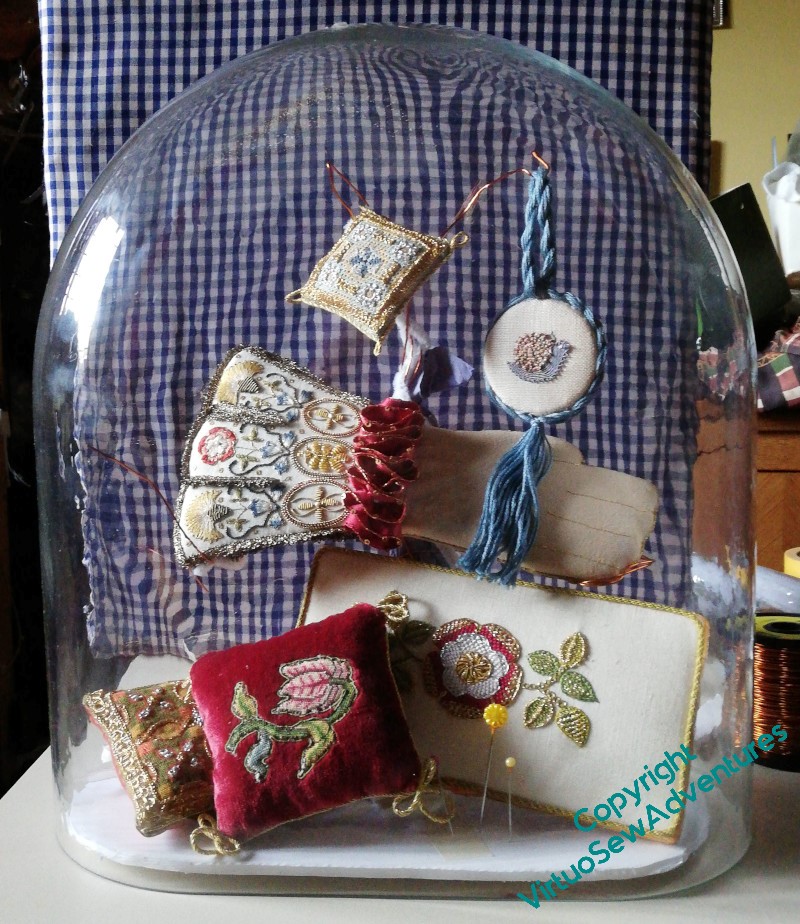
This is better. I’ve used offcuts of the foamcore that I bought to help me with Nefertiti and Akhenaten to create the base that will sit inside the glass, sandwiching the beginnings of the wires forming the tree between two layers. I’ve built up a support for the green and orange cushion at the back using smaller bits of foamcore, and wrapped pipe cleaners around the wires.
It’s not perfect, but I’ve set it up in the hall where I will pass it every day, to work out whether I like it. Then the idea is that I will have a lovely messy hour or so covering the wire with papier mache, allow it to dry, and paint the whole thing gold.
The Tudors were as fond of bling as the ancient Egyptians, after all!
Testing, Testing (phase 3)
There is still much to play with, with regards to the the stitching for the Knot Garden Parterre.
At this point, I’m trying to balance accurate impressions – and therefore useful testing – with not tearing my thread to pieces or wasting any of it. At present I am still thinking of doing this out of stash, if possible, which is why I’m using an impossibly bright shade of green here – I’m unlikely to want it in the real thing!
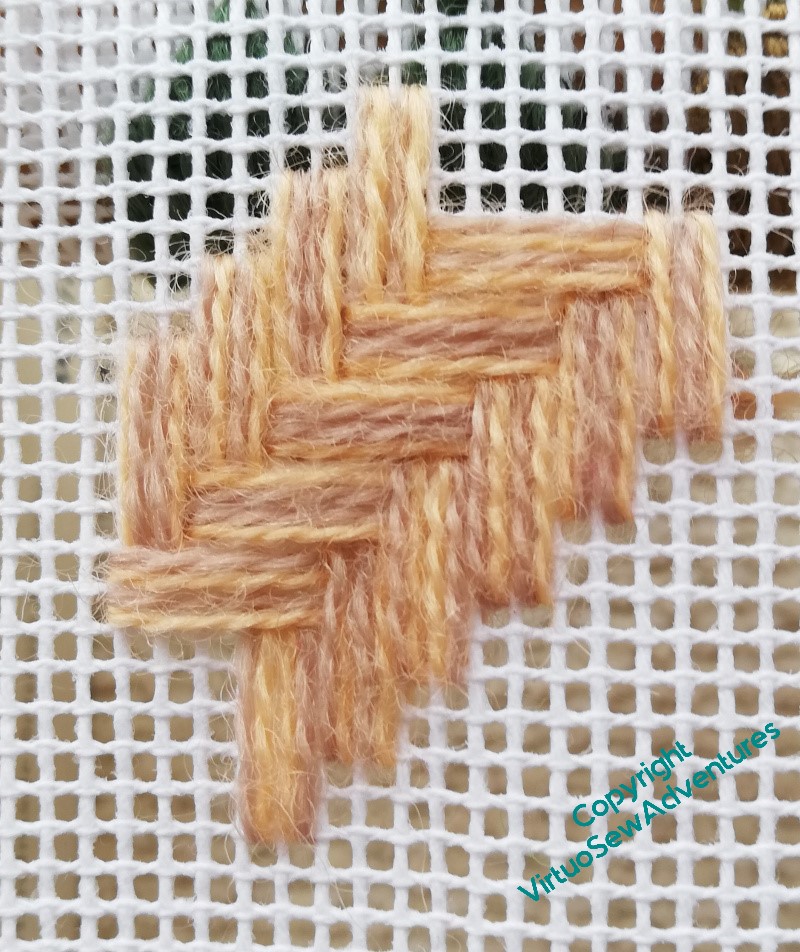
Now, you see here that the short Parisian Stitch enticed me into a broader strap than I was intending, and it has unbalanced the Mosaic Stitch of the border, which in turn became Scotch Stitch as it turned into the diagonal, and lost the pattern it had.
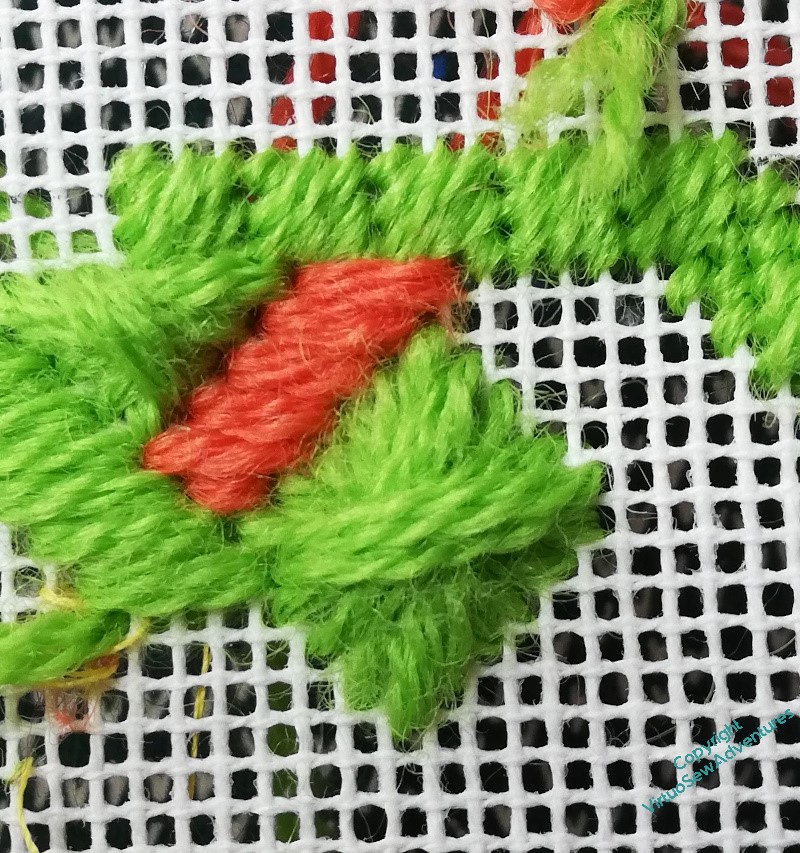
Here, by contrast, I have demonstrated one of the other hazards of canvaswork, especially for my astigmatic eyes – I’ve suddenly managed to turn a Diagonal Rhodes Stitch into a slightly oblong and twisted diagonal Rhodes stitch. I didn’t see it happening, so I am going to have to guard against it with some care.
I think I need to make my stitches and straps bigger, too: the shape drawn on the canvas is the size of one of the ones on the finished piece, and I started the outer border on the centreline, and turned onto the diagonal at the appropriate point. The first horizontal row of diamonds should have two in it. Two properly square diamonds, that is!
And here you see the challenge I need to address: the diagonal Rhodes Stitches start with a horizontal or vertical stitch, so what I need in the angle between the straps is a gap (as you see top and bottom of this intersection) and not a thread (as you see left and right)
At this point I’ve been stitching and unstitching so often that I have lost count of myself, and keep on losing track of the stitch lengths I intend, so there will be a pause to regroup!
Testing, Testing (phase 2)
I’ve been playing around with possible stitches for the pathway in the Knot Garden. In the source picture, it looks to be made of bricks laid in a pattern, rather like a parquet floor.
I don’t feel I’m obliged to replicate that pattern, but this one on the left is altogether too square, and won’t help the sense of movement I’m going to need to counterbalance the borders, which I rather expect to be rather static, given all the Diagonal Rhodes Stitch that’s going to be happening.
The one on the right is the same Medieval Mosaic Stitch from Jo Ippolito Christensen that I used, voided, in the sunglasses case, but this time worked exactly as diagrammed. I like it, and it’s easy enough to work, but I don’t think it does the job I will be asking it to. I’m sure I will work it for real one day, but not for this project!
When I replaced the stitches that were voided in the sunglasses case with stitches in a different colour and thread, to point up the woven pattern, I got something a lot more hopeful…
I like this one a lot. Although I must admit it does rather recall the diaperwork you sometimes see on Tudor buildings, so maybe not very floor-like!
And then I found another, one that actually looks a lot like herringbone brickwork without any adaptation.
I like this one a lot, too.
I will have to see which of these presents itself most strongly when I’ve got more of the ideas crystallised.
Testing, Testing… (phase one)
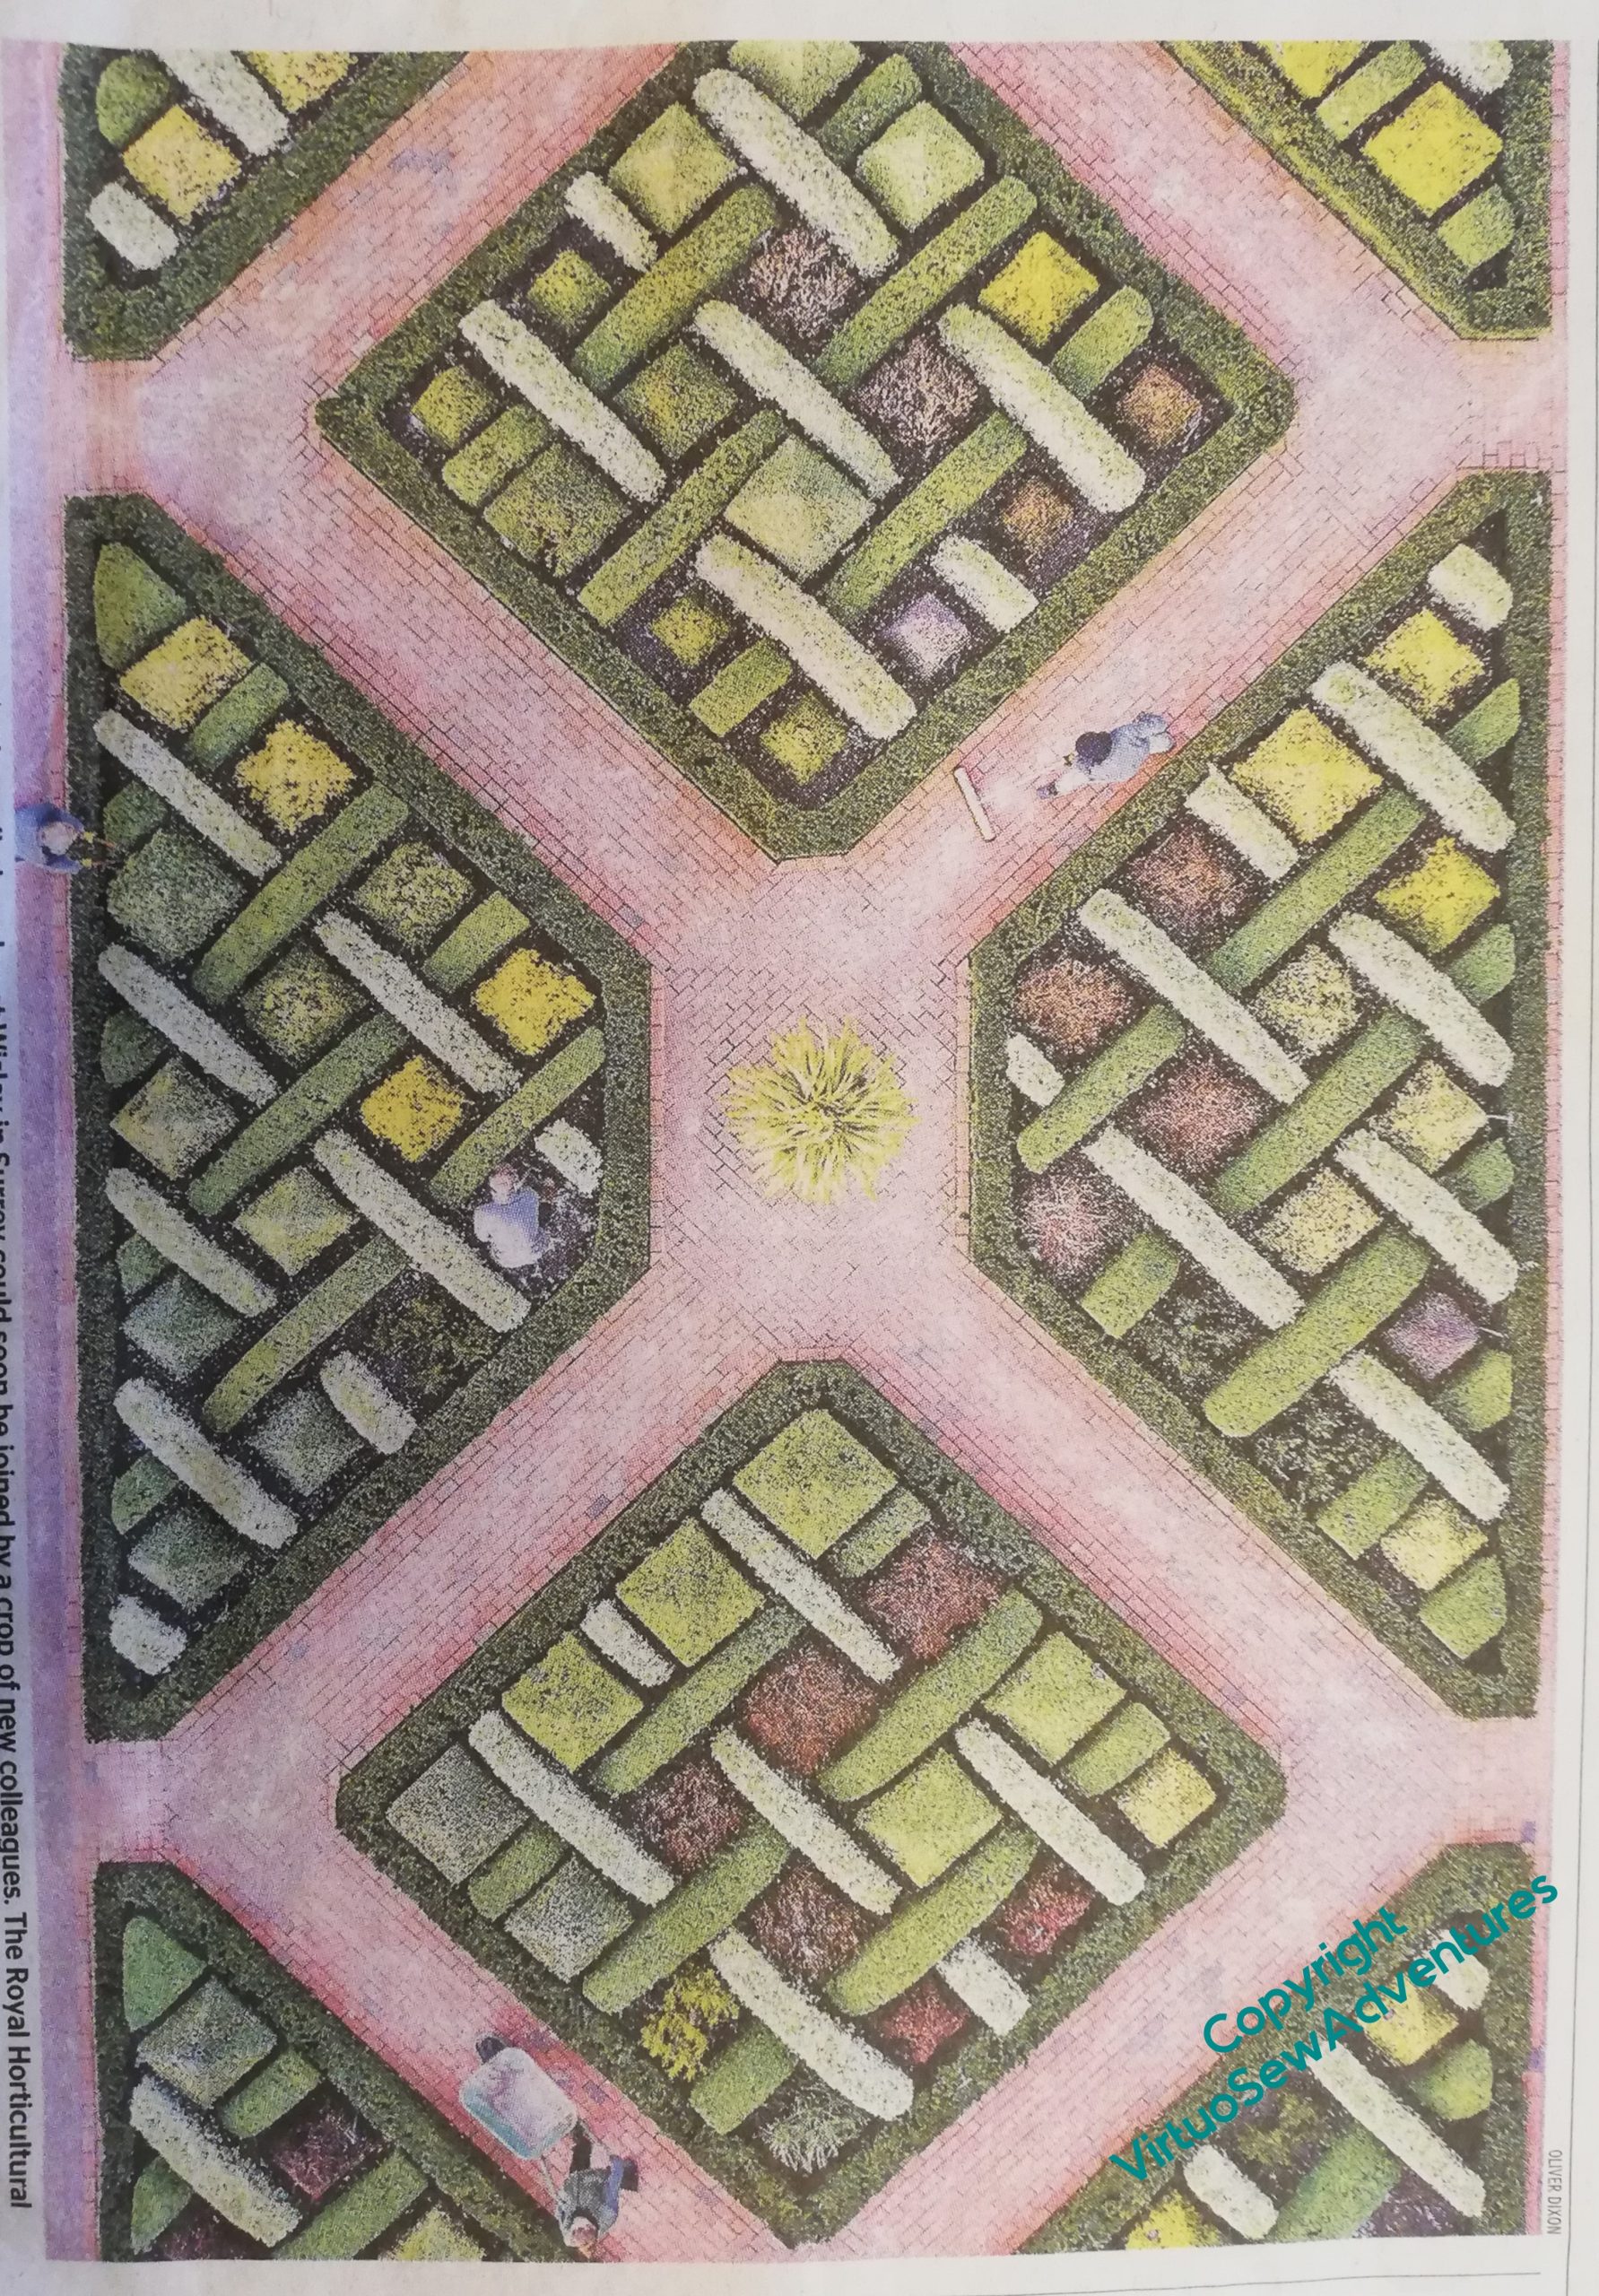
Remember this, the Knot Garden parterre?
It’s going to require a little more precision and therefore a little more planning than I usually indulge in. So there’s also going to be a bit more experimentation than usual. I might not go to the length of actually charting the finished piece, but I’m certainly intending to have a very clear idea of what is going where, and what thread or threads I’m going to use.
I’ve been intrigued to note that, from pulling out a huge variety of threads to use, an assortment of fibres and an assortment of colours, I’m beginning to restrict my ideas to a much smaller palette of threads and stitches.
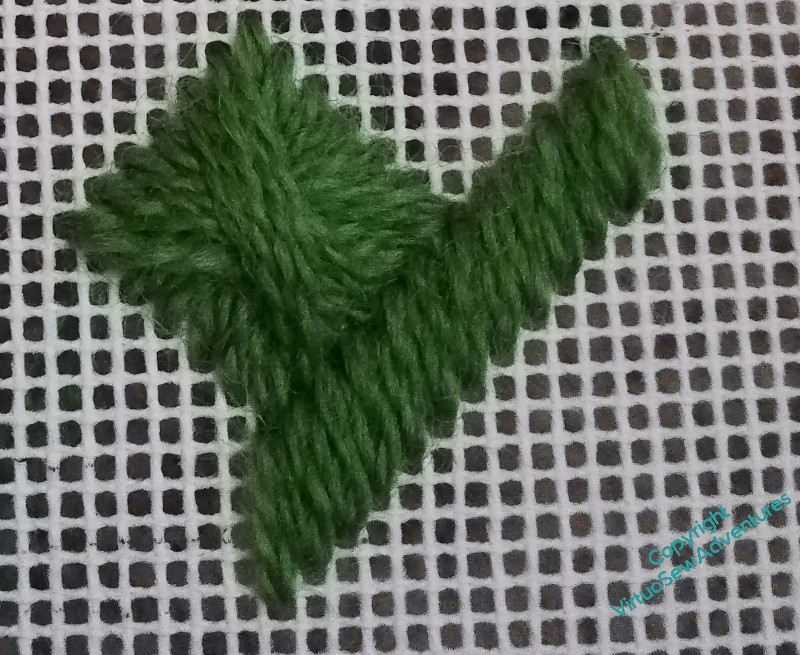
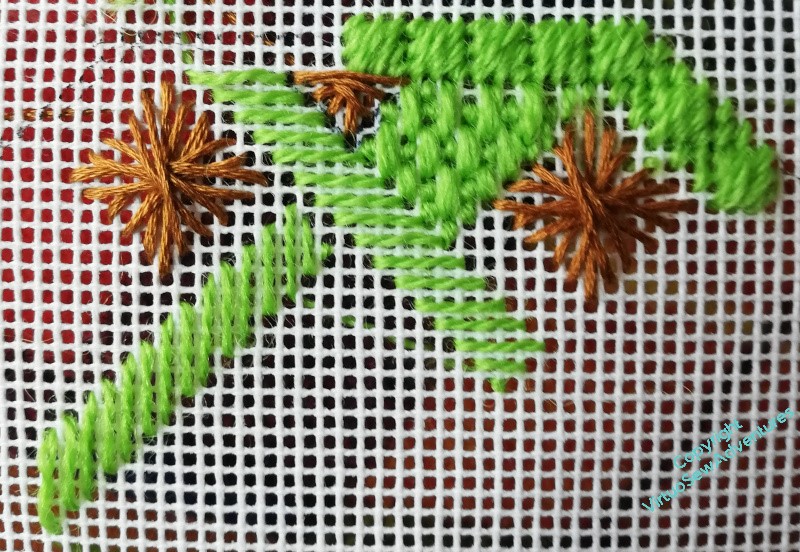
As I looked at the picture more closely, it became clear that the squares within the beds were topiary pyramids. Maybe some are suffering from box blight, hence the colour variations, but this gave me a good place to start experimenting. I’ve gone to the trouble of framing up a piece of the canvas I’m going to use, so as to experiment properly, and my first observation is that I am going to need to be on top form when I work this, because it’s dreadfully easy to go adrift!
However, I think it’s fair to say that Diagonal Rhodes Stitch makes a fine pyramid in topiary! The straight stitches are in the same colour, which they won’t be, but I think the stitch length, compared with the Rhodes Stitch, looks about right for the width of the little hedges that create the strapwork effect.
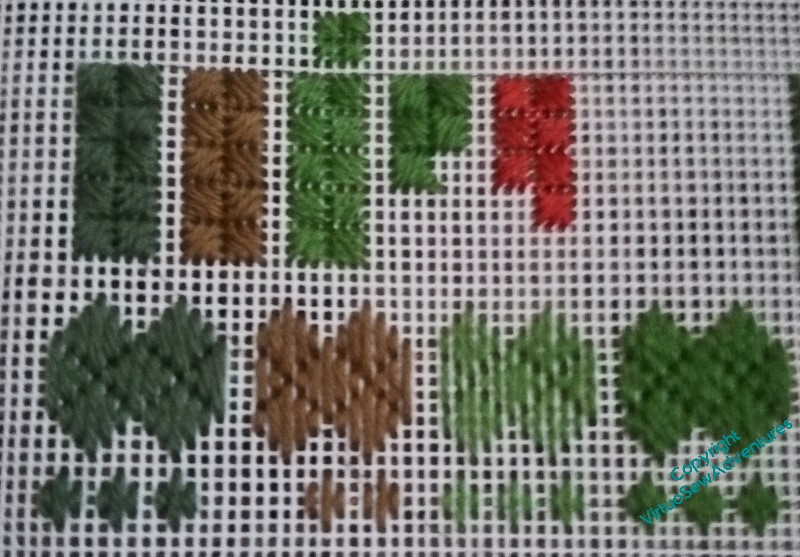
I’ve also been testing out other threads and stitches – tapestry wool, soft embroidery cotton, stranded cotton. I want to have varying textures and patterns within the strapwork, creating a nice harmonious whole – but a stitched harmonious whole. I could easily chart – or even freehand – a tent stitch reproduction of the picture, but it wouldn’t have the personality needed for the place it’s going to live. Textured stitches will help to create that personality.
Manawatu Gorge – finishing the first experiment
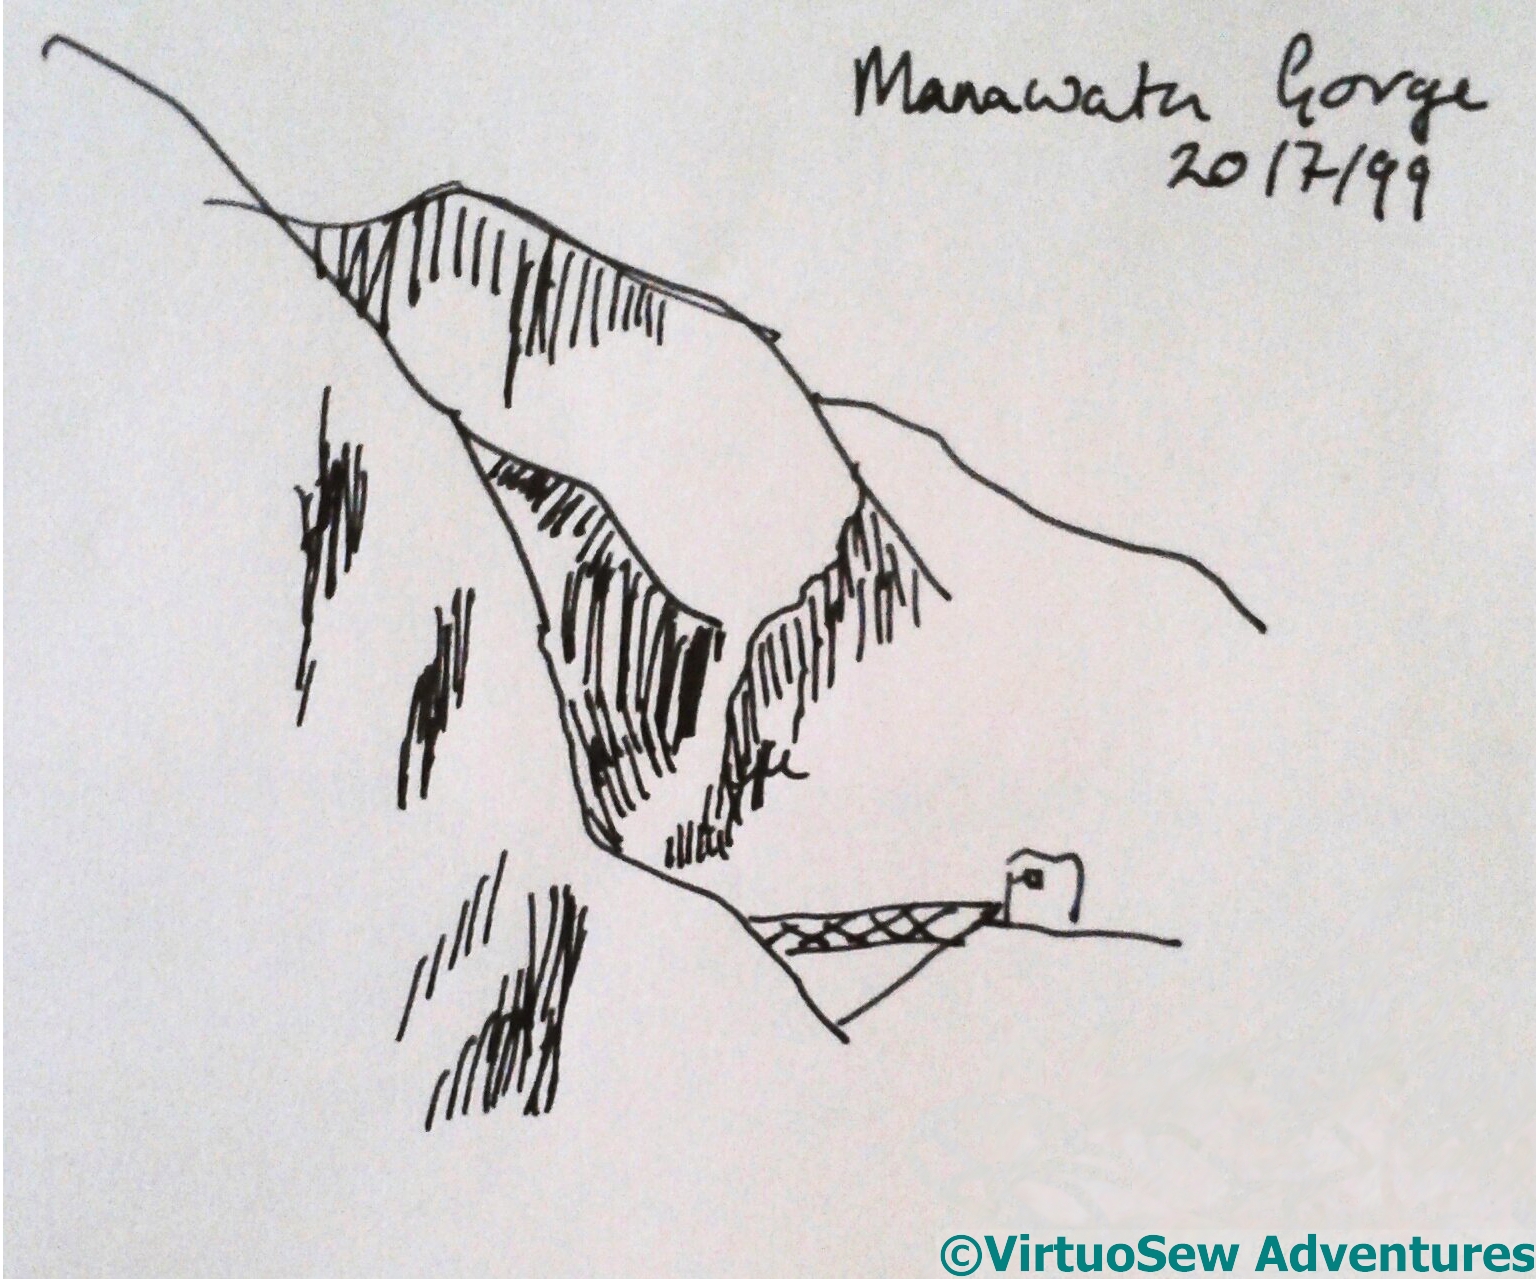
This is such a wild and not-my-comfort-zone sort of experiment that posting the original sketch each time seems sensible. There’s a lot of interesting texture hinted at in the sketch, and I don’t think layered gauze is going to reveal it, so another version is definitely on the horizon at some point!
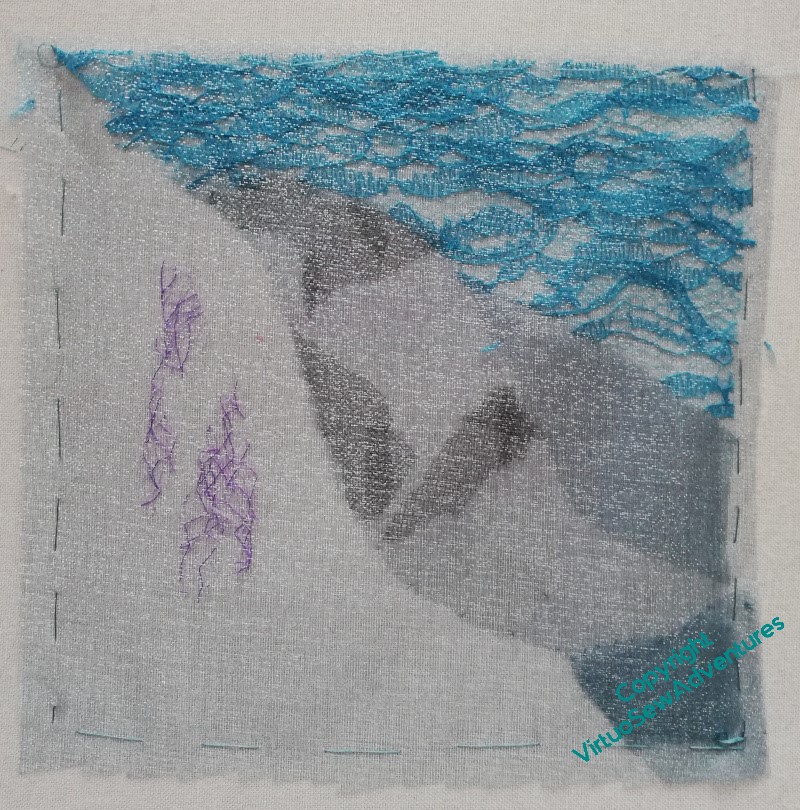
In the meantime, and bearing mind my original thought that the cross hatching indicates some combination of rocky outcrops from, and shadows on, snow, this version layered a blue, slightly sparkly gauze repeatedly over itself and some fragments of the black and purple to create the look of the cross hatching.
Looking at it as I write this, with the sketch on view in the top corner, I realise that even with that simple sketch to work from, I’ve not accurately observed all the details. This is why drawing and sketching are hard: it’s not the control of the pen that’s difficult, it’s the accurate observation of the subject that requires time and practice.
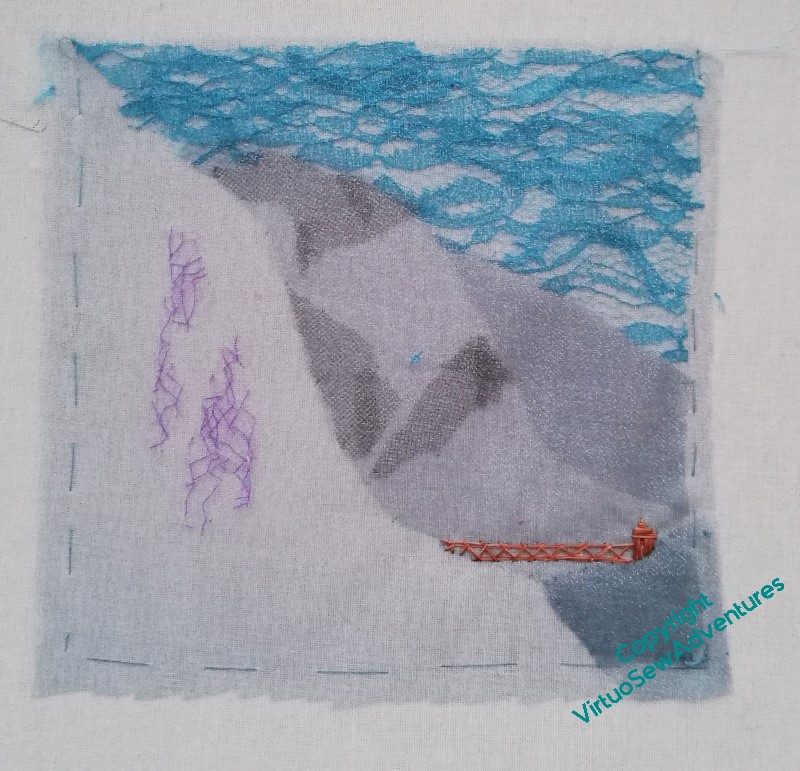
My memory of a rusty-red girder bridge with some sort of lifting engine on one end is really what has kept this sketch in my mind off and on for years, so having noted it needed some land to stand on, of course I wanted to add it in. Since I’m also working on William Marshall, silk was what I had to hand, so iron girders are all in silk!
At this point, I intend to pause. I feel as though some additional stitchery on the rocky bits might help, but equally, maybe I’ve learnt all I can from this sketch, and the thing to do is undo it all and think more about the canvaswork!
Continuing to experiment with Manawatu Gorge..
One should always try to think a project through at least a little bit. I didn’t. I thought that once I got started this would be easier than it turned out to be.
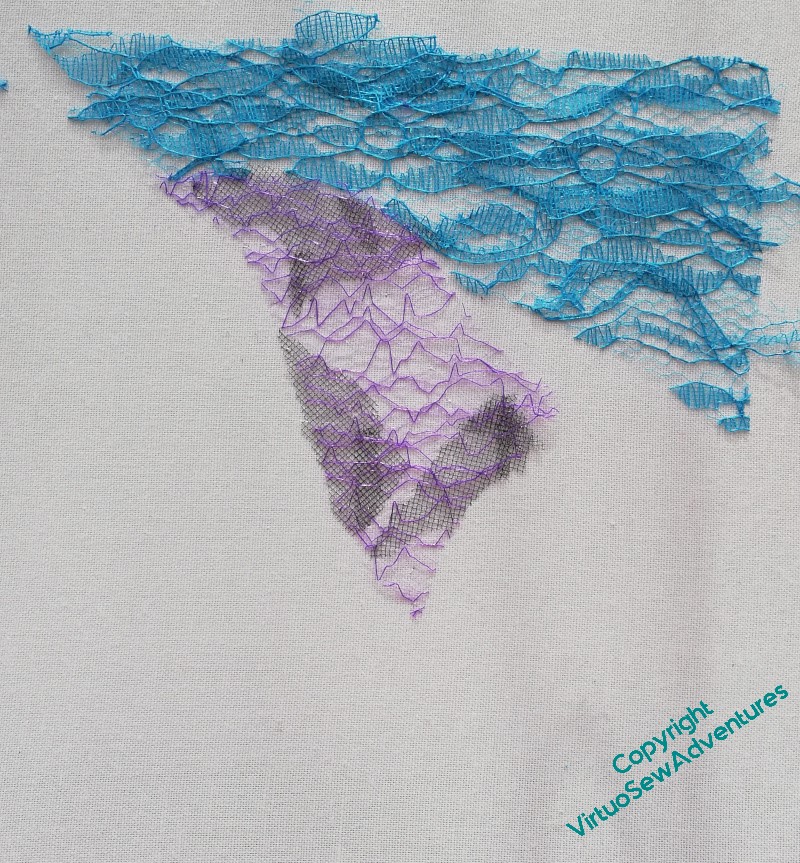
The black net was fairly easy to cut and catch down, and I wanted that to stand in for the shaded areas on the sketch, but the purple net was an unrelieved menace – it caught on the threads I used, and tied itself in knots, and even failed to have a bit of itself under some of the stitches I made, so it didn’t stay in place. All in all, rather exasperating, and even worse when I decided that it wasn’t, in fact, doing what I wanted it to do, and had to remove it again!
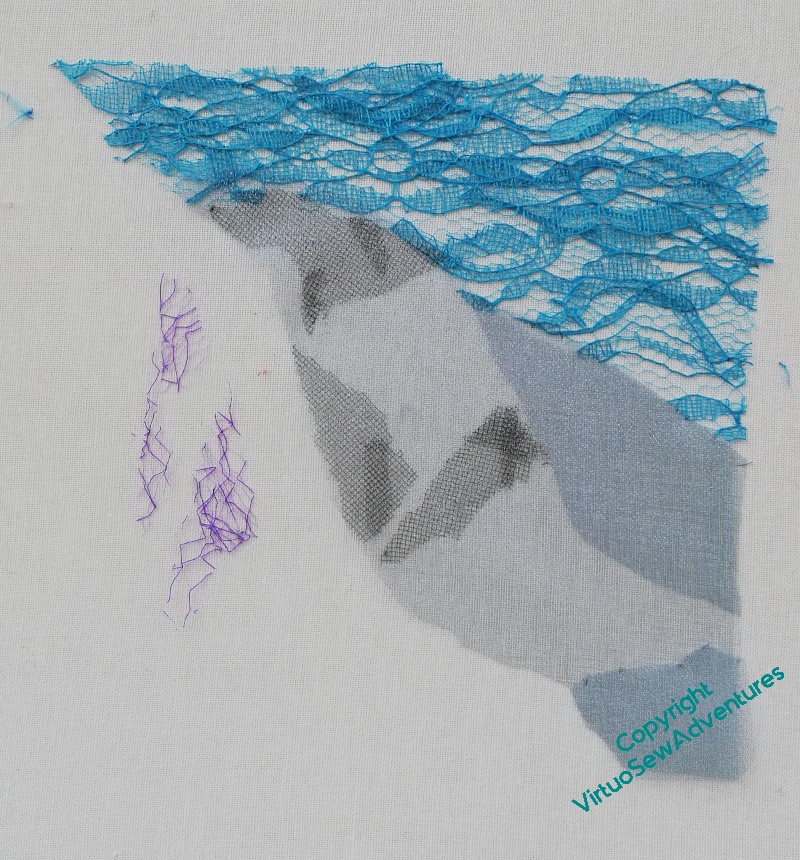
I’m still meditating on the possibility of a canvaswork version of this, possibly made even more abstract, but I still want to finish this one some way, so, onward!
I had another look at the sketch and realised that the engine house for the bridge needed something to stand on – that explains that extra bit of gauze in the bottom right-hand corner. Then I decided that I would roll back from the complicated bits of layering I’d been planning, and simply try to create recession with tone. So far, I think it is working…