Tag: Goldwork
Dreams of Amarna – a Crest for the dig
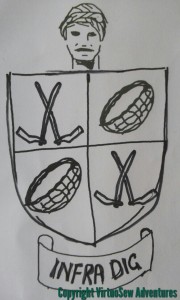
Mary Chubb recounts in “Nefertiti Lived Here” that on the first evening that they were at Amarna, John Pendlebury doodled a coat of arms for the dig. She tells us that he had something of an enthusiasm for the medieval period, and when I was a teenager I was rather a heraldry enthusiast myself, so that little story struck a real chord.
The key elements in a coat of arms are the shield, the crest, and the motto.
The crest was a Gufti’s head. The Guftis were expert excavators and overseers, people from a particular village, originally trained in excavation techniques by Flinders Petrie, who passed on the knowledge and the career from father to son. As I discovered in the BBC4 programme about Petrie, “The Man Who Discovered Egypt“, the Guftis are still in demand in Egyptian archaeology today, which is very good to know.
The motto – suggested by Mary herself – is “Infra Dig”, which I take as a very bad pun. They’ll be digging below the surface, of course, but the term would more usually be taken to mean something like “Beneath Our Dignity”.
On the shield, first and third quarterly, Pendlebury placed crossed touriehs. The tourieh was a sort of mattock, used to pull back the sand into a basket propped up against the digger’s legs. Second and fourth quarterly, he placed a basket.
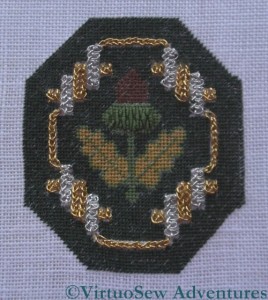
Eventually I intend to stitch the crest design in couched gold onto one of the dark teal corner panels. As it is such a simple design it would be a good one to do while I’m planning something else, but unfortunately I’ve not quite worked out what size I want it to be!
I’ve prepared my sketch using drawing apps on my tablet, and I’m really quite pleased with the result. Although I have moments in watercolour that are really successful, I’m not as good with line as with form, and the Gufti’s head, drawn from one of the photos the Egypt Exploration Society provided, turned out much better than I expected!
A milestone on the Gentleman’s Nightcap, and an experiment
I’ve now finished the silk work on the main sections of the Glittering Gentleman’s Nightcap. The next stage is to work the metal thread embroidery, because I want everything on this side of the fabric done before I take it off the frame, turn it over and work on the brim. In the end, I found that the last few bits went quite quickly, perhaps because I had a whole day when I did nothing else and found the stitching speeding up. It’s taken me a while to realise it, but I now think that Detached Buttonhole Stitch With Return is one of those stitches which requires “flow”, which in turn doesn’t happen if you sit down with only time to do one leaf before doing something else!
Up until now, I have tended to regard the Online University projects I have done as a sort of salutary discipline, and worked them exactly according to the instructions (something I rarely do, even when I have instructions!), but during my last visit to a stitching show, I spent some time on Jacqui Carey‘s stand, talking to her, and acquiring her books about Elizabethan Stitches and Sweet Bags. One of the stitches she found, and “reverse-engineered” is effectively the “Detached Buttonhole stitch with Return” which forms so much of the stitchery on this piece, but it incorporates a border within the method of stitching. So I thought maybe on the brim I could used this bordered stitch instead of the standard stitch.
In another departure from my usual procedure I decided to practise the stitch first, and it’s really just as well.
Perhaps because Jaqui is primarily a braid maker and not an embroiderer, it took me some time to adapt my way of thinking to make sense of her diagrams. She also shows the stitch as worked upwards, whereas I have worked downwards with this sort of stitch all my life – or at least ever since my first attempt, when I worked the Needlelace Embellished Blouse.
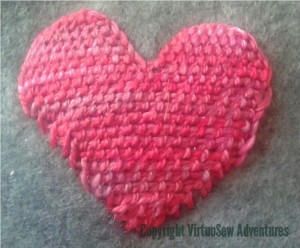
The fact that version one was worked on felt didn’t help, either, since the needle kept snagging it, and the felt sagged under the weight of the stitching.
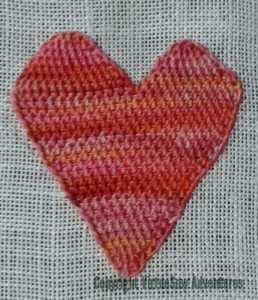
So version two was worked on linen, using a mercerised cotton instead of pearl cotton. This time I think I have got to grips with the stitching and the way to create the border. The linen survived much better, but the mercerised thread kept trying to tie itself in knots!
Furthermore, try as I might to work the stitch as diagrammed – upwards and away from me – I kept turning the frame and working it sideways or downwards instead.
I probably will choose to use the stitch for at least some of the areas on the brim, but it will be interesting to see how I cope when I simply can’t turn the frame around!
Close ups on The Crock of Gold Hoard
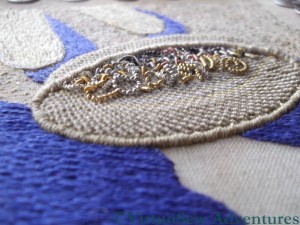
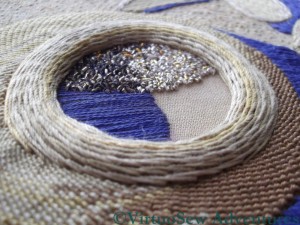
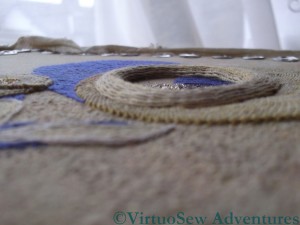
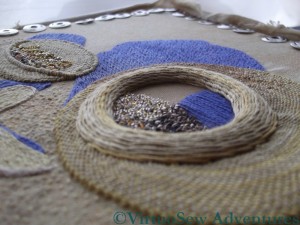
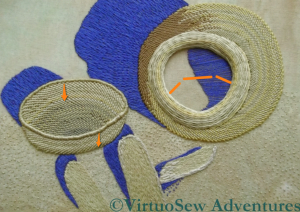
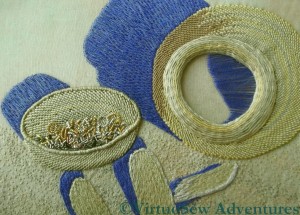
Very few words with this post – Megan asked for some pictures that showed the dimensionality of the various stitches, so here they are!
I’ve left the pictures larger than usual, so do click on them to have a closer look at the stitches and the purls!
I’ve enjoyed revisiting the Crock and looking at it from new angles. I would have loved a strong side light to pick up the glints, but is has been overcast – a good light for working on the Glittering Nightcap, which I’ve finally got back to, in spite of my breath condensing on the magnifier!
The Butterfly Pinpad Finished
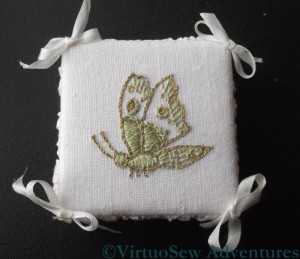
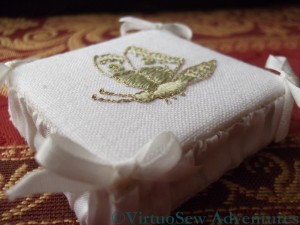
At long last I have finished the embroidery on the Butterfly Pinpad. The embroidery was simple enough – chain stitch, French knots, and satin stitch, worked either with a fine metal thread or pale green silk thread but the fine stitches gave me aching arms during the tennis elbow episode, so everything took longer than I would expect. Then of course I had to get started on finishing it. The reason it took me so long to wind myself up to it was – as some of you may have guessed – that glue was involved!
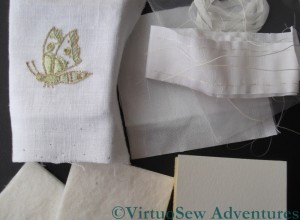
In fact, on this occasion, I cheated – if you can call it cheating when an embroideress uses her needle and thread! I chose to lace the butterfly itself, and the silk backing, onto their card supports, rather than attaching them with glue.
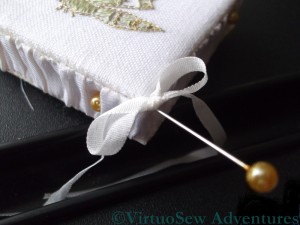
I found the ruched edging almost impossible to keep straight and even – perhaps I simply didn’t make the gathering threads quite even enough. Even squiffy, though, it looks quite luxuriant!
The bows were quite hair-raising to do, as well – tiny, made of very fine silk ribbon, and a little inclined to flop. I tied my fingers in knots, several times, as I made and attached the four of them!
Now that it’s finished, I’m pretty pleased with it, all the same, although I can’t imagine I’ll ever be able to bring myself to stick pins in it…
The Crock of Gold Hoard – Finished
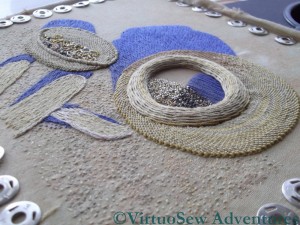
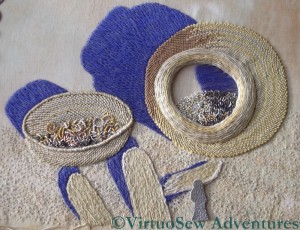
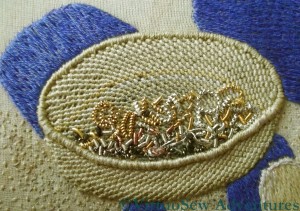
Here is a close up of the finished chipwork on the Crock of Gold Hoard. I’m very pleased with how it has turned out. Especially with a strong side light, there is the right mixture of glint and dullness to suggest old, tarnished metal. I’ve used a mixture of rough purl (both tarnished and untarnished), and check purl, in several shades of silver and gold.
I decided not to use any of the pearl purl, which I used to create the effect of bangles and broken jewellery in the lid. I’ve taken care not to over crowd the chips, because if they started to pile up, it would reduce the illusion of recession that I’m trying to create.
You may recall that last time I posted I had only just spotted the Amulet, set in front of the Crock for the photograph, and I was wondering whether or not to include it in this particular piece. I’m intending to work an or nué version of the Amulet, so even if I fail to include it here, it will still figure in the completed panels.
I could simply tell you what I decided, without explanation, but I think that would be unfair.
This first photo shows the piece as I originally intended to finish it. There are the sticks in the foreground, the deep blue shadows of the Egyptian sun, the Crock, its Lid, and the chipwork and curls of the fragments of metal.
I think it looks pretty good, and in fact I’ve decided to leave it like this, without adding the Amulet.
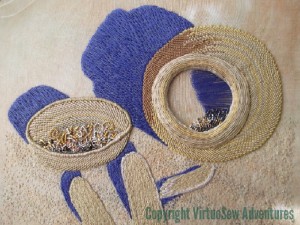
The second photo shows my experiment with adding the Amulet. Since creating the Amulet in stitchery would risk causing damage to the fabric, damage which would be impossible to repair if I dislike the effect, I thought that using silver kid leather would be ideal.
I cut out the Amulet shape – approximately – and laid it on the piece, shifting it around and looking at it in different lights. In some lights, the silver kid drew the eye to such an extent that the rest of the piece might just as well not have been there. In others, it looked like a greyish smudge, killing all the other colours, losing the sunshine and shadow. What it didn’t do, in any light, was create the sense of dialogue between the Amulet and the Crock it had been guarding so faithfully for so many centuries that I was looking for.
I’ve kept the piece of leather I cut out, and may, later, add the padding and stitching to give it form, and keep it to sneak onto the finished work as a challenge for the viewer – Find The Hittite Amulet!
Crock of Gold Hoard – A Surprise in the Photo
I’ve been working on the Crock of Gold Hoard for months, now, with the photo or even an enlargement of it, close at hand at all times. My mother and I even spent several hours staring fixedly at the photo while we tried to sort out the shadows.
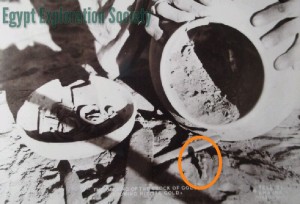
During all that time, something has been nagging me. Mary Chubb mentions that in one of the photos they took at the time of the discovery, the Hittite Amulet was placed in front of the Crock, rather as it had been on top of the Hoard for all those centuries before. And in all that time, with all that staring, I never found it.
And now I have – circled in orange here. In fact, now I’ve found it, I can’t not see it, but since it took me so long to spot it, I thought a bit of help might be in order for my readers!
And here’s the update on progress. I’m working slowly, a bit at a time, on the chipwork inside the Crock. The tarnished silver purl is creating just exactly the effect I thought it would, because the tarnishing hasn’t been even, allowing just the occasional glint to show through.
What I’m still not sure of is just how far I need to go to get the effect of the Hoard still within the Crock, which is a matter of some concern to me, because I don’t have an unlimited supply of tarnished purl.
Oh, and there is the other question – do I even attempt to represent the Hittite Amulet at this scale? I’m going to work it in or nue, as a separate piece, and as the embroidery is only about the size of a postcard, the Amulet would only be about a centimetre high, and if it goes wrong and needs unpicking it will probably leave a blemish.
Tricky.
Crock Of Gold Hoard – Beginning the Chipwork
I began by staring at the black and white photograph for a while, and then “Skitch’d” an approximation of the shape of the chipwork inside the Crock. The arrows on the lid are there to remind me that it is quite shallow, and that the back wall and the front wall of the lid should be about the same. The photograph doesn’t show the lid as absolutely full, so I won’t be hiding the base completely, but I do need to remember details like this and bear them in mind.
Since the Hoard has been described as forming in effect a jeweller’s cache of materials to recycle, I’ve assumed that it would be a mixture of metals. The Egyptians certainly knew enough about metal to create alloys, and different alloys would be different colours, which enables me to use a selection of materials. The Hoard was composed of ingots and bits and pieces, so none of it has to be perfectly shaped or even especially neatly assembled.
I found some tarnished silver purl – it wasn’t tarnished when I bought it, but I was hoping it would be by the time I used it, so I was very pleased. It helps to create a bit of a shadow around the inside of the front rim of the lid. Untarnished silver check purl and rough purl, and various shades of gold and copper in pearl purl and rough purl help to create the impression of a collection of bits and pieces, broken bangles, roughly formed ingots and general jeweller’s scrap.
Now I just need to work on the chipwork inside the Crock itself. I don’t think that I have the shape of the scraps, even in the lid, quite right, but I am pleased with this as a start, and it will be several days before I can do some more, so I have propped it up where I can gaze at it thoughtfully at odd intervals.
Dealing with the Golden Acorn
You last saw the Golden Acorn in July, when I was thoroughly fed up with it.
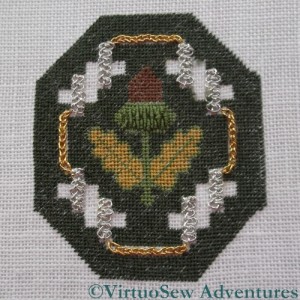
Since I’d got so engrossed in stitching that I’d neglected to pay attention to the details and had to unpick the lot, when I came to re-stitch I decided to put in the braid stitch in silver first.
I found the silver to be a more temperamental thread than the gold, although structurally it was exactly the same. However, these threads are all made more or less by hand, and must be hugely susceptible to temperature and humidity.
I know from my textile technology studies that natural fibres – such as cotton, wool, and silk – are susceptible to environmental conditions, because the basis for the success of the Lancashire cotton industry was due in no small part to the fact that ideal conditions for growing cotton are far from ideal for turning the cotton into cloth. In fact, nowadays, textile factories are built with climate control, because the speed of modern production demands that all possible variables be thoroughly ironed out.
In the same way, if you visit a woollen mill, you will see piles of wool at various stages of production, just sitting there. If you are a time-and-motion person you’ll get very uptight about this, and talk about “Just In Time” manufacturing – only to be told, in no uncertain terms, that if you want to pay for all the failed batches that will result from not allowing the wool to relax (technical term – yes, honestly) between processes, you’re welcome, but the manager won’t let it out of the factory with their name on it.
The silver and gold threads we are using have natural fibre cores, so sensitivity to climate is only to be expected!
I found both of the two main stitches in the strapwork, Ceylon stitch and Braid Stitch, rather troublesome in metal thread, although Braid Stitch in pearl cotton is one of my favourites. There’s no denying that they produce a rich and exotic effect once they are in place, though!
I became slightly fed up with tent stitch – there was such a lot of it! – while I was working this, so I’ve been giving myself some time away from it. I’ll get started on the next one of these when I feel ready for fine tent stitch again.
I’m also waiting until all three are stitched before I decide which to finish to create which stitching accessory. If I recall correctly, there’s a scissors keep, a needlecase, and a pincushion. I suspect they’ll end up in that famous Winter Decoration Corner I keep threatening to do!
Another Needlework Nibble – the Butterfly Pinpad
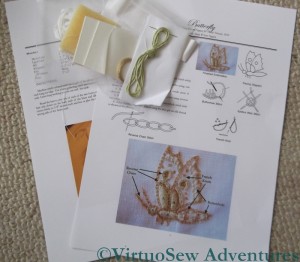
There is yet another Needlework Nibble available from Thistle Threads! This involves a particularly fine gold thread, and some stranded silk.
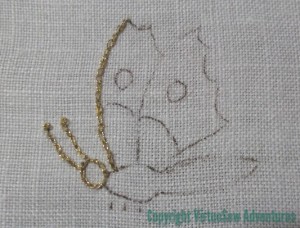
This one is a tiny butterfly, outlined in gold, highlighted in pale green silk, and then finished as a pinpad. I have discovered in the past two years that I really enjoy working these little pieces, and they are a great way to find out about different threads, stitches or techniques without being entirely overwhelmed by the scale of the project.
I’m suffering from tennis elbow at the moment (owing to the housework, not the embroidery!), so I am particularly interested in smaller projects that allow me to make visible progress in short spans of time. I thought that this might be one of them, but actually the stitches are so hair-raisingly small that I’m no longer sure that is the case.
The stitches are only a couple of millimetres long, and with my arm in its present state, what you see here is the result of two half-hour sessions!
Glittering Nightcap – Month Three Done
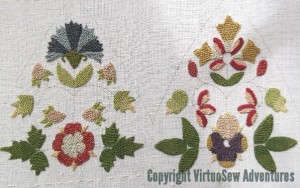
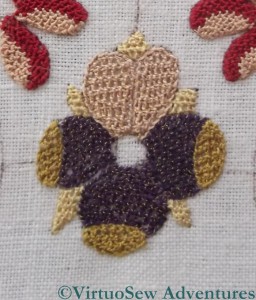
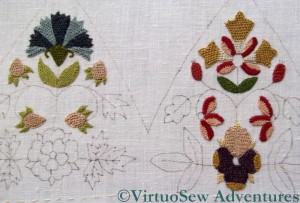
This month, because I’m working the main body of the cap first and then intend to turn over and work the rim, has been a little thin of activity. I’ve really no excuse for it taking so long except that I’ve become very taken up with the Dreams of Amarna. The work on the main part of the cap this month has been only two pansies, worked in detached buttonhole stitch using the Gilt Sylke Twist, with straw-coloured calyxes worked in Soie Perlee.
The other half of Month Three – two pomegranates on the rim – will have to wait until I turn the fabric over. Next month’s activity involves two Tudor Roses and a positive plethora of different leaves in various combinations of Soie Perlee.
This picture shows one of the two pairs of sections that will make up the finished Nightcap. As you can see, there are still large gaps in the pattern, but it is gradually filling in, and Month Four actually completes the embroidery. Months Five and Six concern the finishing of the embroidery to create the nightcap and the silk-brocaded stand for it.

