Tag: online university
Tudor and Stuart Goldwork Masterclass – More Post
Yet more post from Thistle Threads – aren’t I a lucky girl!
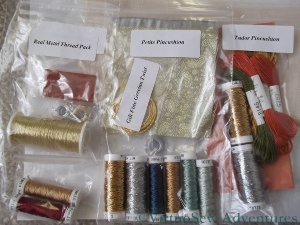
This time, the post contained the real metal threads for the Spot Sampler, and the materials for two pincushions that also form part of the course. There’s a piece of silk brocade, and two pieces of linen, and even more silk threads… I’ve not caught up with printing the instructions yet, so I’m not quite sure what I’m going to be doing with them, although I have had a quick look, and there’s at least one new stitch variation in among them.
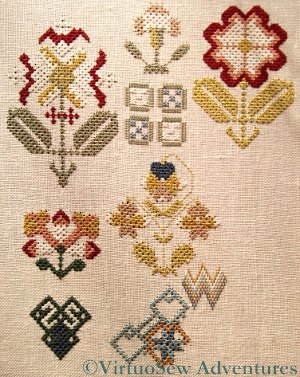
And bear in mind, I still haven’t finished the silk work on the Spot Sampler, and that there are going to be even more ornamental stitches to learn. This photo shows my progress so far. Over the last couple of days I have finished the bargello motif and made a lot of progress on the central motif at the bottom. I once reckoned it took twenty minutes to do ten Queen Stitches, and was very depressed by that discovery, but I think I’m speeding up again!
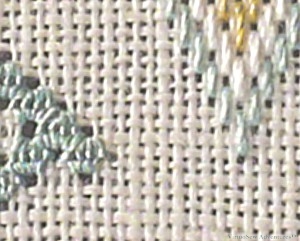
It’s intriguing to see the new fabric created by the Queen Stitches. It’s not often that the effect of stitches is quite so clear. Instead of the ordinary square-woven fabric, the closely-worked Queen Stitches create a sort of heavy openwork lattice. It has a completely different texture to the basic fabric and when I finally finish the piece, I will have to make sure I frame it or mount it in such a way as to make that quite clear.
Tudor and Stuart Goldwork Masterclass Stitches – Month Eight
This month Tricia’s History and Analysis section includes a description from the animator of how he approaches animating the stitches. It’s very painstaking work, and as the first thing he does is to follow the instructions just as we are, he is going to end the course with the same repertoire of exotic stitches as we have!
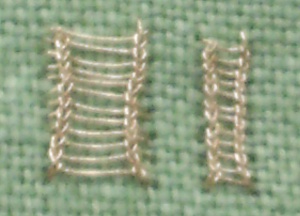
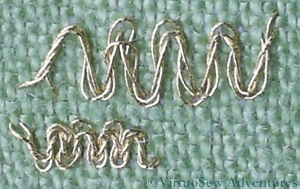
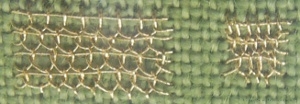
The first of this month’s stitches is Ladder stitch. Like last month’s Ceylon Stitch, this is a stitch I have worked before; in fact it’s very like Ceylon Stitch in structure as well. I can change the width of the stitch, but not the vertical scale, so my two versions here look very similar. With the rather stiff gold thread, the stitch becomes rather a trial when worked with long “rungs”, so I enjoyed it more when I worked it in a narrower space.
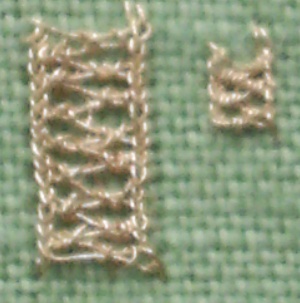
The second stitch is an embellishment of Ladder Stitch, using a ZigZag whipping. I had trouble with this stitch because I simply couldn’t bring myself to pull the whipping tight, so it tangled and tied itself up, and nearly tied me up with it. As the shorter version shows, once I sorted myself out, the stitch sorted itself out too.
My problem is that I’m very aware of the way the thread is made, and concerned that the wrapping of metallic foil will be broken if I pull too tight. It isn’t really a problem, as the overall effect of the thread usually masks any slight breaks, but try telling yourself that when you’re tangled up in an expensive thread you don’t want to waste!
Tudor and Stuart Goldwork Masterclass Stitches – Month Seven
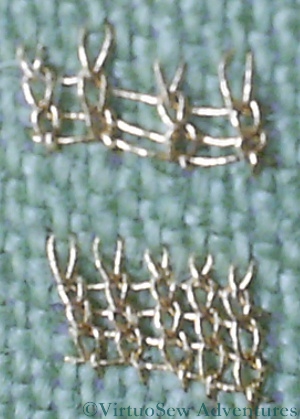
I’ve not been making as much progress on the silk work for the Spot Sampler as I would have liked, recently. Still, I have managed to have a go at the Month Seven stitches, Diagonal Half Guilloche Stitch and Ceylon Stitch. As always, I have done them at two different scales.
I’ve worked Ceylon Stitch before, although certainly not using a metallic thread. It produces something that looks a little like knitting. I suspect it will be easier if I use a stiletto to control the thread. I know I have one somewhere, so I’ll look it out before I try this one again. I think I used it as a needlelace stitch before, and that, of course, used a simple round cotton thread.
I think the Diagonal Half Guilloche Stitch has possibilities for some of my other projects. It looks very like one of the braids sometimes used to edge upholstery, and might also make a good filigree necklace for the Amarna panels. It will be important to pick the right scale of thread and fabric, as you can see in the picture here, but at least when I have been working at the large scale it has been easy to see where the needle is supposed to be. This hasn’t been one of the most complex stitches, but I’m glad that I have chosen to work practice versions of all these stitches before I work them on the sampler or the pincushions!
Floral Glove Needlecase Course Month Five
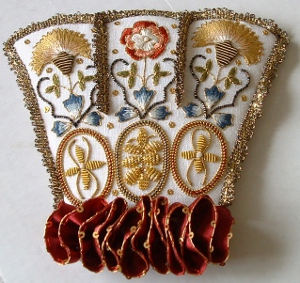
I’ve had an exasperating time with the Floral Glove Needlecase since you saw it last, what with unpicking and reinstating the gold lace (fx: growl!), and wrestling with the silk ribbon ruffle, which had to be gathered up and attached across the bottom in a sort of squiggle.
However, when I finally got all that sorted out, I screwed my courage to the sticking-point, gathered my wits, picked up my glue-pot, took a deep breath and finished assembling the separate ornamental cuff of the Floral Glove Needlecase.
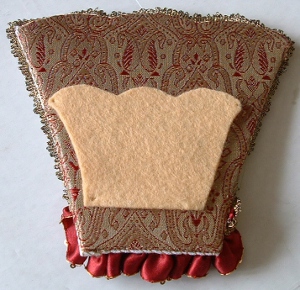
So here is the cuff lining. I know that the felt isn’t centred. I was sure that it was on the brocaded silk, but by the time I had tweaked and stretched and glued, that was the best I could do. As someone who is clumsy and awkward with glue I would have prefered a slightly wider margin of fabric around the card shape, which would have made it easier for me to handle.
The front and the back (stretched over batting, heavy interfacing, and light card) are attached to one another by overcast stitching. I used a strand of one of the silk threads from the embroidery – that seemed the best way of being consistent with the materials used.
Now, as I’ve said before, I’m not good with glue and scissors, so I was worn out when I finished, and I know it isn’t perfect, but it does look pretty good, especially from a reasonable distance!
At this point Tricia’s instructions say – I kid ye not! – “Sit back and admire!“.
So I did.
Tudor and Stuart MasterClass Stitches – Month Six Stitches
Last time, I found the stitches rather tricky in the gold thread and tried them in pearl cotton afterwards to see whether that made them easier. I’m not sure it did, as a matter of fact, but it did show me that the relative scale of fabric and thread would also influence not only the appearance of the stitch, but also the experience of stitching it.
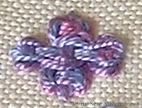
So this time I started with pearl cotton. I can’t say it was markedly easier, especially the Cross Shaped Guilloche Stitch Variation. This time I think the thread was too heavy for the stitch at the scale permitted by the fabric, and furthermore it turns out that both of my practice cloths may be plain weaves, but they are not in fact proper evenweave fabrics, even if they look as though they should be.
I counted very carefully, but somehow it looks as though it should be enclosed in a rectangle and not in a square. It also looks rather a tangle!
The Guilloche Stitch Variation here is in fact the one I have seen in some of my books on embroidery stitches, although those have been somewhat simplified by comparison. Still, I can imagine using it to create a braid effect, and I’m sure that I will think of something to use the cross-shaped variation for, once I’ve had a bit more of a play, and tried to find the right scale of thread to fabric.
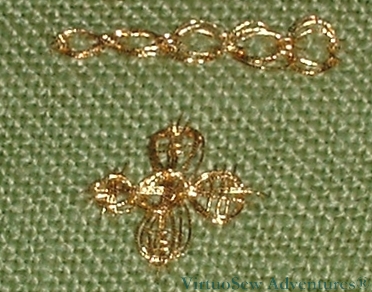
So, finally, here are the stitches in the gold thread. It’s harder than you might think to keep the thread in order, and in the end I decided to make a virtue of my difficulties and in the Guilloche Stitch variation I’ve got two of the sections showing a close, tight version of the wraps, while the other three are looser and more loopy.
In the Cross Shaped Variation, again I thought I had counted carefully, but again it didn’t come out quite square. I think I might try again but doing the stages in a different order so see whether that helps me in any way. I also found myself, in spite of all my efforts and in spite of having the instructions beside me, getting the thread wraps weaving over where they should have gone under and under where they should have gone over.
More practice needed, that’s for sure!
In fact, it occurs to me that there is a lot to be said for practising each of the stitches on the actual cloth before putting it in place on the sampler. Just as a final check. . .
A view from my bookshelf. . .
Like so many of us, I have probably several shelves’ worth of books about embroidery scattered around the house. Some of them never make it back to the shelves because they are always beside me as I work (Barbara Snook’s “Embroidery Stitches” and Yvette Stanton’s “The Right Handed Embroiderer’s Companion“), some of them are put aside for study when I have leisure (when will I learn?), but the rest of them are shelved (not all in the same place) ready to be pulled out to give me entertainment and pause for thought.
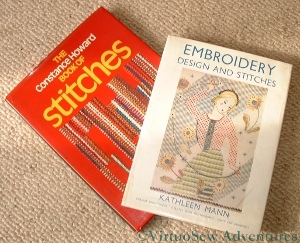
One of those is Kathleen Mann’s “Embroidery Design and Stitches”, first published in 1937. Kathleen Mann trained at the Royal College of Art, but went to teach at The Glasgow School of Art, at about the time this book was published. Looking at the stitch diagrams and the design ideas she presents, they are very much of the Thirties, of a particular modern, exuberant style that occasionally is found in the designs in that stack of The Needlewoman Magazine that I inherited. So it is not surprising that in the text I find her bewailing the fact that so much of the embroidery of that time was backward-looking, expressions not of modern sensibility but of indebtedness to the past. Certainly if you look at some of the “Jacobean work” designs in The Needlewoman, some of them are rather stiff, dark and charmless. A little oppressed by scholarship, perhaps, like some of the authentic performance practitioners in the early music movement (for an antidote to that problem, if you like baroque music but don’t take it too seriously – get to a performance by Red Priest!).
When I look at “Constance Howard’s Book of Stitches“, further along the shelf, I find the stitch samplers illustrating it also speak vividly of their time – in this case the 1970s. Strong, bold, and abstract, often using heavy fabrics and threads – certainly much heavier than would have been used in the Thirties – and not quite so “careful”. Perhaps, more accurately I should say – the embroiderer clearly has a good technique, but chooses for the purposes of her sampler to vary the size and shape of some of her stitches, sometimes rather chaotically.
Then again, I have been reading one of Jill Paton Walsh’s “Imogen Quy Mysteries”, in which part of the plot turns on the dating of antique patchwork quilts from both the pattern and the fabrics used (print styles can be dated).
Suddenly I find myself thinking – what are we doing? What am I doing? If someone were to look at my embroidery in thirty, forty years’ time, how will it appear to them? Stiff, derivative and uninspired? Or will it speak of the times in which it was made? What is it that is characteristic of our time? When we look at a film made in the Eighties, we don’t need to see the end credits or look it up on IMDB.com to know that it was made in the Eighties, yet at the time, had we seen it, the clues we now use wouldn’t have registered at all.
Of course, we can learn an enormous amount about embroidery and embroiderers by studying and replicating past work. I don’t think Kathleen Mann would have disapproved of that, and I certainly don’t. I enjoy the exuberance of Jacobean work, and I am fascinated by the two online university courses I am following.
But it is an interesting question for all of us who create anything, all the same. Is my work modern, current, inspired by the past, or is it hidebound by the past, backward looking, a pale imitation of past glories?
Quick update on the Spot Sampler
I miscounted some of the stitching on the central motif of the Spot Sampler we are doing in the Tudor and Stuart Goldwork Masterclass – cue much muttering and swearing – so when I had convinced myself that I really did need to unpick it and re-stitch it, I was rather anxious. Some fabrics never recover from the first stitching, and I felt that there was a very good chance that the pulled Queen stitches would be pretty much impossible to recover. Furthermore, Queen stitch is the most difficult to unpick that I have ever had to wrestle with. Especially at this scale. I ended up using a laying tool and a seam ripper, with my heart in my mouth in case I cut something I shouldn’t.
And yet look at it. It’s hard to tell where the stitching was, and even unpicking with the laying tool hasn’t done much harm. I’m very impressed, and greatly relieved.
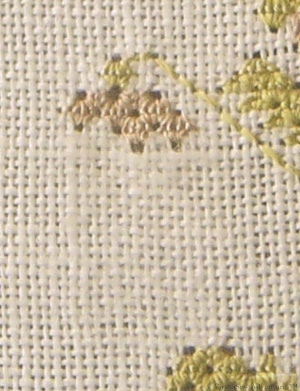
I also noticed something in stitching the beginning of the bargello section I started while I was thinking about restitching the central motif. The lowest row of the bargello section and the Queen stitches just beside it are worked with the same colour. The differing light reflectance on a straight and uninterrupted stitch, in comparison with an angled stitch which is interrupted by a tyeing stitch has actually made about two or three tones difference in the colour as it appears. I knew about this effect, but it is the first time I’ve seen it demonstrated quite so clearly.
This sampler is teaching me a good many things in addition to the stitches!
Floral Glove Needlecase – Second Stage of Finishing
There is a sparkly ruffle between the cuff and the hand on the Floral Glove Needlecase, and of course we have to make it ourselves. You can’t go to your local needlework shop and say “Half a yard of Elizabethan glove trimming, please” with any prospect of success!
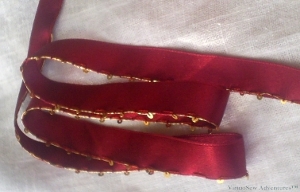
So the trim is composed of a length of double-sided silk ribbon, with Gold Twist and spangles whip-stitched down one edge.
The silk ribbon is wonderful stuff to play with, smooth and supple, and with just enough body not to flop. The idea is to ensure that the spangles all end up on the same side of the ribbon as each other and as the Gold Twist, and I think I managed it (not without the occasional tweak!).
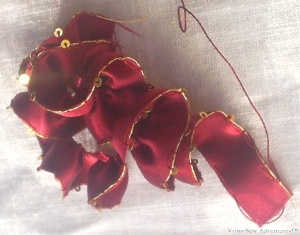
Then, we run a gathering thread down the other side and pull it up to make a ruffle. It looks wonderfully exuberant, doesn’t it, and I haven’t even set it into the shape it needs to fill on the project. Tricia suggests leaving that stage until the various unseen bits of backing are all assembled and shaped, and since I need to buy some fabric glue before moving to that stage, that is exactly what I am going to do.
Completing this fairly simple task took me most of an afternoon. But then, no one ever said embroidery was quick!
Floral Glove Needlecase – beginning the Finishing Process
I’ve been prevaricating on the finishing process for the Floral Glove Needlecase, because it will involve glue, and I’m clumsy with that sort of thing.
I’ve worked very hard on the embroidery, I’m quite pleased with most of it, and I don’t want to fall at the last hurdle!
Finally, however (largely because I’ve been blogging about it and felt I should finish what I started!) I’ve screwed my courage to the sticking point, printed out the instructions and promised myself I would read everything twice before starting any stage of it.
That’s one of the effects I hoped blogging would achieve – providing encouragement to finish things properly. So I think we can count that as a success, can’t we!
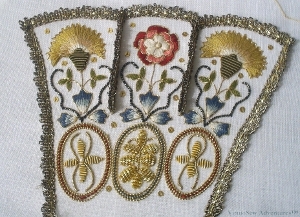
What you see here is stage one of the fifth month’s instructions – adding the gold lace to the edge and around the tabs. This has actually been fairly simple, in that the lace has loops on the straight edge, and the whole thing is done with a single length. No joining ends to worry about, just making sure that the lace is neatly attached along the line, carefully controlled at the corners, and back-to-back on the lines separating the tabs.
I’m pleased with this. In real life it has a lovely sparkle and – yet again – the addition of further embellishment seems to have brought it to life even more.
Tudor and Stuart Goldwork Masterclass – Month Four Stitches
While I continue to persevere with the silkwork, I am trying to keep up with the new stitches, practising on a separate cloth. In the case of the Detached Buttonhole stitch with Return, I think you can see that the fabric and the thread are not well matched, and so the structure is correct, but the appearance is not. The stitch should be much more closely worked, giving the impression of a fabric, not of a net. It’s tricky to be sure that the gold thread doesn’t kink back on itself in working this stitch, although this may be easier when I’m working on the real thing, using a slate frame on a stand, and therefore have both hands free to control the thread!
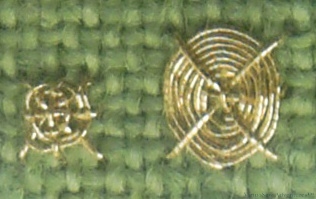
This second stitch is an Eight Spoked Flat Spider’s Web. It is very similar to the one in last month’s pair of stitches, but uses a foundation composed of a cross and an upright cross. I suspect it will be rather more stable than the four-legged version.
These “spot” stitches may come in very handy when I start thinking about some elements of the Amarna Panels.
I’m using a single type of thread for all these practise stitches. I don’t want to confuse myself with problems that may relate to an unfamiliar thread when I am already dealing with unfamiliar stitches! Still, already when I look down the row of stitches I’ve already tried, I see ideas for further experiments and even for applications of the stitches. This is what I hoped for when I joined the course, so I’m very happy with how it is going!

