
Tag: Silk thread
Starting on the Tudor Rose
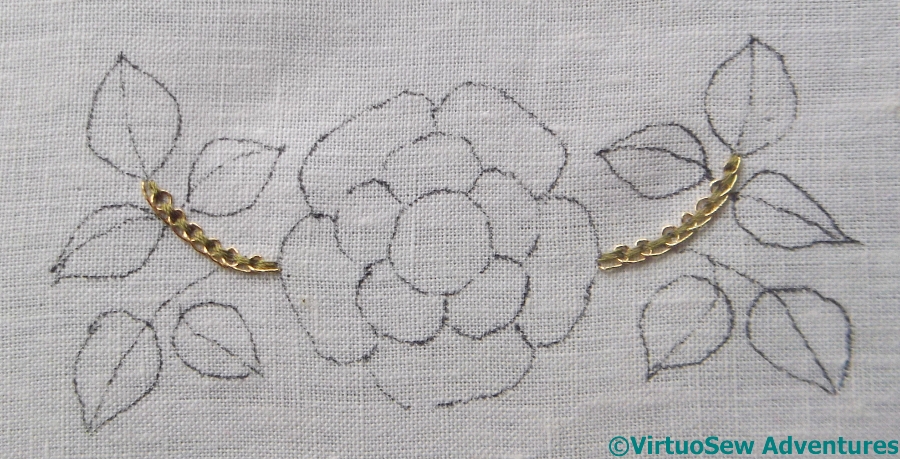
Tudor Rose – First Stage
Having finished the embroidery on the Glittering Nightcap – even if I haven’t assembled it yet – I decided that I would allow myself to begin on the Tudor Rose. The goal of this course is to introduce stitches and effects that combine silk and metal thread – in the same stitch, not in the same thread – and I am hoping that it will give me ideas for tackling representations of ancient Egyptian jewellery for the Dreams of Amarna.
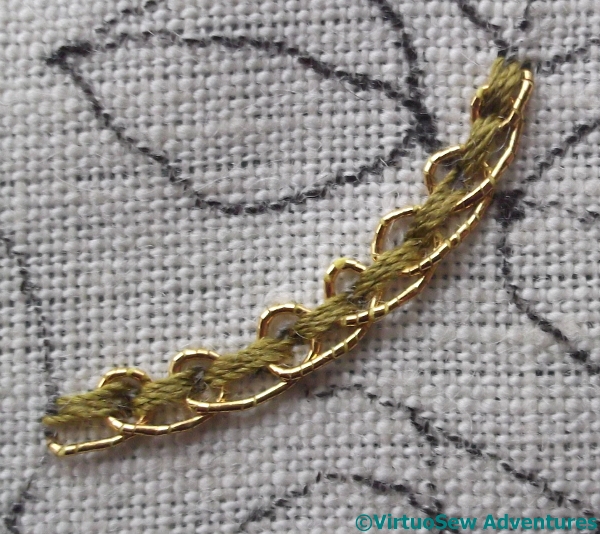
Interlaced Back Stitch
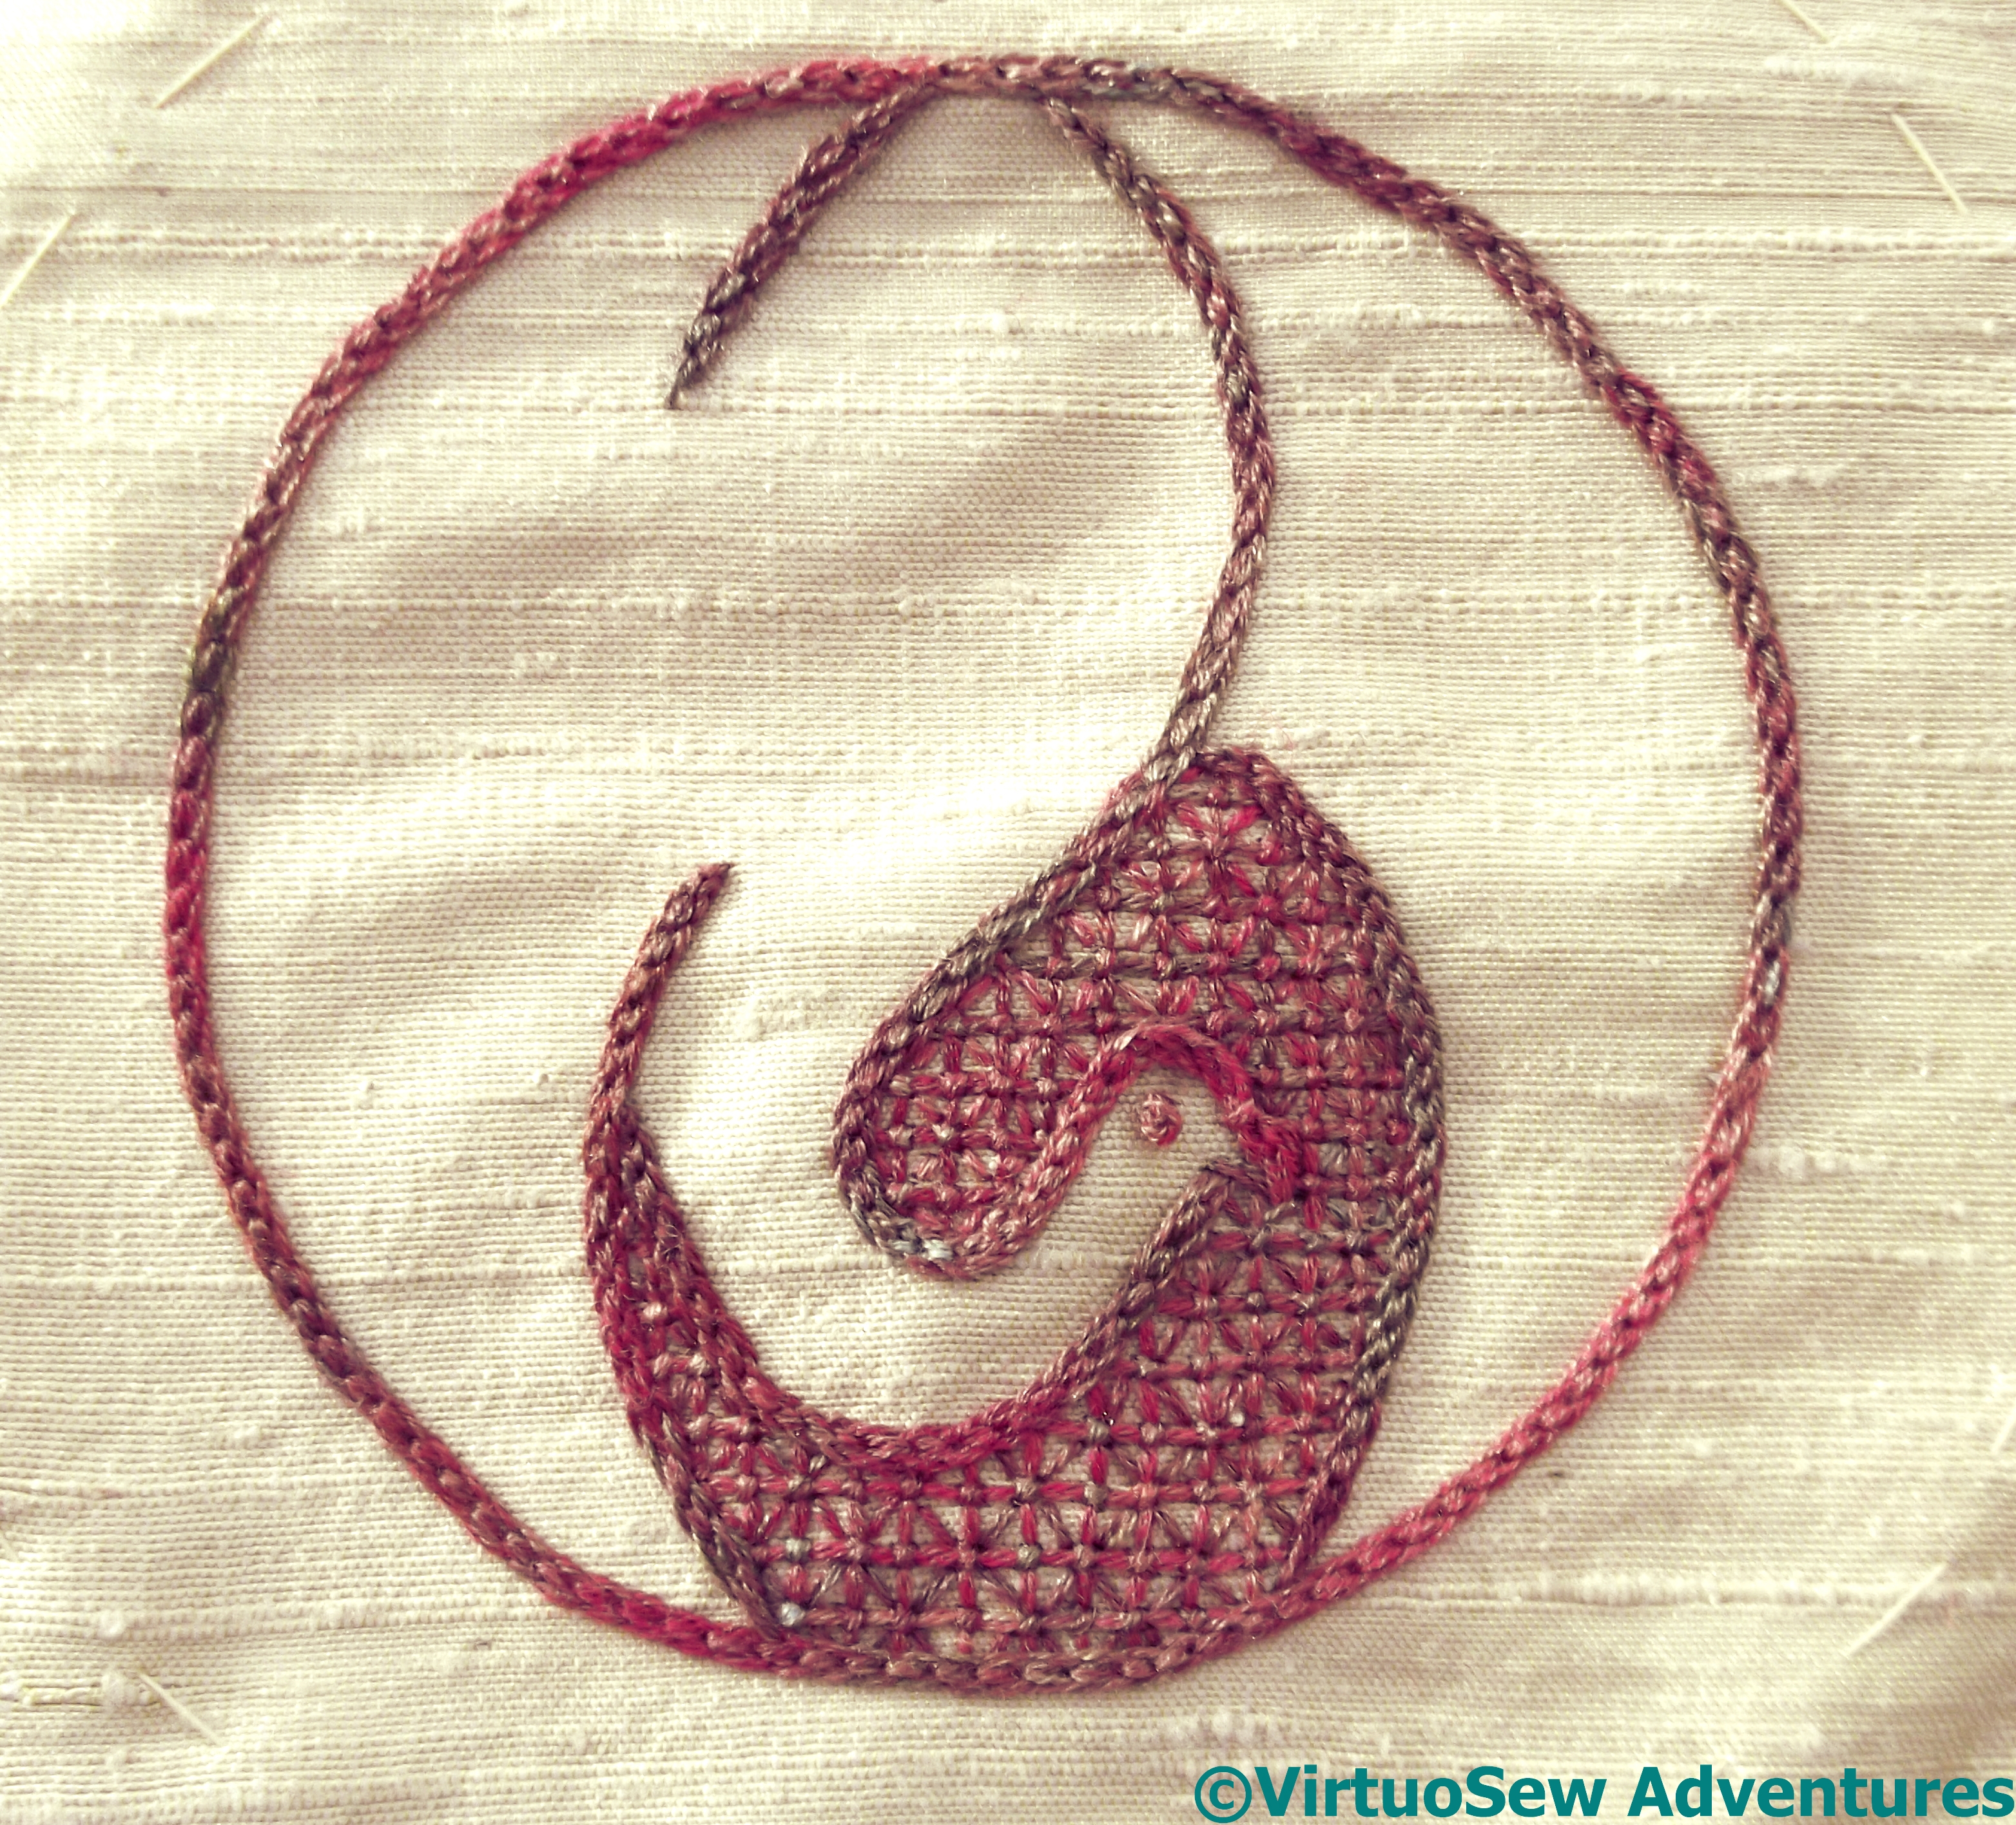
The first element is a fairly simple one, in effect a version of Pekinese Stitch, but with three rows of back stitch for the base, and a metal thread used for the interlacing. The challenge here is in making sure that the silk thread is sufficiently loosely stitched to make the interlacing possible, without being so loosely stitched that nothing stays in its’ place. Since the metal thread structure is of a core wrapped around with a fine film, when the thread is bent, the film sometimes stands away from the core, catching on the silk. Another key for Tricia in this course – as in fact in all her courses – is learning to be aware of the use to which a particular thread was intended to be put. We need not restrict ourselves to that use, but we do need to be aware of it!

First Two Leaves
I rather suspect Tricia of letting us in gently, here, because the next element she describes is also fairly simple. The leaves are outlined in reverse chain stitch, in silk, and then filled using alternating rows of reverse chain in gold and in silk.
I hasten to add I have no objection to being let in gently – I’ve looked at the instructions for some of the later elements and rather expect a deal of unpicking to happen, so I’ve been able to enjoy handling the silk threads, which are quite heavy, but soft and “lofty” so they don’t punish the fabric unduly. If you look closely at this photo you will see that the olive green used for the stem is slightly thinner than the more emerald green thread used for the leaves. The weight matches nicely with the gold thread, so the more complicated elements that are coming up should look well balanced.
Restarting on the Hittite Amulet
Progress On The Hittite Amulet
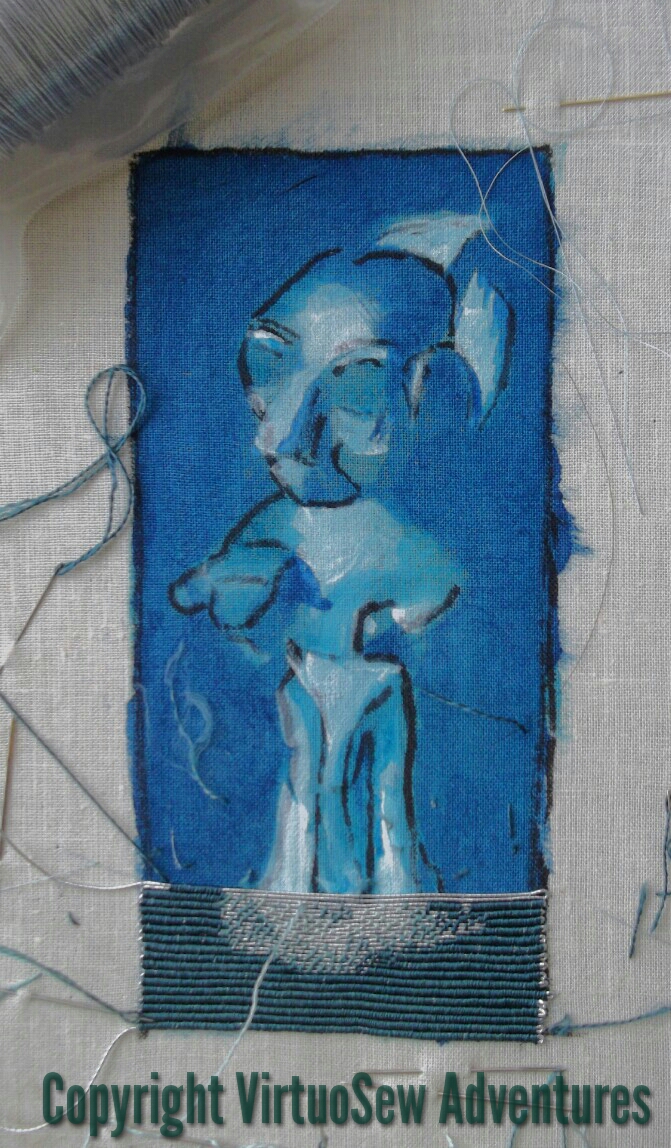
It is months since you last saw the Hittite Amulet. I put him away in a boxfile before Christmas and refused to get him out again until the embroidery on the Glittering Nightcap was finished.
Of course, it takes a while to gather ones’ wits, and restore the “flow” of a piece like thisl. Since there are two alternating tasks – laying the silver thread and then covering it with silk as appropriate – it is hard to develop a sense of momentum. If I succeed, I may find he gallops away with me – which would be gratifying, because I have a lot more ideas for Dreams of Amarna pieces that I want out of my head and onto fabric!
Oblique View
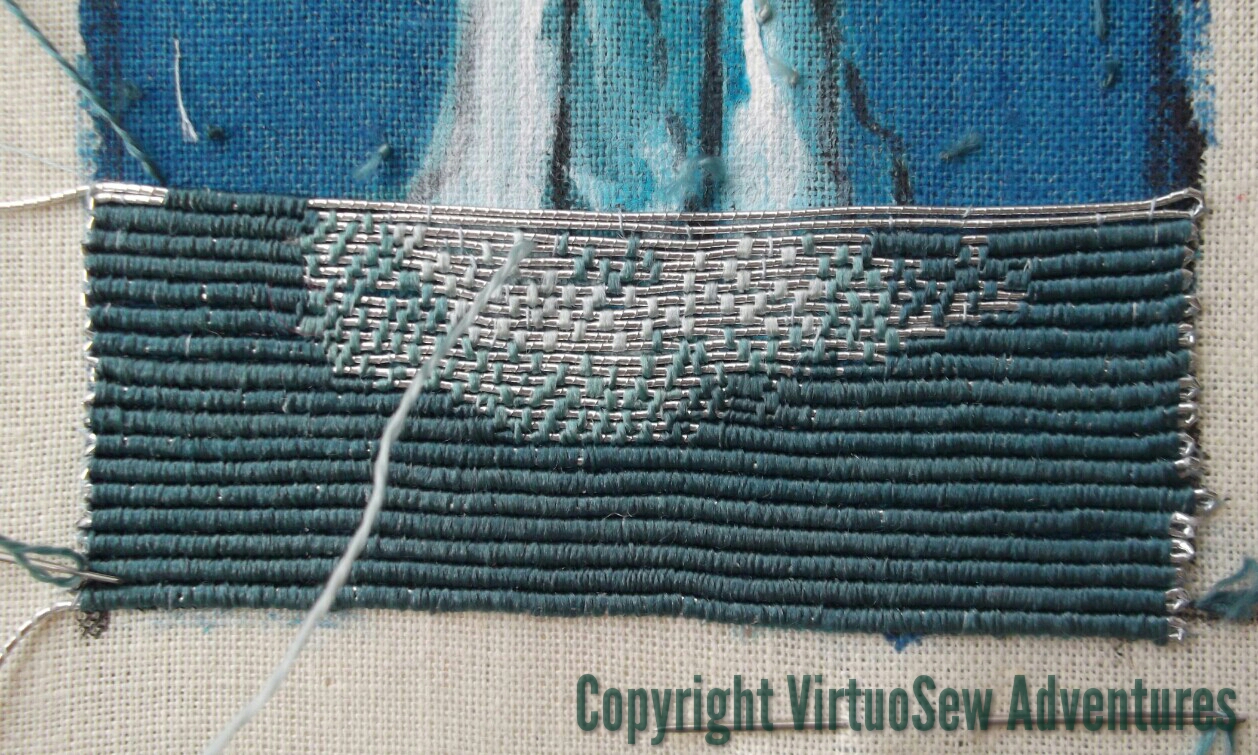
I’ve tautened the fabric again, and I am trying hard to remember not to let the lines of couching sag in the middle. Sometimes I forget and stitch too tightly, but usually only for one row, so the situation does not get out of hand!
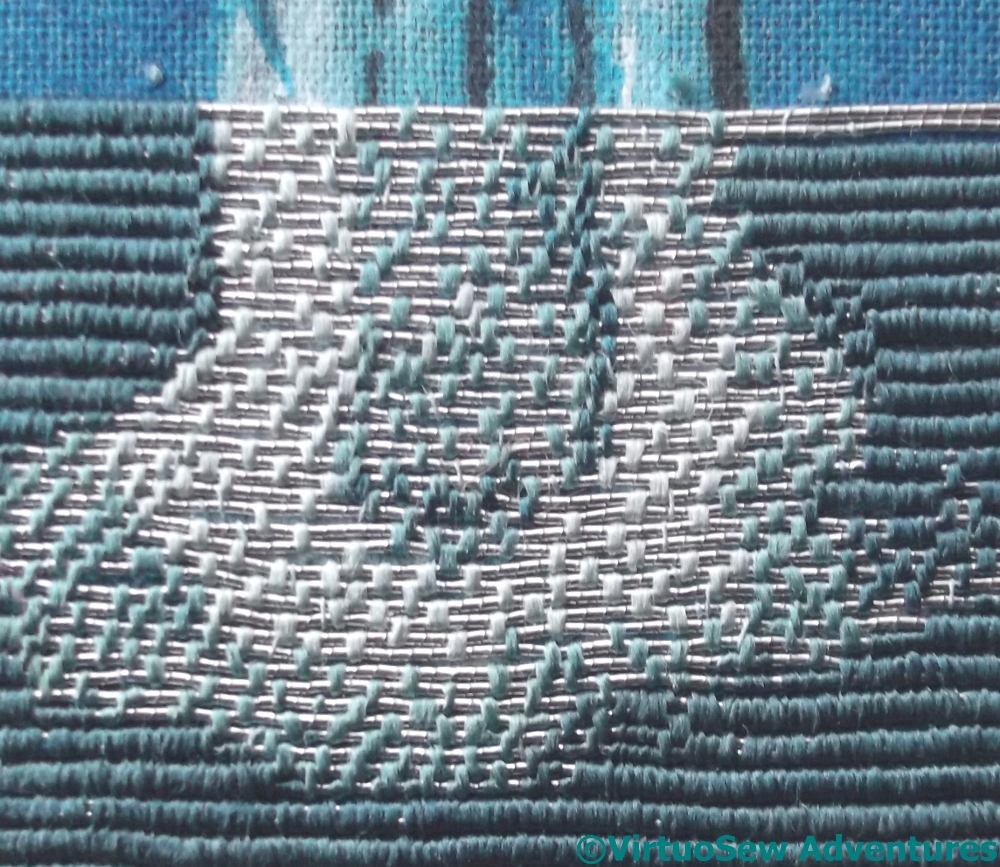
This close-up, oblique view, gives you a sense of the ribbed, “grosgrain” type effect of the background, and the speckling of stitches across the Amulet himself that give the light and shade.
I really think it’s working!
The Crane – playing with silken thread, Part Two
Japanese Crane Design
Here is the Crane design, finished and ready to be mounted for display.
I picked a wooden pot from Framecraft Ltd. People who have been stitching for a long time may remember them as “Framecraft Miniatures”, and they were always a good source of silk gauze and other supplies for people interested in furnishing dolls’ houses. They also supply a huge variety of other items with spaces for inserting embroidery – you might remember my Homage To The Opal, if you’ve been reading my blog for a while.

View Of Crane Pot
Framecraft supply a plastic cover to protect the embroidery, but as my cousin isn’t the type of person to maul a piece of embroidery with sticky fingers, I decided she would probably prefer to see the embroidery properly. They also supply padding, but it is a light foam, and I substituted two layers of a very fine cotton wadding instead. The cotton wadding has a bit more substance to it, and created a nice firm dome, which looks much better when the embroidery is displayed without a plastic cover.

Crane In Place
The colour changes and textural stitches keep the design from looking too stiff, but because the silk thread has a slightly matte appearance it looks soft and doesn’t dazzle the eye.
When my cousin took it home, she strolled around her house asking the Crane where he wanted to live. He chose the bedside table in the spare room, where his colours talk nicely with the wallpaper and the bedspread, and the wooden pot echoes the dark wooden bedhead and wardrobe.
The Crane – playing with silken thread, Part One
Japanese Bird
I decided to make a “Useful Pot For Putting Things In”, as Winnie-The-Pooh would have called it, for my cousin for Christmas. In fact, I cheated and merely embroidered a design for a lid!
I found the motif in the Japanese section of “Pattern Motifs: A Sourcebook” by Graham Leslie McCallum. I think it’s a crane. The design is very pared-down, and I thought it would make a good way to show off some of the superfine silk thread from Stef Francis, maybe even an excuse to use some more unusual stitches to see how the threads show them off.
Hungarian Braided Chain Stitch
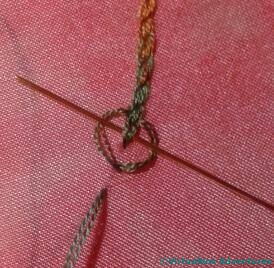
Those of you who follow me on Twitter may recall that I tweeted this picture of the stitch I eventually chose to use. It’s called Hungarian Braided Chain, and I found it in one of those books by Edith John that I mentioned when I began embellishing the Circles Skirt. If you think of it as Heavy Chain with the needle weaving over and under the threads as shown here, you will get the idea.
I’m very taken with the stitch, in fact. It creates a fascinating textured line, and colour changes in an over-dyed thread bring it to life even more. I can imagine using it in plain thread as an indication of braid on clothing, or ropes on a ship, or even simply in side-by-side rows to create a textured effect.
This is the first – so far unfinished version, in superfine silk on silk habotai. The relatively short colour changes in this thread create subtle changes from stitch to stitch, emphasizing the structural patterning and texture. When the destined pot arrived I decided the combination looked altogether too hot and bothered, and went rummaging in my stash again…

Close Up Of Stitching On The Crane
The fabric I finally chose is a rough dupion from The Silk Route, in a golden cream colour which is extraordinarily difficult to photograph, and I picked a slightly different silk thread, more restricted in colour range. Using four strands of thread produced a lovely cable-like appearance, which you will see if you open the photo at full size.
The dark section of the design, behind the bird’s head, I worked in a dense version of trellis stitch, with horizontal, vertical, and diagonal lies all tied down with tiny cross stitches. Even working in a hoop or frame, trellis stitch cane be a bit of a challenge to stitch, but I made it in the end!
Another Course From Thistle Threads!
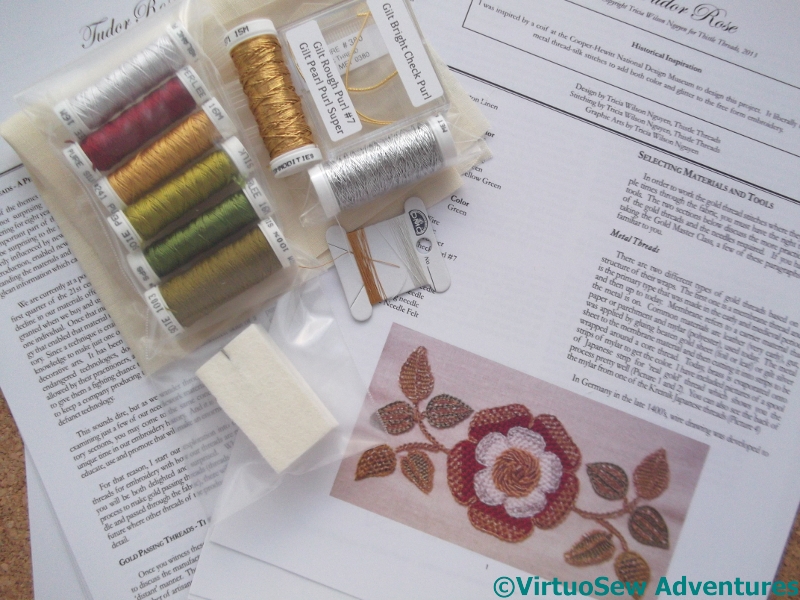
Tudor Rose Kit
There was another clatter of the letterbox and a gentle thunk on the carpet recently. It was soon followed by some excited squeaks and a dash upstairs to print out Month 1 of the History and Instructions.
This time, instead of a clear distinction between metal thread stitching and silkwork, as in the Floral Glove Needlecase, the Tudor and Stuart Goldwork Masterclass, or the Glittering Gentleman’s Nightcap, the aim of the course is to show how the metal and silk threads were combined within stitches and motifs.
I’m hoping that this will give me some new ideas and techniques to apply to my Dreams of Amarna panels. However, I intend to be a good girl. I won’t actually start this until I’ve done the Glittering Gentleman’s Nightcap, which is still “going slow” owing to a combination of end-of-year exhaustion and fugitive winter light. With a bit of luck, I may be able to get started in the spring.
Making Progress on the Hittite Amulet

The Hittite Amulet Progressing
There was a slight, panic-stricken, pause in progress on the Hittite Amulet recently. As you can see, I’ve barely completed a third of him, and I’ve used half of my darkest silk. This is a graver situation than I anticipated, because since I bought the thread – three years ago! – the master dyer at Pearsall’s has died and they have closed the company.
I can leave to your imaginations how I felt when that realisation hit home…
Fortunately, the remaining stock was sold to Tristan Brooks Designs in America, and while it is extremely frustrating to have to have thread dyed in England shipped back to England from the States, the two skeins I bought do seem to match well enough. I’m going to alternate strands from the new skeins with strands from the old, all the same – that should help to make sure any change is gradual.
Close Up On The Amulet
When I was at the Knitting And Stitching Show in Harrogate, I bought an extra skein from Laurelin Specialist Embroidery. The colour is very slightly brighter than the darkest one I am using for the background, but I am hoping that it will help to add a bit of depth and strength to some of the shadows on the Amulet himself.
You can also see in the close-up that I’ve nearly got the rows straight again after their wanderings. Now I know I have to be careful, I hope that the problem won’t arise again.
The Hittite Amulet – progress of a sort!
Progress On The Amulet
Now that I have started on the main design element of the Hittite Amulet, I am entering a familiar and disheartening stage. There is so much more to do, it’s very concentrated work, and at the moment, I’ve not done enough to be confident it will work at all.
In fact there is a good chance that until it is completely finished, I won’t be sure that it is working, which in turn means I need to ignore my doubts and just keep at it!
The fact that I have several needles with different shades of thread in them, all working at once, will explain why I can’t do very much at a time – I need to avoid tangling the threads, and as soon as I start to get tired, the threads tie themselves in such convoluted knots they’d make a macramé expert think twice!
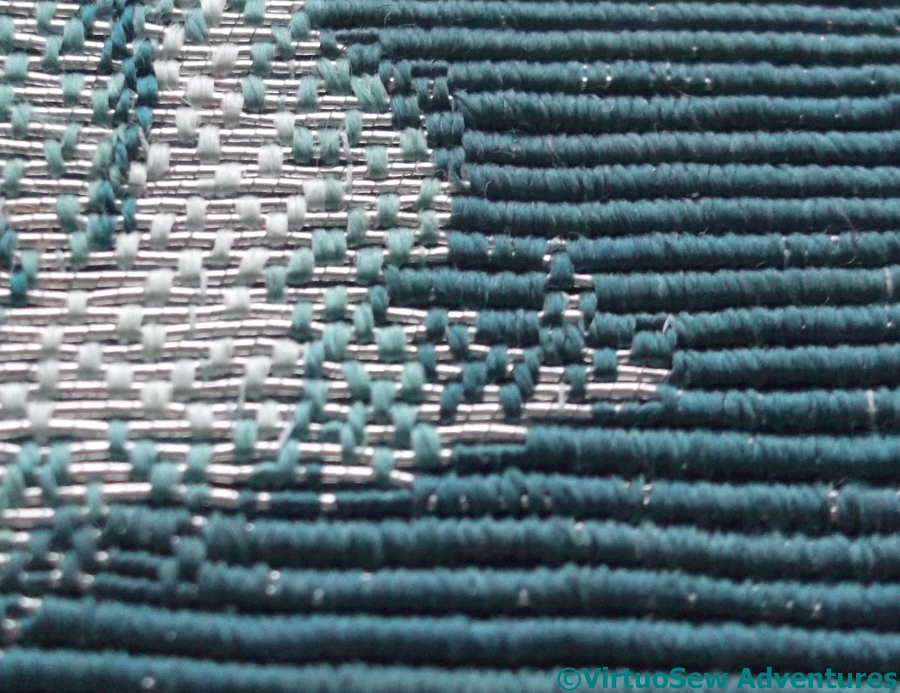
Many Threads In Progress
This close up should give you an idea of what is involved. I decided to allow the coloured silk stitches on the Amulet to be either across the same pair of threads as the background, or across pairs which are off by one. This should allow me to be a little more precise in colour placement. It may or may not matter, but I felt that since this is such a strange piece, I wanted to have as much flexibility as possible.
I have already discovered that in some ways the straight rows are harder than the spiral that I used for Christus Natus Est. As the backing fabric sags, and the stitching became more widely spaced over the Amulet, I found that the rows were no longer straight. I’ve spent several sets of rows geting the rows more or less straight again, which was just a little scary!
The Hittite Amulet – Beginning to stitch
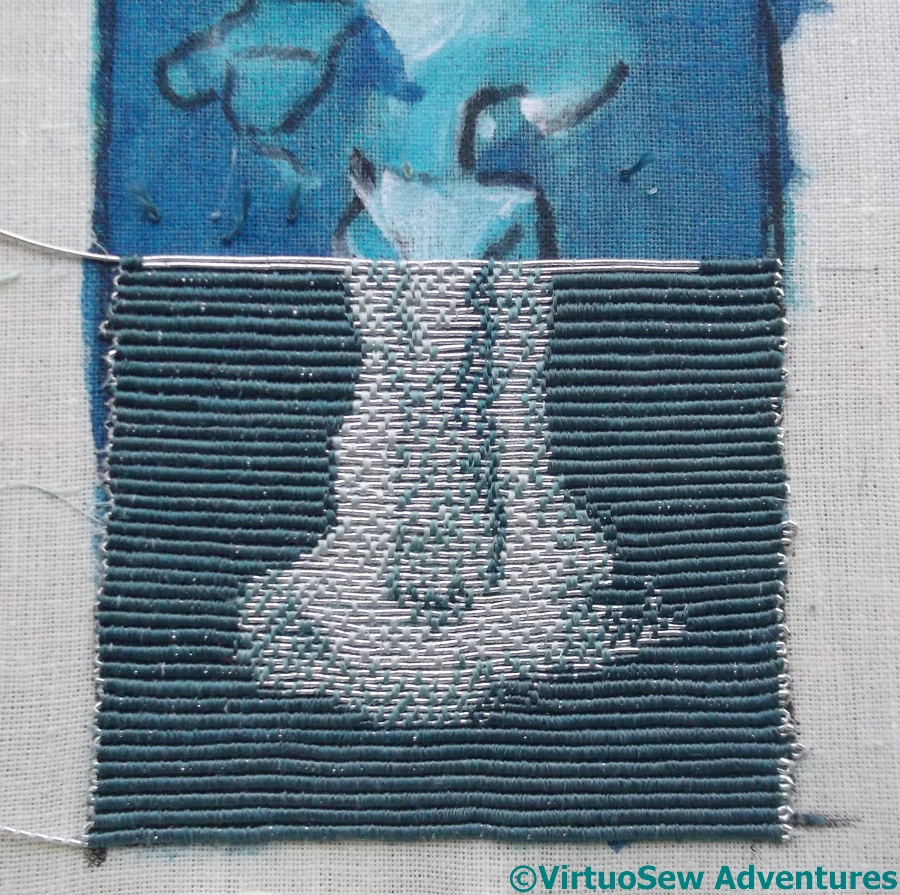
First Silver Row
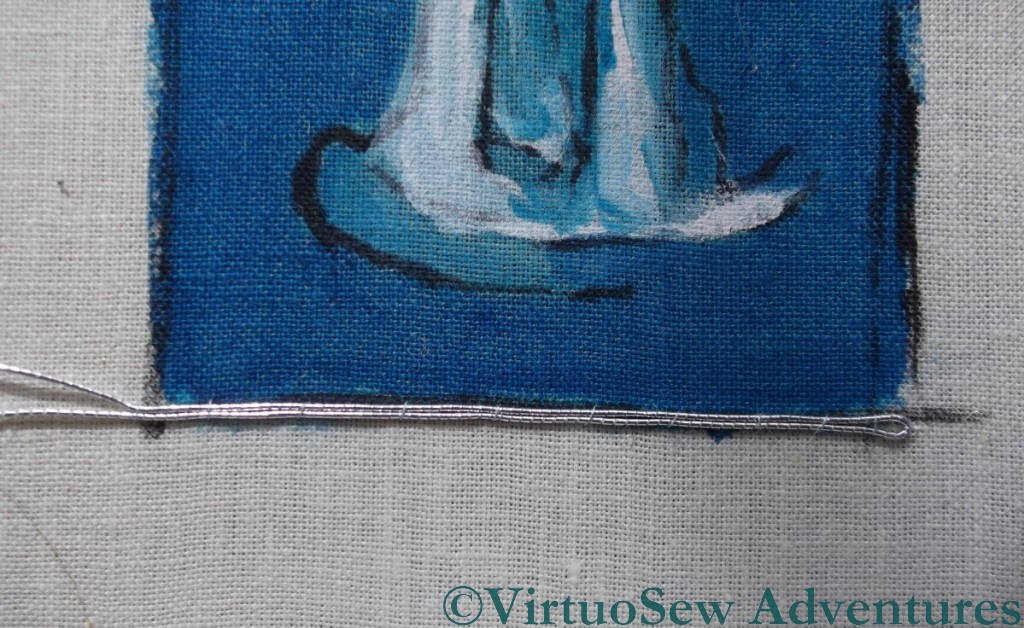
So, with the Hittite Amulet painted on my fabric, stretched, and ready to go, I have now settled down to stitch. I have decided to aim for a more strongly corded effect in the background of this piece than I used for Christus Natus Est, so each row of stitches will be worked over two rows of silver.
This in turn means that I will spend a lot of time wrangling the springy silver thread to make it lie close and straight. Even the first row was a challenge, and as I reach the core of the spool and find the thread that has been wound closely around it, I am expecting the challenge to become even more challenging!
Still, nothing easy was ever worth doing – so they say…

Covered In Silk
This second photo shows the stitching halfway along the third row of background at the base of the piece. You can see the ribbed effect is already building up, and it will create a good strong background. If I get the rest of it right, the Amulet should almost pop out of the surface at me!
I am still trying to decide how to organise my stitching of the Amulet himself, but I plan to allow the silver to show through across the entire design, spacing my silk stitches accordingly. The stitches for the design may cover two silver threads or only one, and I am going to try to space them using the original black and white photo for guidance, to create some sense of the shadows breaking up across the surface.
The Hittite Amulet – all by himself
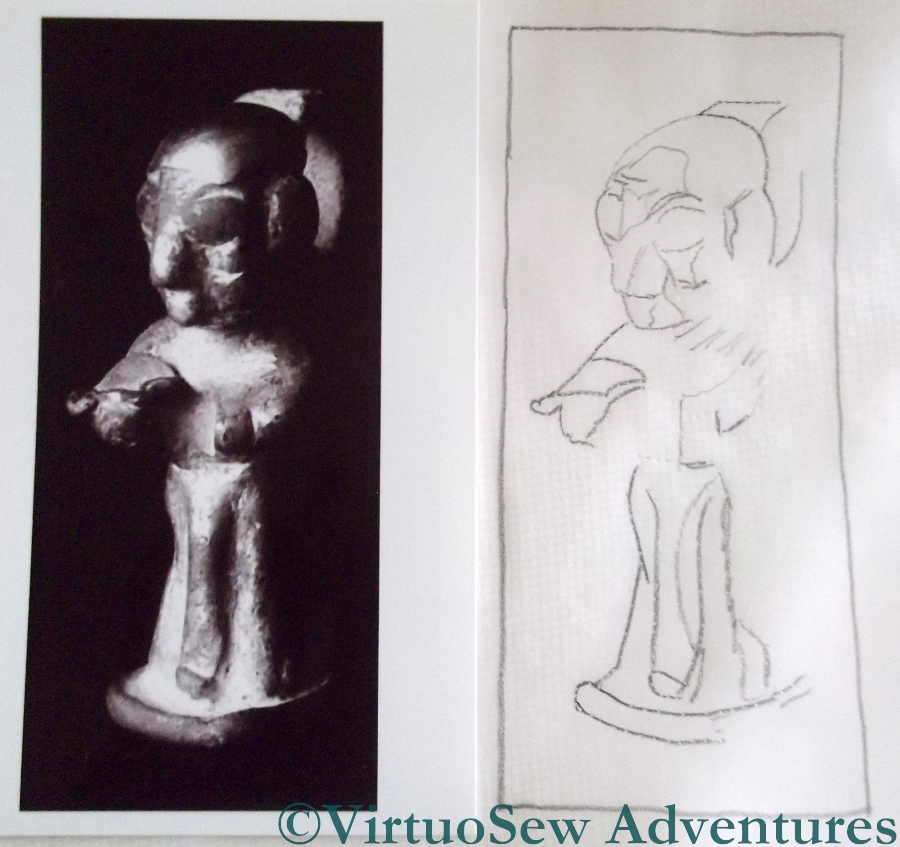
Photo And Sketch
Since I finished the Lotus Flower Tile Fragment, I haven’t had a piece for the Dreams of Amarna to work on. I’ve been thinking about several, of course, but in combination with the Online University projects I’m working on and my sudden idea for the Vision Of Placidus, none of them really caught fire.
Then I filled very dull, dreary afternoon – pouring with rain, with no light to embroider by (remind me, it’s summer here in the northern hemisphere, right?) – with the preparations for working the solo version of the Hittite Amulet. He’s going to be worked in or nué – actually argent nué, since I’ll be using a silver thread! – so the first thing to do was prepare the base fabric.
There were two photos from the EES to choose from, one of them rather moody, with the amulet seeming to look out from the black background, and the other, arguably better lit, and full face rather than three-quarter. Guess which I chose?
Yes, of course, the moody, dramatic one!
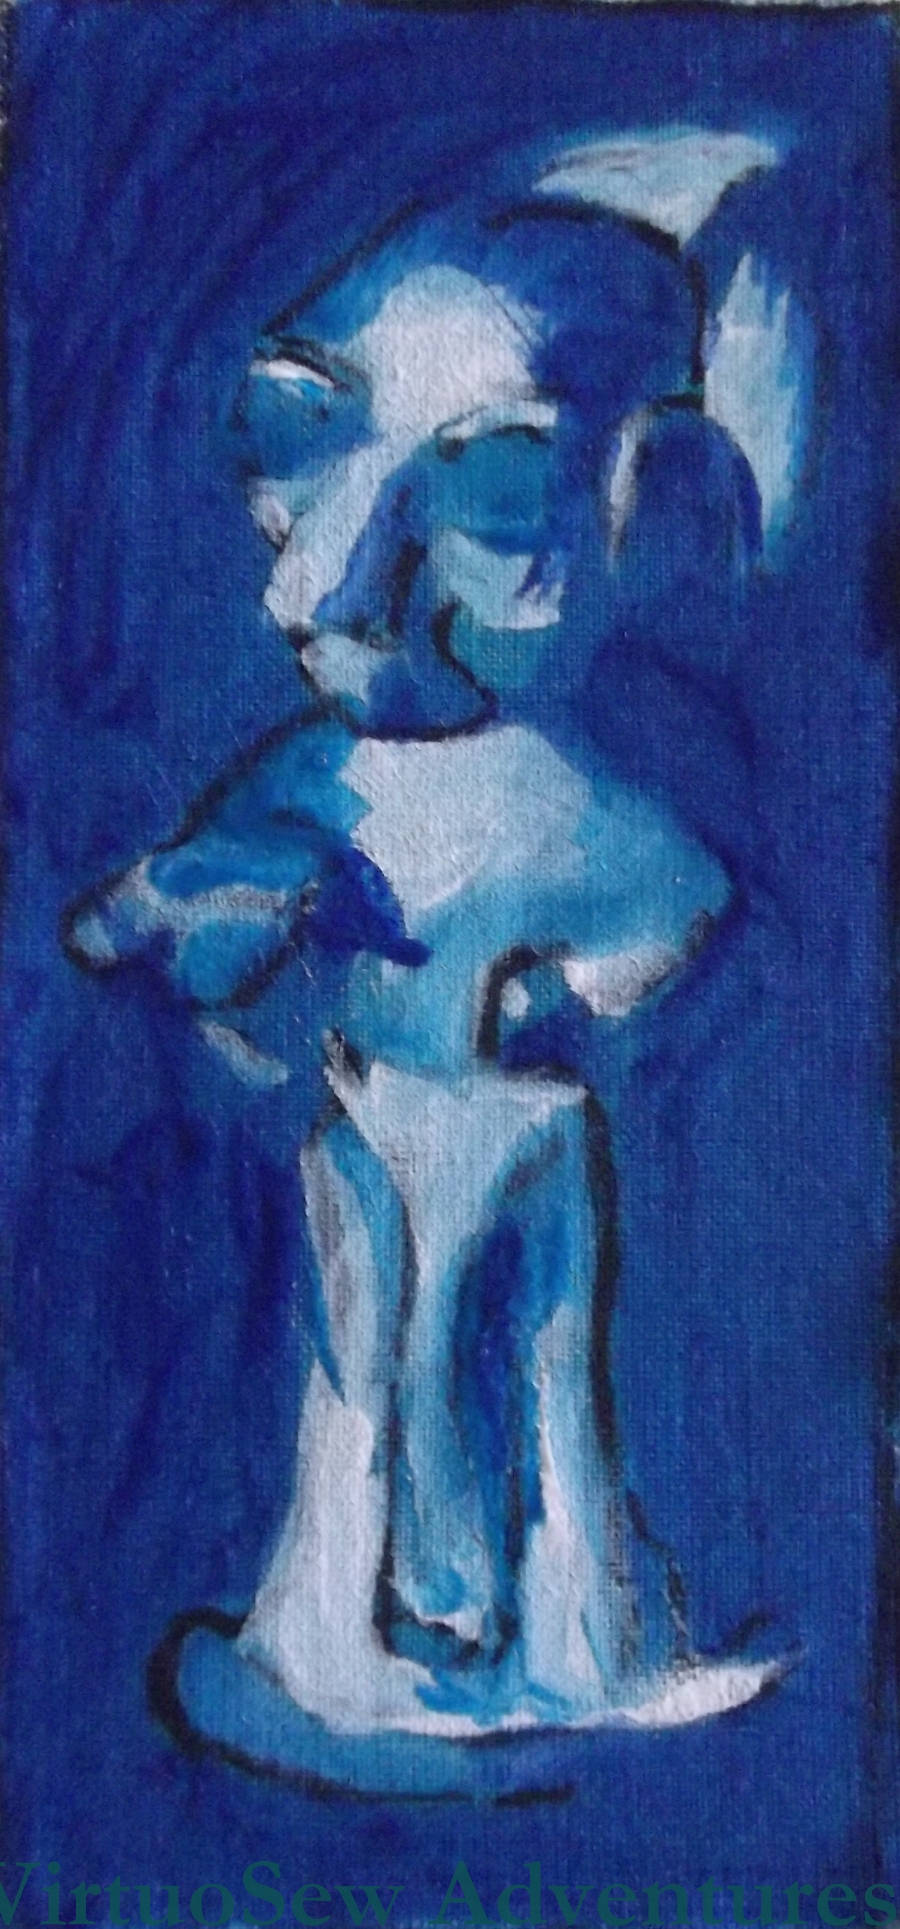
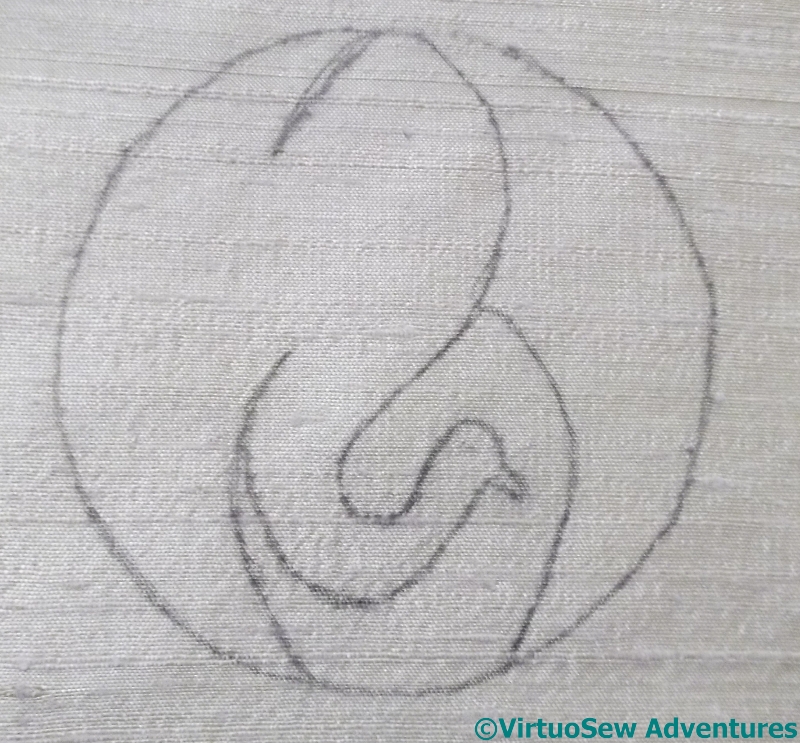
Ready To Stitch
It’s very hard to trace a picture that doesn’t show everything you know is there. You will see that the lines I’ve traced produce a sketchy effect, not complete detail. That’s because I decided to paint more of the details onto the background fabric to help guide my needle, and the lines were really only there to guide my brush!
It may seem that creating this painted panel is a lot of work that will be completely hidden, but while my other or nué panel, Christus Natus Est, had simple sweeping lines, and the coloured background was merely there to prevent cream calico from grinning through any gaps, the Hittite Amulet is a very much more intricate design. Creating my painted version putting darks and lights in the right places took immense concentration and I would hate to have to concentrate that hard on the design when the execution is going to be so challenging.
Wish me luck!
The Lotus Flowers Finished
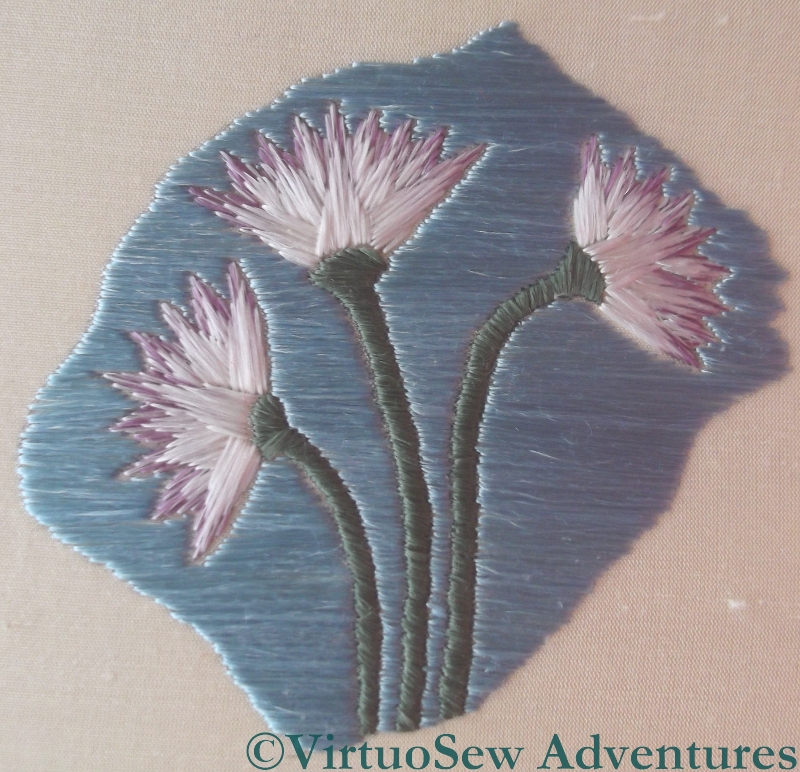
Silkwork Done
The laid silk satin stitches grew surprisingly quickly, in the end. I think of satin stitch as a very painstaking and tedious technique, but for some reason or other, I found the background of the Lotus Tile Fragment the reverse of tedious. I’m sure that the way flat silk spreads out helped with that, and likewise the increasing complication of working the satin stitches around the lotus flowers.
The horizontal stitches worked beautifully, creating the effect of a flowing stream behind the flowers. It can be hard to introduce enough movement into a design to prevent it seeming static, while at the same time avoiding any suggestion of hectic activity. In this case I think the balance between stillness and movement is reasonably well-achieved.
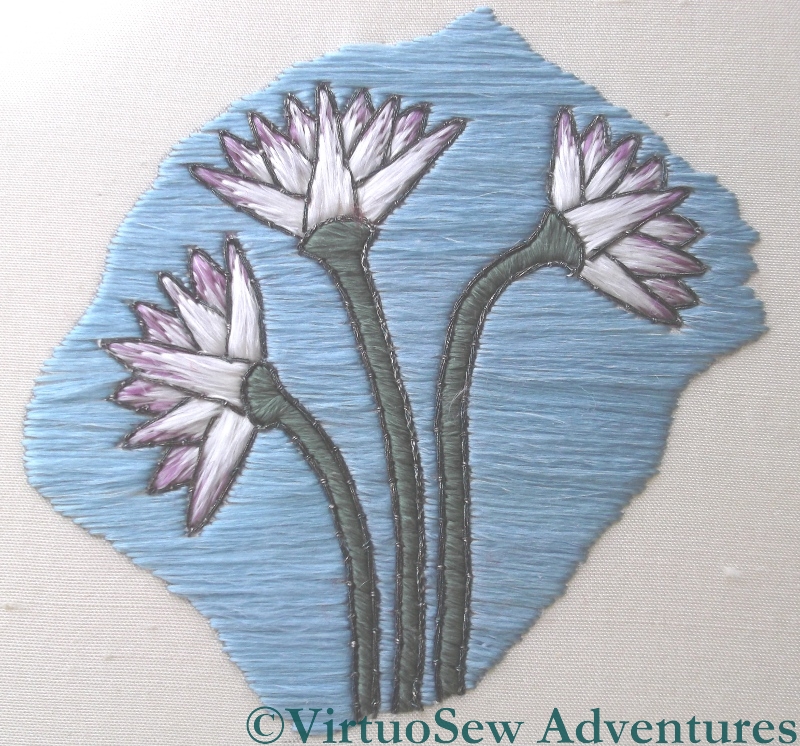
Outlining Done
Once it was done to my satisfaction, I spent a bit of time searching online for images of other Egyptian representations of Lotus Flowers dating from the Amarna period. I was a little disturbed to find that many of the photos in the search results were from this blog, which made my search a little self-referential, but in the end I decided that I should put an outline in, since most of the Egyptian images were outlined.
I was influenced in this decision by the fact that I really enjoyed stitching this little piece, and I felt that re-stitching it if the outline did not please me would be no hardship at all!
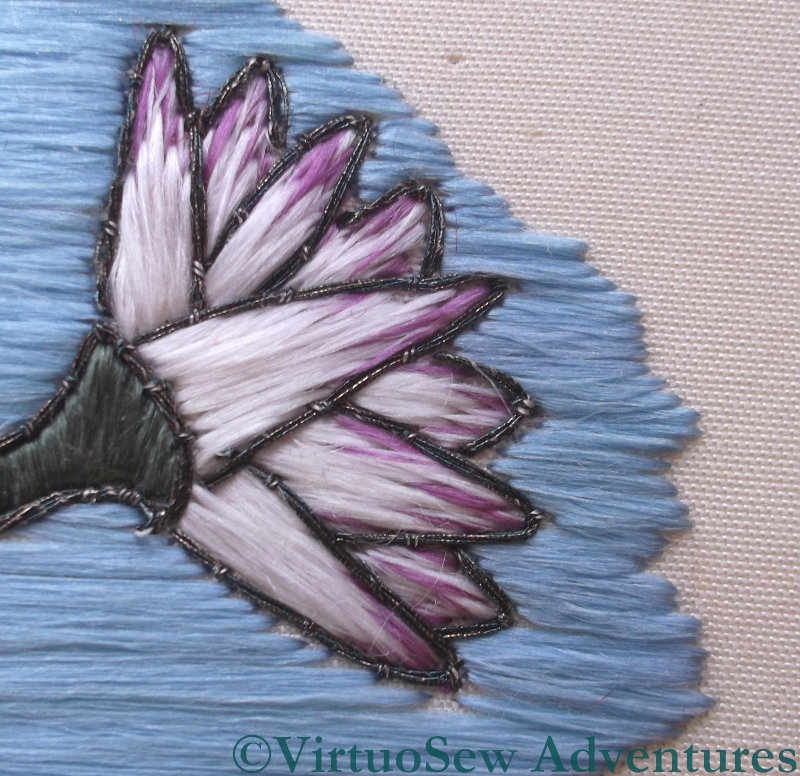
Detail of a Lotus Flower
I used a fine metallic thread, also purchased from Midori Matsushima, and couched it. For the stems I used three doubled threads and couched them – slightly twisting them – using a single doubled strand. For the flowers I used two doubled strands, couched with a single doubled strand. I’m not convinced that the different number of threads made a difference, but believe me, I won’t be unpicking it!
I’m pleased with it. The outlines do make it look a little more like some of the images I found in my search, and they will help the design to maintain its shape when it is overlaid with the gauze portrait.