Tag: Thistle Threads
Tudor and Stuart Goldwork Masterclass Stitches – Month Eight
This month Tricia’s History and Analysis section includes a description from the animator of how he approaches animating the stitches. It’s very painstaking work, and as the first thing he does is to follow the instructions just as we are, he is going to end the course with the same repertoire of exotic stitches as we have!
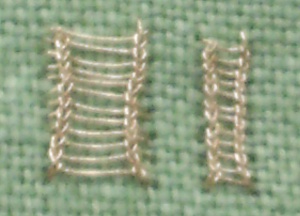
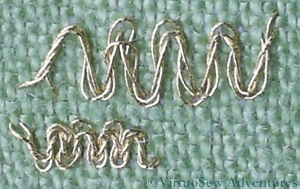
The first of this month’s stitches is Ladder stitch. Like last month’s Ceylon Stitch, this is a stitch I have worked before; in fact it’s very like Ceylon Stitch in structure as well. I can change the width of the stitch, but not the vertical scale, so my two versions here look very similar. With the rather stiff gold thread, the stitch becomes rather a trial when worked with long “rungs”, so I enjoyed it more when I worked it in a narrower space.
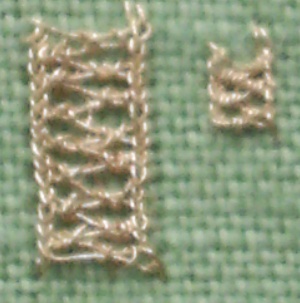
The second stitch is an embellishment of Ladder Stitch, using a ZigZag whipping. I had trouble with this stitch because I simply couldn’t bring myself to pull the whipping tight, so it tangled and tied itself up, and nearly tied me up with it. As the shorter version shows, once I sorted myself out, the stitch sorted itself out too.
My problem is that I’m very aware of the way the thread is made, and concerned that the wrapping of metallic foil will be broken if I pull too tight. It isn’t really a problem, as the overall effect of the thread usually masks any slight breaks, but try telling yourself that when you’re tangled up in an expensive thread you don’t want to waste!
Stitching a Snail for Storage
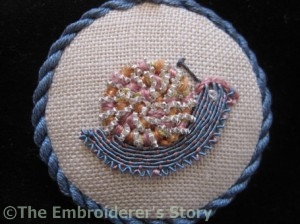
Since I am following the Tudor and Stuart Goldwork Masterclass, I receive Tricia’s Newletter, and a recent one described a plan she has to raise money for storage and display of gloves in the Museum of Costume in Bath, which she’s calling “Stitch a Snail for Storage“. It looks fascinating, so I’ve ordered one of the kits, and downloaded the instructions and printed them out.
The fundraising is about two thirds of the way to the total needed by the Bath “Museum of Costume” to rehouse the collection of embroidered gloves and gauntlets in such a way as to make it possible for embroiderers and other people interested in embellishment techniques to examine them without touching them and rishing damage to them.
Tricia’s “Needlework Nibble” will be a great way to support this while being introduced to some of the interesting threads she has developed following her research. Why don’t you give it a try?
Tudor and Stuart Goldwork Masterclass Stitches – Month Seven
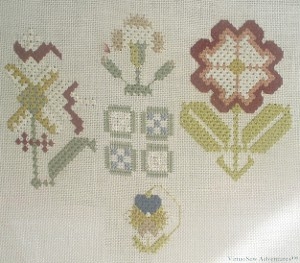
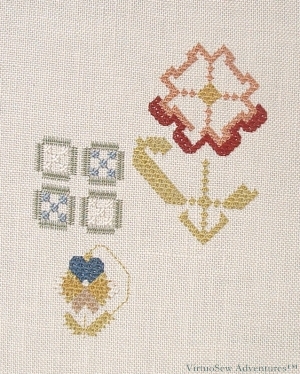
I’ve not been making as much progress on the silk work for the Spot Sampler as I would have liked, recently. Still, I have managed to have a go at the Month Seven stitches, Diagonal Half Guilloche Stitch and Ceylon Stitch. As always, I have done them at two different scales.
I’ve worked Ceylon Stitch before, although certainly not using a metallic thread. It produces something that looks a little like knitting. I suspect it will be easier if I use a stiletto to control the thread. I know I have one somewhere, so I’ll look it out before I try this one again. I think I used it as a needlelace stitch before, and that, of course, used a simple round cotton thread.
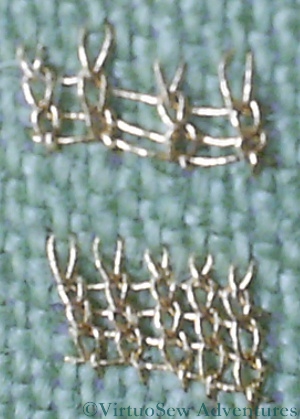
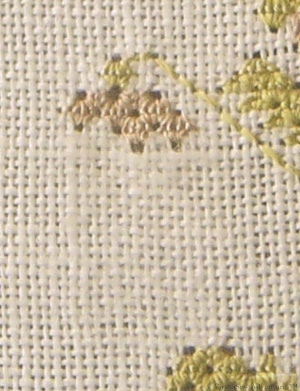
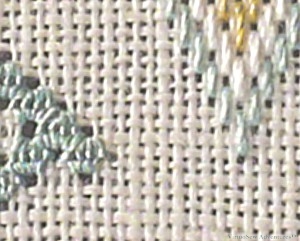
I think the Diagonal Half Guilloche Stitch has possibilities for some of my other projects. It looks very like one of the braids sometimes used to edge upholstery, and might also make a good filigree necklace for the Amarna panels. It will be important to pick the right scale of thread and fabric, as you can see in the picture here, but at least when I have been working at the large scale it has been easy to see where the needle is supposed to be. This hasn’t been one of the most complex stitches, but I’m glad that I have chosen to work practice versions of all these stitches before I work them on the sampler or the pincushions!
Floral Glove Needlecase Course Month Five
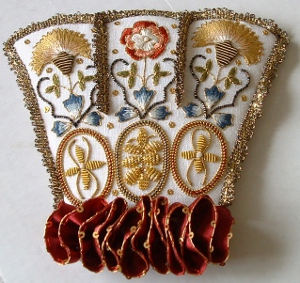
I’ve had an exasperating time with the Floral Glove Needlecase since you saw it last, what with unpicking and reinstating the gold lace (fx: growl!), and wrestling with the silk ribbon ruffle, which had to be gathered up and attached across the bottom in a sort of squiggle.
However, when I finally got all that sorted out, I screwed my courage to the sticking-point, gathered my wits, picked up my glue-pot, took a deep breath and finished assembling the separate ornamental cuff of the Floral Glove Needlecase.
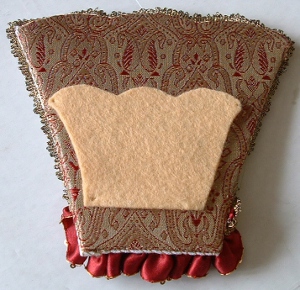
So here is the cuff lining. I know that the felt isn’t centred. I was sure that it was on the brocaded silk, but by the time I had tweaked and stretched and glued, that was the best I could do. As someone who is clumsy and awkward with glue I would have prefered a slightly wider margin of fabric around the card shape, which would have made it easier for me to handle.
The front and the back (stretched over batting, heavy interfacing, and light card) are attached to one another by overcast stitching. I used a strand of one of the silk threads from the embroidery – that seemed the best way of being consistent with the materials used.
Now, as I’ve said before, I’m not good with glue and scissors, so I was worn out when I finished, and I know it isn’t perfect, but it does look pretty good, especially from a reasonable distance!
At this point Tricia’s instructions say – I kid ye not! – “Sit back and admire!“.
So I did.
Quick update on the Spot Sampler
I miscounted some of the stitching on the central motif of the Spot Sampler we are doing in the Tudor and Stuart Goldwork Masterclass – cue much muttering and swearing – so when I had convinced myself that I really did need to unpick it and re-stitch it, I was rather anxious. Some fabrics never recover from the first stitching, and I felt that there was a very good chance that the pulled Queen stitches would be pretty much impossible to recover. Furthermore, Queen stitch is the most difficult to unpick that I have ever had to wrestle with. Especially at this scale. I ended up using a laying tool and a seam ripper, with my heart in my mouth in case I cut something I shouldn’t.
And yet look at it. It’s hard to tell where the stitching was, and even unpicking with the laying tool hasn’t done much harm. I’m very impressed, and greatly relieved.
I also noticed something in stitching the beginning of the bargello section I started while I was thinking about restitching the central motif. The lowest row of the bargello section and the Queen stitches just beside it are worked with the same colour. The differing light reflectance on a straight and uninterrupted stitch, in comparison with an angled stitch which is interrupted by a tyeing stitch has actually made about two or three tones difference in the colour as it appears. I knew about this effect, but it is the first time I’ve seen it demonstrated quite so clearly.
This sampler is teaching me a good many things in addition to the stitches!
Floral Glove Needlecase – Second Stage of Finishing
There is a sparkly ruffle between the cuff and the hand on the Floral Glove Needlecase, and of course we have to make it ourselves. You can’t go to your local needlework shop and say “Half a yard of Elizabethan glove trimming, please” with any prospect of success!
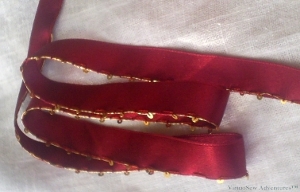
So the trim is composed of a length of double-sided silk ribbon, with Gold Twist and spangles whip-stitched down one edge.
The silk ribbon is wonderful stuff to play with, smooth and supple, and with just enough body not to flop. The idea is to ensure that the spangles all end up on the same side of the ribbon as each other and as the Gold Twist, and I think I managed it (not without the occasional tweak!).
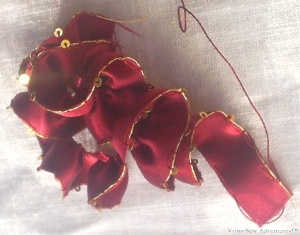
Then, we run a gathering thread down the other side and pull it up to make a ruffle. It looks wonderfully exuberant, doesn’t it, and I haven’t even set it into the shape it needs to fill on the project. Tricia suggests leaving that stage until the various unseen bits of backing are all assembled and shaped, and since I need to buy some fabric glue before moving to that stage, that is exactly what I am going to do.
Completing this fairly simple task took me most of an afternoon. But then, no one ever said embroidery was quick!
Floral Glove Needlecase – beginning the Finishing Process
I’ve been prevaricating on the finishing process for the Floral Glove Needlecase, because it will involve glue, and I’m clumsy with that sort of thing.
I’ve worked very hard on the embroidery, I’m quite pleased with most of it, and I don’t want to fall at the last hurdle!
Finally, however (largely because I’ve been blogging about it and felt I should finish what I started!) I’ve screwed my courage to the sticking point, printed out the instructions and promised myself I would read everything twice before starting any stage of it.
That’s one of the effects I hoped blogging would achieve – providing encouragement to finish things properly. So I think we can count that as a success, can’t we!
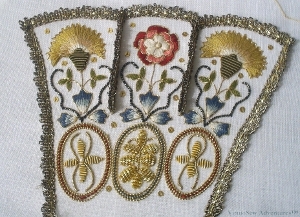
What you see here is stage one of the fifth month’s instructions – adding the gold lace to the edge and around the tabs. This has actually been fairly simple, in that the lace has loops on the straight edge, and the whole thing is done with a single length. No joining ends to worry about, just making sure that the lace is neatly attached along the line, carefully controlled at the corners, and back-to-back on the lines separating the tabs.
I’m pleased with this. In real life it has a lovely sparkle and – yet again – the addition of further embellishment seems to have brought it to life even more.
Tudor and Stuart Goldwork Master Class – Progress on the Silkwork
I’m still working away at the silkwork on the sampler. It has been so grey and miserable recently that the light has been poor and it has been difficult to make any progress at all.
Some time ago I bought a daylight lamp to use in the evenings or when the natural light is poor. It works well for some projects, but not this one. I think part of the problem is that it glares on both the fabric and the magnifier, and believe me, I’m not going to work this piece without a magnifier!
So I can only work on this when there is good natural light, but not glaring sunshine, of which there has been all too little this summer. I’m also careful not to strain my eyes, so I work maybe two lengths each time I sit down, but no more.
I’m working one motif at a time, and letting it grow from the nearest point at which it approaches a previously finished one. That means I have relatively little counting to do, although sometimes I start a motif somewhere a little odd. The one I am working on at the moment started from the tip of the large leaf. When I do have to count, I count in fours – that is, the width of one Queen Stitch. I can almost do that by eye, and if I do miscount, it’s easy to double check.
The stitch produces a very pleasing texture on the fabric, and because it is a pulled stitch – at least on this fabric – there is a light and lacy look to it. If only I had better light I would be enjoying this even more!
More on the Masterclass
I’m making progress on the Tudor and Stuart Goldwork Masterclass. As I mentioned, I was a little anxious when I realised how much counted work was involved, but I am developing techniques to cope. Since the designs are large and simple, rather than being full of subtle shading, it is actually fairly easy to decide by eye where the next stitch goes. I count twice to place a new motif correctly, but then just do what seems right.
The other decision I have made is to help convince myself I am making progress – so here, instead of finishing the leaves, I’ve started on the flower. It gives me a better idea of the extent of the design – this is the top right hand corner – and I needed the reassurance!
Megan has produced a fantastic round-up of links and resources about Queen Stitch over at Elmsley Rose – well worth following up, as each different description contributes to developing a technique for working the stitch.
I am planning to set up another frame with a piece of cloth to practice the goldwork stitches on, since some of them will need it, but for the moment I am trying to apply some discipline to my stitchery…!
Floral Glove Needlecase – The Finishing Kit
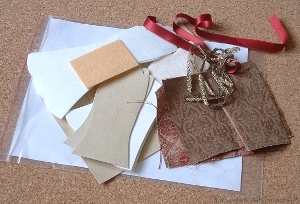
Another gentle thump through the letterbox and the Finishing Kit for the Floral Glove Needlecase has arrived.
Neatly die-cut pieces of card, interfacing, and fabric, lengths of ribbon and lace… It all looks rather promising, doesn’t it!
The first thing I need to do (I’ve looked at the instructions online but not quite got as far as printing them out) is to embellish the ribbon with gold thread and spangles. I am learning from this project that the layering of intricate detail and embellishment can be hugely successful; even when you think something is as ornate as it needs to be, sometimes it looks better with more.
That doesn’t work with fashion – I remember coming across this some years ago. Even now I survey myself critically in the mirror before going out, to see whether I need to remove an accessory. And this is a link to the picture referred to in the post.

