Tag: Thistle Threads
Glittering Nightcap – Month Three Done
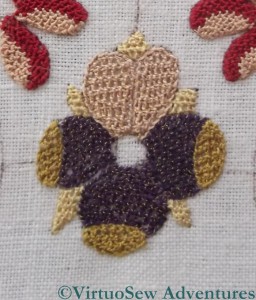
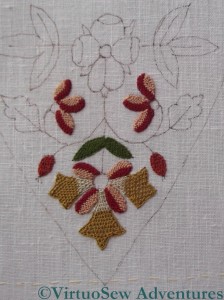
This month, because I’m working the main body of the cap first and then intend to turn over and work the rim, has been a little thin of activity. I’ve really no excuse for it taking so long except that I’ve become very taken up with the Dreams of Amarna. The work on the main part of the cap this month has been only two pansies, worked in detached buttonhole stitch using the Gilt Sylke Twist, with straw-coloured calyxes worked in Soie Perlee.
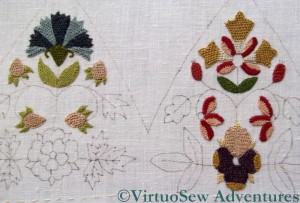
The other half of Month Three – two pomegranates on the rim – will have to wait until I turn the fabric over. Next month’s activity involves two Tudor Roses and a positive plethora of different leaves in various combinations of Soie Perlee.
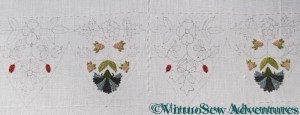
This picture shows one of the two pairs of sections that will make up the finished Nightcap. As you can see, there are still large gaps in the pattern, but it is gradually filling in, and Month Four actually completes the embroidery. Months Five and Six concern the finishing of the embroidery to create the nightcap and the silk-brocaded stand for it.
More on the Crock of Gold Hoard
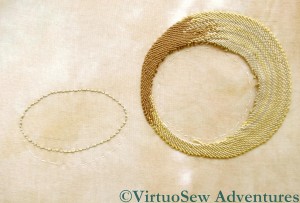
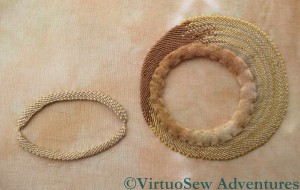
I’ve been making progress on the Crock of Gold Hoard. Quite a lot of progress, in fact. Working spiral trellis stitch in such a way as to leave an asymmetric gap in the middle was a rather odd experience! If you click on the picture to look at it at full size you will see that some of the crossover points where I changed colour break the spiral a little, but in fact I think the effect is working reasonably well.
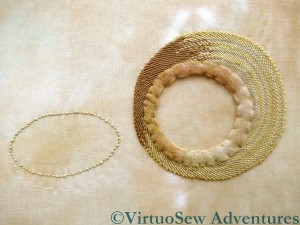
I decided not to pad this version of the Crock – although who knows what other versions I may try? – but I did feel that padding the rim would help to put the chipwork in the right context when I do it. I happened to have some variegated felt that toned nicely, so I’ve cut two hoops of it and stacked them to form the padding for the rim. It has the added benefit of concealing the raggy edges of the spiral trellis stitch, and should help the rim to stand out a little against the main body of the Crock.
What I’ve yet to decide is how I shall work the rim, so for now I have set the problem to one side while I work on the dish that was used for a lid. In this case the spiral trellis is worked on the inside of one half of the backstitch foundation and the outside of the other. This may seem another eccentric variation, but bear with me – I have my reasons! I want to maintain the continuous slant in a single direction, which I feel better reflects the texture of a hand made pot, whereas the zig zag effect of trellis worked back and forth across a shape (look at any close up in Month Two of the Glittering NightCap) doesn’t feel quite the right. I grant you that it’s another tiny detail that may not really effect the overall impression, but if I’ve learnt anything in the last few years from Thistle Threads and others, it’s that small details do count.
The Glittering Nightcap – Month Two Complete
So, here we are, more progress on the Glittering Nightcap. It still looks spotty, but rather less so, I’m happy to say!
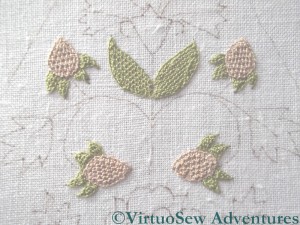
Here is a close up to show you what has been added in Month Two in more detail, and you can click on the picture to enlarge it further. The flower is apparently a honeysuckle (botanical realism wasn’t one of the artistic preoccupations of the period!), and is stitched in two shades of Gilt Sylke Twist, in detached buttonhole stitch. All of the pink and red buds are worked in detached trellis stitch in the soie perlee. In both these cases there is nothing complicated about changing colours – it is simply a matter of starting the new colour with a new row of stitches. It does mean that there seem to be ever more threads to finish off at the end of a stitching session, which is when I prefer to do it, because that means that when I sit down to start again everything is clear and tidy, and there is nothing to tangle my next set of stitches.
Working the trellis stitch involved some rather uncomfortable contortions in order to work the stitches in the directions described in the instructions. The annotated sketch on the right shows the stitch directions spiralling around the centre of the flower. The whole thing is mounted in a rectangular frame about twenty inches across – sometimes there is a lot of fabric and frame between me and the tiny petal I’m stitching.
That’s the other thing to remember – everything is very small. In a way this is not a problem, because even though the stitches are tiny the shapes do fill fairly quickly. If I have a good light, and a tranquil mind, I can make quite a bit of progress in a single afternoon.
Golden Accessories – more on the Acorn
I need to learn to pay attention to the instructions.
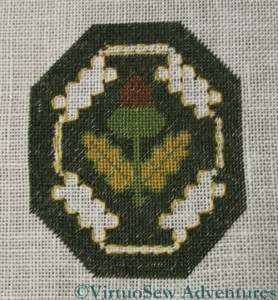
Still, before we get to that – I’ve finished the tent stitch on the Golden Acorn!
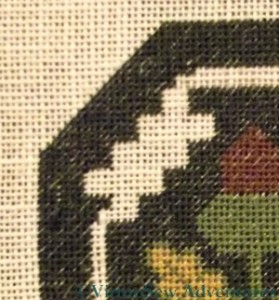
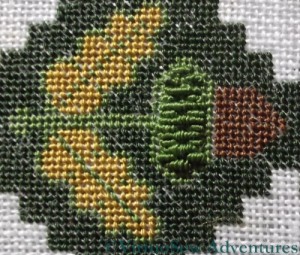
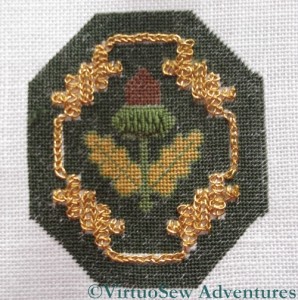
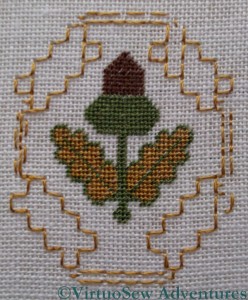
Here you see it, first with the outlining for the strapwork still in place, and then in close-up with the outlining removed. That was exciting at times – the gold thread had been caught in a few places by the green.
Next, there was a pattern of bullion knots to create an interesting effect on the cup of the acorn. Several different lengths interlock here. I’m not particularly keen on Bullion Knots, but I’m glad I included them – I think they look really good.
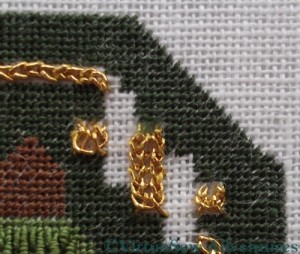
The beginning of the strapwork was a row of Broad Chain Stitch in each of the narrow channels left in the green background.
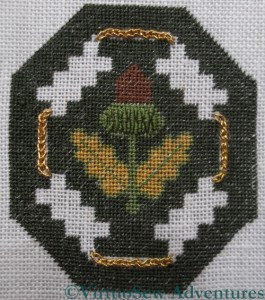
All is still well in the first of these pictures, where I’ve put in the Ceylon Stitch strapwork in gold.
Then, concentrating painfully on my Braid Stitch I went on to add the second lot of straps, and didn’t stop to think until I had finished all four corners. At which point I looked at it and thought it looked rather clunky and that it really didn’t have the delicacy or charm I’ve come to expect from Tricia’s designs.
So then (not soon enough!) I went to have a look at the instructions.
The Braid Stitch should be in silver.
Out it all came.
That’ll larn me!
(“Larn” is a dialect word, so what I mean is “That’ll teach me!”)
Glittering Gentleman’s Nightcap – Month One Stitching
You may recall that I commented in my last post about the Nightcap that it looked very “bitty” because each flower, leaf and bud was going to be done before the stems. This view of the whole piece, with all of Month 1 finished, shows precisely what I mean. If you click on the photo to the left you will be able to see a larger version of it, with the blurred copyright notice unblurred (something strange happened there!).
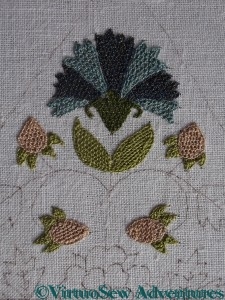
There are two of these flowers worked in two shades of blue, using detached buttonhole stitch in Gilt Silke Twist. Some of it is tricky because I want to change the orientation of the fabric relative to me, which is impossible because it’s framed up as an entire rectangle. Since I really don’t want to crush work already done, I can’t put each element in a hoop, so I’m occasionally having to sit in a rather contorted fashion to to tackle some of the sections.
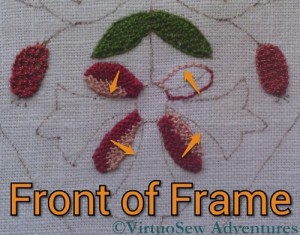
The leaves and strawberry calyxes are in Soie Perlee, which is a joy to use, supple, smooth and strong. That said, there’s something distinctly odd about the right hand leaf in this detail photograph. It seems almost as though the stitching has pleated or bunched up on itself. One of the possibilities is that I was working this leaf before I bought my Necessaire stand, and somehow I tied myself in knots because I was balancing the frame on the windowsill as well; it might be something to do with the angle of the stitch relative to the stitcher; or I might simply have lost concentration.
Oh, and when I say “All of Month One”, that’s a slight exaggeration. Because of the structure of the Nightcap, there is a band of stitching on the back, which will form a brim or browband. I’m going to do that last, so that I don’t spend too much time changing the orientation of the fabric in the frame. So what I really mean is “All of Month One on the front”…
Progress on the Glittering Gentleman’s Nightcap
As you might have guessed, once I got started, I wanted to keep going!
However, detached buttonhole stitch is a very time consuming stitch, and I’ve been warned by comments in emails that the Gilt Sylke Twist, undeniably gorgeous though it is, can be a bit trying to stitch with. So I have been working quite hard to remind myself it is not a race, and that doing as much as I feel up to at any one time is perfectly acceptable!
I found myself struggling with the Millenium frame on my existing frame stand, which was too flimsy for the breadth and weight of the frame, so after some weeks I decide to invest in the Necessaire Floor Stand that goes with it. After only two stitching sessions, I love it. Sturdy and well made, it doesn’t sag under the weight of the frame, there is a place for my magnifier to attach, and there’s even a hook for a pair of scissors.
I haven’t yet finished Month One of the instructions, so what you are seeing is an intermediate stage. At the moment, as you will see from the “Progress So Far” it’s looking very spotty, because there are such acres of linen between the stitched motifs. It can be a little disheartening to slave for hours and find that the odd couple of leaves has made very little difference to the overall impression. This is a problem I had with the Piano Shawl, but in that case I was able to solve the problem very simply by stitching in the stems. I don’t want to do that here, because the silk thread would catch on the gold thread of the stems and be spoiled. So I will simply have to be patient and find some other way of highlighting my progress.
You will notice that there is some peculiarity about the right-hand leaf in the detail picture. I’m not quite sure what happened there – I think it was in the period of struggle before I bought my Necessaire – but I’m not going to take it out until Month One is complete. I want to have a clear sense of progress before I start snipping things out!
Beginning the Glittering Gentleman’s Nightcap
I’ve been looking at the kit of materials for the Glittering Gentleman’s Nightcap Course for quite some time, but since I received the finishing kit I’ve finally decided to get going.
There was quite a bit of preparation to do. There are lines of basting to help with finishing the piece when the stitching is done, and I’ve added fabric at the top and bottom, and bound the sides, to make framing up a bit easier. I invested in a Millenium frame for this project, and I wanted to be sure that I would have enough fabric at the top and bottom to work with the attachment system.
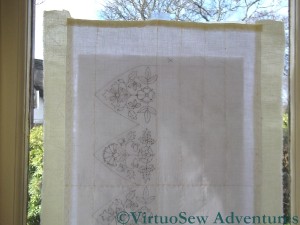
I don’t have anything that resembles a light-table, so I had to improvise. The tracing and the fabric have both been taped to a pane of the only unleaded window in the house, and I spent a careful hour or so using the Pigma pen included in the kit to trace over the pattern onto the fabric. Bear in mind, if you find yourselves applying this method – it’s a most unnatural position to be drawing in, and you will find your arm aching and your hand cramping, if you aren’t careful.
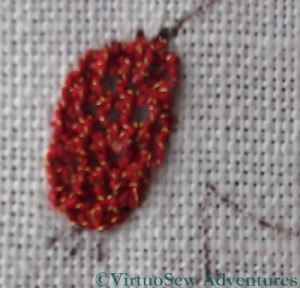
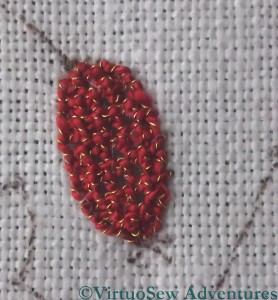
I also did some stitching. These are my first two attempts at Detached Buttonhole Stitch using the Gilt Sylke Twist.
Which is just as hair-raising as anything you might have read will have lead you to expect. It’s very lively and springy, and the gold spiral does sometimes break or scrunch up along the silk.
All that said, perhaps because I was prepared for it, I did not find it as troublesome as I feared, and the second bud is a marked improvement on the first, so I think I can be very pleased!
Golden Accessories – Progress and preparation for the goldwork.
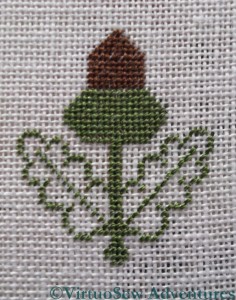
The Acorn itself was finished rapidly, and looks pretty good. For some reason I found it easier, with the second leaf, to work by reference to the first leaf, rather than the chart. You would expect that that would lead to the result being asymmetrical, but I think removing the extra step of checking with the chart was a good idea!
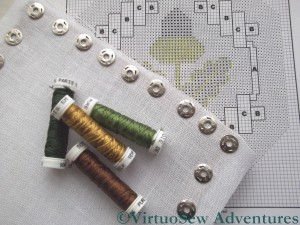
The next stage is to work the background, leaving space for the goldwork stitches that will embellish it. I really do not want to have to refer to the chart with every line of tent stitch, so I’ve taken some time to outline the placement of the goldwork stitches in back stitch. Doing this has nearly driven me absolutely mad, but it will means that I will be able to count the background from the edge of the goldwork rather than from the acorn, which will be ever so much easier.
The background is dark green tent stitch, and I will next post about this when I’ve finished it, and started the goldwork stitches. It will take a while. There is only so much dark green I can cope with at any one time!
Glittering Gentleman’s Nightcap Finishing Kit
I’m really not keeping up at all, am I?
I’ve not even started on the Glittering Gentleman’s Nightcap course from Thistle Threads, and then the finishing kit drops through the letterbox, rather rubbing my nose in the fact.
However – now I’ve finished the Masterclass, I can get started – only about four months late!
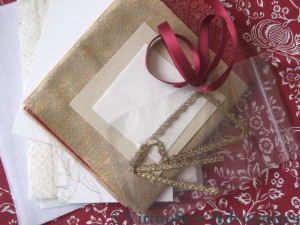
The package contained more mouthwatering silk brocades (one creamy-beige, one burgundy), more of that lovely silk ribbon (like the ribbon on the Floral Glove Needlecase) and gold lace (ditto), together with assorted pieces of stiffening and padding, and – a sort of bonus – a canvas shopping bag printed with a suitably period pattern.
Time I got started on the embroidery, then…
Beginning on the Golden Accessories
The Golden Accessories is a set of bonus instructions for three needlework accessories which was supplied with the Tudor and Stuart Masterclass, and now that the Petite Pincushion is finished, I’m starting on the first of them.
The silk work seems to be entirely in tent stitch, so, although the fabric is very fine, it will be simple enough to work. The cold snap at the beginning of the year has roughened my hands, so the silk sometimes catches a little – but in fact, surprisingly little, and at least the wristwarmers make stitching possible at all!
I’ve been fortunate, since the weather has been kind, giving me good light to stitch by. So good, in fact, that the first two colours seemed to be stitched in no time at all, leaving me positively flabberghasted by my progress. Strange to say, although tent stitch has never been a favourite of mine, I’ve thoroughly enjoyed starting work on the Acorn – I think it is something to do with the silk thread, which is just gorgeous to work with!

