Two Thirds Done
We interrupt our normal programming…. to bring you your first sight of the whole Cushion.
Probably your only sight until I take it off the stretchers, too. As it turned out, getting the canvas rolled up neatly again, under sufficient tension, was really quite a task, involving two people and much changing of minds, as well as many rollings and unrollings. Furthermore, since the rollers are permanently set in their sockets, it won’t be possible to show the whole thing without taking it off the stretchers. I shan’t be doing that, because I really don’t enjoy the mounting process!
However, I can report that I am really very pleased with how it is going. I think I need another set of greens for the next section, since there seems to be a rhythm of sorts going on there. I certainly need something bright, with a bit of punch and impact. I like the last two sections — they work well together – but they are beginning to look a little too well behaved. It’s not quite as riotous as I was hoping…

Moorish Stitch
Section Nine of the Crazy Canvaswork Cushion is worked in Moorish Stitch, a diagonal stitch to set against the crossed stitch of the previous patch.
There is one heathered thread in this pattern – the solitary tent stitch vertically separating the short dashes. That’s turned out a bit too subtle, but it does help to maintain the difference between Moorish Stitch and Jacquard Stitch, for example.

Section Nine
This patch took longer to do because as the weather warms up, wool becomes a less appealing material to work in. In addition, the main, peach wool proved to be rather harder to separate that I expected. It’s labelled Paterna, and should be exactly the same as all the other threads, but it was harder to strand, and has slightly less sheen.
Now I need to pick a stitch – I think it should be a straight stitch, with pattern that runs horizontally – and then pick the colours for Section Ten…

Rose Outlined
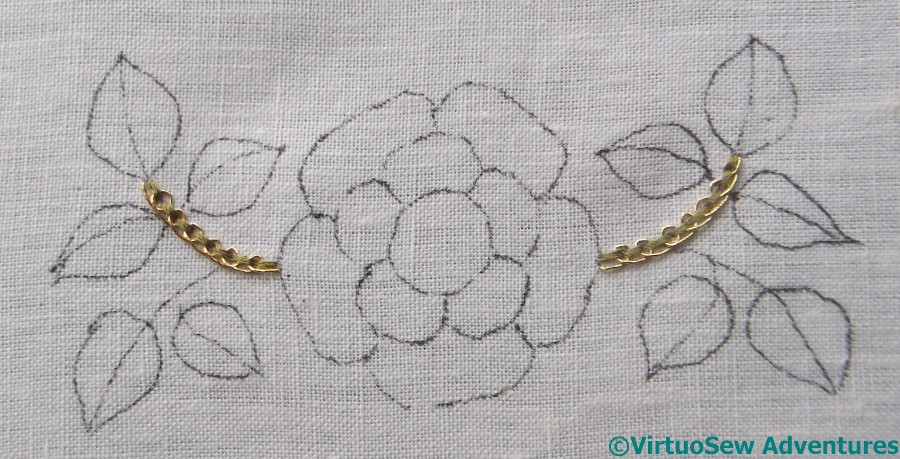
At this point, the challenges abruptly increased… The petals are to be filled with Up and Down Buttonhole Stitch With Return (which is one of the stitches from the Tudor and Stuart Goldwork Masterclass), but in a combination of metal and silk threads. The outer petals will be red and gold and the inner petals white and silver, and we are explicitly instructed to finish the back stitching (both white and red) before tackling the filling.

Detail Of Red Petal
The red silk is used for the return – the straight bar stitch – and the gold for the up and down buttonhole stitch. This means, of course, that there are long stitches on the back of the fabric, but it also creates a rather lovely chequerboard effect of gold and red. Up and down buttonhole stitch is one of my favourites, but as a detached stitch it offers a few challenges, especially in the gold thread. I was very glad to be working this in a frame resting on a stand, as there were times when both hands, and one of my bone stilettos, were needed to bring the gold thread under control.
I’ve noticed that in the metal thread, the stitch is squarer than in the silk, which compressed itself into a much denser fabric. I suppose this adds to the contrast in textures, but it will be interesting to see whether it becomes more even as I become more experienced with it!

Red Petals Complete
I’m rather pleased with it so far. In a couple of the petals, the rows somehow are not as straight as they should be – I’m not quite sure how that happened – but, if you click on the image you will see the larger version, and I think it shows evidence of improvement in technique. Which, after all, is the whole point of my following these courses…!

The Finished Circle Skirt – Perhaps!
This seems a good enough point at which to say the Circle Skirt is finished, although I may tweak and titivate further next winter.
Click on the picture to zoom in..
Some of the circles have been needlefelted, to greater and lesser extents, to help them to stay in place. Now I have my embellisher, I think that the next time I try this sort of thing, I will needlefelt very thoroughly, to try to help blend in the edges a little more. Once I have tried both ways I will feel that I am beginning to gain an understanding of how the embellisher affects the handle of the the fabric. I already know that it does, of course, but now I need to learn how to predict the effect and allow for it.
The skirt is now much more useful and wearable than it was. Unembellished, it was a strange light greyish colour that seemed just slightly “off” with everything I owned. Now, however, the burgundies, reds and greens tie in nicely with an assortment of tops, and the way the embellishment shrinks around the sides to the back helps to emphasize the kick-flare at the back.
In the right company, it’s a fabulous conversation starter, and it’s a wearable sampler as well. I’m rather looking forward to wearing it at the Knitting and Stitching Show in Harrogate in November!

Tudor Rose – First Stage
Having finished the embroidery on the Glittering Nightcap – even if I haven’t assembled it yet – I decided that I would allow myself to begin on the Tudor Rose. The goal of this course is to introduce stitches and effects that combine silk and metal thread – in the same stitch, not in the same thread – and I am hoping that it will give me ideas for tackling representations of ancient Egyptian jewellery for the Dreams of Amarna.

Interlaced Back Stitch
The first element is a fairly simple one, in effect a version of Pekinese Stitch, but with three rows of back stitch for the base, and a metal thread used for the interlacing. The challenge here is in making sure that the silk thread is sufficiently loosely stitched to make the interlacing possible, without being so loosely stitched that nothing stays in its’ place. Since the metal thread structure is of a core wrapped around with a fine film, when the thread is bent, the film sometimes stands away from the core, catching on the silk. Another key for Tricia in this course – as in fact in all her courses – is learning to be aware of the use to which a particular thread was intended to be put. We need not restrict ourselves to that use, but we do need to be aware of it!

First Two Leaves
I rather suspect Tricia of letting us in gently, here, because the next element she describes is also fairly simple. The leaves are outlined in reverse chain stitch, in silk, and then filled using alternating rows of reverse chain in gold and in silk.
I hasten to add I have no objection to being let in gently – I’ve looked at the instructions for some of the later elements and rather expect a deal of unpicking to happen, so I’ve been able to enjoy handling the silk threads, which are quite heavy, but soft and “lofty” so they don’t punish the fabric unduly. If you look closely at this photo you will see that the olive green used for the stem is slightly thinner than the more emerald green thread used for the leaves. The weight matches nicely with the gold thread, so the more complicated elements that are coming up should look well balanced.

Crested Chain Stitch
I managed some really close close-ups here! This is the Crested Chain Stitch on one of the small circles on the back of the skirt, on the flaring panels.
The thread is a very ordinary stranded cotton, used straight off the skein – although as you can see, a couple of strands are making a bid for freedom, even so!
This picture also gives you a sight of the rainbow of colours involved in the tweed fabric I used for this particular circle – isn’t it lovely to see!

Trailing Spiral
The trailing spiral is high up on the front of the skirt, off to one side, and it was – in spite of the order of its appearance – one of the earliest elements which trailed off the circle and onto the fabric. I thought this would turn out to be quite important, to help link the various materials and create a cohesive whole. I had to work the spiral twice because the first time it barely showed at all. I’m all for the painter’s technique of “lost and found edges”, but there has to be something to find!
The purple chain stitch is there purely to make sure of the edges. If I had already bought the embellisher, I might have simply used that, very heavily, first.

Chainette Spiral
I love using rayon chainettes in this sort of experimental embellishment. As a one-time specialist in the industrial production of “novelty” yarns, I have a sentimental attachment to chainettes, chenilles, and eyelash yarns.
This particular chainette was striped, which echoed the twill weave of the tweed very nicely. It was also a real trial to stitch with – hence the simple running stitch. I simply didn’t have the energy for anything else..

Progress On The Hittite Amulet
It is months since you last saw the Hittite Amulet. I put him away in a boxfile before Christmas and refused to get him out again until the embroidery on the Glittering Nightcap was finished.
Of course, it takes a while to gather ones’ wits, and restore the “flow” of a piece like thisl. Since there are two alternating tasks – laying the silver thread and then covering it with silk as appropriate – it is hard to develop a sense of momentum. If I succeed, I may find he gallops away with me – which would be gratifying, because I have a lot more ideas for Dreams of Amarna pieces that I want out of my head and onto fabric!

Oblique View
I’ve tautened the fabric again, and I am trying hard to remember not to let the lines of couching sag in the middle. Sometimes I forget and stitch too tightly, but usually only for one row, so the situation does not get out of hand!
This close-up, oblique view, gives you a sense of the ribbed, “grosgrain” type effect of the background, and the speckling of stitches across the Amulet himself that give the light and shade.
I really think it’s working!
The pictures in this post link to some close-ups I find positively terrifying. It’s astonishing to think that not so long ago I could never have taken a shot like these without buying some pretty serious equipment. I spent some time picking my digicam, but there is absolutely nothing special about it, and yet…!
-

-
DBSIntoChainOnCrown
-

-
BorderedCordedOnBrim
Even looking at the real thing it is hard to see details. The eye tends to be overwhelmed by the glitter – which is very useful if there are elements one would prefer others not noticed, but positively counter productive if the aim is to analyse the techniques.
-

-
SilkDBSOnCrown
-

-
SilkDBSOnBrim
I am trying to compare and assess the differences between the Detached Buttonhole Stitch with Return worked into Chain Stitch, which is what I did on the Crown of the Nightcap with the Bordered Detached Buttonhole Stitch with Return, which is what I used on the Brim.
In the case of the silk used for the leaves, one of the reasons the stitching on the crown appears loose and floppy compared with the stitching on the brim is that in the latter case I decided not to heather my threads.
-

-
PansyOnCrown
-

-
PansyOnBrim
I had the impression while I was stitching that the stitching on the Brim was ending up neater and tighter than the stitching on the Crown. Looking at these photos I still can’t decide whether I was right or not!
-

-
CarnationOnCrown
-

-
CarnationOnBrim
Maybe in some cases it is. Maybe when the whole thing is made up and I can get the Crown and the Brim in a single photograph, I might be able to come to a decision!

Blanket Stitch Wheel
I’ve recently bought myself an embellisher, and this is one of the circles I’ve used it on. The stitching is a simple blanket stitch wheel, which some small straight stitches between the spokes and French knots on the skirt fabric. The thread is wool, so I thought this one might be a good candidate. It has had the effect of making the stitches seem much more part of the tweed circle – almost drawn or painted on. In turn, that helps the French knots to seem a little more textural.

Change In Texture
Learning to use the embellisher – and in particular, how soon to stop! – is going to prove interesting. Here you can see that there is a less fuzzy texture at the centre of this tweed circle. That section has been more heavily treated with the embellisher. This was quite deliberate, because the very free ornamentation on this skirt allows me to experiment, and one thing I would like to know is – will this change in texture be permanent, or will this fabric become fuzzy again as the skirt is worn?

Couched Bouclé
In this case, I’m not sure I can even distinguish the effects of the embellisher! I couched a bouclé thread over the top of the tweed in this case, then ran the embellisher over the tweed and bouclé at random. There is extensive scope for investigation and experimentation here..
Incidentally, for those who’ve not heard of one before – an embellisher is something like a sewing machine, but it replaces the needle and thread with an assembly of barbed needle-felting needles. The barbs entangle the fibres of the fabric, creating new textures and joining the fabrics without stitching. So far I’ve only had a chance to experiment a little, but I think it might be a very useful tool when I start work on the Vision of Placidus!

Tree Pattern
This tree pattern is one I’ve been looking for an excuse to do for quite some time. The book in which I found it suggests using it for small pieces like spectacle cases, but I’m not sure I agree. I think it might make for a rather overpowering pattern if not contained by something else. That same book said it was easy, and I’m not sure I agree with them about that either – I had to unpick all the trees the first time I did them, because I’d repeatedly got one element of the stitch placement wrong, in a rather unfudgeable fashion!

Section Seven
Section Seven covers – just – the whole width of the cushion, and makes a good interruption to the rhythm I’d built up.
It occurs to me that it might be a good candidate for a single colour design, one of these days, especially a light colour that will allow the ends of the stitches to cast shadows and build up the pattern.
As though I don’t have enough plans swirling in my head!

Section Eight
It turned out that the next section was rather tricky to pick a colour for, until my mother suggested blues, to help reflect the pattern around Section Seven.
I decided to create a shaded effect on Section Eight. I used three strands of wool, which meant that I could create a fairly subtle graduation starting from three dark strands, and progressing through 2 dark and 1 medium, 1 dark and 2 medium, 3 medium, and then 2 medium and one light, 1 medium and 2 light, then finally 3 light.

Dutch Stitch
The stitch is Dutch Stitch, found in Mary Rhodes’ Dictionary of Canvaswork Stitches. It is a condensed, closely worked crossing stitch. In fact it is so condensed as to be quite an effort when worked in three strands on this canvas!
Still, I expect it will prove a hardwearing stitch, and the texture is a good contrast with the smoother textures of the straight stitch patterns.


 When we took the tray to pieces to remove the embroidery, we had a Nasty Shock.
The fabric was glued to the backing board and cut off flush with it. So much for our blithe expectation that we would be able to remount the fabric – carefully, of course! – and then get it properly framed to advantage.
In retrospect, we should maybe have guessed from the staining around the stitching that maybe some glue had been involved, but since I always mount over padding, it would never have occurred to me that Grandmama’s framer would have done anything else, still less that the legendary Miss Hunter would have presided over all that beautiful embroidery and then permitted it to be mounted onto any old piece of board using any old glue that happened to be to hand!
The embroidery is worked in long and short stitch, satin stitch, stem stitch, and French knots. I think Grandmama used two strands of stranded cotton throughout, and as it was wartime I’m impressed that she managed to gather ten different colours of thread for it.
It’s a salutary reminder to me that a riot of ornamental stitches and overdyed threads isn’ t always the very best way to achieve a striking result.
We are going to ask a textile conservator to have a look at the piece as it is, glued to its backing board, and give us some advice about the next step. Grandmama would be in pleats with laughter at the idea of any of her embroidery going to a conservator, but I hope she would be secretly pleased as well…!